Odoo 19 brings advanced features that make subscription billing easier and more organized for businesses of all sizes. One of the key improvements is consolidated billing, which allows companies to manage all subscription charges through a single, unified process. Instead of handling multiple invoices or tracking different billing schedules, businesses can now streamline everything in one place, saving time and reducing complexity.
With consolidated billing in Odoo 19, billing accuracy is significantly improved. By combining subscription charges into clear and well-structured invoices, businesses can avoid common billing errors and ensure customers understand exactly what they are being charged for. This not only builds trust but also improves customer satisfaction by providing a smoother and more transparent billing experience.
As subscription-based models continue to grow, having a scalable and efficient billing system is essential. Odoo 19’s integrated subscription tools help businesses manage recurring payments effortlessly, even as their customer base expands. In this blog, we will explore how to set up consolidated billing in the Odoo 19 Sales module, how it works in daily operations, and best practices to get the most value from this powerful feature.
Consolidated subscription billing allows businesses to group multiple active subscriptions for the same customer into one clear and detailed invoice. This is especially useful for customers who subscribe to several products or services with similar billing cycles. Instead of receiving multiple invoices, customers get a single consolidated invoice, making payments easier to manage while reducing administrative work for the business.
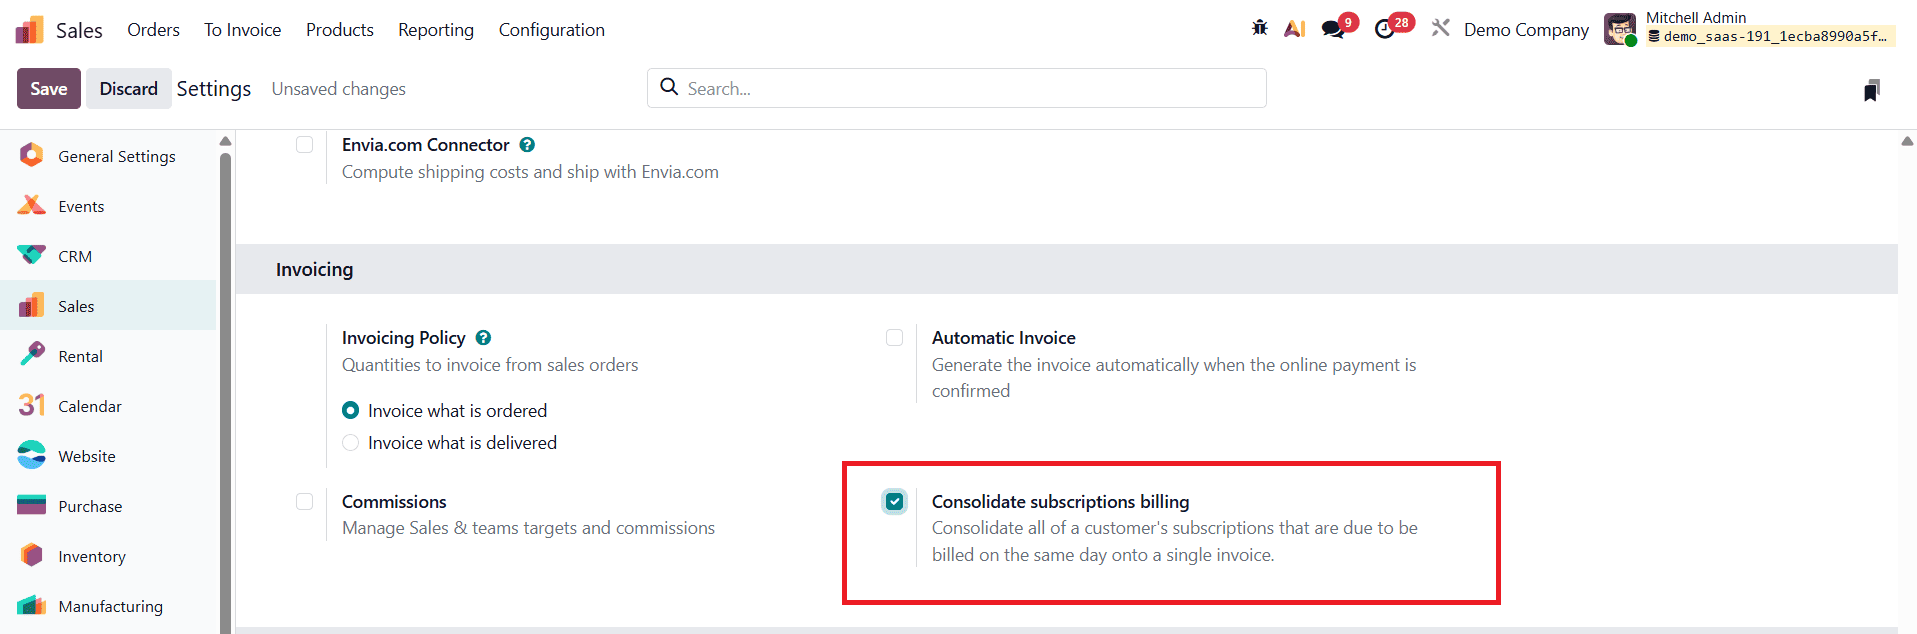
To enable this feature in Odoo 19, open the Sales module and go to Settings under the Configuration menu. In the Invoicing section, enable the Consolidate Subscriptions Billing option. This setting ensures that subscriptions with the same billing dates are combined into one invoice. Don’t forget to click Save to apply the changes.
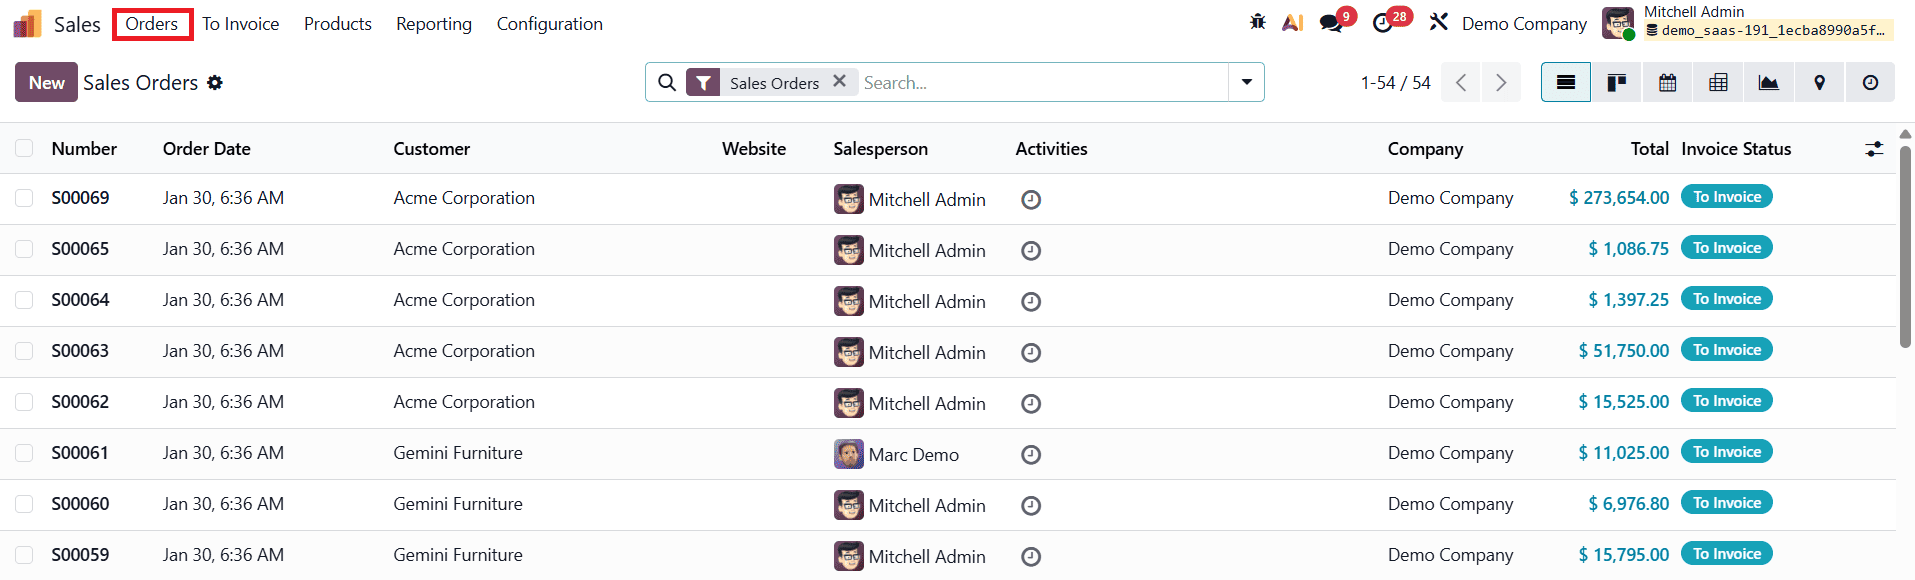
To begin, you can select existing subscription orders from the Sales Orders dashboard in the Sales module, or you can create new subscription orders or quotations as needed.
To create a new subscription order, navigate to the Orders menu and open the Orders window. Click New to start a new sales quotation. In this step, we will create two separate sales orders for the same customer.
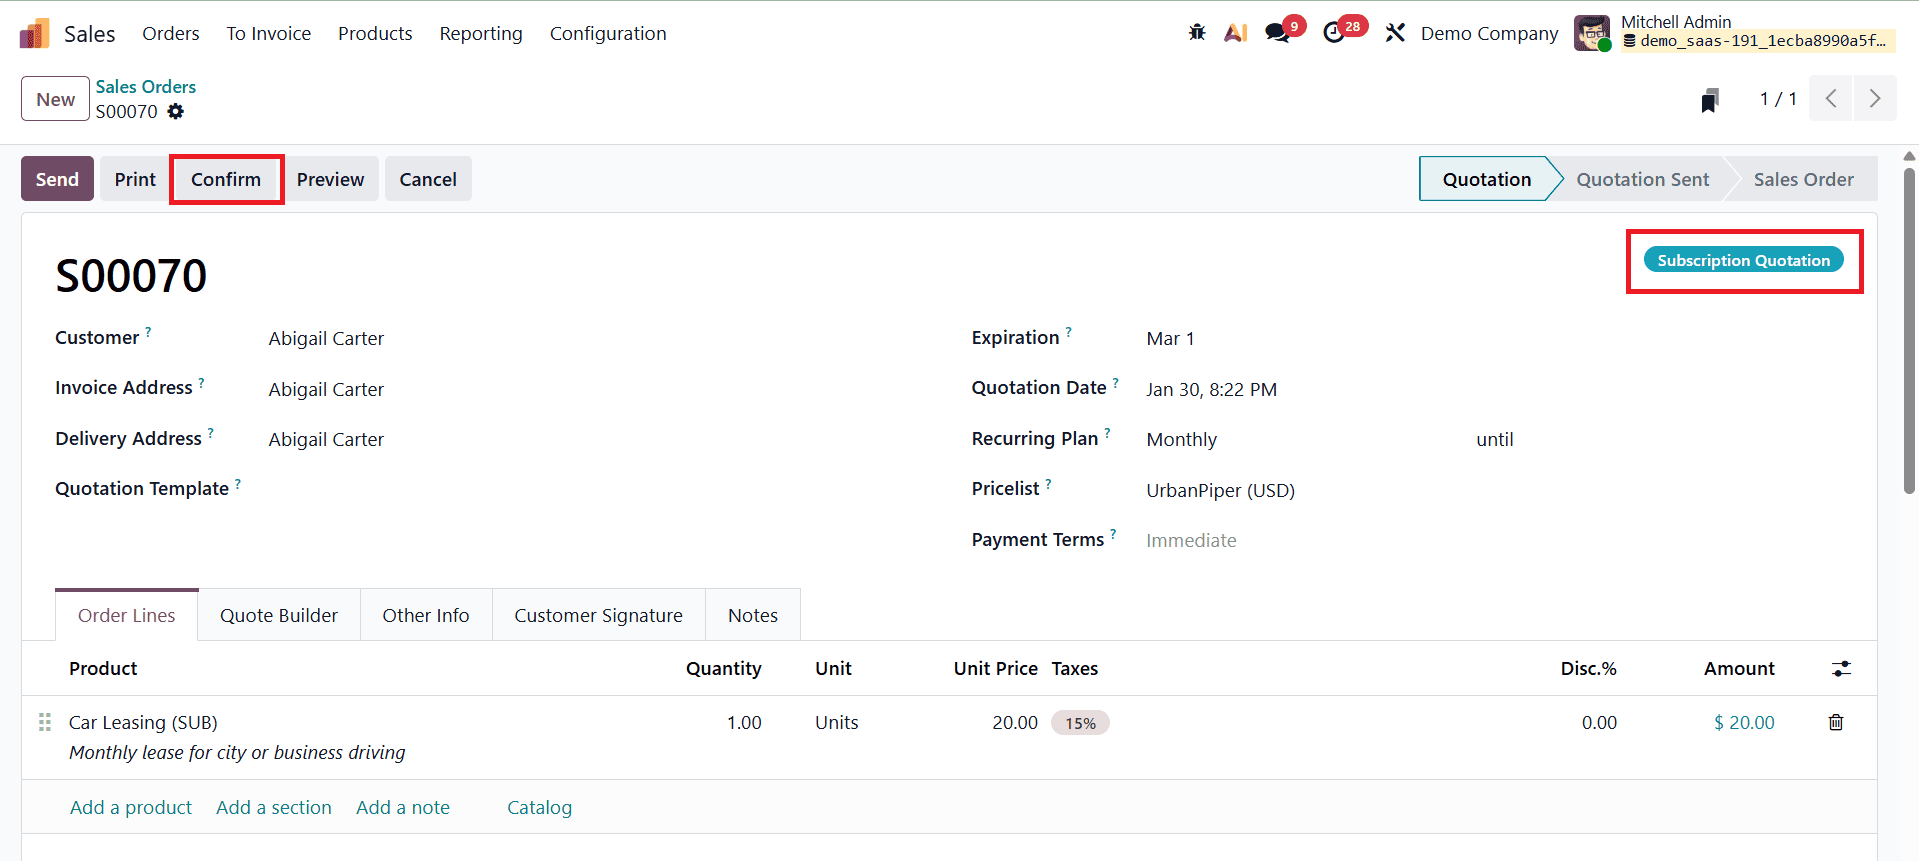
First, select the customer, enter all the required information in the quotation form, and add a subscription-based product. Once all details are filled in correctly, confirm the quotation by clicking the Confirm button.
After confirming the first order, create another quotation for the same customer with a different subscription product.
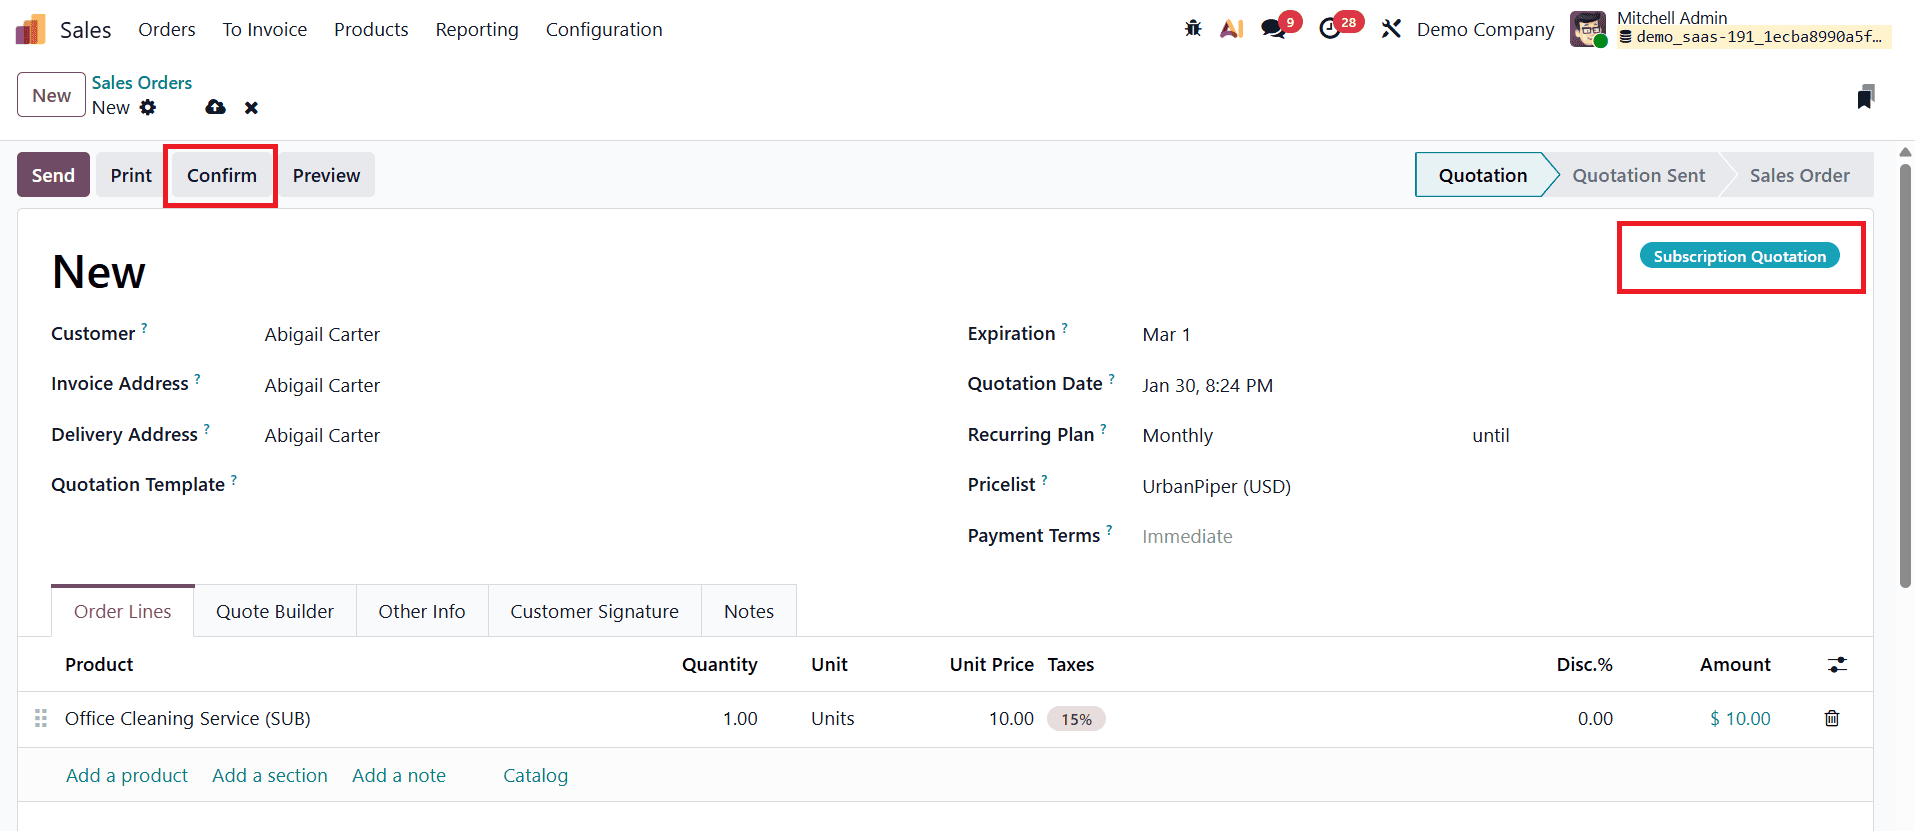
Again, select the same customer, complete the necessary form fields, and add the required subscription items. This process allows multiple active subscription orders to be created for a single customer, which can later be combined into one consolidated invoice if the billing dates match.
Once all required details are completed and the subscription orders are confirmed, multiple orders for the same customer can be invoiced together as a single consolidated invoice. To do this, go to the Sales Orders dashboard and select the relevant confirmed orders for the customer from the list view.
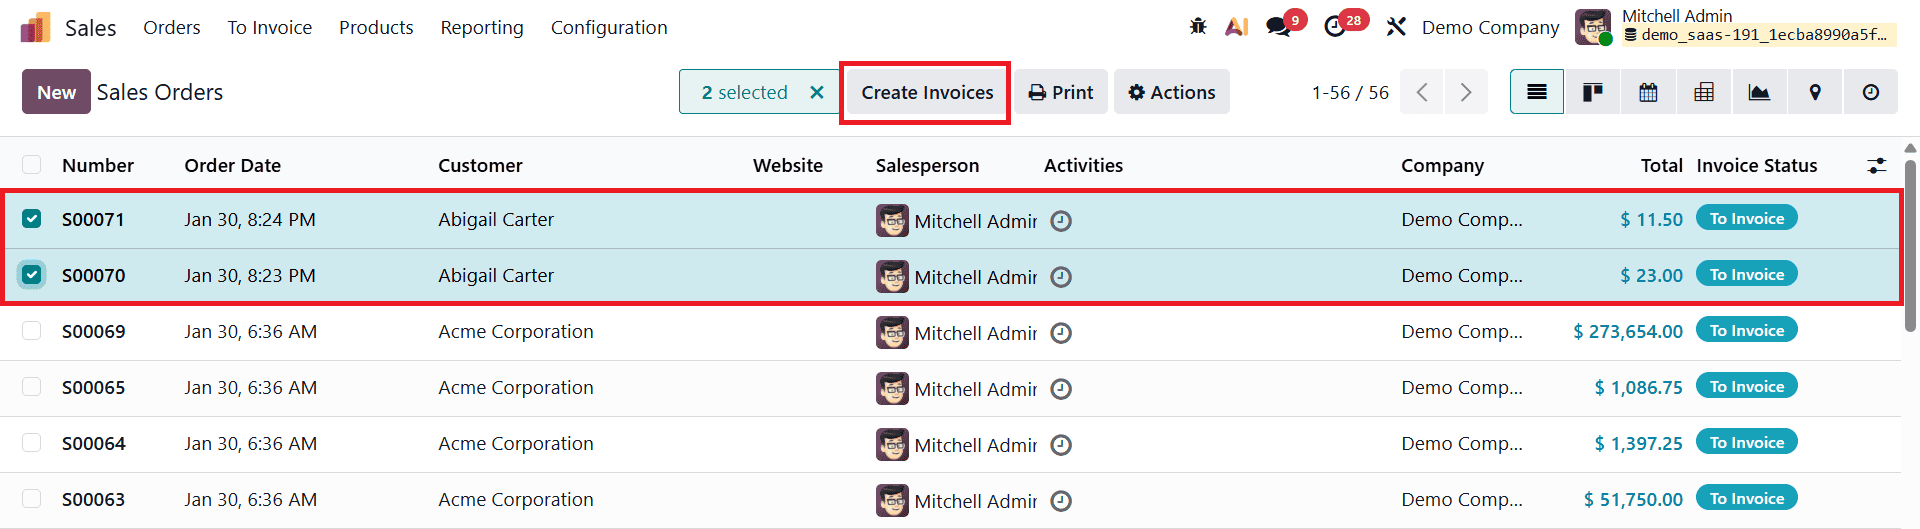
After selecting the orders, click the Create Invoice button at the top of the screen. This action opens an invoicing wizard.
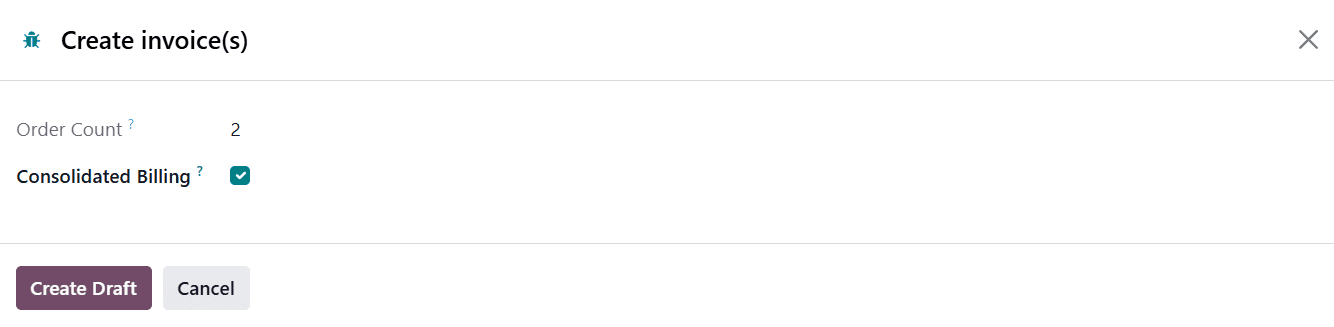
In this wizard, the Order Count field displays the total number of selected orders. Enable the Consolidated Billing option to combine the selected orders into one invoice, then click Create Draft to generate a consolidated draft invoice.
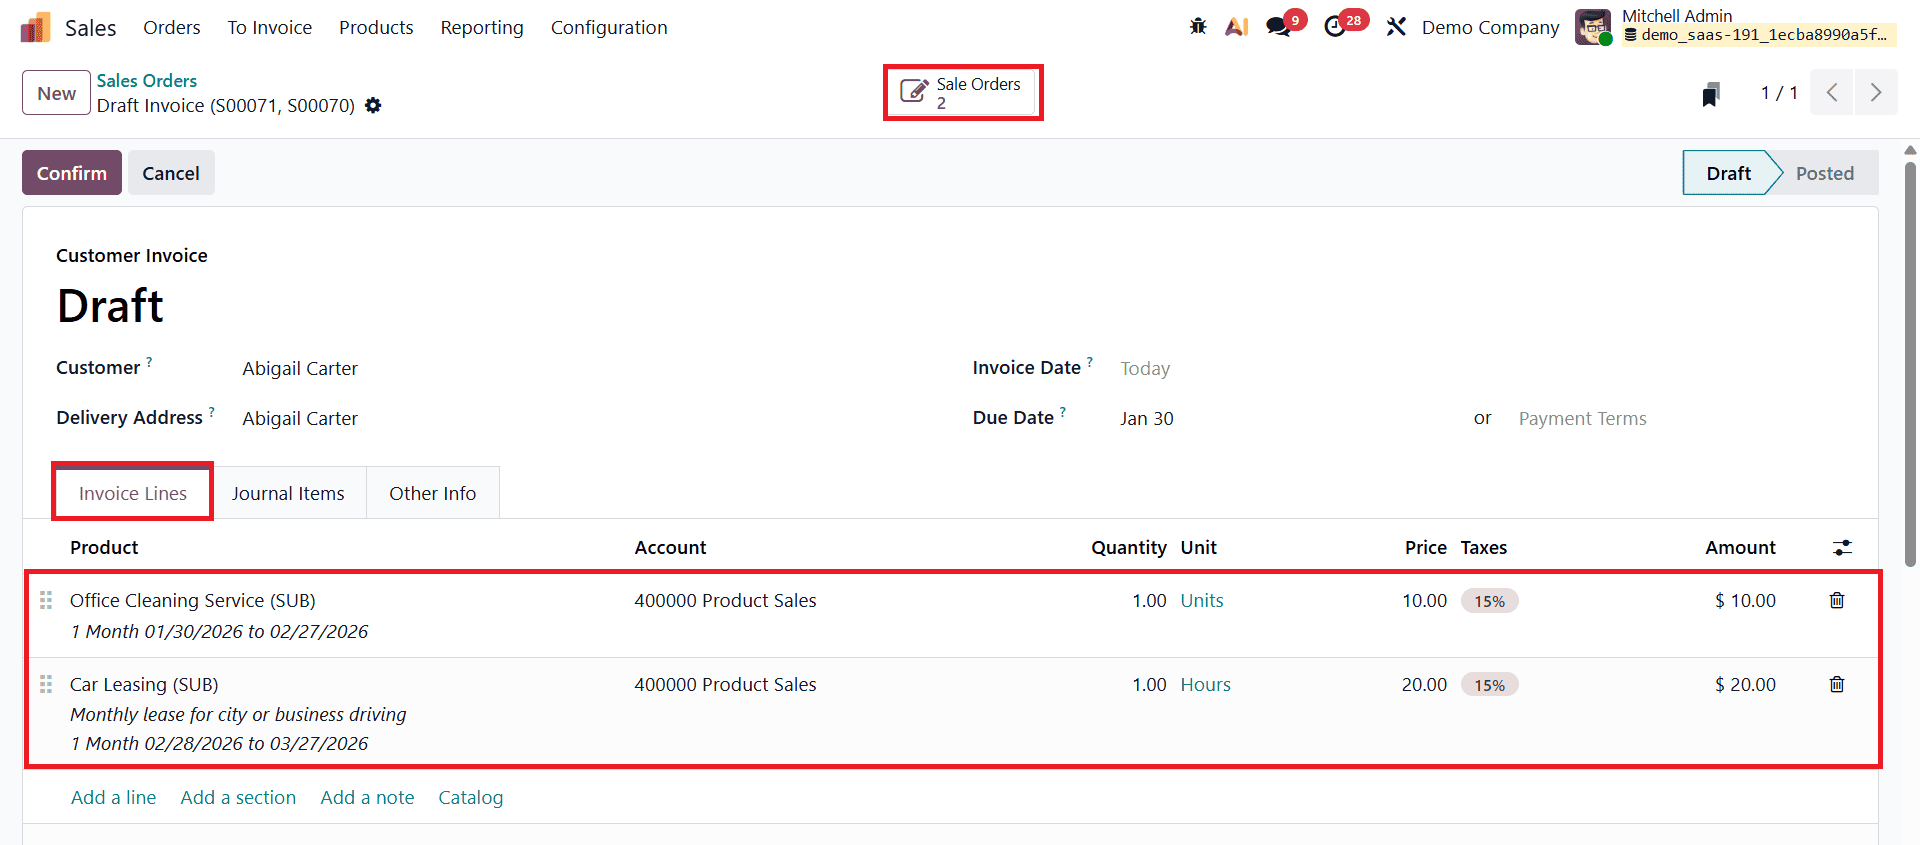
In the draft invoice view, the Invoice Lines tab shows all billing lines from the selected subscription orders combined into a single invoice. From the Actions menu, users can perform various operations such as printing the invoice, duplicating it, sharing it, sending it by email, providing a payment link to the customer, creating debit notes, or removing the invoice if needed.
You can access a complete overview of the generated invoices by clicking the Sales Orders smart button, which opens the related invoice dashboard.

From this dashboard, users can manage invoices, track their statuses, and use the available action menu options to organize and monitor billing activities more efficiently.
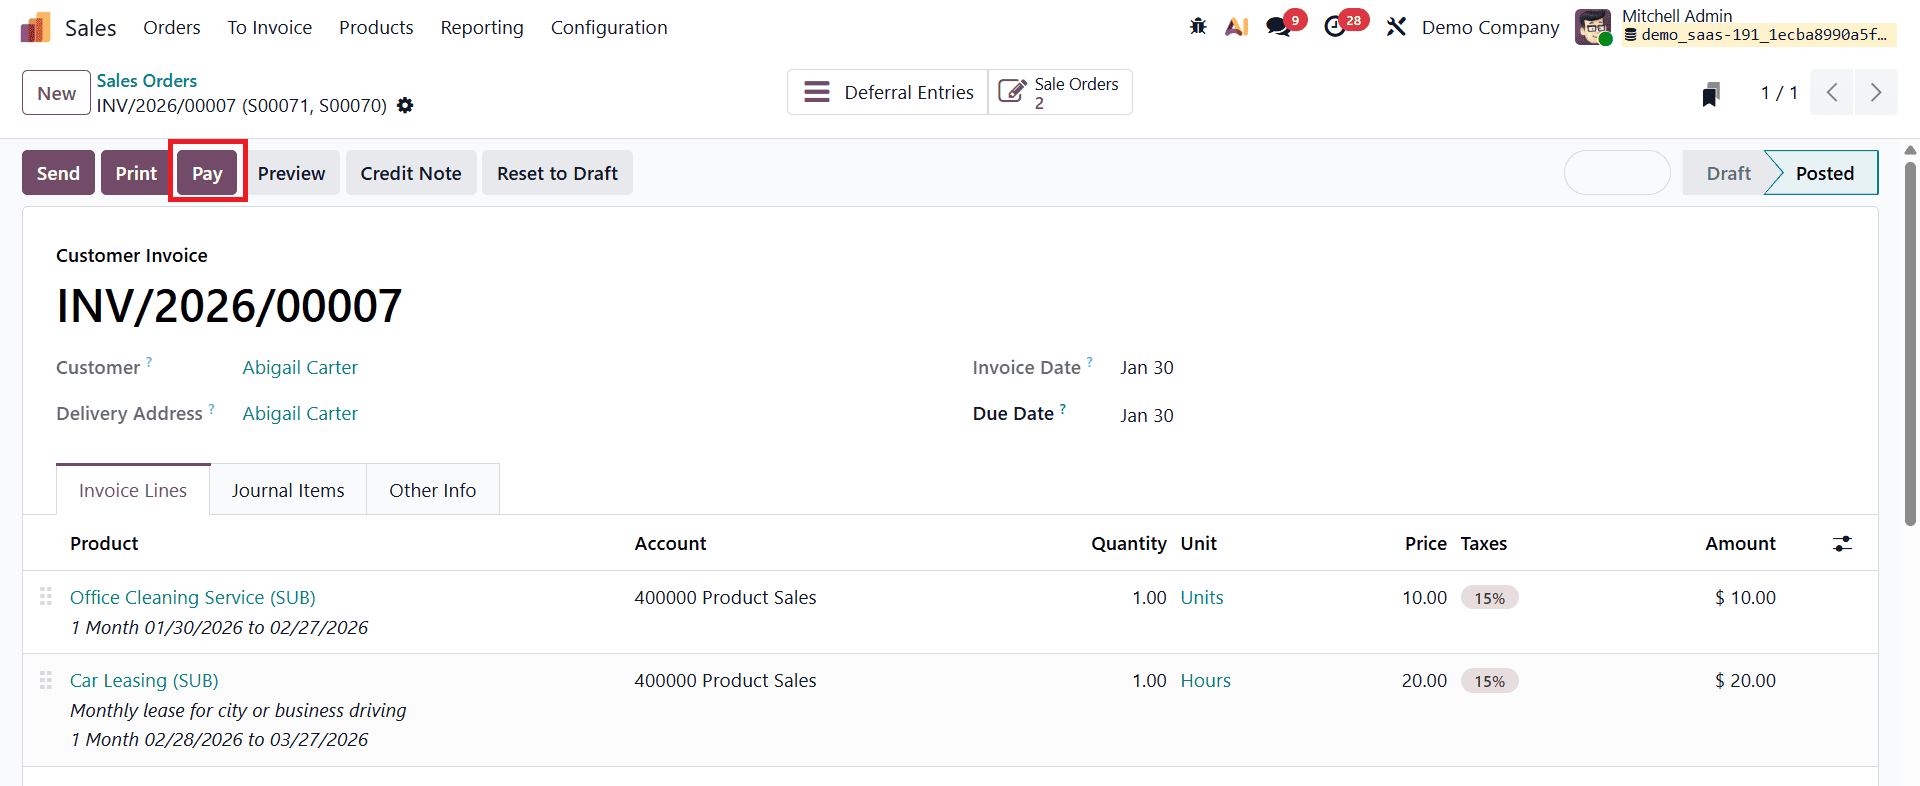
Returning to the draft invoice, click the Confirm button to validate the invoice and proceed with the payment process.
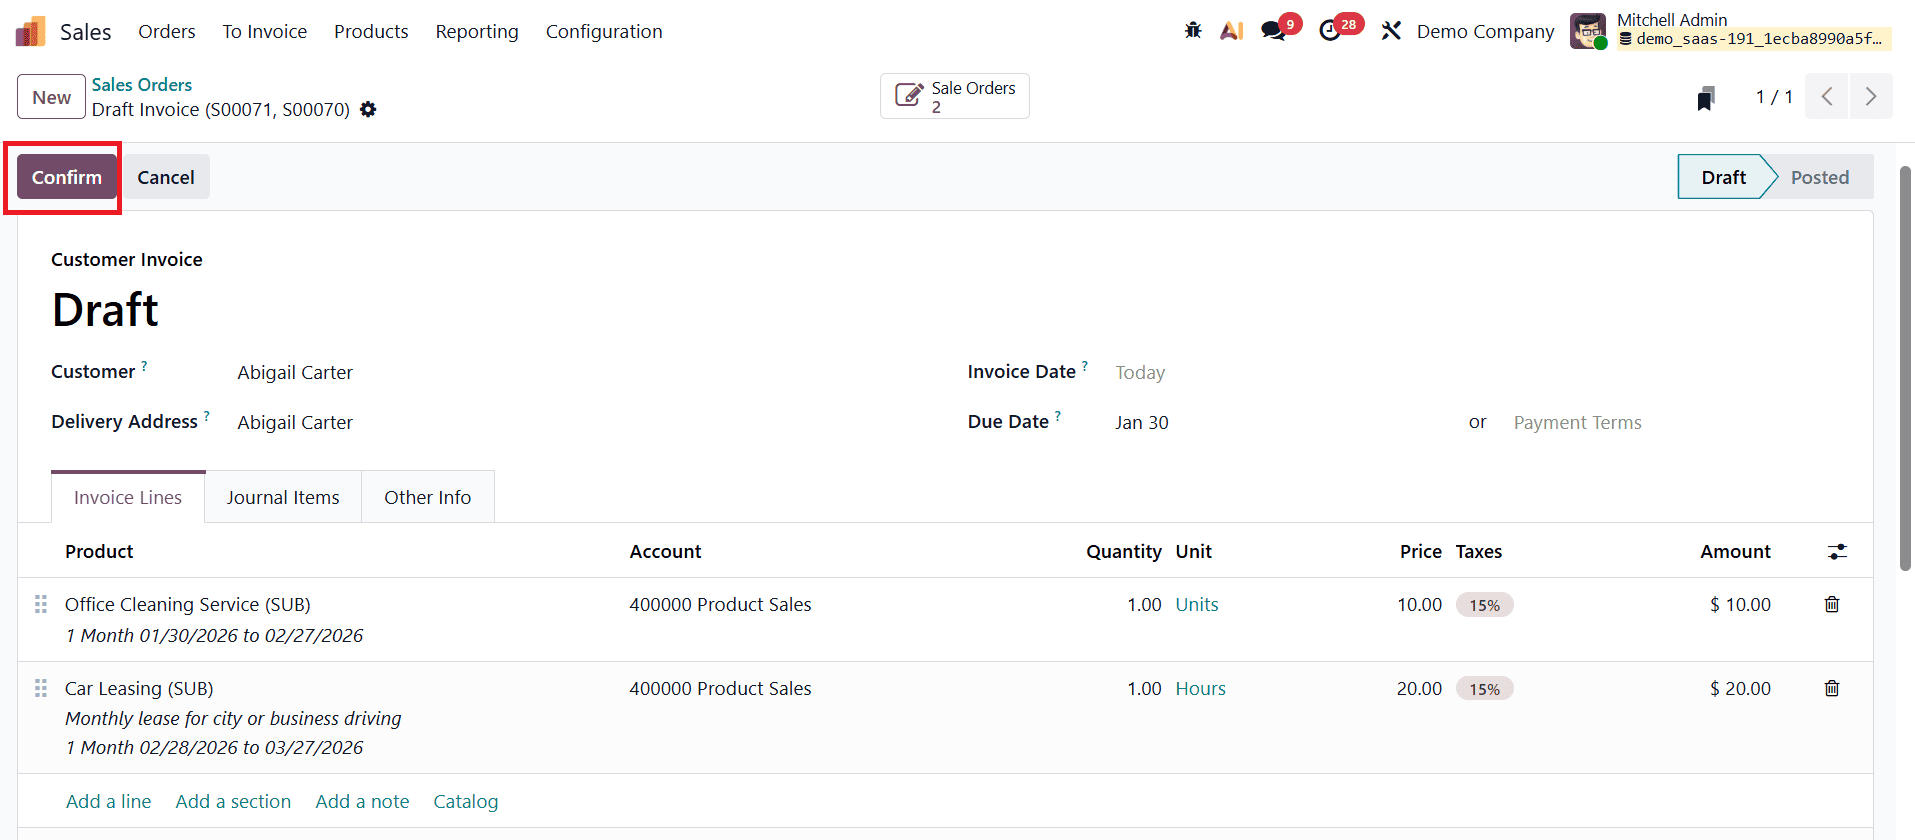
Once confirmed, the Pay button becomes available.
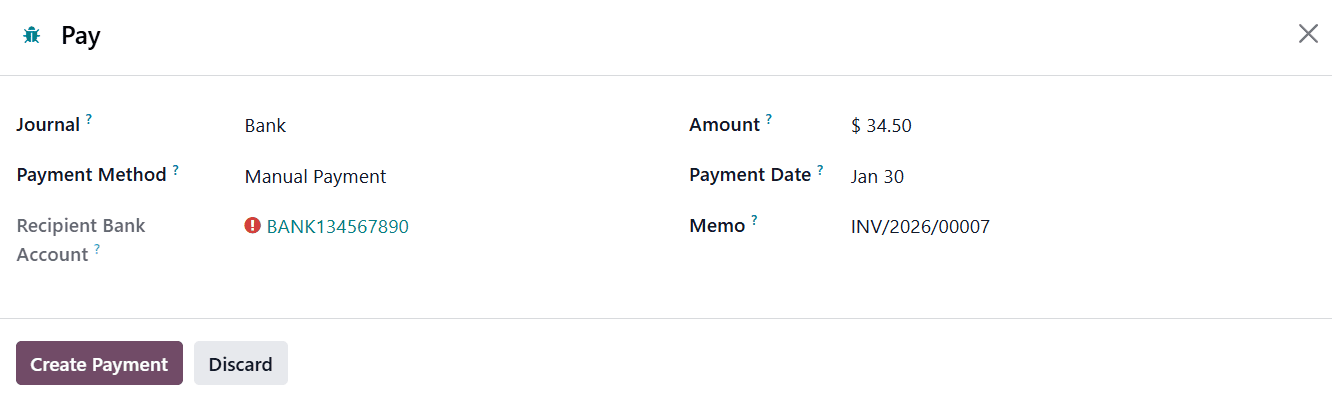
By selecting this option, users can review and edit payment details such as the payment journal, payment method, payment date, memo, and other relevant information before finalizing the payment.
After the payment is successfully processed and confirmed, an IN PAYMENT status label appears on the invoice form view.
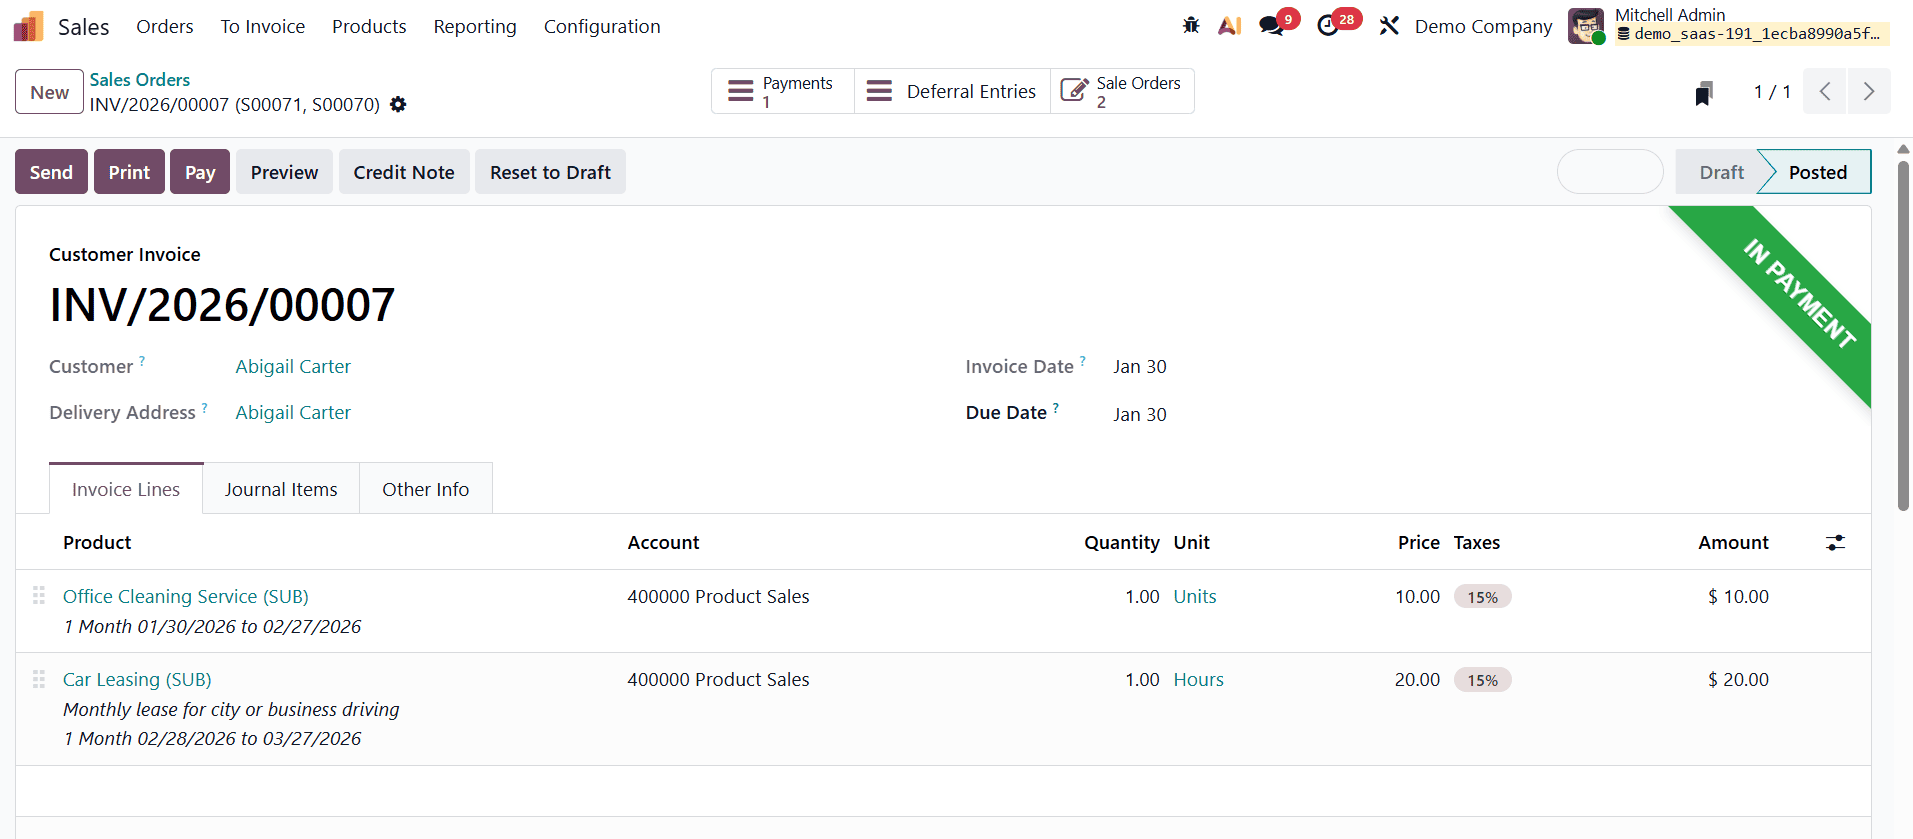
This confirms that the consolidated invoice is in the payment stage.
This is how consolidated subscription billing works in Odoo 19. By allowing multiple subscription orders to be combined into a single invoice, Odoo 19 simplifies billing management, reduces administrative effort, and helps businesses efficiently manage recurring payments and outstanding invoices across multiple subscriptions.
To read more about How to Configure Consolidated Subscription Billing in Odoo 18 Sales, refer to our blog How to Configure Consolidated Subscription Billing in Odoo 18 Sales.