In Odoo Point of Sale (PoS), the Kiosk Mode is a feature that allows you to simplify the interface for self-service use, typically suited for environments like retail stores, restaurants, or any other place where customers can directly interact with the PoS system without assistance from a cashier or salesperson. Kiosk Mode streamlines the user experience by presenting a limited set of options and guiding users through the purchasing process.
Configuring Kiosk Mode
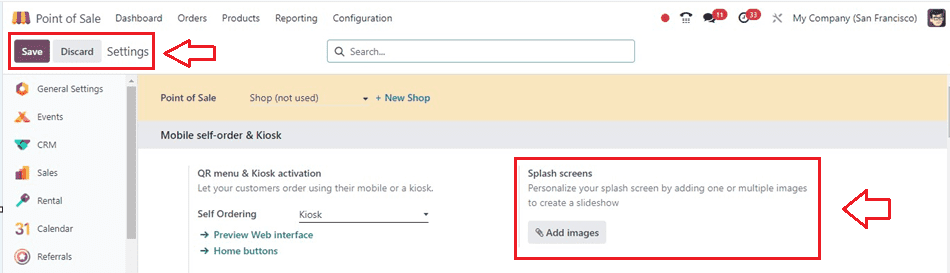
First, log into your Odoo account and go to the Point of Sale application in order to enable the Kiosk Mode. Once there, enter the Settings section of the Configuration menu, which is typically accessible from the application menu bar.
Within the Settings page, locate the ‘Mobile self-order & Kiosk’ tab section to enable Kiosk Mode, often labeled as "Kiosk Mode" or "Self-Service Mode," and activate it to initiate the kiosk interface. If desired, customize the interface to meet your specific requirements, such as selecting products or categories to display, configuring payment methods, adjusting layout and design elements, and incorporating additional features.
Web Interface Preview and Adding Home Buttons
Click on the Preview Web Interface link to view the preview of the Kiosk interface. Then, the Home buttons will help you to set the buttons inside the Kiosk home window. Opening the Home buttons link will open the dashboard of all the buttons available inside the Kiosk window with their Label, URL, Point of Sale, Style, and Preview, as shown below.

Then, create a new window button using the ‘New’ button, and this will open a new editing line in which you can create new Labels, URLs, and other specifications. Then, save the data using the Save button.

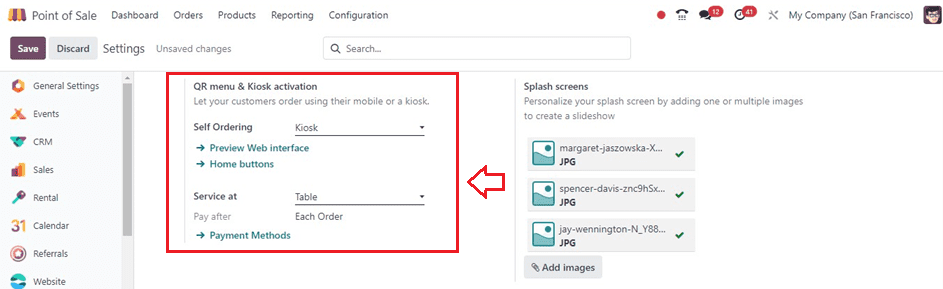
Adding Splash Screens
Splash screens are crucial for app loading and branding, providing users with a glimpse into the app's features. They set the tone for the user experience, convey brand identity, offer useful information, and create anticipation for future content.
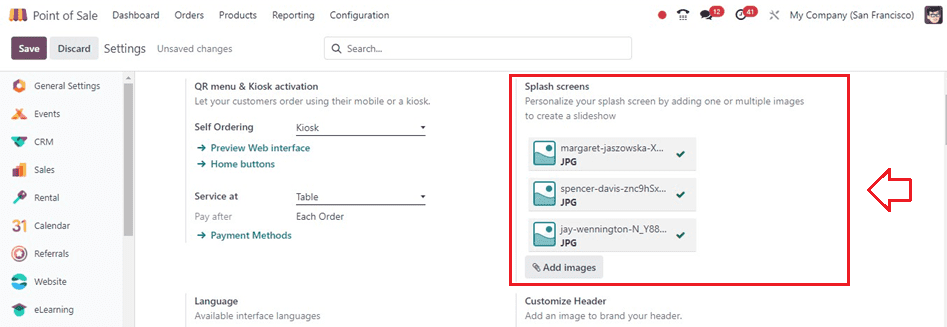
To add custom splash screen images for your Kiosk interface, click on the ‘Add images’ button provided under the Splash screens section of the kiosk settings area.
Prior to that, ensure that you have personalized images stored on your device to choose from for the splash screen. Selecting the "Add images" button will prompt the device's storage to open, allowing you to choose suitable images. In this instance, I'm opting for some sample images previously downloaded and then proceeding to save them.
Payment Methods
Go to the ‘Payment Methods’ link available in the Kiosk settings area to choose the payment methods for ordering and billing. You can see the available options of various payment methods in the opened window as shown below.
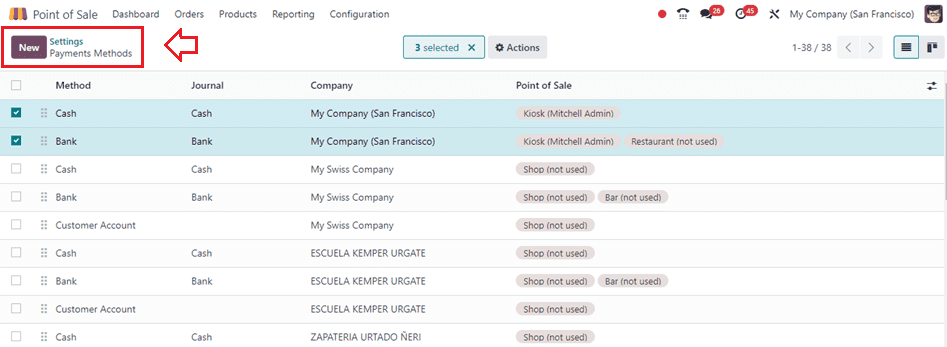
The dashboard will provide a quick overview of the Method, Journal, Company, and Point of Sale. Utilize the ‘New’ button to create a new payment method. Here, we can see there are some preconfigured payment methods existing for this Point of sale, such as Bank, Cash, and Customer Account.
Setting Interface Language
Selecting a convenient language option from the “Language" area enables you to specify the language used within the Kiosk interface.
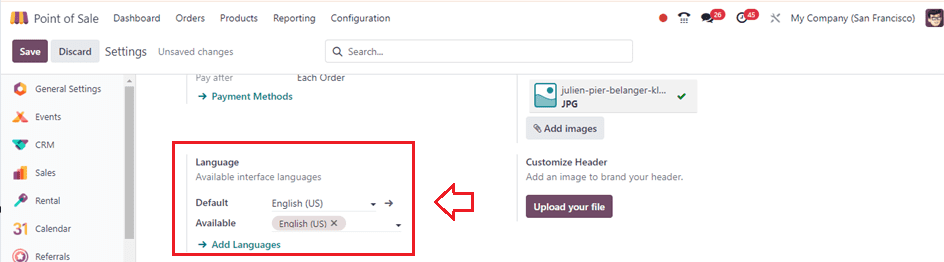
Set a Default Language and multiple other Available languages in the relevant functions, as illustrated in the above screenshot.
Eat In/Take Out
The tax rates can be adjusted in the "Eat in/Take out" area by selecting a Fiscal Position, which will apply the selected fiscal position's specific tax rate. In this instance, I am selecting a random fiscal position to facilitate tax management. Utilize the Fiscal Position link located under the Eat in/Take out section to establish personalized tax rates based on your business location or other specific requirements.
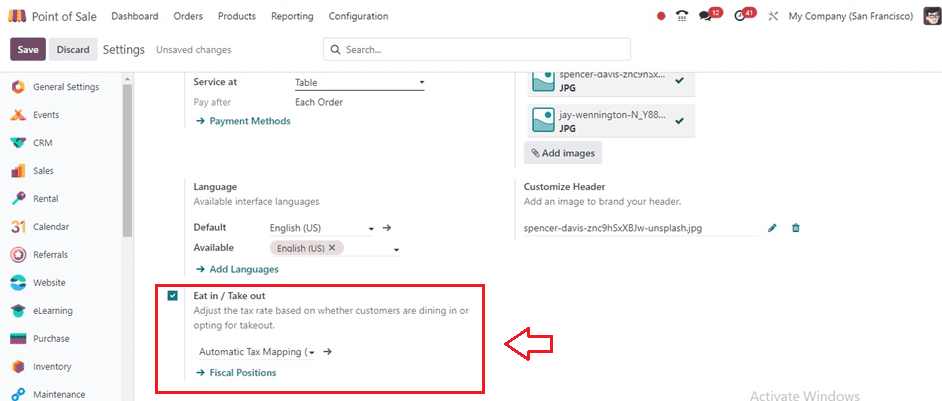
To get an idea about how to configure Fiscal Position in Odoo, refer to the link.
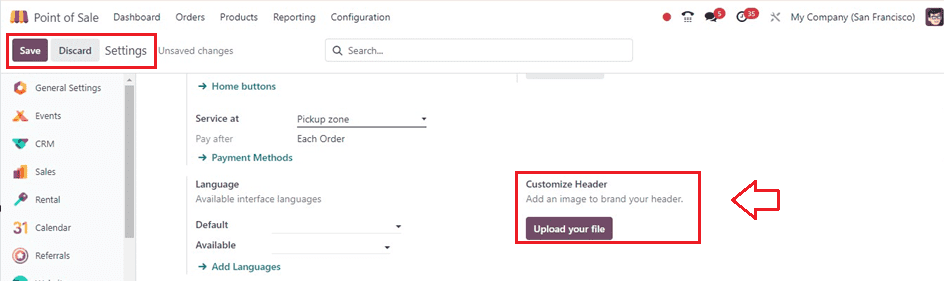
Customize Header
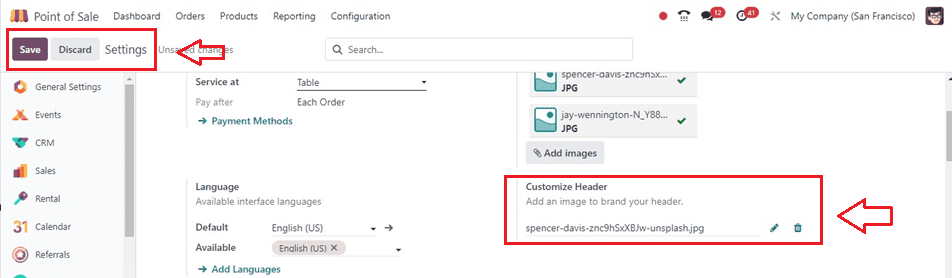
The Customize Header option to add a customized header image on your kiosk mode window. To add an image file from your device storage to the kiosk mode window header section, click the "Upload your file" button.
Upon clicking the "Upload Your" button, the device storage section will be accessed. Once you select the image file, it will be incorporated into the Customer Header field, as depicted below.
Additionally, consider configuring restrictions within Kiosk Mode to limit certain actions or features, such as disabling access to settings or administrative tasks, to prevent unauthorized changes and streamline the self-service experience.
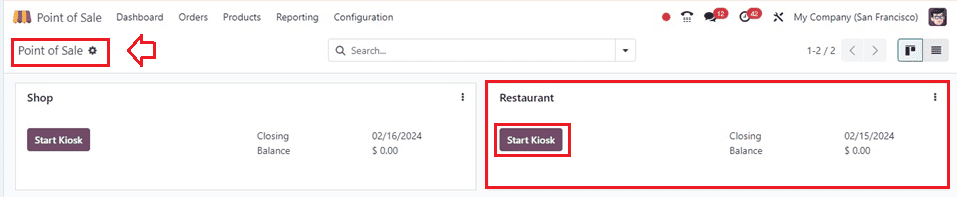
Upon saving the kiosk configuration settings, return to the Dashboard window of the Pos Module. You'll notice the kiosk interfaces are available for the chosen shop. Utilize the "Start Kiosk" button to access or initiate the kiosk mode, as illustrated below.
Starting a New Kiosk Session
The Start Kiosk button will trigger a small dialog box prompting you to choose whether you wish to open the self-kiosk in a new tab or close the current window, as demonstrated below.
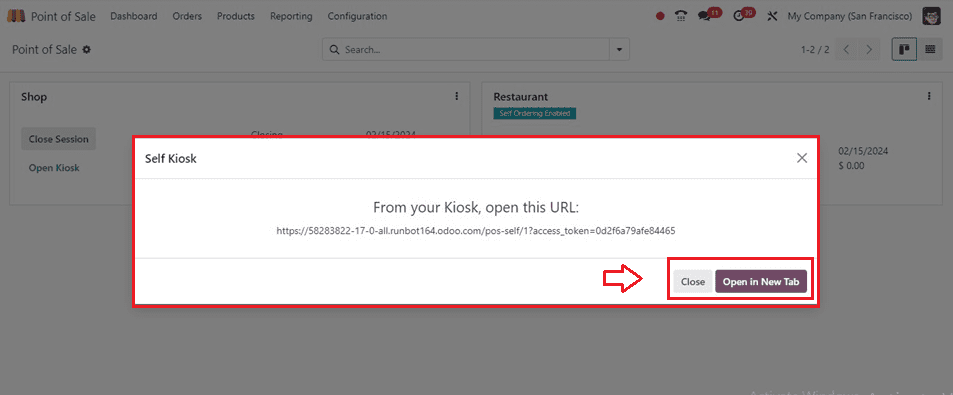
We are selecting the new tab option, so click on the "Open in New Tab" button. This action will launch the kiosk window featuring the configured images as flash screens.
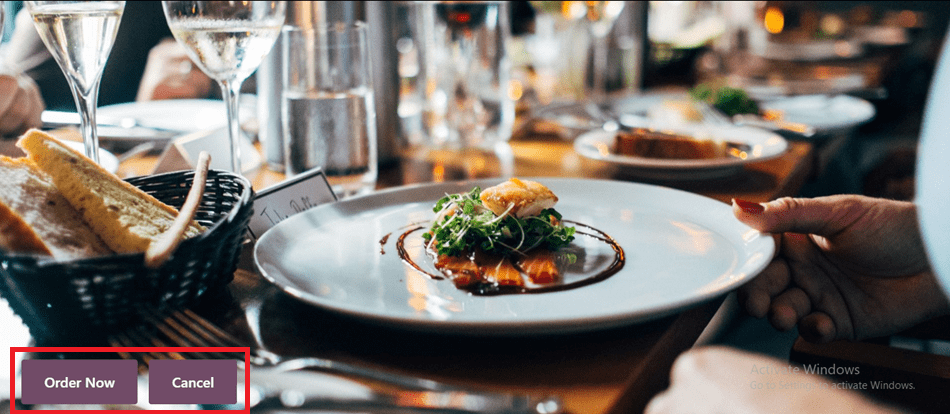
You can order the items using the ‘Order Now’ button. Clicking this button will ask you to choose the two methods, such as Eat In or Take Out.
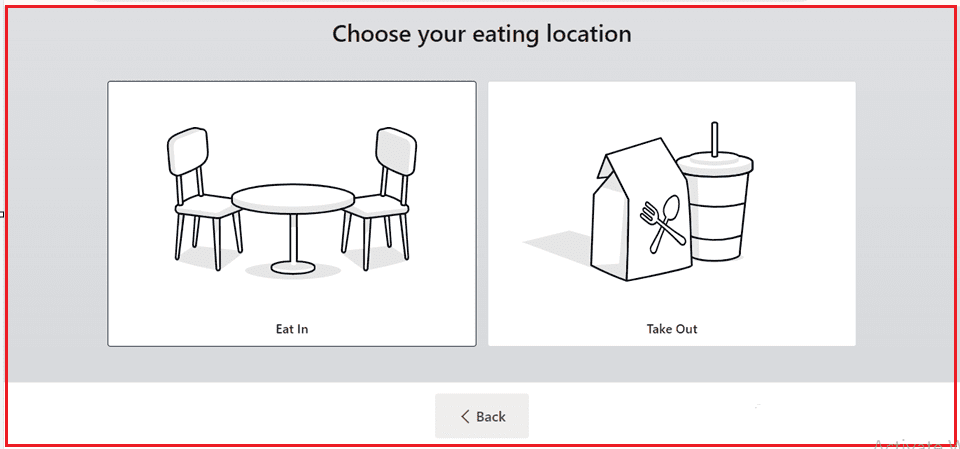
In this instance, I am selecting the "Eat-in" option. This action will prompt the product catalog to display available categories, allowing us to select desired products. The total amount of the selected products will be displayed on the page under the label "Your Order," as depicted in the screenshot below.
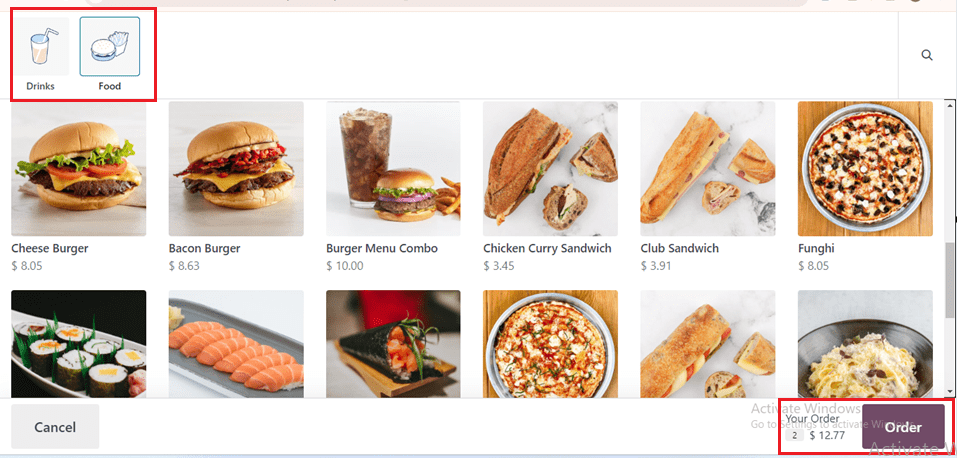
After deciding on the products, confirm the order using the ‘Order’ button. This will open the detailed list of the ordered products.

After confirming the order, we can proceed by clicking the 'Pay' button. This action will open a window where we must enter the table number to track the order.
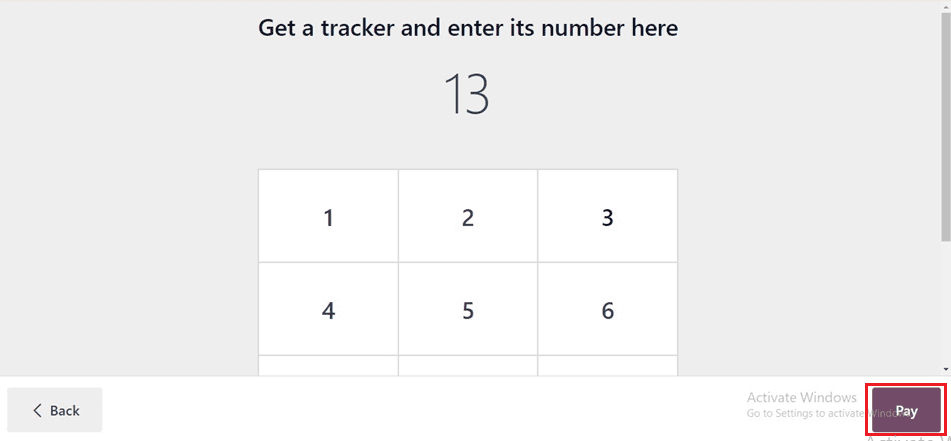
Once you've entered the tracker number, press the 'Pay' button again. This will finalize the ordering process, and you can then await the arrival of the ordered products at the designated table.
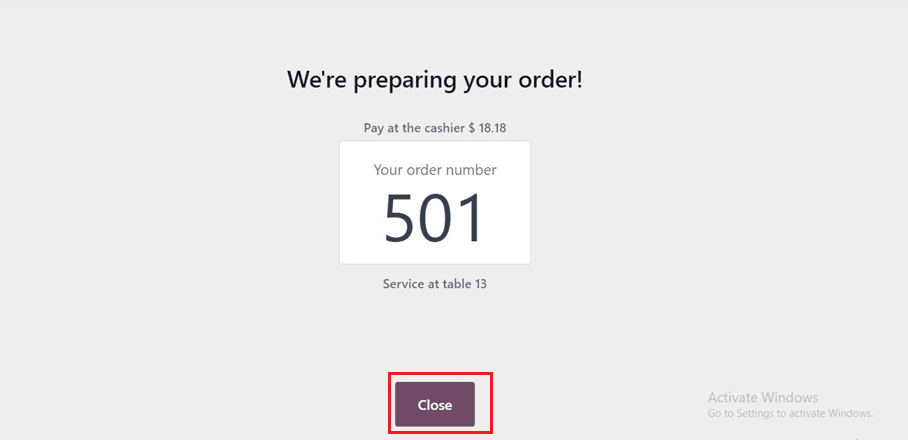
Upon completing the order process, you will receive a notification containing the Order Number, Table Number, and Billing Amount, as depicted below.
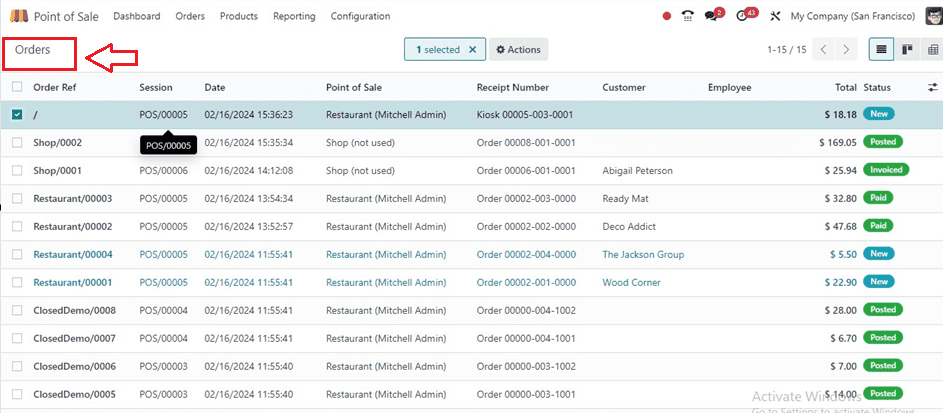
After closing the window, we can see these order details from the ‘Orders’ window of the Orders menu.
Once you have opened the form view of this particular order, you can see the detailed order details, Tax rates, and other details.
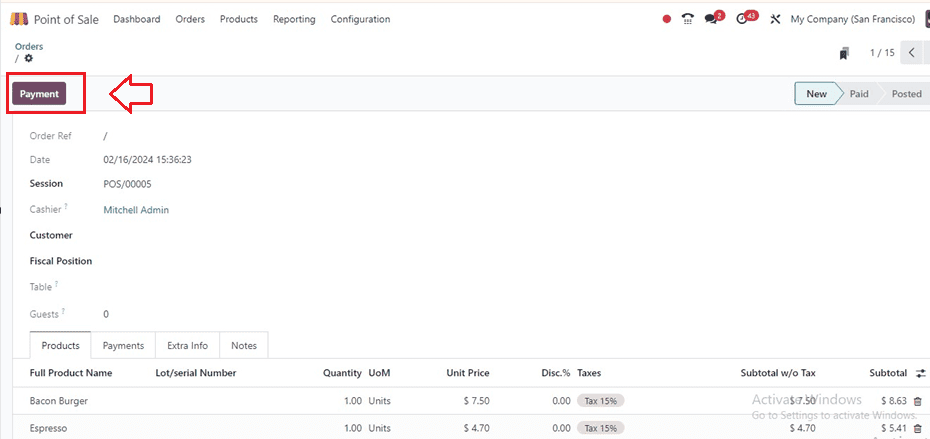
We can mention the Customer Name and fiscal Positions inside this form view in the respective fields and make the payments using the Payments button provided on the upper left side of the page. Pressing the Payments button will open the Payment window, where we can see the Payment Method, Amount, and Payment Reference, as shown below.

Make sure the payment details are correct, and proceed with the Make Payment button. This will generate an Invoice button.
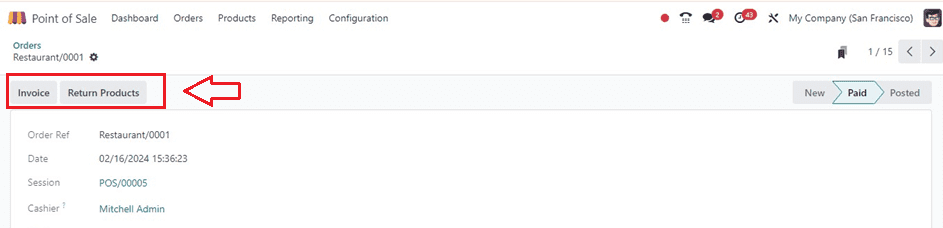
Make sure to add the Customer's Name before invoicing the customer and press the Invoice button. This will complete the payment, Generate the invoice, and display a PAID ribbon as shown below.
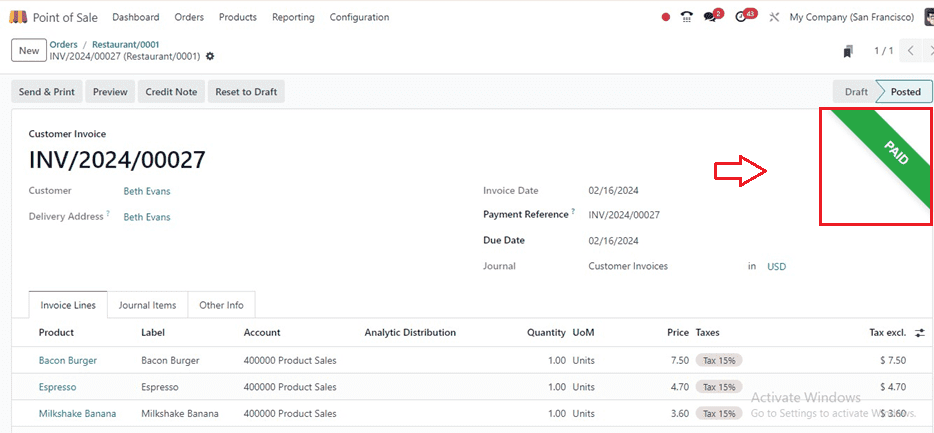
Later, we can send and print the invoice, view the invoice preview, make credit notes, and reset it into draft using the Send & Print, Preview, Credit Note, and Reset to Draft buttons, respectively.
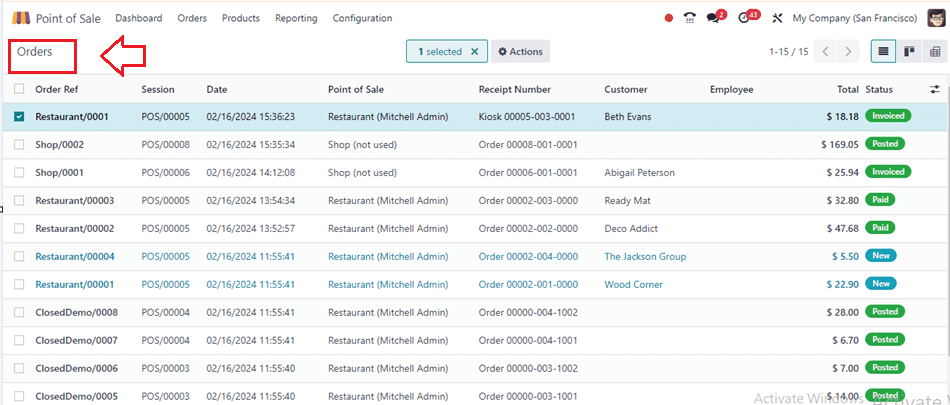
After completing all the Payment and Invoicing procedures, we can see the status of this order as Invoiced from the Orders dashboard window, as shown below.
By following these steps, you can effectively manage a kiosk system in Odoo 17 Point of Sale, providing customers with a seamless and convenient self-service experience.