For service-based businesses, getting invoicing right is everything. Billing a client too early, before work is actually done, can damage trust and trigger disputes. Billing too late affects cash flow. Odoo 19 addresses this challenge through a smart invoicing option: billing based on delivered quantity (manual). This approach gives businesses precise control over when and how much to invoice, making it ideal for project-driven organizations such as consulting firms, IT service providers, construction companies, and creative agencies. In Odoo 19, the Project module and Sales module work together seamlessly to support this billing method. A sales order tied to a service product defines the contractual scope, while the delivered quantity entered manually by the project team drives the actual invoice amount. This blog walks through the complete setup and execution of this workflow in Odoo 19, from product configuration to invoice generation and revenue tracking.
What Is Delivered Quantity (Manual) Billing?
In Odoo 19, every service product has an Invoicing Policy setting that determines how and when invoices are generated. There are generally two main options: an invoice based on ordered quantity (bill upfront as per the sales order) or an invoice based on delivered quantity. The delivered quantity method can be further controlled in two ways: automatically via timesheets or manually by the user.
When the invoicing policy is set to Based on Delivered Quantity (Manual), the invoice is generated only after the project team explicitly updates the delivered quantity on the sales order line. This manual entry represents the actual volume of work completed or services rendered. The customer is then billed strictly for what has been delivered, no more, no less. This provides a transparent and dispute-free billing experience for both parties.
Setting Up the Project in Odoo 19
The process begins in the Project module. Navigate to the Project dashboard and click the New button to create a new project. In Odoo, there are two options: one is that we can create a new project by clicking the New project button and create a new one and the next option is to create a project from a pre-configured project template. In the project creation form, provide a meaningful project name that reflects the scope of work.
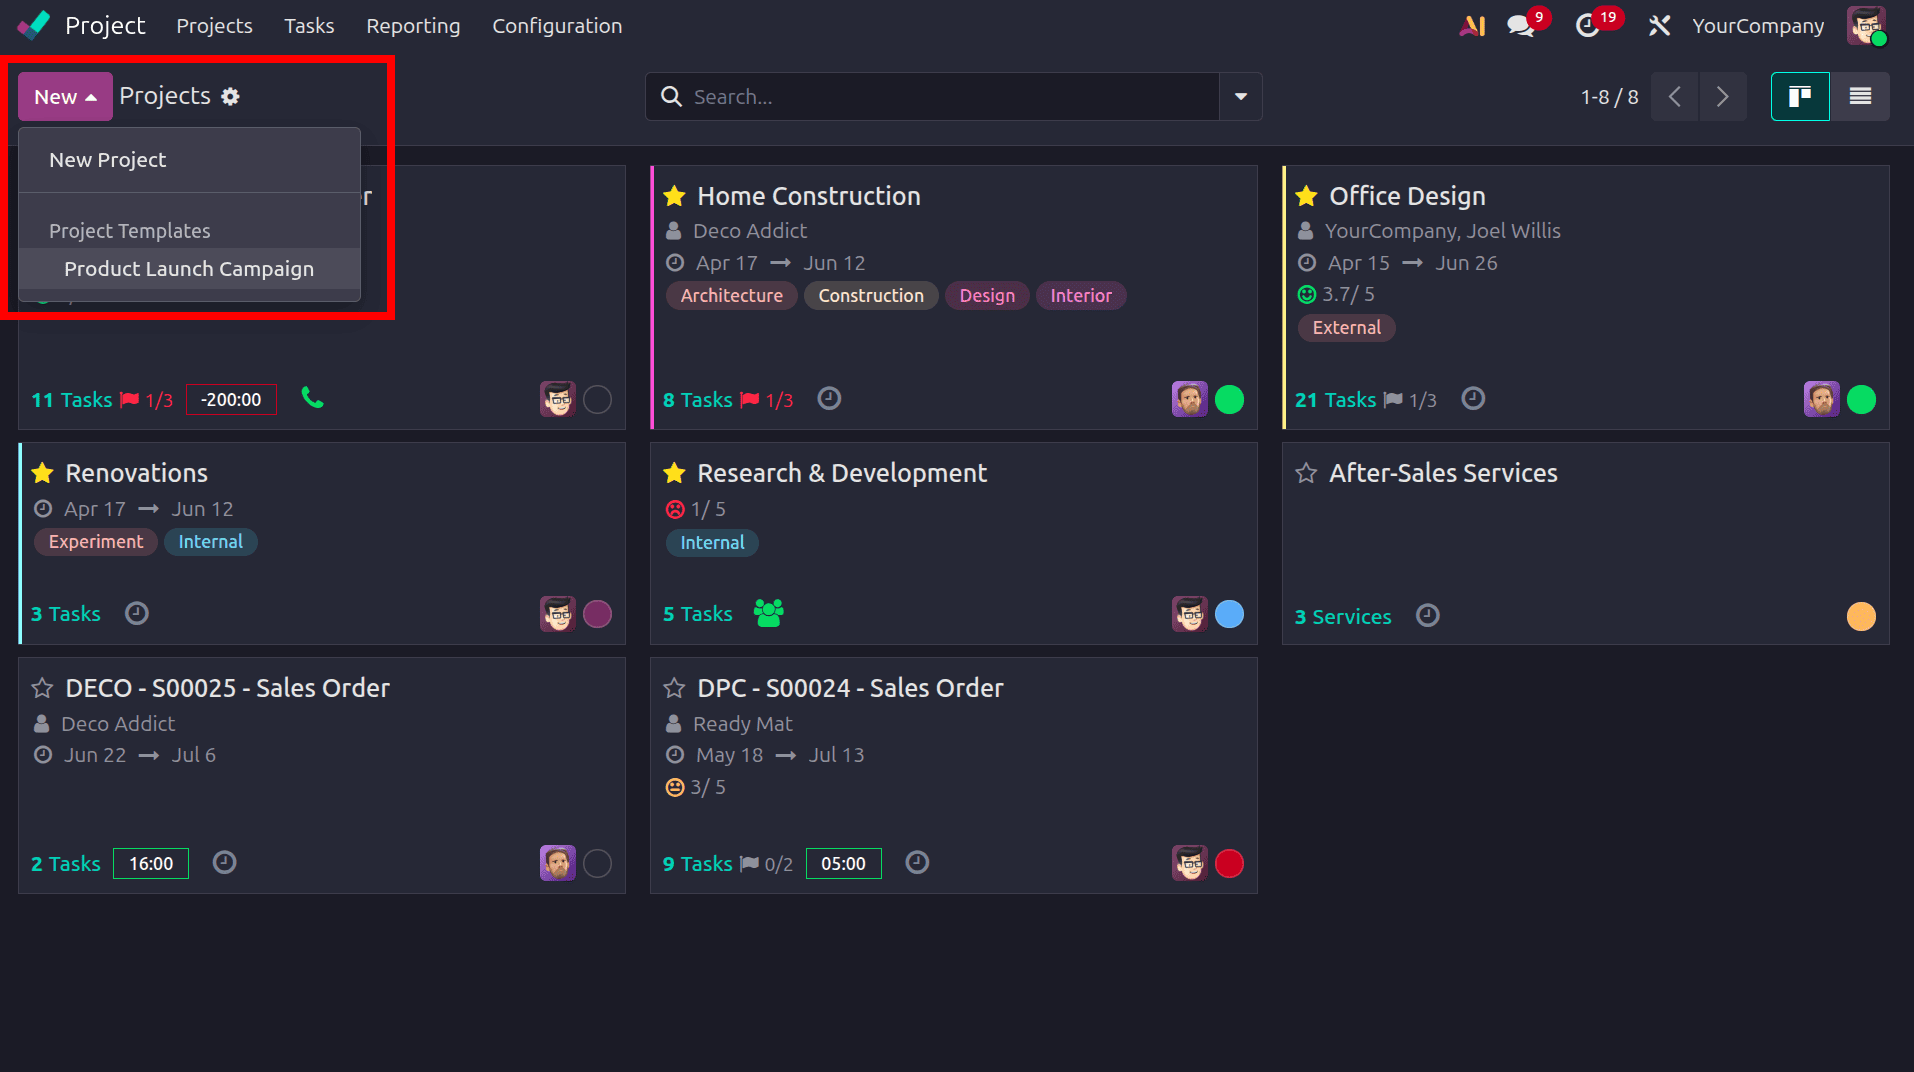
Two key configurations need to be enabled on the project:
- Timesheets: Enabling this option allows team members to log time directly against project tasks, giving management visibility into hours spent on the project.
- Billable: Activating the Billable option marks the project as chargeable and connects it to the invoicing workflow in the Sales module.
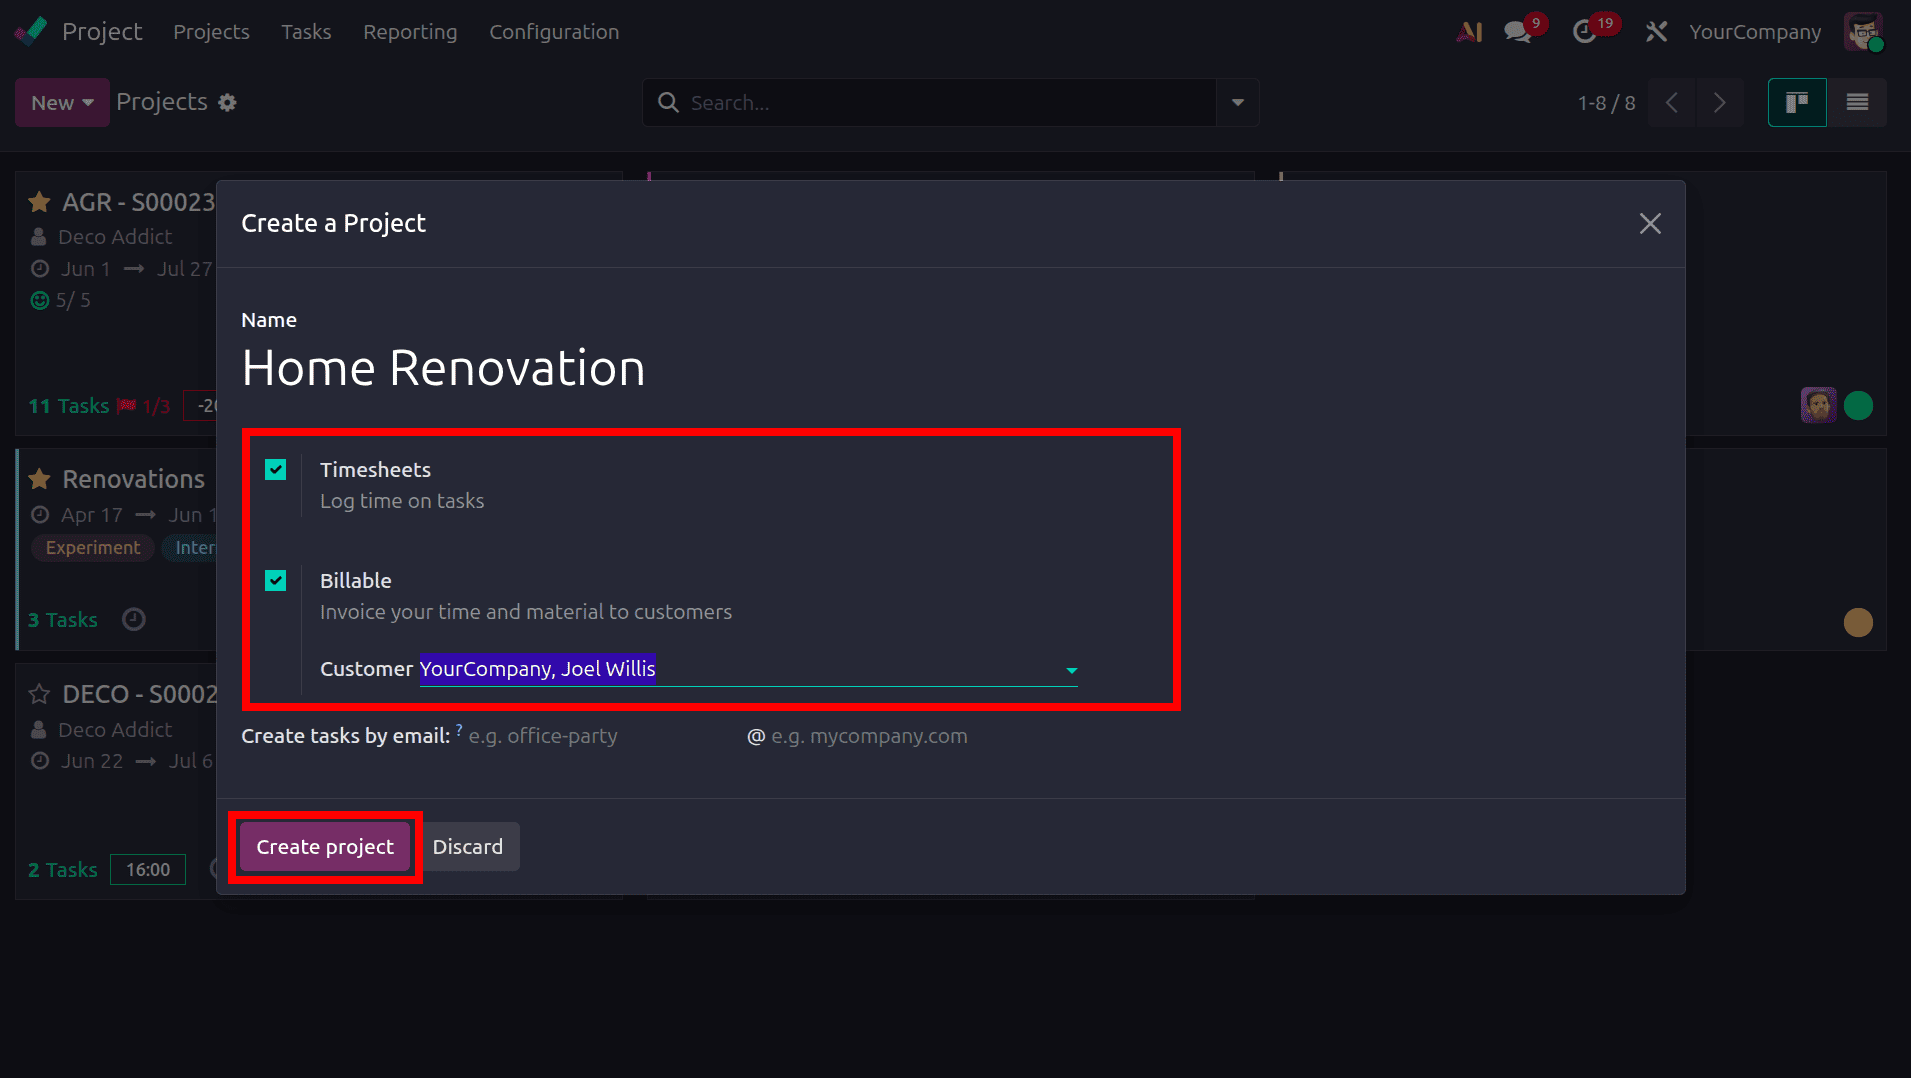
After adding the data, click the Create Project button to create the new project. Then the next step is to set up stages for the project. Once the project is created, set up the stages of the project. Billing of the project. So let's move to products and create a service product.
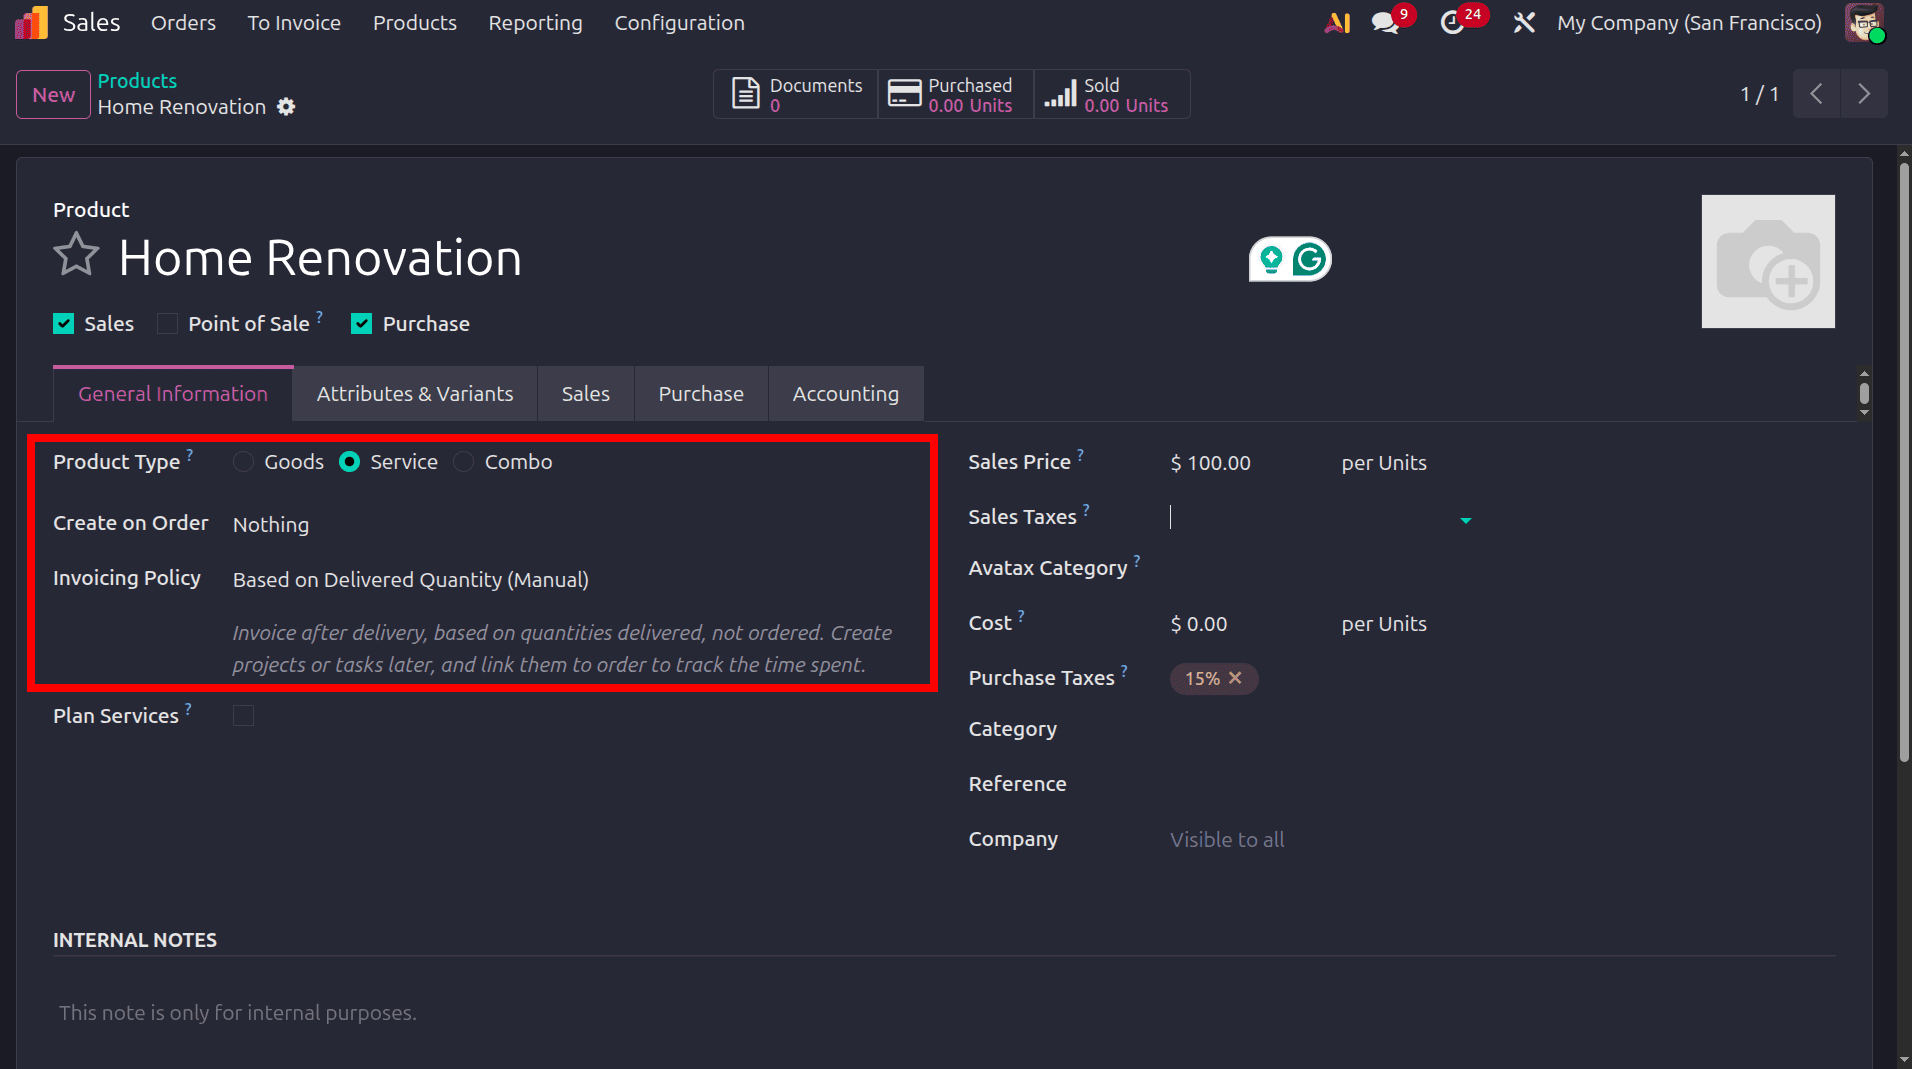
While creating the product, set the product type as Service, and we don't need to create anything while making an order for this product. Set the field create on Order to Nothing, and Invoicing policy to Based on Delivered Quantity (Manual)
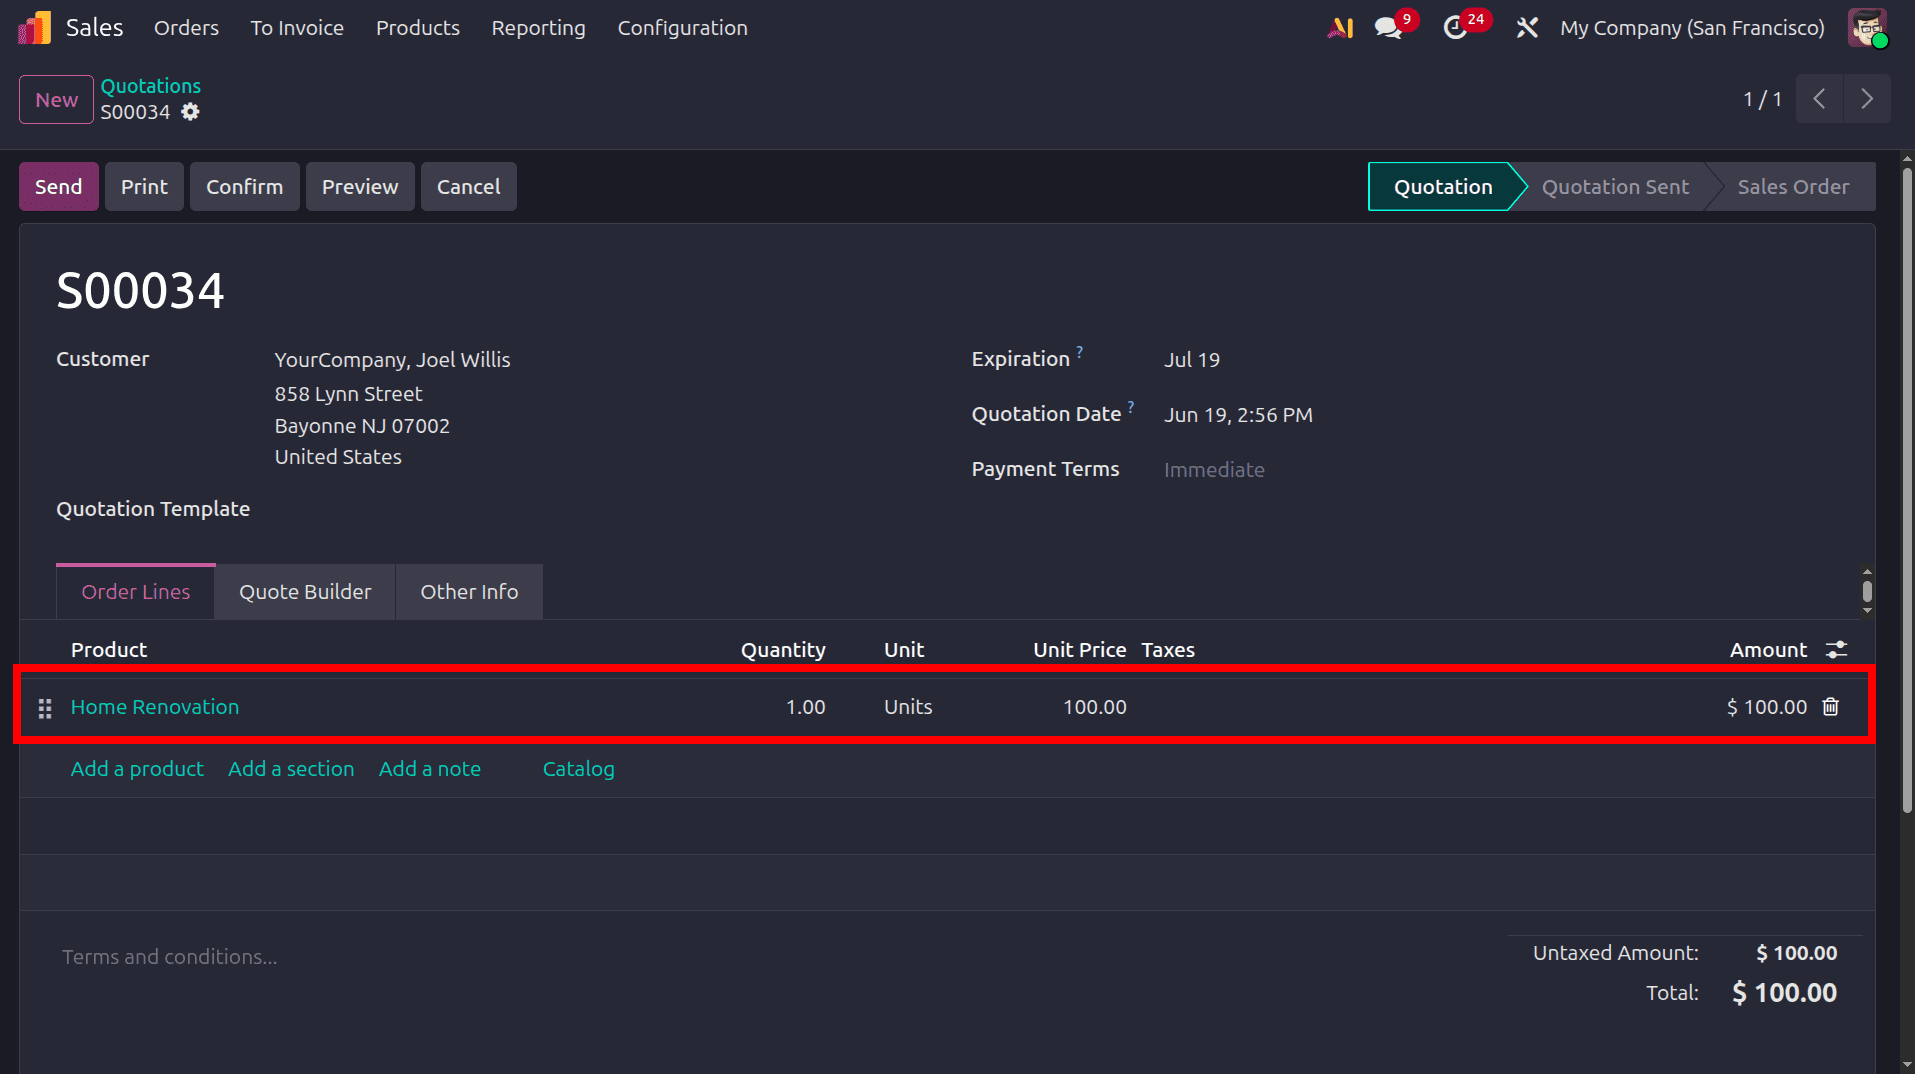
So once the products are created, the next step is to create a new sales order for this product.
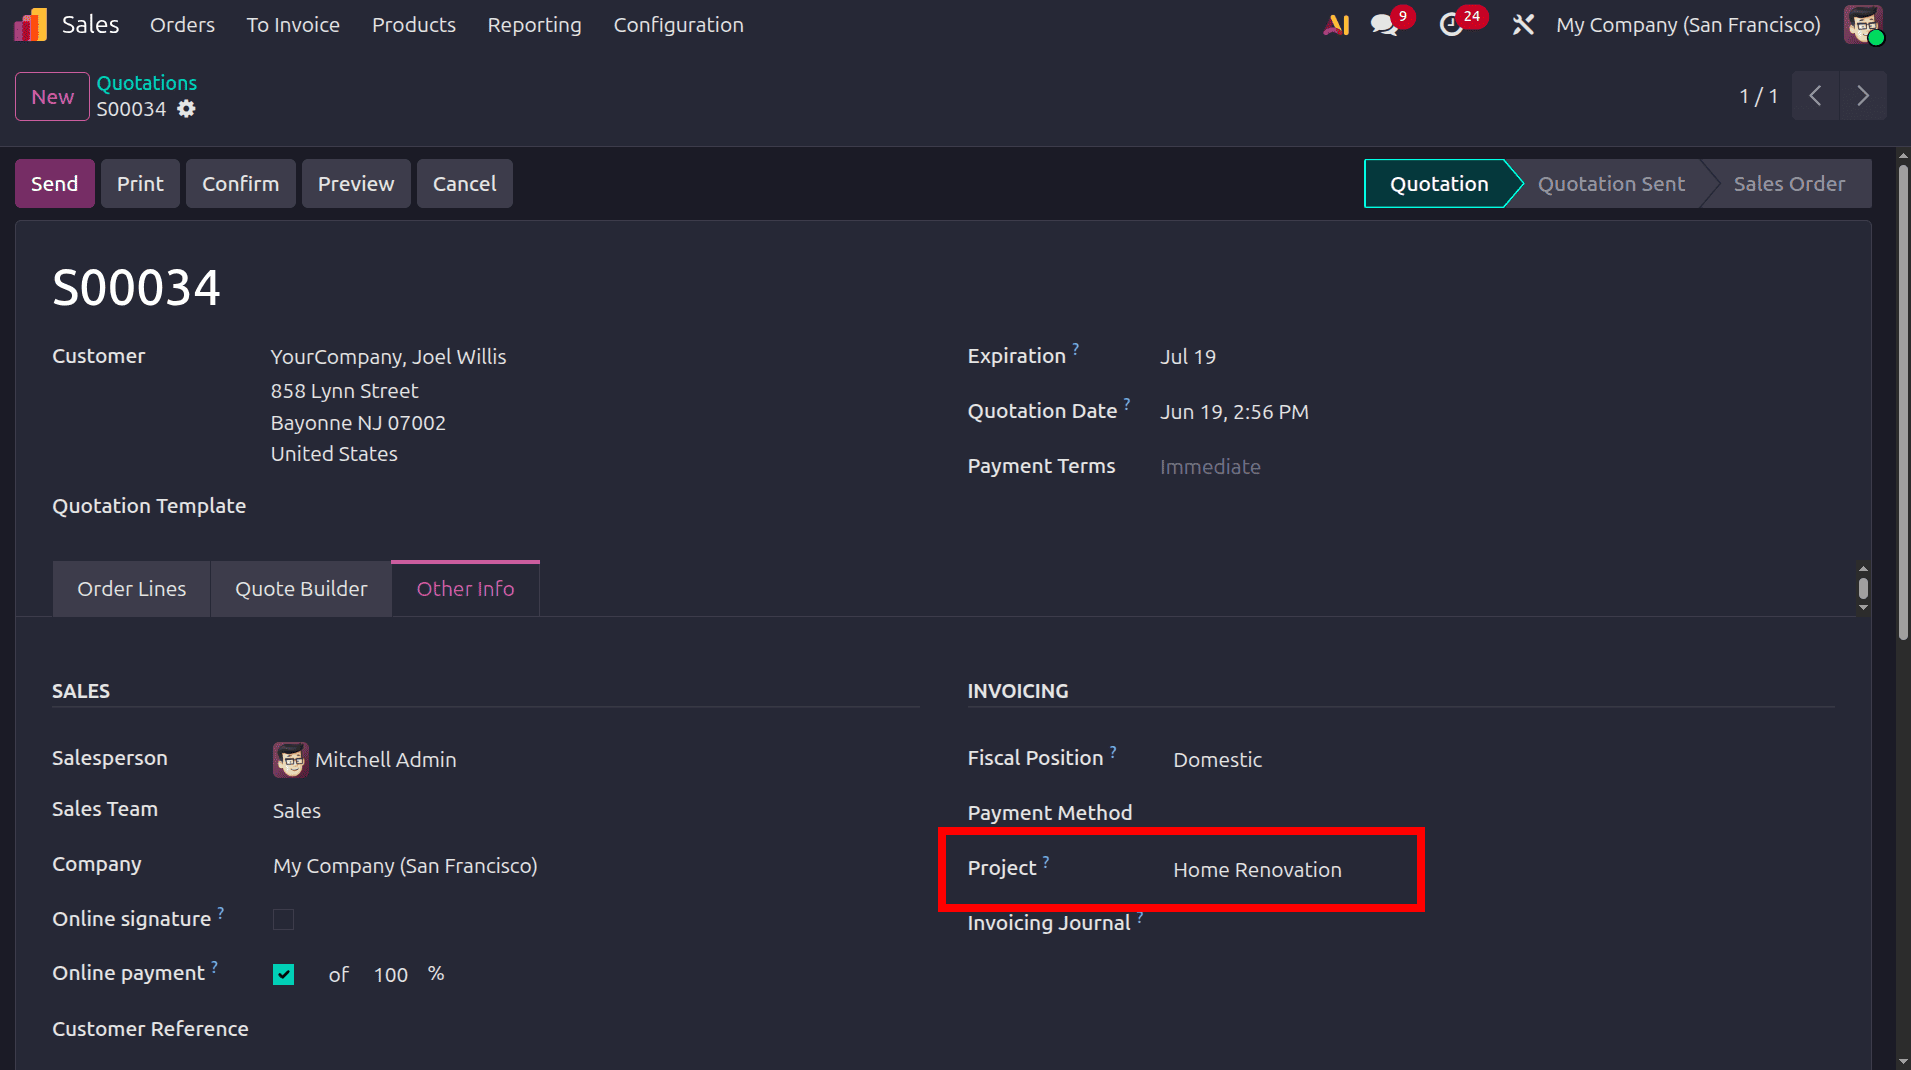
To associate the sales order with the previously created project, navigate to the Other Info tab of the sales order. There, you will find the Project field, where you can select and link the relevant project. Before confirming the project, set the delivered quantity in the order and confirm the sales order.
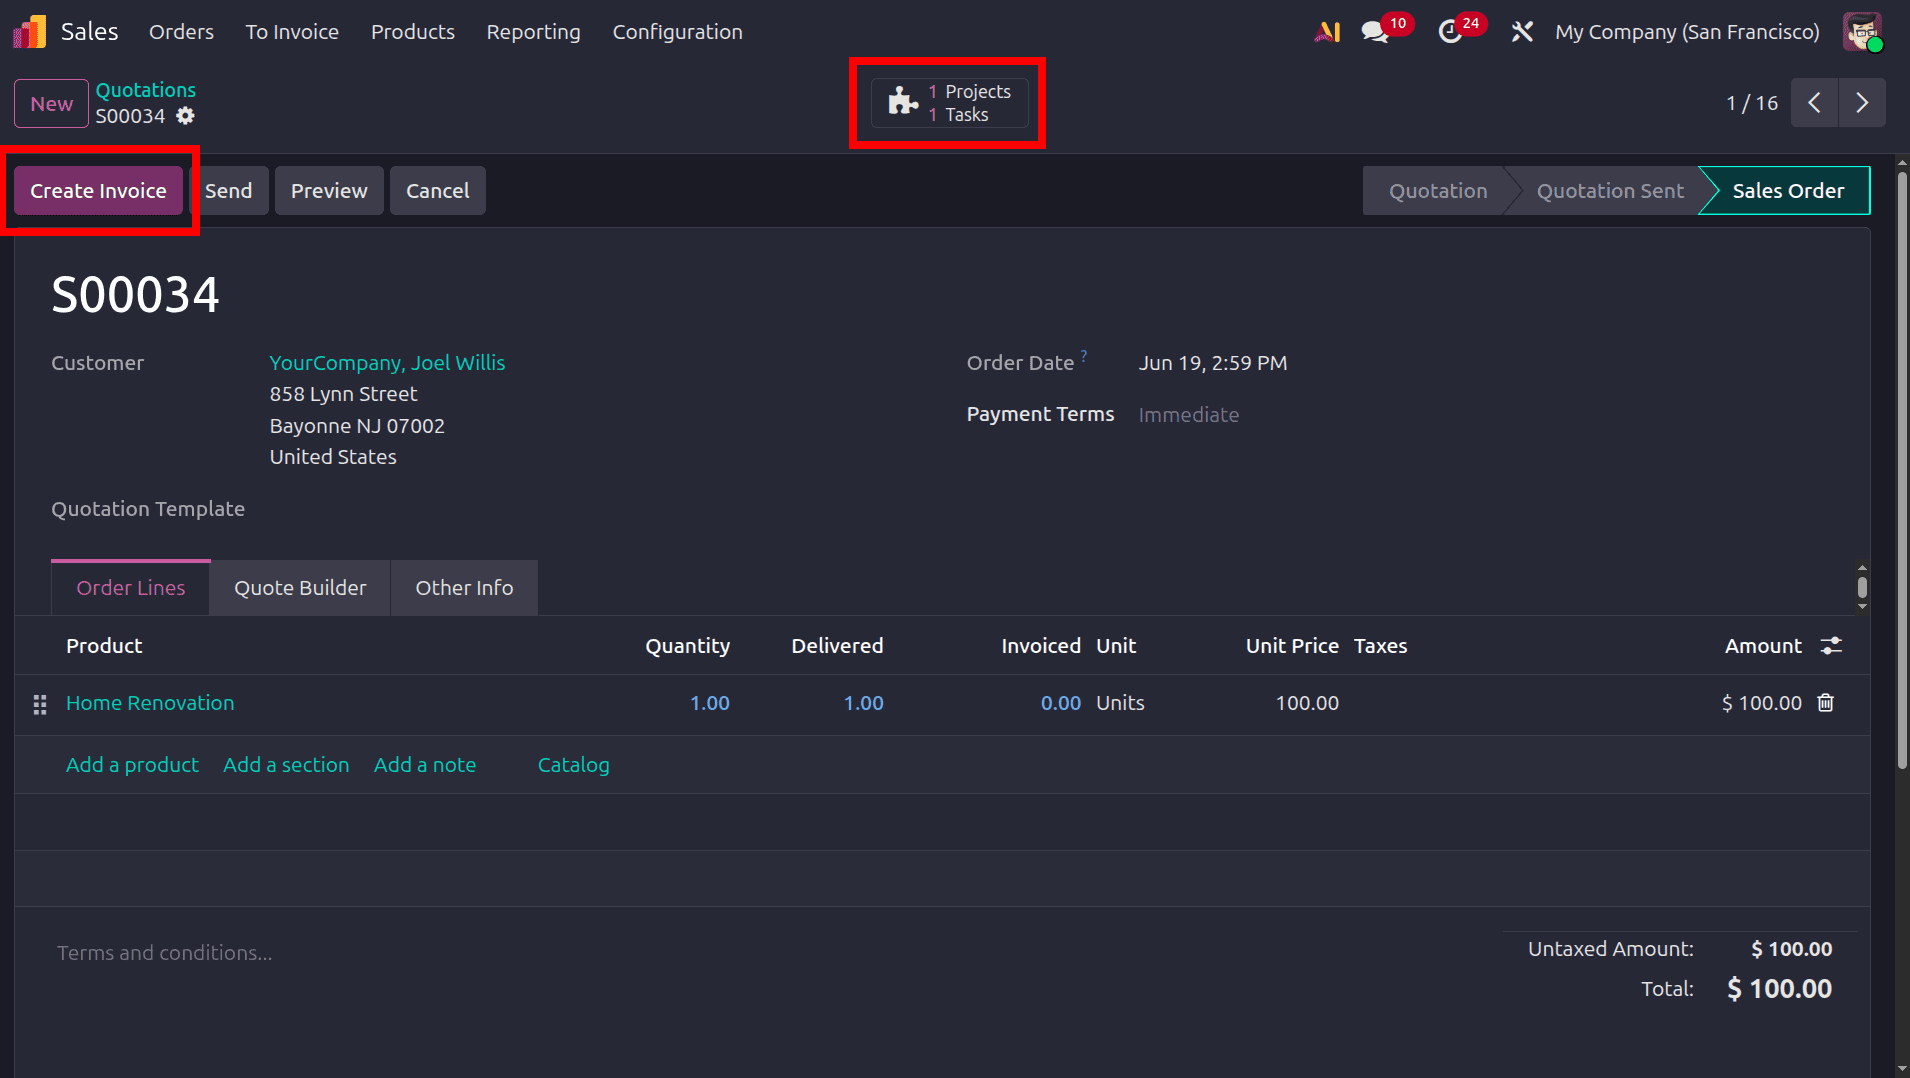
Here we can see the project and tasks related to the project and the create invoice option.
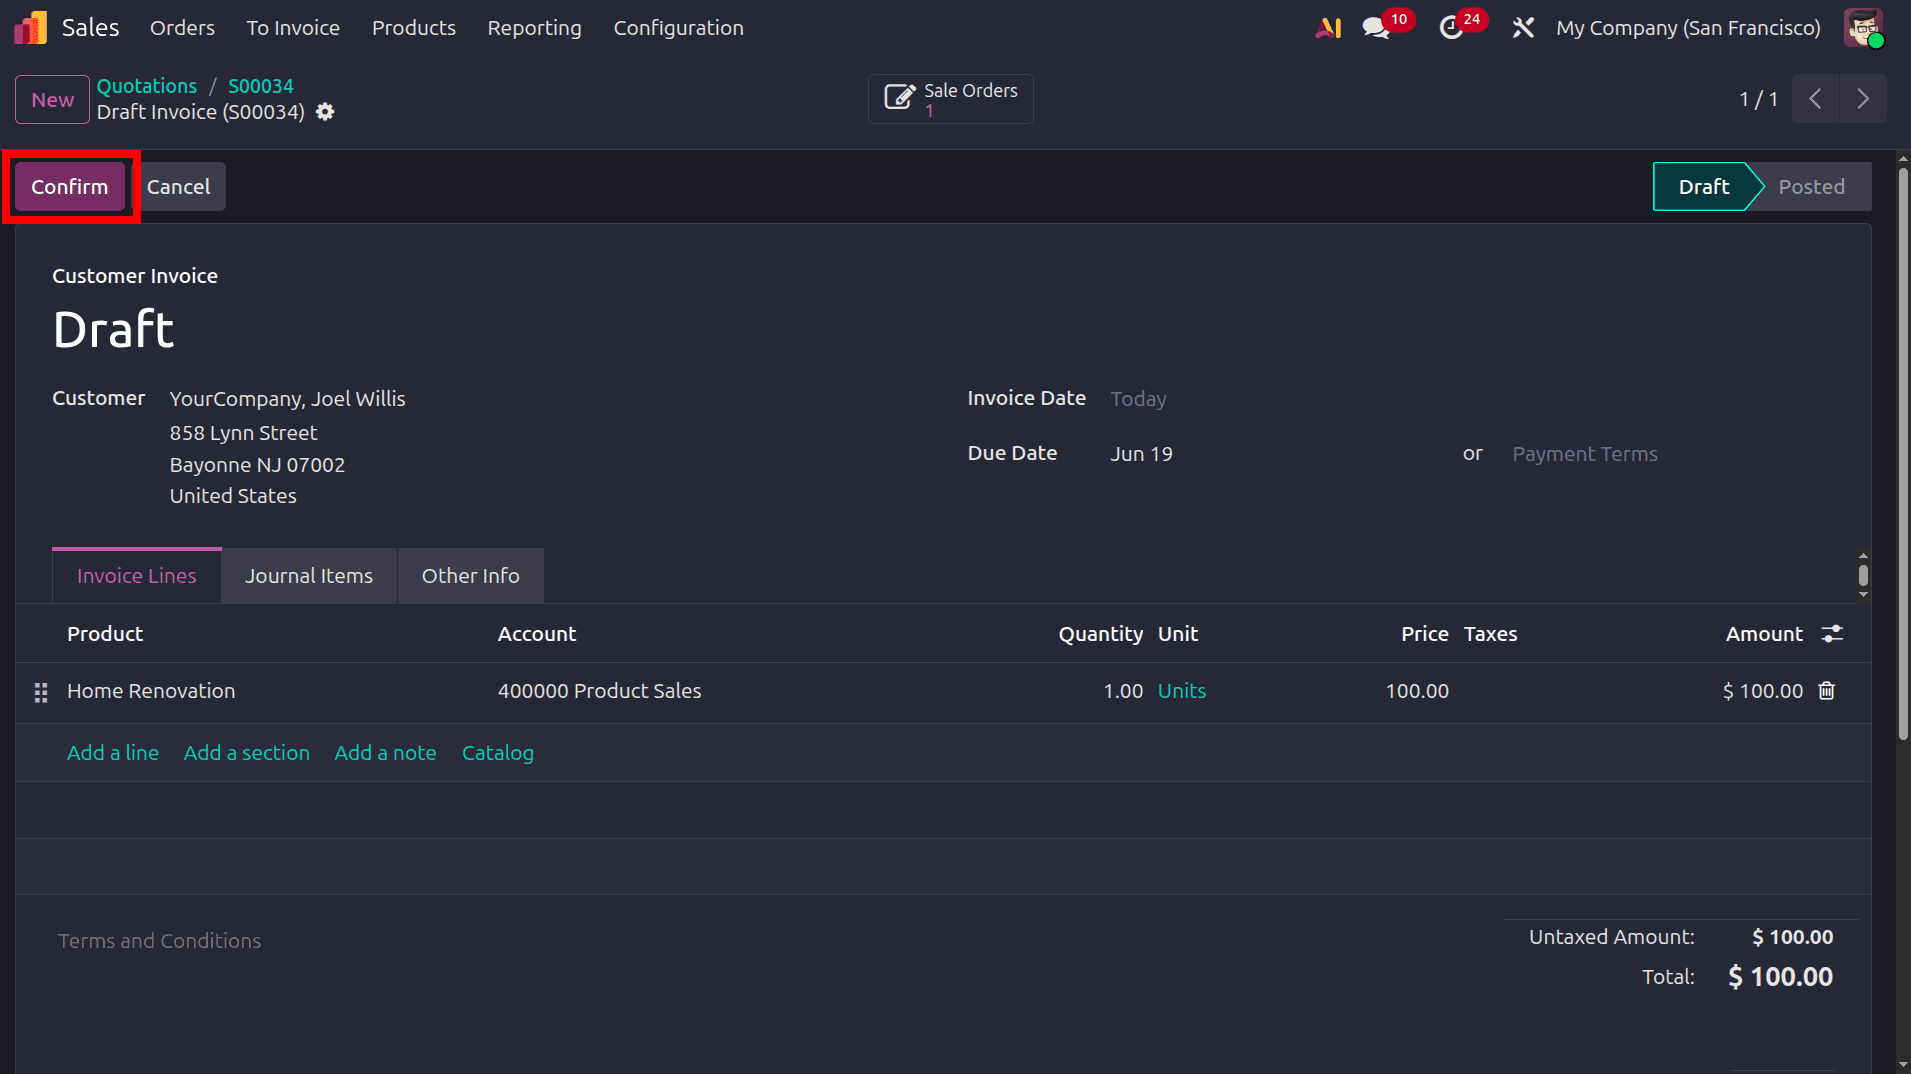
Click the "Create Invoice" button to create an invoice, and then confirm it by clicking the "Confirm" button. To check whether the invoice that we created has affected the profitability of the project. Move to the project module and open the dashboard for the specific project.
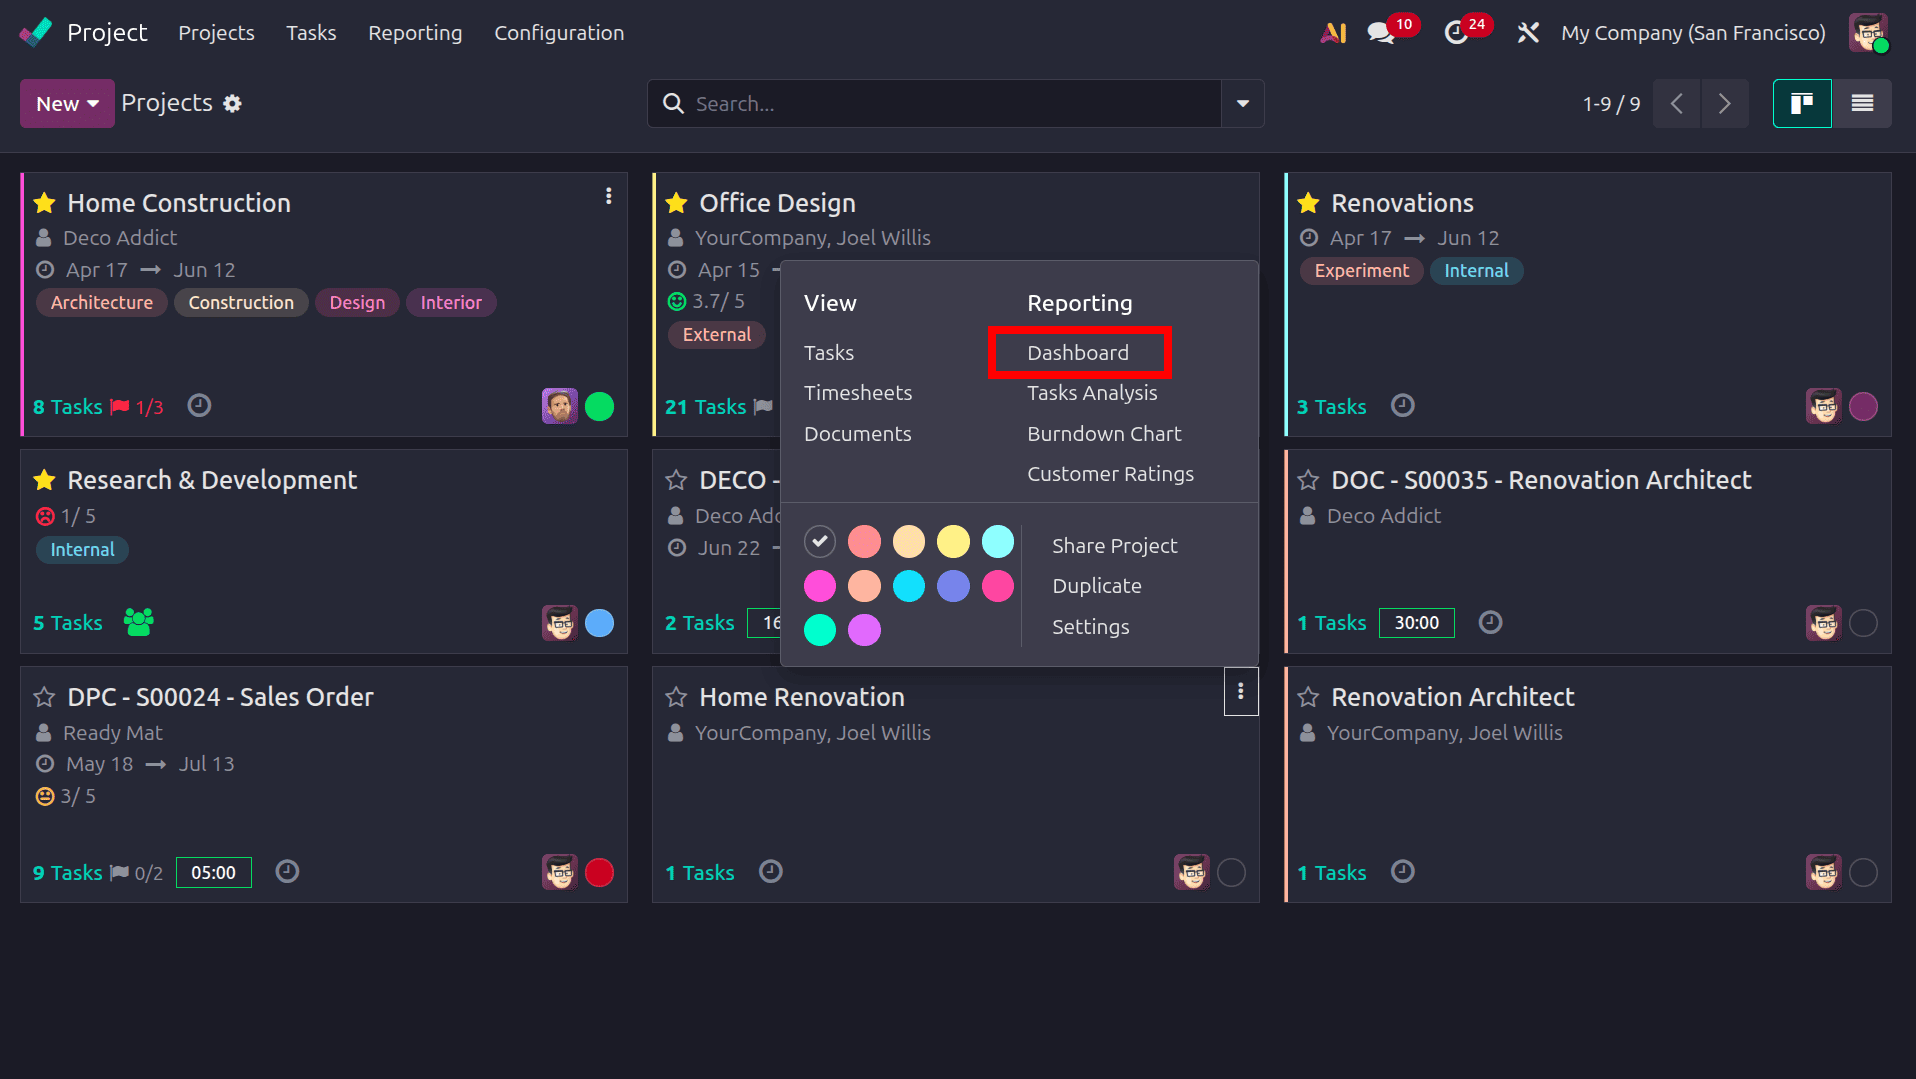
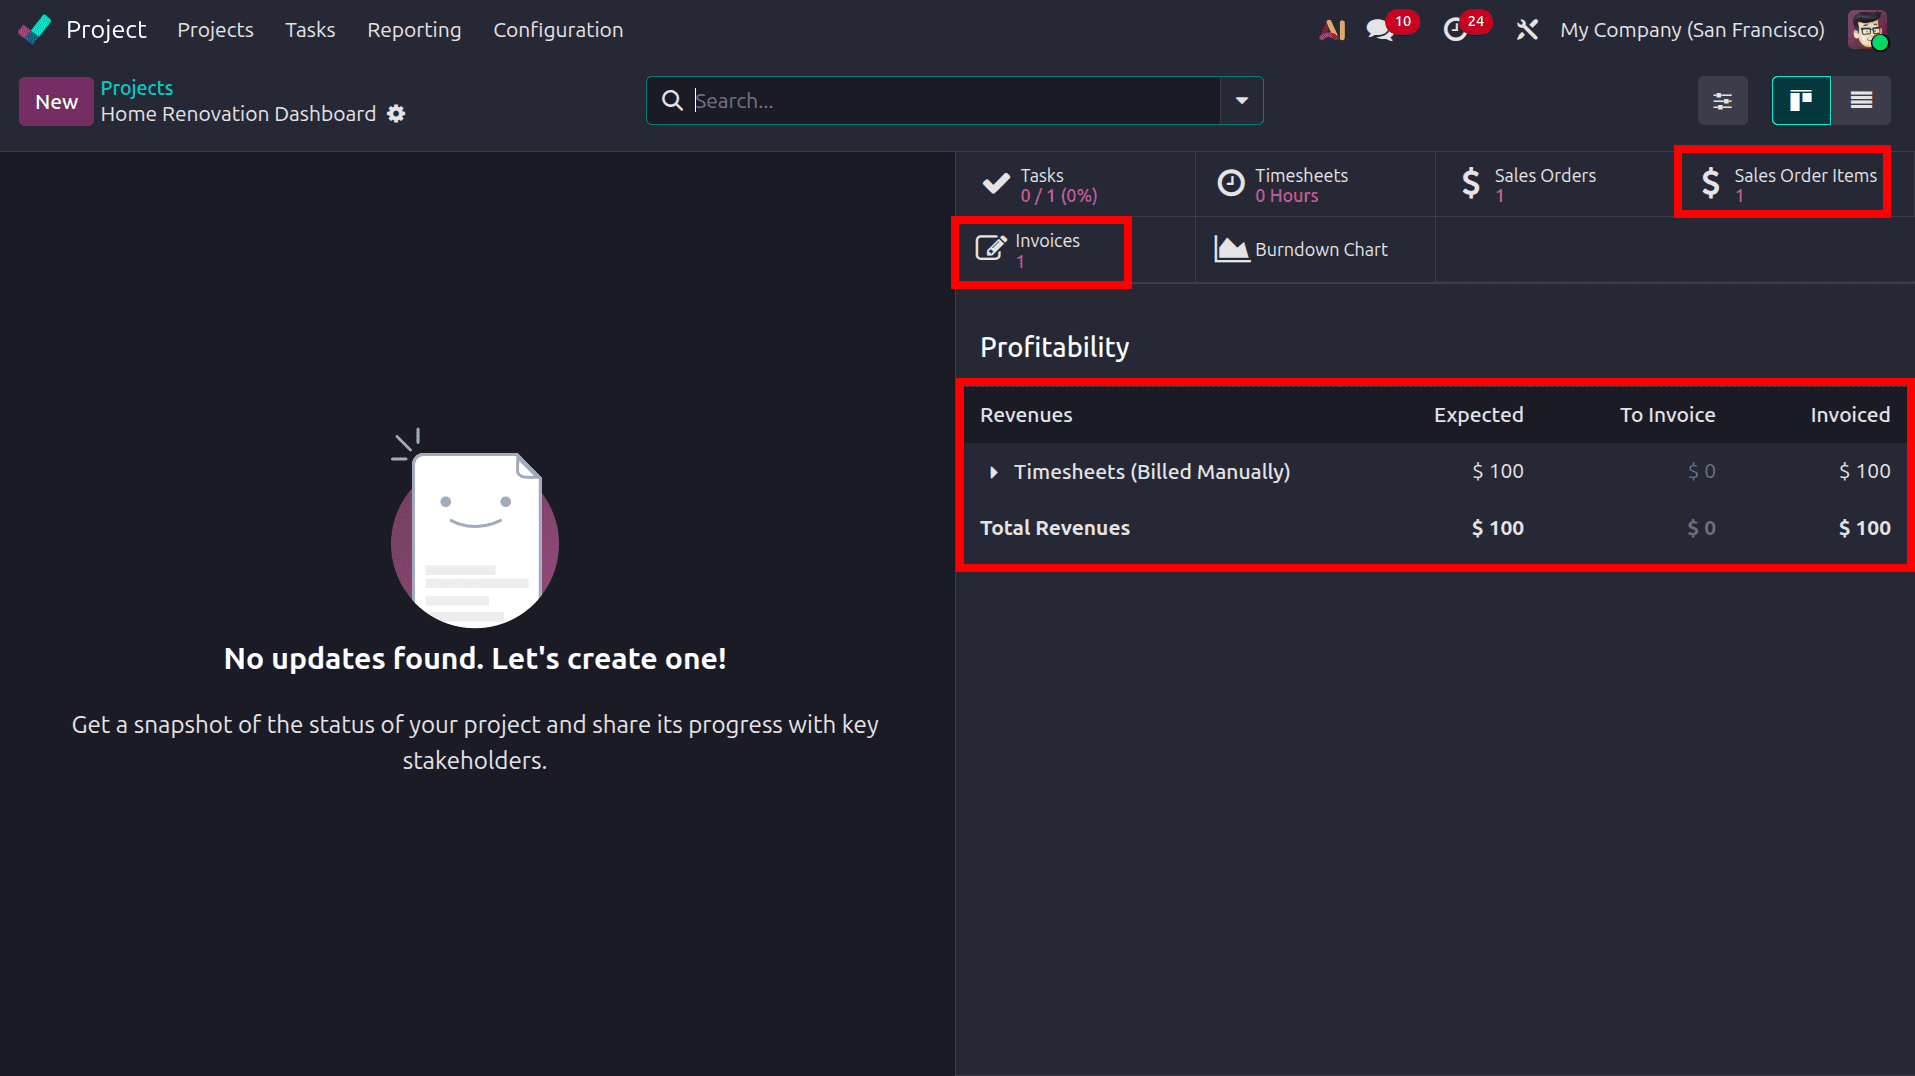
Here we can see that the Task, Timesheet, Sales order, Sales order Item, and the invoice are related to that project. In the Sales order, Sales order item, and Invoice, we can see the Data we created.
In the profitability, we can see that the invoice that we created has been added to the revenue of the Project.
Managing project billing with precision is critical for service-based businesses, and Odoo 19 makes it seamless through the Delivered Quantity (Manual) invoicing policy. This blog explores how the Project module and Sales module work in sync to ensure accurate, dispute-free invoicing. By configuring a Service product with the Invoicing Policy set to Based on Delivered Quantity (Manual) and linking it to a confirmed Sales Order, businesses gain complete control over revenue recognition. The manually updated delivered quantity on the Sales Order line directly drives Customer Invoice generation. Furthermore, the Project Profitability dashboard reflects invoiced revenue in real time, offering accountants and project managers a transparent, integrated view of financial performance across every billable project in Odoo 19.
To read more about How the Project Can Be Billed Based on the Delivered Quantity (Manual) in Odoo 18, refer to our blog How the Project Can Be Billed Based on the Delivered Quantity (Manual) in Odoo 18.