Accounting is a vital element that helps organizations handle their financial operations effectively. Odoo is a complete suite of business management software. Keeping track of purchase receipts, which attest to the delivery of products or services from suppliers, is a crucial component of accounting. A purchase bill and a purchase receipt have different functions in Odoo 17's accounting and procurement modules. A tangible receipt from a vendor recognizing the delivery of goods or services to the business is called a purchase receipt. A Purchase Bill, on the other hand, is a financial document that represents the vendor's request for payment and lists the amount owing to them for the products or services they have received.
To ensure effective inventory control and financial management, it is critical to understand how these sheets differ. We'll look at how to create and activate purchase receipts in Odoo Accounting in this blog article.
Configuring Purchase Receipts
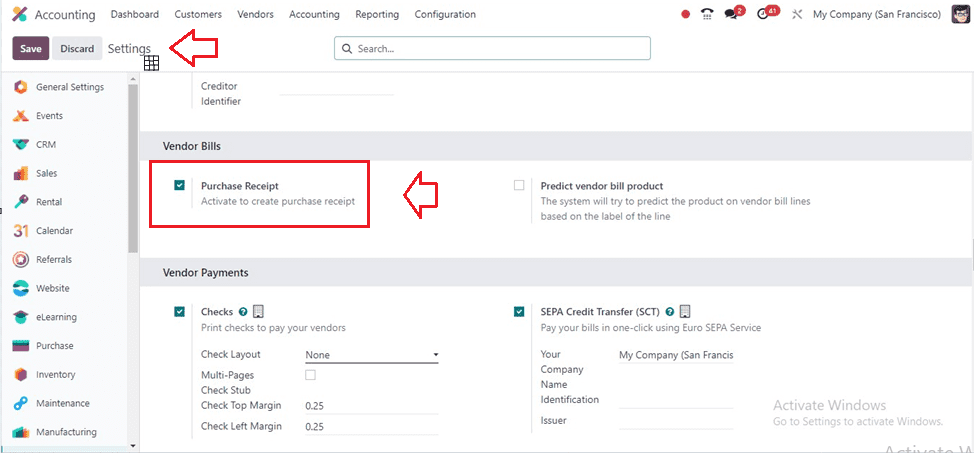
To create purchase receipts in Odoo 17 Accounting, go to your Odoo Accounting module first. You'll find the ‘Settings’ page under the ‘Configuration’ menu. The screenshot below shows that to produce buy receipts, you must activate the 'buy Receipt' option in the 'Vendor Bills' area.
The system will now display the Receipts option under the Vendors tab of the Odoo 17 Accounting module.
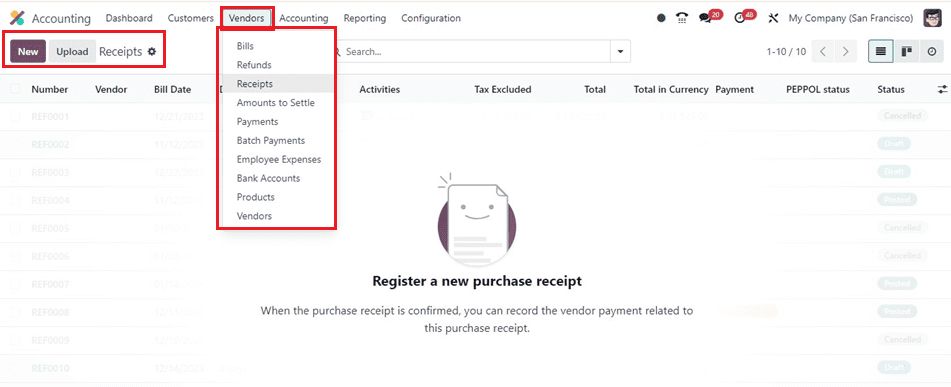
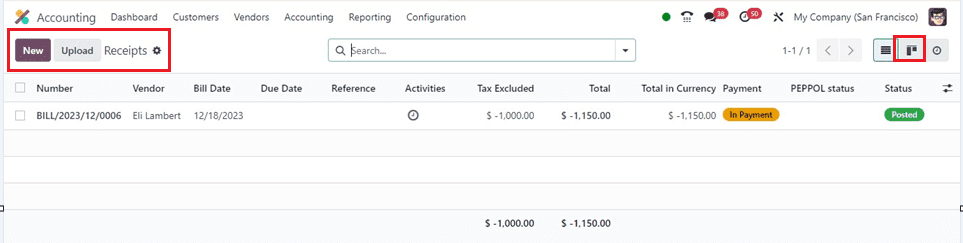
When selecting the ‘Receipts’ menu, you will enter into the Receipts dashboard window, which will display all the previously created Purchase Receipts. Default Receipt data, including Number, Vendor, Bill Date, Due Date, Reference, Activities, Tax Excluded, Total, Payment, PEPPOL Status, and many more, are shown in this Preview view. You can display the receipt's status in a particular color format. Full details can be viewed by selecting them. The Receipts window provides a comprehensive view of all Purchase Receipts.
We can upload any receipt documents from tour device storage by using the ‘Upload’ button. The ‘New’ button can be used to create a new receipt.
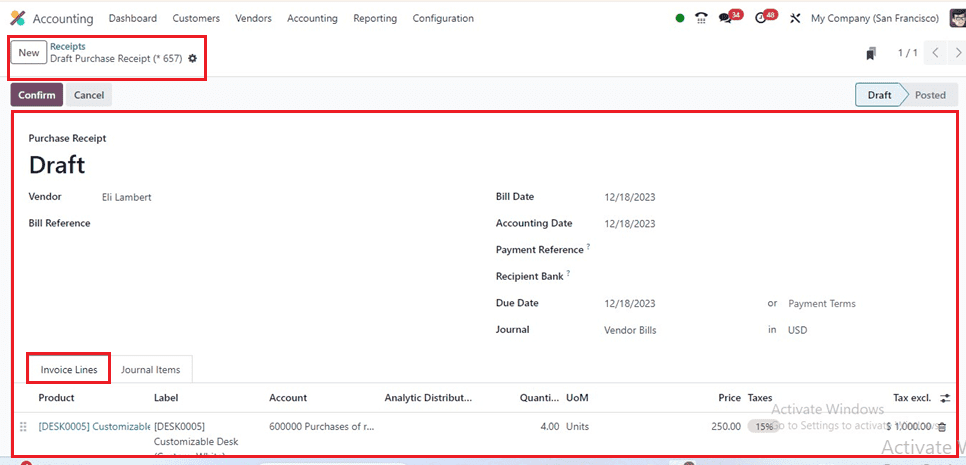
Inside the displayed form page, fill in the required fields such as Vendor, Bill Reference, Bill Date, Accounting Date, Payment Reference, Recipient Bank, Due Date, Journal, etc. After adding the products and journal items, save the details, confirm the receipt order using the ‘Confirm’ button, and register the payment using the ‘Register Payment’ button.
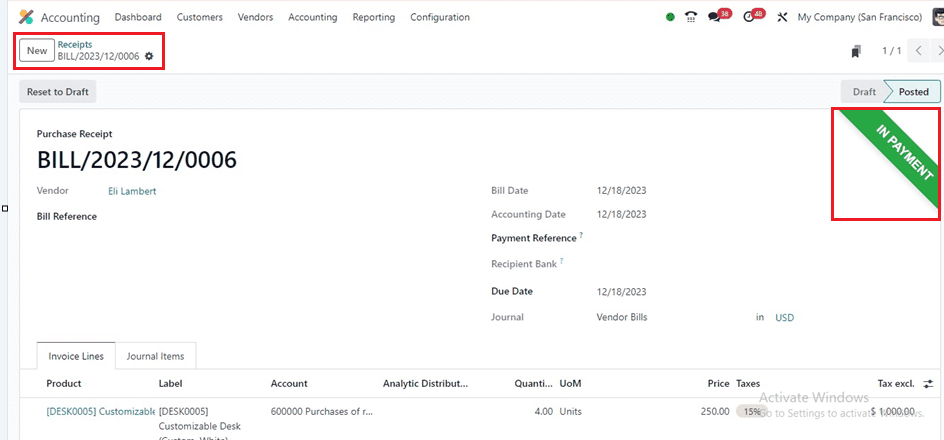
You will see the ‘IN PAYMENT’ ribbon in green color, as illustrated in the above screenshot.
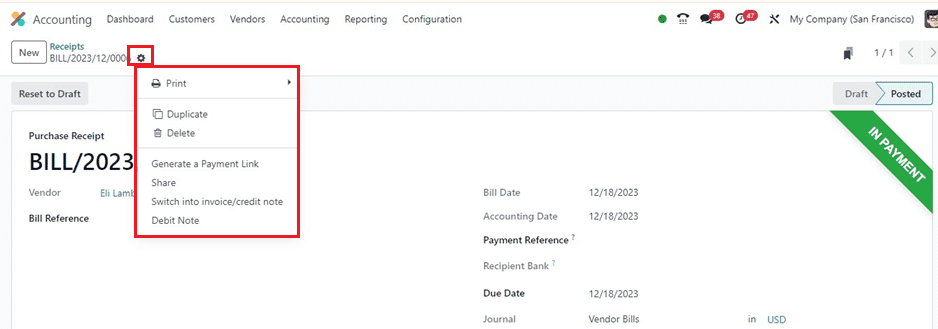
Features like Print, Duplicate, Delete, Generate a Payment Link, Share, and Switch into refund/credit note and debit note options are available inside the 'Action' menu.
You can see the newly created receipt data from the ‘Receipts’ dashboard window, as shown below.
The Kanban menu icon may be used to open the 'Receipts' pane in the Kanban view. The platform offers various options for sorting and grouping data inside the advanced search bar for quick search.

Users may apply default and customizable filters to records in the 'Filters' area. Some of the filters that can be applied include My Invoices, Draft, Posted, Cancelled, To Check, SDD Mandate, Unpaid, Paid, Overdue, and others. Users may personalize filters by using the 'Add Custom Filter' option.
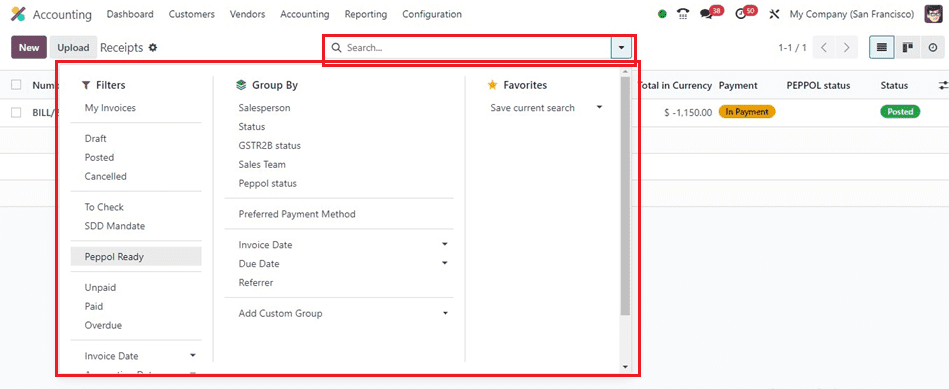
You can group the dashboard data based on the Salesperson, Status, GSTR2B Status, Sales Team, Peppol Team, Invoice Date, and Referrer using the ‘Group By’ section. Access the activity view of the ‘Activity’ icon located near the Kanban icon. This window can also be used to schedule the activity related to the receipt order.
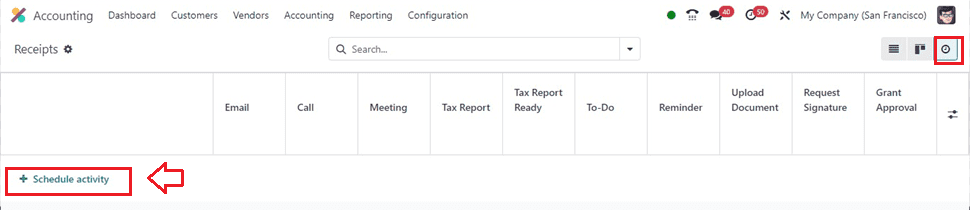
From the activity view of the receipt, click on the ‘Schedule Activity’ button to create an activity based on the receipts and choose the receipt from the ‘Account Entry’ wizard to set an activity.

After choosing the receipt, you can set the activity inside the ‘Schedule Activity’ window by choosing the Activity Type, Summary, Due Date, and Assignee Person, as illustrated in the screenshot below.

Then, press the ‘Schedule’ button to schedule the activity. The ‘Schedule & Matrk as Done’ and ‘Done & Schedule Next’ buttons can also be used according to your requirements.
Odoo 17 Accounting gives users the ability to handle purchase receipts. To manage vendor relationships and keep correct financial records, this is essential. Businesses may simplify their financial procedures and keep things running smoothly by leveraging Odoo's robust accounting tools.