In our daily life, we often confront a variety of meetings whether it is planned or unplanned. When it comes to business meetings it is important to manage the timing of each meeting properly in order to succeed in the principal objectives of your business gatherings. A well-structured and planned appointment scheduling is essential in business programs to organize working time effectively. You may have job interviews, client meetings, business plannings, medical appointments, etc, on your working days. Whatever the type of meetings you have to attend, you need to manage your time accurately.
To perform the time management functions efficiently, you need a perfect appointment scheduling system. Only a good appointment management system can solve your time-consuming unorganized meeting patterns. You can perfectly schedule each appointment with the help of an appointment system by saving your time. A well-planned appointment can lead you to create fruitful business relationships and the progress of your business. Proper management of time is very important for any business program to improve productivity.
Let’s take a look into the advantages of using an appointment scheduler.
Organizes all client appointments in real-time by checking available time slots in working time.
Showing available time slots for appointments will help clients to manage their time.
Customers are able to avoid never-ending waiting hours for appointments.
The online booking option saves time for both parties by reducing back and forth phone calls and emails for booking an appointment.
Clients can book a slot at any time and from anywhere according to their convenience.
One booking in one slot will avoid double booking for the same slot.
Sending reminders option in the appointment scheduling system will give alert notification to both parties about upcoming appointments.
Odoo provides you the best appointment scheduling module to manage all your appointments by automating the scheduling processes. Users can schedule their appointments at their convenience using this module. Apart from traditional booking systems of a large number of calls and emails to book a slot, Odoo reduces the stress by introducing an automated appointment management system.
In this blog, we explain how to schedule an appointment easily by using the Odoo appointment module.
Users can effortlessly access and make use of the advantages of the Odoo appointment module through easy moves.
Configuring Appointment Module
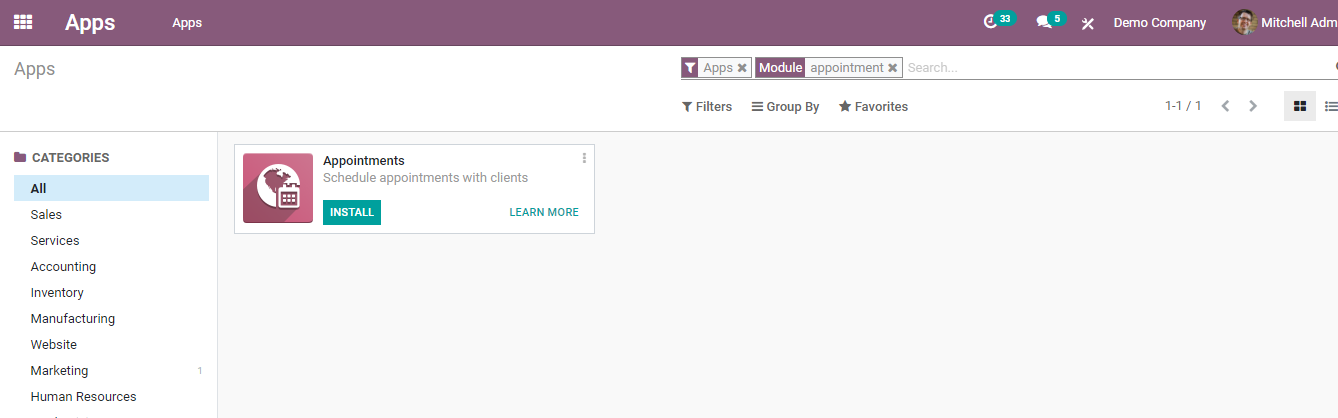
In order to facilitate the scheduling programs first, you have to install the appointment module. A user can easily find and install the appointment module from the Odoo app store.
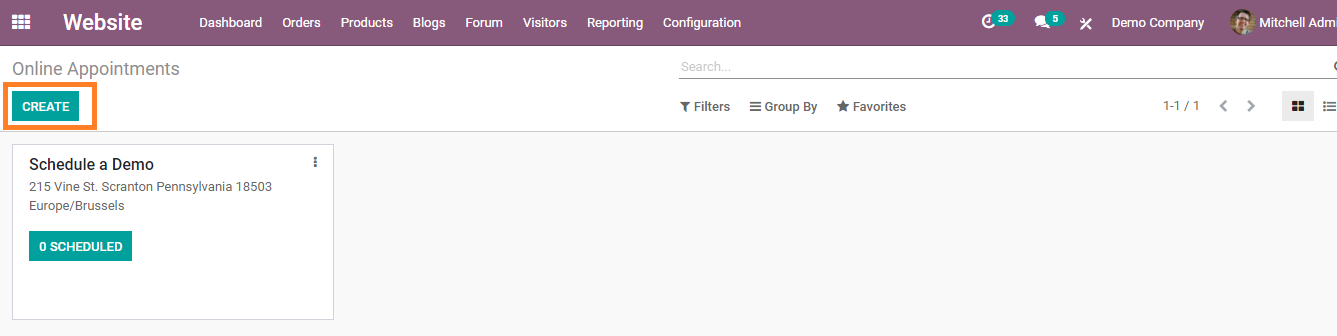
The installed module will be automatically integrated with your calendar module. Visit the configuration menu of the website application to schedule a new appointment. On clicking the ‘Create’ button, you will get a form to fill about the new appointment.
You have to fill the required fields as per your appointment type.
Scheduling and Availability
In this tab, you can specify the details about your new appointment. You can mention the appointment duration, time zone, location, etc in this field. In the ‘allow canceling’ field, you can suggest a time limit to cancel a scheduled appointment. If you are unable to make the appointment you can easily cancel and reschedule it before the mentioned time limit.
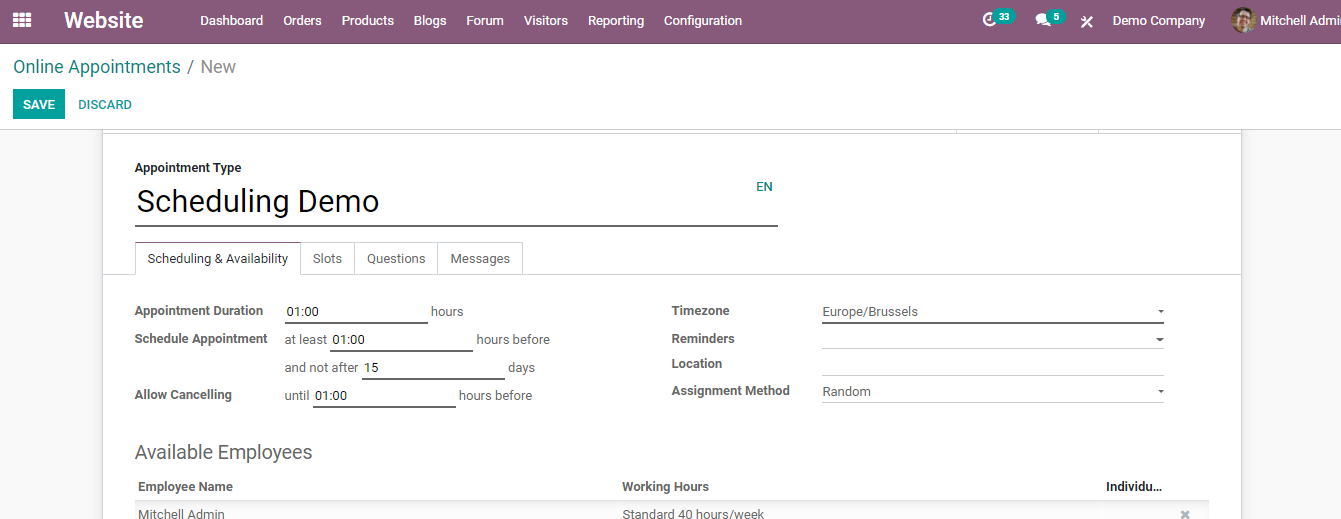
Odoo allows you to add available staff for this particular appointment by selecting from the employee lists.
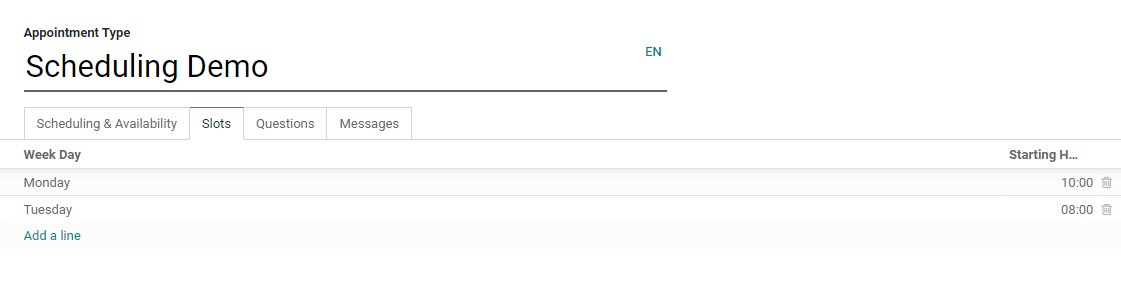
Slots
Available time slots can be mentioned in this field. It includes the day and time of your appointments so that the client can easily check your availability.
Questions
While creating an appointment, if you want to ask some questions to your clients such as name, email address, contact information, and work details you can include them in this field.

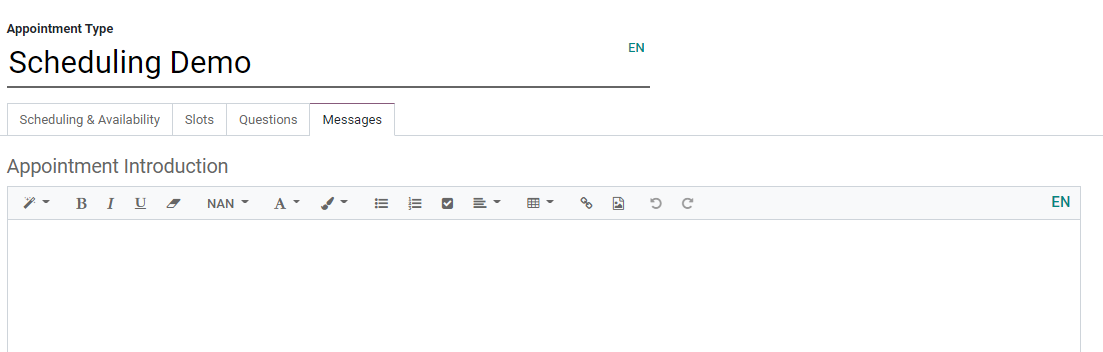
Message
Here, you are able to add any message that you want to send to your client.
Advertising the Appointment
After adding all this basic information to your appointment, you need to publish this on your website so that customers can access the appointment details.
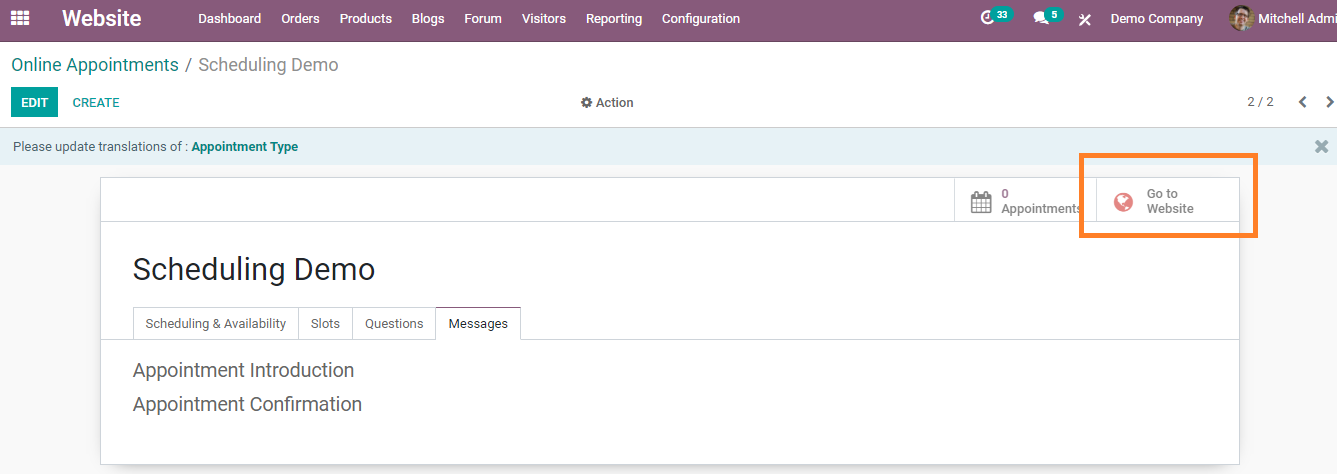
For this, click on the “go-to website’ button and you will be directed to a calendar view.
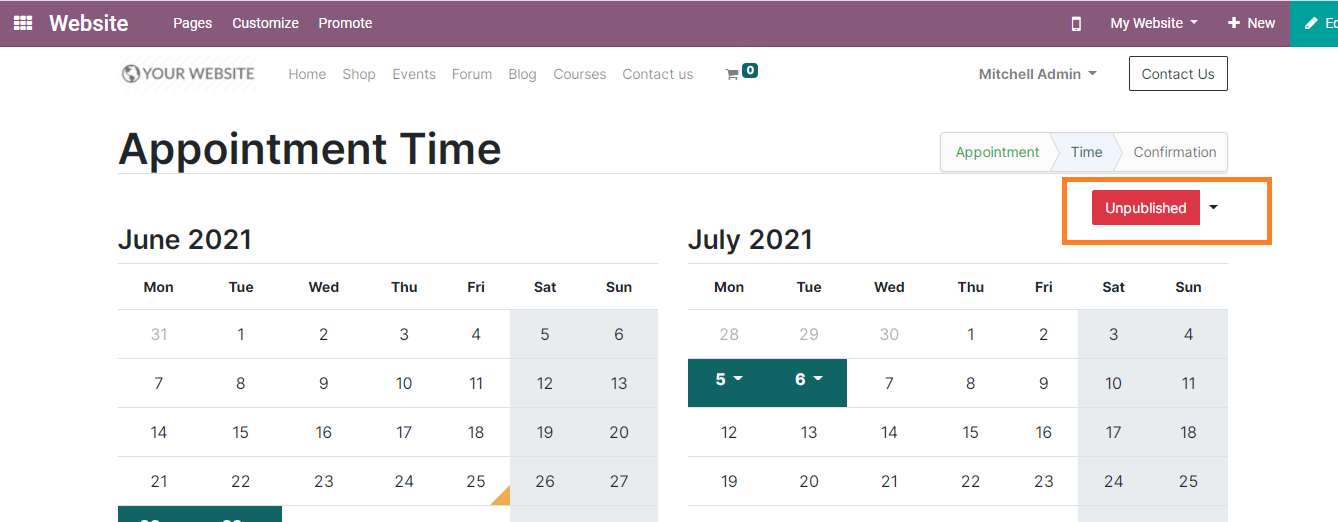
On the right side of the calendar, you can see the status of your appointment as ‘unpublished’ in red color. In order to publish the appointment you can click on it and it will turn into green color.
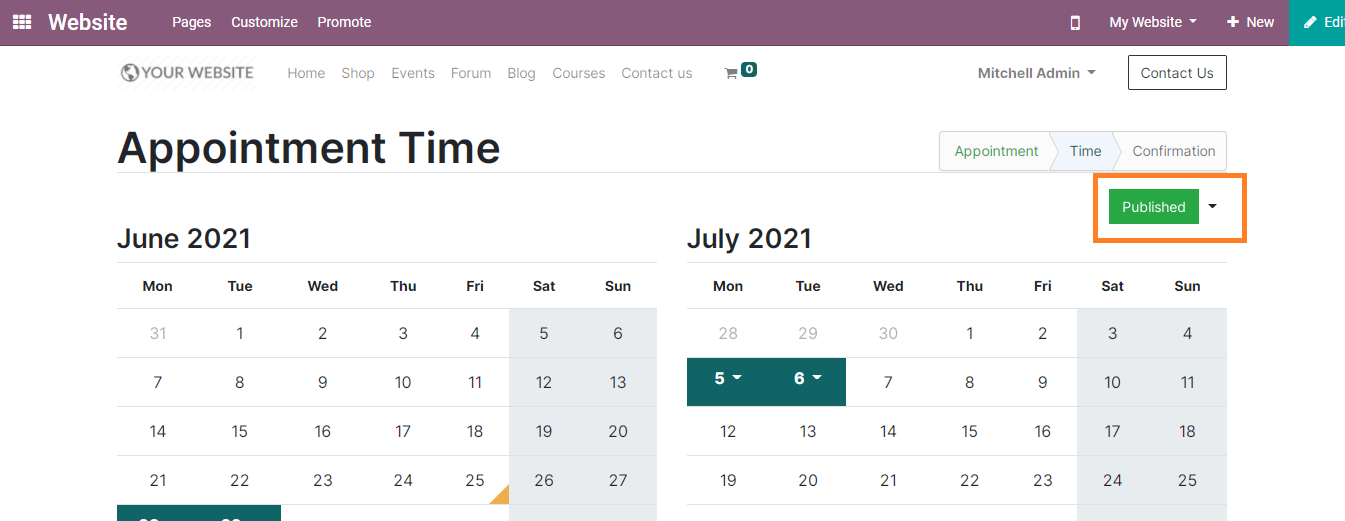
Your appointment will be published on the website and customers can directly select them at their convenience.
Booking an appointment
Using the appointment in the menu a client can reserve their appointment.

The user can view available time slots by clicking on the ‘view availability’ and they are able to see available dates for the appointment.
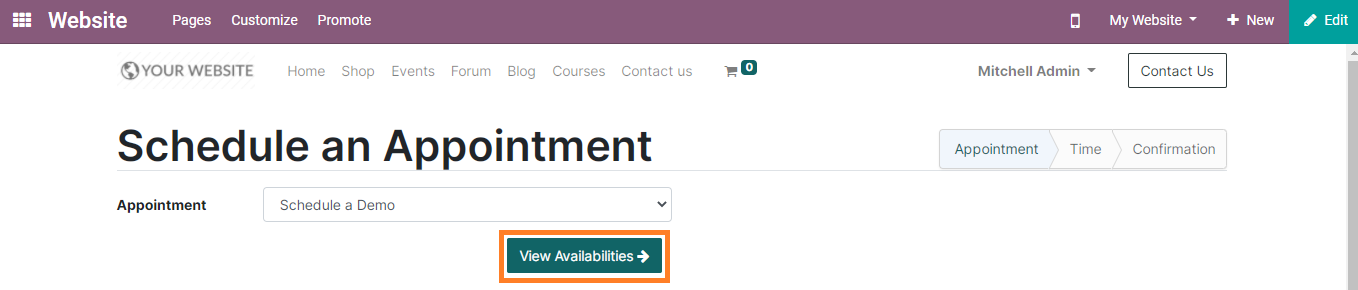
They can choose a suitable time from the given dates. You can view available time slots by clicking the available date and select one as per your requirement. You will get a confirmation page to fill in some basic details as shown below.
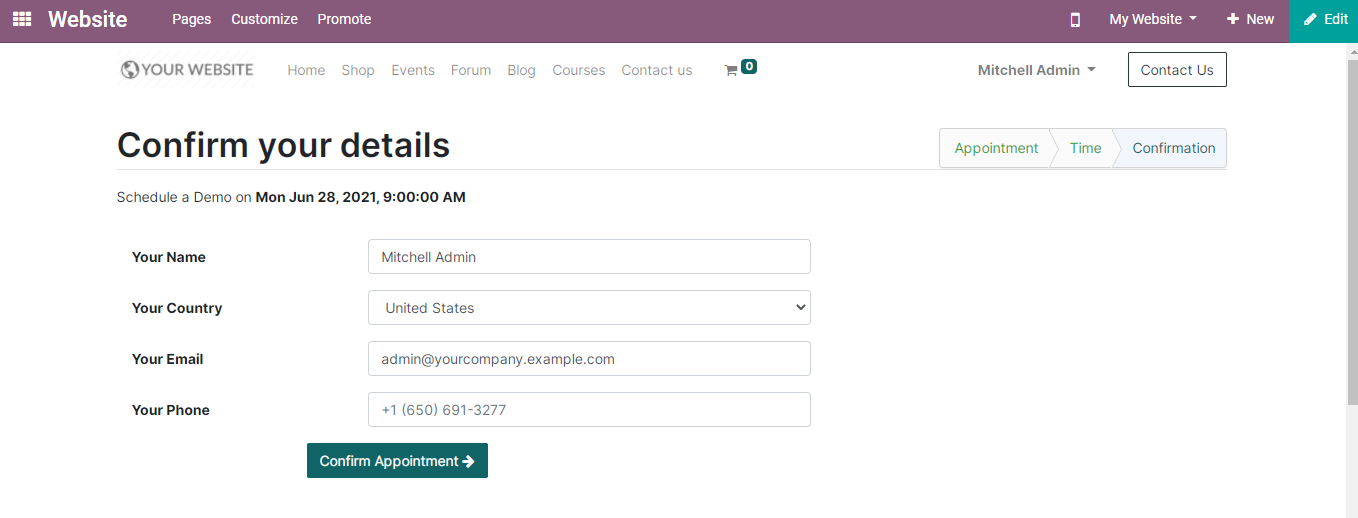
After adding personal details in the required field you can click the confirmation button to confirm your appointment.
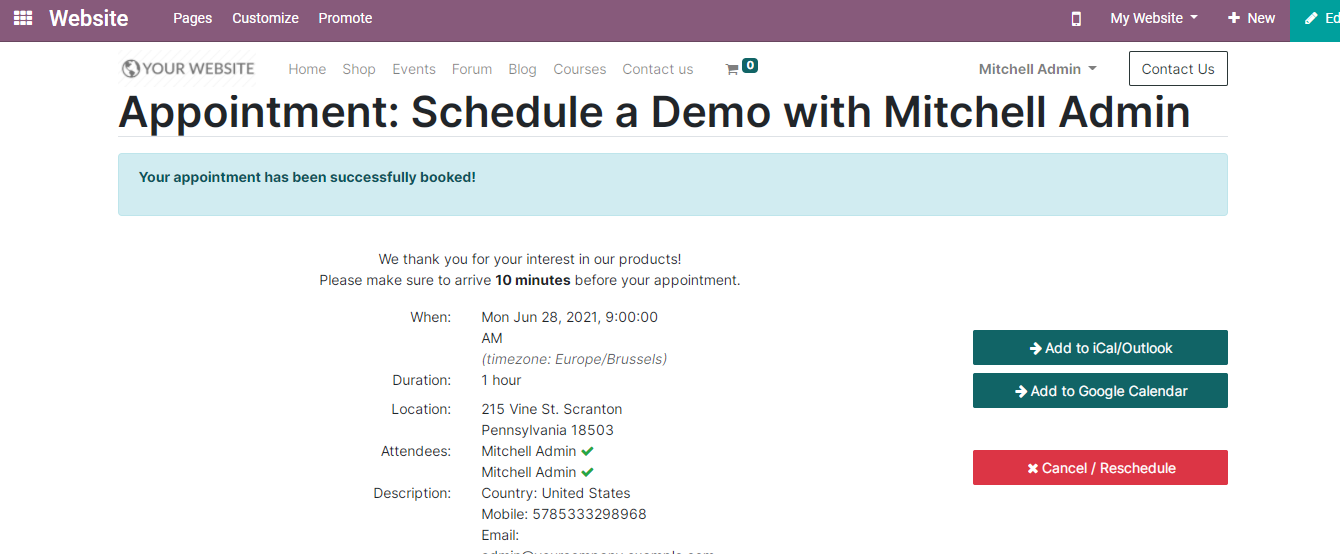
This will be the model of your scheduled appointment. You can add this to your google calendar also. If you want to cancel or reschedule the appointment you can select the ‘cancel/reschedule’ option. The newly scheduled appointment will be issued on your calendar and you can see it on your calendar module.
You are also allowed to use the calendar module to schedule new appointments. Clicking on the online appointment from the menu bar will direct you to the creating page of the appointment.
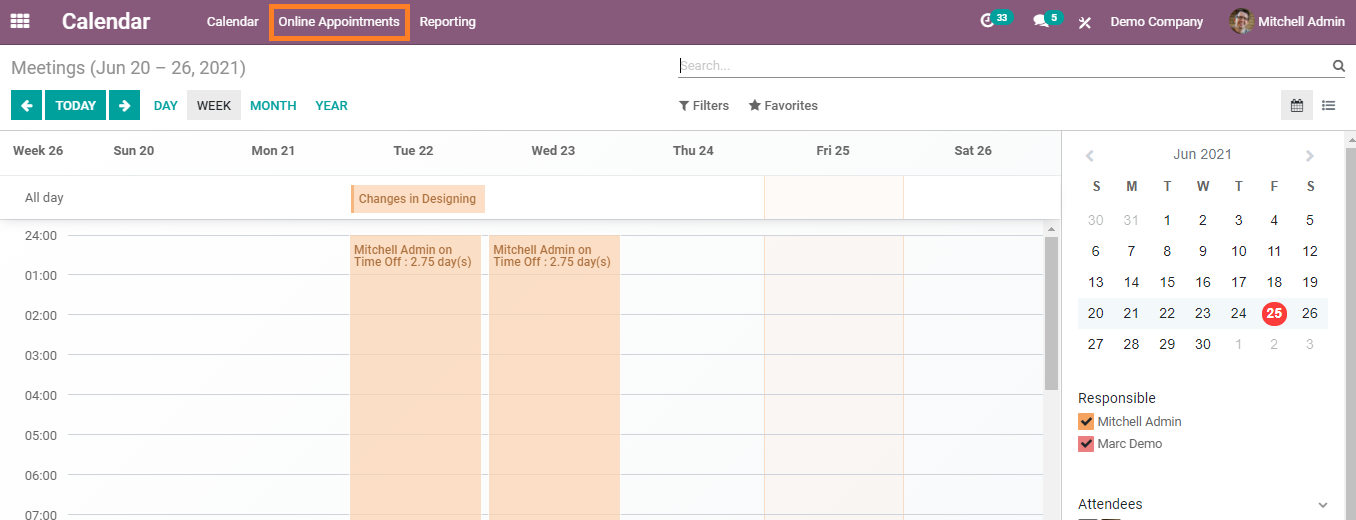
The calendar module keeps track of all your appointments and helps you to send reminders to both parties.
Using the Odoo appointment module, a client can view your availability and easily reserve slots. It reduces the difficulty of managing multiple appointments by avoiding double booking for the same slot. Once you booked your reservation you will be able to get a confirmation mail. It also sends regular reminders to customers for ensuring their availability. By recording all appointment details Odoo automates your scheduling processes in real-time. Odoo is the best option for you if you are looking for a better appointment management system.