Tracking and managing debts associated with specific assets, such as real estate, machinery, or automobiles, is made simpler with Odoo 19 Accounting's loan management feature for business assets. It enables businesses to immediately link loans to assets, ensuring that related financial obligations are readily apparent. By automating the generation of journal entries, interest calculations, and payment schedules, the system simplifies the management of complex loan agreements. Integration with the asset depreciation module gives a comprehensive picture of how loan repayments impact the asset's value over time.
By ensuring accurate accounting for both liabilities and asset evaluation, this improves financial transparency. Users can also generate detailed reports that look at loan performance, repayment status, and interest costs so they can make well-informed decisions. The function reduces the amount of manual labor required to manage asset-linked loans and enhances financial control.
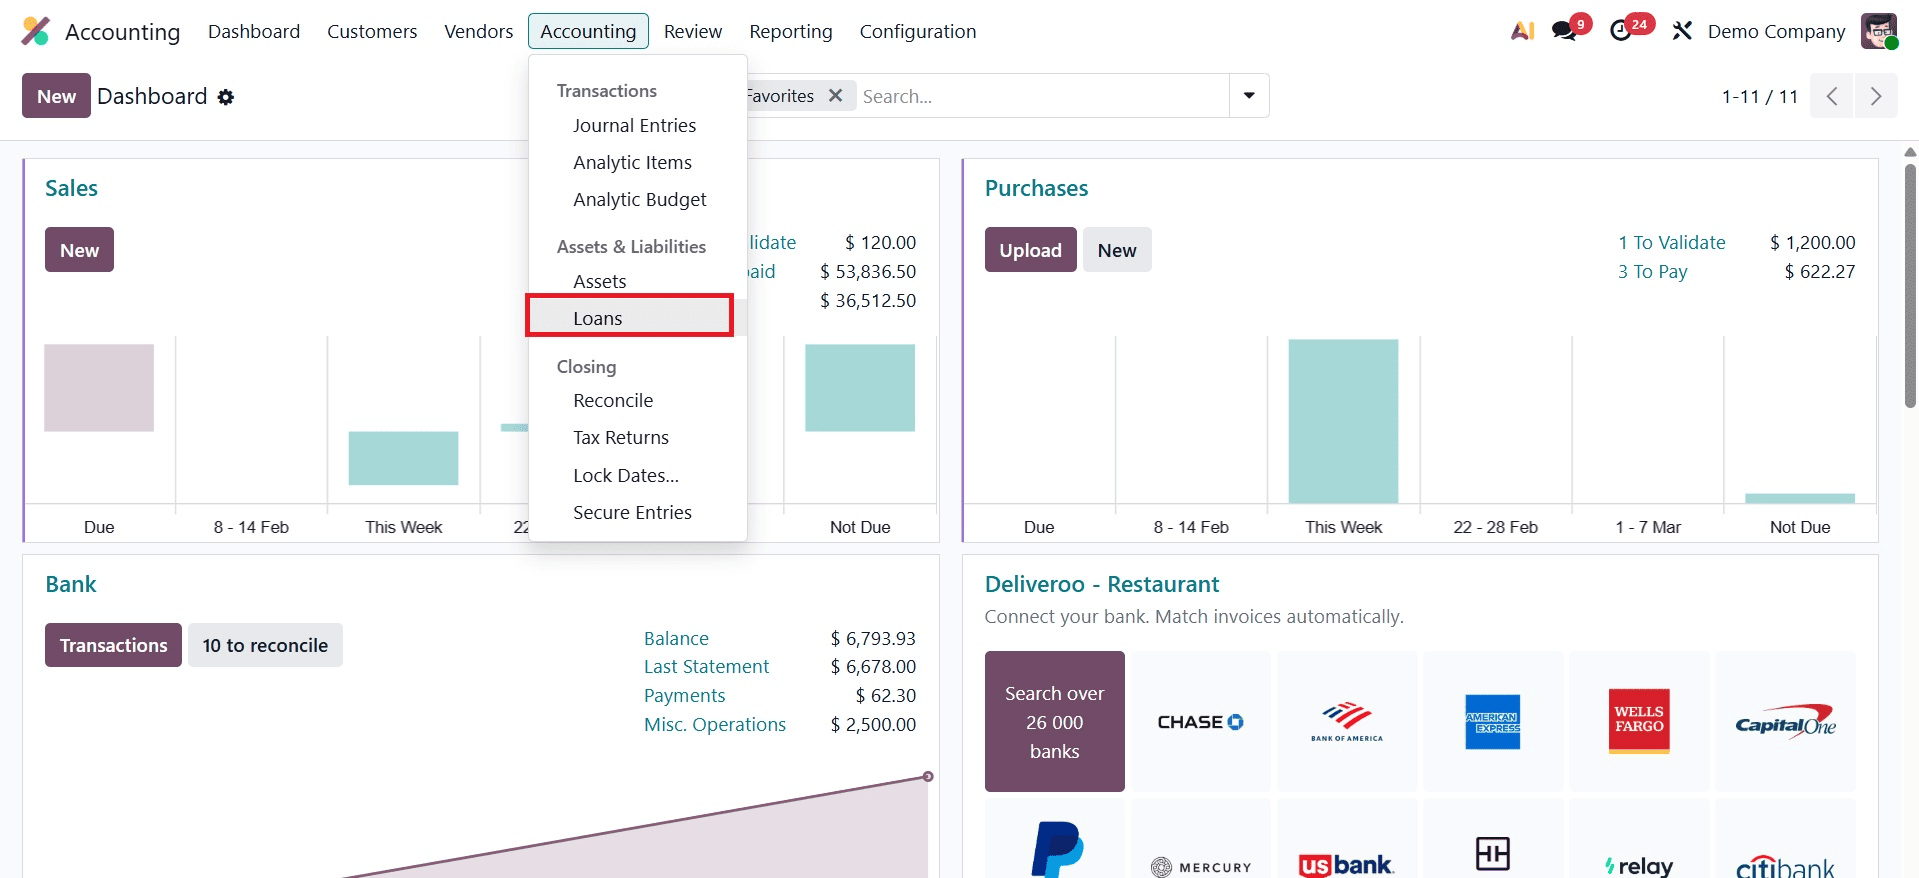
Let's now examine how Odoo 19 Accounting handles loan management. As seen in the screenshot below, the Loans are located under the module's accounting menu.
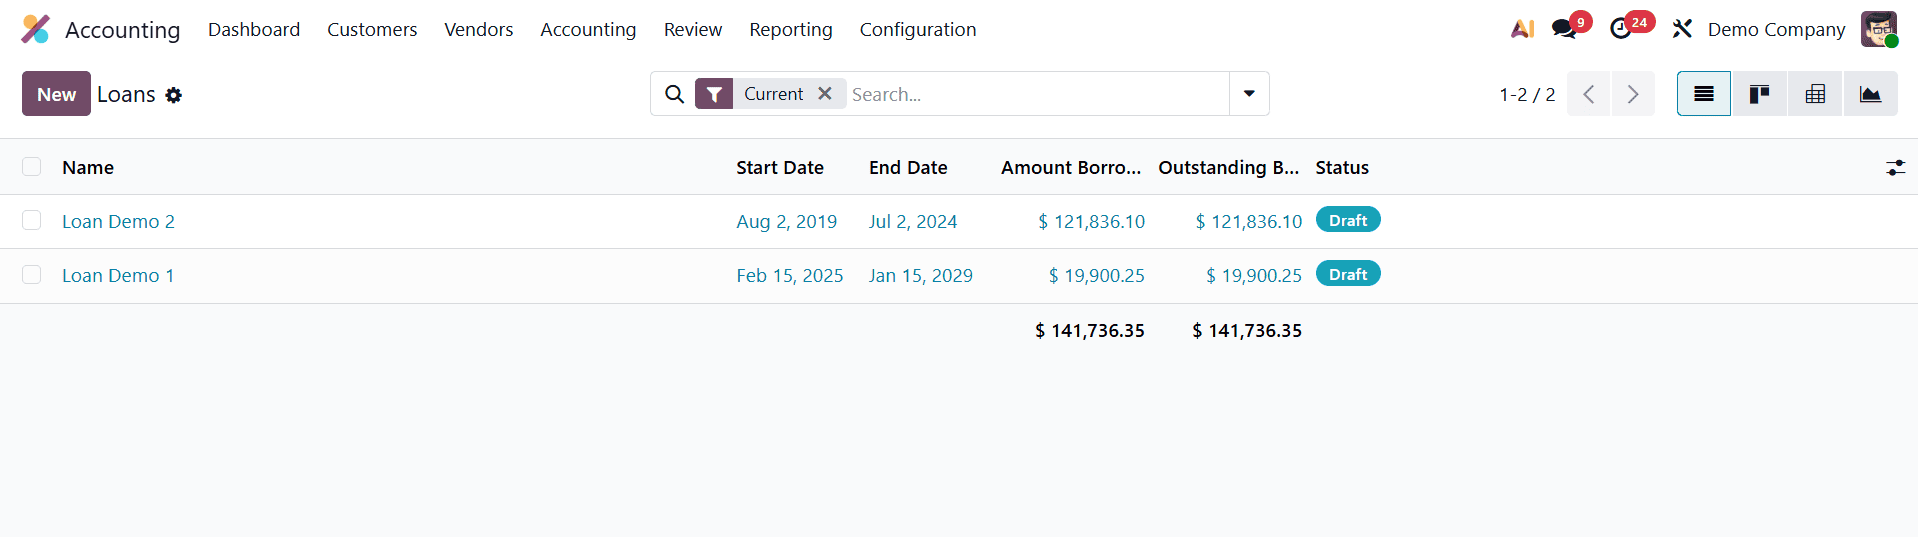
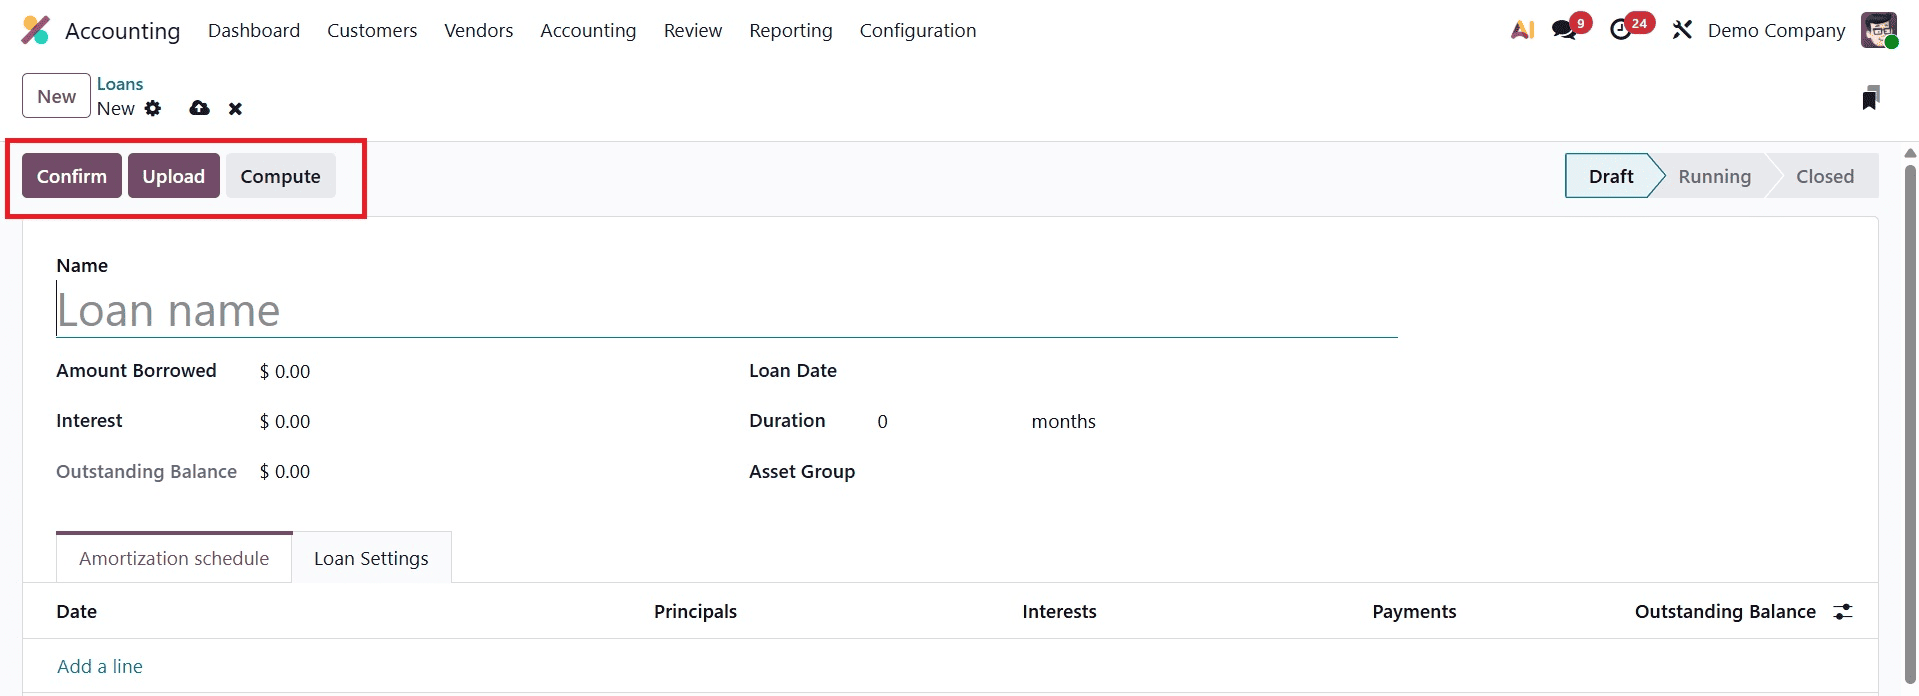
Here is a list of the loans that have already been established. The list displays the loan's name, start and end dates, amount borrowed, outstanding balance, and status. Click the New button to add a new loan.
Next, include the loan name in the creation form. Next, enter the loan amount, interest rate, loan date, and loan length. Once the Asset Group has been mentioned, the Outstanding Balance will be entered.
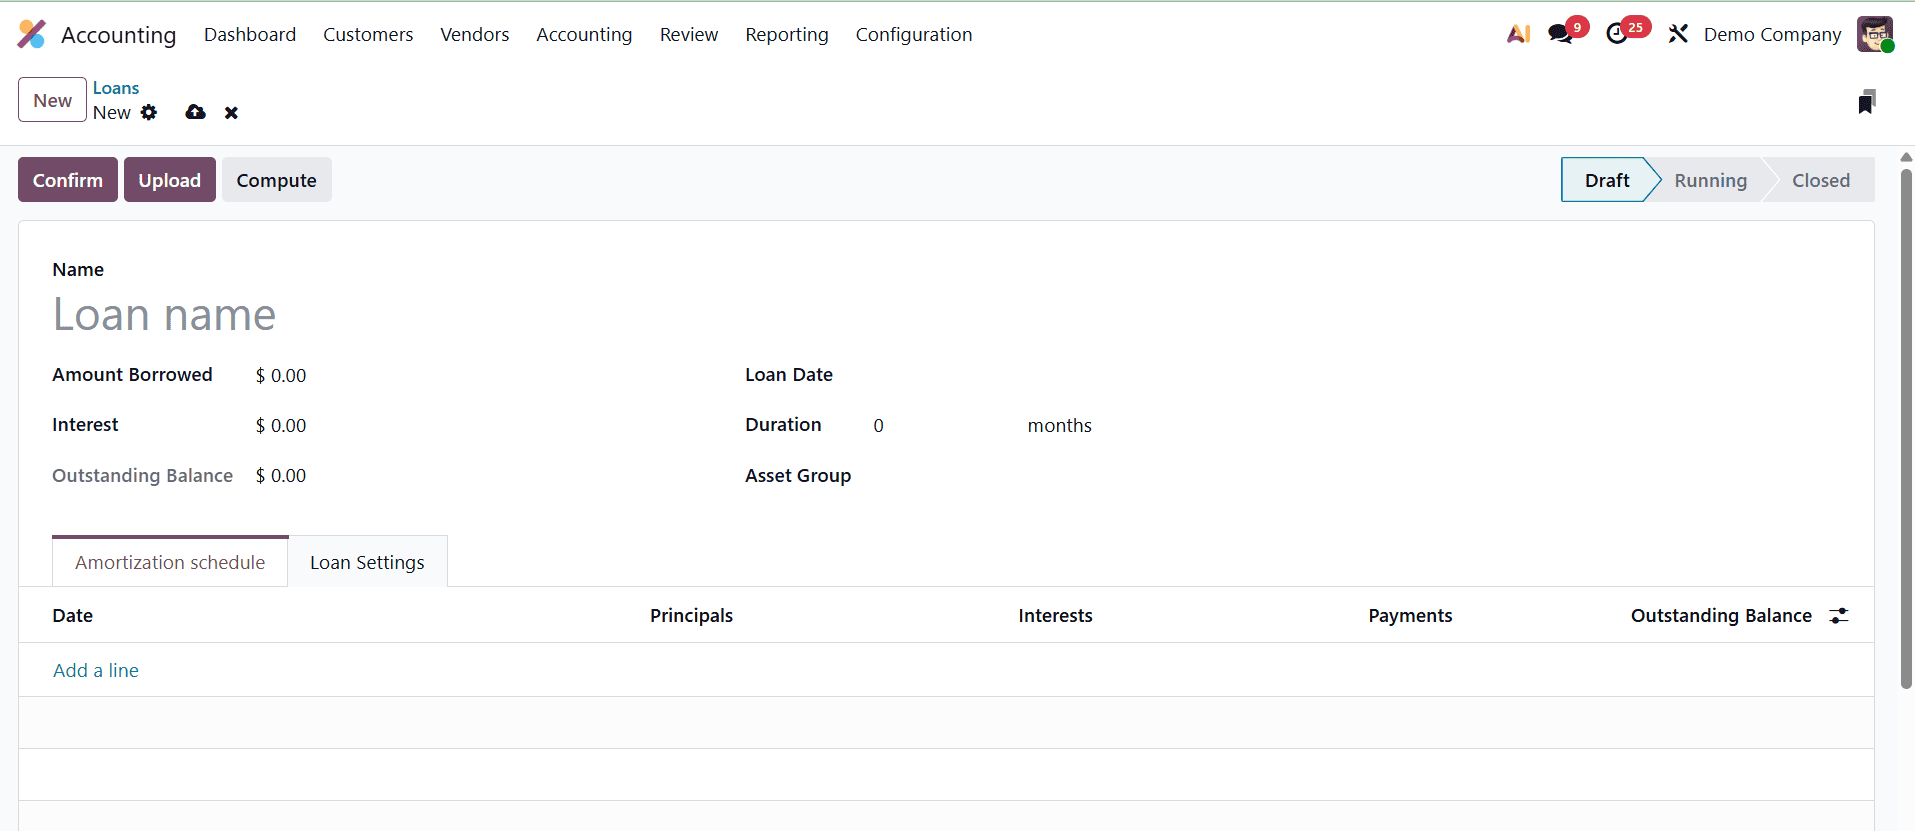
Amount Borrowed: The principal amount borrowed in a loan is the sum that the borrower agrees to receive from the lender and that has to be repaid over a predetermined time period with interest.
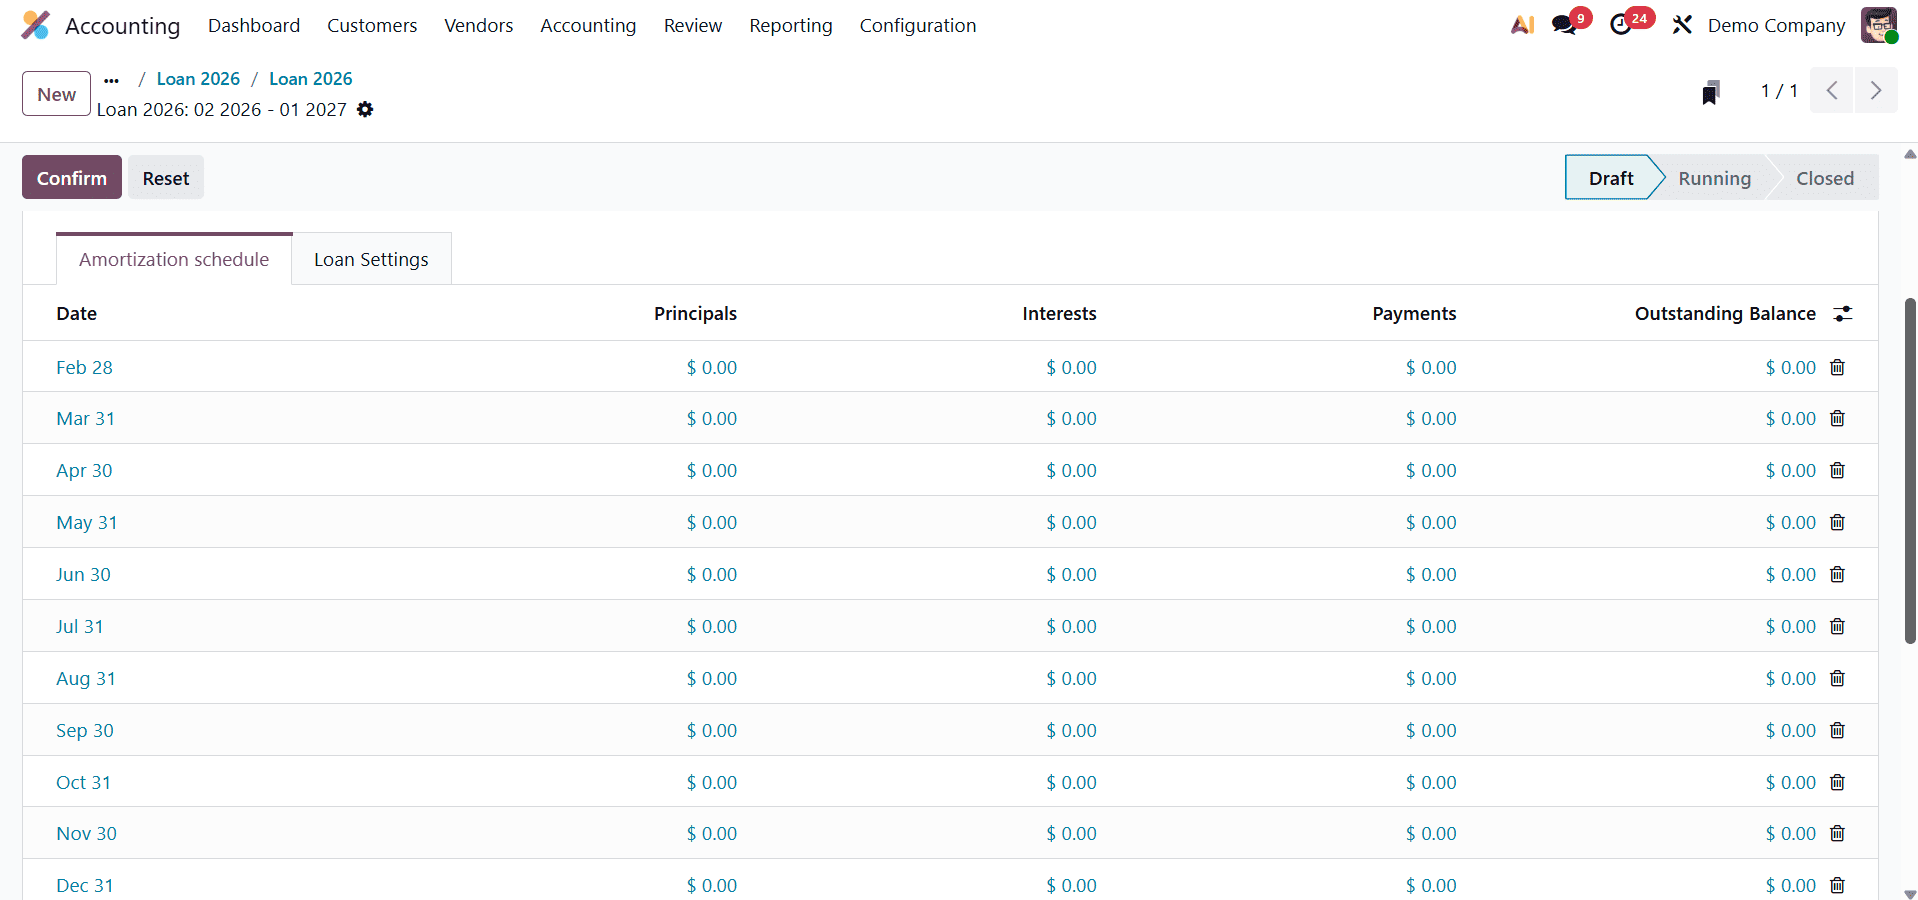
The screenshot can then display the Amortization Schedule. An amortization schedule is a detailed chart that shows the total amount owed over the term of the loan and breaks down each payment into principal and interest components. By selecting the "Add a Line" button, users can manually input the timetable or have it filled automatically according to the Compounding Method they have selected.
Next is the Loan Settings tab. The accounts are set up in the loan settings. Include the Long Term Account, the Short Term Account, the Expense Account, and the Journal.
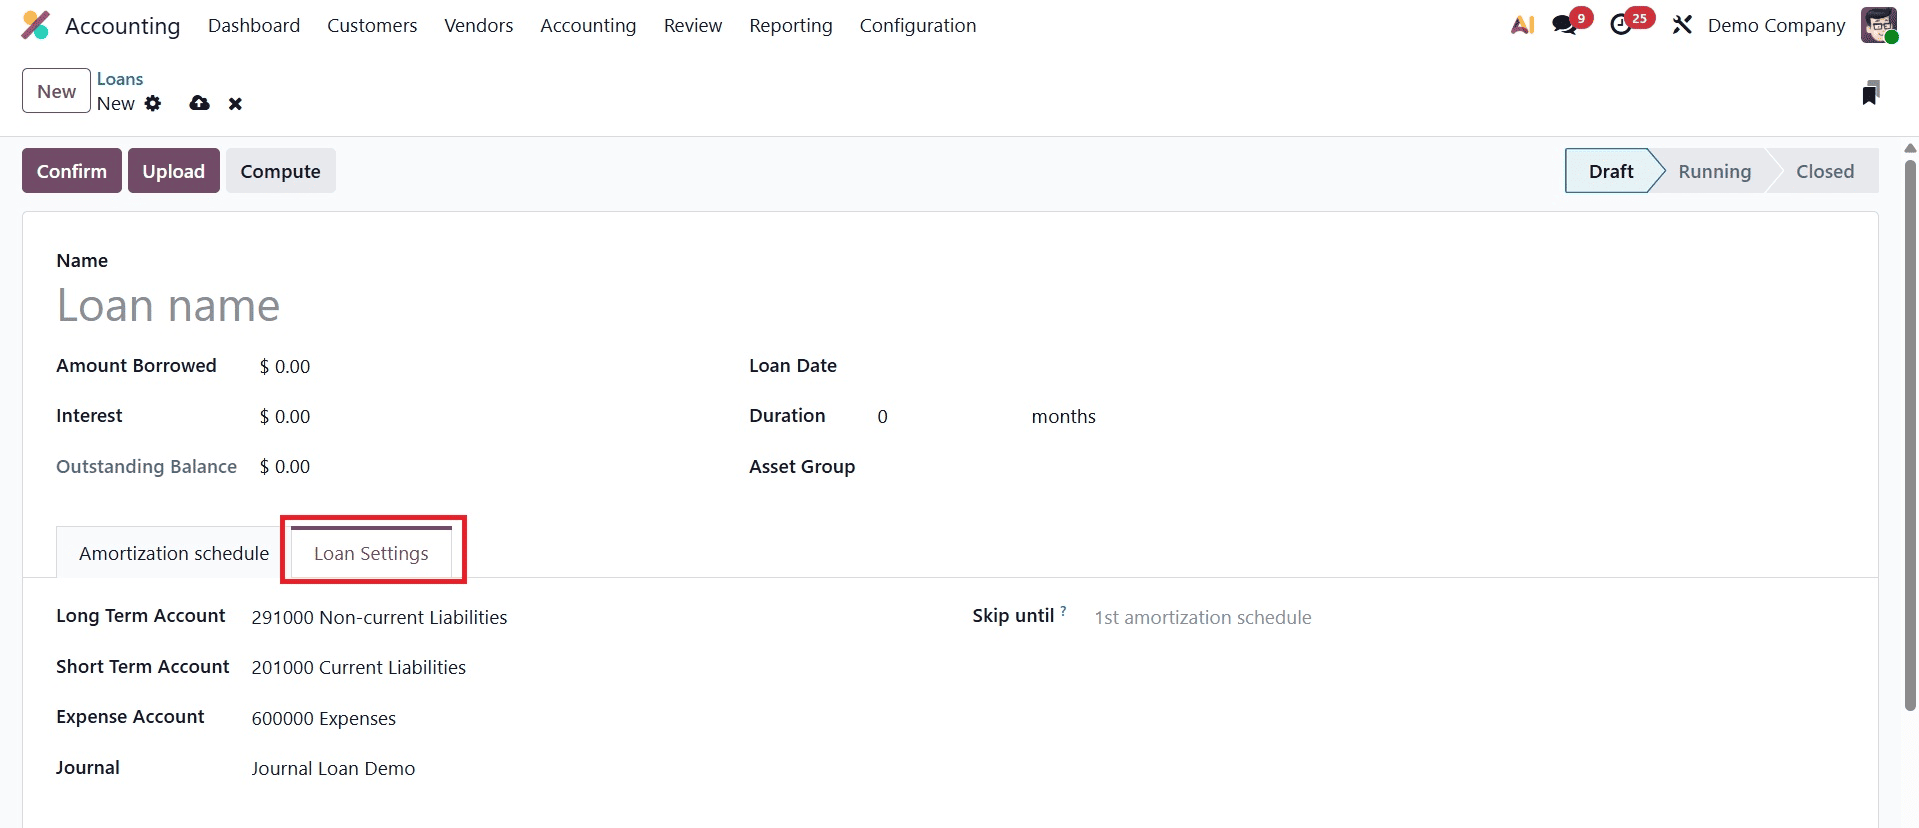
Odoo will not generate records for loan lines up to this date (inclusive), therefore skip till the loan is that. This is useful if the user had already entered information by hand before the creation of this loan.
The top left corner of the screen displays three buttons. Confirm is the first one, which is used to verify the loan. The second is Upload, which facilitates the uploading of the relevant loan document. Computing is the last one.
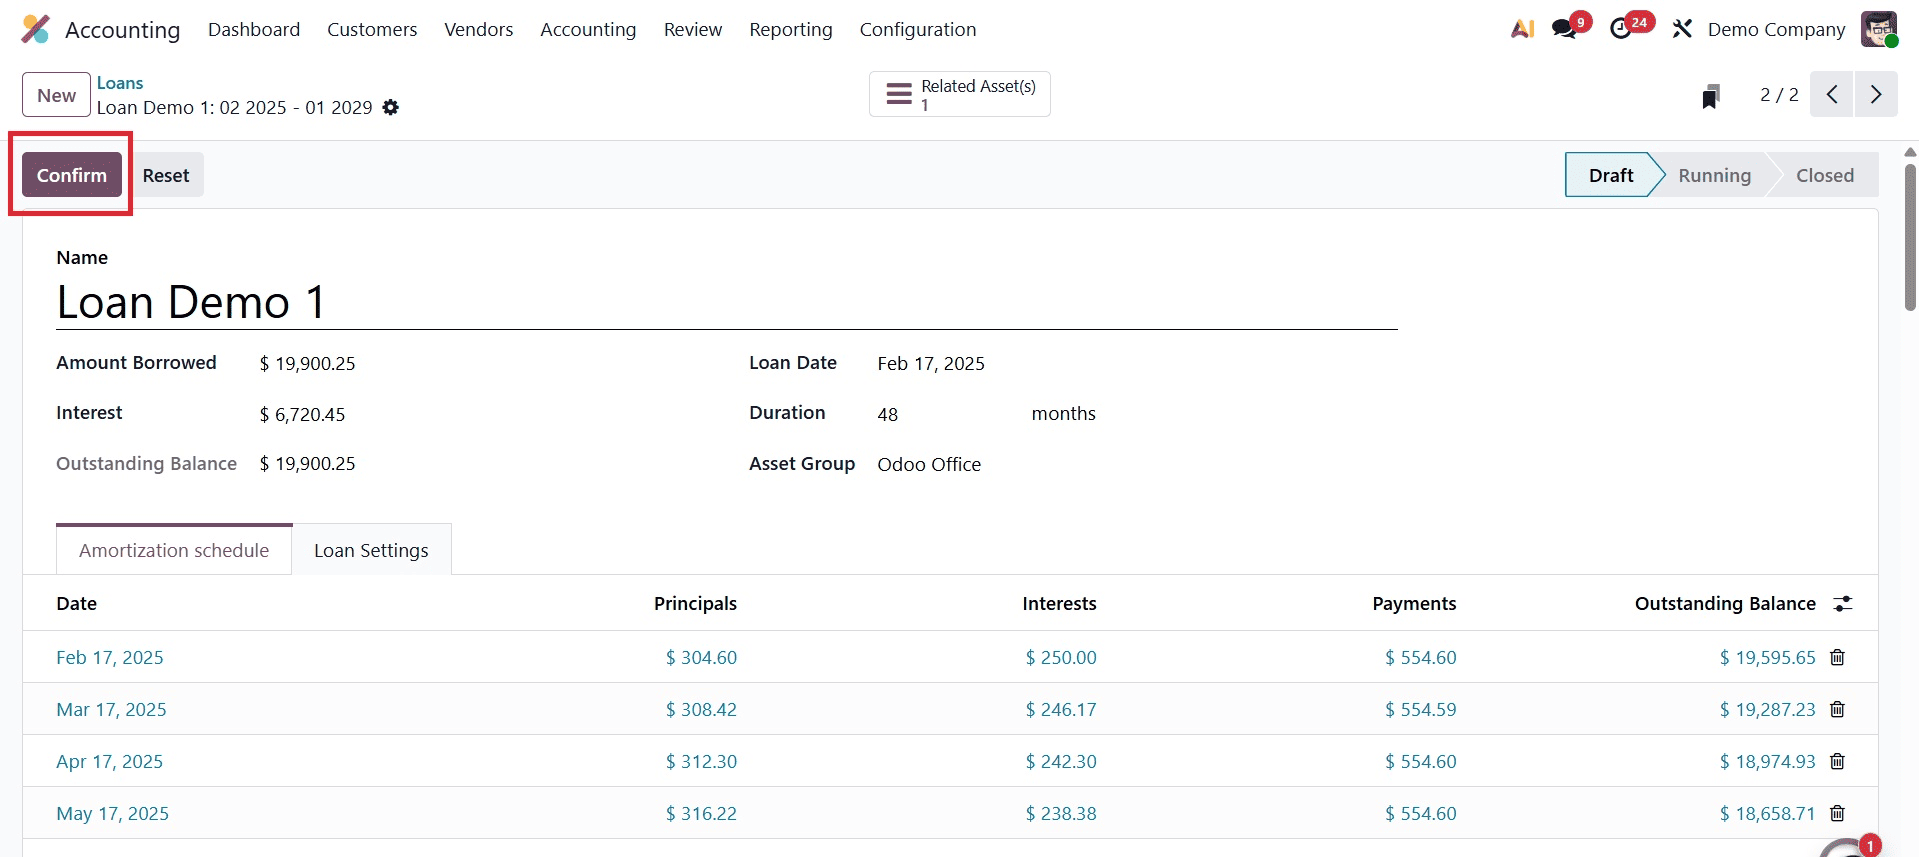
As seen in the screenshot below, a new window will open when you click the Compute button. Make reference to the loan amount, interest rate, start date, term, and payment.

To include this in the Amortization Schedule, click the Apply button.
Depending on the computation method selected, the interest, duration, and outstanding balance are immediately updated there. Next, press the Confirm button.
The stage will transition from Draft to Running once the loan has been confirmed. Additionally, there is a clever tab called "Posted Entries."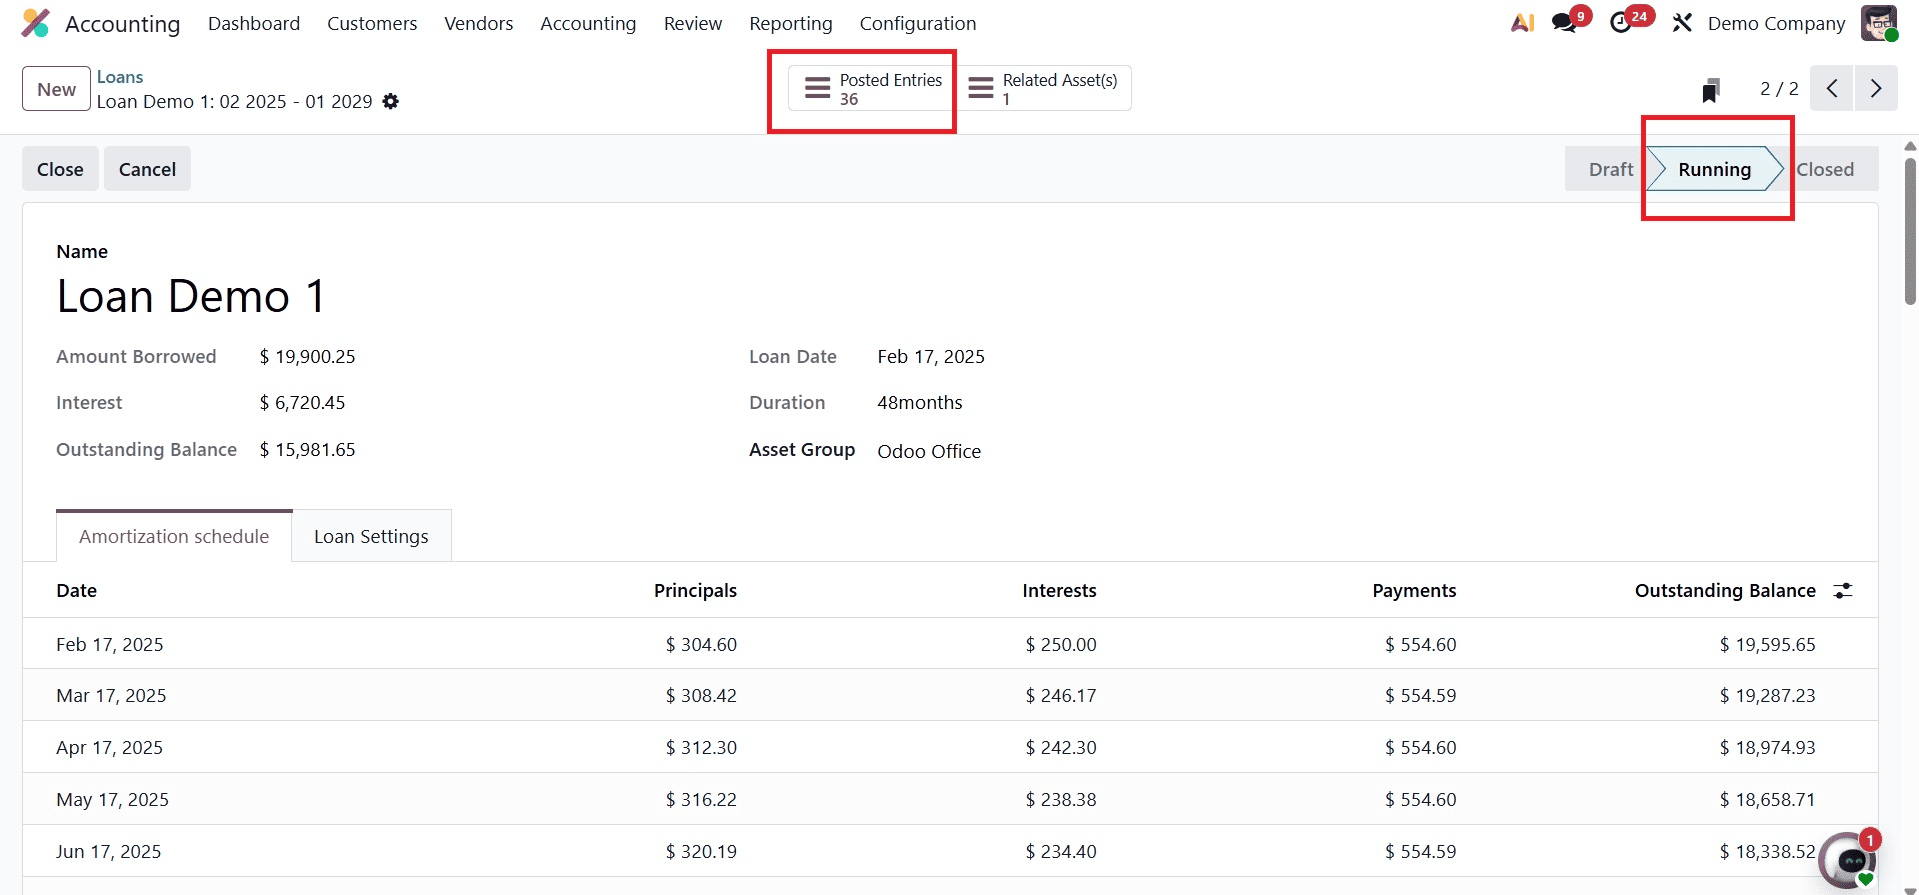
To view the journal entries, open the smart tab.
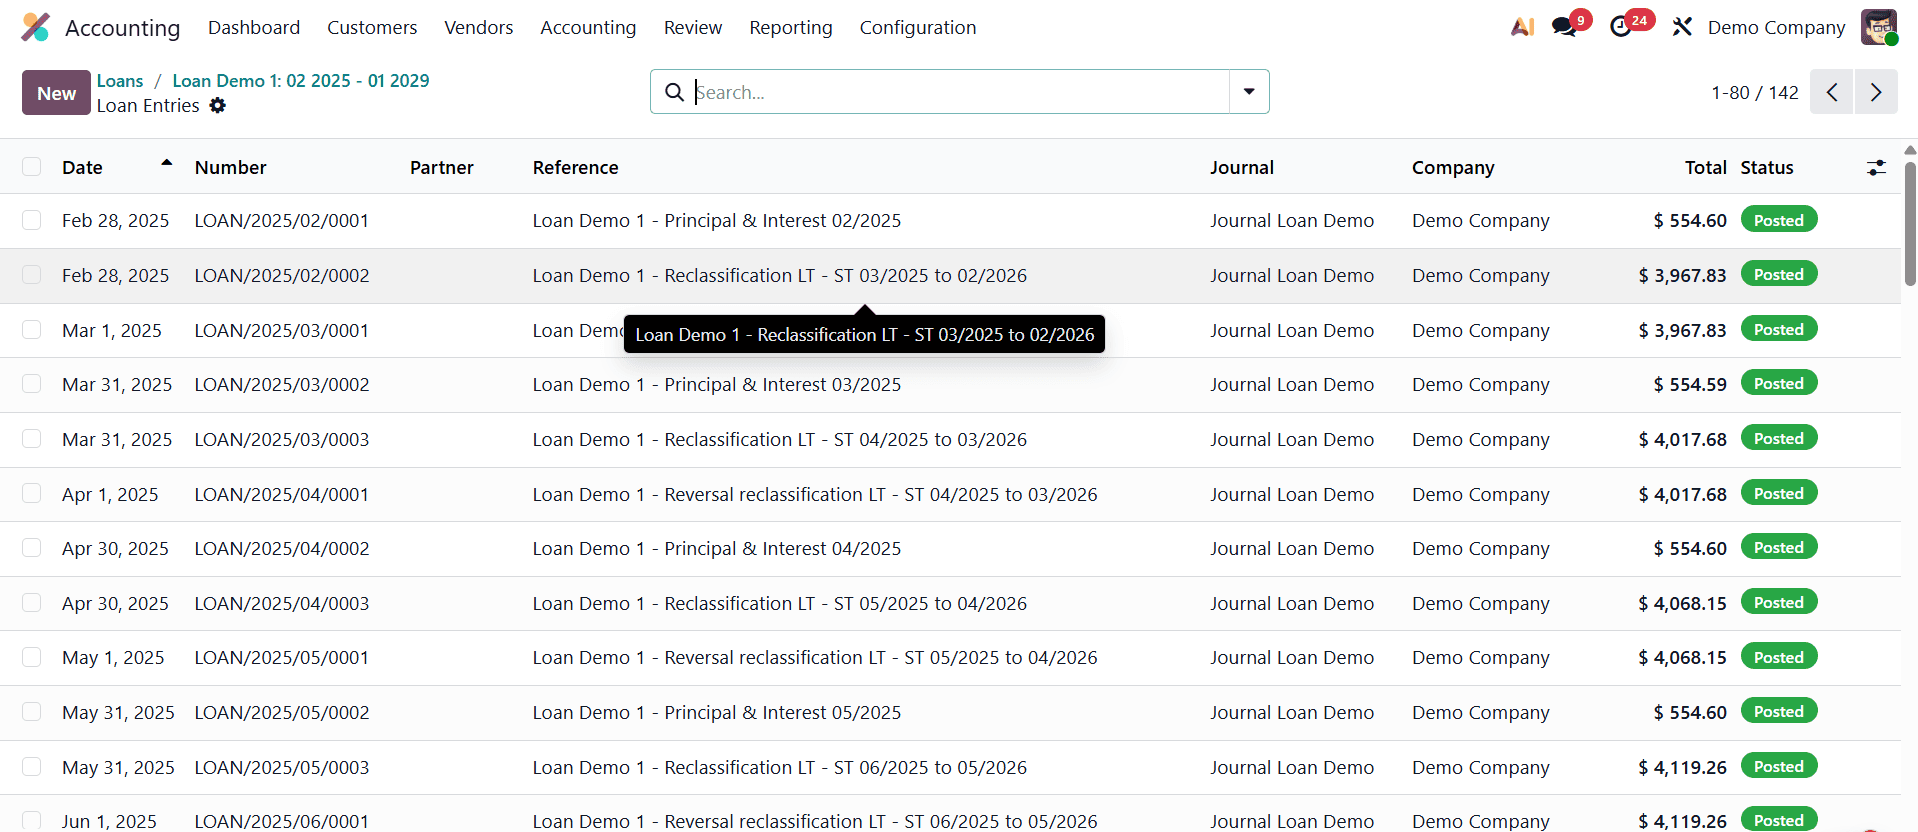
Let's look at the first journal entry. The main amount for the first month is taken out of the Long Term Account, which is a type of debt. Since the debt is going down, we record it as a debit. Then, the payment is added to the Short Term Account, which is also a type of debt. When the debt goes up, we record it as a credit. The interest on the loan is recorded as an expense. Since the expense is going up, we record it as a debit.
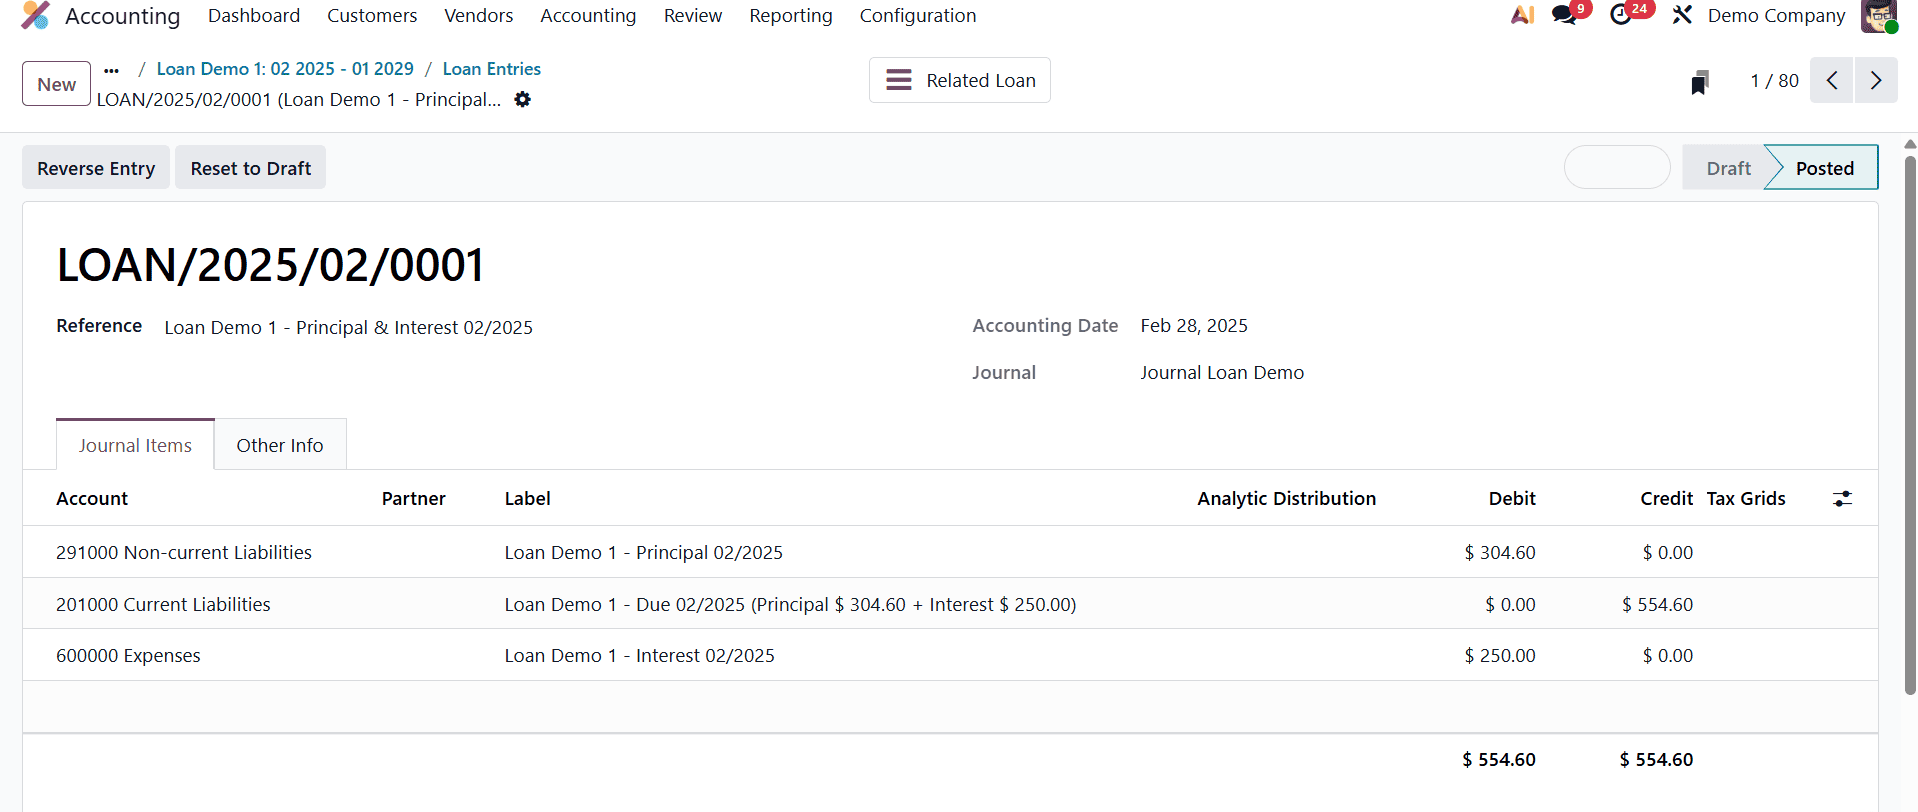
Open the second journal entry after that. In this case, the outstanding sum is credited to the Short Term Account and debited from the Long Term Account. Liability is declining here. The Short Term Account (Current Liability) is credited and the Long Term Account (Non-current Liability) gets debited as a result.
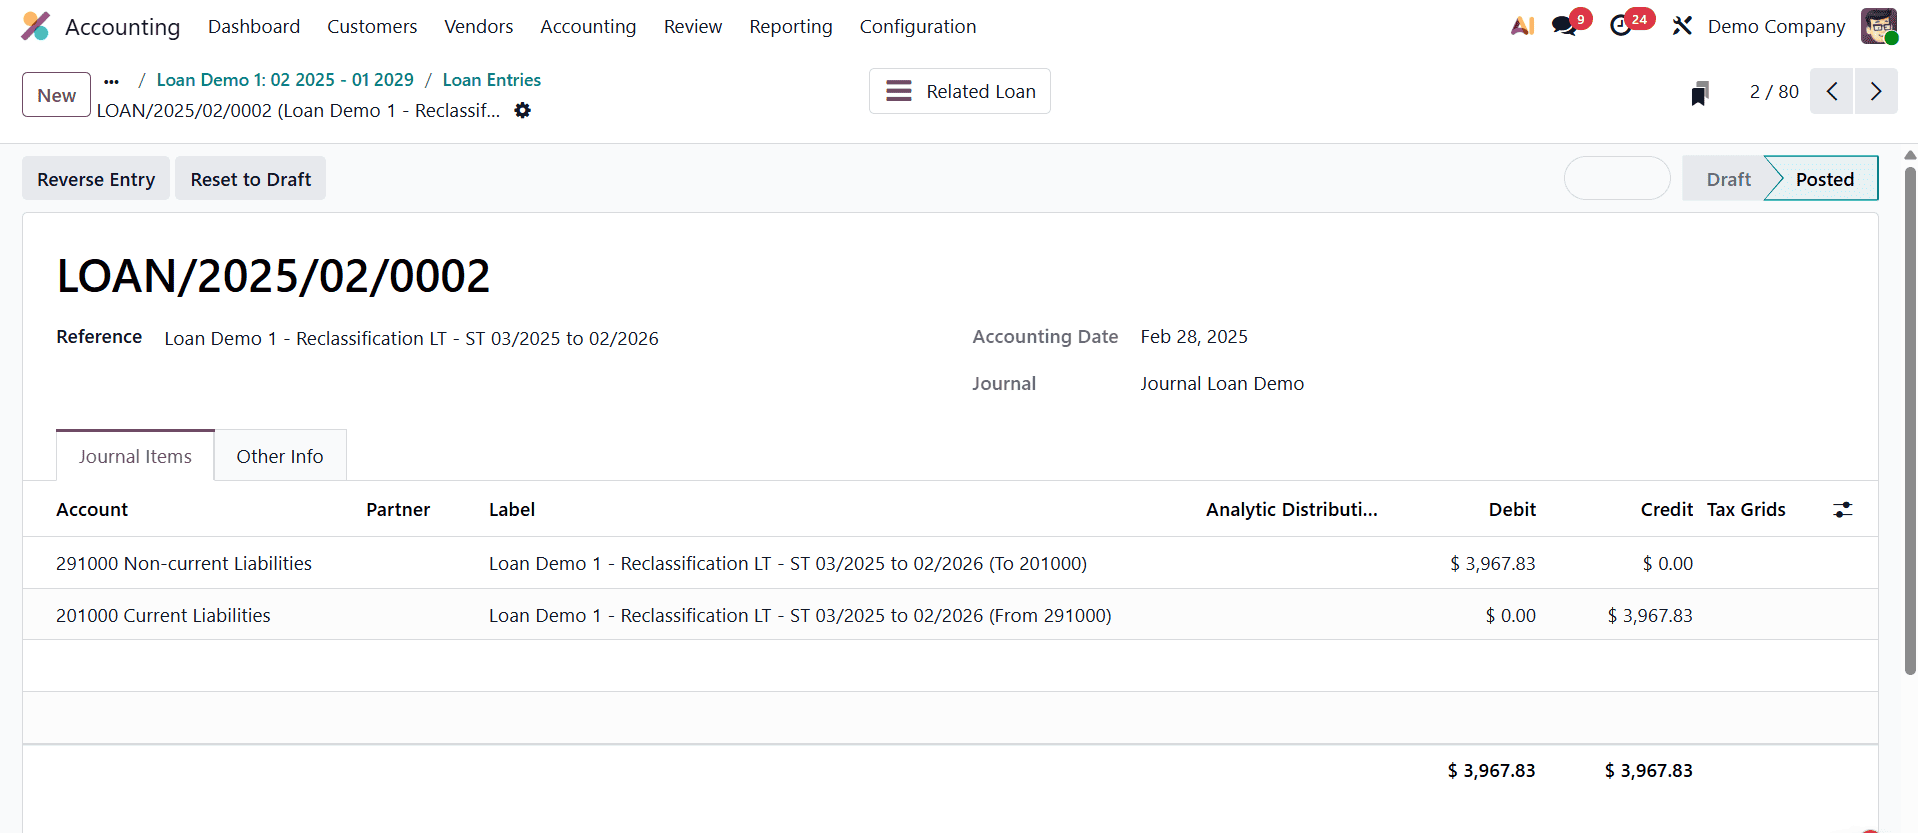
The loan stage will automatically move to Closed after all the entries have been posted. If not, close the loan by clicking the Close option. The loan will close and any unposted diary entries will be removed.
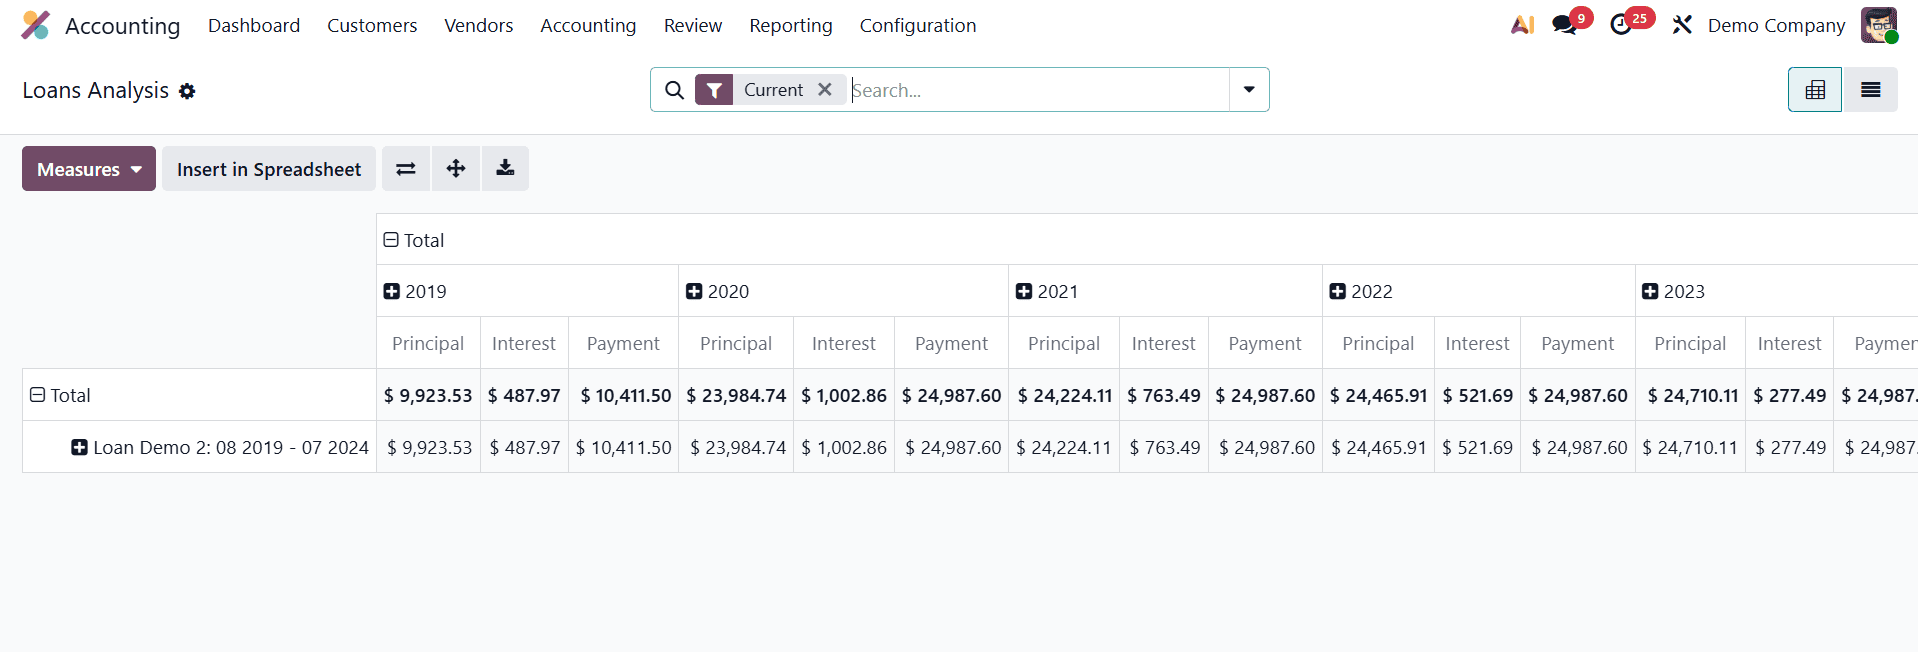
The Loan Analysis Report in Odoo 19 Accounting, which contains details on principal amounts, interest accumulated, and repayment dates, offers a comprehensive overview of loan performance. It can be used by businesses to track loan progress and assess the impact of loans on balance sheets and cash flow.
Click the Reporting Menu and select the Loan Analysis report, which is located under the Management report, to obtain the Loan Analysis report. The loan analysis report will first open in a pivot view. To better comprehend each loan in the organization, the loan names on the Y and X axes display the total principal amount, interest, and annual payment.
The Loans Analysis Report will be as shown below, where you can see the entry in the report of the created Loan.
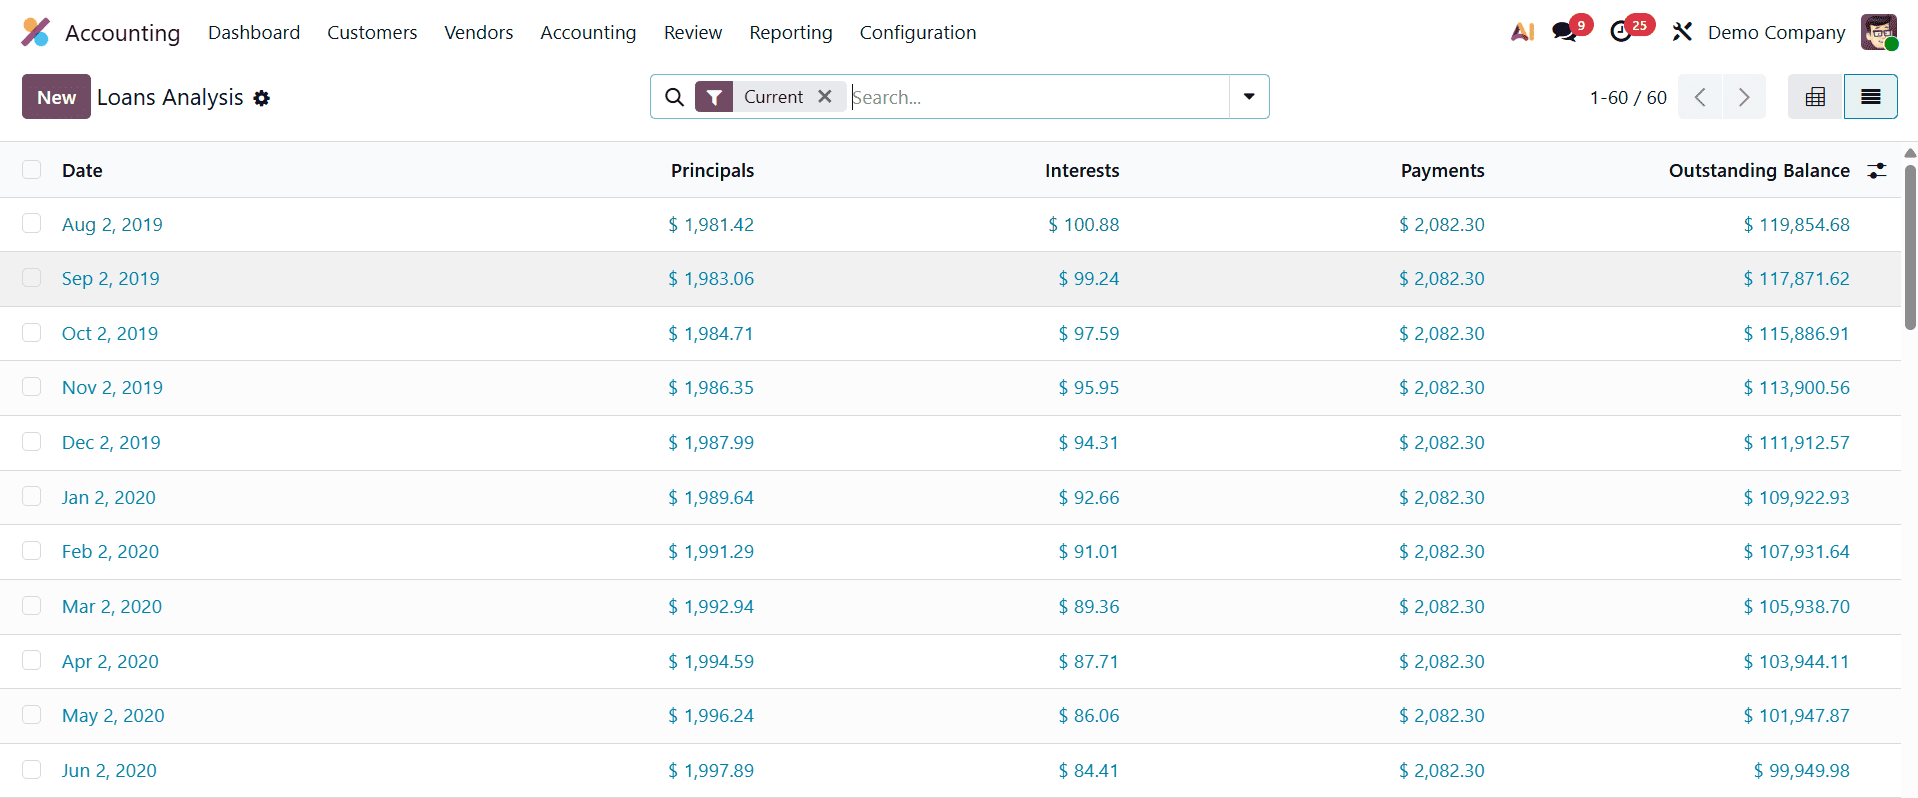
There's also a list view. With its adjustable filters and actionable insights, the report ensures compliance with financial management regulations and supports informed decision-making. The report can be filtered by users according to the loan date, closed loans, and current loans. We may arrange it according to the Asset Group, Loan, and Loan Date. Personalized Groups and Filters. There are options there. Additionally, by selecting the store current search button, you can store the search.
Finally, Odoo 19 Accounting's Loan Management functionality streamlines the administration of loans related to corporate assets by automating journal entries, interest calculations, and payment monitoring. This technology enhances financial accuracy and transparency by making it easier for businesses to manage obligations and their impact on asset valuation.
To read more about How to Track & Manage Loans in Odoo 18 Accounting, refer to our blog How to Track & Manage Loans in Odoo 18 Accounting.