Expiration dates are an important part of inventory management. They allow businesses to track the age of their products and ensure that they are not sold after their expiration date. Odoo 16 makes it easy to set expiration dates for products. Expiration dates can help you to track the inventory of products with a limited shelf life. This can help you to ensure that you are not overstocking these products and that you are selling them before they expire. Moreover, customers are more likely to be satisfied with your business if they know that you are selling fresh, non-expired products. By tracking expiration dates, businesses can ensure that they are not selling or using expired products.
Using the lot or serial numbers and the expiration date, we can quickly control and trace the product. Each product should have a unique lot/serial number. This will help you to track the product throughout its lifecycle, from production to sale. And it will help you to keep track of your inventory and identify products that are approaching their expiration date. Let's look at how to use the Odoo 16 Inventory module to produce expiration dates for a product.
Head to the settings menu of the Odoo 16 inventory module. And activate the expiration dates and Lot/Serial numbers inside the traceability session to set the expiry of a product.
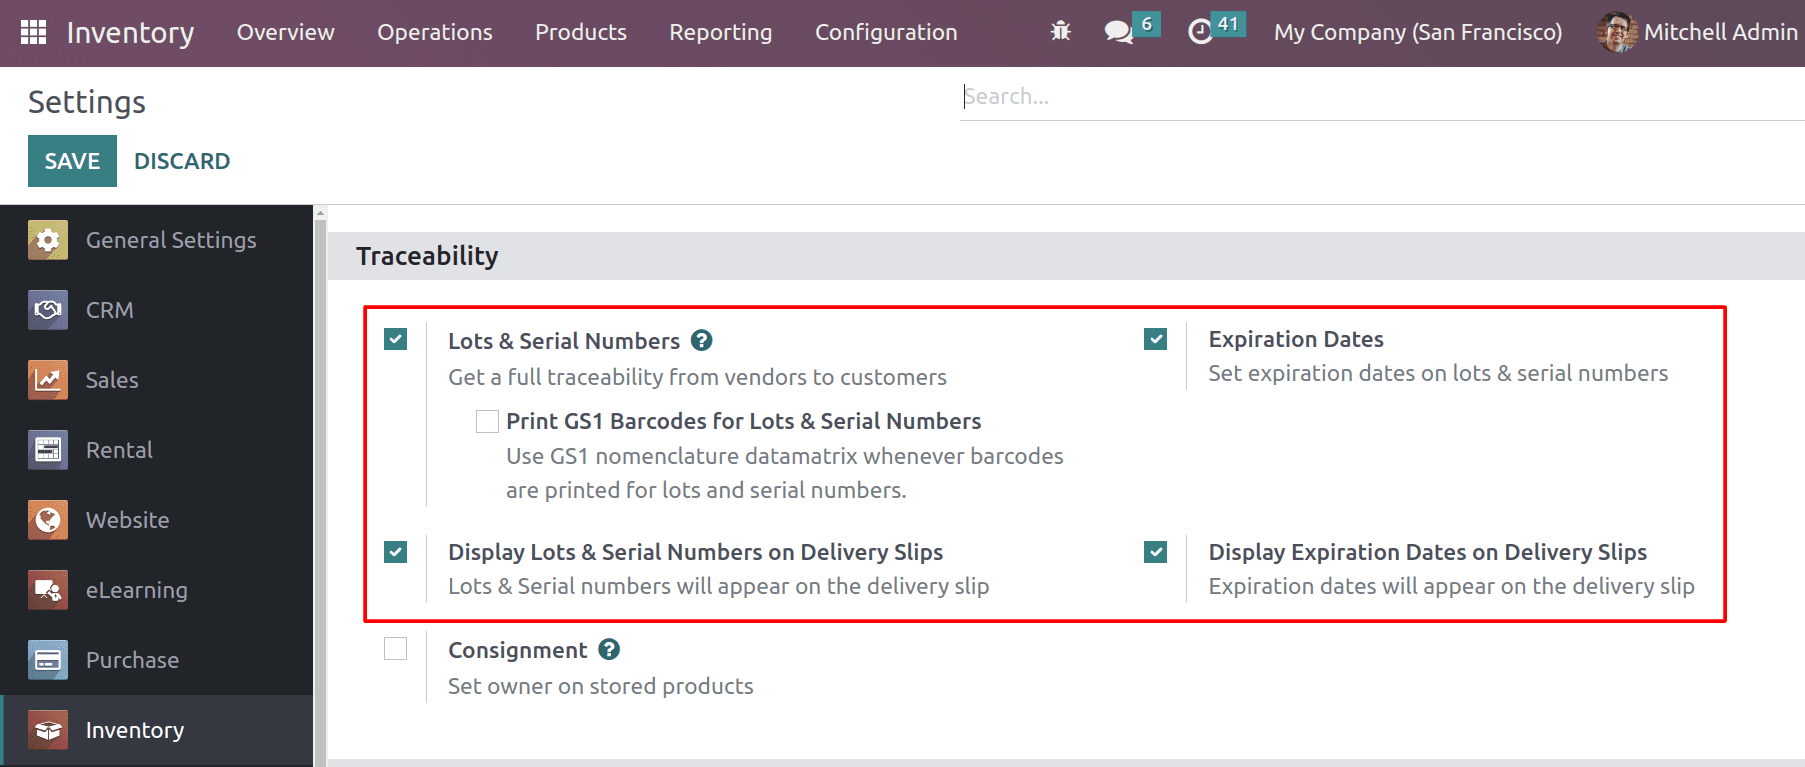
With the expiration date, you should enable the lots and serial numbers for tracking the product. And by enabling Display lots and serial numbers on the delivery slips, lots and serial numbers will appear on the delivery slip, and we can also display the expiration dates on the delivery slip by enabling Display expiration dates on the delivery slip.
Now we can create a new product from the product menu of the inventory module in Odoo.
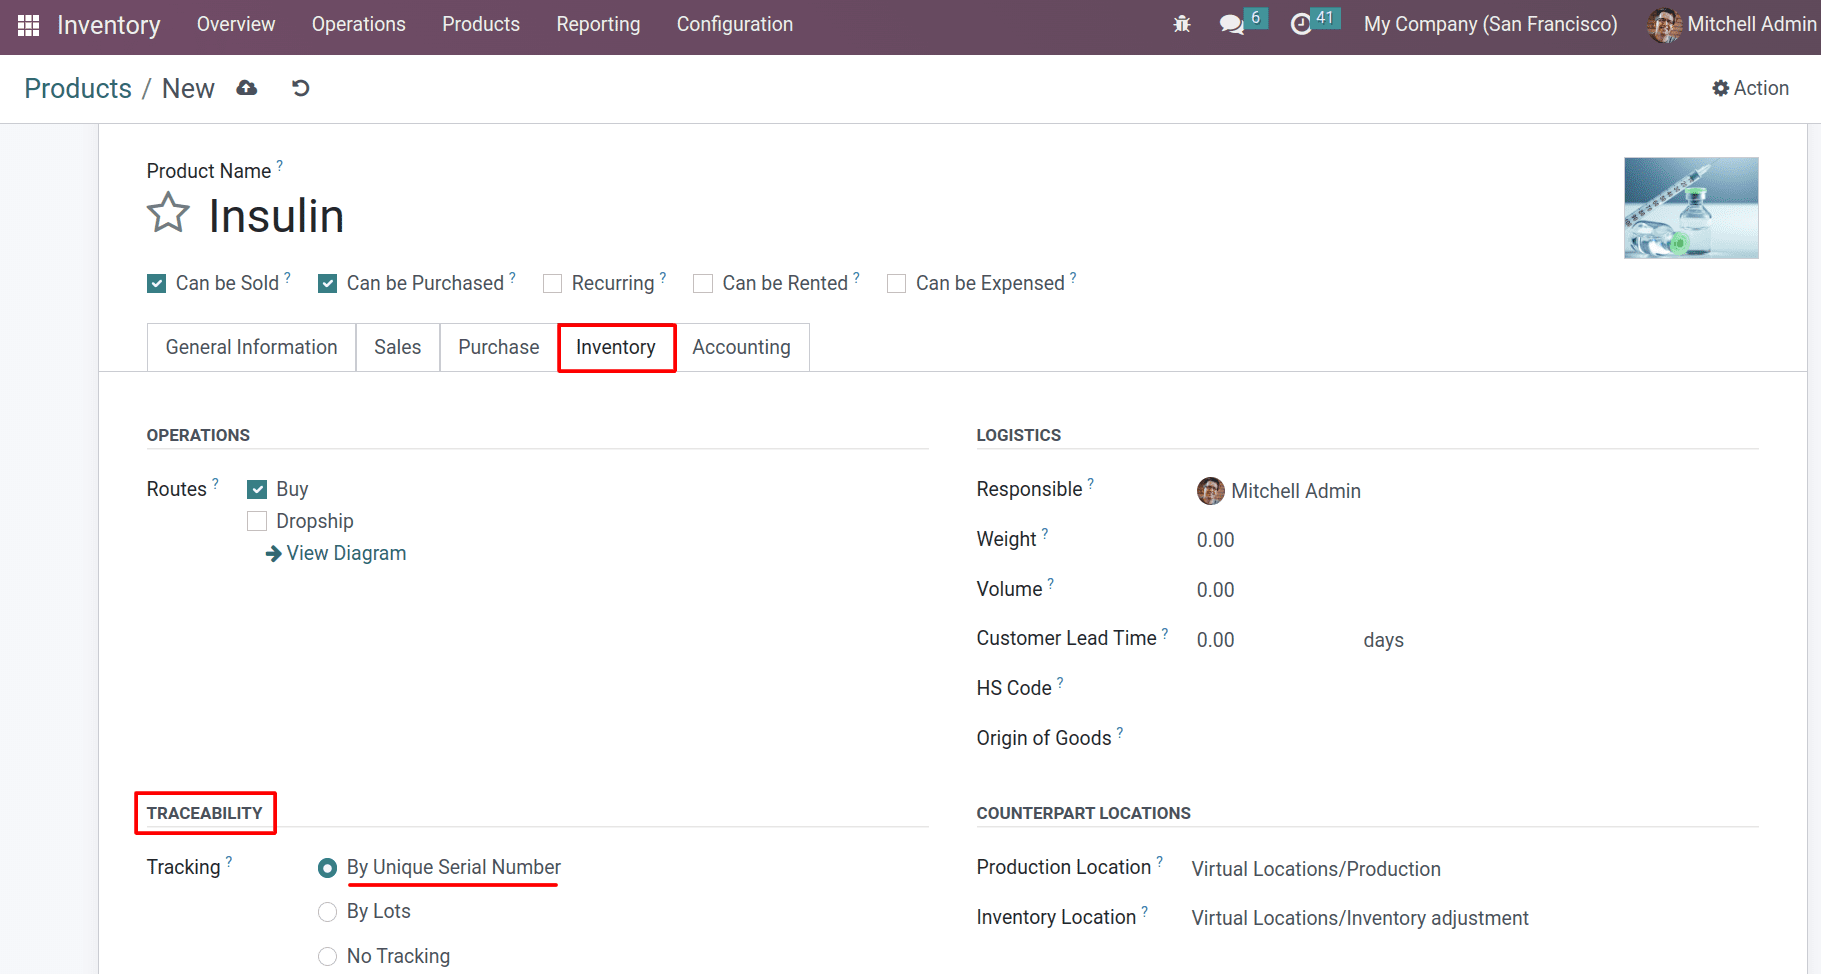
Inside the inventory part of the product form, you can access the traceability by unique serial numbers or by lots. When you choose traceability, there will be a new field generated for the expiration dates.
An expiration date begins several days after a product is received from the vendor. Here, we can set it to 10 days after the receipt date. A best-before date is the number of days before the expiration date after which products begin to be destroyed. We can set it to 6 days. The removal date is the number of days before the product's expiration date, after which it is no longer available for sale. And we added it to the 7 days before the expiration dates. An alert should be activated for the serial number of the product when we set the alert time. Here, the alert date is 5 days before the expiration date.
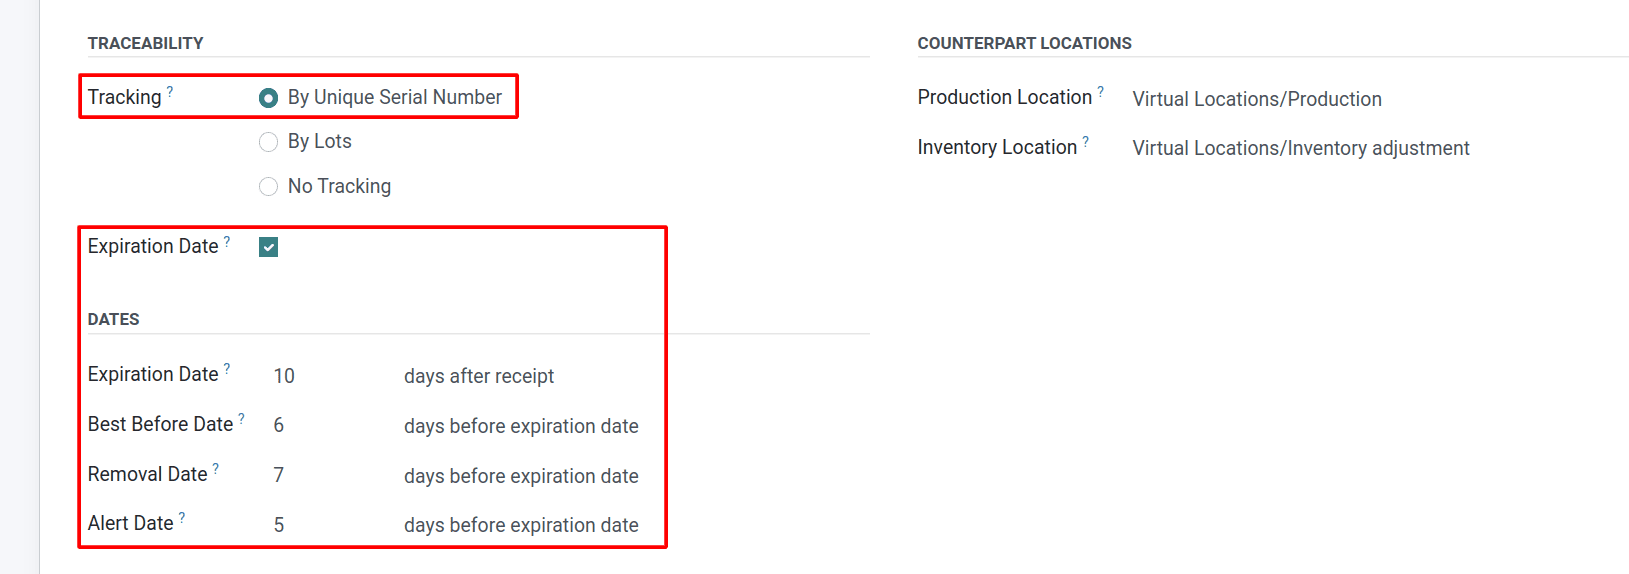
So after configuring these things, we can create a new purchase order for this product. Let’s move on to the Odoo 16 purchase module and create a purchase order.
After creating a request for a quotation, let’s confirm the order and validate the receipt.
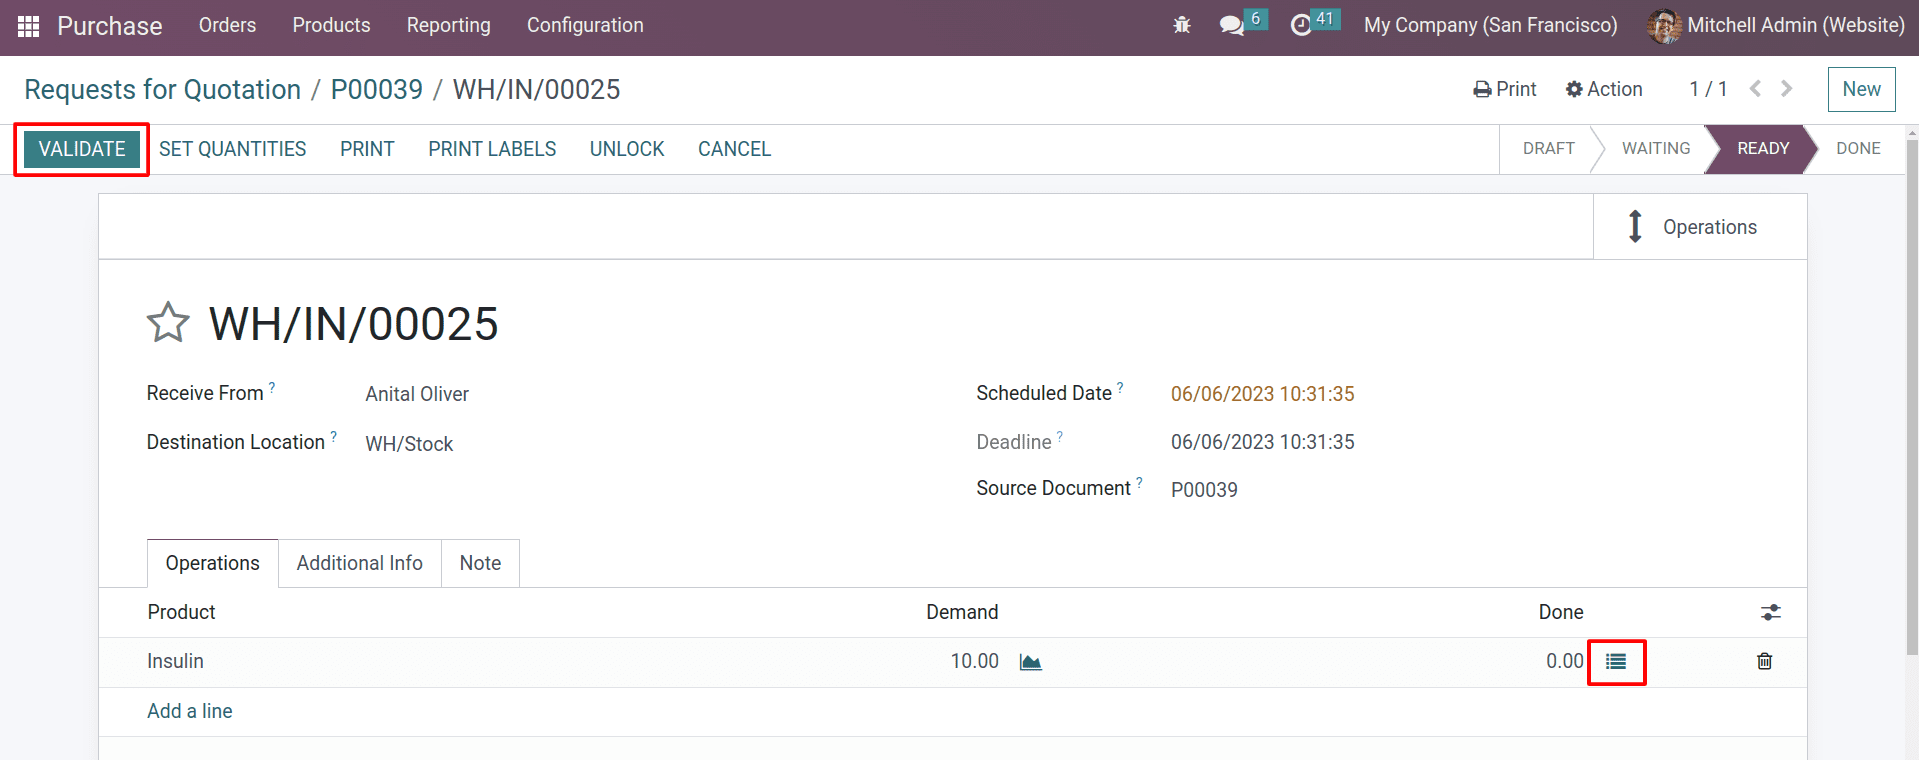
While validating the receipt, there’s a details icon for setting up the lot/serial number and expiration dates.
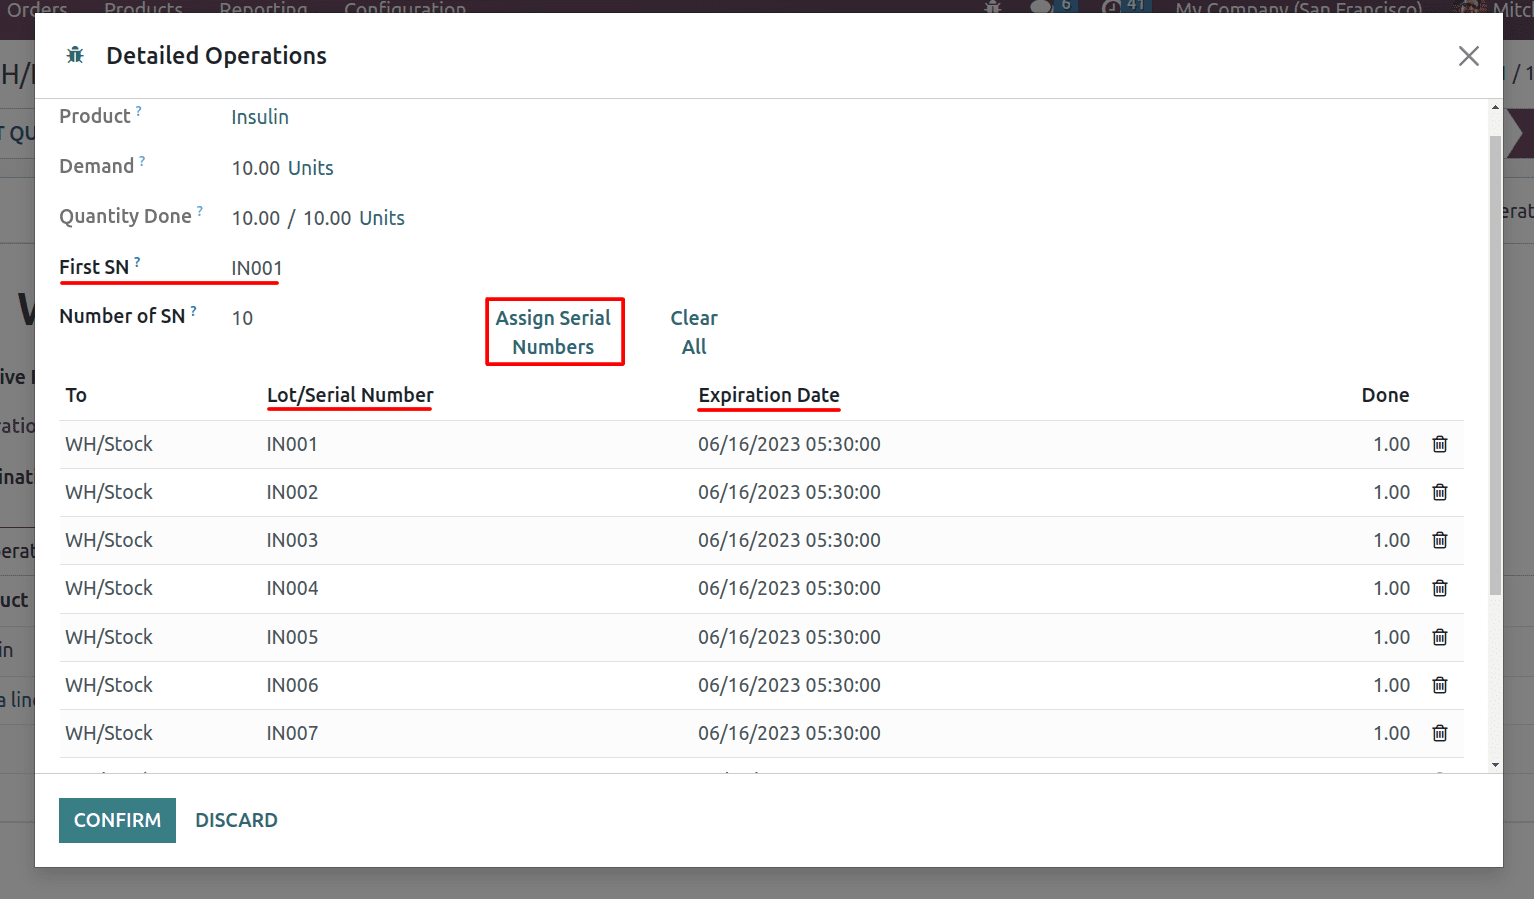
The details icon will take you to the wizard that is shown in the above image. And from here, you can provide the first serial number for your purchasing quantity and click on “assign serial numbers” to generate the serial numbers for your entire quantity. Now you can see the expiration dates along with the serial numbers.
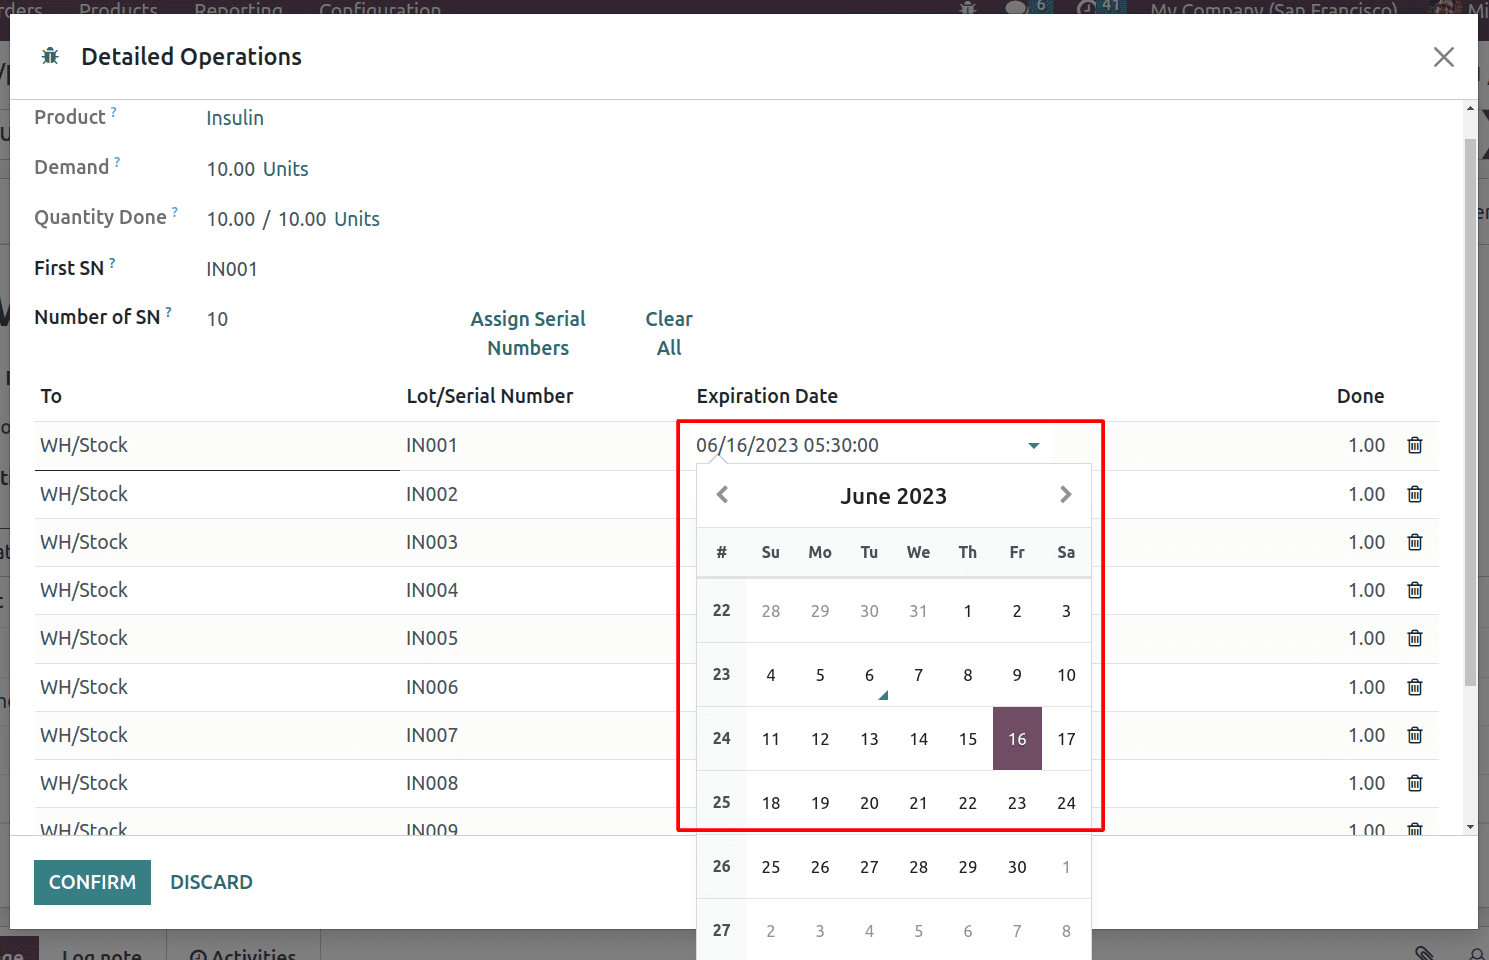
And if you need to change the expiration date of any of the serial numbers, you can do it from here.
After these things, you can continue with the confirm button. And validate the receipt to complete the purchase order.
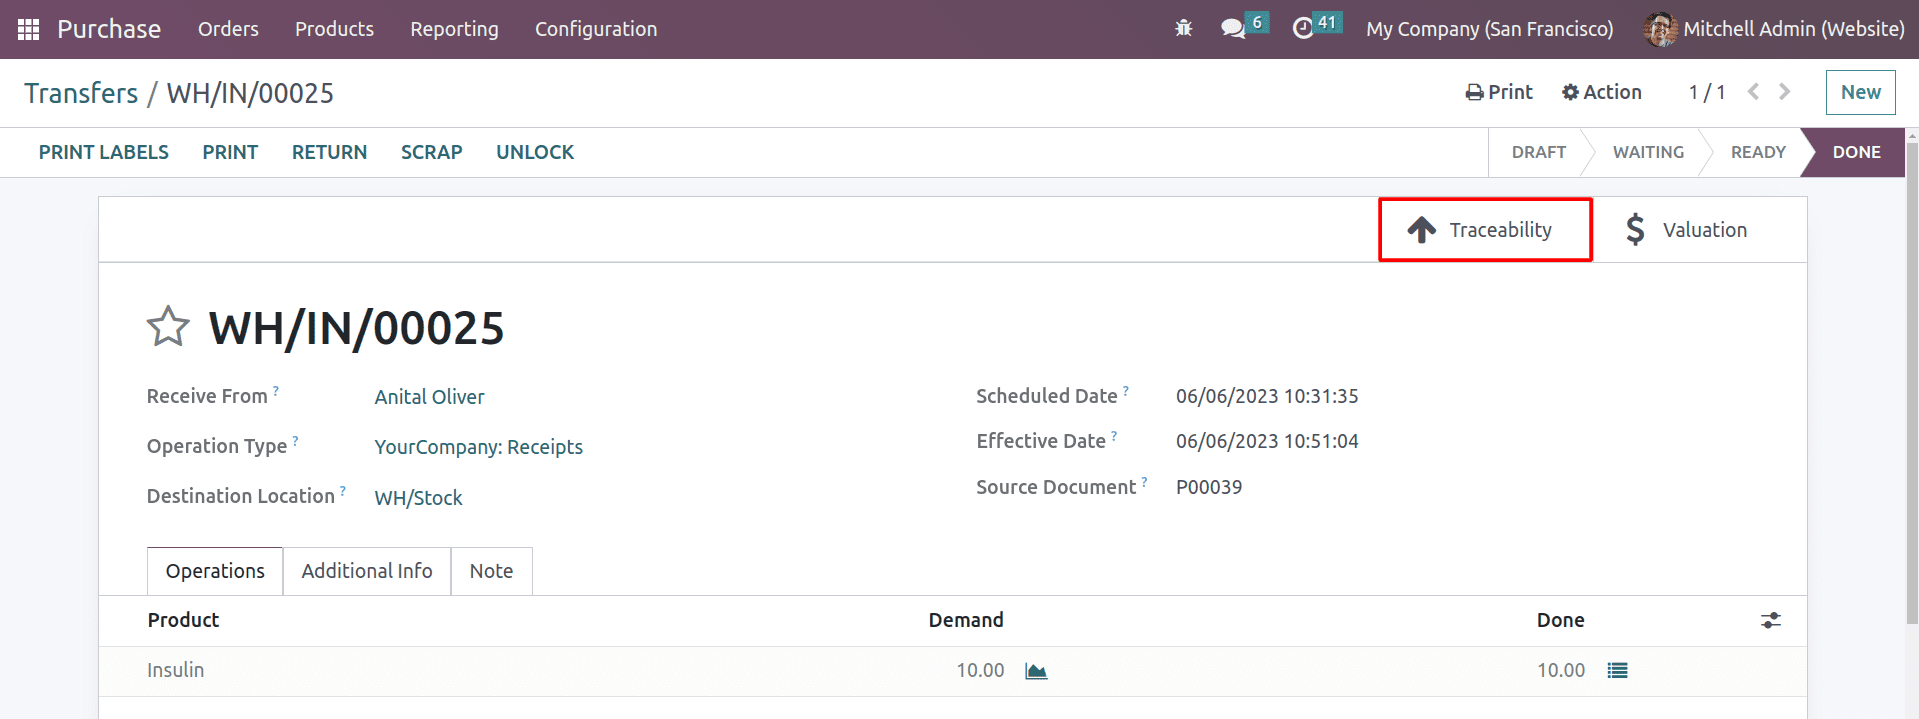
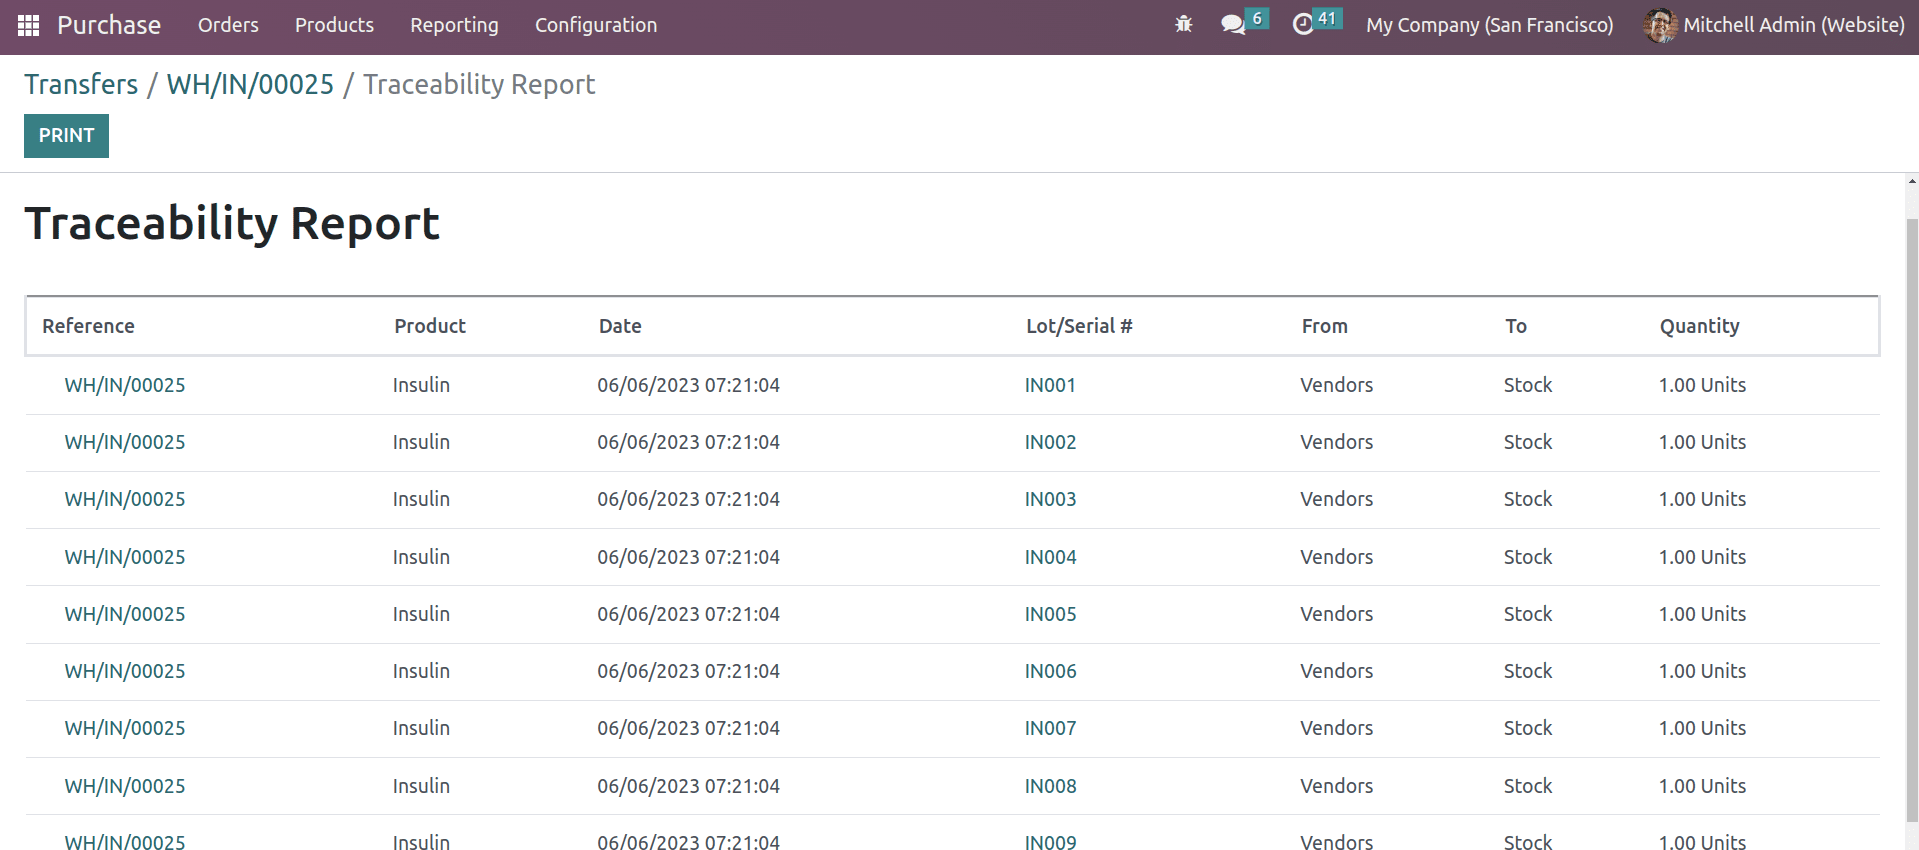
After completing the receipt, there will be a smart button named Traceability. From here you can see the product tracking information, like lot/serial number and expiration dates, etc…
After completion of the purchase, we can check the lots/serial numbers in the inventory module.

From here, you can select your product and open the lot/serial numbers.
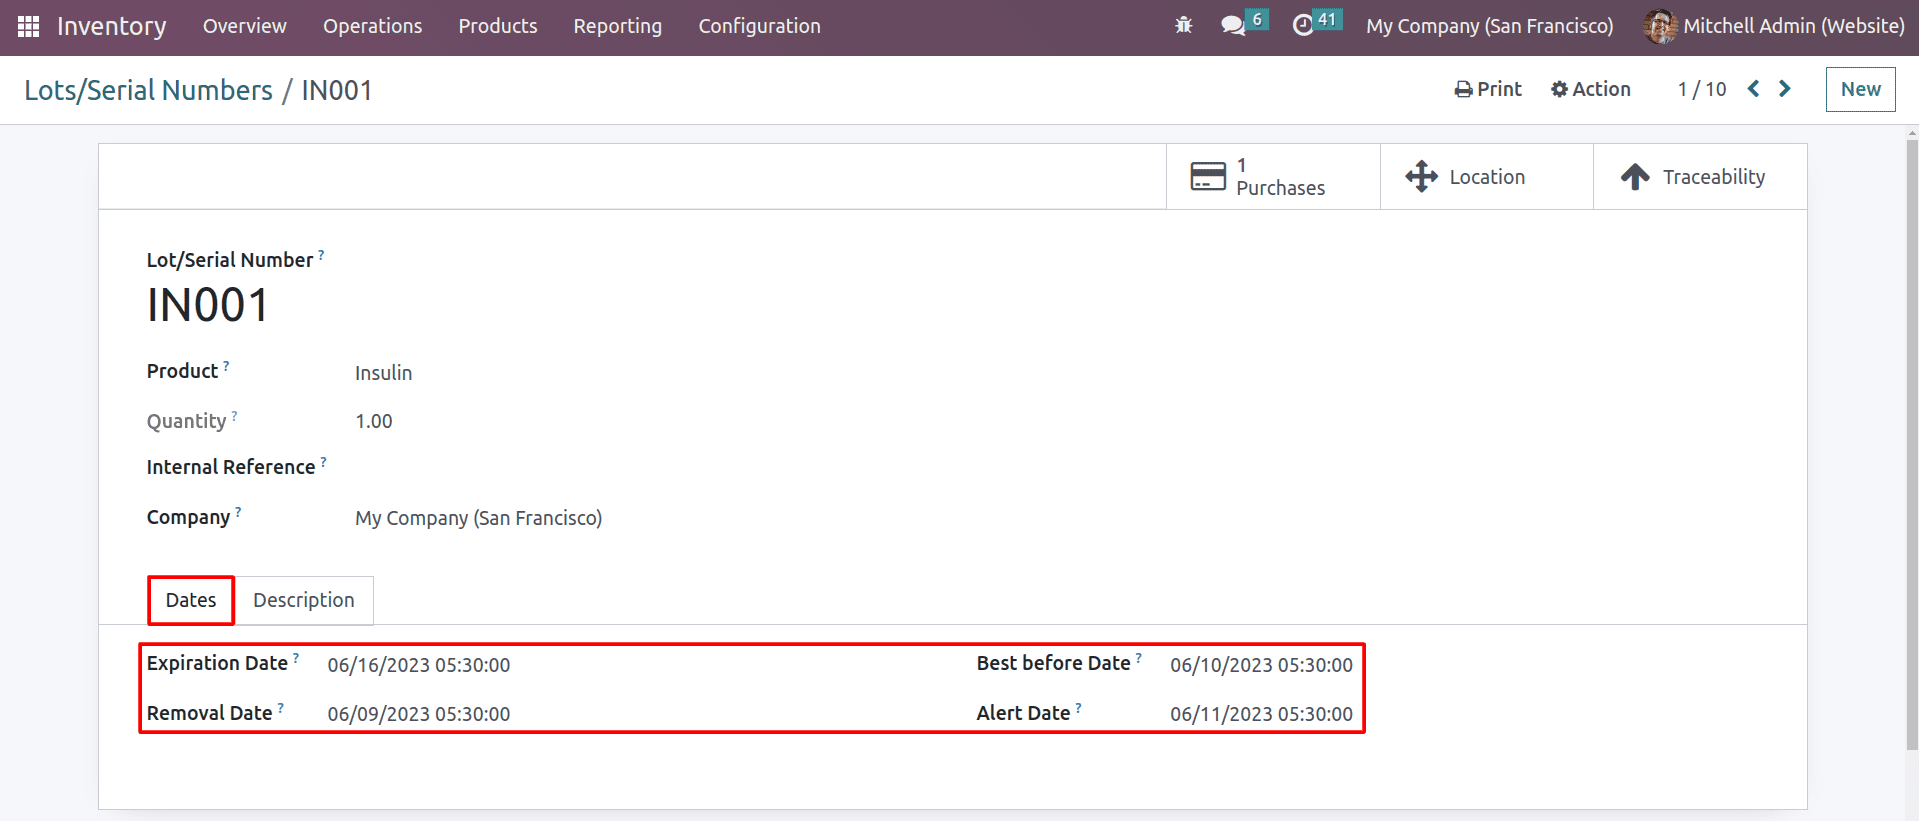
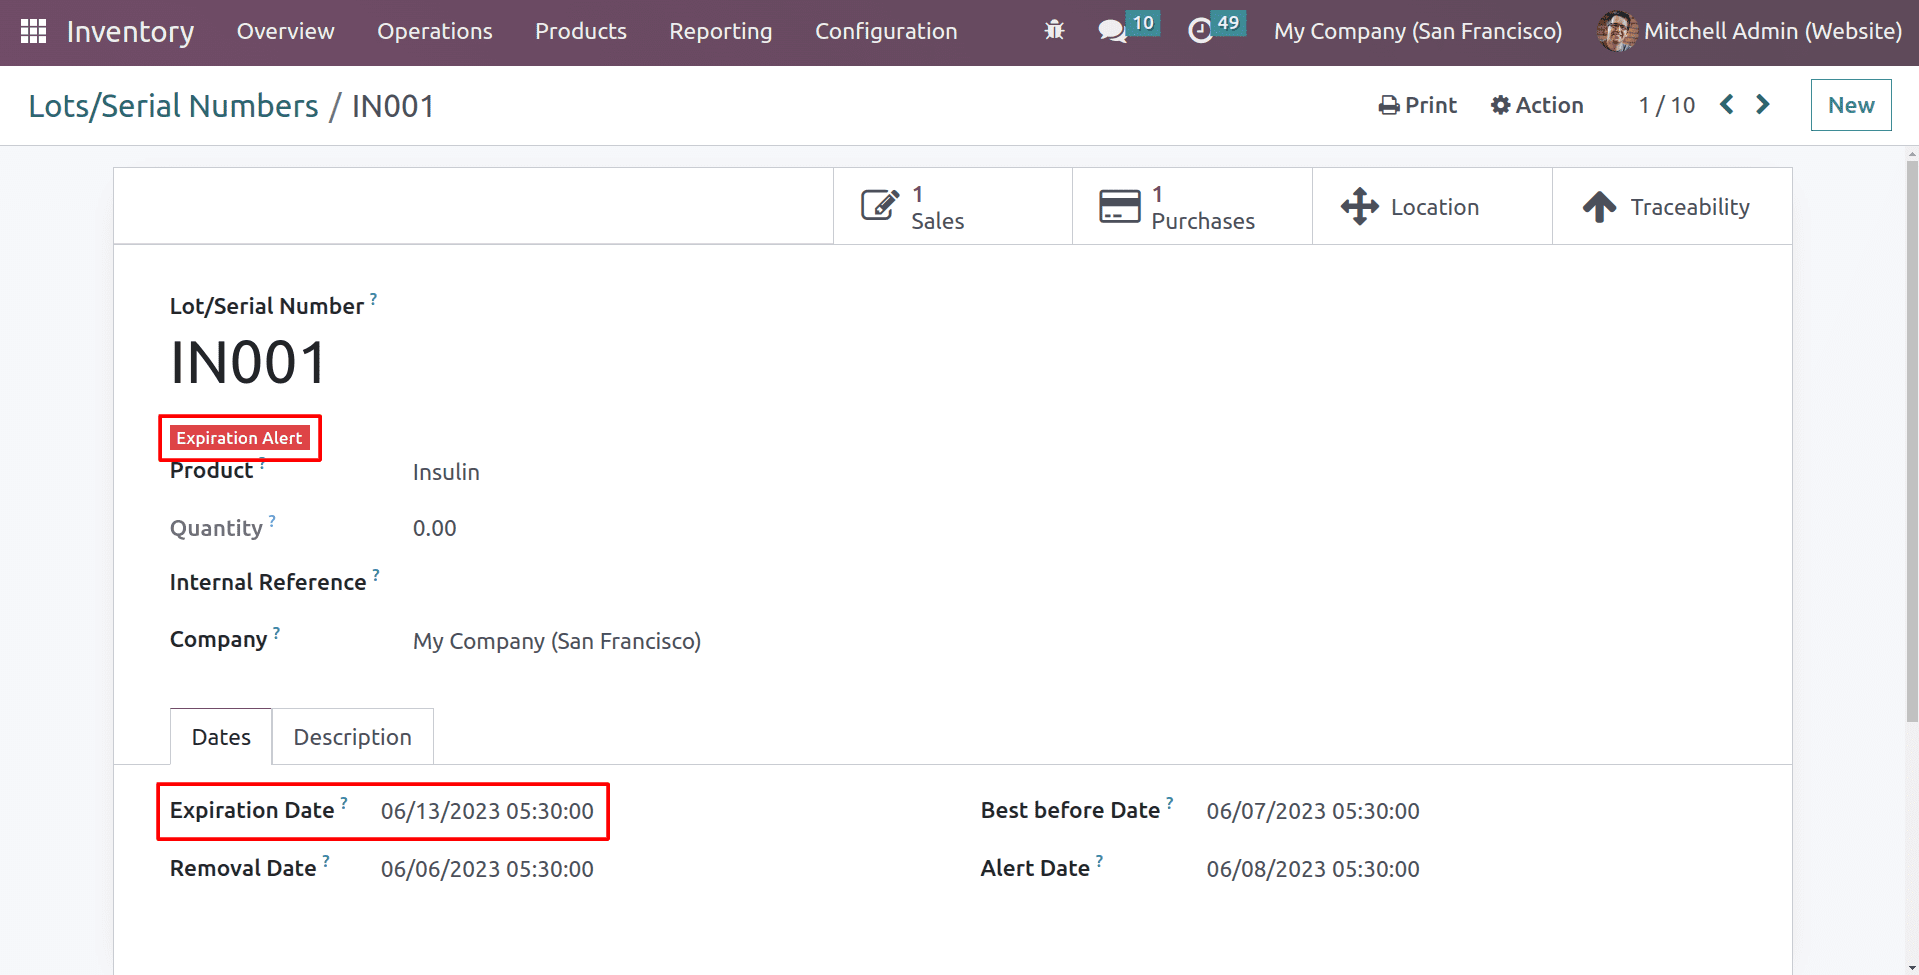
You can find the Best Before Date, Expiration Date, Removal Date, and Alert Date in the Date division. Additionally, we can modify it and change the product date. Here you can see the expiration date became 06/16/2023 because the expiration date was set to be 10 days following the receipt date. For that, the best-before date, removal date, and alert date are generated according to the days set in the product.
And Odoo provides a filtering option for expiration alerts. From the lot/serial number form, you can filter out the products that have an alert.
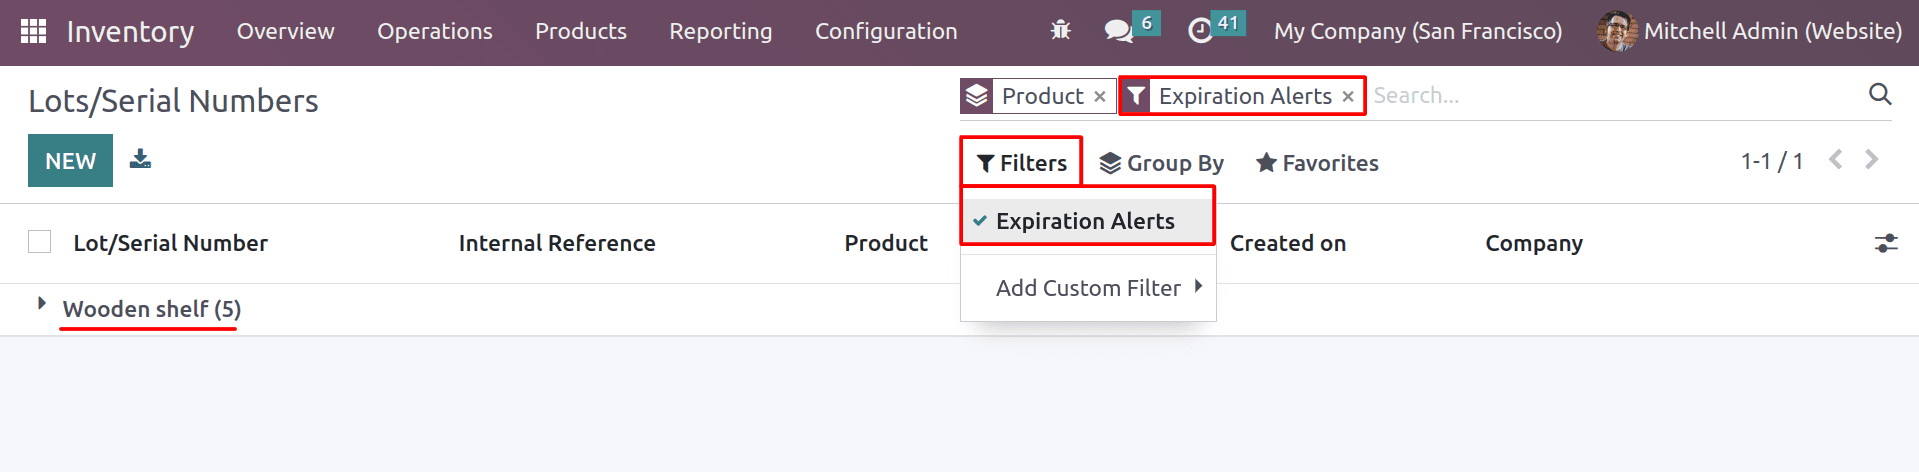
So here you can see the expiration alert has been filtered out. In our inventory, there’s one product in the alert time that shows up in the expiration alert filter. This makes it much easier for identify the expiration alert for the products.
Now let’s check to display the lot/serial number in the delivery slips. For that, create a new sale order from the Odoo sales module for the product that we purchased.
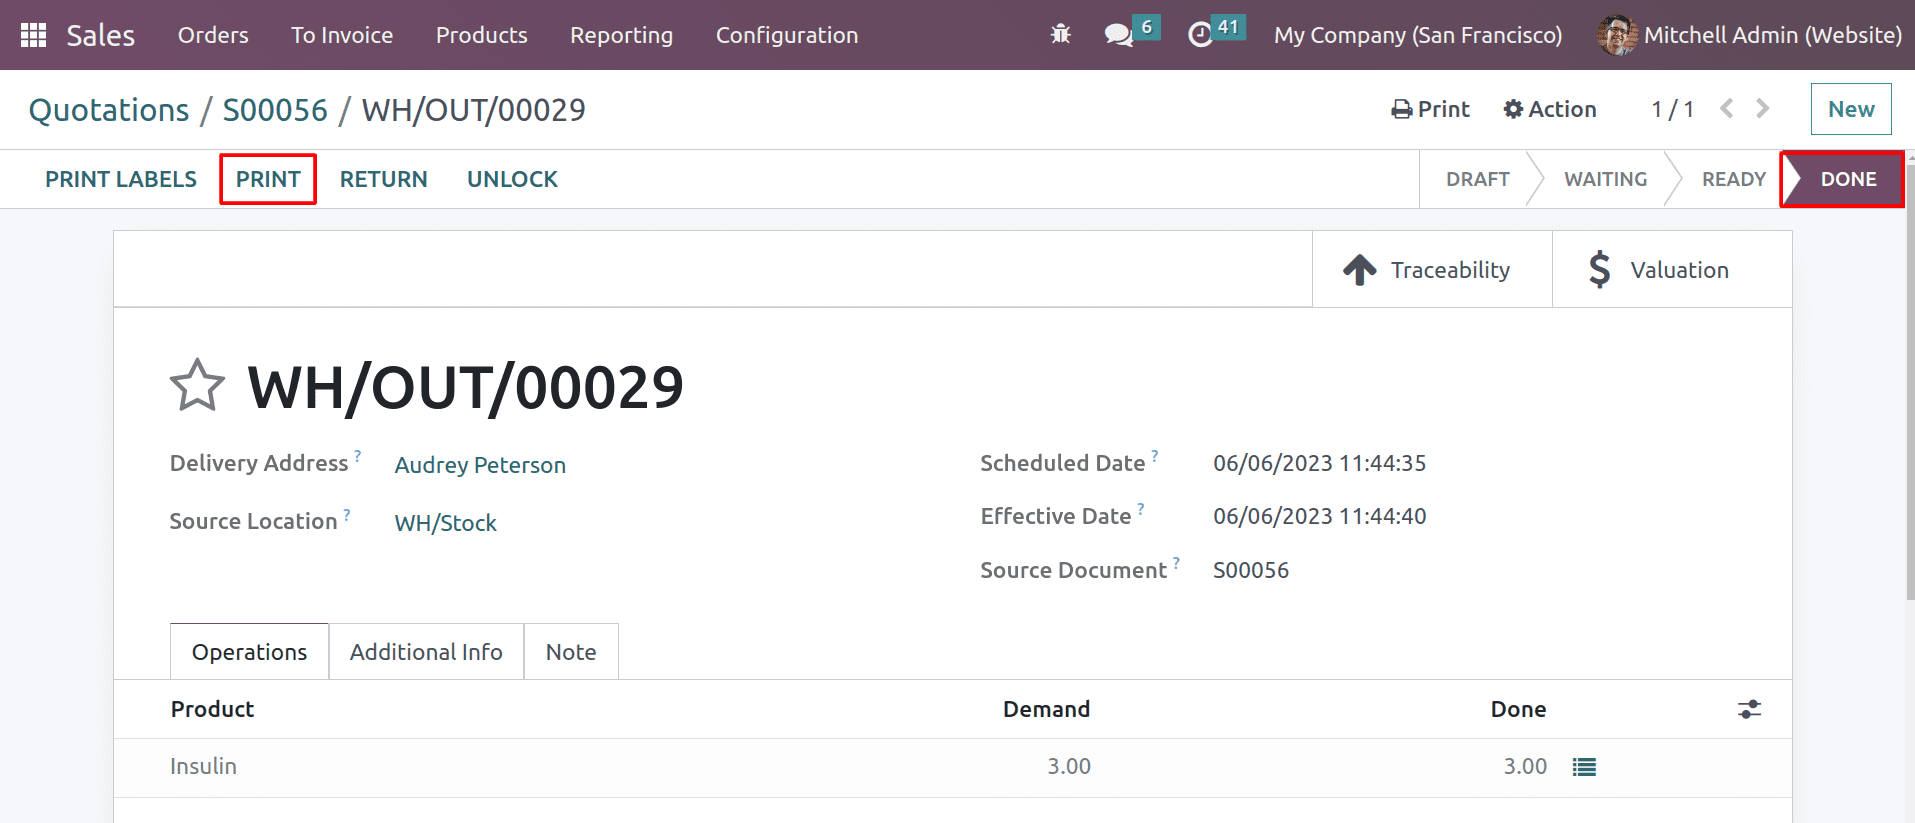
After completing the delivery, we can print the delivery slip by clicking on the print button.
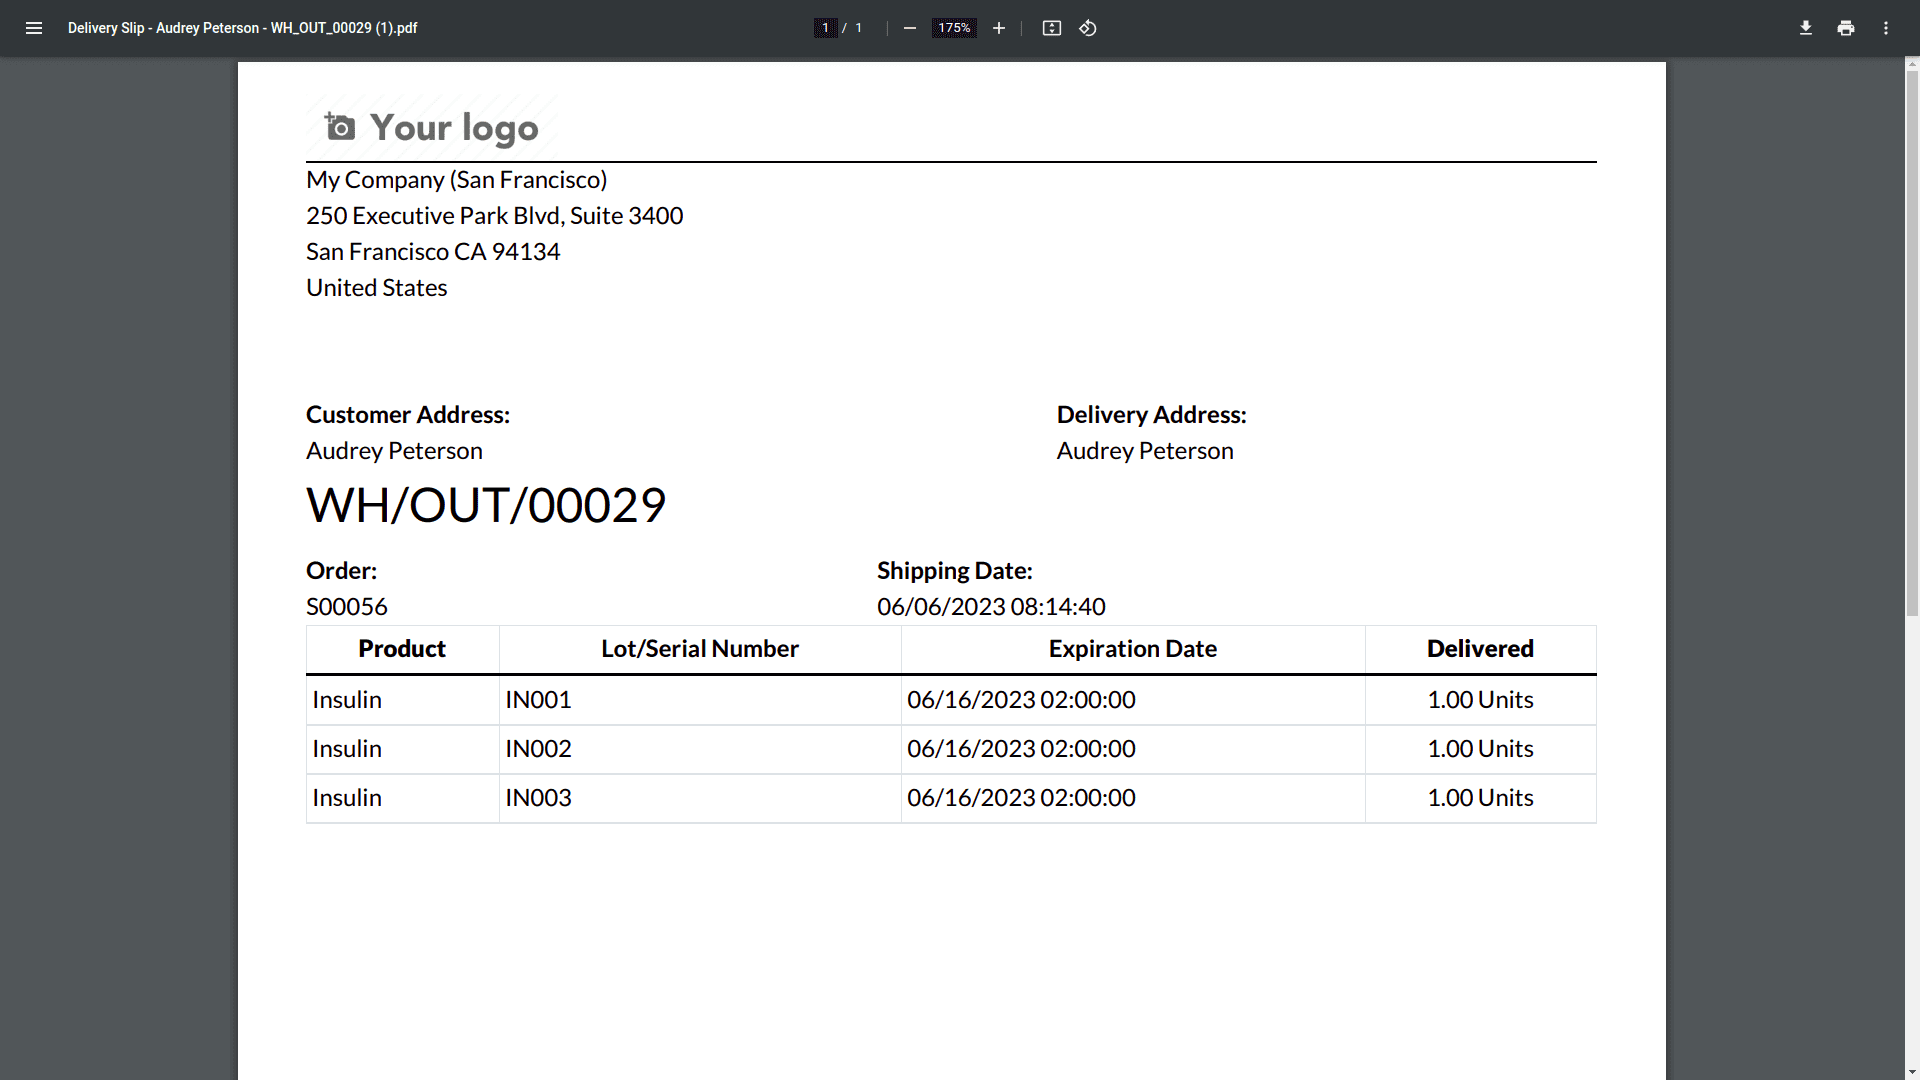
In the above-mentioned delivery slip, you can see that the expiration date is displayed along with the lot/serial number. This improves customer satisfaction because customers are more likely to be satisfied with your business if they know that you are taking steps to ensure the safety and quality of your products.
And let’s check what will happen when we sell an expired product to a customer. For that, we can change the expiration date of a lot that we purchased. To change the expiration date of a product, go to the Lot/Serial in the inventory module through the product menu.
Here you can see the expiration alert for the product in the Lot/Serial number. And next, we can create a sale order for the product that contains this Lot/Serial number.
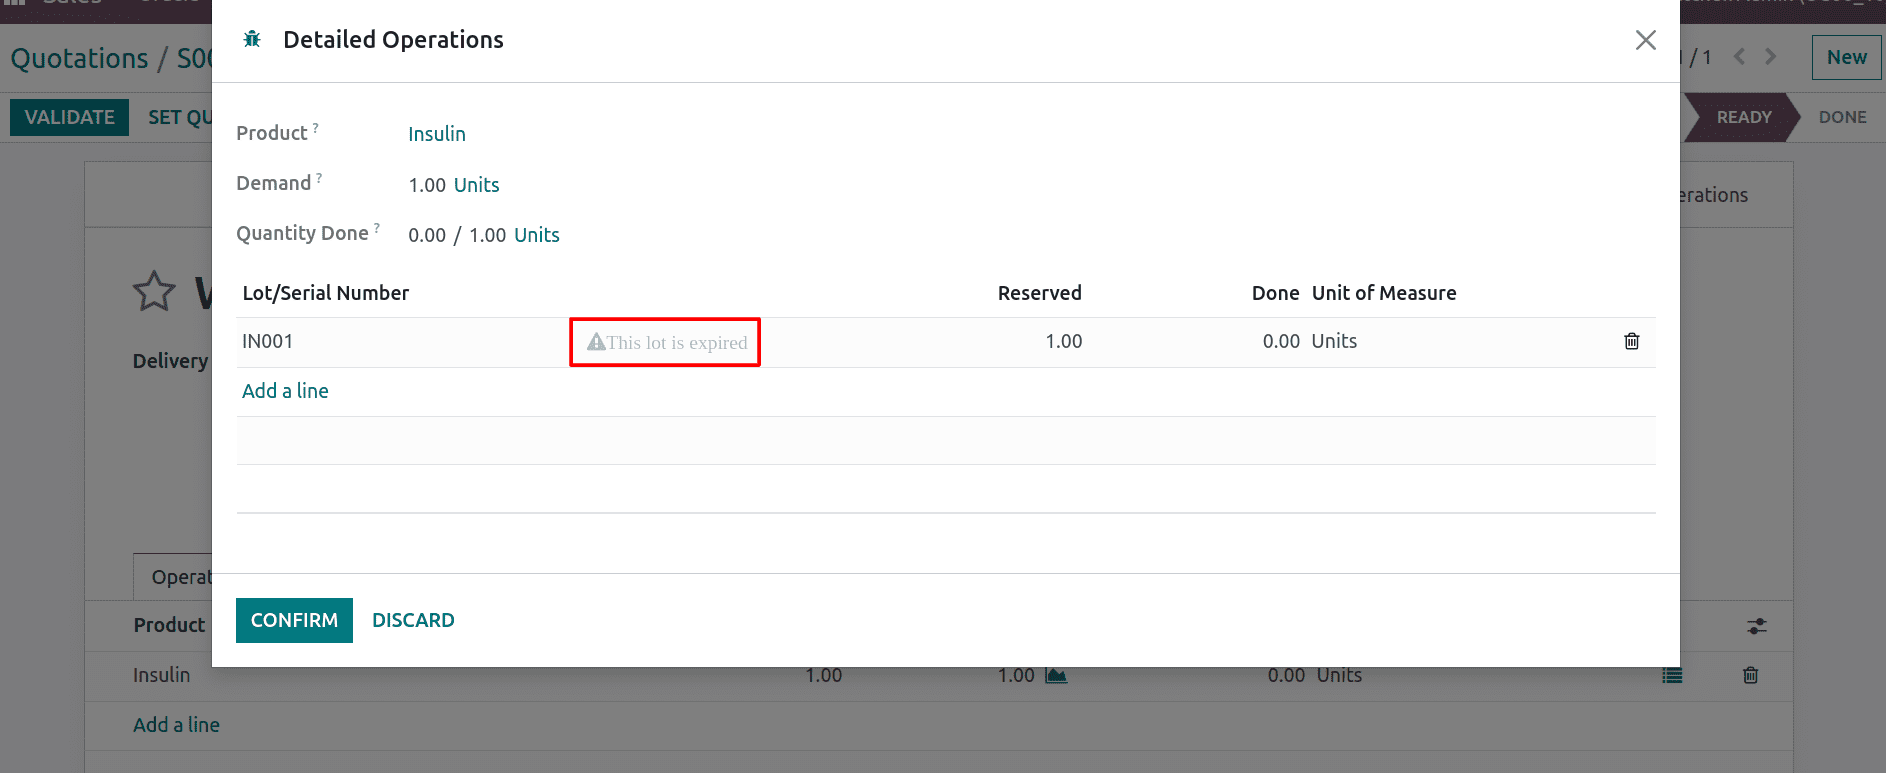
While validating the delivery, there will be a warning about the expiration of the product. And after choosing the lot, click on the validate button.
Here you can see the pop-up for confirmation of delivery of the expired products. So whether you can confirm the product or proceed with it except for the expired one.
In conclusion, expiration dates and lot/serial numbers are important tools for businesses that sell products with a limited shelf life. By tracking expiration dates and lot/serial numbers, businesses can improve their inventory management, reduce waste, improve customer satisfaction, and reduce risk.