Version 17, the most recent edition of Odoo, has the greatest functionality and is the most well-known and capable version of the program for attaining the best possible business administration. Python 3.10+ is used for backend development in Odoo 17, PostgreSQL is used for the database server, and Javascript is used for frontend development.
Ubuntu 20.04 is a Long-Term Support (LTS) version, meaning it will get regular app updates and essential security patches for the next five years. New Linux kernel versions and graphics driver upgrades are released every six months as software updates.
We will discuss how to use the Pycharm IDE in Ubuntu 20.04 to build up a development environment for Odoo 17.
Therefore, before setting up Pycharm, we need to install a few necessary libraries and packages to run Odoo. Let's examine that in more detail.
Step 1: Download and install the Pycharm IDE
We're going to install the Pycharm Community version here, and your machine must fulfill a few basic requirements to run Pycharm.
The requirements necessary to install Pycharm on your computer are:
| Requirement | Minimum | Recommended |
| RAM | 4 GB of free RAM | 8 GB of total system RAM |
| CPU | Any modern CPU | Multi-core CPU. PyCharm supports multithreading for different operations and processes making it faster the more CPU cores it can use. |
| Disk space | 3.5 GB | SSD drive with at least 5 GB of free space |
| Monitor resolution | 1024×768 | 1920×1080 |
| Operating system | Officially released 64-bit versions of the following: Microsoft Windows 10 1809 or later Windows Server 2019 or later macOS 10.15 or later Any Linux distribution that supports Gnome, KDE, or Unity DE. PyCharm is not available for Linux distributions that do not include GLIBC 2.27 or later. Pre-release versions are not supported. | Latest 64-bit version of Windows, macOS, or Linux (for example, Debian, Ubuntu, or RHEL) |
You may install Pycharm by downloading the Debian installation file from the following URL.
https://www.jetbrains.com/pycharm/download/other.html
Alternatively, you may install Pycharm by using the instructions.
To do so, launch Terminal (Ctrl + Alt + T to launch Terminal) and run the following commands:
sudo apt-get update
sudo apt-get upgrade
sudo snap install pycharm-community --classic
Step 2: Install Python 3.10:
The most recent Python 3.10 version is not accessible in Ubuntu's default repository. As a result, we must add another repository. Python Packages may be found in the deadsnakes repository on launchpad.
Using the commands below, add the deadsnakes repository.
sudo add-apt-repository ppa:deadsnakes/ppa
sudo apt-get update
Using this command, you may check the updated Python package list.
apt list | grep python3.10
Python 3.10 can be installed using the following command:
sudo apt-get install python3.10
The following code may be used to install the required packages for Python3:
sudo apt-get install python3-dev build-essential libjpeg-dev libpq-dev libjpeg8-dev libxml2-dev libssl-dev libffi-dev libmysqlclient-dev libxslt1-dev zlib1g-dev libsasl2-dev libldap2-dev liblcms2-dev
Step 3: Install web dependencies:
Installing the web dependencies is the next step.
sudo apt-get install -y npm
sudo ln -s /usr/bin/nodejs/usr/bin/node
sudo npm install -g less less-plugin-clean-css
sudo apt-get install -y node-less
Step 4: Install the wkhtmltopdf:
If you want to publish Odoo reports, you must install Wkhtmltopdf, which can be done with the following code.
sudo wget https://github.com/wkhtmltopdf/wkhtmltopdf/releases/download/0.12.5/wkhtmltox_0.12.5-1.bionic_amd64.deb
sudo dpkg -i wkhtmltox_0.12.5-1.bionic_amd64.deb
sudo apt install -f
Step 5: Install PostgreSQL
Next, we must install PostgreSQL:
sudo apt install postgresql postgresql-client
Step 6: Configure a Database User Role for Odoo Databases.
Create a database user with the following instructions, and specify a password for the separate user because it will be required when creating the conf file, so save it.
sudo su - postgres
createuser --createdb --username postgres --no-createrole --no-superuser --pwprompt odoo17
Set the specified user as the superuser.
psql
ALTER USER odoo17 WITH SUPERUSER;
Exit from both psql and the Postgres user.
\q
Exit
Step 7: Get Odoo 17 Source Code
Odoo 17 Community Source code may be obtained straight from Odoo's Github source. Otherwise, you may clone it from git. Install git and then run the following commands:
sudo apt-get install git
The command below will clone the Odoo code into the Odoo17 directory within your home directory.
git clone https://www.github.com/odoo/odoo --depth 1 --branch 17.0 --single-branch odoo17
Step 8: Open the Odoo project in Pycharm
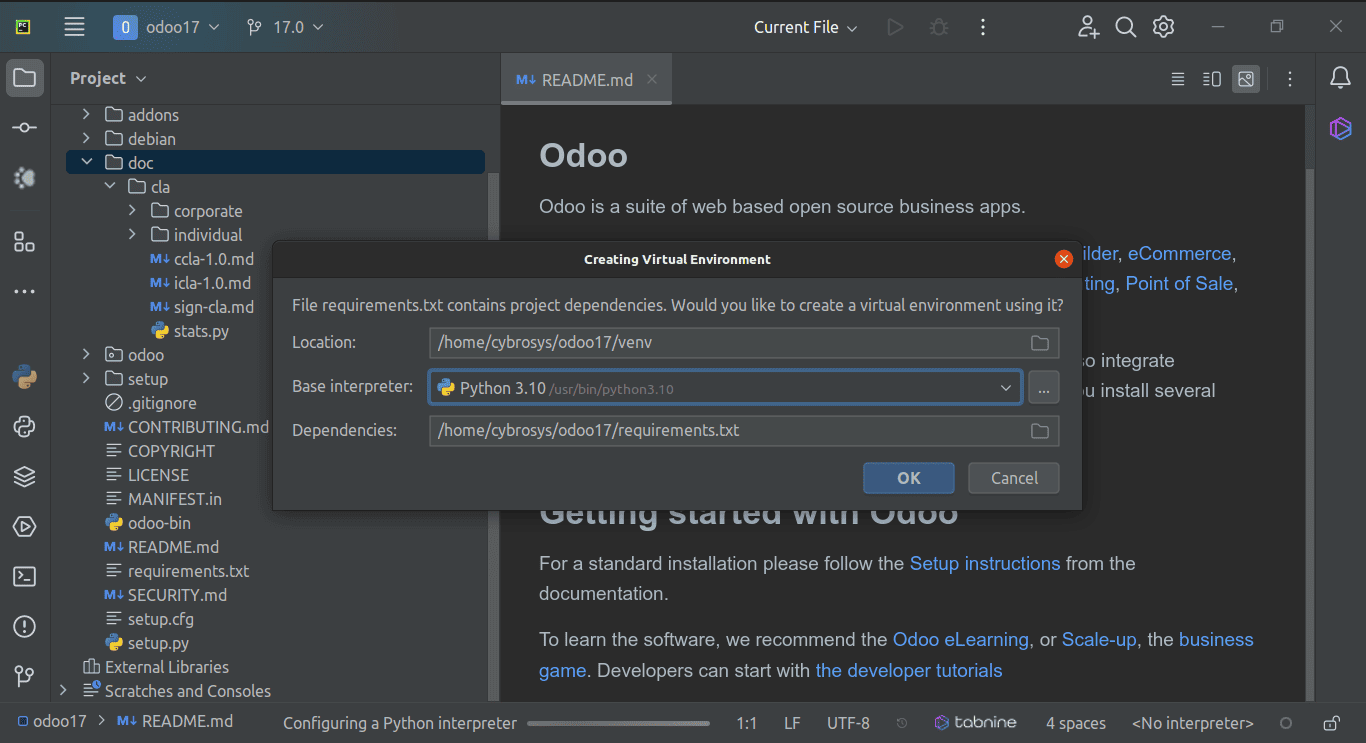
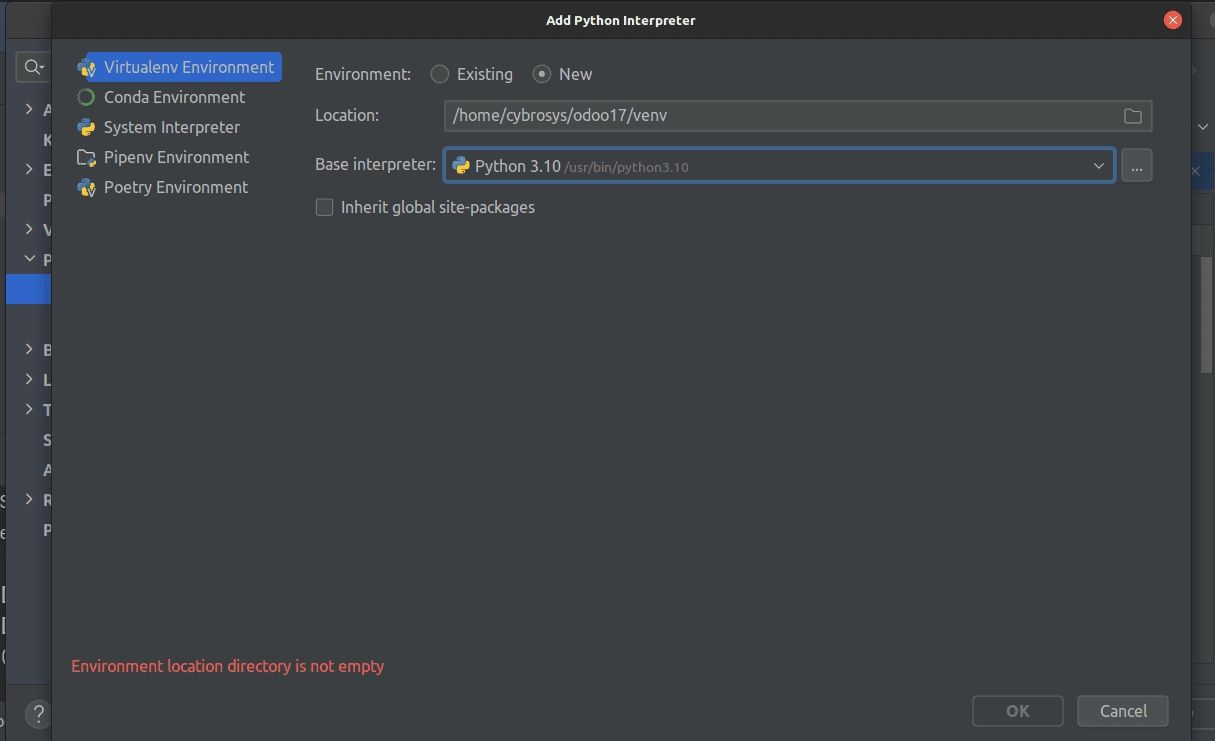
Open Pycharm Community and navigate to the Odoo17 directory. After the project is open, a dialogue box similar to the one seen in the picture below may appear. This is used to build a virtual environment; however, we will construct a virtual environment via the terminal, so cancel it.
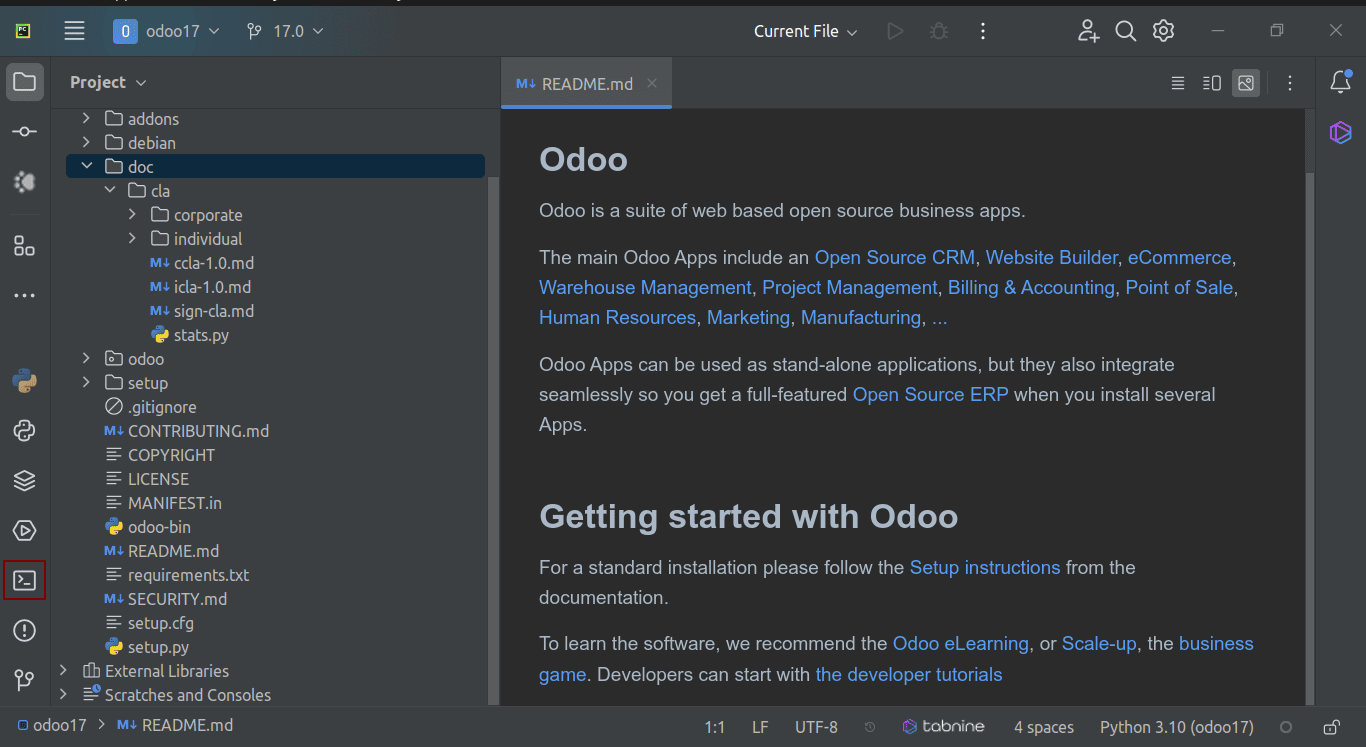
To open the terminal, click on the icon shown below or use the command Alt+F12.
Then, use the commands below to create a venv with Python 3.10.
curl -sS https://bootstrap.pypa.io/get-pip.py | python3.10
sudo apt install python3.10-venv
python3.10 -m venv your_venv_name

You will be able to observe that your virtual environment has been enabled after closing and reopening the terminal; you will see the indicator in the terminal as shown below with your venv name.

If this does not activate your venv, use the following command.
source your_venv_name/bin/activate
Step 9: Install the required Python packages
Odoo requires the installation of various Python packages, which are stated in the file requirement.txt within the Odoo17 directory. As a result, run this command in the terminal.
pip install -r requirements.txt

In case you don't find any errors, you can use the command below to test whether all of the requirements stated in requirements.txt have been installed.
pip list

If you run into any errors, go to the requirements.txt file and install each requirement one by one with the command below.
pip install requirement_name
Example 1:

Example 2:

In most cases, when installing packages that are specified twice, only one of them should be installed. So, even if one of them fails to install, it should not be a problem.
Also, if some prerequisites defined with sys_platform as 'win32' fail to install, do not install them.
If any errors occur during installing the package "psycopg2==2.9.2 ; sys_platform != 'win32' and python_version <= '3.10' or psycopg2==2.9.5 ; python_version > '3.10' or sys_platform == 'win32'" instead, use the command below to install another package.
pip install psycopg2-binary
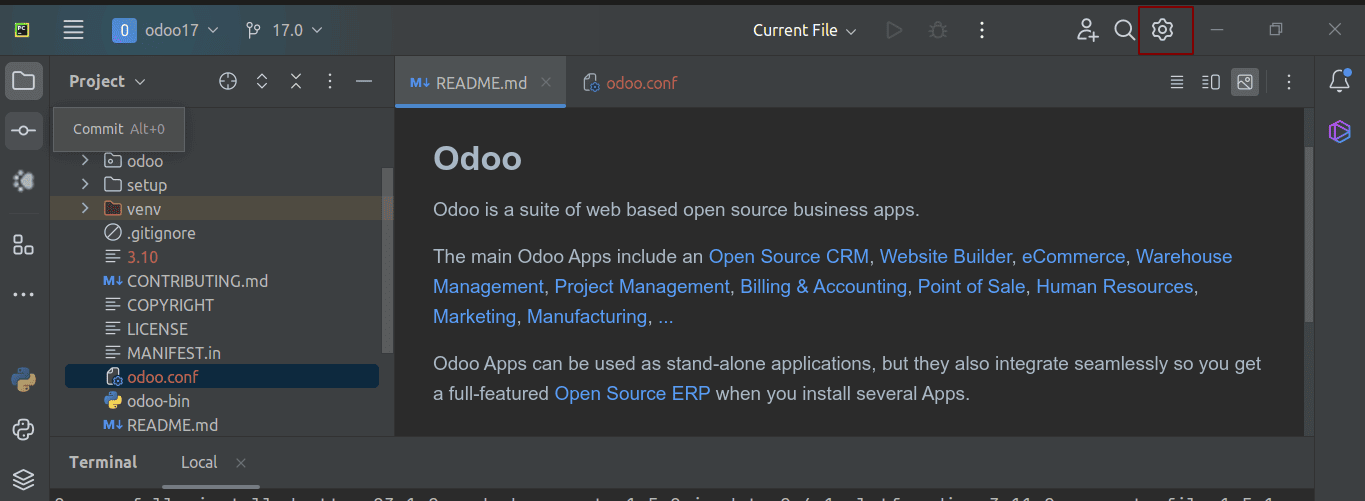
Step 10: Create the odoo.conf file within the Odoo17 directory
You can create conf file by right-clicking the directory and select New -> File -> odoo.conf
After inserting the following block into the file odoo.conf, you should update the db_password, which is the password you specified for the database user Odoo17 in the previous stage.
[options]
admin_passwd = admin
db_host = localhost
db_port = 5432
db_user = odoo17
db_password = your_password
addons_path = /home/user/odoo17/addons
xmlrpc_port = 8017
Also, replace the addons_path value using the real path to the Odoo17 addons directory. You may accomplish this by pressing Ctrl + Shift + C in the addons directory. You will then be given the path to the current directory. Replace it in the addons_path. You may also create a new directory to include your custom modules; the path to that directory must be supplied in the addons_path, separated by commas.
eg: addons_path = /home/user/odoo/addons, /home/user/odoo/custom_addons
Step 11: Add Python Interpreter
Go to Settings -> Project: odoo17 -> Python Interpreter to configure a Python interpreter.
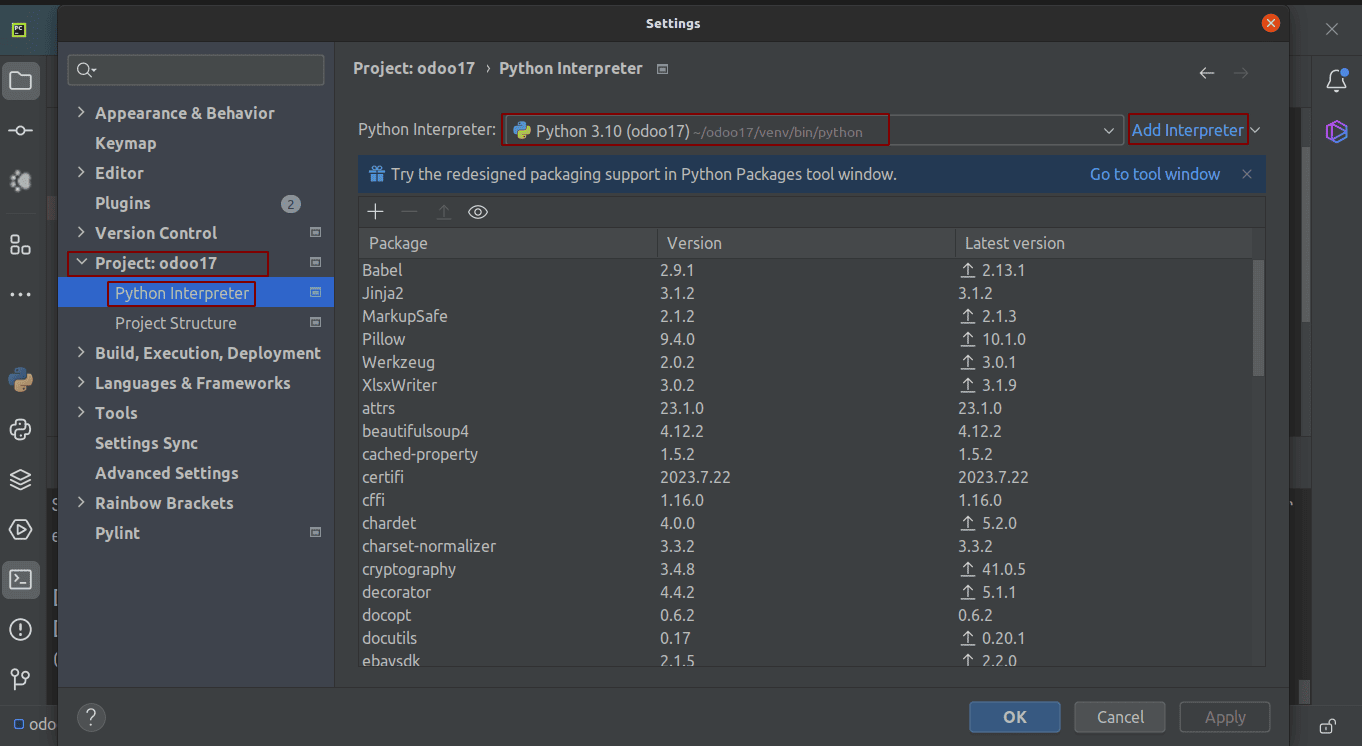
When you open the aforementioned window, if the interpreter (python 3.10 from Odoo17 venv) is already set up, you don't need to make any changes. Otherwise, select the Add Interpreter option and make the following selections.
Step 12: Add Project configuration in Pycharm
In order to configure, Go to Edit Configurations under Current File.
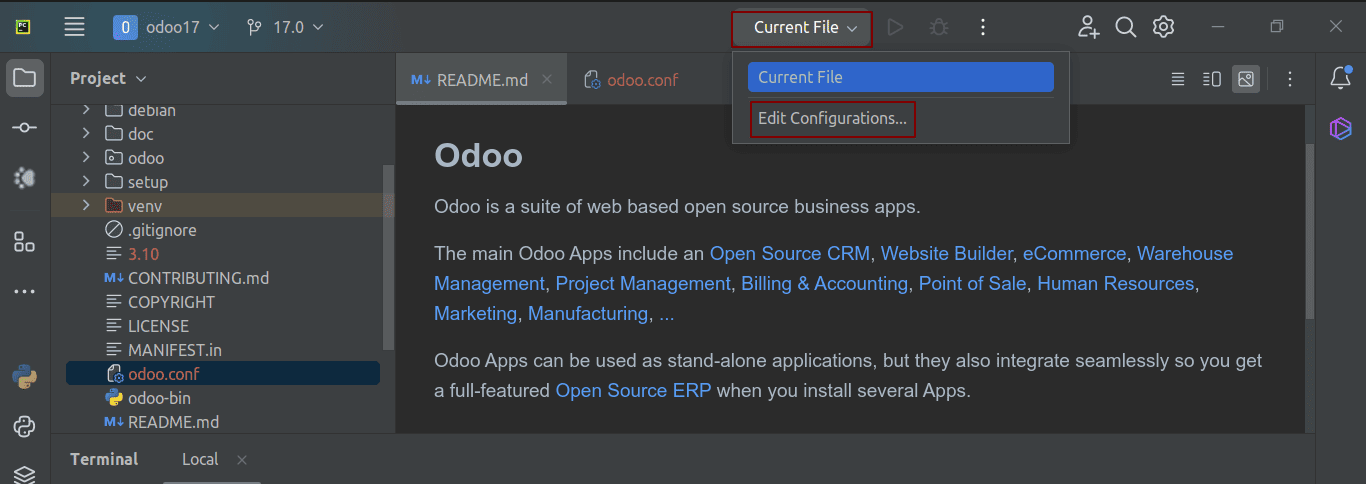
When the dialogue box below shows up, click the "+" button and select "Python" from the list.
After that, you may fill in the fields as seen in the picture below.
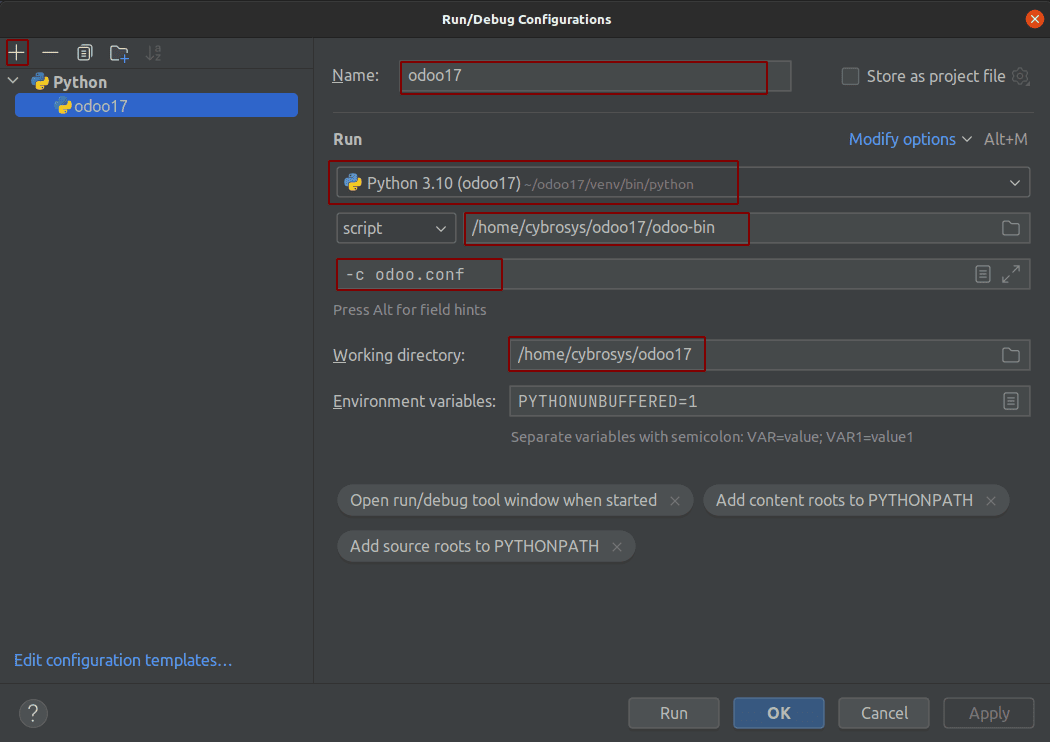
Name: You are free to give the configuration any name.
Python Interpreter: This project's Python Interpreter needs to be included here. Because we had set the interpreter in the previous stage, it will fill in automatically.
Script Path: Choose the "odoo-bin" file from the directory odoo17.
Parameters: You can add parameters here to run with the script; the parameter -c is necessary, and you can add additional ones. You can also need to add the conf file in the parameter.
Working location: You must include the location for the project's current working folder here.
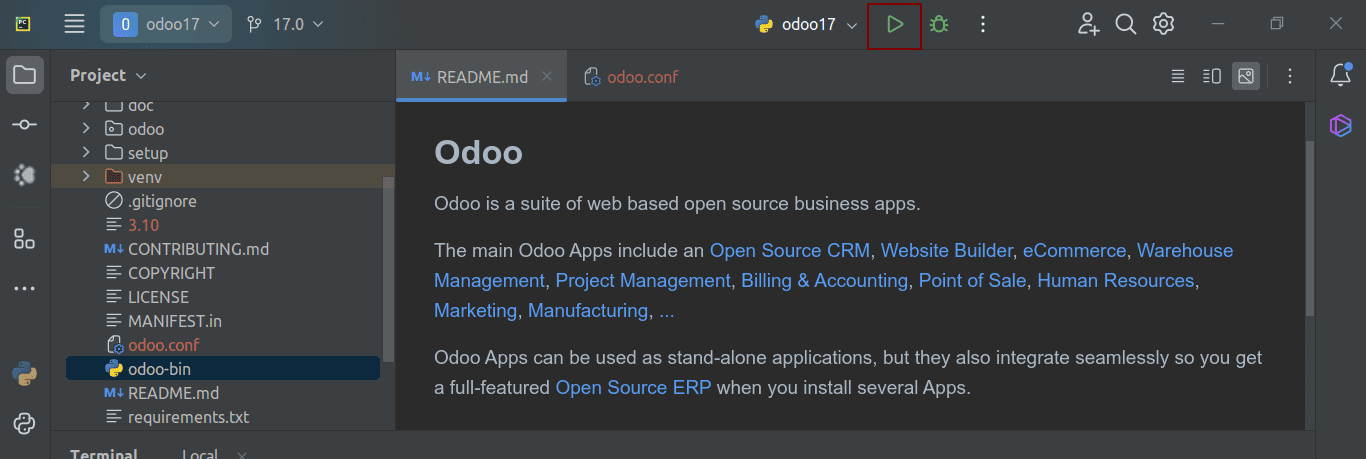
Step 13: Test Run Odoo 17
Odoo's setup is finished. You may now try it by clicking the button below to launch the project.
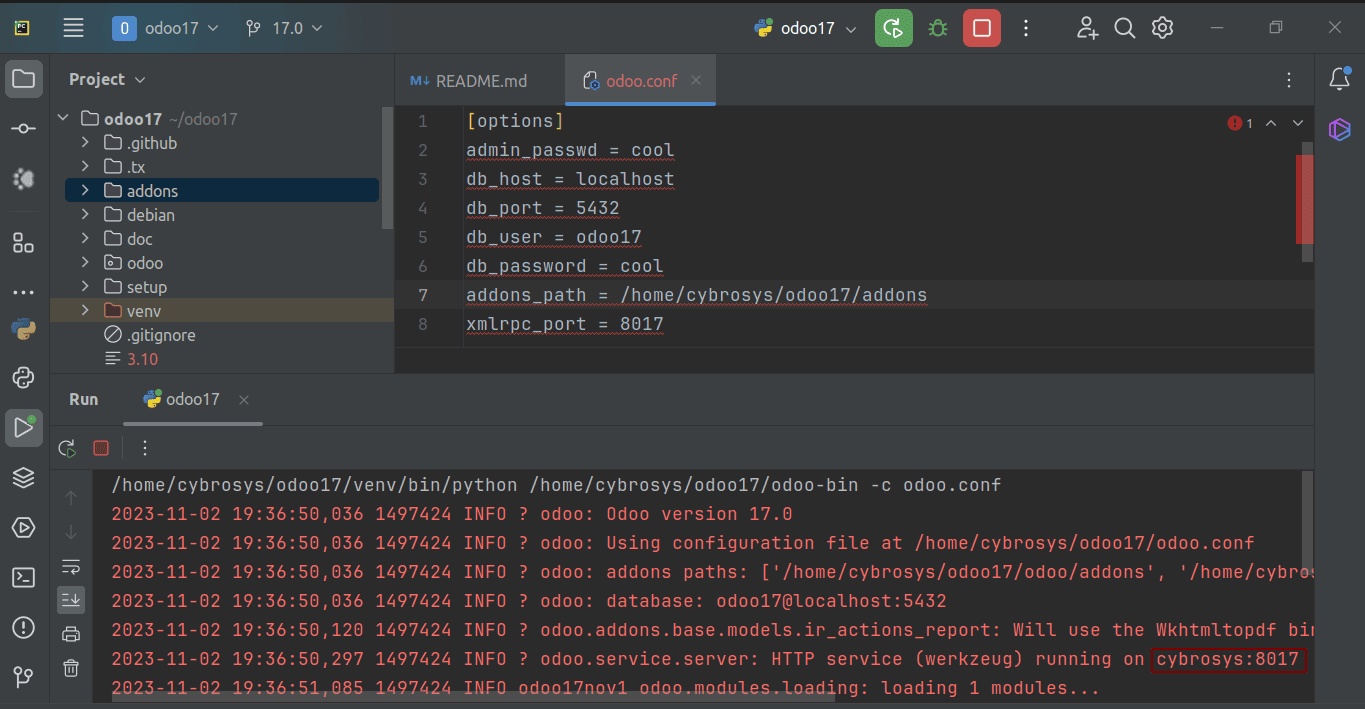
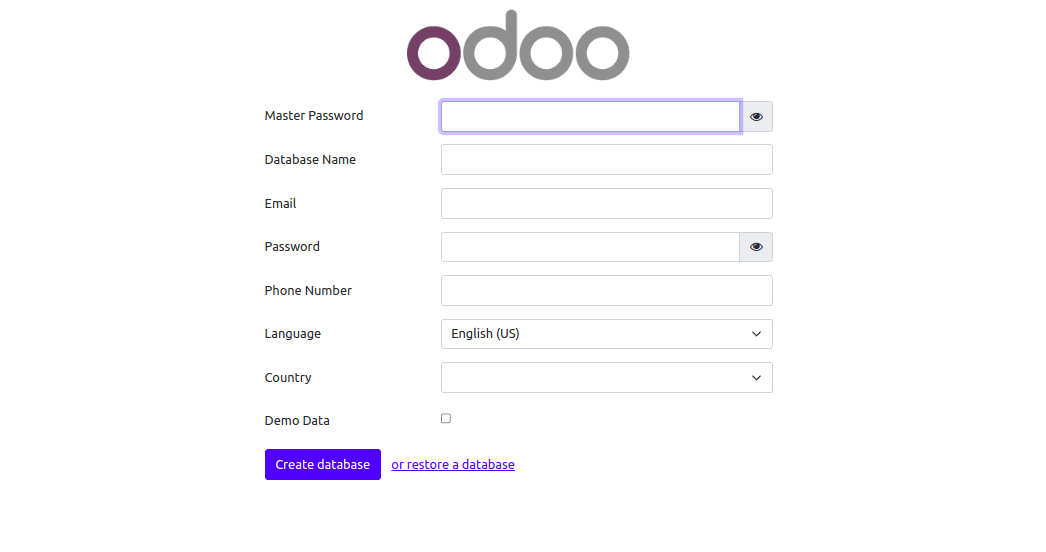
You may now test localhost:8017 in your browser. The browser will open the Odoo database management, as seen below if all of your settings are successful.
This is how Ubuntu 20.04 users may set up an Odoo 17 Pycharm development environment.
To read more about setting up Odoo 16 development environment using Pycharm in Ubuntu 22.04, refer to our blog How to Setup Odoo 16 Development Environment Using Pycharm in Ubuntu 22.04