The Expenses module in Odoo is a feature that gives businesses the ability to manage and track employee expenses efficiently. It enables staff members to submit their incurred costs together with receipts for authorized personnel's approval. The module speeds up the process of reinvoicing expenses once they have been approved, registering them as payable, and enabling effective financial management within the company.
It is possible to set up Odoo's employee expense module to accept incoming emails for expense submission. Employees can use this functionality to send their associated receipts and expenses immediately via email. The expense module automatically records the given data, and authorized users may examine and approve the charges inside of Odoo, expediting the entire employee expense management procedure.
Let's check how an employee will submit their expenses through incoming email, and how the process will be managed.
Configuring Incoming Email Server
First, the company needs to configure an Incoming Email server. The email server can be configured in Settings. Before that, the user needs to configure a Custom Email server. This can be enabled in General Settings. Enable the Custom Email server and set the Alias Domain there.
: General Settings > Custom Email Server > Save
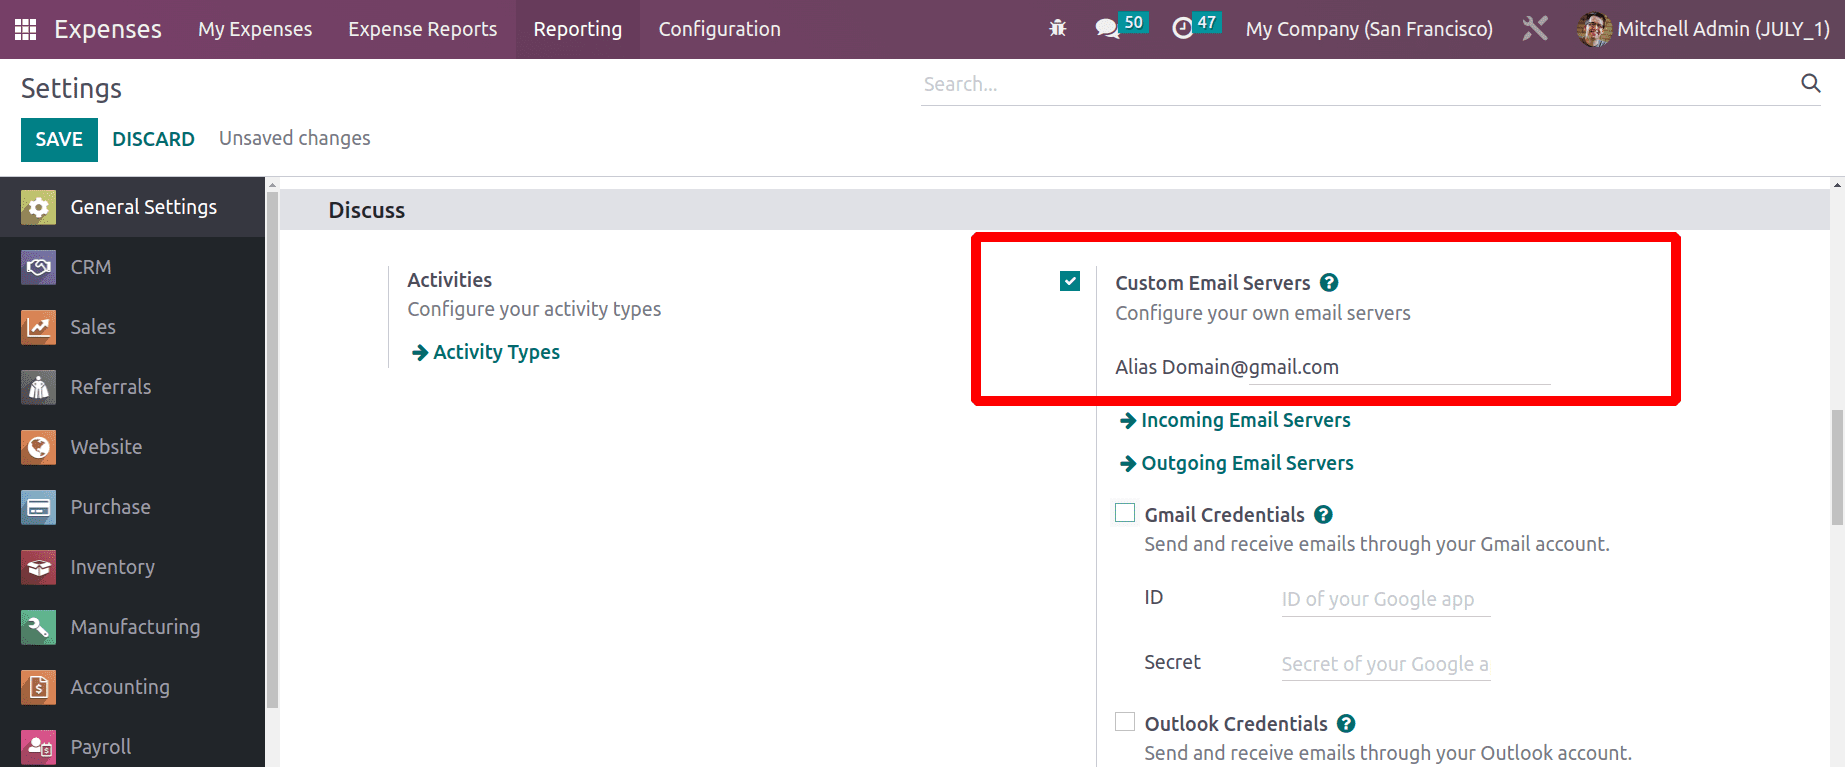
Users can configure Incoming Email Server and Outgoing Email Server by enabling this Custom email server.
Incoming Email Server: The setting of the incoming mail server in Odoo enables the system to accept and handle incoming emails. Users can interact with the Odoo system using emails by setting up the incoming mail server to enable various functionalities, such as creating new records or changing existing ones based on email content.
Outgoing Email Server: The setup in Odoo known as the outgoing mail server, enables the system to send outgoing emails. By configuring the outgoing mail server, the user can enable Odoo to send notifications, alerts, and other communications to customers and other parties.
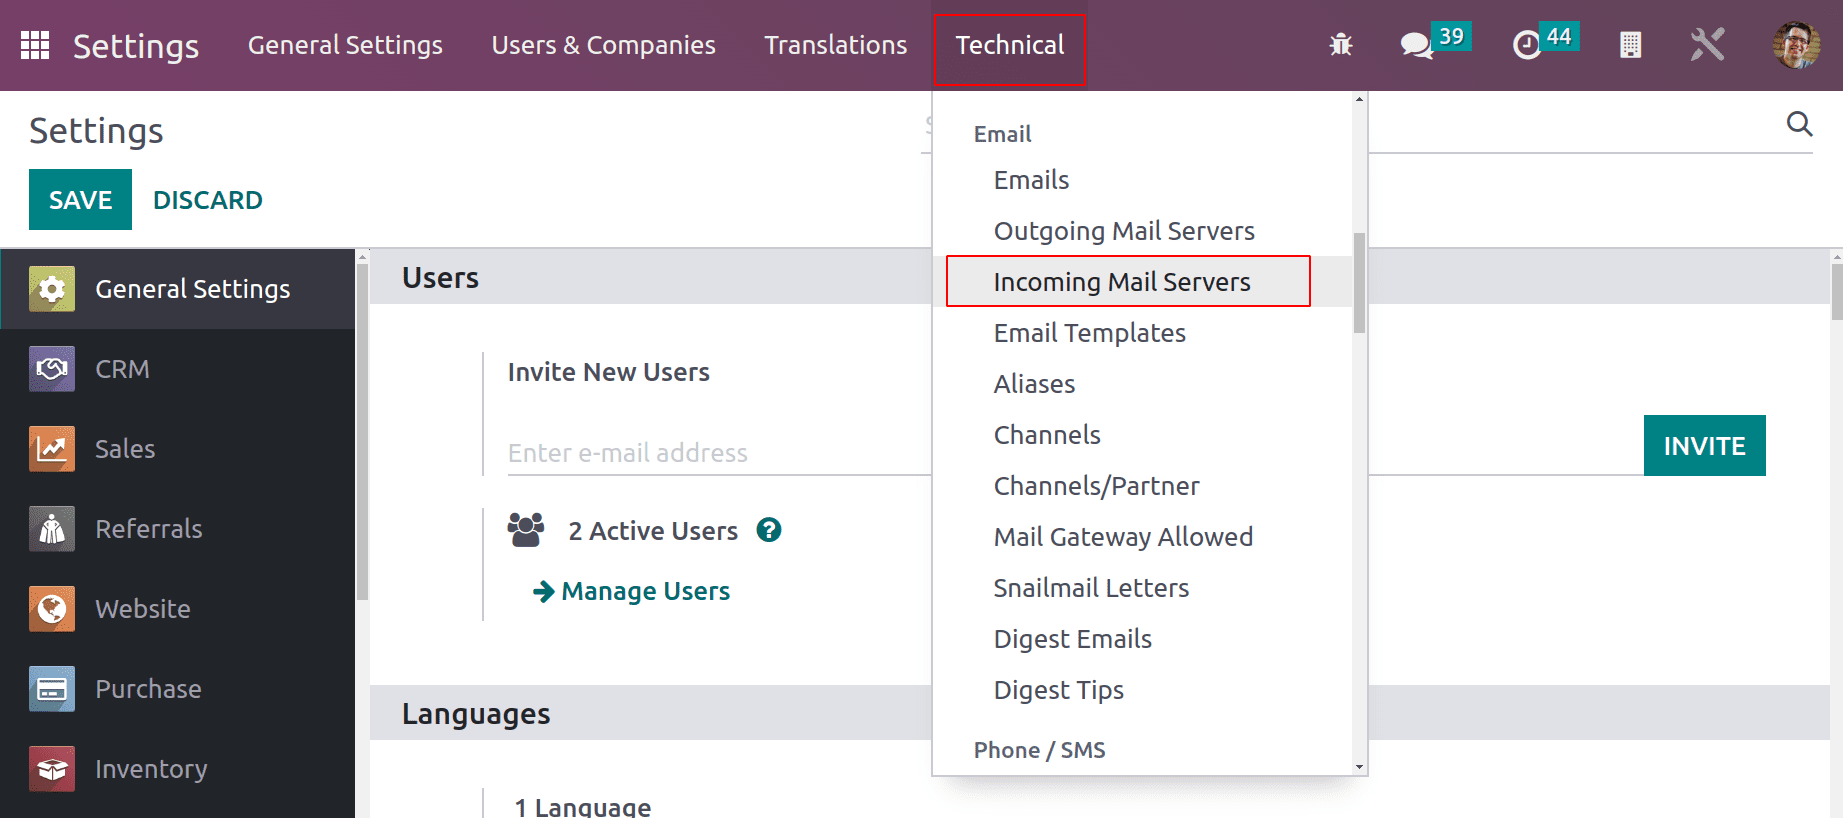
After saving the configuration, the incoming mail server can be configured by clicking the Incoming Email Server button. Or go to the Technical tab and scroll down to get the Incoming Email Server menu. From there, choose the option Incoming Email Server menu under the Email option.
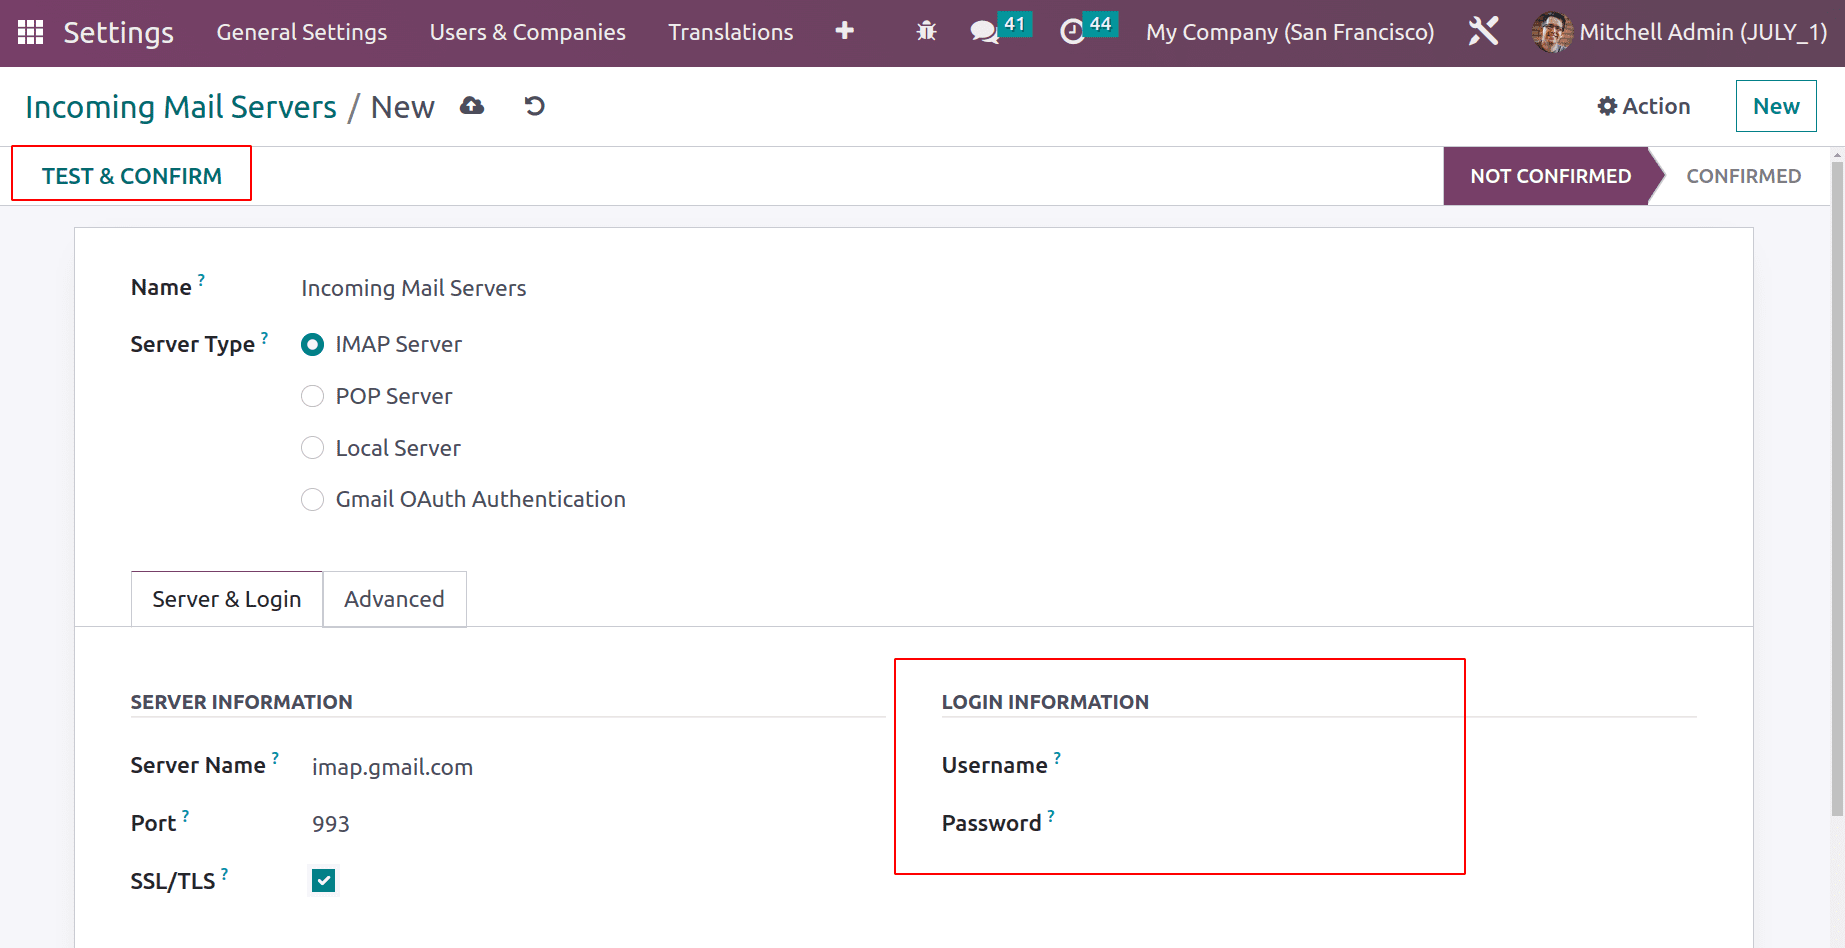
The incoming mail server name is given in the Name section. Choose the server type. Then add the server name, and Port details. Add the login information, like email id and password. After adding the details, test the connection. This is done by clicking the TEST & CONFIRM button.
The user can choose what action needs to be taken on this newly formed incoming mail server. There is a section titled "Actions to perform on incoming mail server" under the left-hand corner. Pick a task from the list. The chosen action in this case is Expense.
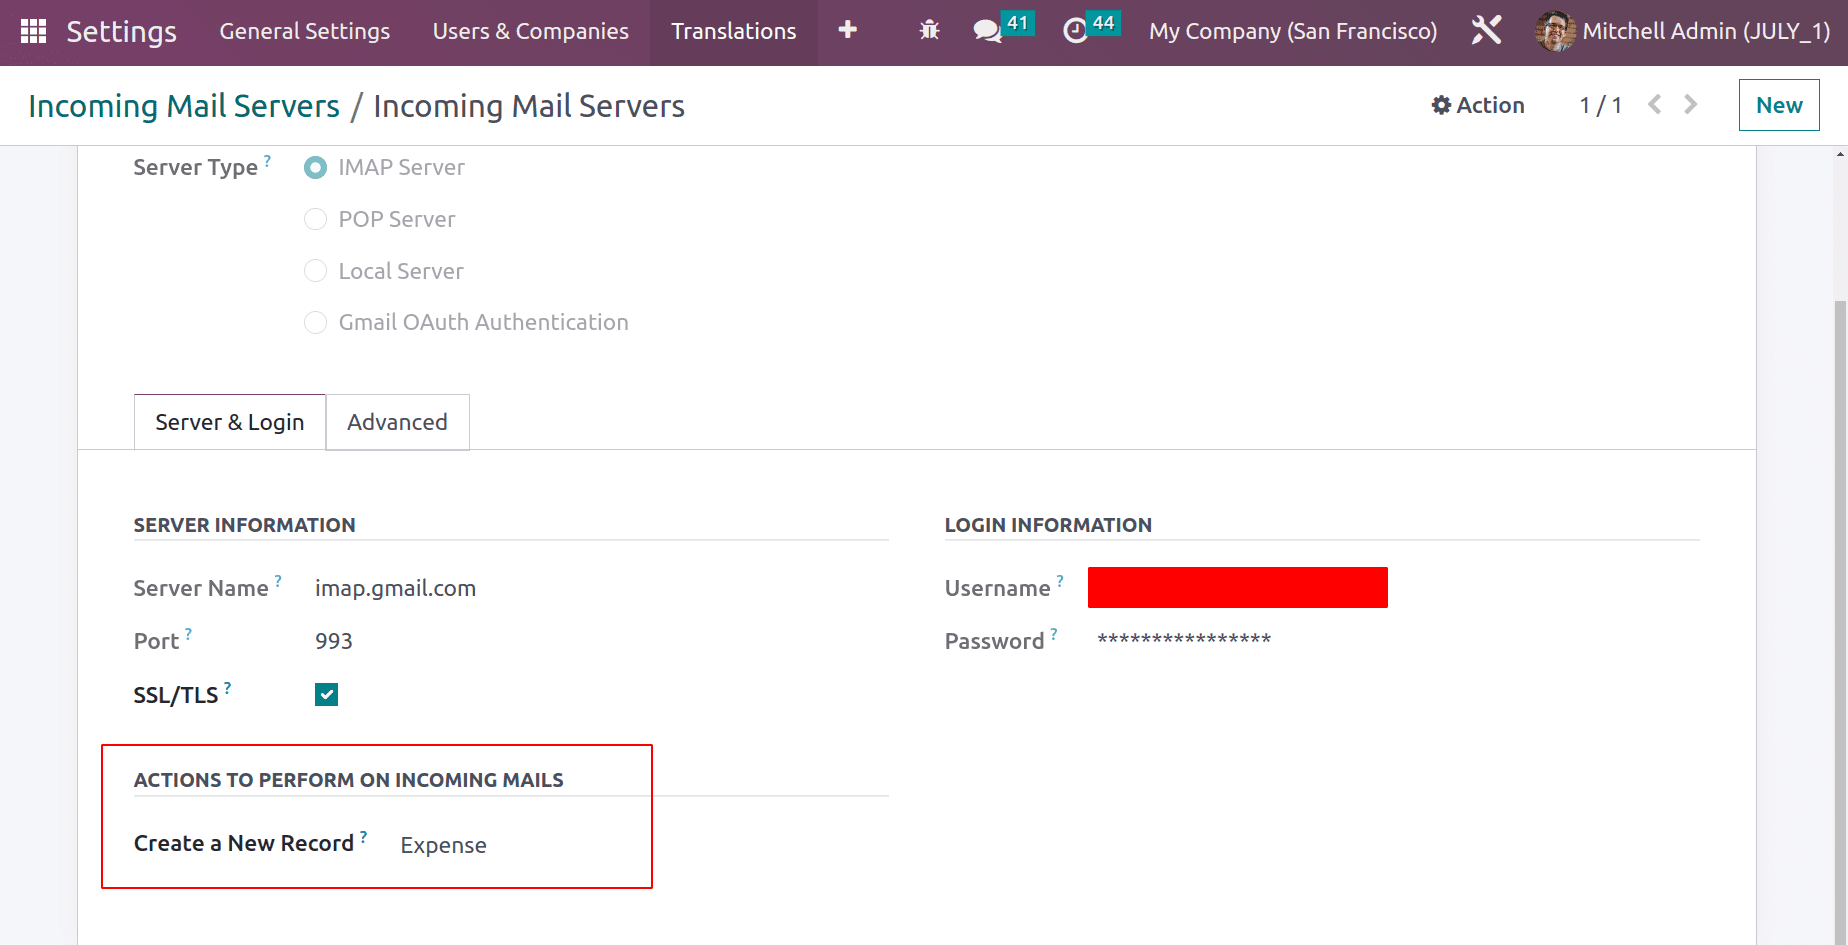
This means that any email sent to the given email id will automatically be created as an expense here.
Configuring ExpenseProduct
For creating expenses from the Incoming email, the user first needs to configure an Expense product. So move to the product tab. From there, a new expense product can be created. Open the expense product ‘Hotel Accommodation.’
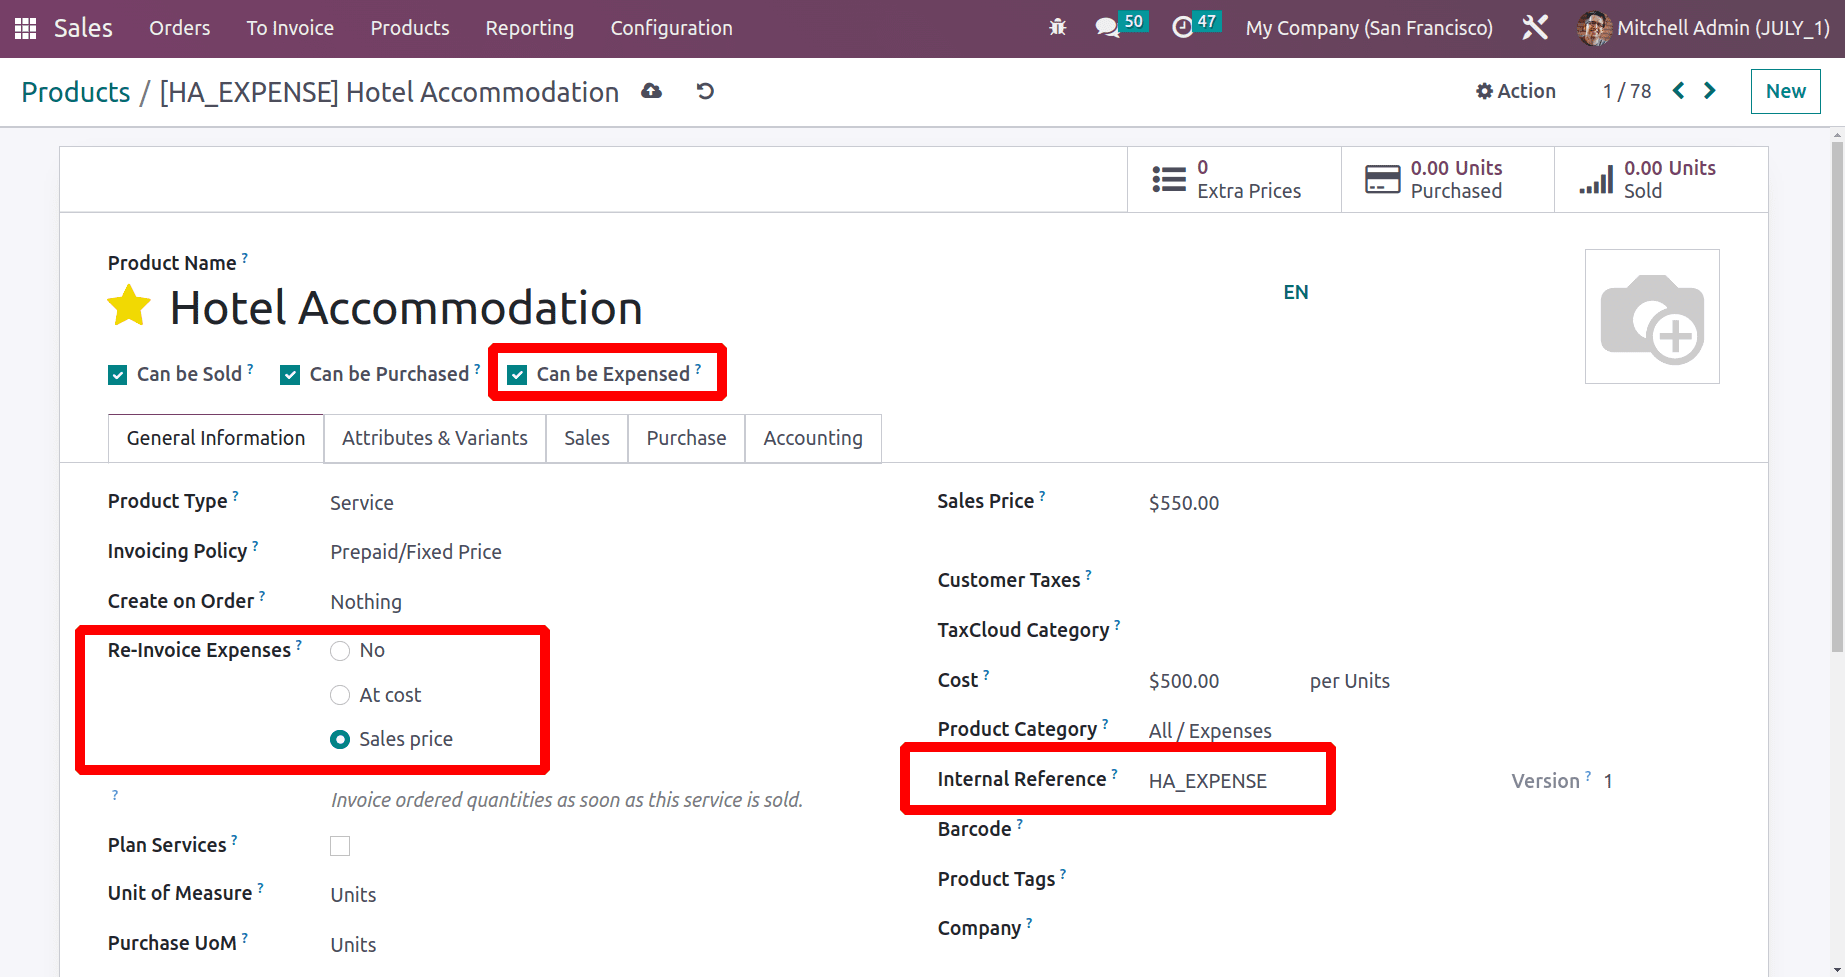
In this case, the Hotel Accommodations is an expense item. This is reinvoiced in accordance with the Sales Price. Add $550 to the sales price. Here, internal referencing is required. Considering that the product's internal reference is used to generate expenses from incoming email. Keep the item.
Creating expenses from Email
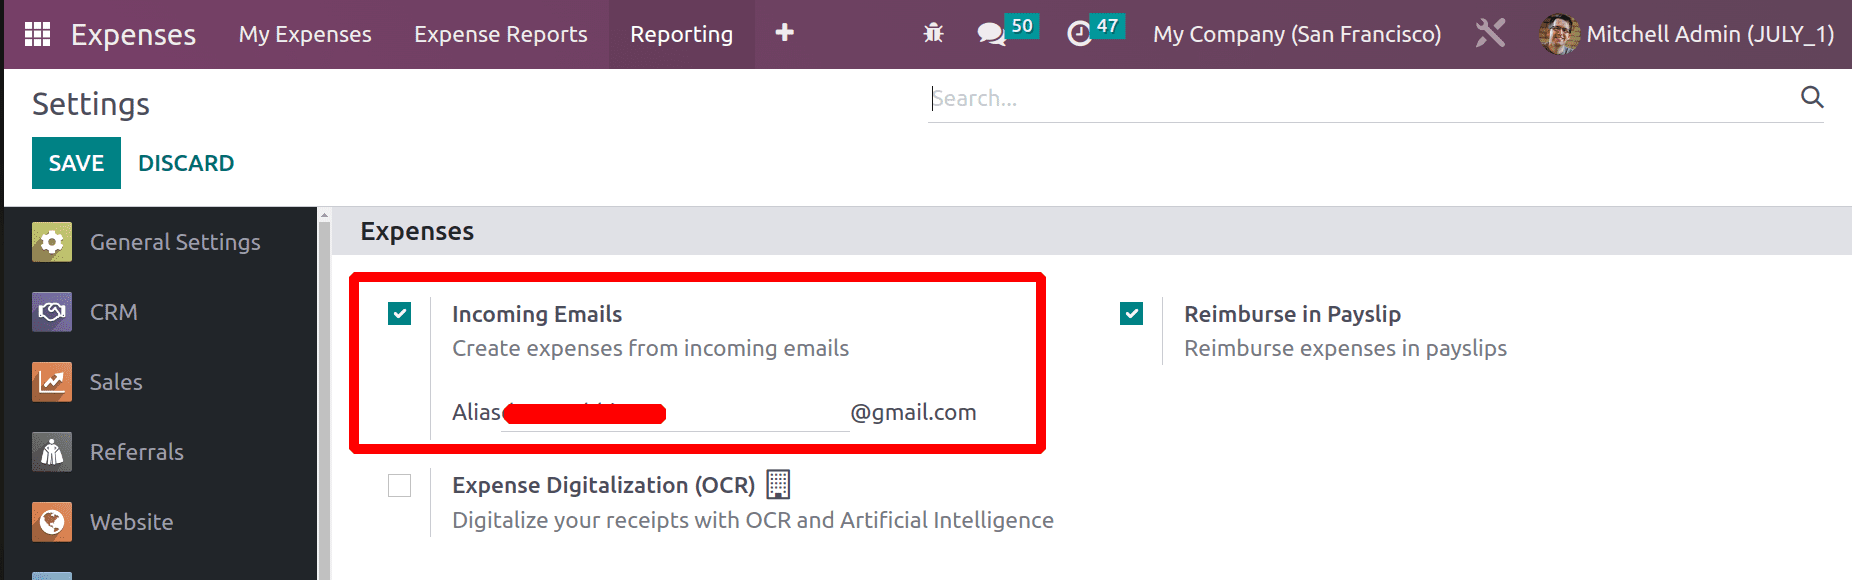
For adding an expense from email, the user must configure the option inside the Expense module. For that, choose Settings from the Configuration tab. There is an option for Incoming Emails. Enable it and add the Alias, which must be the same email mentioned inside the Incoming mail Server. Save the configuration.
: Configuration > Settings > Incoming Emails > Save
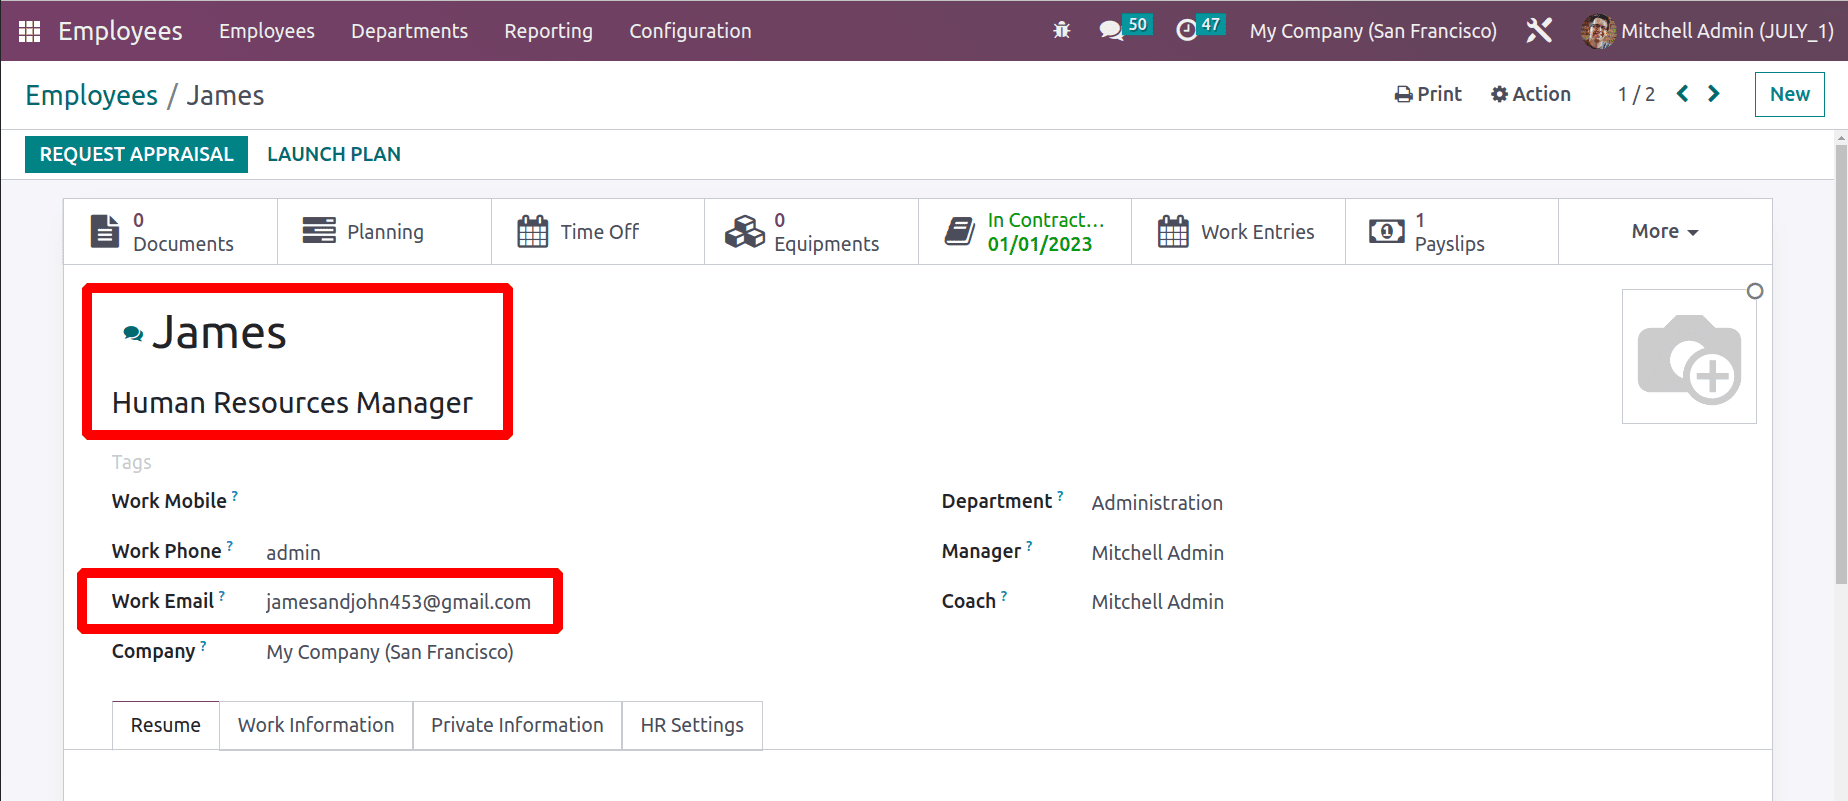
There is an employee named James. If he has no access to the Expense module. So it's easy to add his expenses through a single email. A Work email is added for the employee. So if the employee sends an email to the company email from his Work email, it will be created as an expense inside the Expense module.
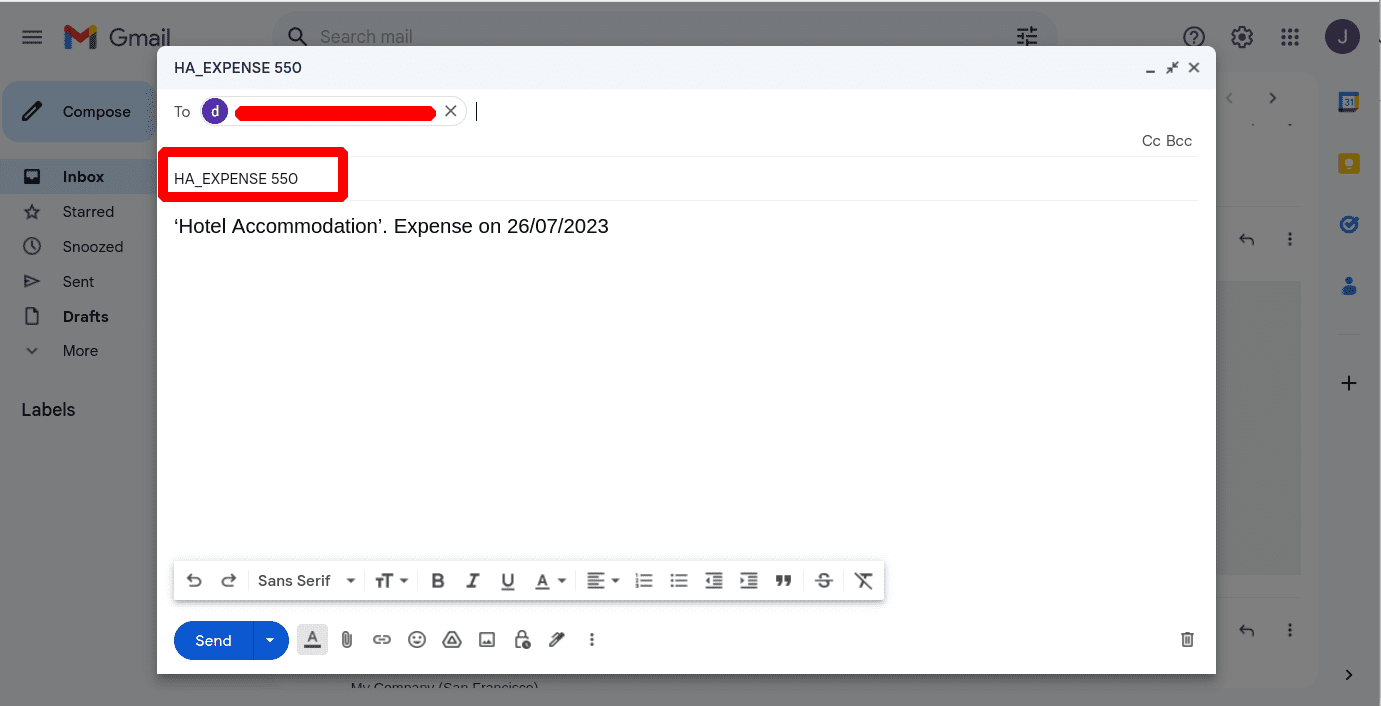
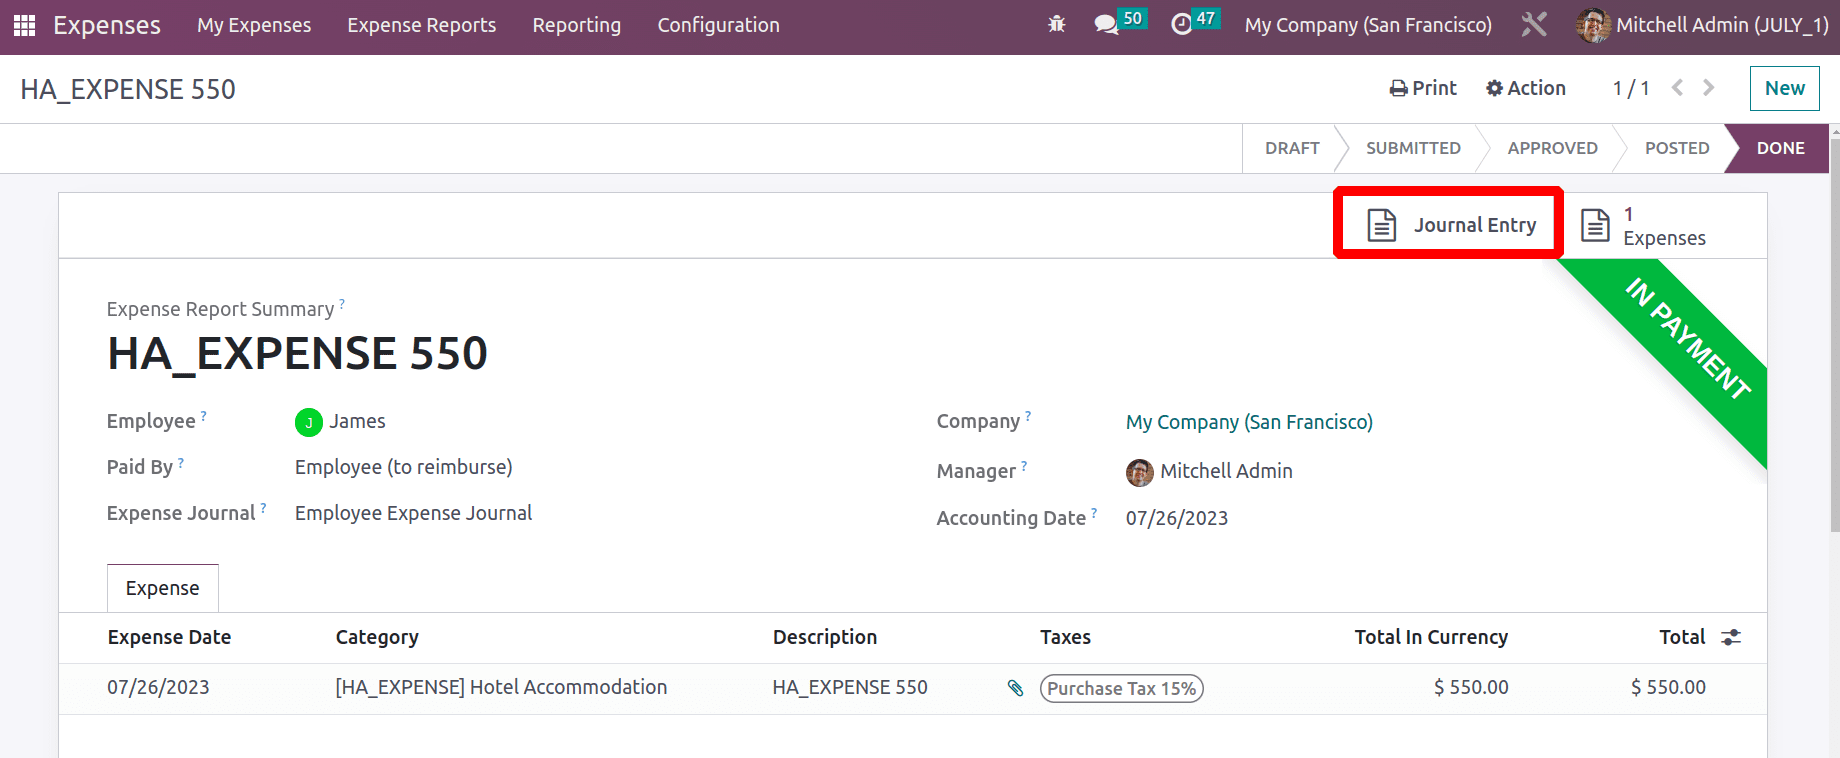
The employee James sends an email to the company. Here the Subject of the email should contain the internal reference of the expense product and cost of expense. So the subject added here is HA_EXPENSE 550. And the Body is ‘Hotel Accommodation’. Expense on 26/07/2023’. Send the email to the email id given inside the incoming email server. Send the email.
Then let's go to the expense module. An expense corresponding to the send email will be generated inside the expense module. The date, Description, and total such details are shown there. Which is the To Submit stage now. Let's open the expense, and for that, click on it.
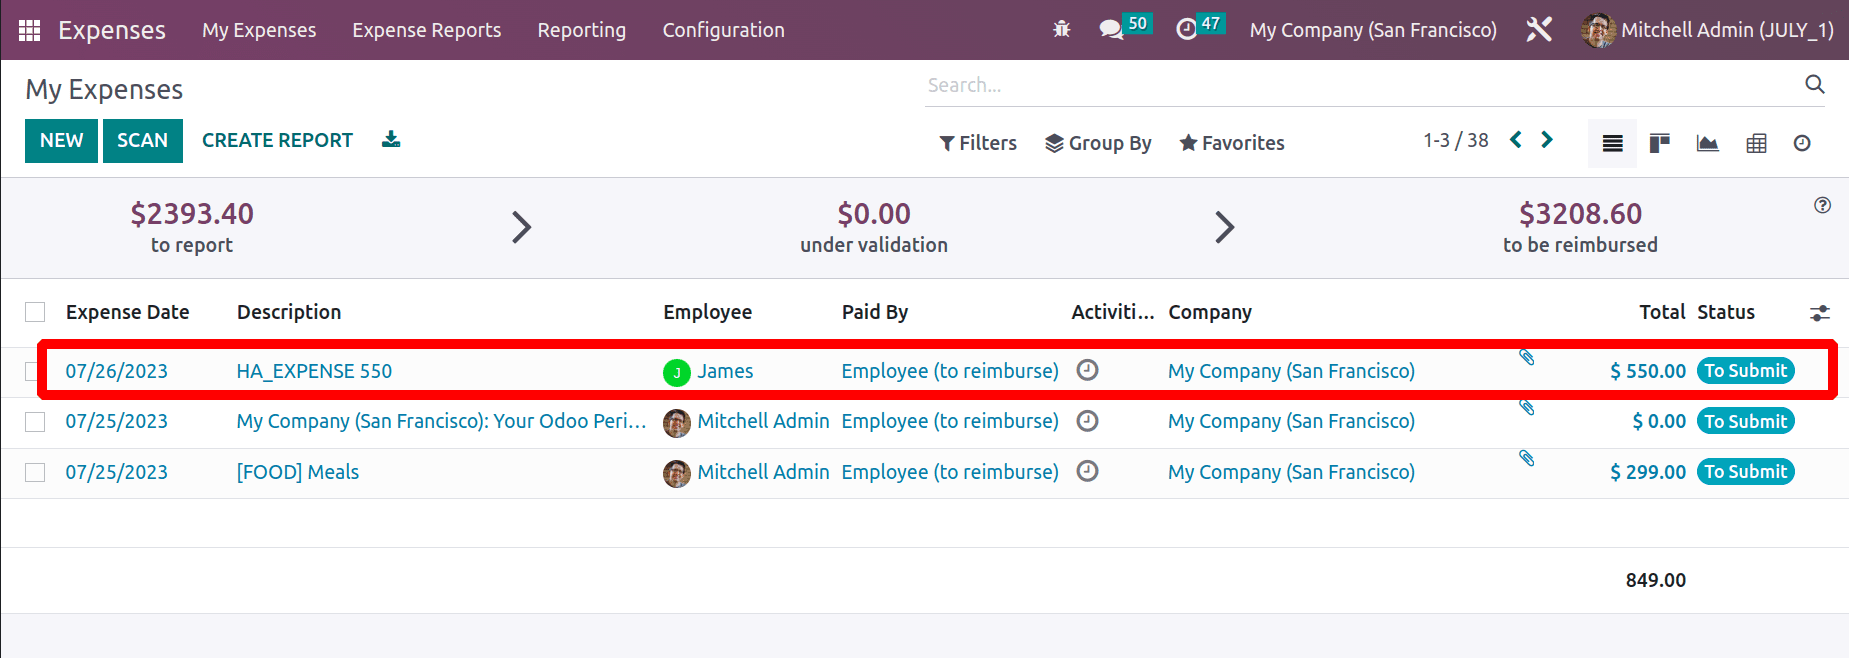
The subject added inside the email is added as a description here. The same expense product and amount are added here. The date on which the email is sent is updated as an expense date.

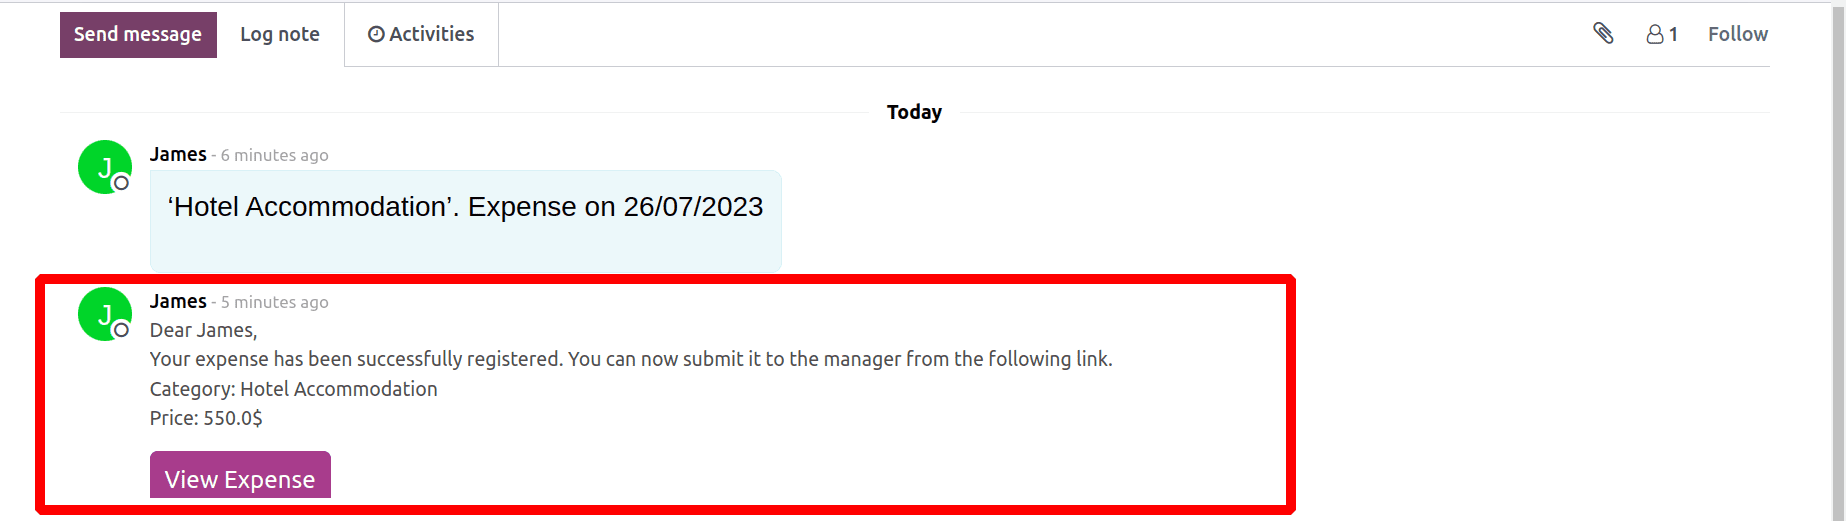
The email is displayed there, and the tree view demonstrates that the expense was generated from the email. A reply email is immediately sent to the employee after an expense is created inside the module. A button to view the expense is included in the response email.
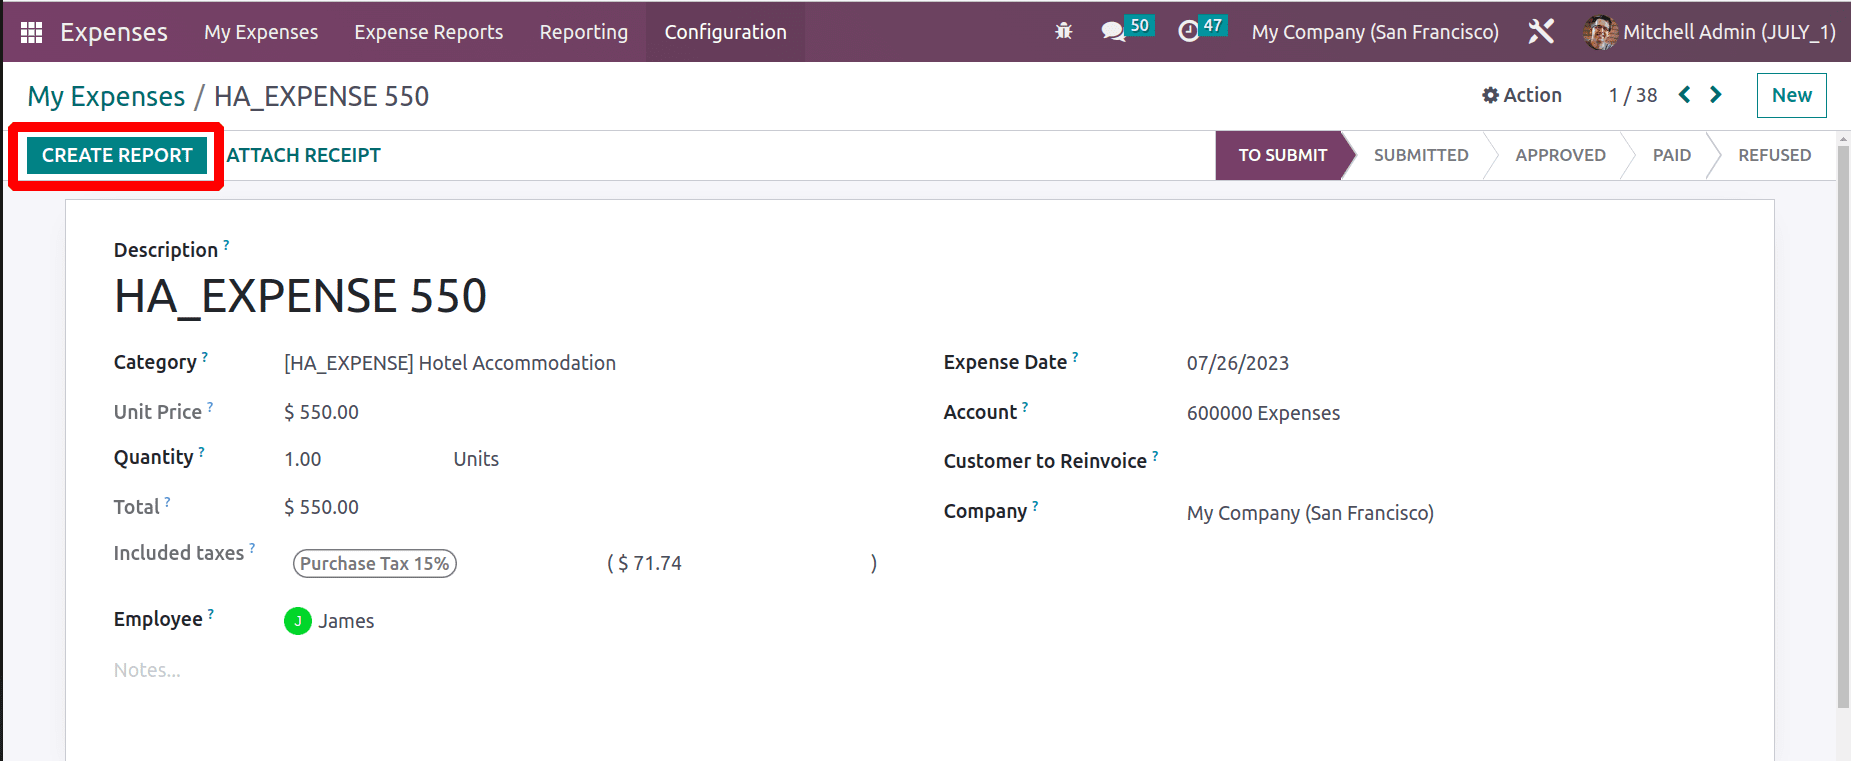
To create an Expense report, click the CREATE REPORT button. If the expense amount is spent to complete a task for any particular customer, the amount can be added to the invoice for that customer. For that, choose the customer in the Customer to Re Invoice section.
To know how the expense amount adds to a customer invoice, check the document: Expense Re-invoicing in Odoo 16
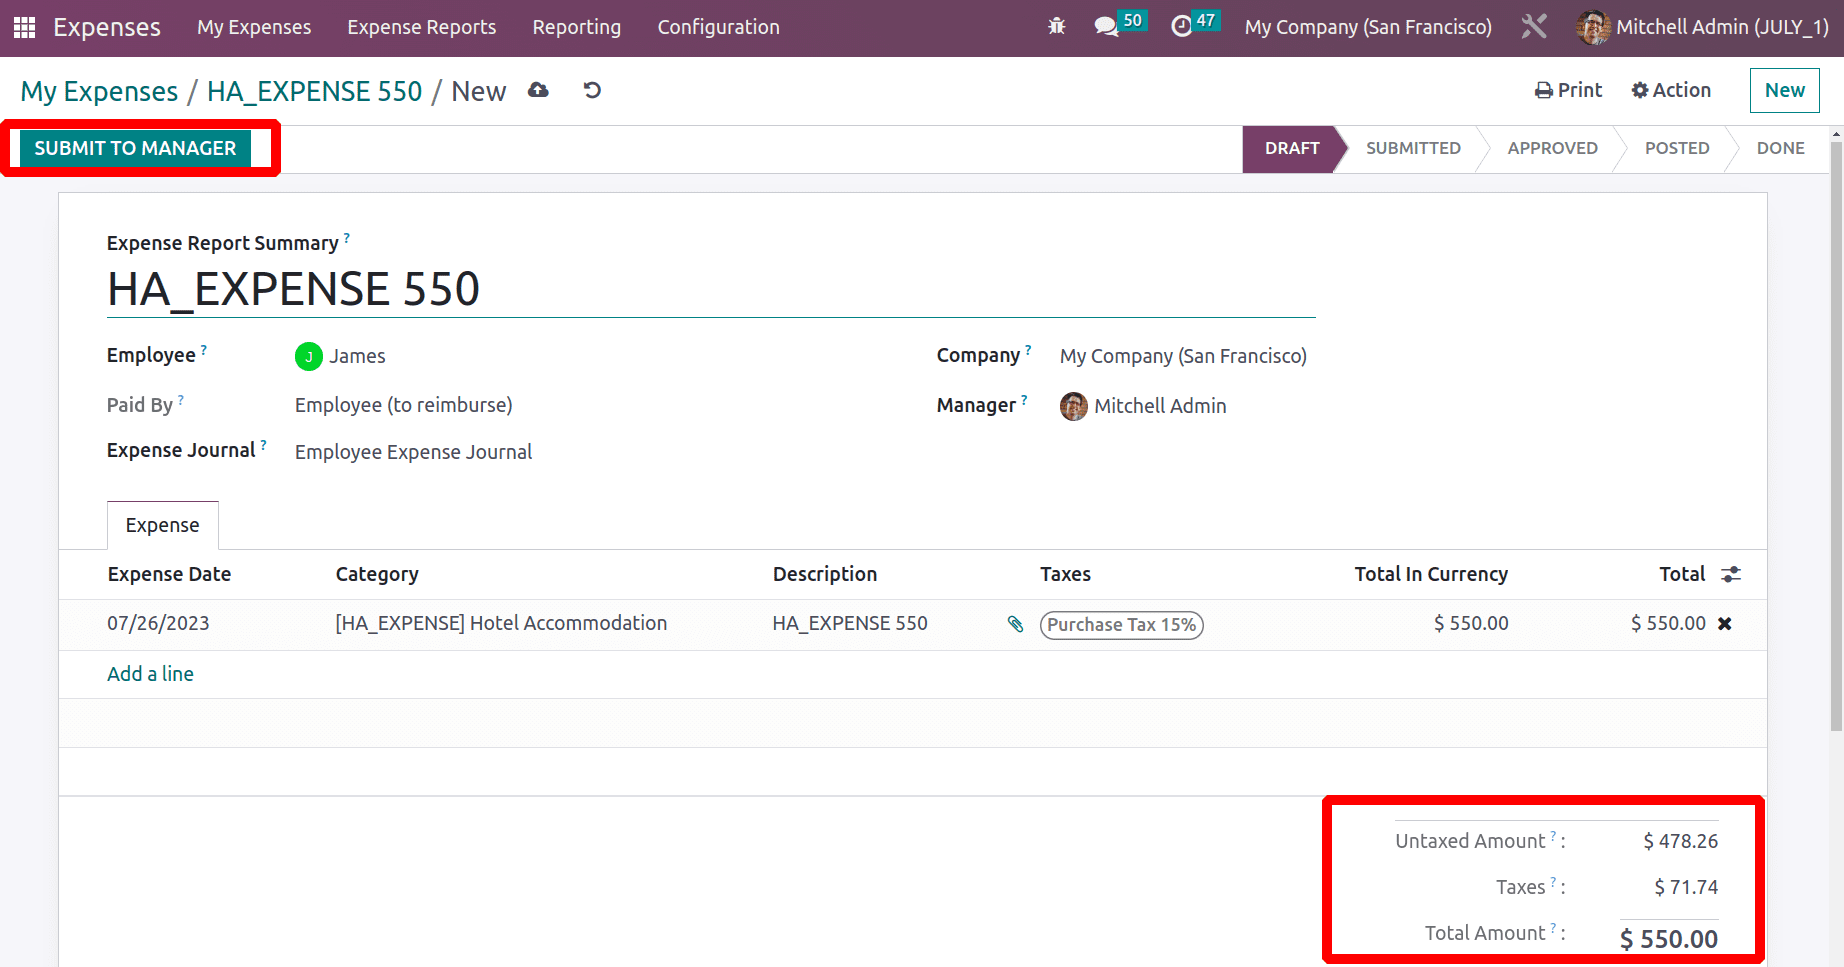
The report contains the newly created expense. The cost with tax is updated inside the report. So the report can be submitted to the manager.
After approving the expense report by the manager either the amount can be re invoice to the employee or pay the expense amount through his next payslip.
Check out the document:
Reimbursing Employee Expenses through Payslip in odoo 16 to know how the expense is reimbursed through payslip.
Click on the POST JOURNAL ENTRIES button.

Register the payment to the employee. Then the Expense goes to the Inpayment stage.
Last but not least, Odoo 16's Expense Creation from Incoming E-mail feature streamlines the process of expense reporting by enabling users to easily convert email correspondence into expense reports. If the employee doesn't have access to the expense module, this feature makes creating an expense easier.