In Odoo 17, one of its standout features is the capability to fashion personalized views, allowing users to engage with data in distinctive ways. This blog post delves into the creation of a custom view using a JavaScript class to render the form view. By following this tutorial, readers at the secondary level will gain valuable insights into customizing their Odoo 17 experience, unlocking the platform's full potential for tailored solutions and enhanced usability.
In this blog, we will explore how to customize form views in Odoo using the JavaScript class functionality. We will begin by adding a custom button to an XML view, which, when clicked, will trigger a JavaScript function. We will go through the JavaScript code step by step to comprehend how it works. By the end of this blog post, you will have a better understanding of how to use JavaScript to enhance Odoo's functionality.
The JavaScript class function operates by registering a class for a specific view. When we add this class to the form view, it injects the customized view into the form. To achieve this, we must create the custom view as a template, register it as a component, and then link it to the form controller. As a result, the form controller will execute the view when it detects the specified class while loading the views.
In the image, you'll notice the "Info" button we integrated into the form views using the JavaScript class "model_info".
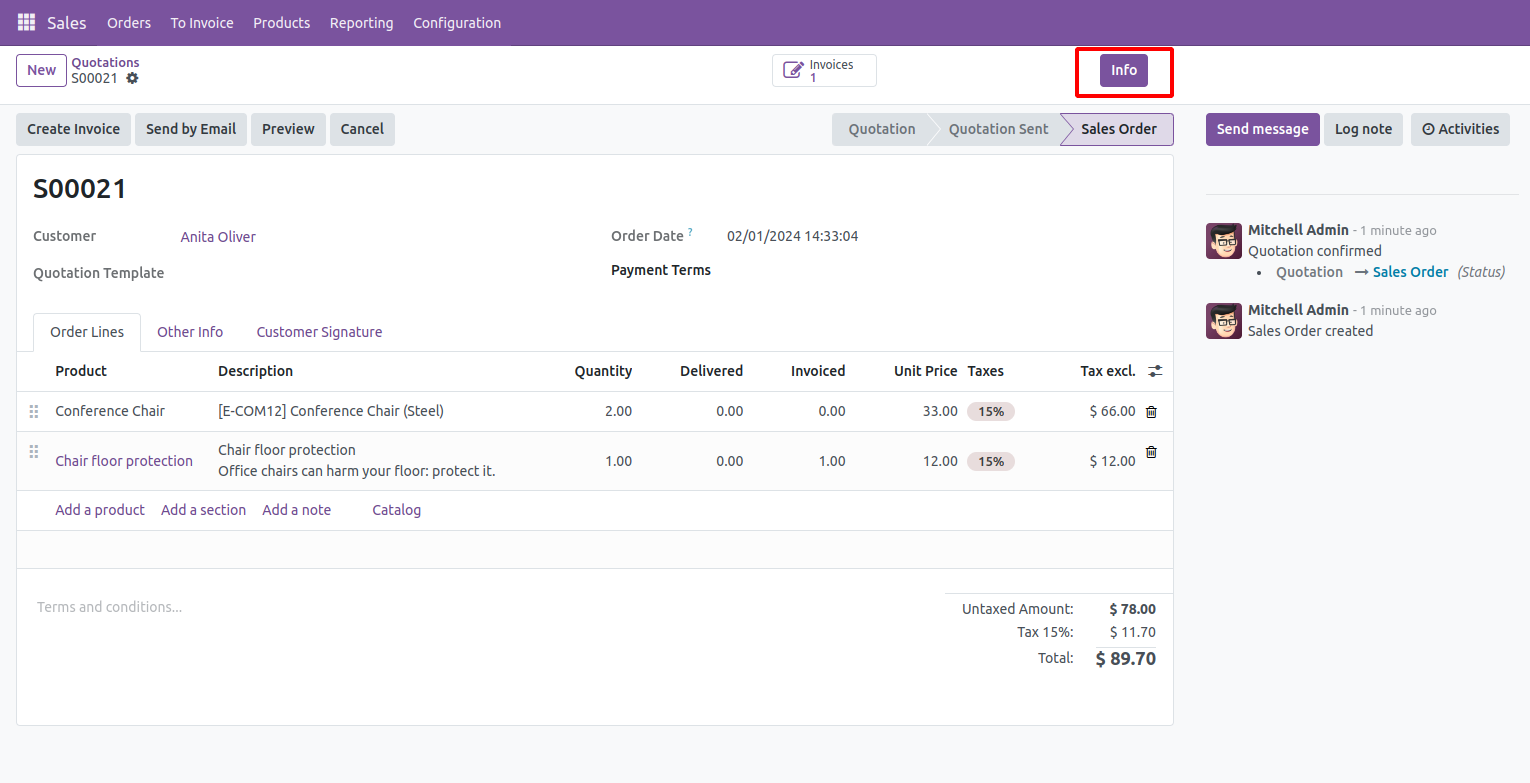
Here, we've inherited the Sale order form and added the attribute "js_class" with the value "model_info".
<?xml version="1.0"?>
<odoo>
   <record id="view_sale_order_form_inherit" model="ir.ui.view">
       <field name="name">sale.order</field>
       <field name="model">sale.order</field>
       <field name="inherit_id" ref="sale.view_order_form"/>
       <field name="arch" type="xml">
           <xpath expr="//form" position="attributes">
               <attribute name="js_class">model_info</attribute>
           </xpath>
       </field>
   </record>
</odoo>
Firstly, the Form controller verifies if the JS class is saved in the registry. For this purpose, we register the class with the custom view in the core registry.
Here, we inherit the base form view by adding the button as a template.
<templates>
   <t t-name="blog_js_class.modelInfoBtn" t-inherit="web.FormView">
       <xpath expr="//t[@t-set-slot='layout-actions']" position="inside">
           <button class="btn btn-primary" t-on-click="actionInfoForm">Info
           </button>
       </xpath>
   </t>
</templates>
Here, we have a button tag with a click function “actionInfoForm()” inside it. Now, we extend the template into components to render the view along with the function called from the button click.
/** @odoo-module **/
import { FormController } from "@web/views/form/form_controller";
import { formView } from '@web/views/form/form_view';
import { registry } from "@web/core/registry";
import { jsClassDialog } from "@blog_js_class/js/js_blog_dialog";
class jsClassModelInfo extends FormController {
   actionInfoForm(){
       this.env.services.dialog.add(jsClassDialog, {
           resModel: this.props.resModel,
           resDesc: "This is a demo pop-up; feel free to customize the functionality to meet your requirements."
       });
   }
}
jsClassModelInfo.template = "blog_js_class.modelInfoBtn";
export const modelInfoView = {
   ...formView,
   Controller: jsClassModelInfo,
};
registry.category("views").add("model_info", modelInfoView);
In this block of code, we import the required classes for registering the template. We create a new class by extending the formController and save the template into it. Then, we export it to the controller using a constant. Finally, we register it in the core registry under the view category with the js_class "model_info".
Now that the template is registered, in this extension class, you'll find the function actionInfoForm(), which pops up a dialog box. In Odoo 17, to pop up the dialog box, we need to create a new component. Here, you can see the dialog box template and its values registered in the Owl component class.
/** @odoo-module **/
import { Component } from "@odoo/owl";
import { Dialog } from "@web/core/dialog/dialog";
import { _t } from "@web/core/l10n/translation";
export class jsClassDialog extends Component{
    clickClose() {
        this.props.close()
    }
}
jsClassDialog.template = "blog_js_class.infoDialog";
jsClassDialog.components = { Dialog };
jsClassDialog.title = _t("Model Info"),
jsClassDialog.props = {
    confirmLabel: { type: String, optional: true },
    confirmClass: { type: String, optional: true },
    resModel: { type: String, optional: true },
    tools: Object,
    close: { type: Function, optional: true },
    };
jsClassDialog.defaultProps = {
    confirmLabel: _t("Close"),
    confirmClass: "btn-primary",
};
<templates>
   <t t-name="blog_js_class.infoDialog">
       <Dialog size="'md'" title="'Model Info'" modalRef="modalRef">
           <div class="">
               <h6>Model:</h6>
               <span>
                   <t t-esc="props.resModel"/>
               </span><br/>
               <h6>Description:</h6>
               <span>
                   <t t-esc="props.resDesc"/>
               </span>
           </div>
           <t t-set-slot="footer">
               <button class="btn" t-att-class="props.confirmClass"
                       t-on-click="clickClose" t-esc="props.confirmLabel"/>
           </t>
       </Dialog>
   </t>
</templates>
By importing the class "jsClassDialog" and adding it to the environment dialog service, we can pop up the dialog box.
import { jsClassDialog } from "@blog_js_class/js/js_blog_dialog";actionInfoForm(){
this.env.services.dialog.add(jsClassDialog, {
resModel: this.props.resModel,
resDesc: "This is a demo pop-up; feel free to customize the functionality to meet your requirements."
});
}Now, let's see the dialog box when we click the "Info" button.

In conclusion, the JS Class feature in Odoo is an invaluable resource for developers, providing the flexibility to customize workflows as required. It unlocks numerous possibilities for integrating JavaScript functions, thereby enhancing the Odoo form view with JS class functionalities and maximizing its potential. Ultimately, this leads to a more adaptable and efficient system for users.