For businesses that provide services based on the time spent on tasks, having a reliable and clear billing method is very important. Instead of estimating costs or manually calculating hours, it is always better to have a system that directly links work done to invoicing. With Odoo 19, this process becomes much easier by allowing you to track time through timesheets and generate invoices based on the actual hours worked. This helps companies generate more accurate invoices while giving customers a clear understanding of the work completed and improving overall project cost management.
To begin with, the Timesheets feature must be enabled so that time tracking can be used within projects. You can do this by navigating to Project > Configuration > Settings, where under the Time Management section, you will find the Timesheets option. Once this option is enabled and you click on Save, the system allows users to log the time they spend on tasks.
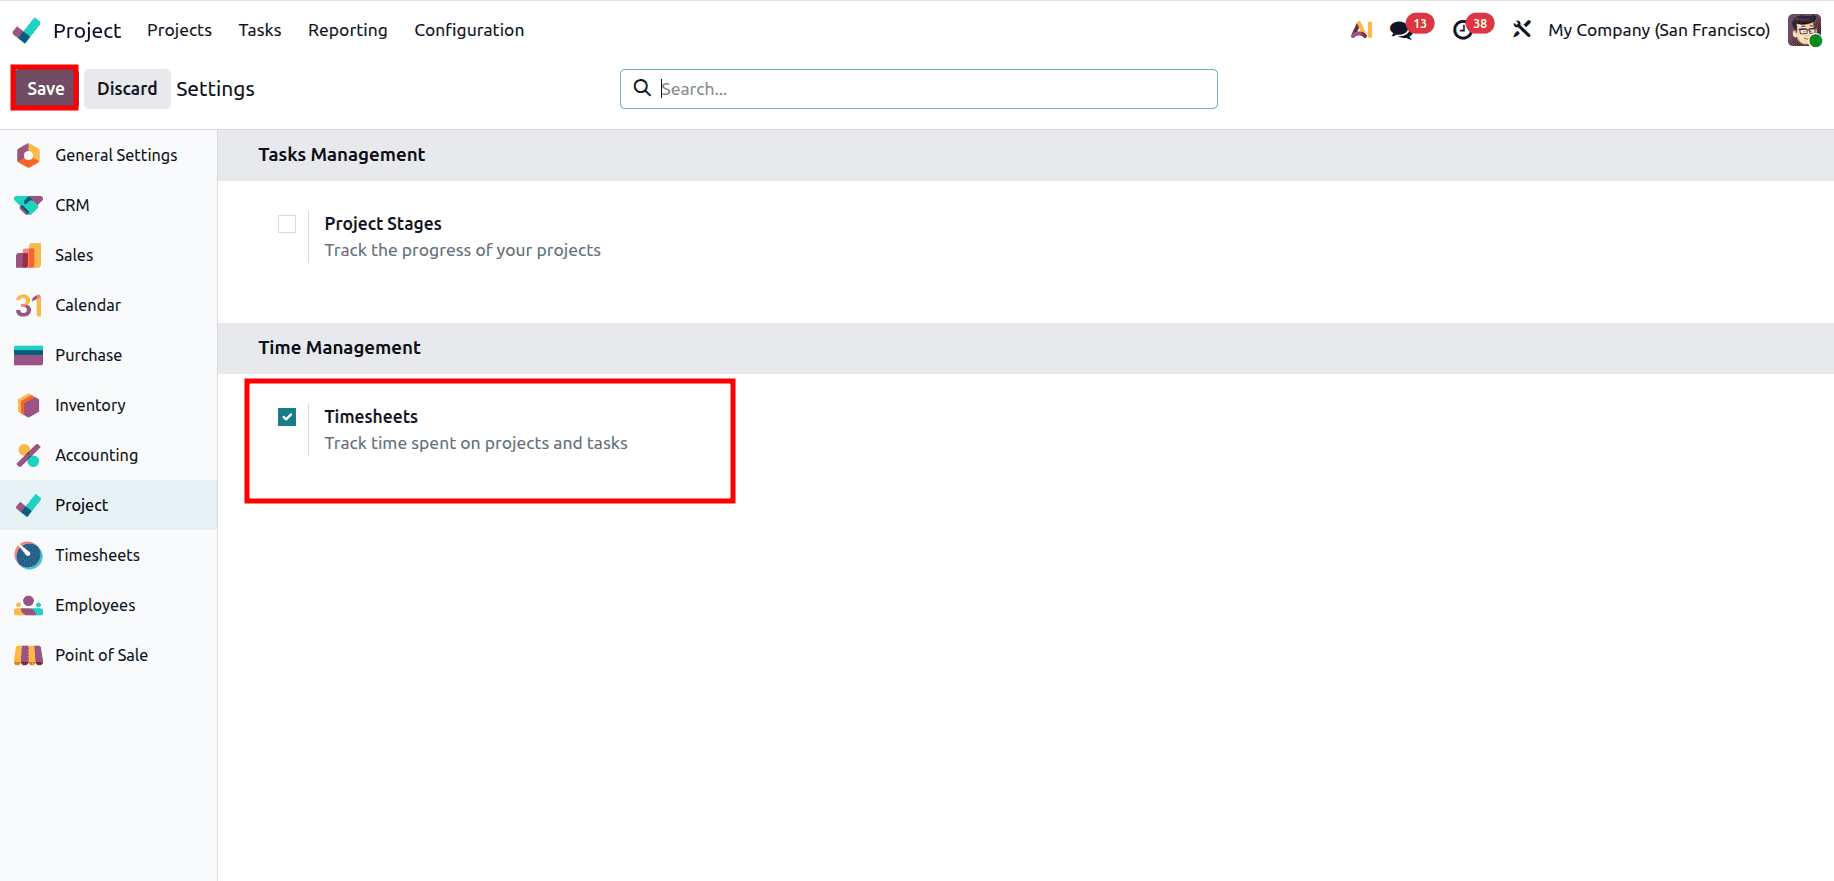
This step is important because all future billing in this method depends on the time entries recorded by employees. Without enabling this feature, it will not be possible to track hours or generate invoices based on them.
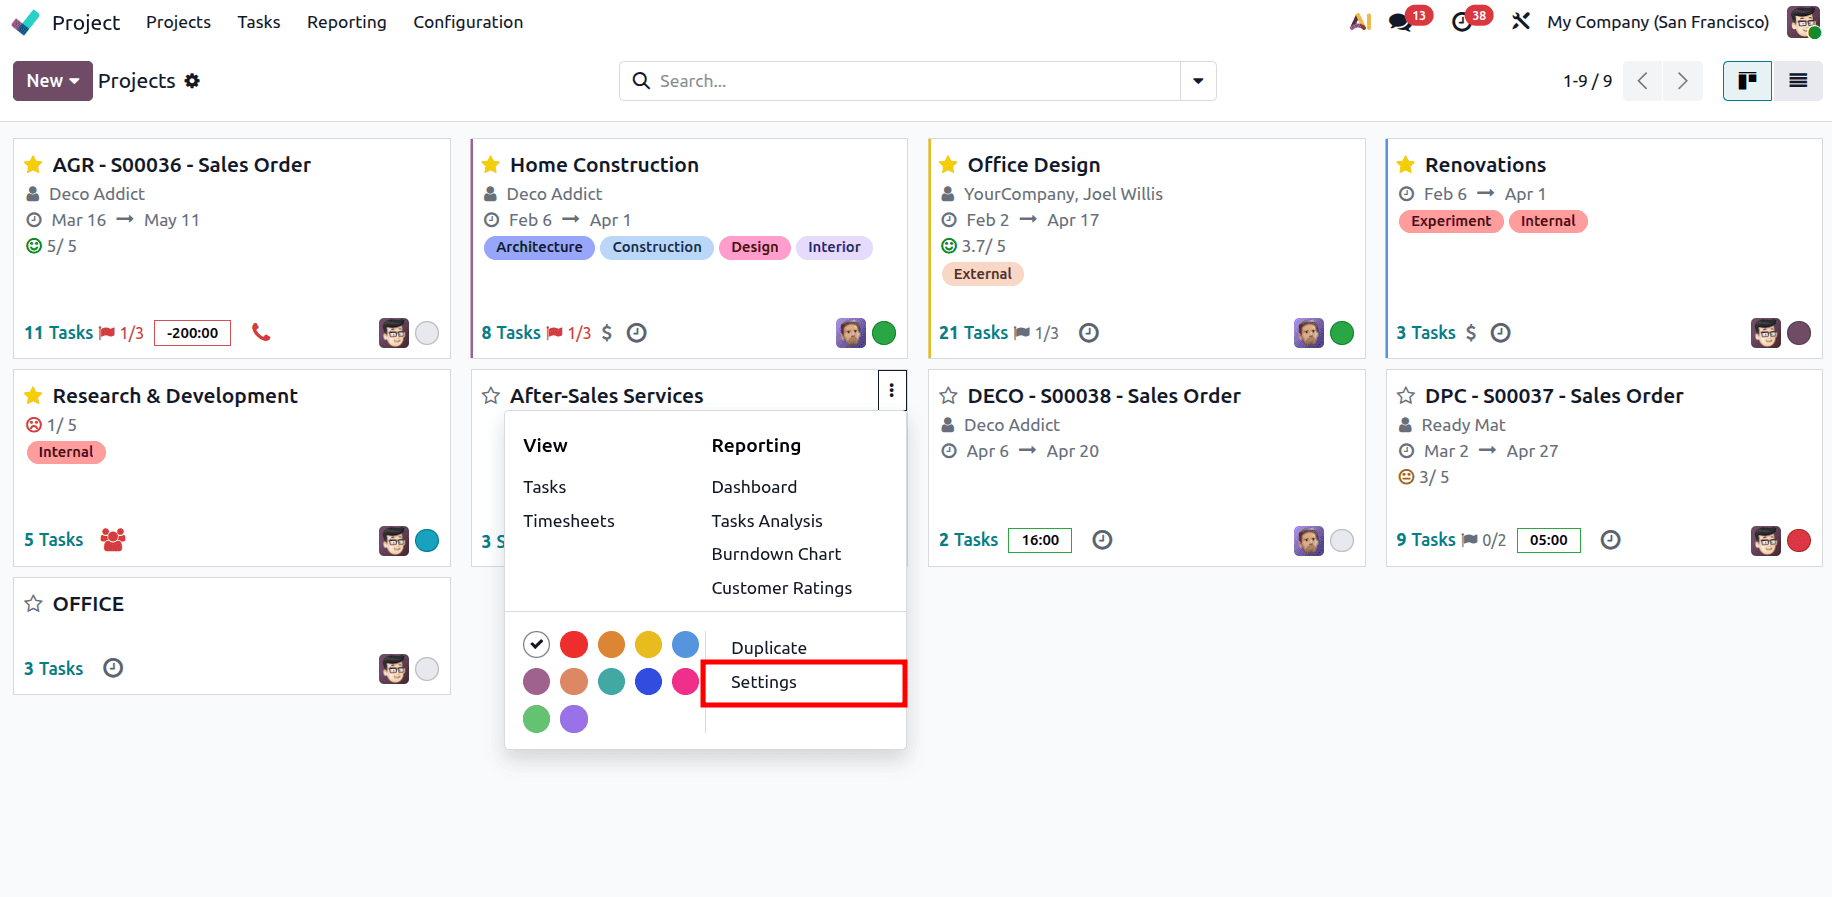
After enabling timesheets, the next step is to configure the project properly so that it supports billing. Open the required project from the dashboard, click on the three-dot icon, and go to Settings.
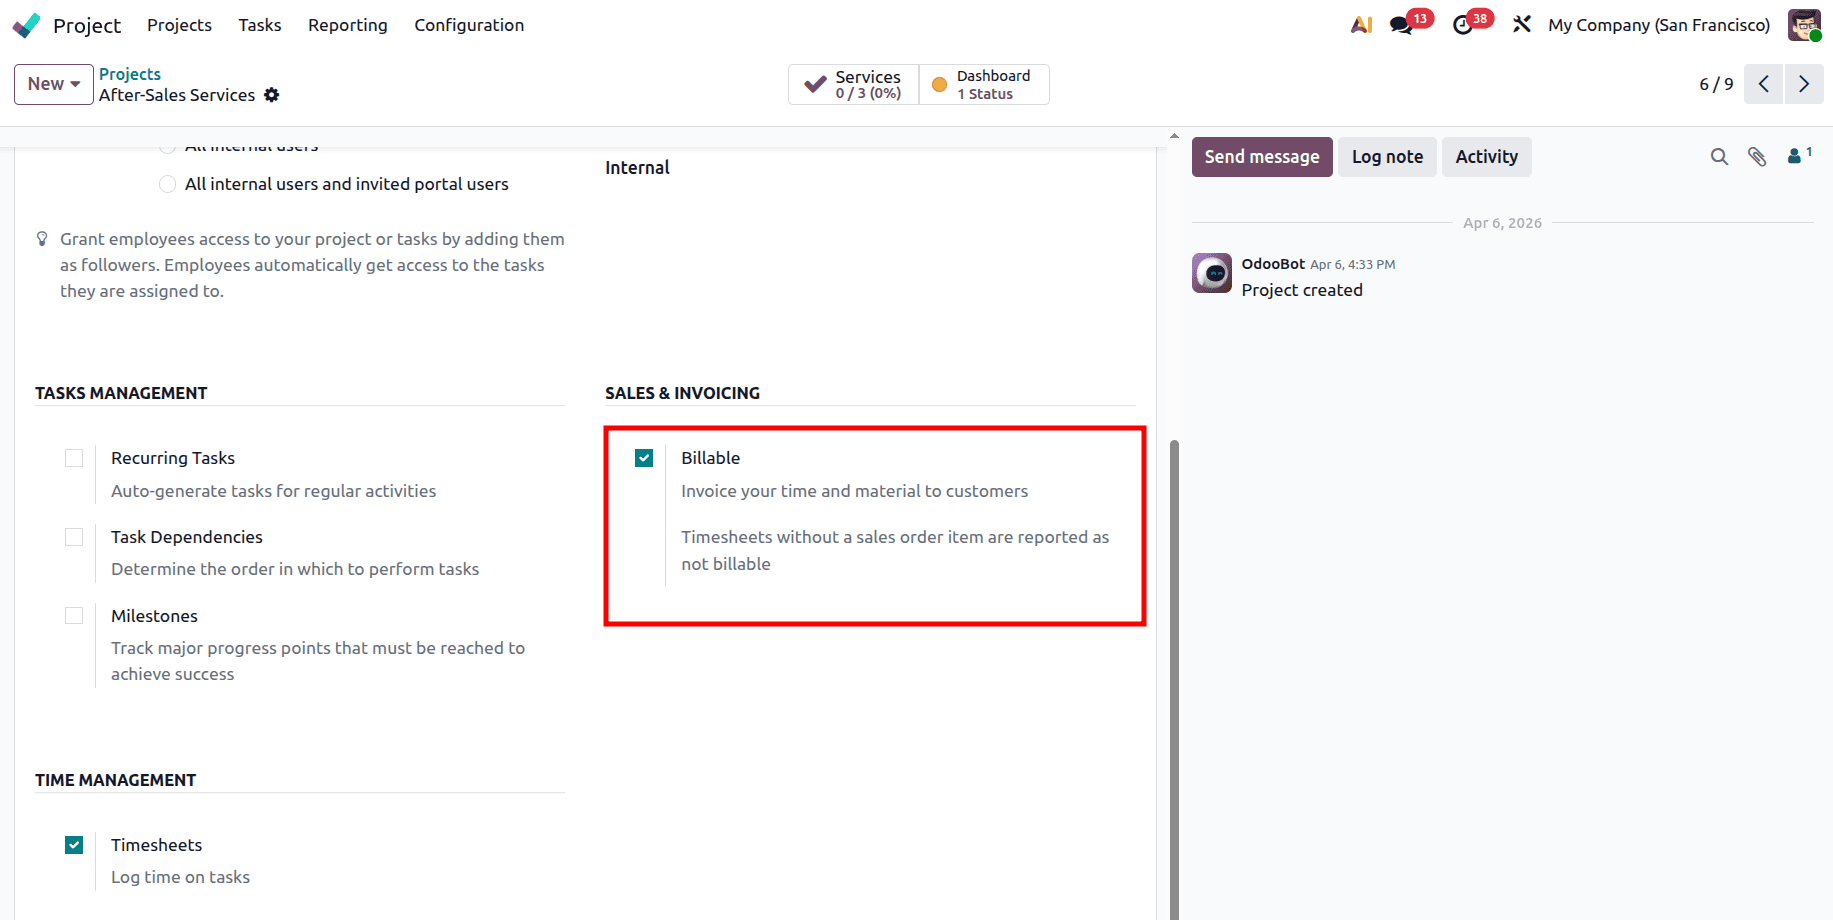
Then navigate to the Settings tab of the project, and there is a Billable option under the Sales & Invoicing section. Make sure this option is enabled, as it allows the system to generate invoices based on the time logged in that project.
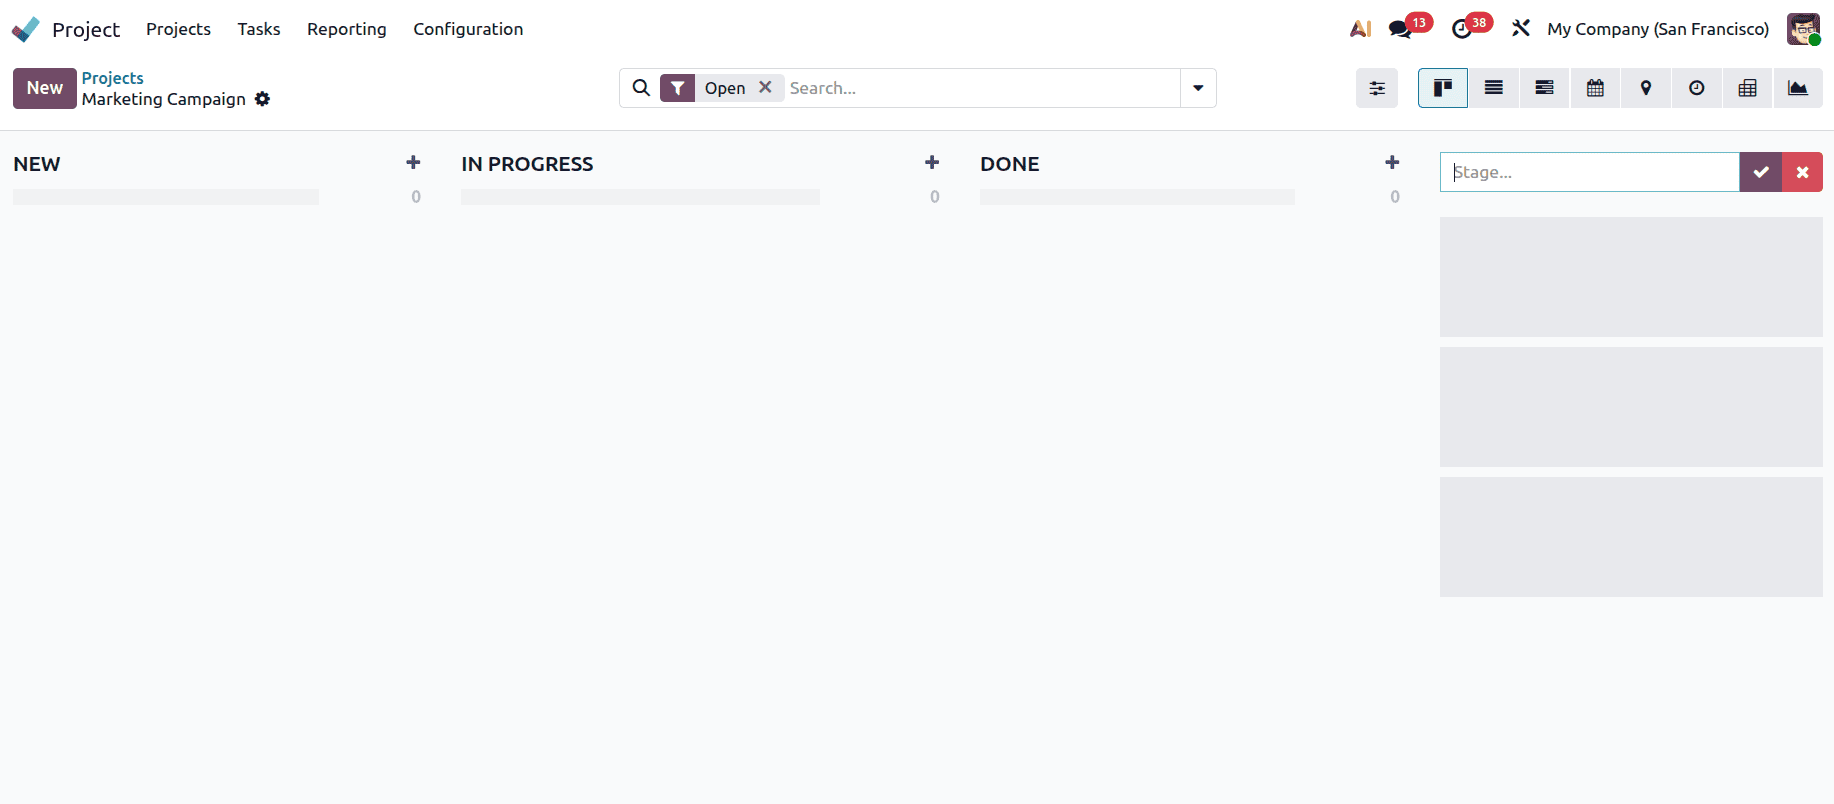
To create a new project, click on New, provide the project name, enable the Billable option, and then click on Create project. You can also create a new project using a template, which helps you quickly apply predefined stages and configurations without setting everything up from scratch.
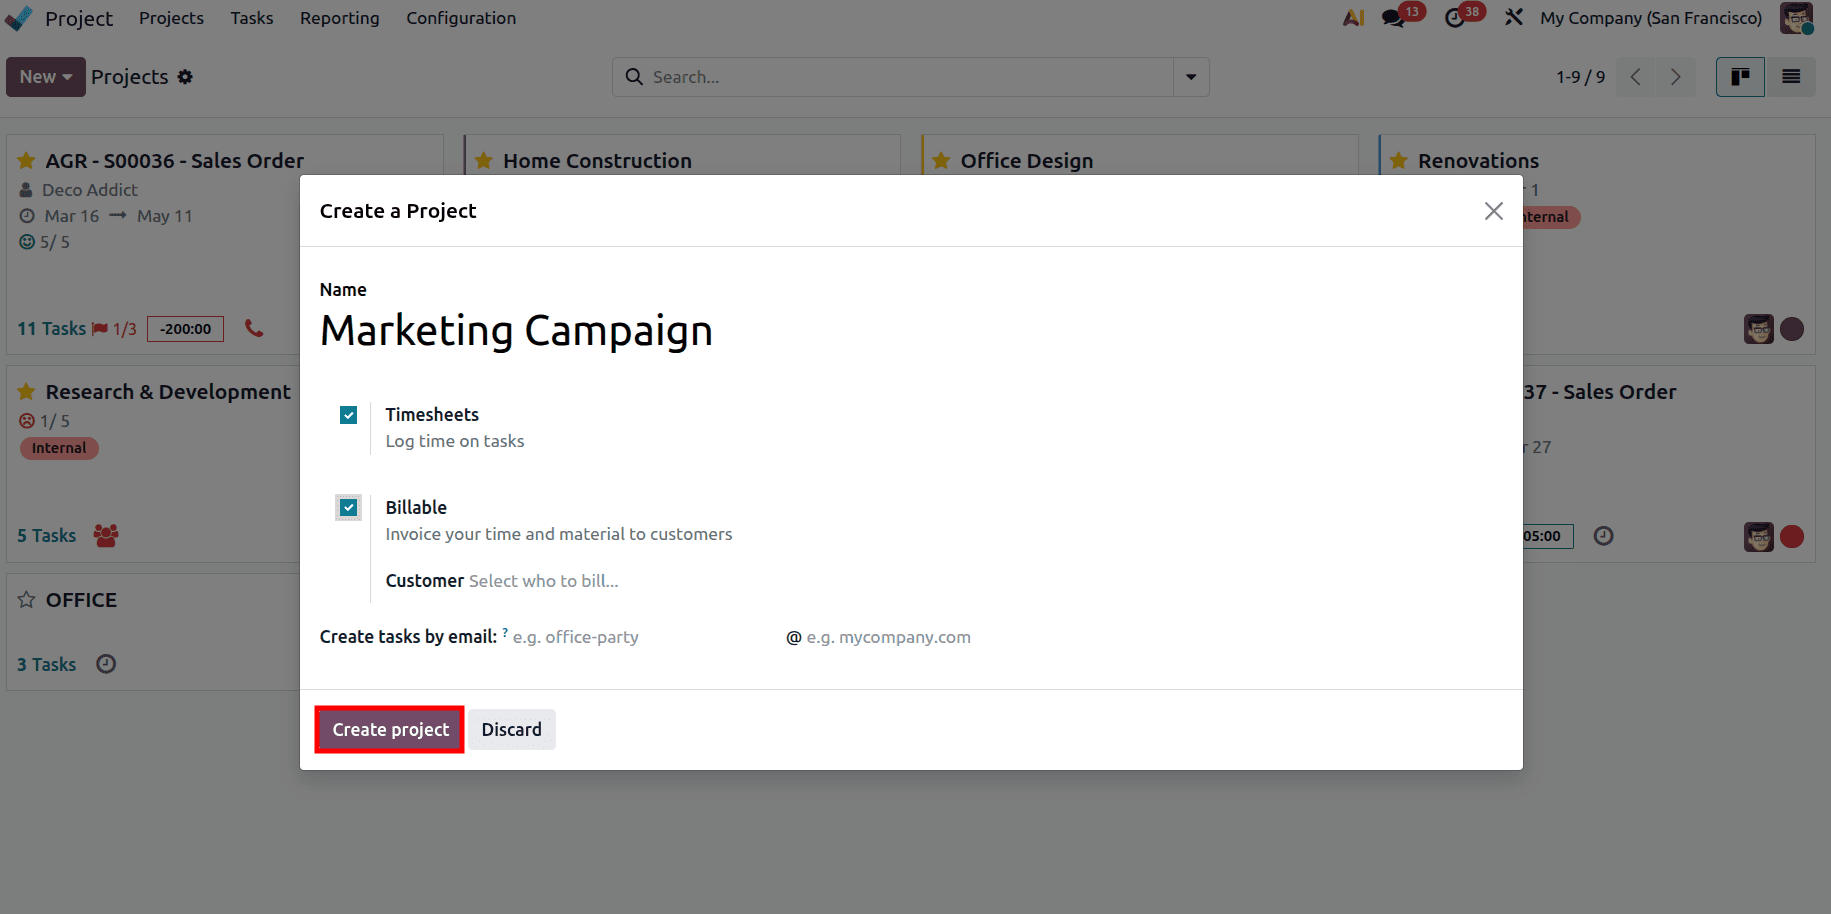
At this stage, you can also define different stages for the project based on how your workflow is structured, which helps in organizing tasks and tracking progress more effectively.
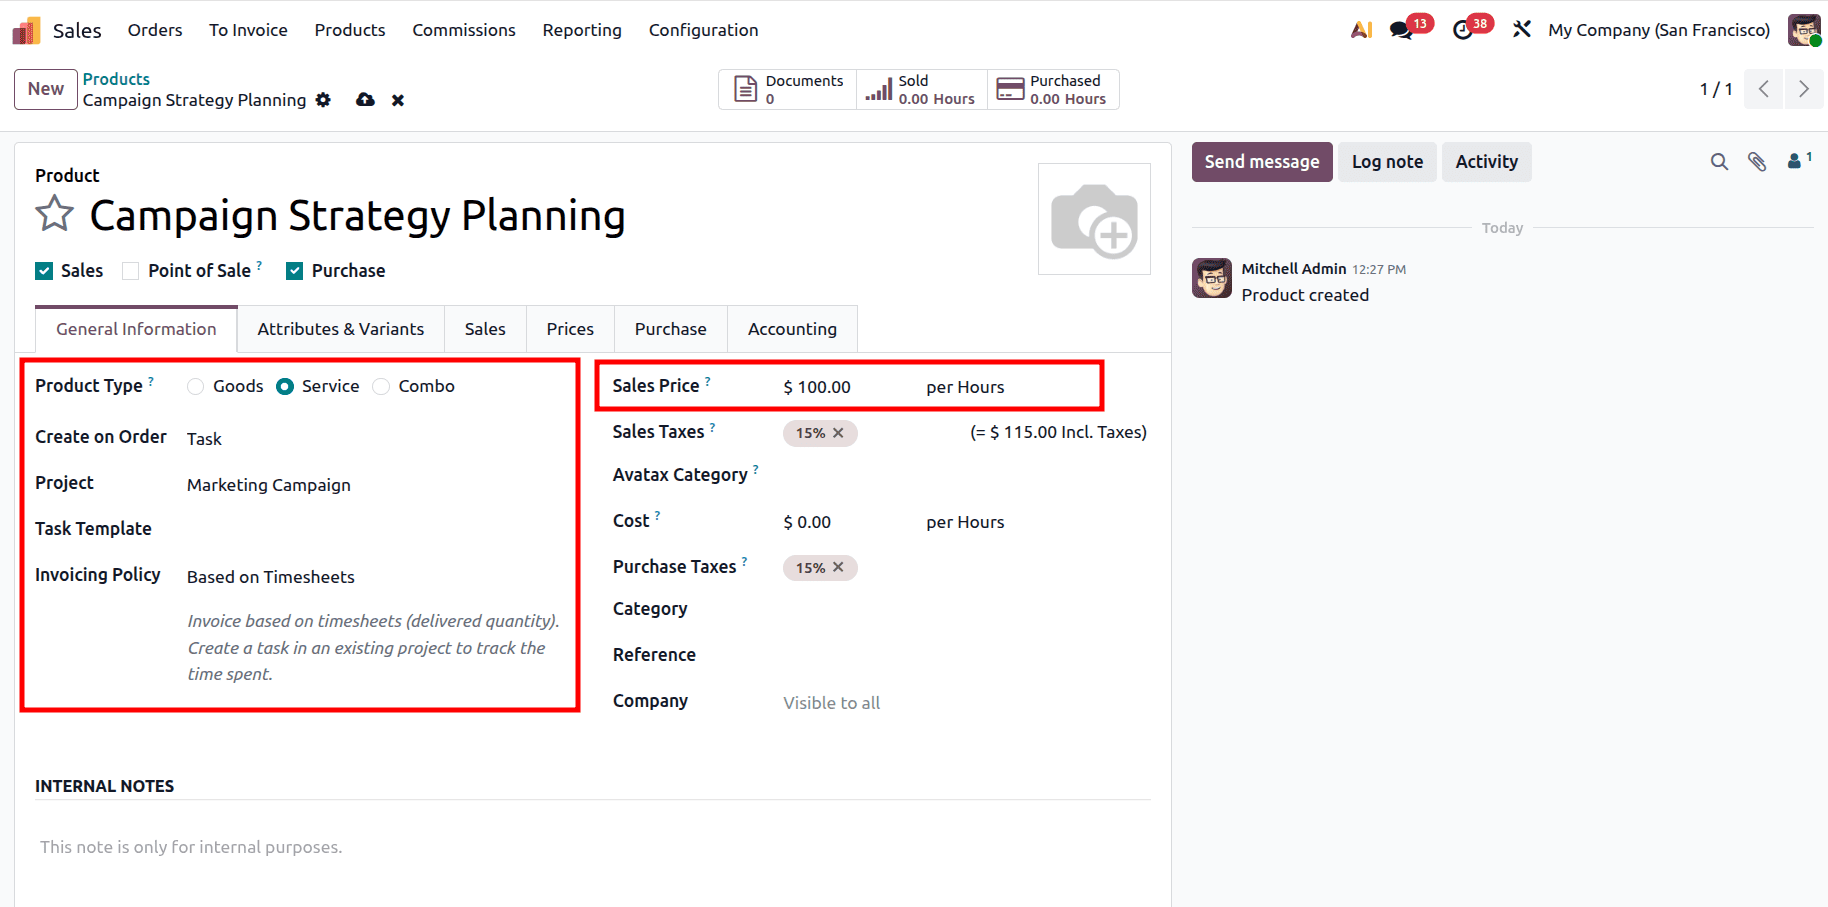
After configuring the project, the next step is to set up the service that will be used for billing. Navigate to the Sales module and create a new service product. In the product configuration, set Create On Order as Task, and choose the previously created project in the Project field. With this setup, confirming a sales order containing this product will automatically generate a task within the selected project.
Next, set the Invoicing Policy to Based on Timesheets, which tells Odoo to generate invoices only for the time that has been recorded. You should also define the Sales Price, usually as an hourly rate, which will be used to calculate the final invoice amount.
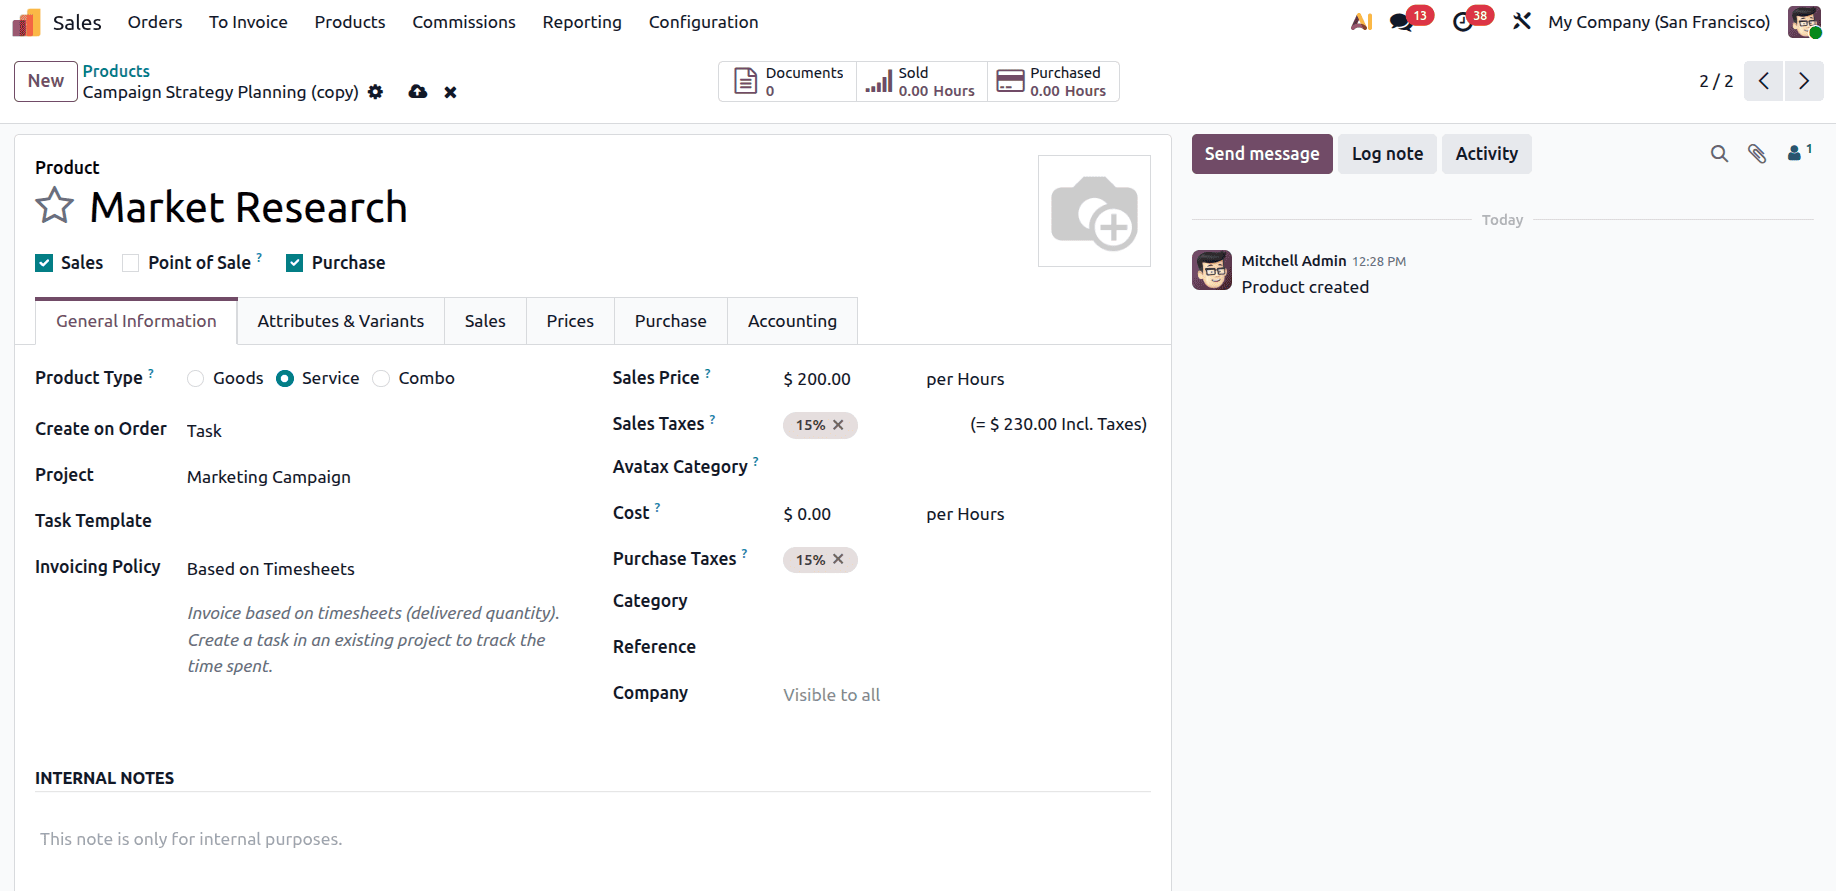
Create one more service product that the business offers.
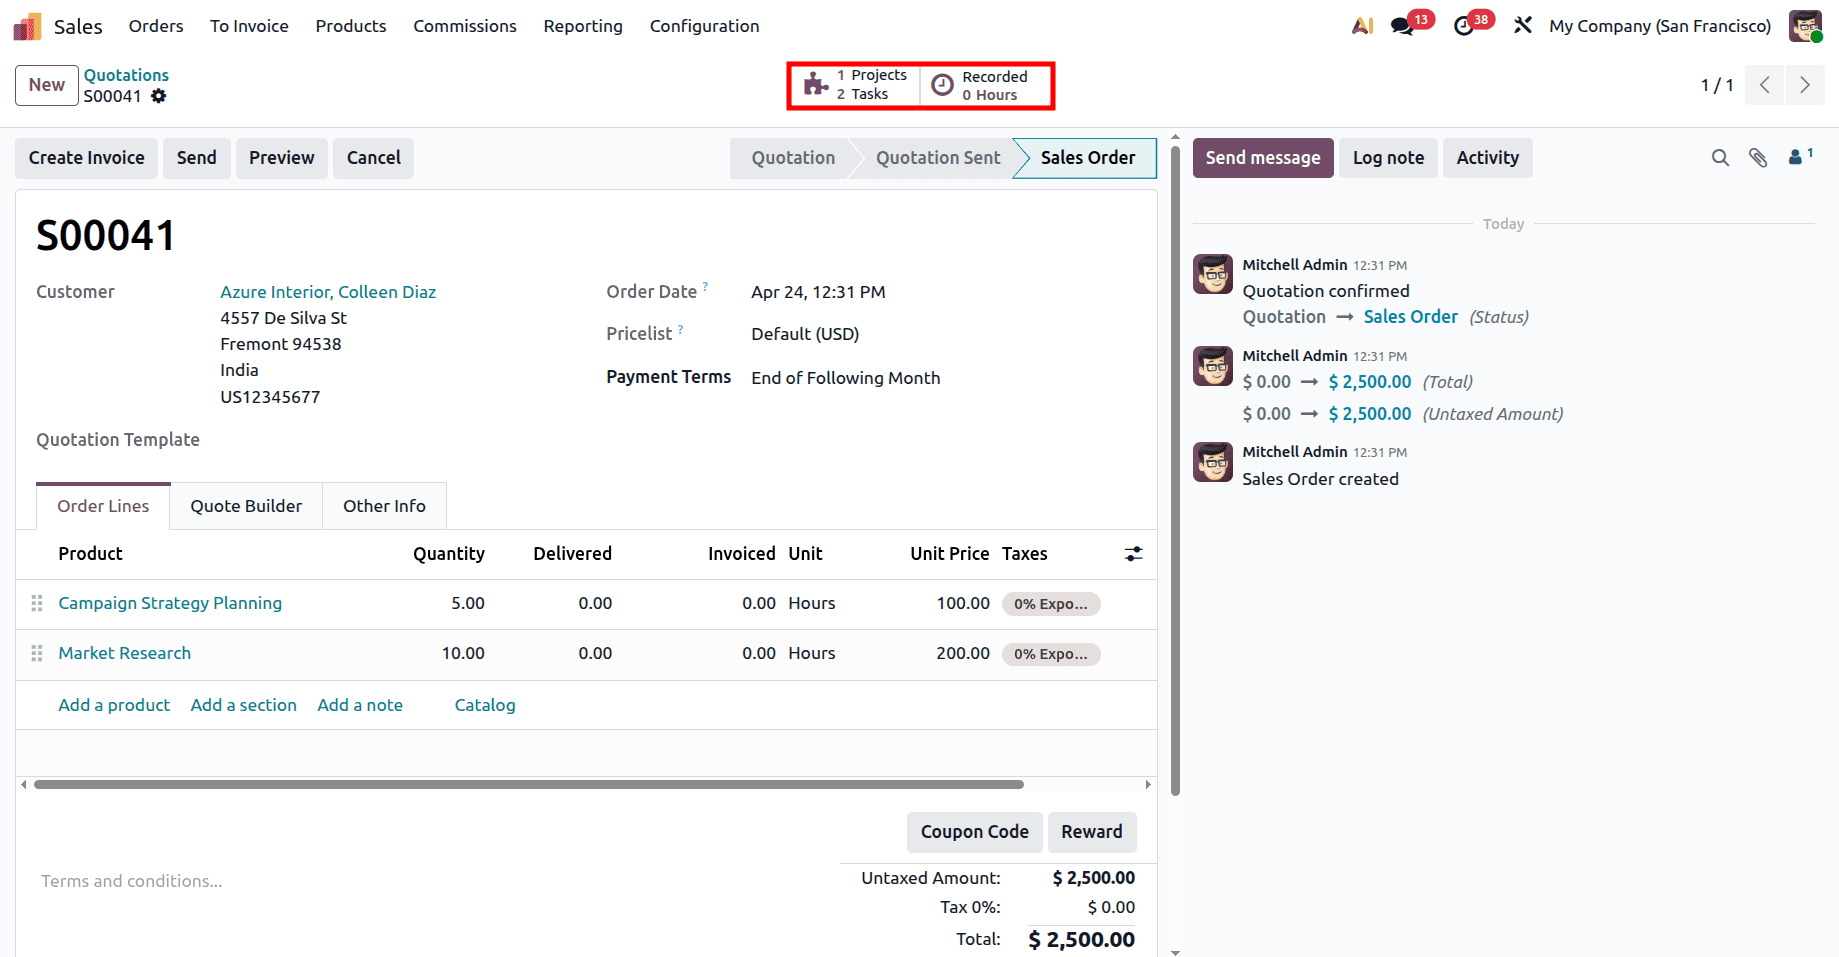
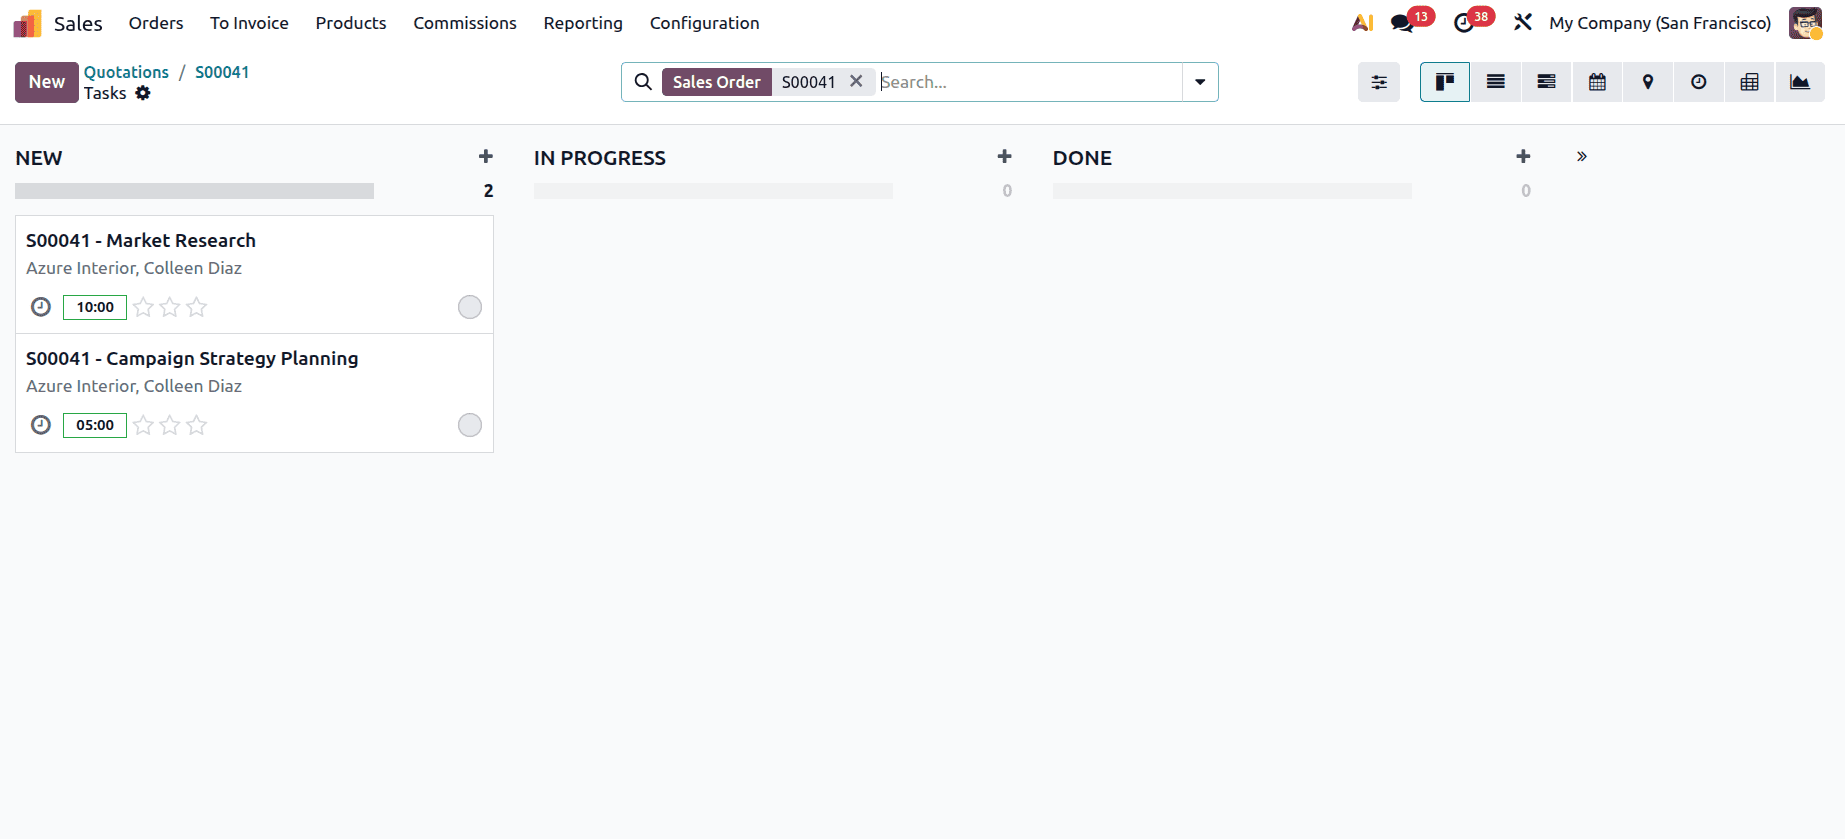
After setting up the service products, you can move on to creating a sales order. Go to Orders > Quotations and click on New. Then choose the customer and enter the necessary information in the quotation. Add the service products that you created and set the quantity to the number of hours planned for each service. These quantities represent the Allocated Time for the tasks that will be created. Once the quotation is confirmed, Odoo automatically generates tasks under the selected project, and a 1 Project and 2 Tasks smart tab will appear.
The next step is to log the working hours for each task. Open the tasks through the Tasks smart tab and choose the task for which the time needs to be recorded.
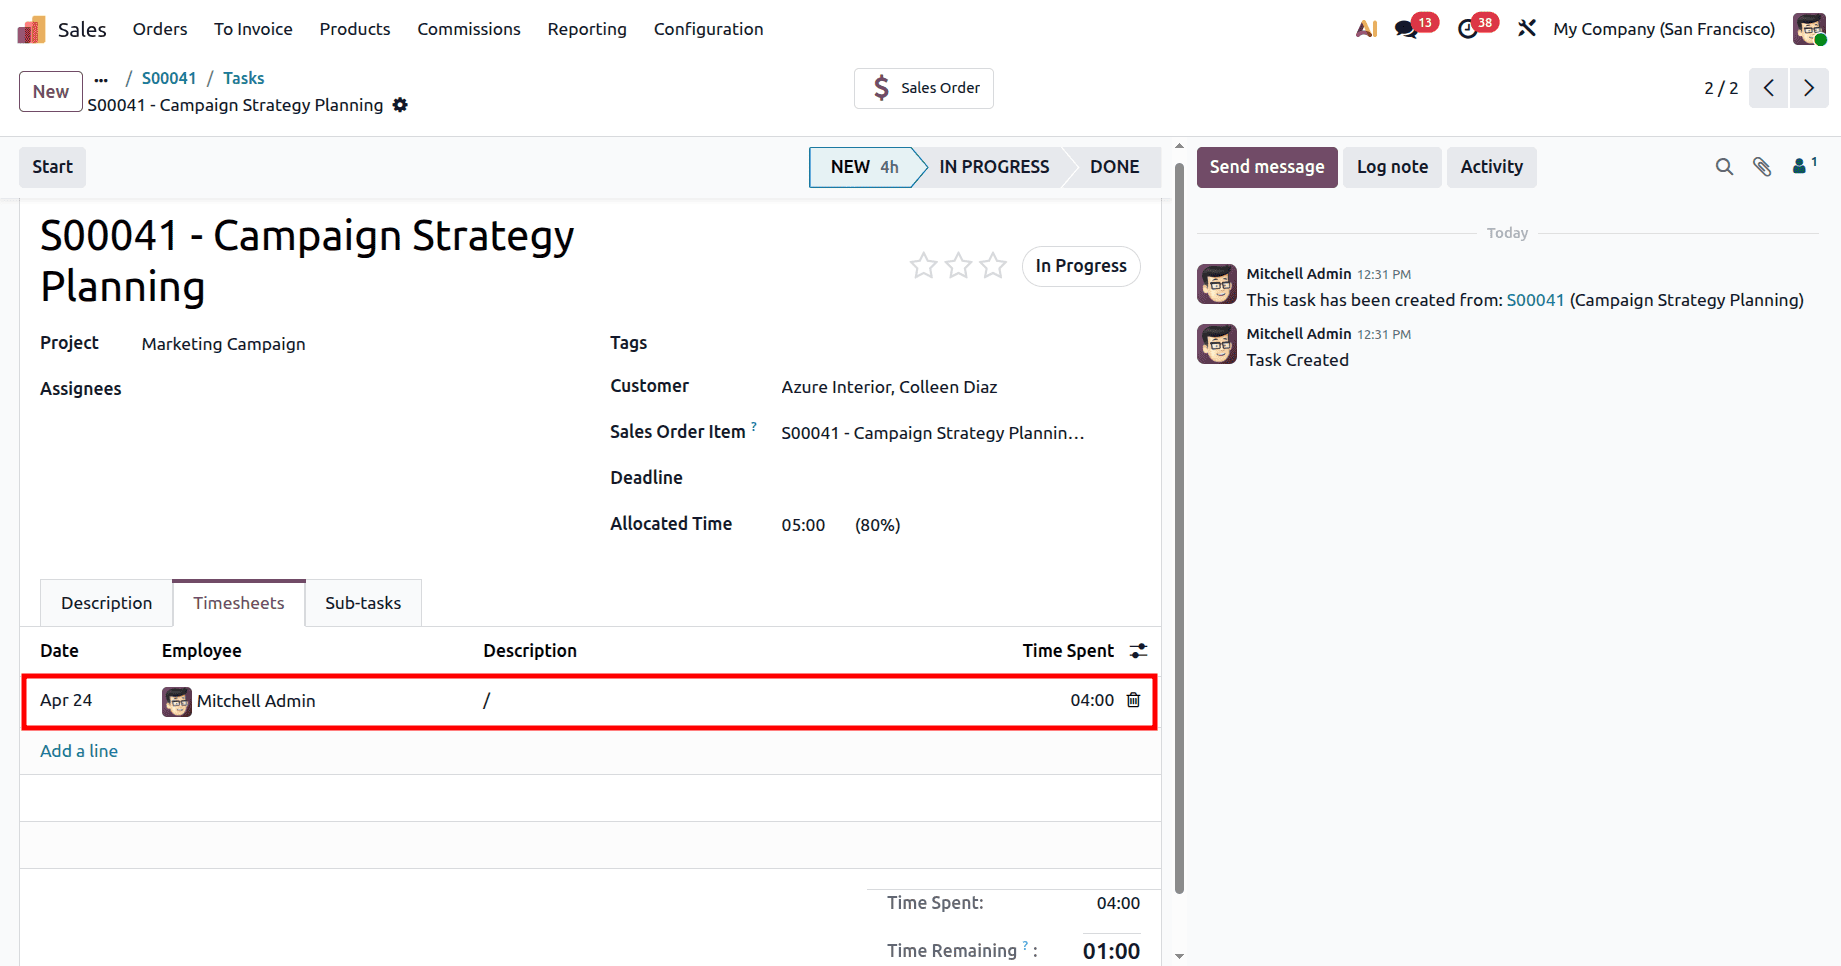
Inside the task, you will notice that the Customer and Sale Order Item fields are already filled in based on the sales order, which helps maintain proper linkage. You can assign team members using the Assignees field. After that, open the Timesheets tab and record the hours worked on the selected task.
As you add entries, the system automatically updates the Time Spent and adjusts the Time Remaining based on the allocated hours. This gives you a clear view of how much work has been completed and how much is still left, making it easier to manage project timelines.
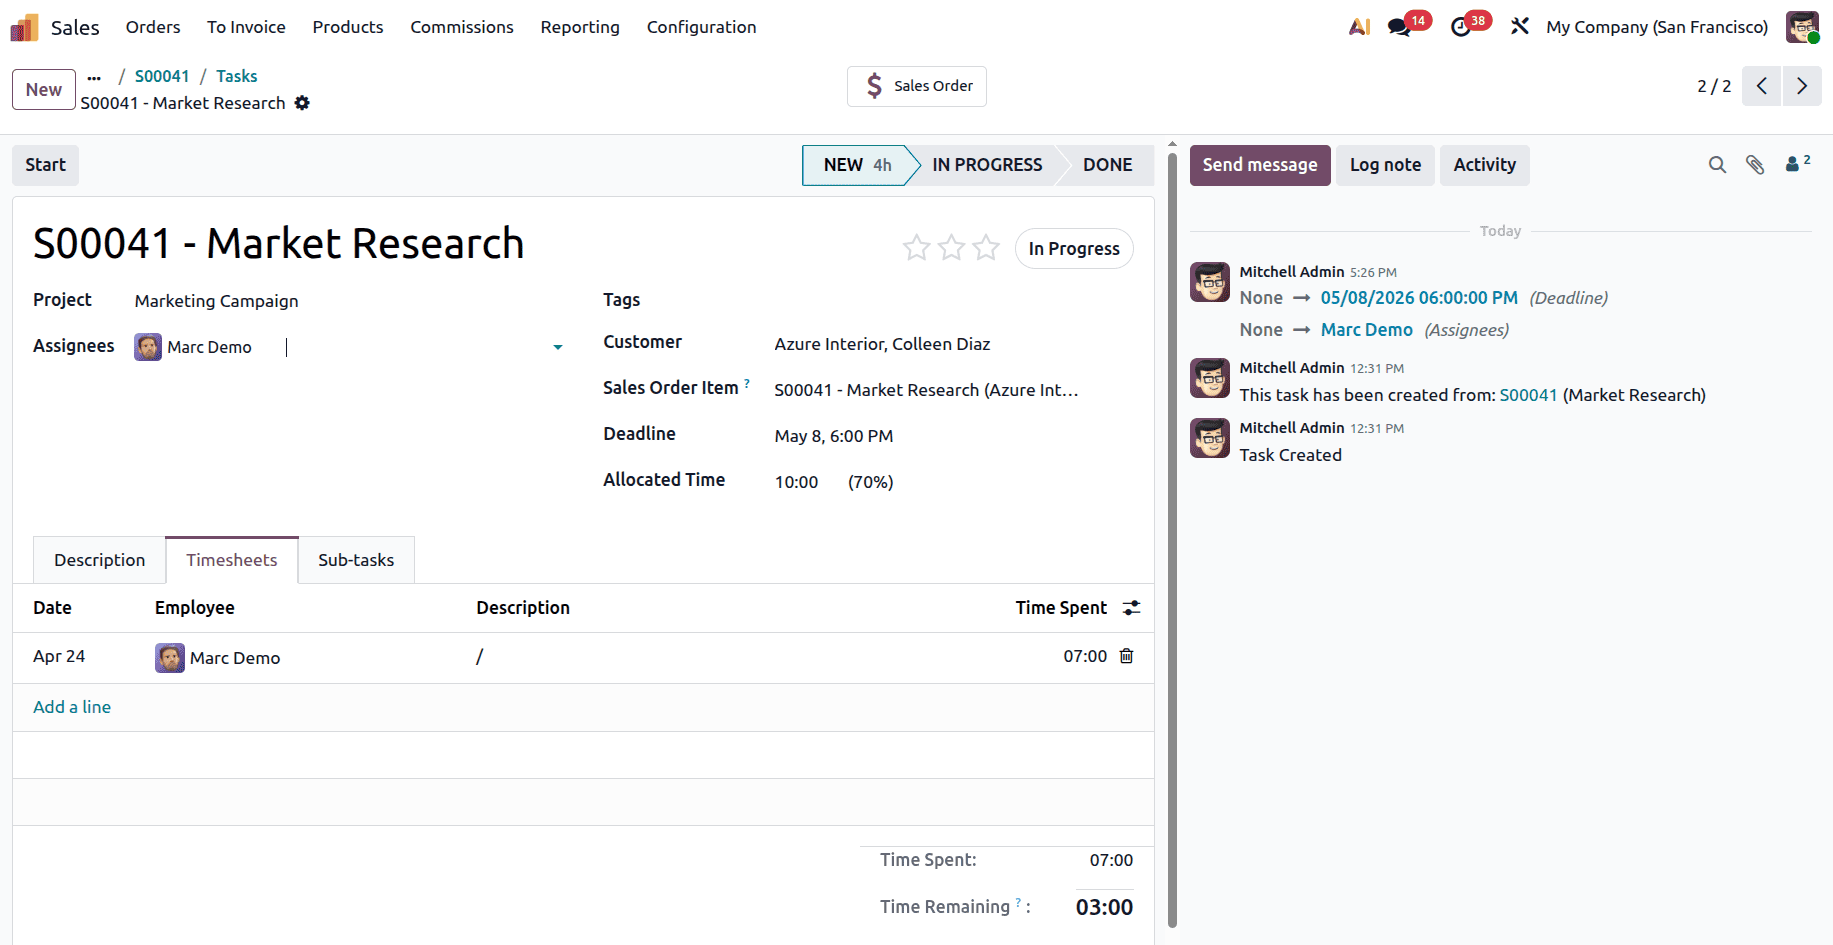
Add the timesheet for the next task created.
Once all the required timesheet entries have been recorded, you can proceed to generate the invoice. Open the Sales Order using the smart tab, where you will see that the Delivered hours now reflect the total time logged across all tasks.
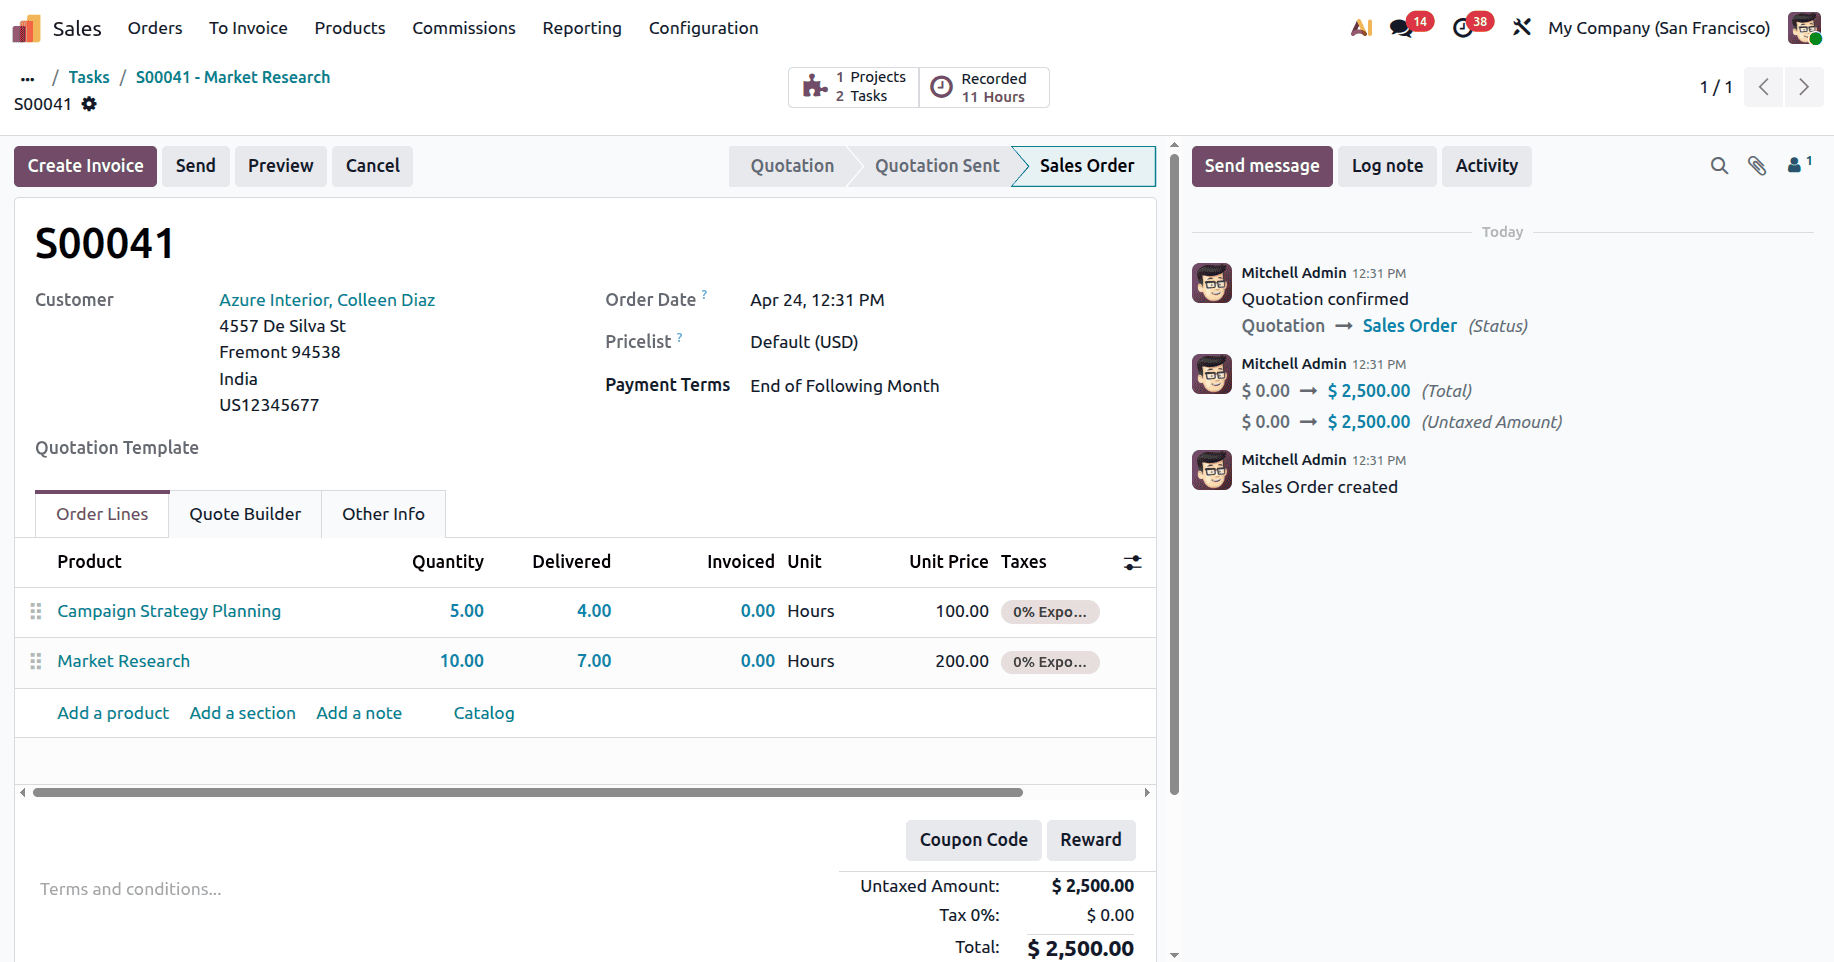
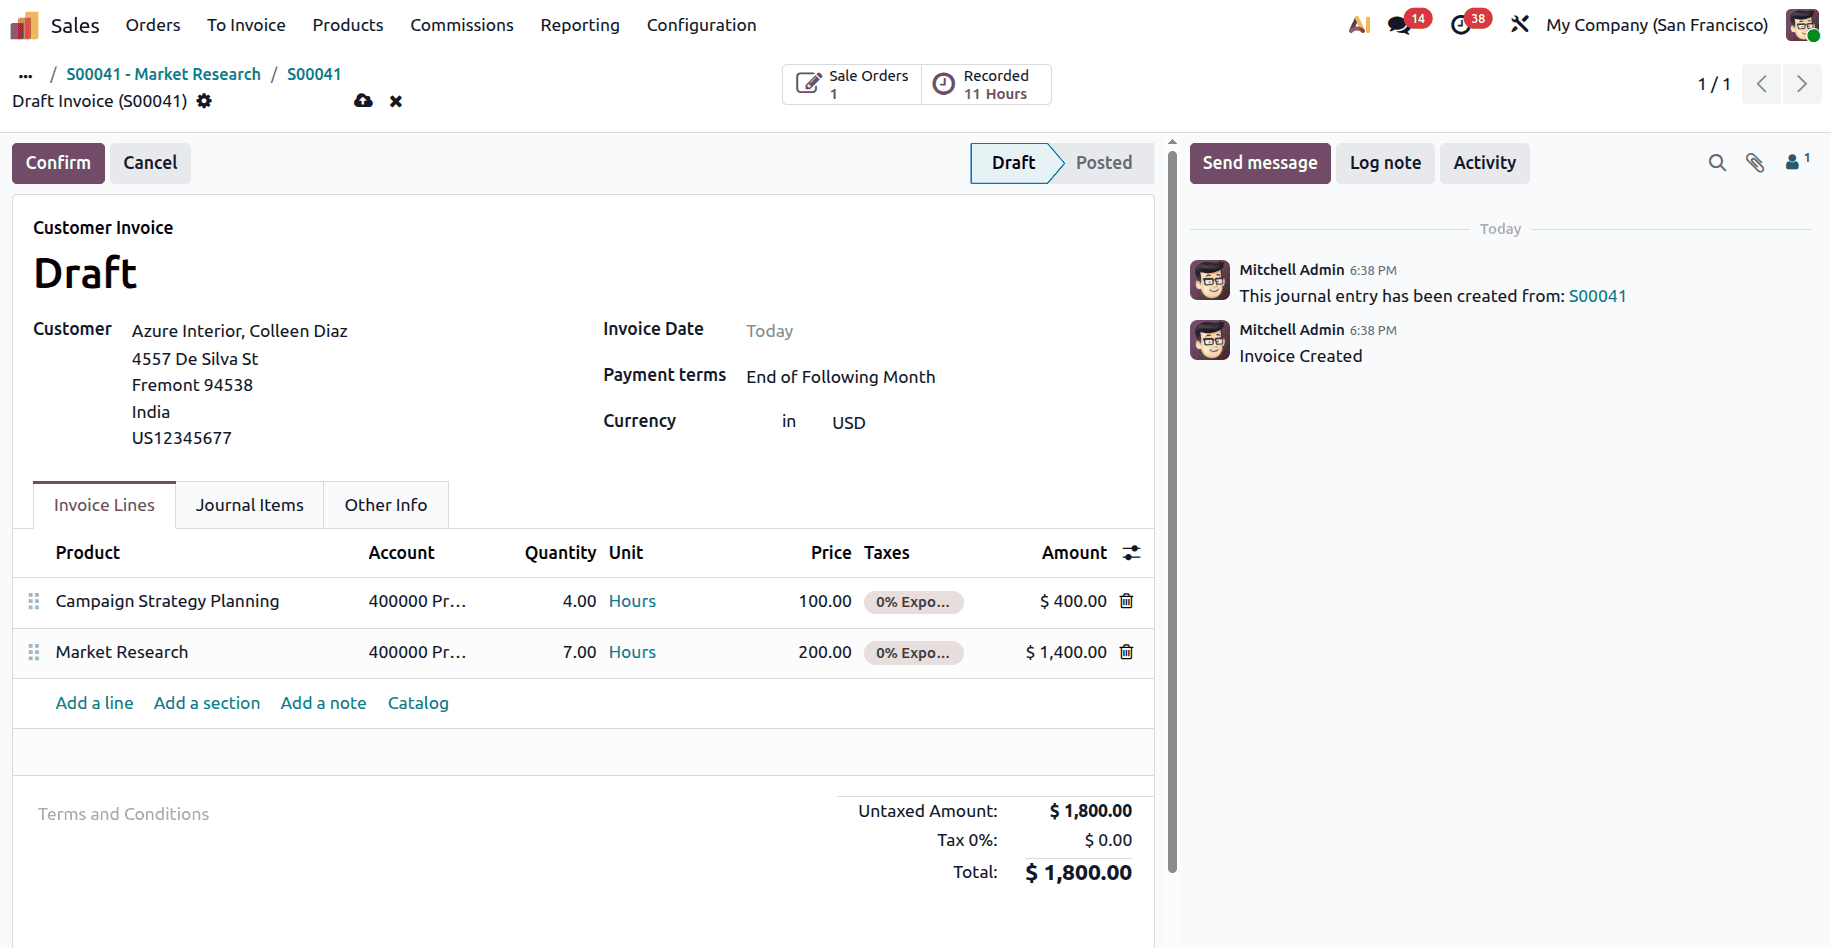
Click on Create Invoice, where options like Regular Invoice, Down Payment (Fixed Amount), and Down Payment (Percentage) will be available. Select the invoicing option that best matches your requirement. Odoo will then generate a draft invoice that includes only the delivered hours. Once the invoice details have been reviewed, click on Confirm to validate and finalize the invoice.
The total amount is calculated automatically using the Sales Price defined in the service product, which ensures accuracy and reduces manual effort.
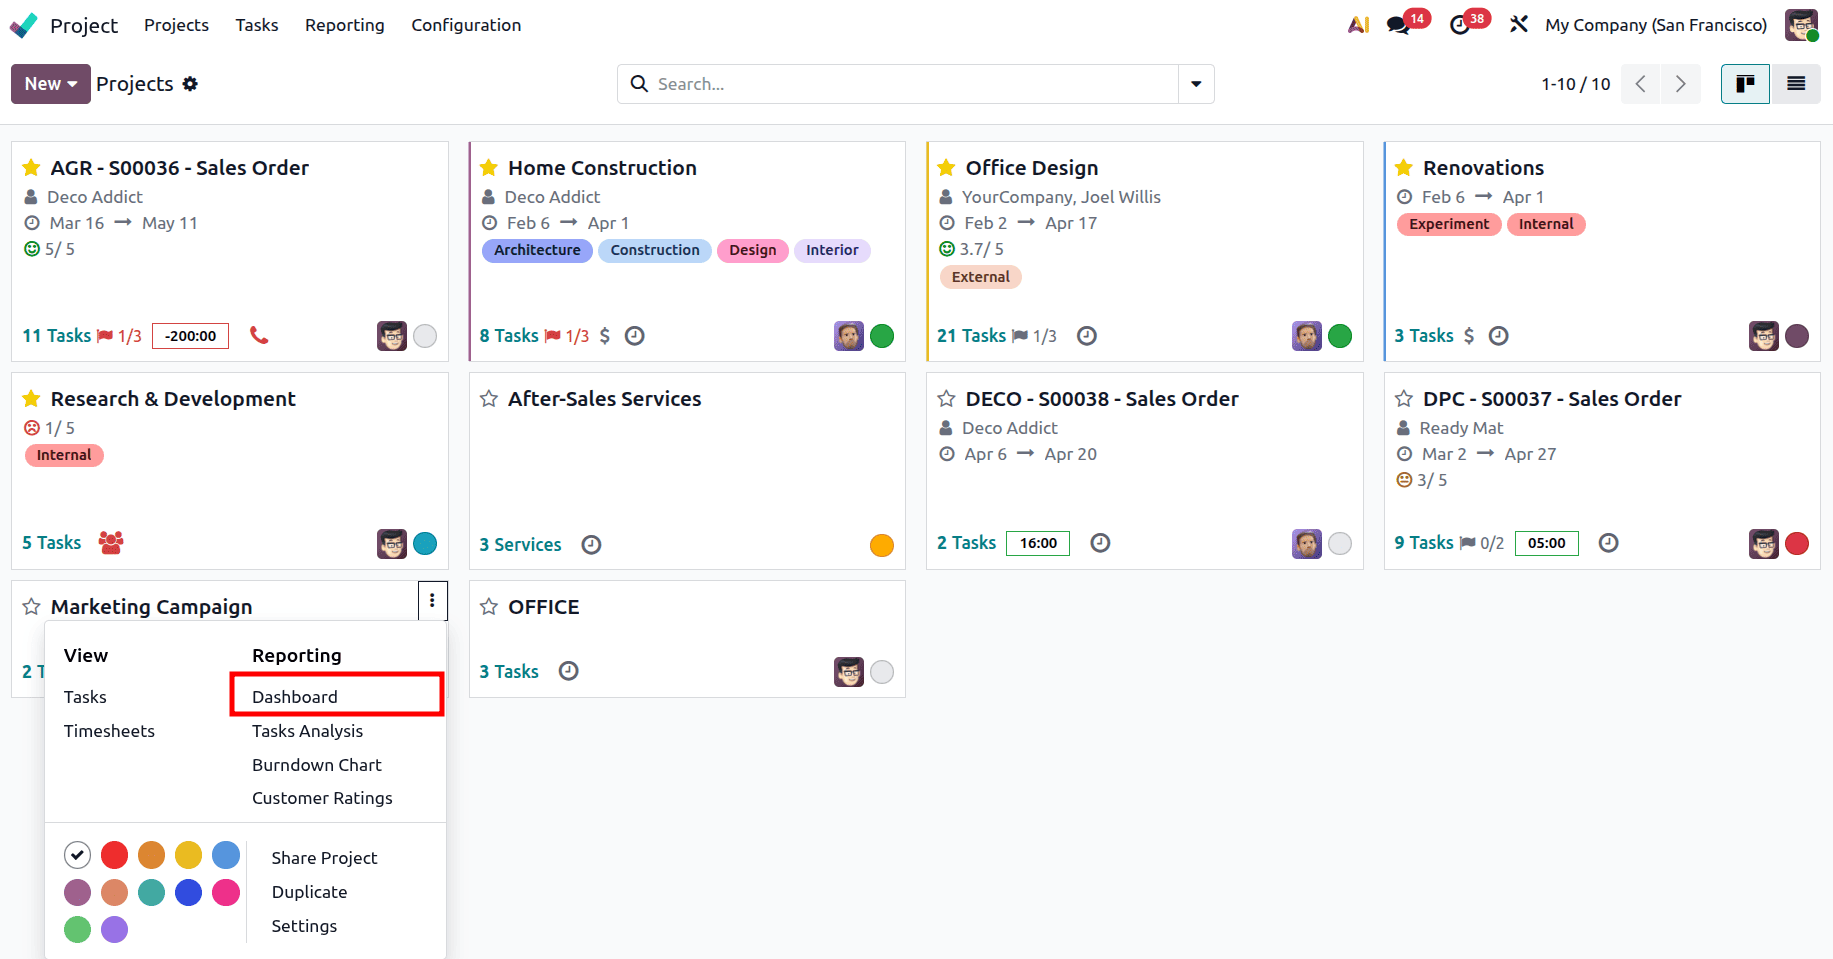
Apart from billing, Odoo 19 also provides a complete overview of the project, helping you monitor both progress and financial performance. From the project dashboard, click on the icon available on the project card and select Dashboard to open the overview page.
This page displays key information such as the number of tasks, total timesheets recorded, invoices created, and milestones achieved. It also includes a burndown chart, which visually shows how the project is progressing over time. This helps users monitor project progress more effectively and quickly identify any delays in task completion.
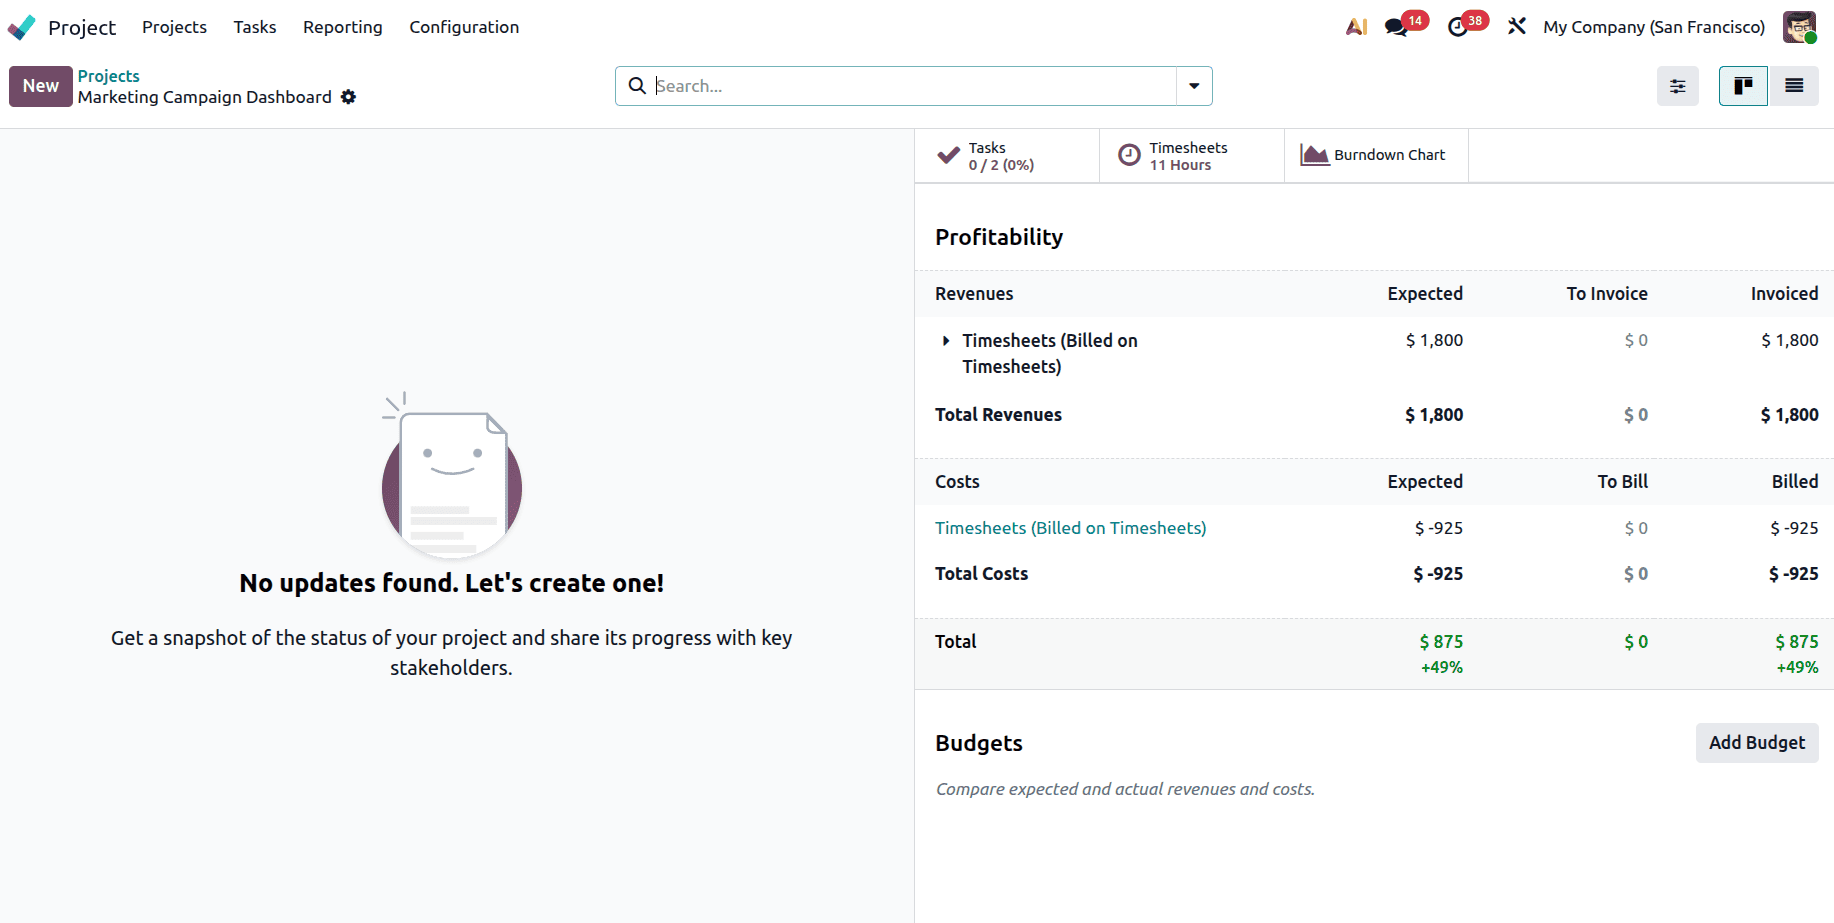
Another important feature in this view is the Profitability section, which gives a clear understanding of the financial side of the project. Under revenues, you can see Expected Revenue, To Invoice, and Invoiced amounts. Under costs, you can view Timesheet Costs, Expected Costs, and Billed Costs. This data gives businesses a clearer view of the project’s financial performance and helps identify areas that may need improvement. It also assists in planning and managing future projects more effectively.
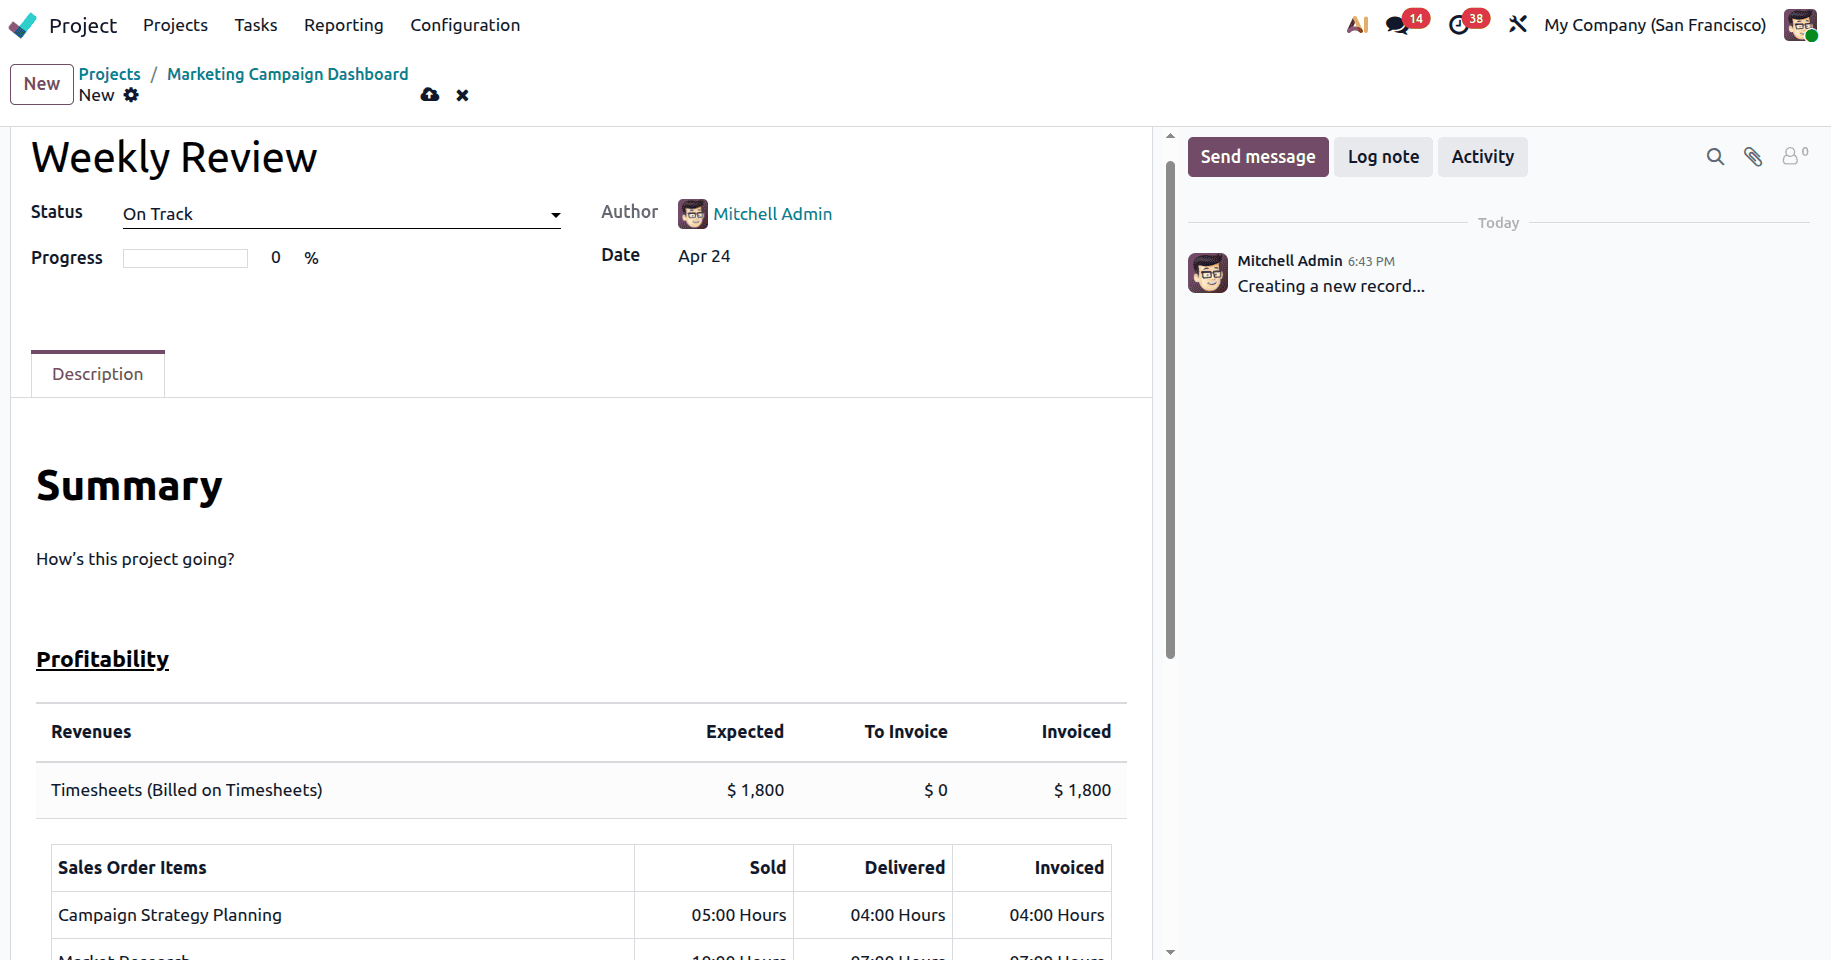
In addition to this, users can create project updates to track progress over time. By clicking on New in the updates section, you can create a report by adding a title, setting the project status such as On Track, At Risk, or Done, and writing a summary of the work completed. These updates can also include details about revenue and costs, making them useful for both internal tracking and communication with stakeholders.
In conclusion, timesheet-based billing in Odoo 19 is a simple and effective way to ensure that businesses are paid accurately for the work they perform. Connecting timesheets with sales orders and invoices helps automate the billing process, minimizing manual calculations and reducing the possibility of billing errors.
It also improves transparency, helps track project performance, and provides better control over profitability. This makes it highly suitable for service-oriented businesses that rely on accurate time tracking to manage their daily operations and billing activities.
To read more about How Project Can be Billed at Timesheet Hours in Odoo 18, refer to our blog How Project Can be Billed at Timesheet Hours in Odoo 18.