One of the crucial aspects of business is effective communication with clients, and a business's rapid growth relies on solving customer queries. On the other hand, lack of integration or denying customers' questions leads to a fall in entrepreneurship. Odoo 15 Live Chat module ensures to deal with customers visiting your website and involves direct communication. The dialogue box in the website is a great tool to chat with clients, and the box is visible to the user while entering the website. Customers can deal with Sales team members through this communication box, and Odoo 15 Live Chat module assists to develop a new Website Live Chat Channels for your business.
This blog helps you use Website Live Chat Channels with the Odoo 15 Platform.
Odoo 15 Live Chat module is a real-time platform that interacts with clients for business purposes through effective communication. The Live Chat dashboard ensures you generate a new Website Live Chat Channel for your personal/business purposes inside the Channels tab. When creating a new Live Chat channel, you can set the messages, operators, and channel rules.
Website Live Chat Channels
Let's go back to the Website module before creating new Live Chat Channels. Click on the Settings menu inside the Configuration tab and look at the Live Chat option below the Features heading. You can see your website's recent Live Chat Channel in the Channel option, as shown in the screenshot below.
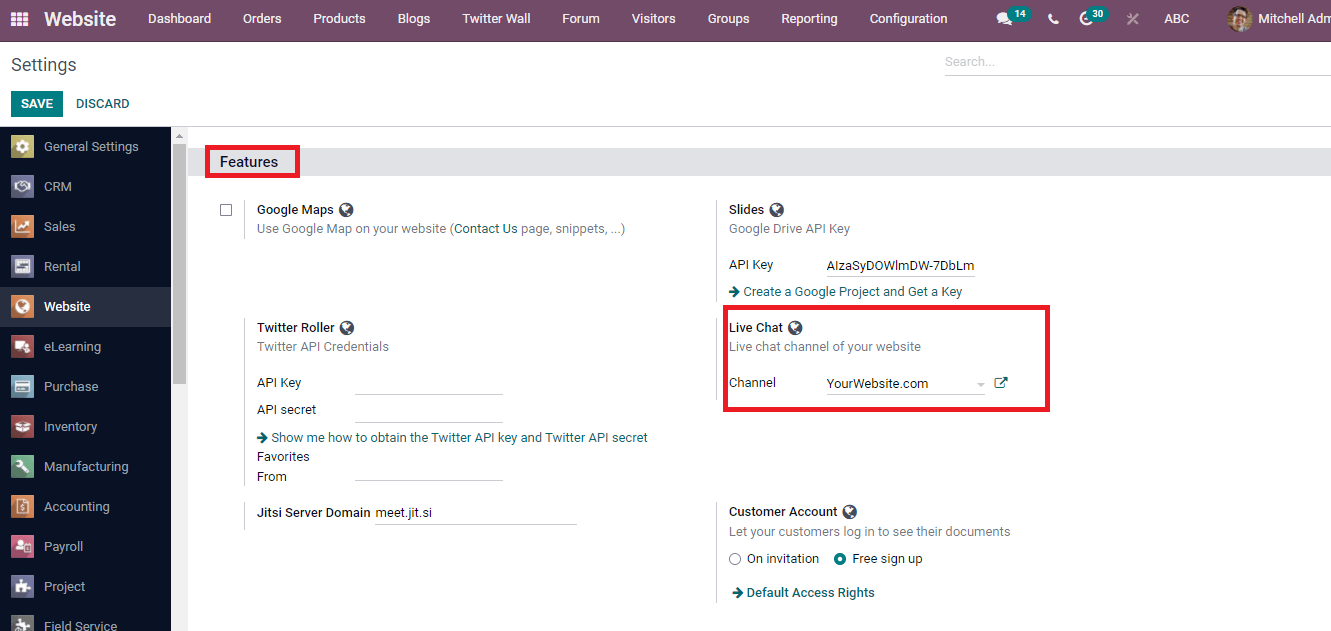
The external link near the Channel option directs you to the Website Live Chat Channel, and users can manage the details regarding the channel.
How to Generate a New Website Live Chat Channel?
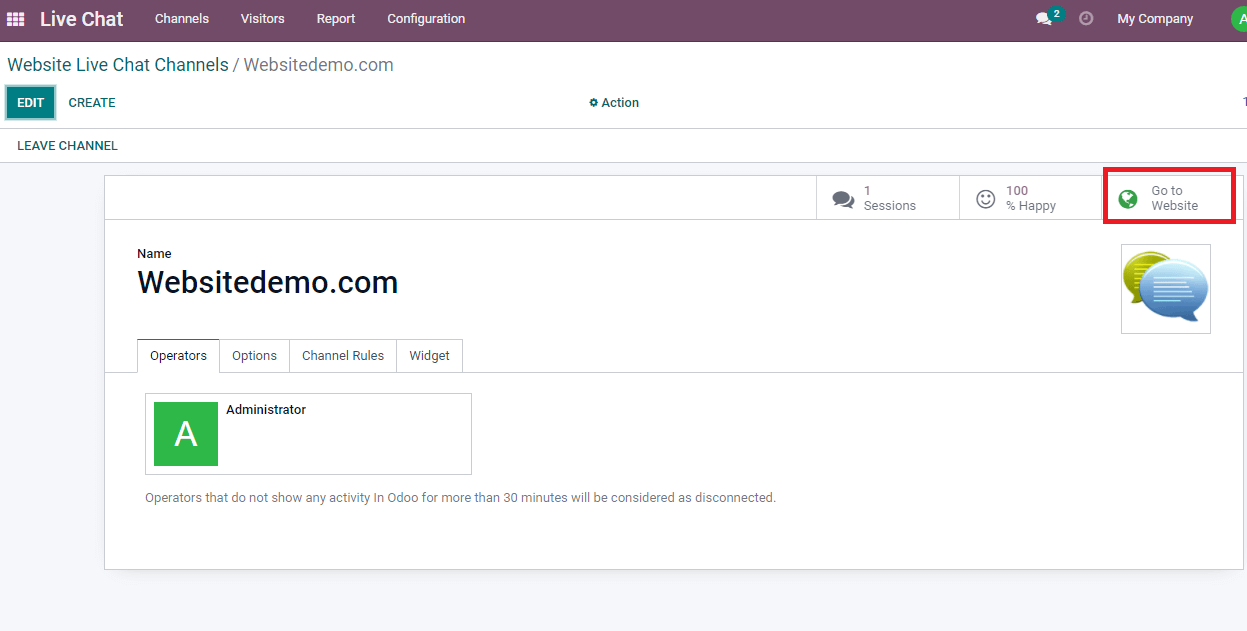
Odoo Live Chat dashboard displays the list of created channels, and users can develop a new channel from here. For that, click on the Channels tab in the Live Chat dashboard, and you can view details such as the number of operators, sessions, and customer rating percentage/website, as shown in the screenshot below.
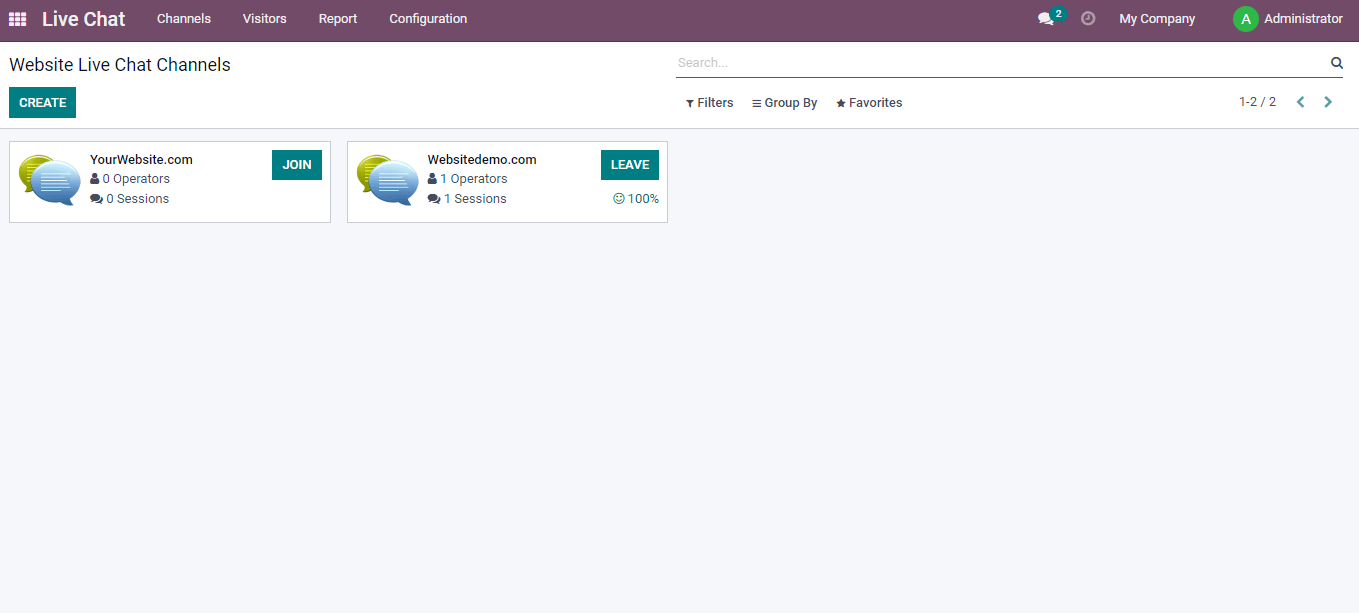
You can move away from a website by clicking on the Leave icon, and the Create button enables you to develop a new Website Live Chat Channel for your business. A new channel opens before you after selecting the Create icon. Here, enter the website Name such as 'Websitedemo.com'. Various tabs are visible for you below the Name, and click on the Operators tab. Add icon assists in selecting the Operators for your website channel. Choose your operators from the operators' window, and they are viewable inside the Operators tab, as shown in the screenshot below.
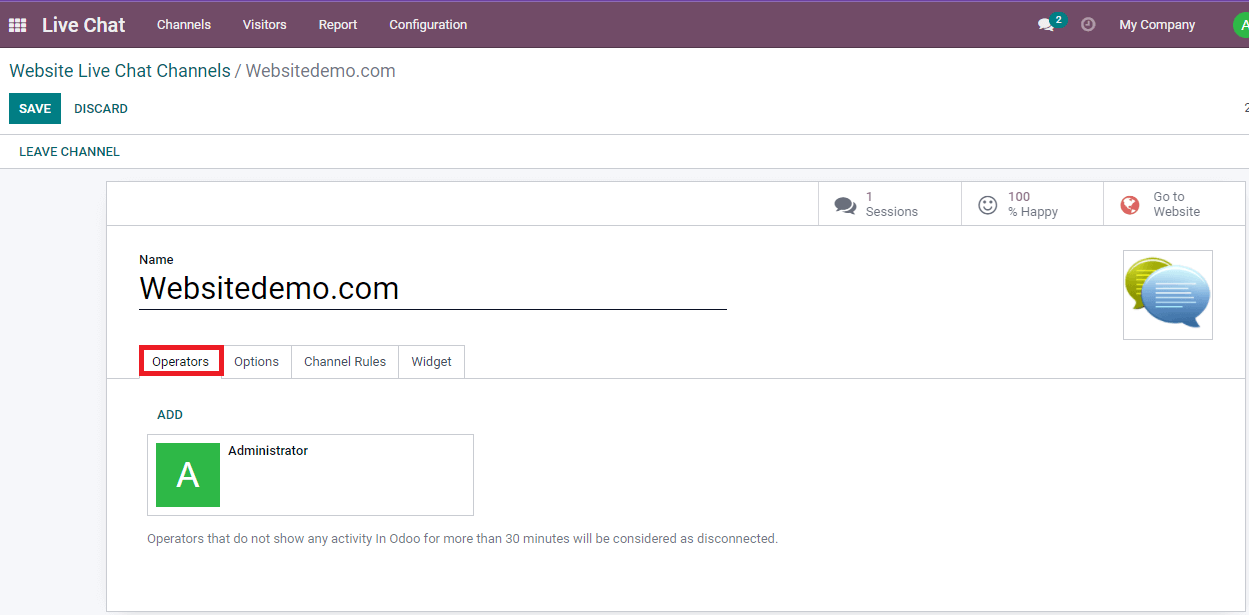
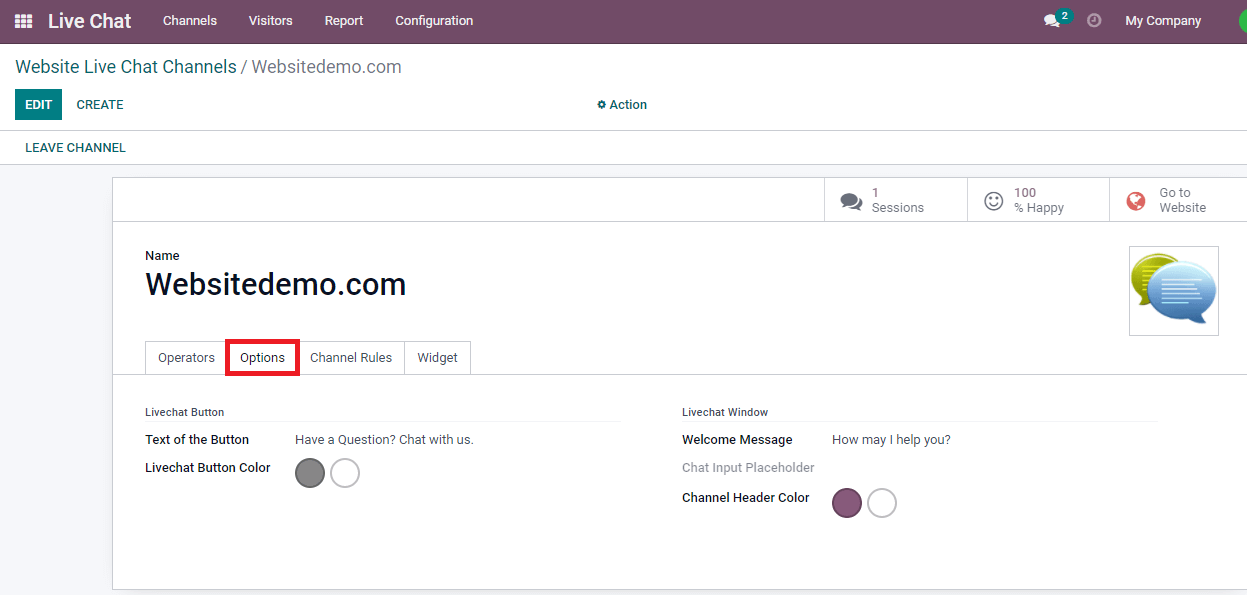
The Operators were considered disconnected when they did not show any activity for more than 30 minutes in Odoo. Inside the Options tab, you can see the Live Chat Button and Window options. Text of the button is a default text viewable on the LiveChat Support Button, and you can enter the text inside the space. You can pick a colour by clicking on the circle button near the Live Chat Button Color, a default button background colour of Live Chat. Below the Live Chat window, enter the Welcome Message that is automatically viewable to visitors when visiting your website. The text that denies the user to start a chat is Chat Input Placeholder. You can also apply the default background colour of the channel header using the Channel Header Color. After clicking on any circle, you can choose the colour for the background of the channel.
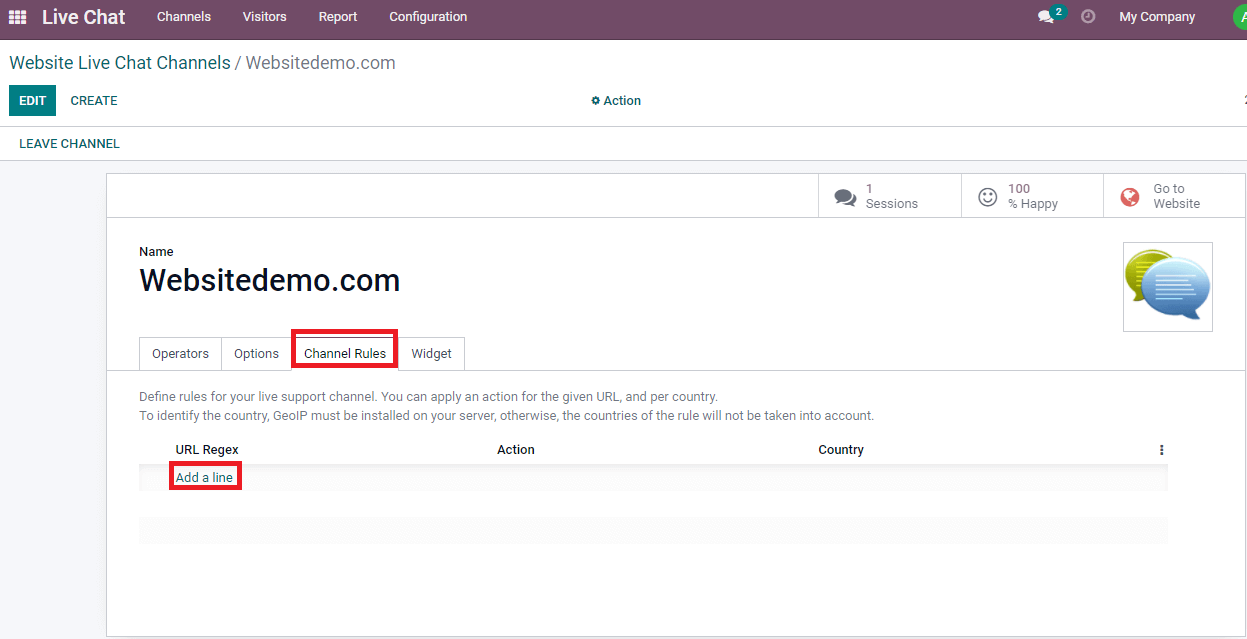
The rules for Live support channels are defined through Channel Rules. You can apply URL as per Country, and GeoIP should be installed in the server to identify your Country. The countries did not take it into account without installing the server.
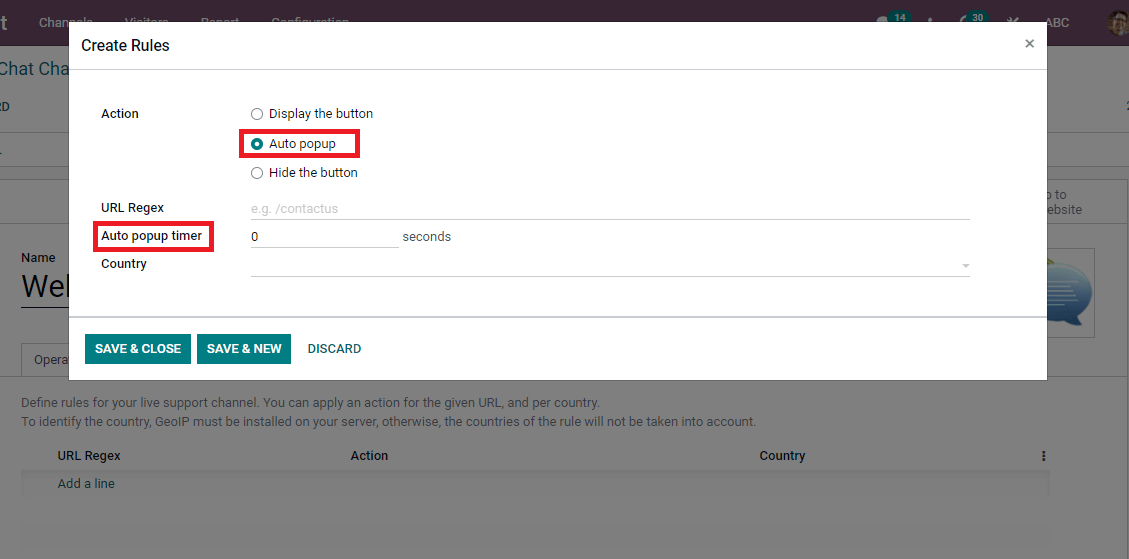
You can create rules by clicking on Add a line option. In the Create Rules window, we can enable the Action as per Display the button, Auto Popup, and Hide the button. The chat button is visible on the pages after activating the Display the button, and the chat button hides after enabling the Hide button. Auto popup options assist in starting the conversation and displaying the button automatically. You can apply the time in seconds using an Auto popup timer that delays automatically starting the conversation window. This parameter will not be considered when enabling the Display the button or Hide the button options. It is only applicable after activating the Auto popup option, as shown in the screenshot below.
The common expression specifying the webpages is URL Regex, and you can apply it in the Create Rules window. After that, choose your Country, and the rule will be applicable for selected countries only. For example, If you choose 'Algeria' and 'Australia' as countries for enabling the hide button to hide the chat button on a specific URL of visitors in these two counties. So, installing the GeoIP on your server is necessary to activate this feature. Later Click on Save and Close icon in Create Rules window.
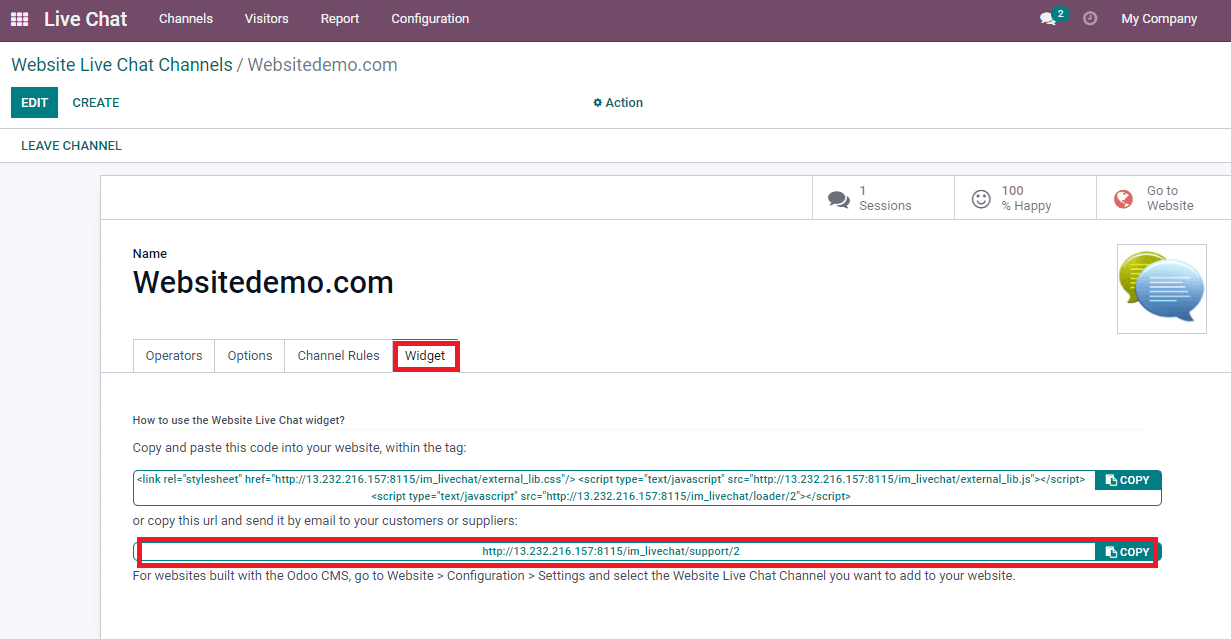
After saving the new website Live Chat Channel, the link of your website displays inside the Widget tab. You can know about how to use the website's live Chat Widget. Users can copy/paste the code into the website and send it to customers through email using the URL. Another method is to choose the Website Live Chat Channel from the Odoo Website module. A web page is a URL to a static page in the client can discuss with the channel operator.
Let us look at how we can chat with visitors through the Website Live Chat Channel. Click on the Copy button in the Website Live Chat Channels window and paste it on the search engine. Here, you can see the Chatbox on the front end view of the website, and a welcome message is visible for a visitor visiting your website.
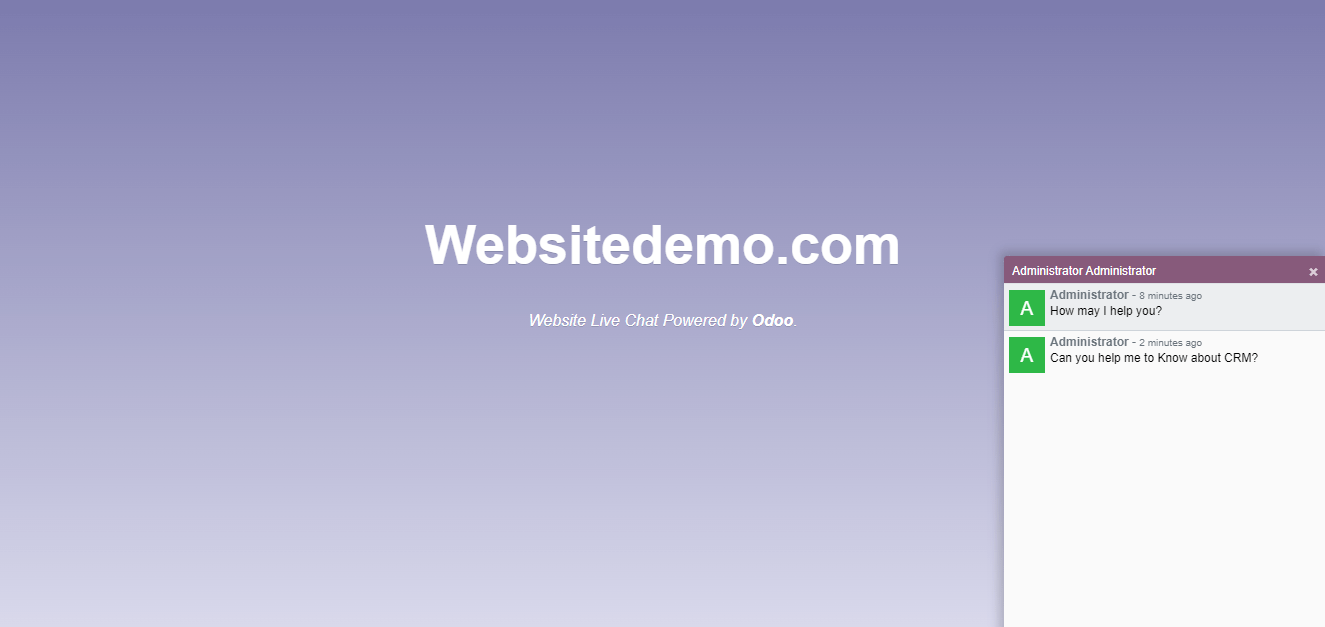
After the visitor types the message inside the dialogue box, it is displayed for you in the Website Live Chat Channel window. For example, if the visitor enters a message such as 'Can you help me to know about CRM?', it is quickly visible in the website live Chat channel, as shown in the screenshot below.
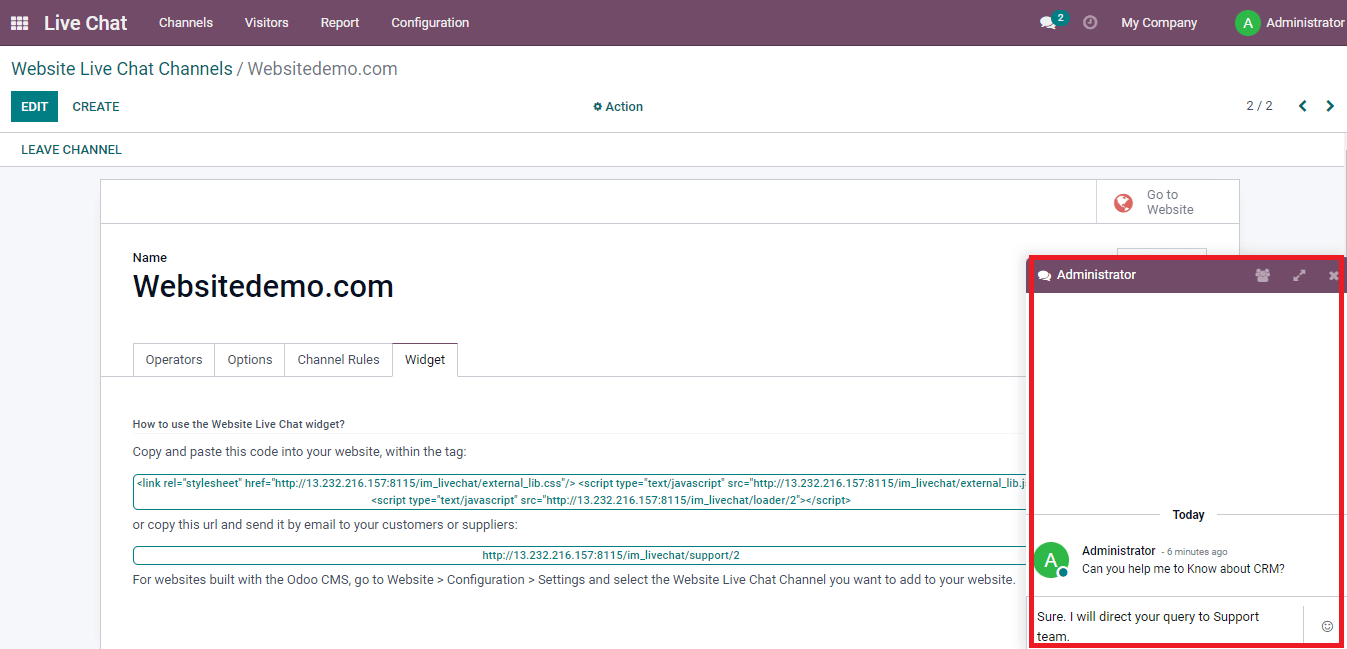
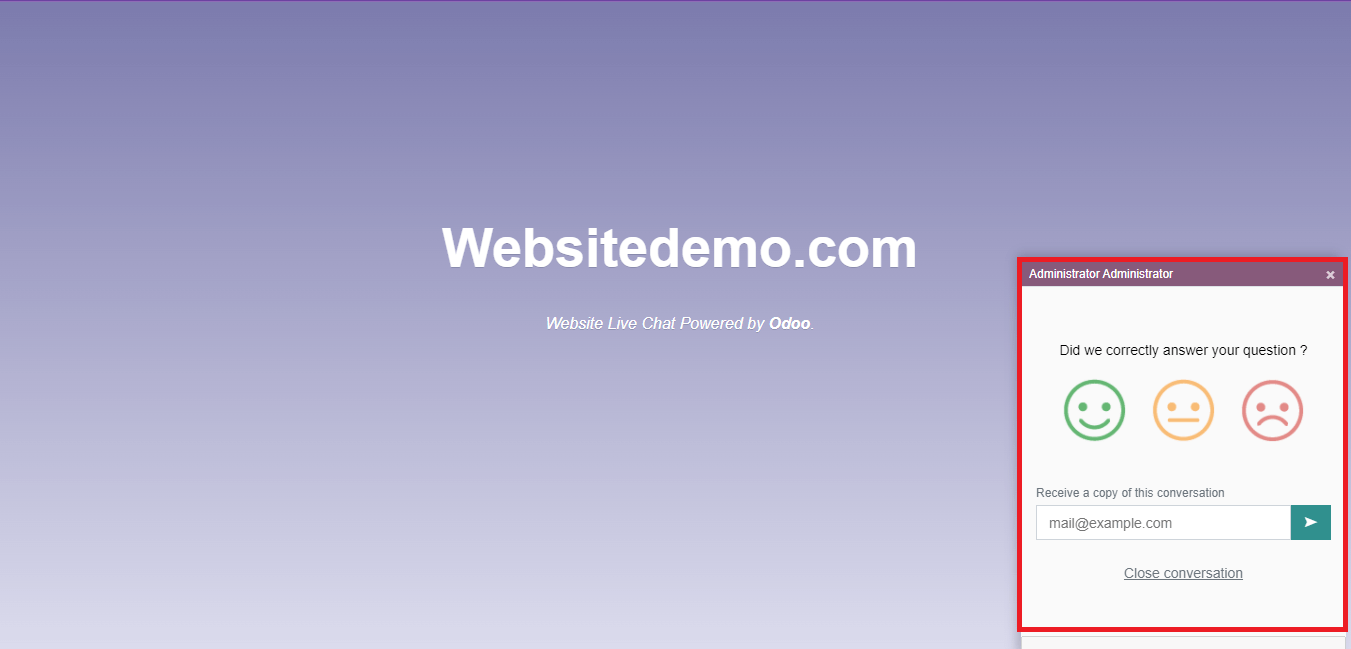
Here, you can reply to the visitor's message, such as 'Sure, I will direct your query to the support team'. You can continue the conversation with visitors through the Live Chat dialogue box in this method. Before closing the chat conversation, visitors can rate the experience of resolving their queries on the website, as shown in the screenshot below.
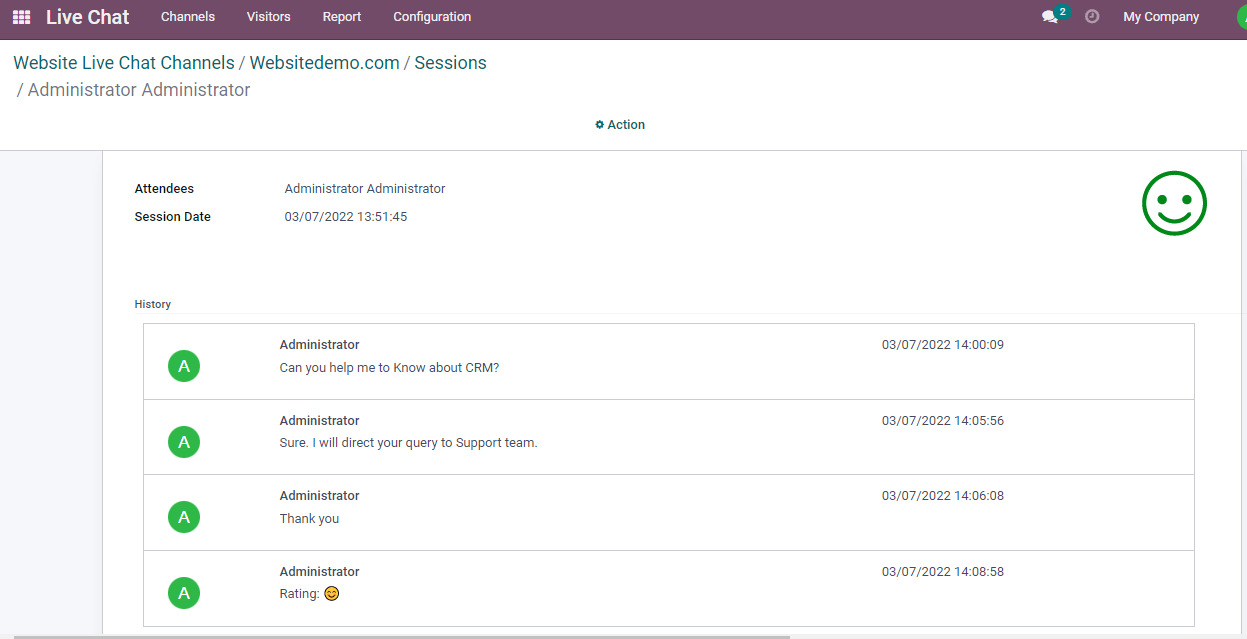
The feedback is visible inside the percentage ratings of the Website Live Chat Channel window. Various options such as Sessions, 100% Happy, and Go to Website are viewable after closing a conversation. By clicking on Sessions, it will direct you to a new page that contains details such as Attendees, Ratings, Session Dates, and Messages. The messages recorded with customers on your website is visible on the Sessions window, as shown in the screenshot below.
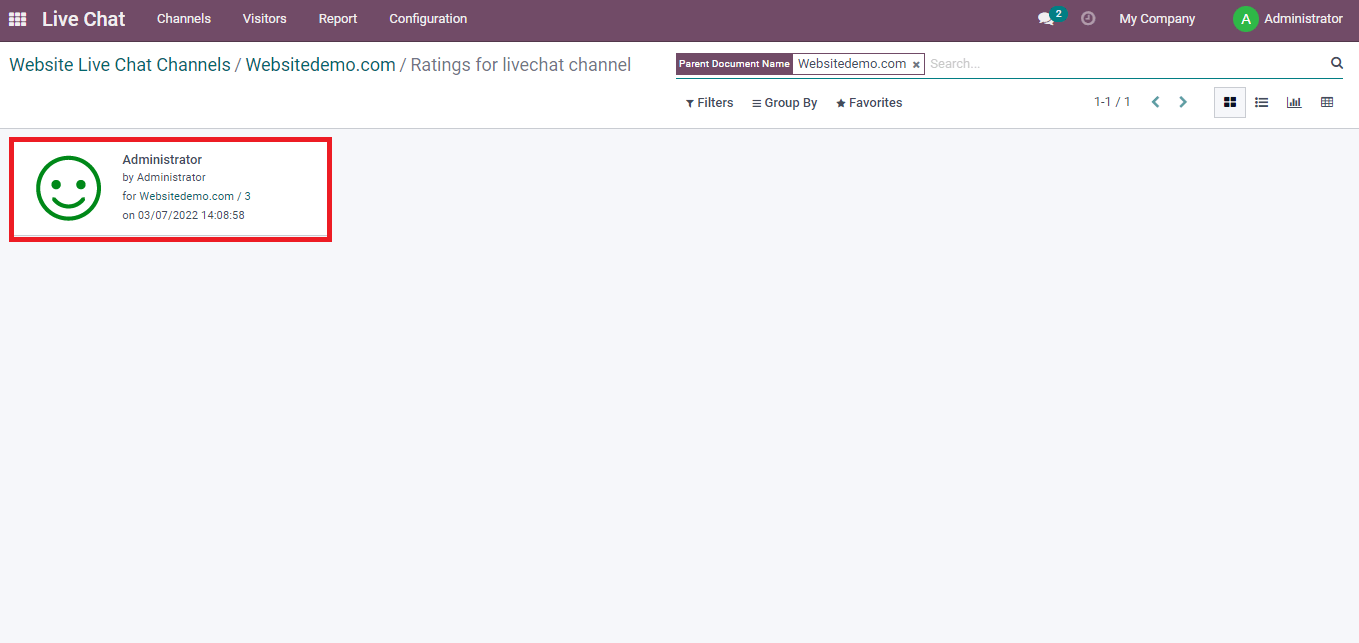
We can view the ratings for Live Chat Channel by clicking on the 100% Happy option in the Website Live Chat Channel window. In the new window, you can identify the rated operator, customer, submitted date, time, resource name, parent holder and rating as shown in the screenshot below.
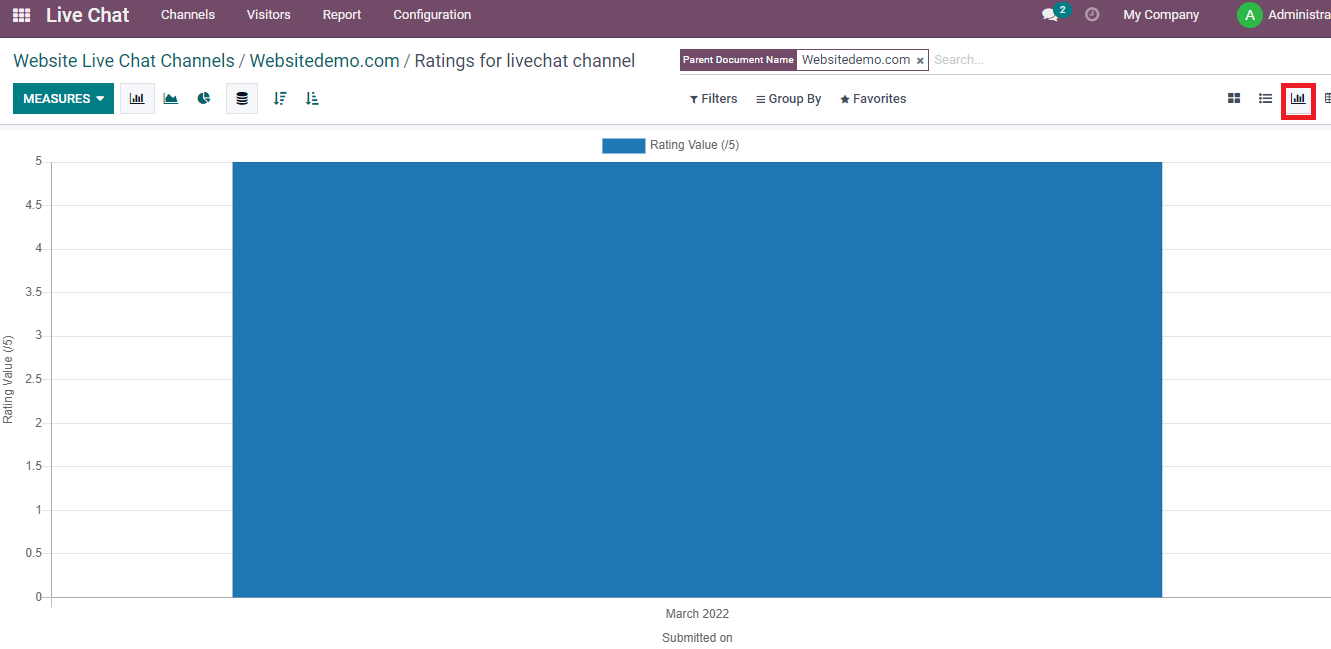
The Rating for Live Chat Channel window is viewable in different formats such as Graph, Pivot, Kanban and List. In the Graph view, you can see the Submitted date on X-axis and Y-axis depicts the Rating Value of customers. Users can also apply the Count value on the graph using the Measure icon, as shown below.
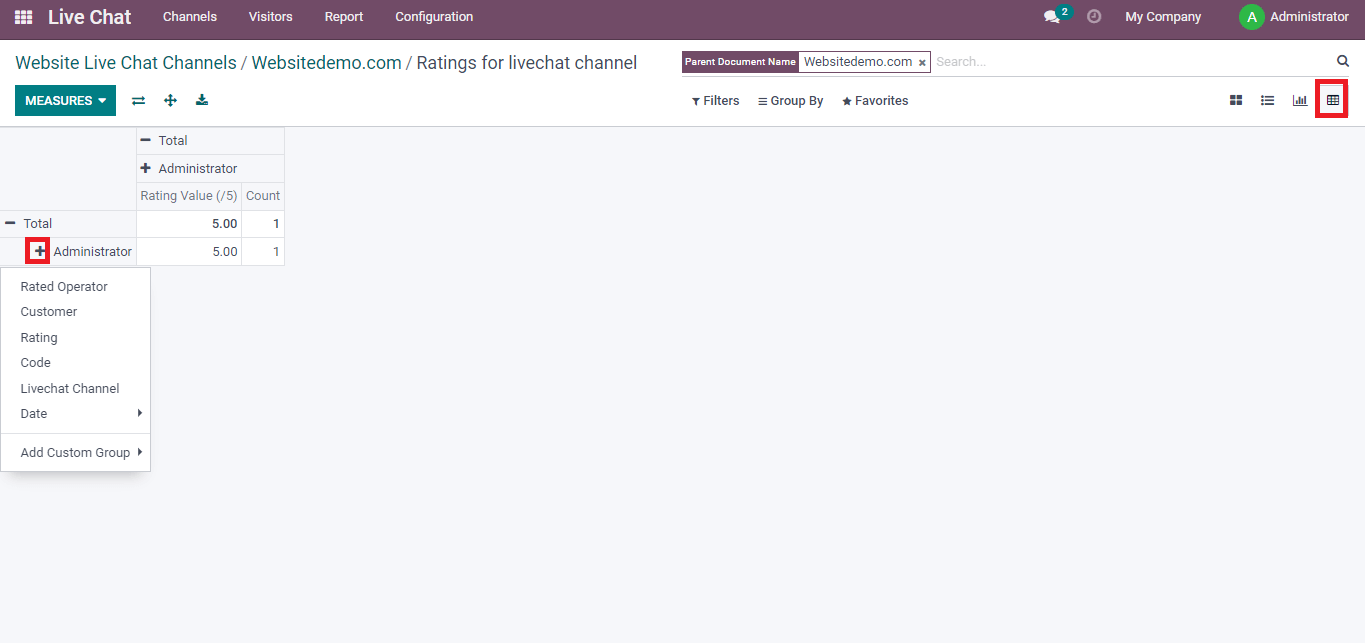
The Pivot view of the window shows the total count and rating value in a Pivot table. You can add Custom Group into the Pivot table such as Rated operator, Code, Customer and more aspects as depicted in the screenshot below.
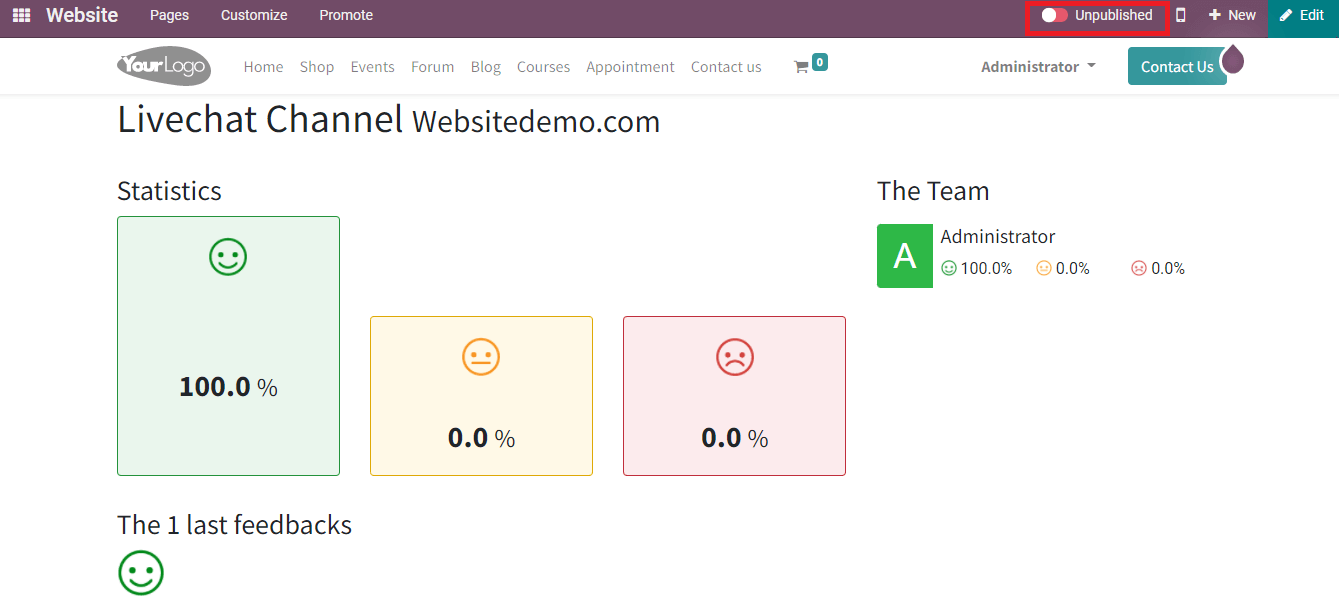
We can publish the Live Chat Channel into the website by clicking on the Go to Website button. The front end of the Website page is visible before the user. Here, you can see the Statistics, feedback and information about your team members. The rating percentage of your channel depicts in the window. You can view an Unpublished button at the top end of the window, as shown in the screenshot below.
Click on the Unpublished button, and it changes to Published with green colour as depicted in the screenshot below.
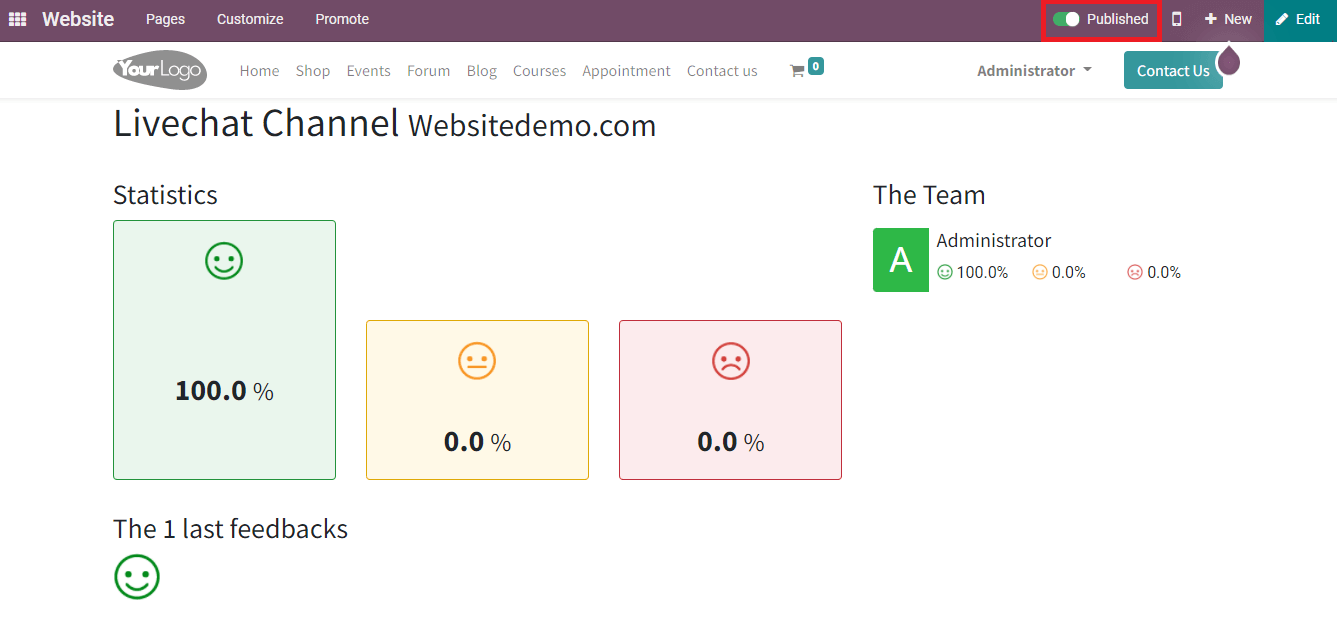
The Live Chat Channel is visible to all visitors after the channel's publication. You can see a green colour on the Go to Website button in your Live Chat Channel after publishing on the website shown in the screenshot below.
We discuss here the usage of Website Live Chat Channels with the Odoo 15 platform. Personalized communication with clients and visitors visiting on website imparts through Odoo 15 Live Chat module. Live Chat is commonly used on most websites to engage business sales. Most companies rely on this system to increase their relationship with their customers