The additional cost which gets added to a shipment is called Landed cost. Different types of costs including shipment charges, insurance amounts, and customs duties or handling charges can be considered as the landed cost. That means the total cost of a product would be the sum of the purchase price of the product and the landed cost of the product.
The first thing we have to notice here is that we can add landed cost to the product price only if the costing method is FIFO or AVCO. Make sure that inventory valuation is automated.
We can check the landed cost management for both these costing methods. First, we can check the landed cost management for AVCO or Average Cost. Then in the second part, we will discuss the landed cost management for FIFO or First In First Out. Note that we have to use the Automated inventory valuation method for both these costing methods.
First, we have to enable Landed cost in the Configuration Settings.
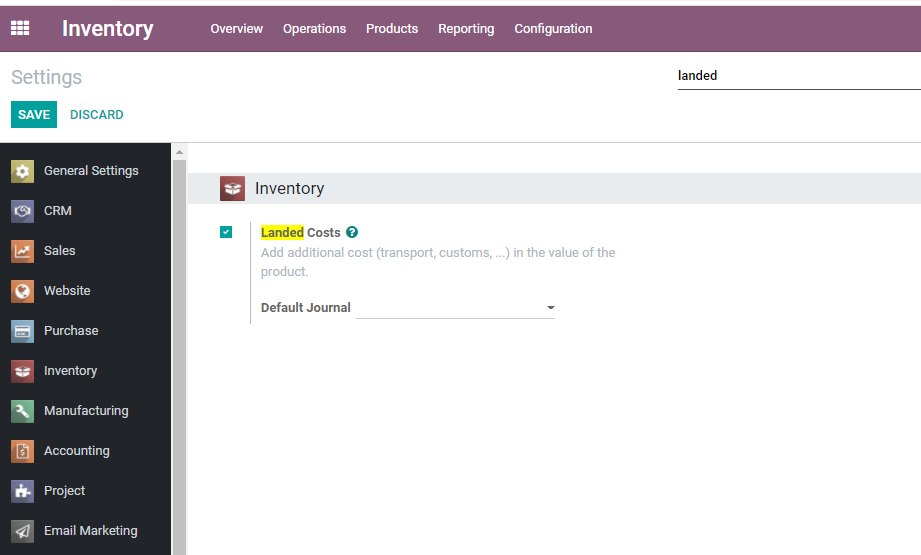
Before saving the changes we can also set a default journal if required.
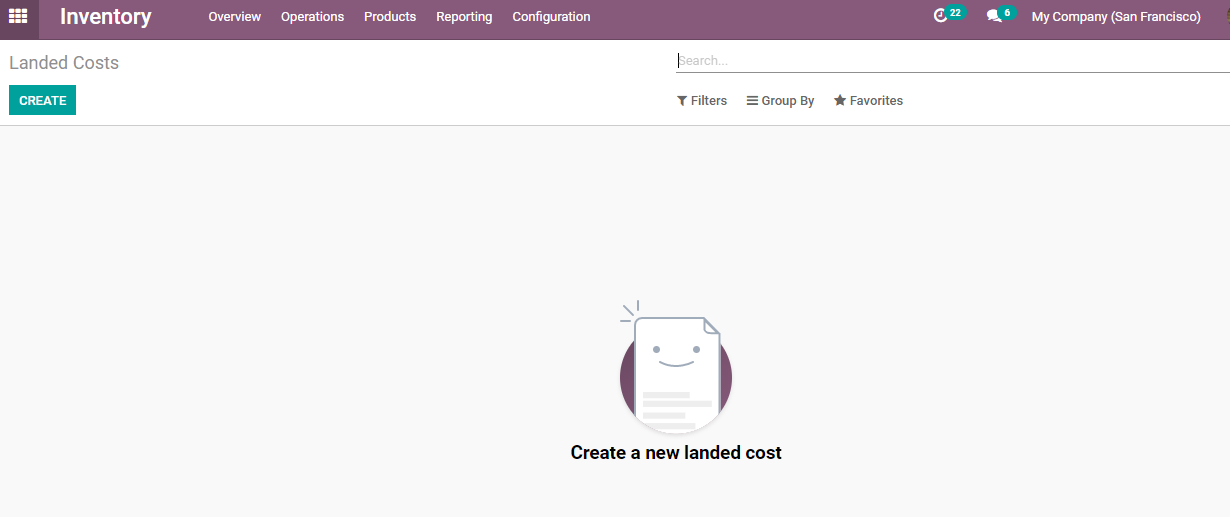
The landed cost can now be found below the Operations menu.
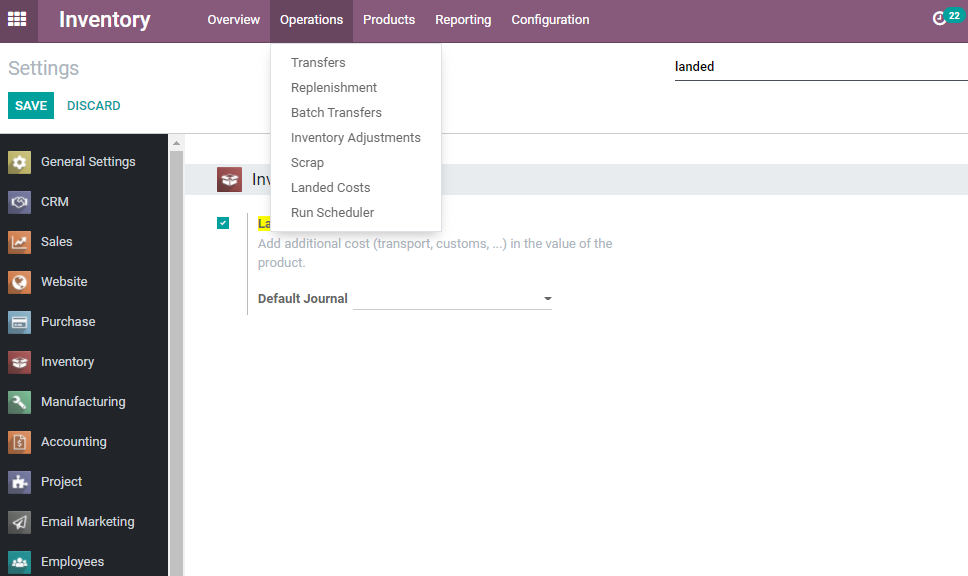
WE can move to the Landed Cost function.
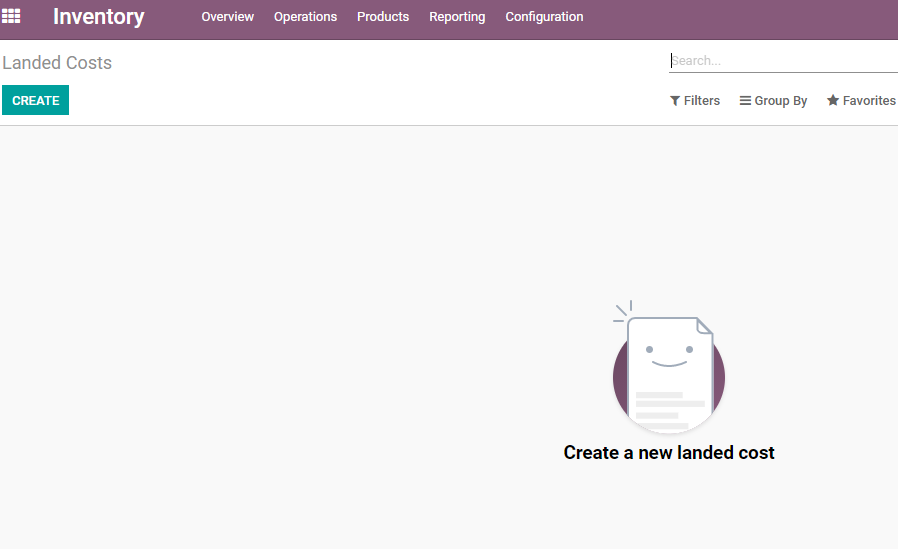
Here, we cannot find any pre-configured landed costs. So we can check how to create one landed cost for a product.
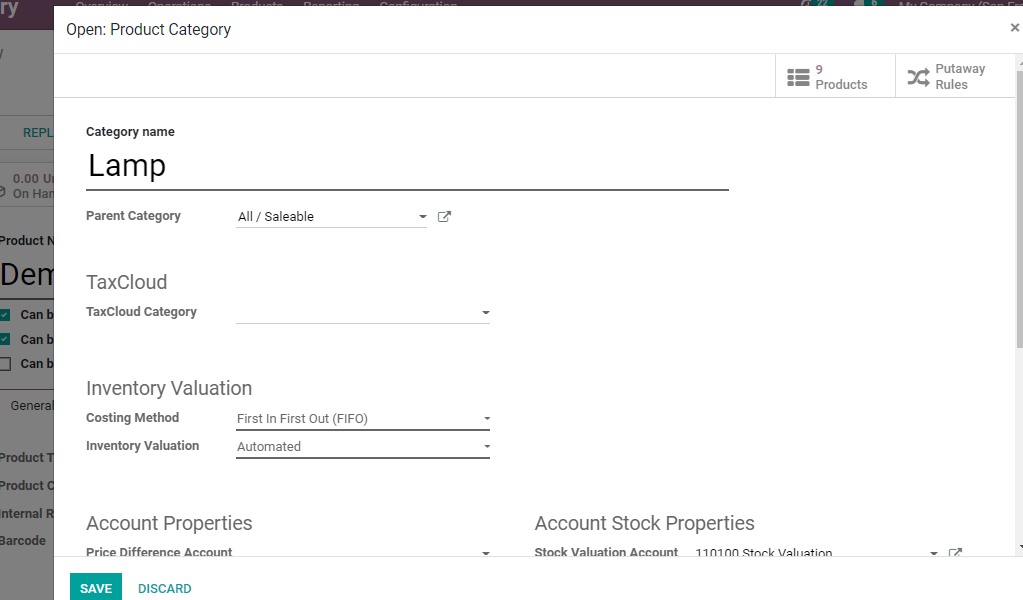
As we had mentioned earlier, we can use this feature only if the costing method is FIFOor AVCO. So we have to first move to Configurations> Product Category and make necessary changes.
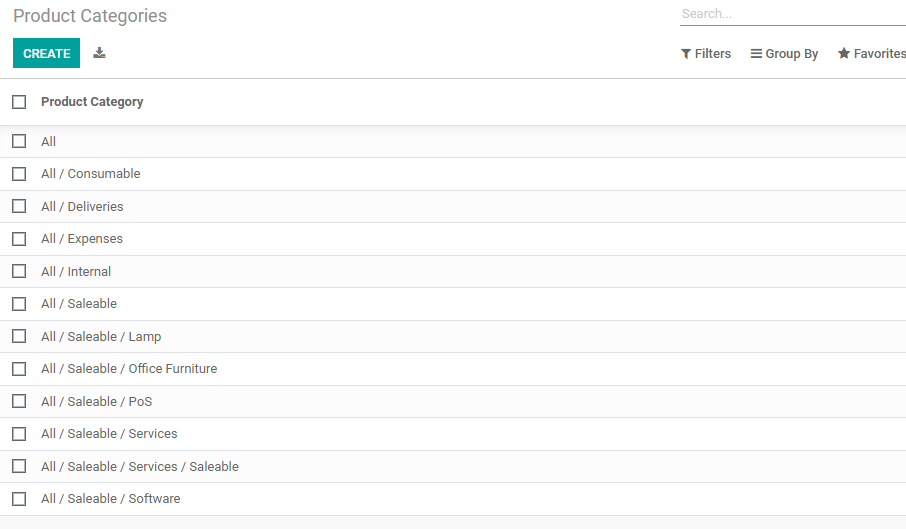
WE can either create or choose any of the categories from here.
Let me choose All/Saleable/Lamp
We can set category, parent category, etc here. I have set the costing method as AVCO and the inventory valuation as automated. We have to avoid the costing method as standard price and manual inventory valuation
Then we can set accounting properties and account stock properties also for this category.
IF required we can set the Logistics section and set routes
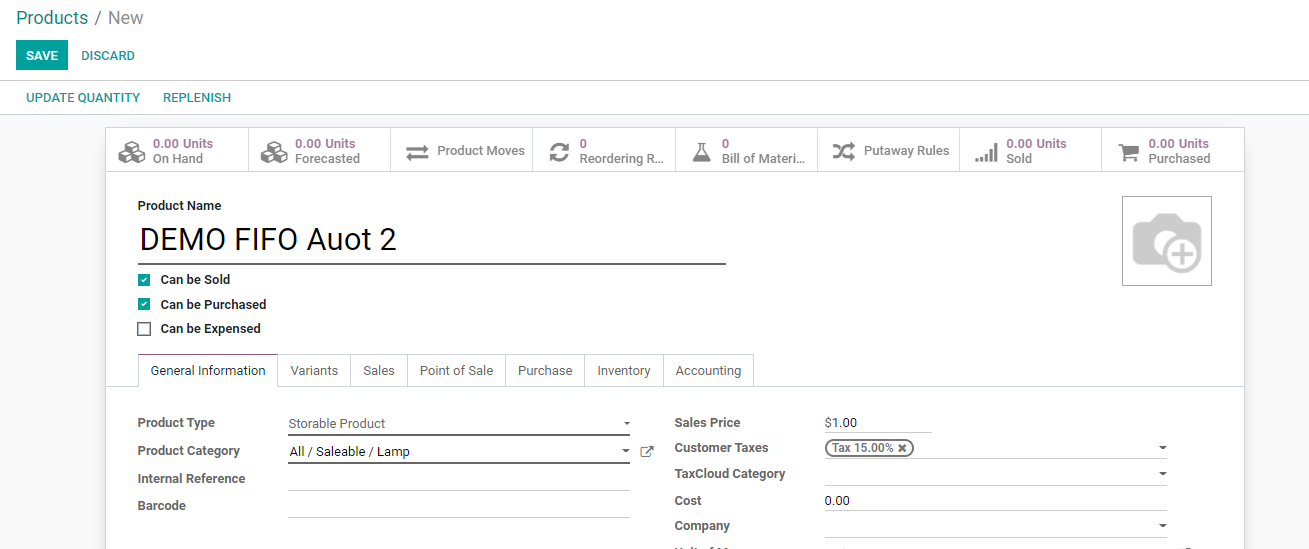
After saving the category changes we can create a product.

Now we can create a demo product using the create tab.
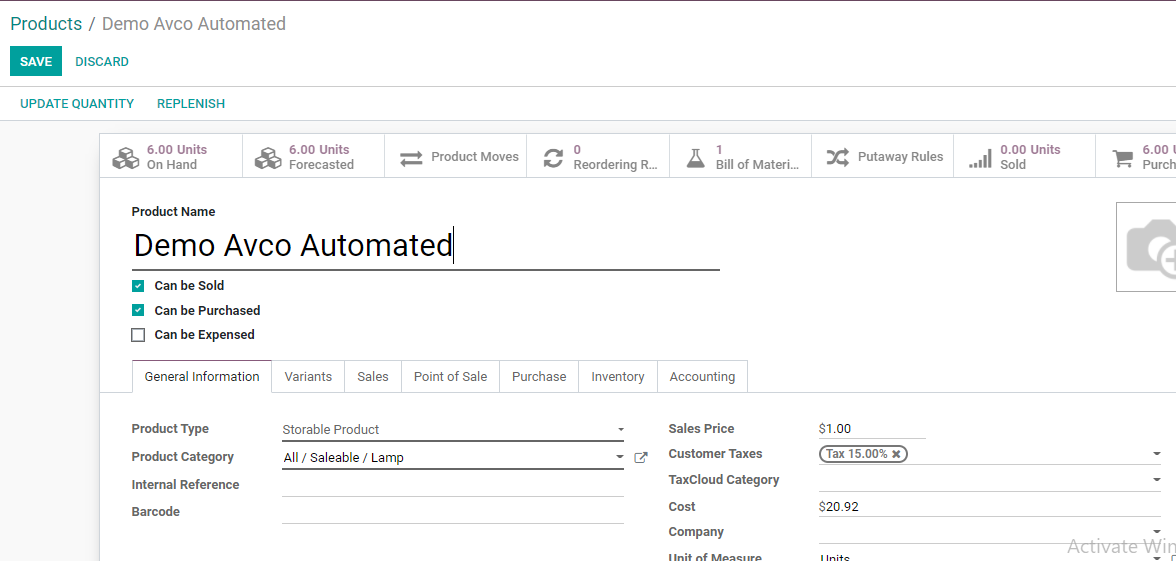
Here we can set the product name, product type, etc. We have created Demo Avco automated as the product name and have to set the product type as storable. Only storable products can be managed with an inventory.
Then we can select the recently configured product category All/Saleable/Lamp.
We can also set the sales price if required.
After saving this product we have to create yet another product. Let us name it Demo Avco Auto 2
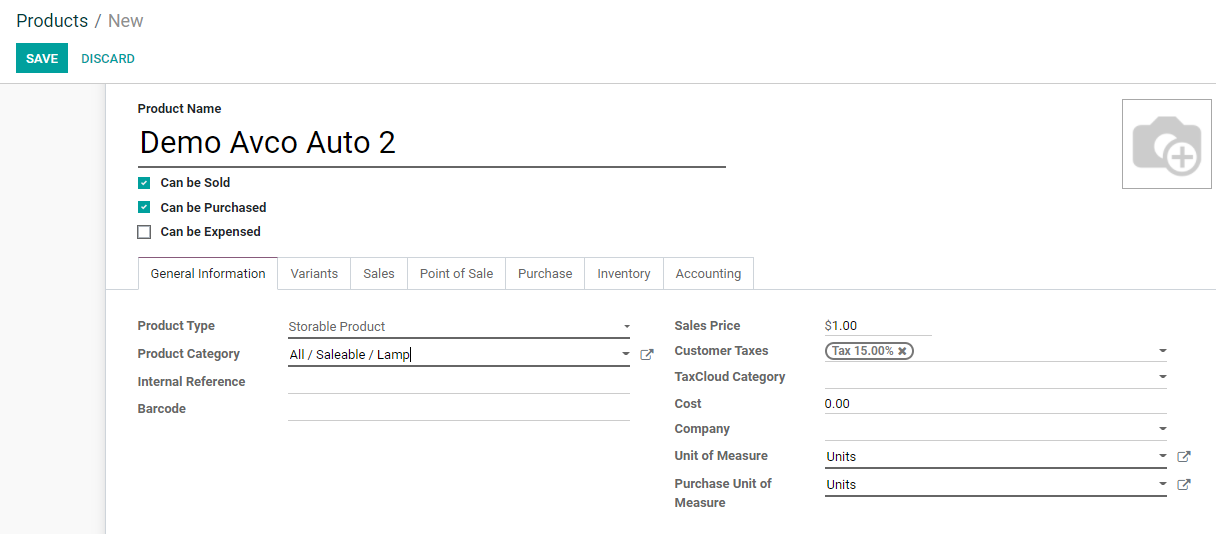
All other fields remain the same here.
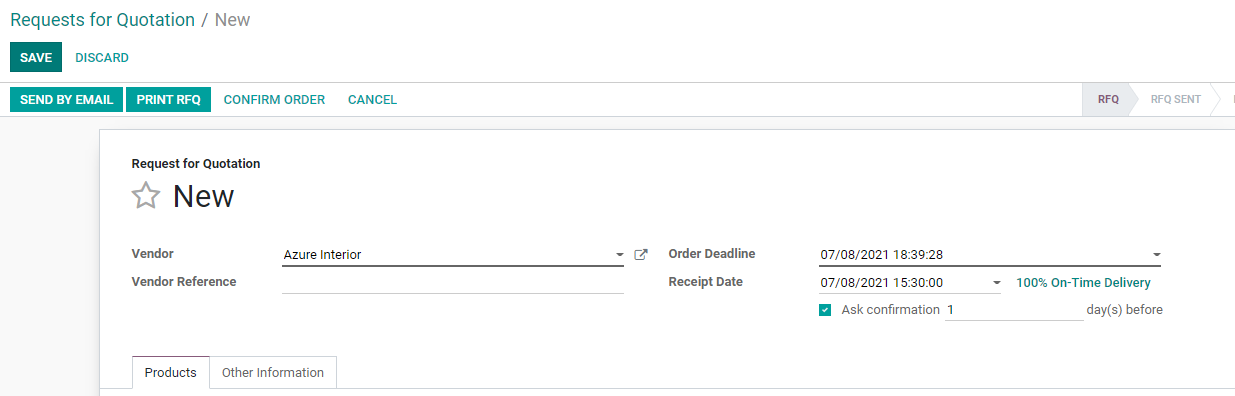
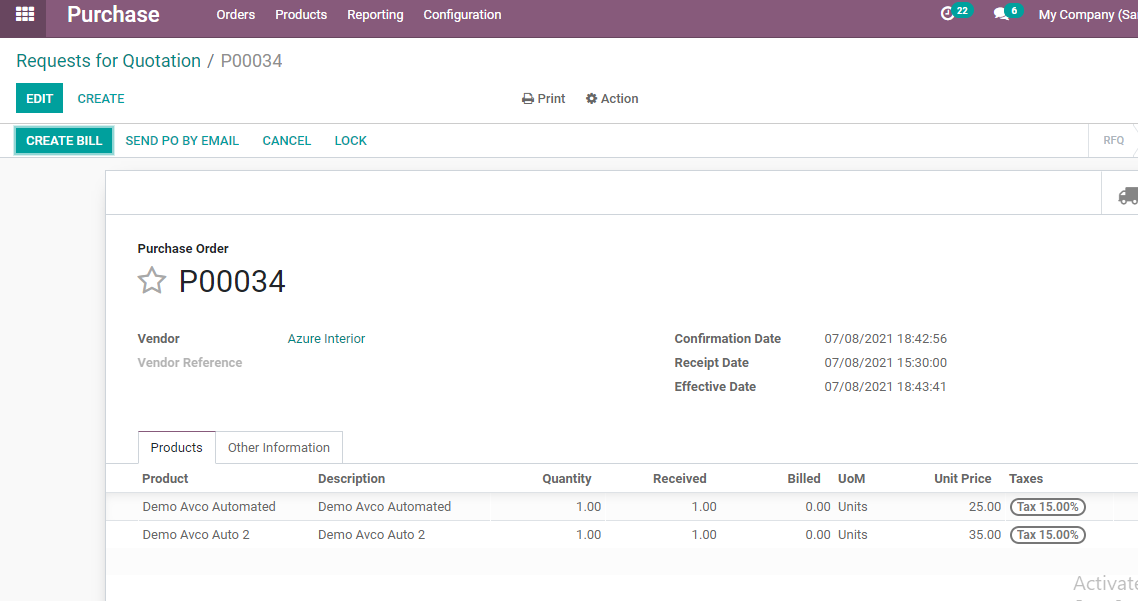
IT is time to move on to the Purchase module to create a PO for the products.
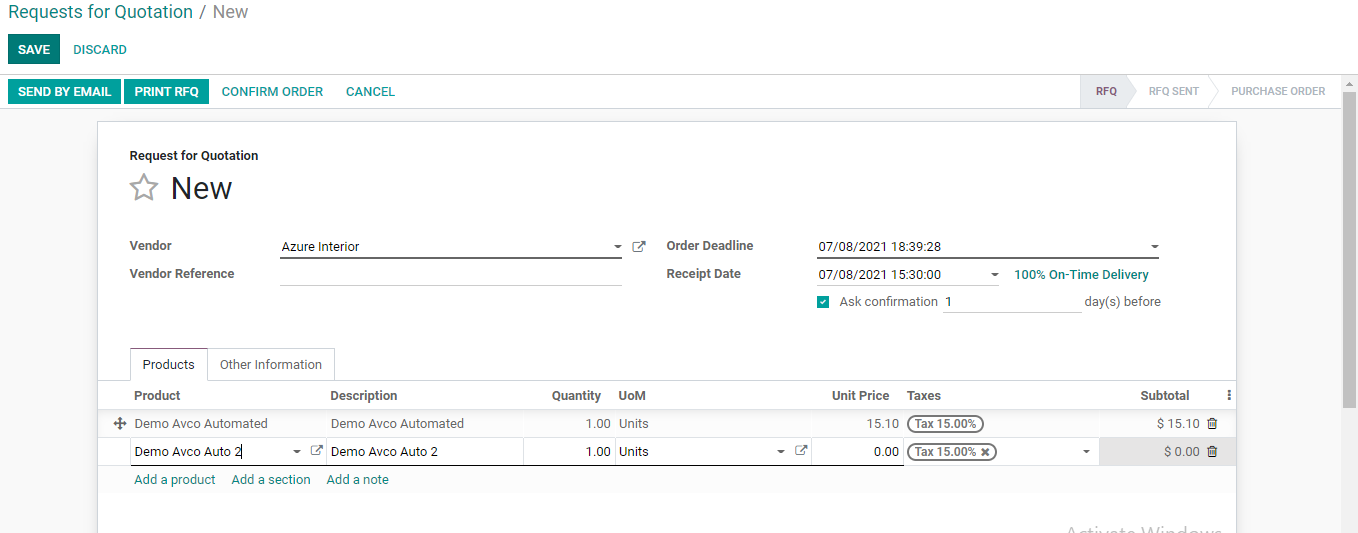
I have selected the two products after filling in the vendor details and order deadline.
We also have to set the unit price for the products.
The subtotal is viewed on the right side of the product line.
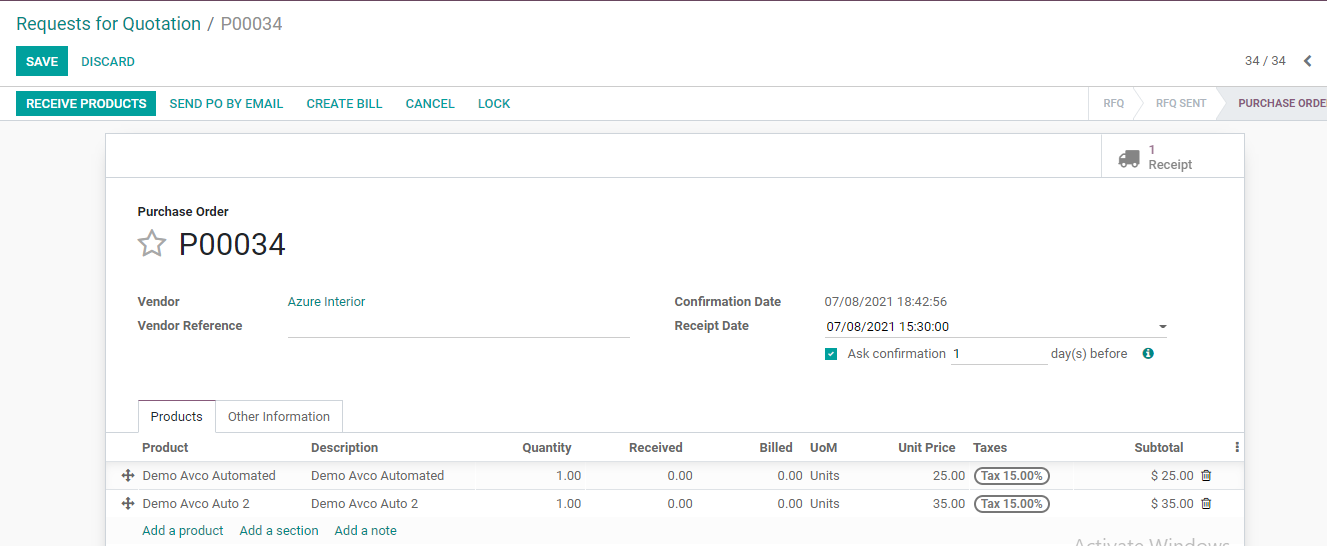
We can confirm the order
ReceiveProducts
Validate receipt
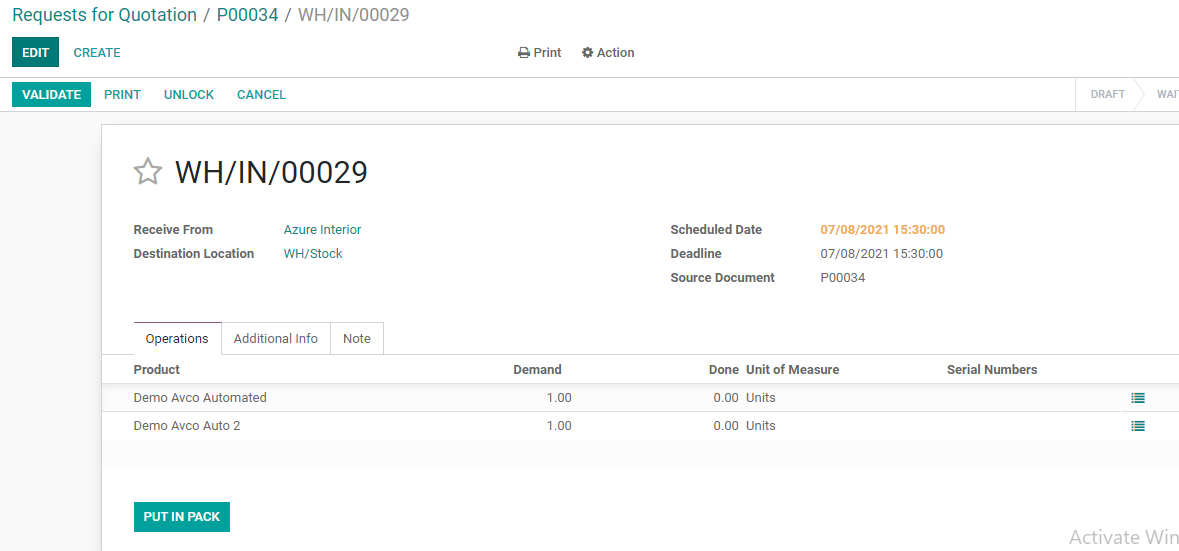
After validating we receive the product.
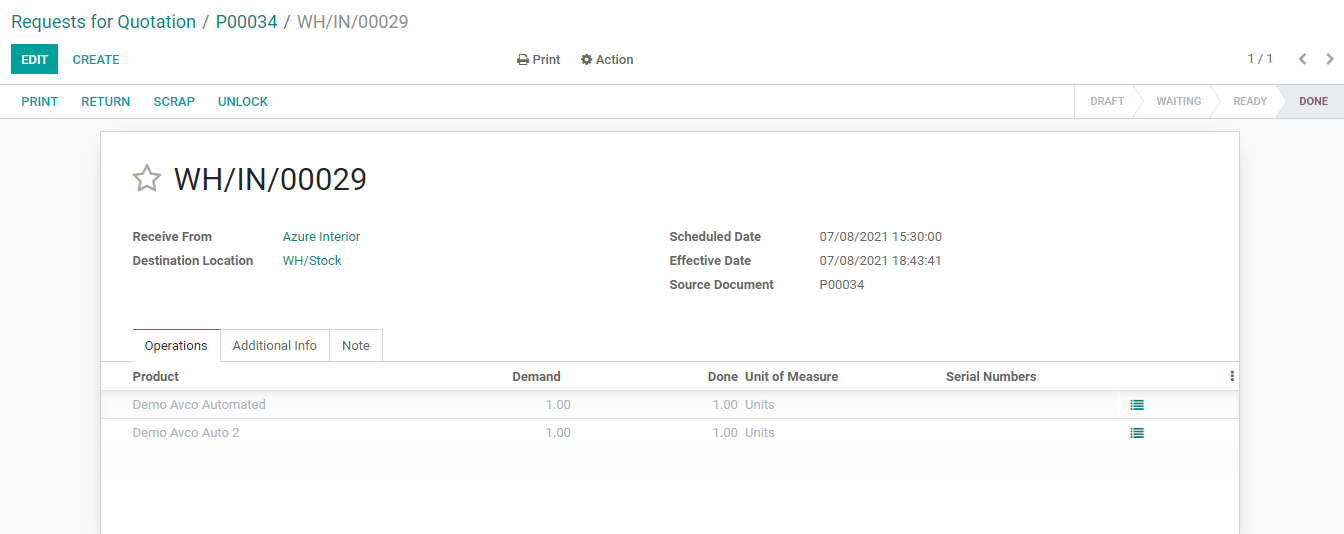
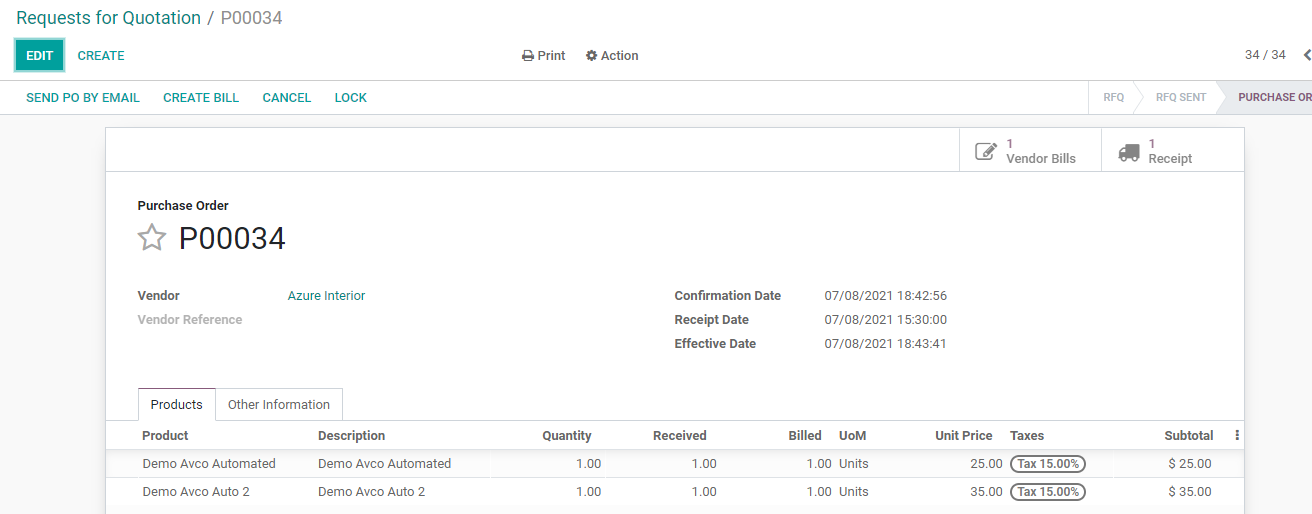
WE get the status of the PO as Done.
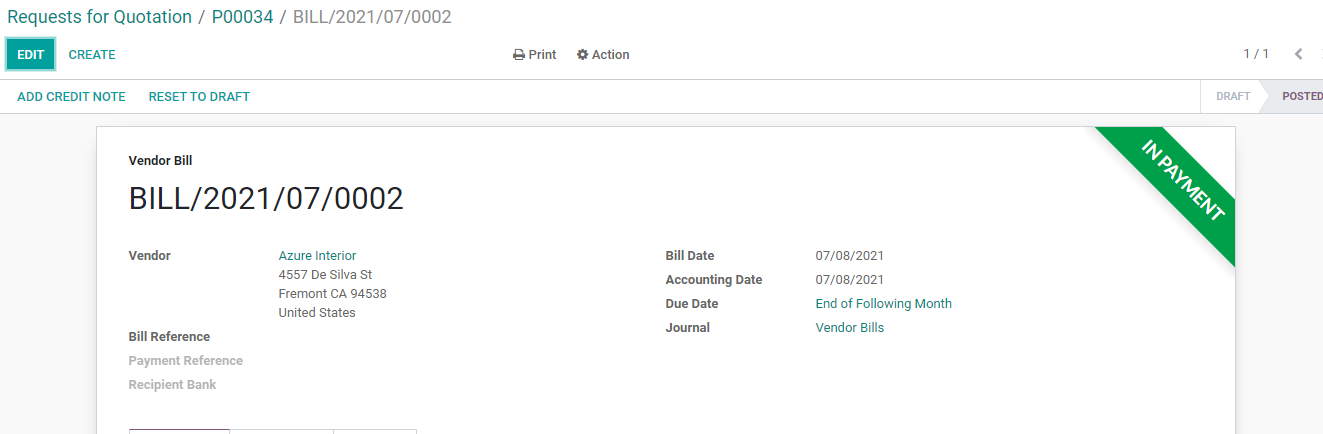
Now we can click the CREATE Bill button to create a bill.
Here we get an option to create a bill. After clicking it confirms the payment and registers the payment.
Return to the PO page and then go to receipts.
Here we can find a receipt and the status can be viewed as Done
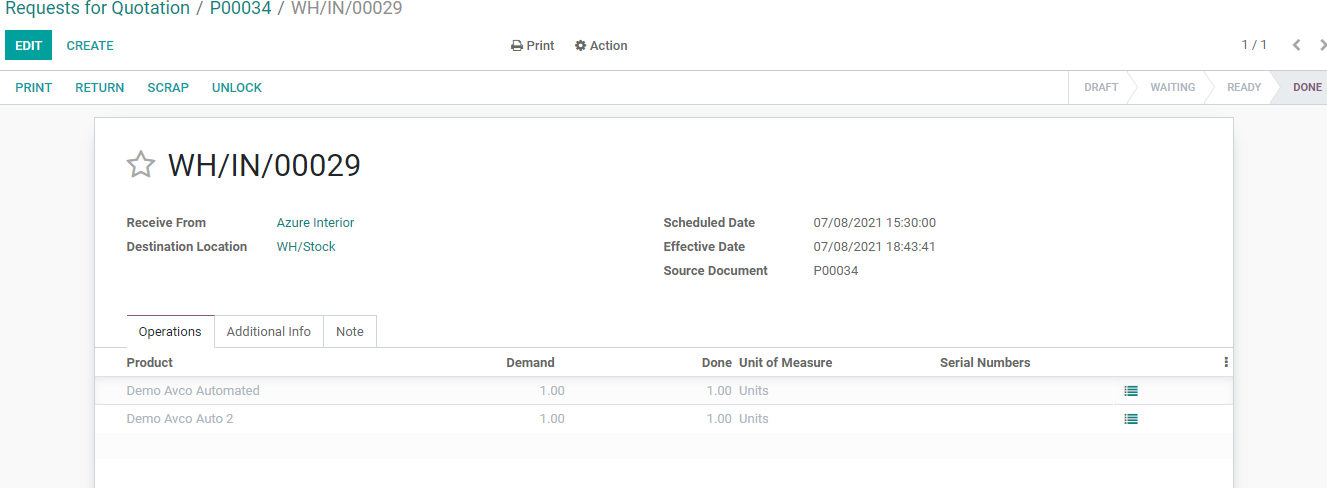
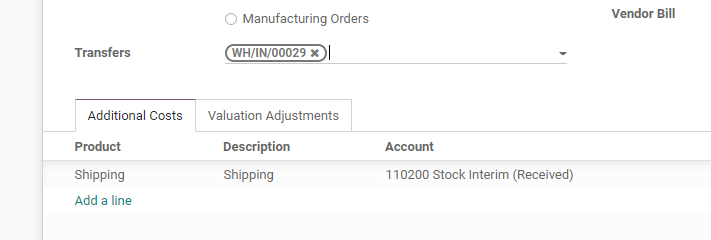
On the top, there is a reference number. The number here is WH/IN00029. We have to copy this reference so that we can add additional cost or landed cost to the product.
Return to the Inventory Module to complete the task.
It is important to create a new landed cost for the same.

Here we can find the date on which the landed cost is being created. Then we can find another field Apply on. We can find two options here- Transfers and Manufacturing Orders. We can first choose the Transfers option for the landed cost.
We can find a Tab Additional Costs here.
Click on the product line and add additional costs like insurance, shipping, handling, etc.
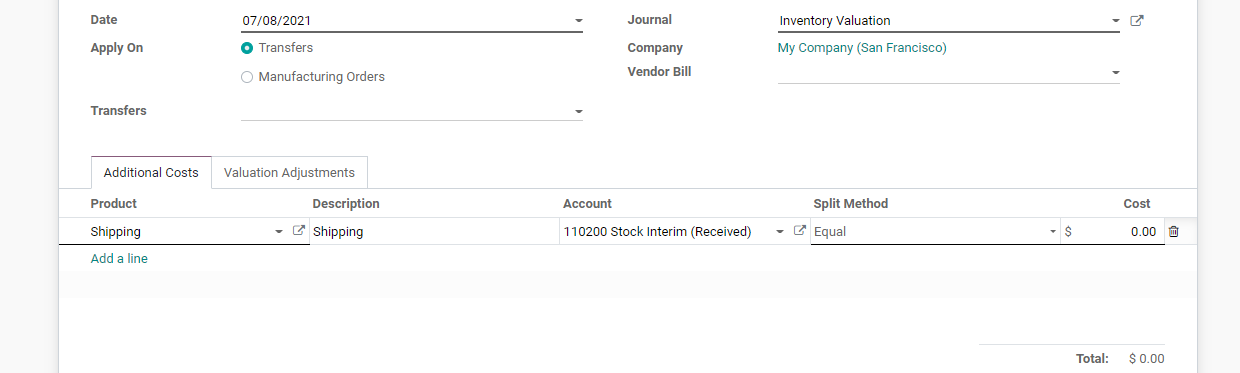
I have added shipping as the first product. Now we can use the external link attached to shipping to add necessary fields.
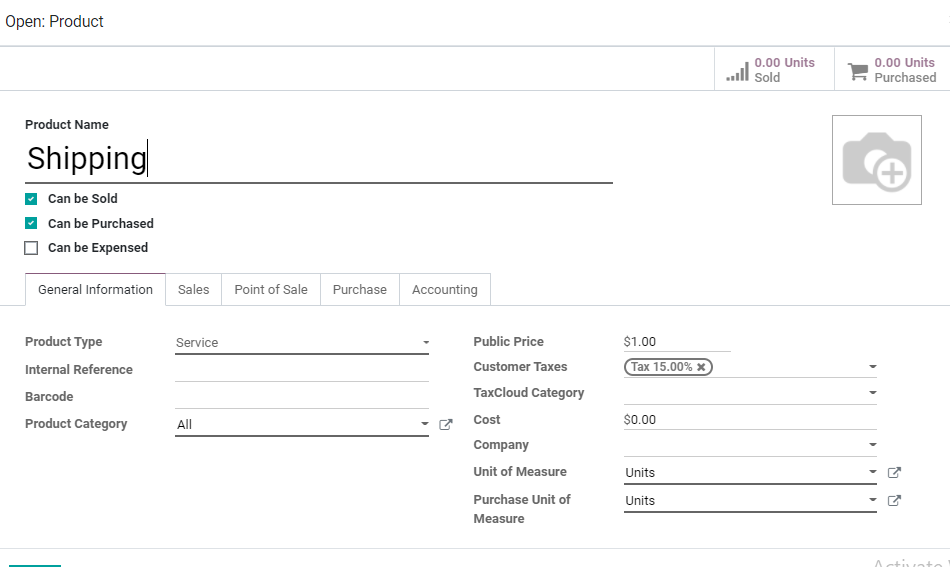
Here, the product name is shipping and the product type is service. We can now move to the Purchase tab to set the landed cost.
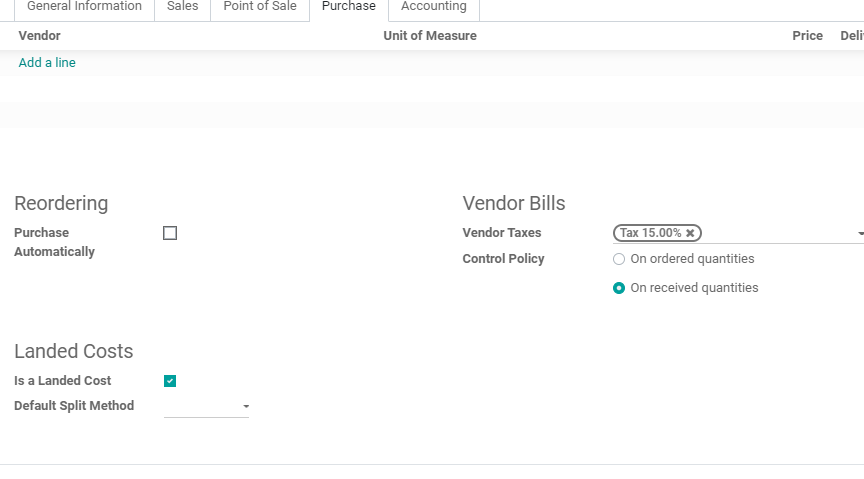
WEhave reordering, vendor bills, and landed cost sections here. Below landed cost we have to enable the Is a Landed Cost. We can also select the default split method. This helps us to choose how to split the landed cost.
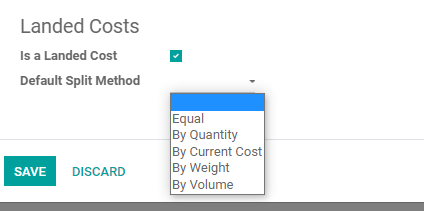
We can choose any of the methods from the list. If we select Equal the landed cost will be split equally among the products.
The Quantity the option enables us to split the amount based on quantity. We can choose, by current cost, by weight, and by volume options also based on our requirement.
I have chosen the method as Equal now.

We can also set the cost here.
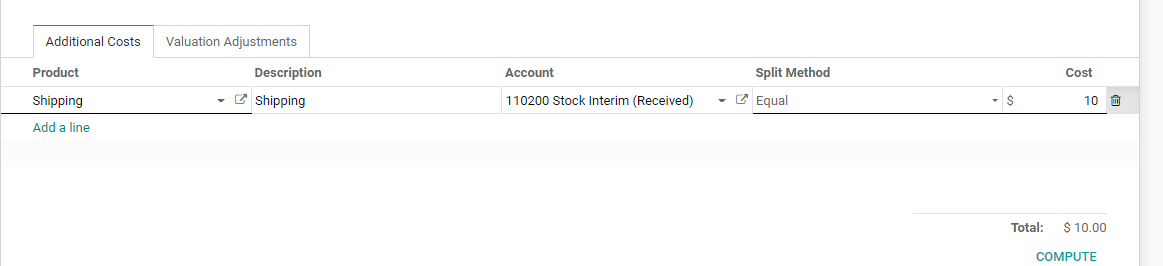
I have set the cost at 10 and now will click COMPUTE
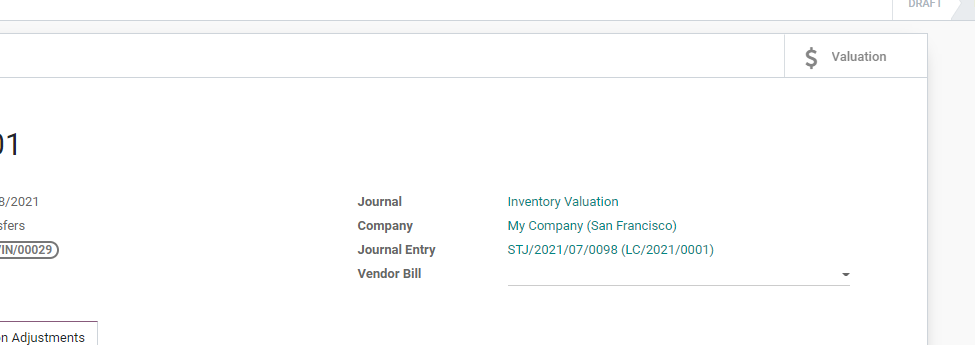
Now go to the Transfer field and select the Reference number for the PO from there for which we want to apply the landed cost.
Then check the next tab Valuation adjustment

Here we can find that the shipping cost has been added to both products. As the total landed cost is 10 it has been divided into two equal parts and $5 each has been added to both the products. Choose other split methods the same way.
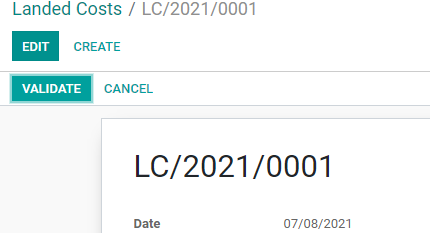
Then use the Validate option
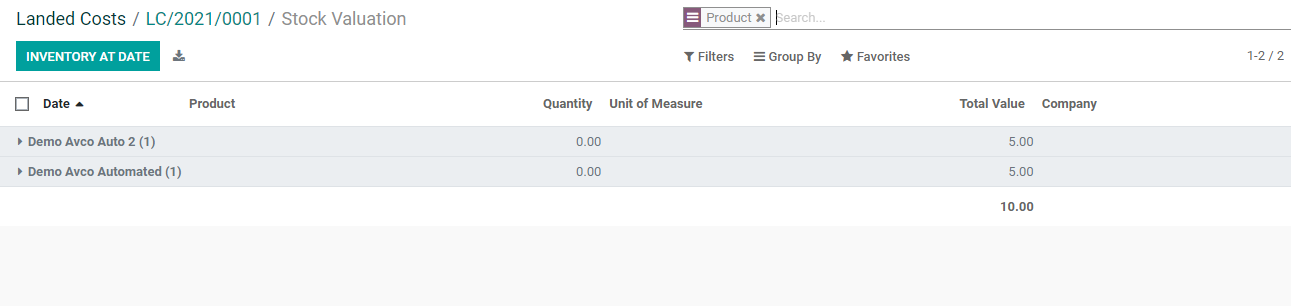
Once validated get a tab to view the valuation
Click on it to see the valuation
Now the price of the product would be changed. This can be viewed by checking the product detail.
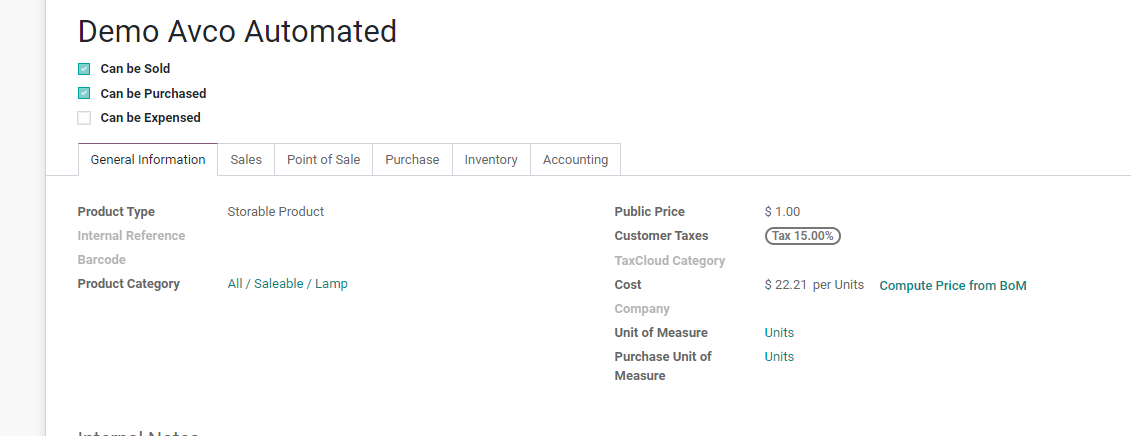
The same way cost has been updated for the second product.

It's all about landed cost management for AVCO.
Landed Cost Management for FIFO
To check how to manage this, we have to create new products. We will have to make changes in the product category as well. For this we can return to Inventory Module> Products> Products
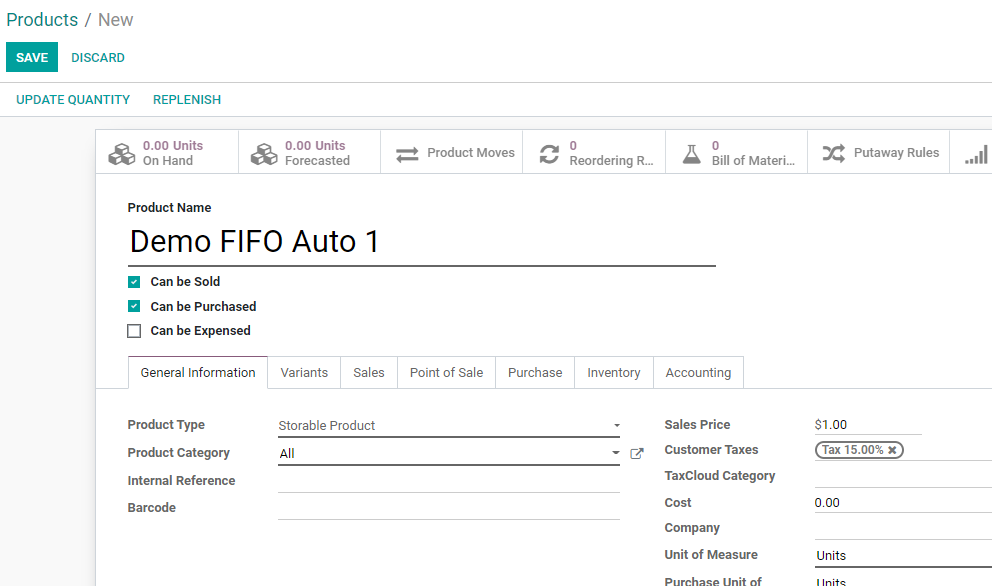
Here the first product is Demo FIFO Auto 1.
The product category needs some changes in settings. We can take the same category/Saleable/Lamp
As mentioned in the beginning, we can do landed costing only for products with a costing method as AVCO and FIFO. As we have already discussed how to find landed costs for AVCO products, now we have chosen FIFO as a costing method.
Inventory valuation should remain Automated.
Save the changes to return the product and we can save the product.
We can create one more product with the same costing method and inventory valuation.
We have created two products Demo FIFO Auto 1 and Demo FIFO Auto 2.
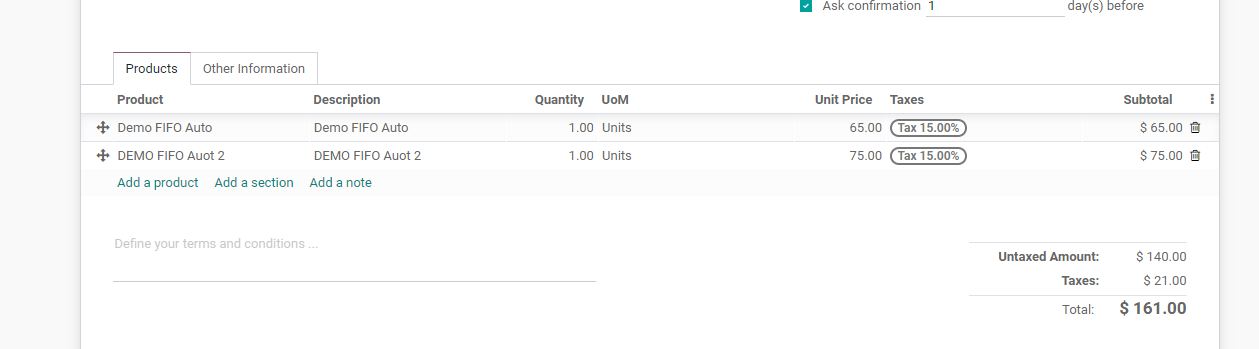
The remaining process will be the same. As in Avco products, we can create purchase orders for these two products also.

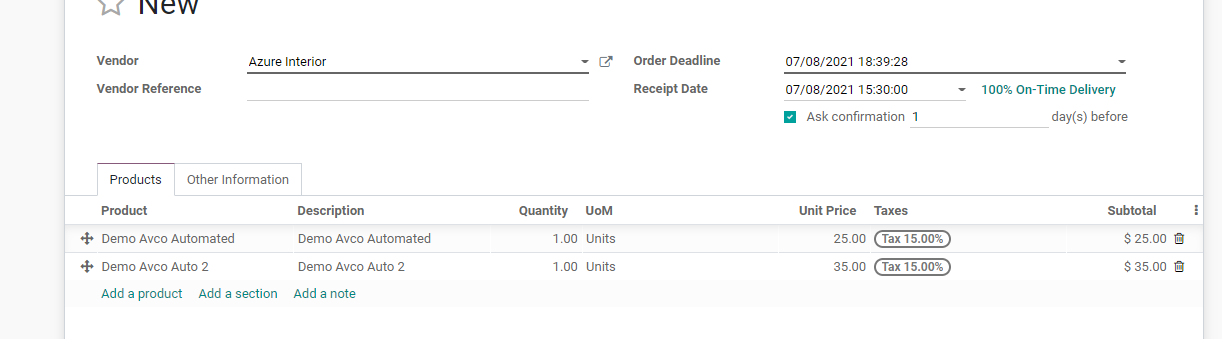
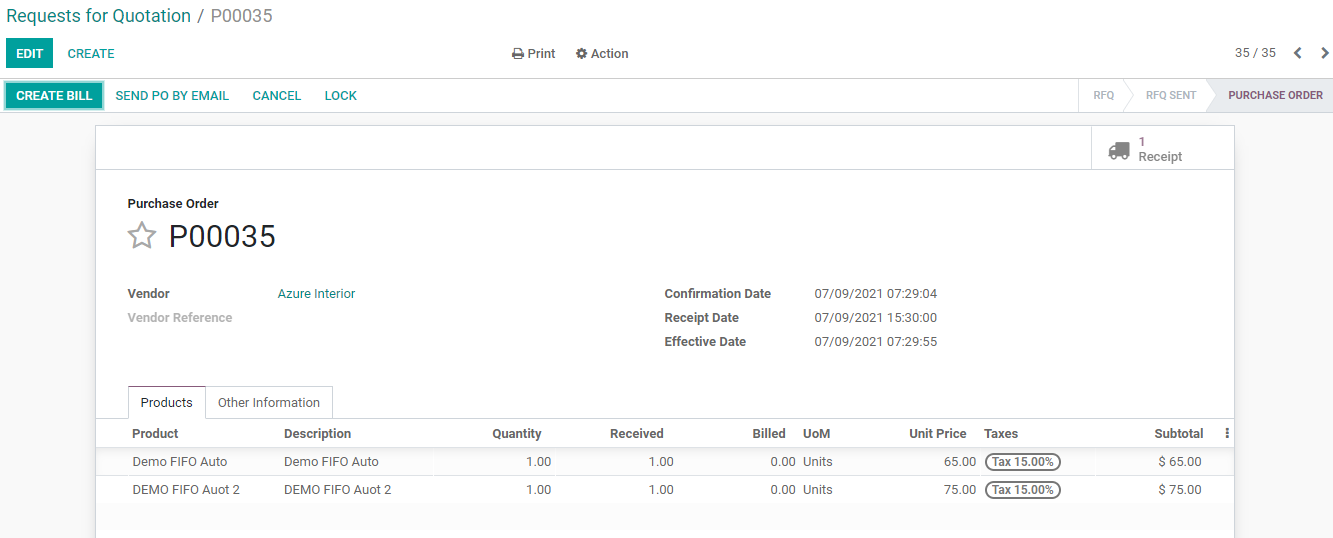
We have added the vendor and product details. Now, we can set the unit price for the products.
The amounts have been set as $65 and $75 for the products. We can also find the subtotal and the total cost.
Now we can confirm the Purchase order to receive the products.
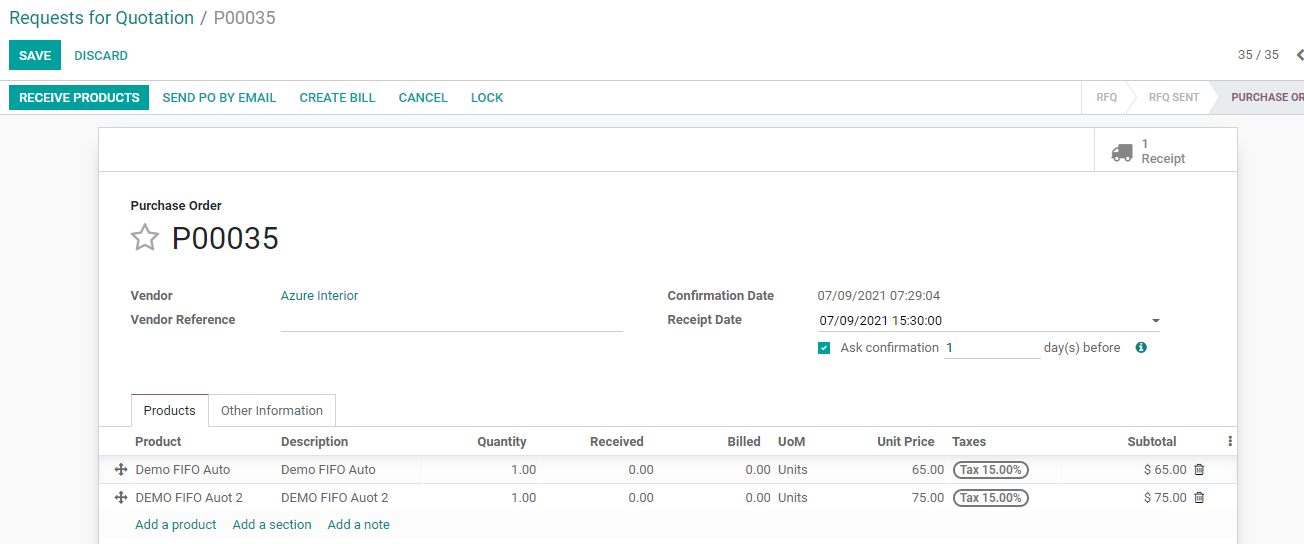
Then it is time to validate it.
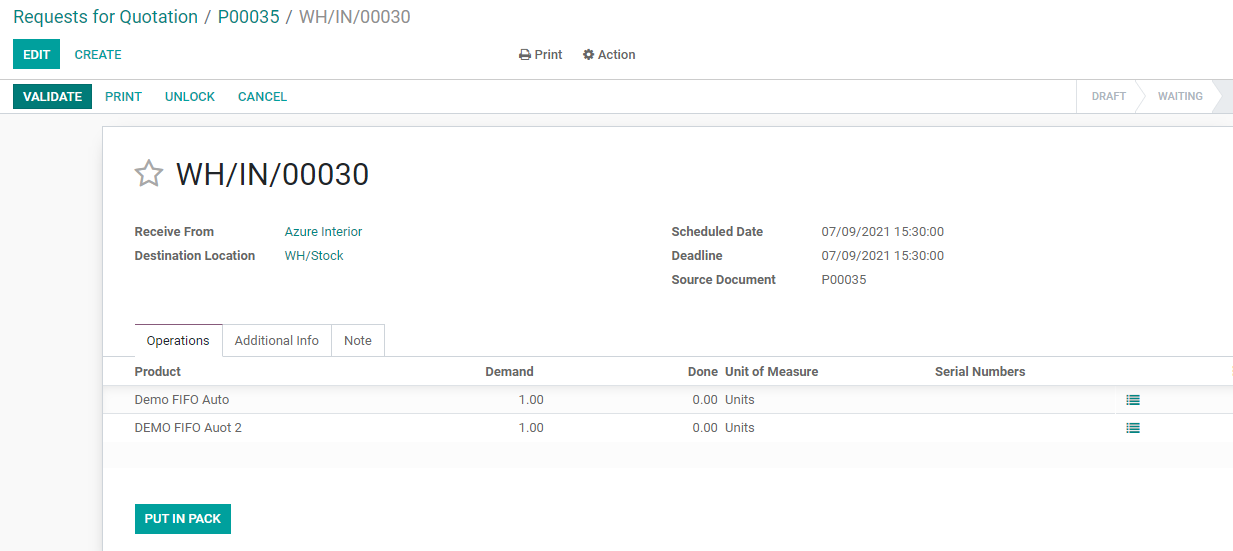
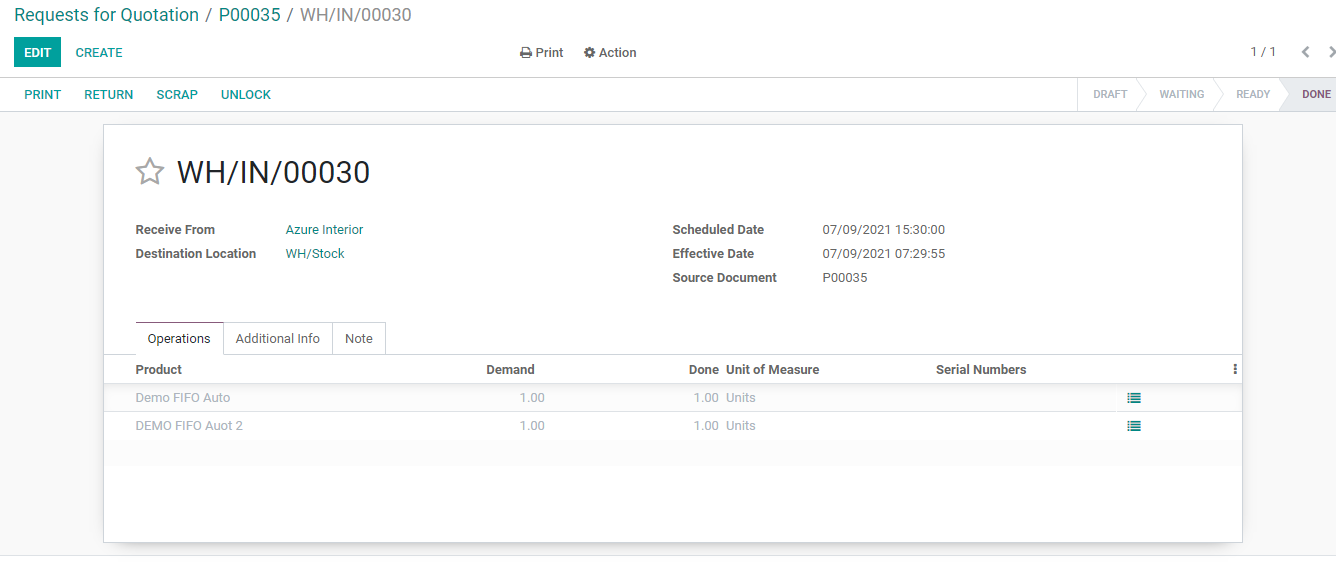
We have completed adding the items to the purchase order and we have received the product. The status now is Done
Once it is done we can CREATE
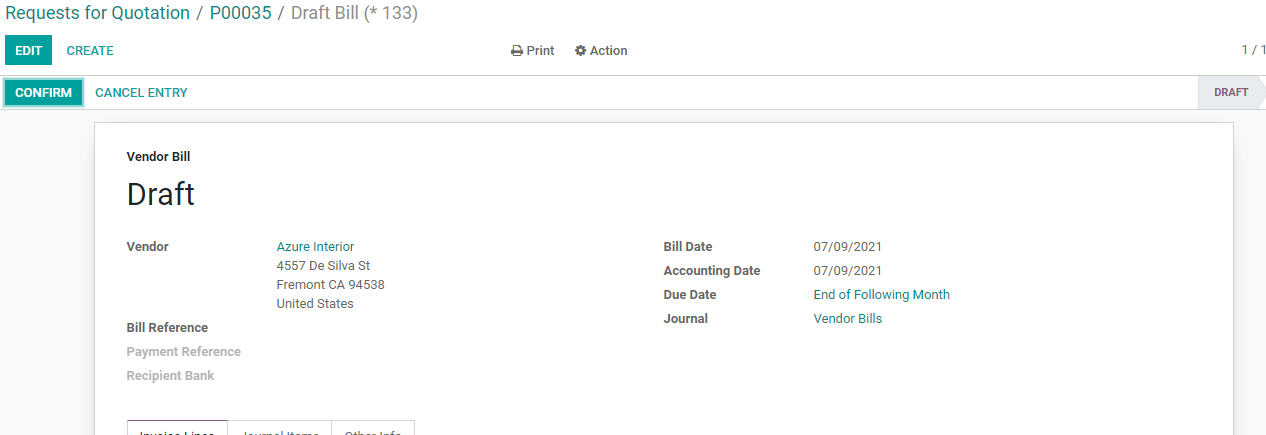
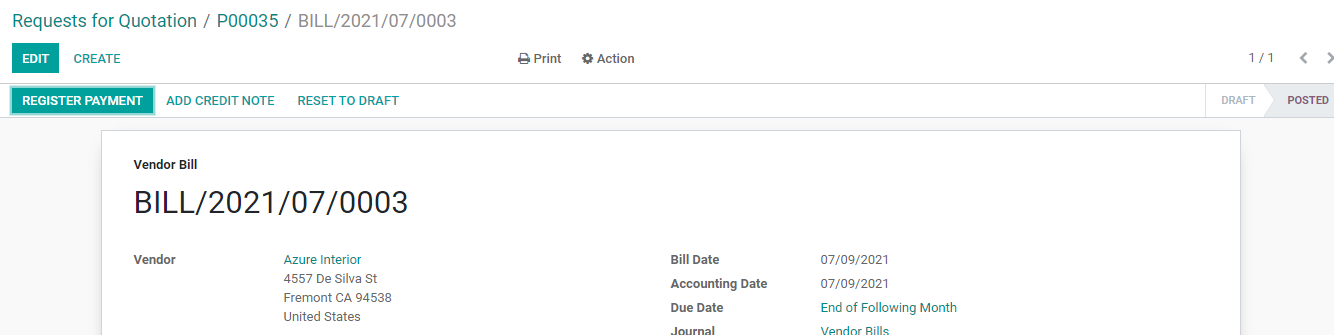
BILL using the tab.
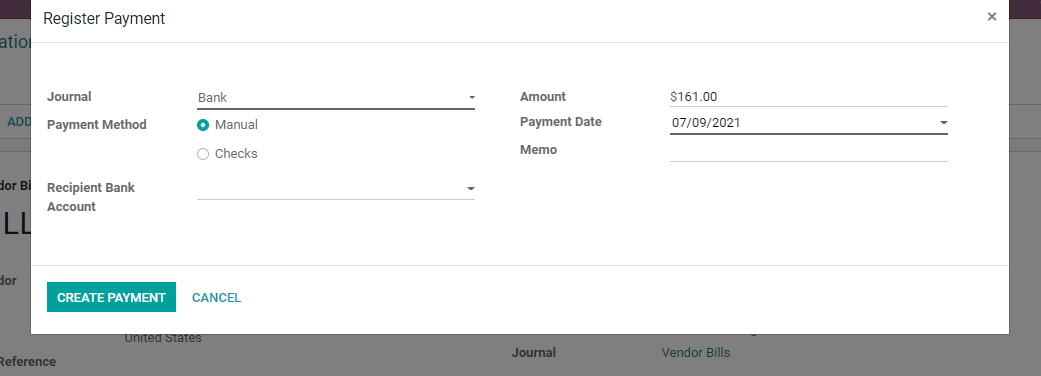
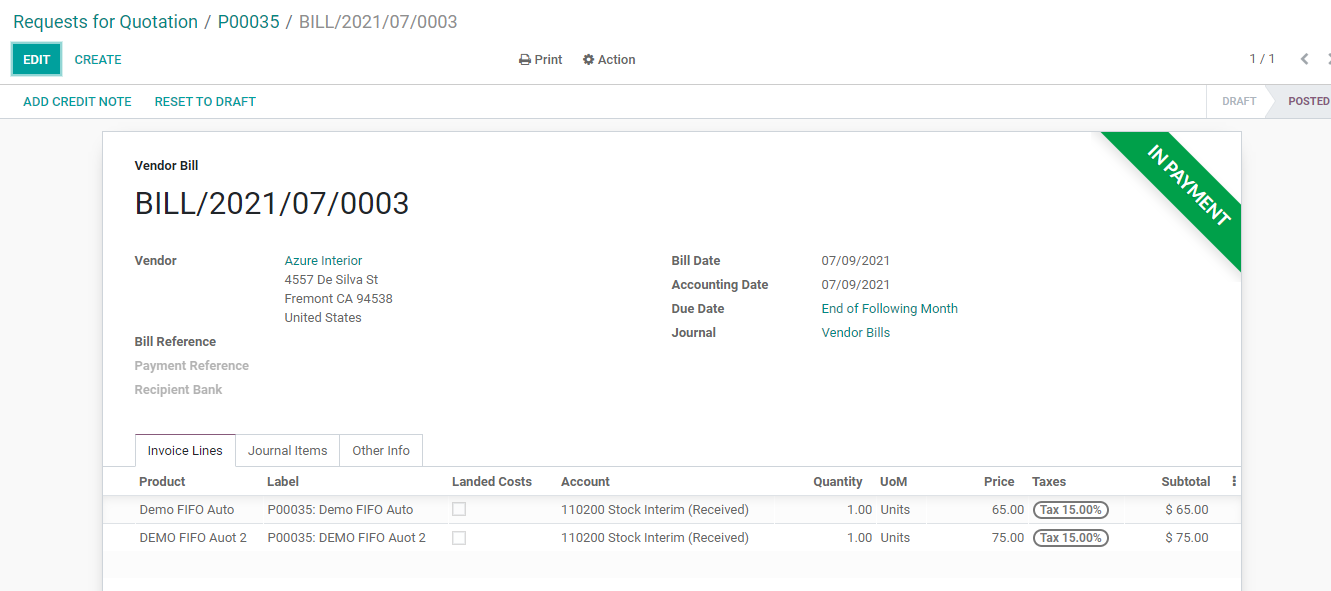
It is not a difficult task and we can Confirm the Bill, Register the Payment, and find the status as IN PAYMENT.
Register payment
IN PAYMENT
After this, we can return to the purchase order and find out the receipts.
Clicking on Receipt we can find the receipts.
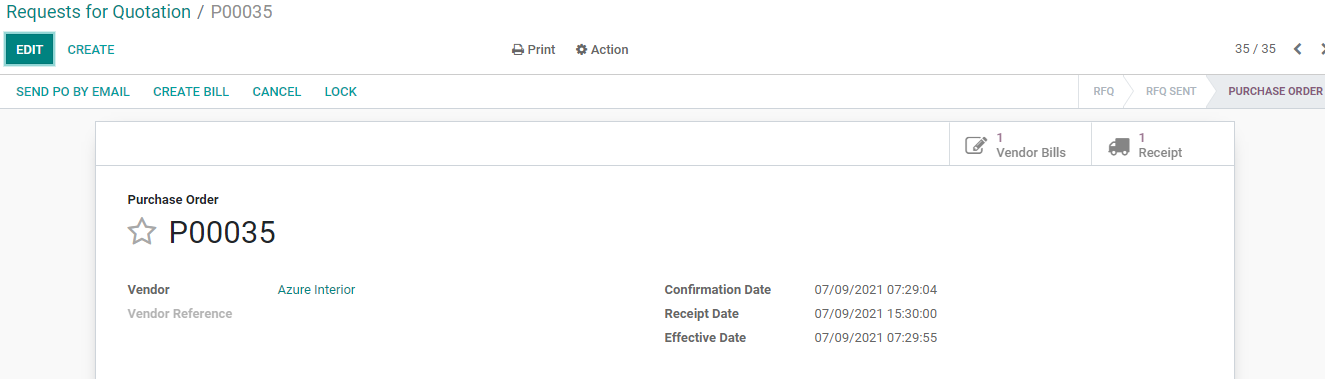
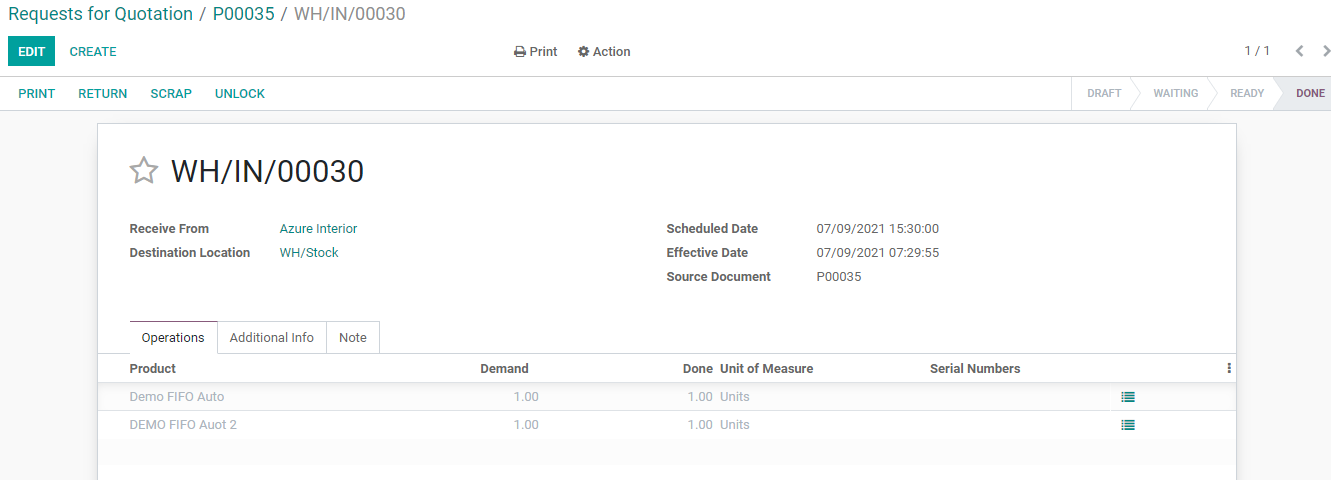
We can find the reference number here and the number that we find now is WH/IN/00030.
We have completed the Purchase order creation and now we can move to Inventory Module to create landed costs for the new product.
WE can find the previously created landed cost here.
We don’t need it now. So we can create a fresh landed cost for the DemoFIFO products.

We can find the date of creation of the landed cost here as well.
We can choose Transfers for Apply on the field.
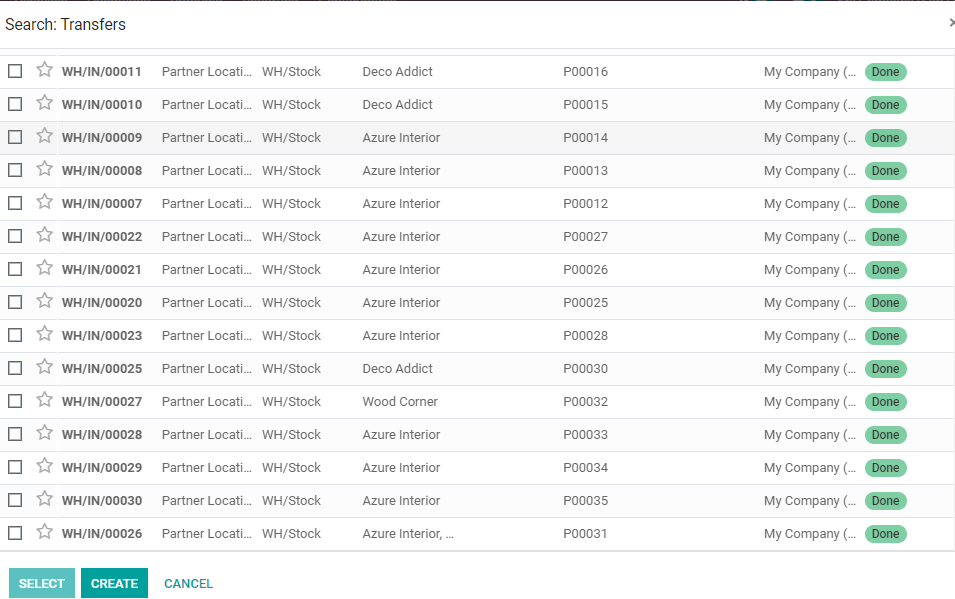
Then we can select the transfers. Either we can copy the reference from the receipt and paste it here or just pick the corresponding number from the list.
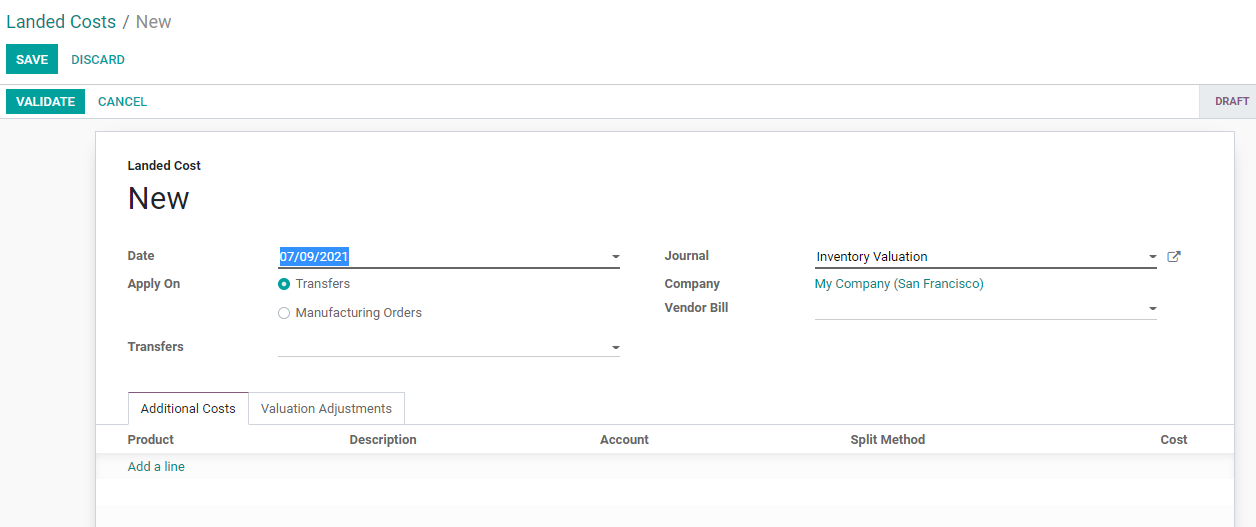
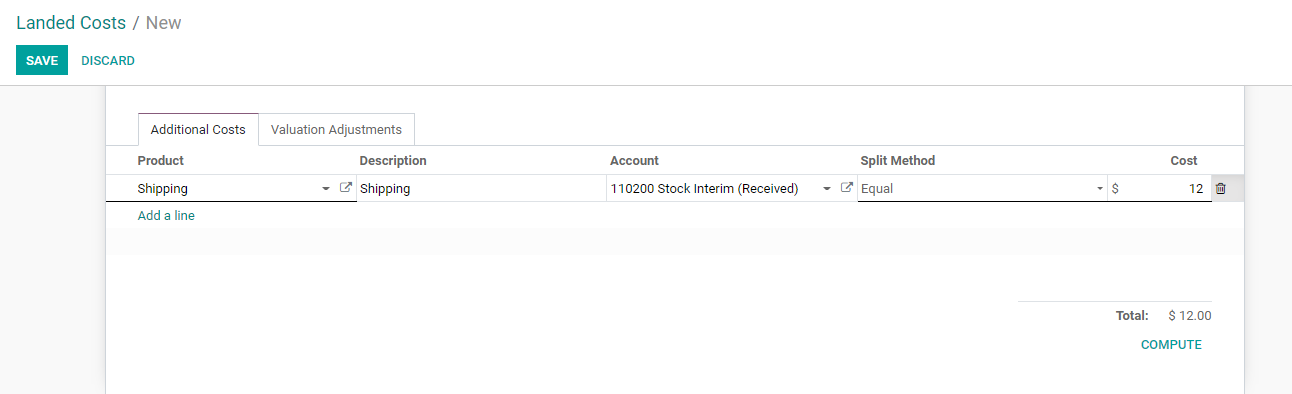
Then we can go to the Additional Costs tab and create new products. Here the products are service products like Shipping, insurance charges, etc. Let us select the product line and add the product as shipping.
Here also I am setting the split method as equal. The shipping cost can also be added here.
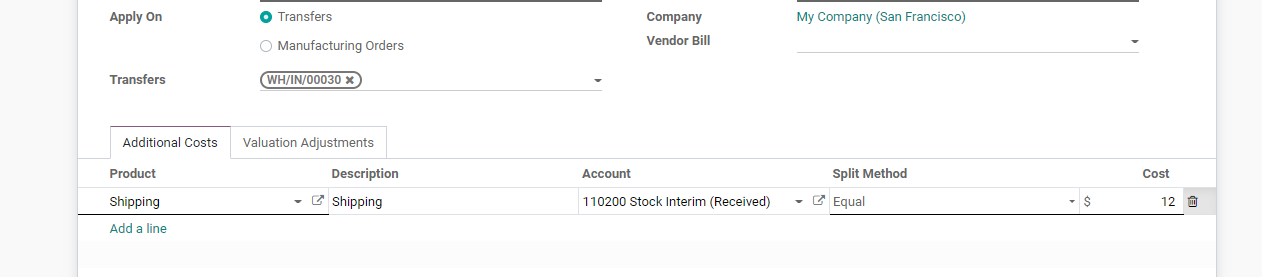
I have added the shipping cost like $ 12.
Now we can use the COMPUTE tab at the bottom to add the cost to the products.
Where can we check this now? We can move to the Valuation Adjustment tab to see the products and their costs.

BelowValuation Adjustments we can find the product name, quantity, Original Value, New Value, and Additional Landed Cost.
We can now return to the Additional Costs tab.
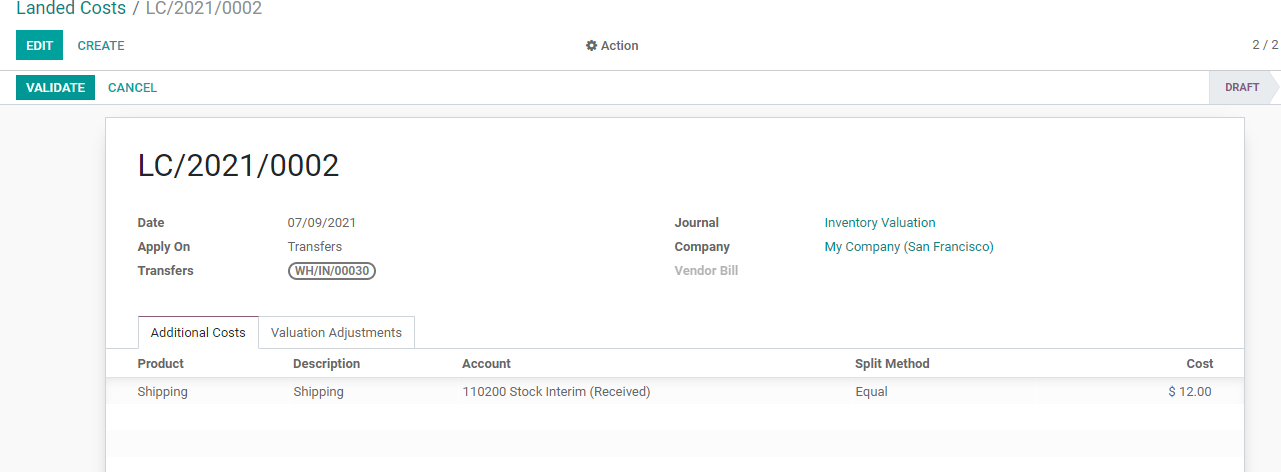
We have to check if we have added the stock account here and then go for validation.
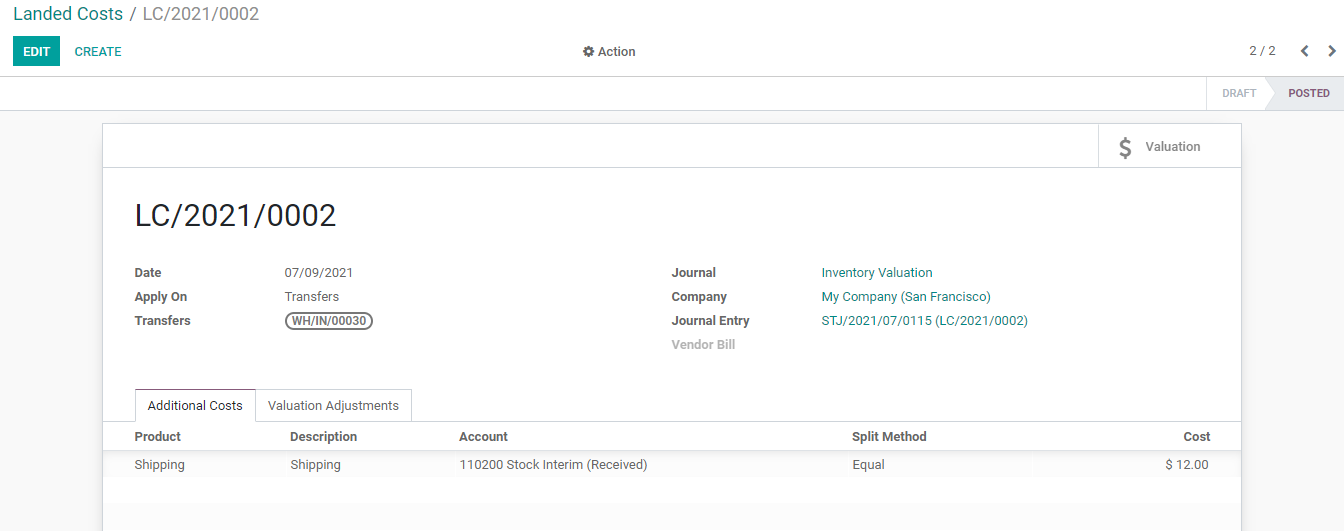
Once validated the entry gets posted.
Clicking on the newly created Valuation icon we can find the landed cost for the products.
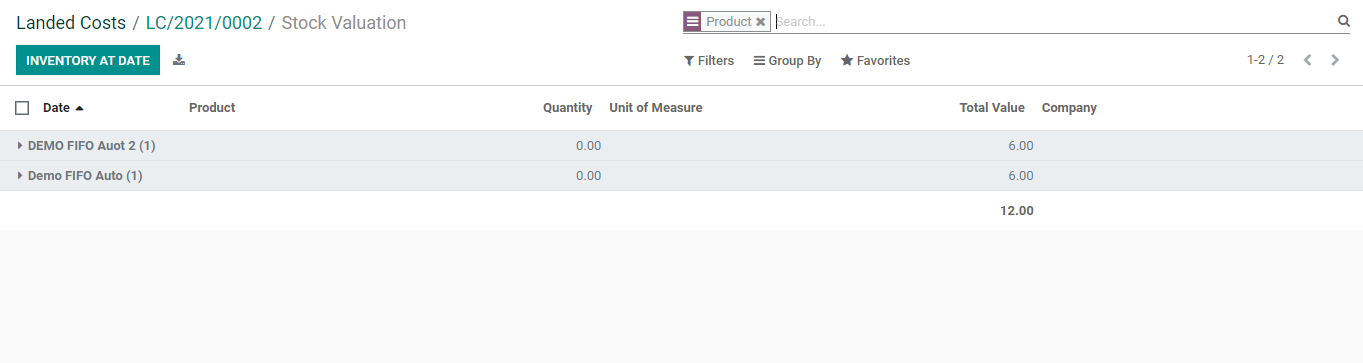
The landed cost has been equally distributed between the products. The cost added by us was $12and the two products now have a landed cost value of $6 each.
Now let us check the product and find if the cost has been added to the product.
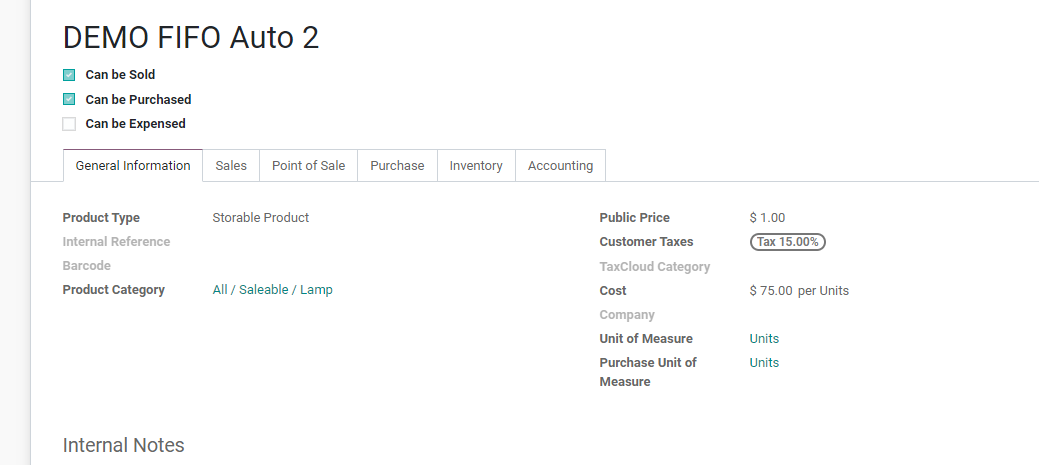
Here we can find that the price of Demo FIFO Auto 2 has not been updated.
This is because we have selected the costing method as FIFO and in this case, the cost gets added only when the product leaves the stock.
So to check this feature we have to go to the Sales module and create sales orders.
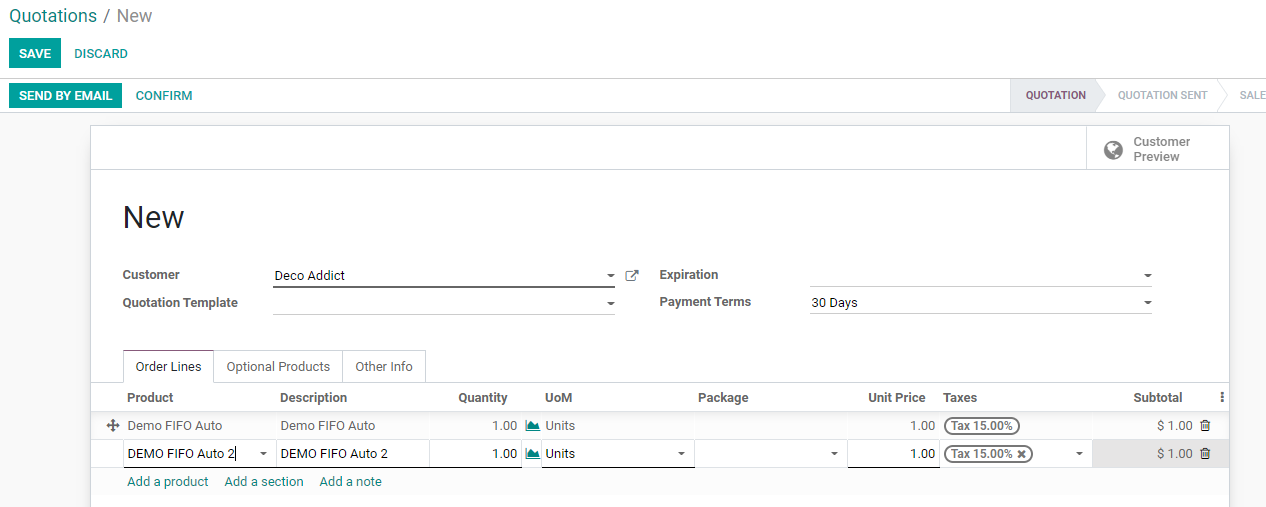
Once the products are selected and customers are added we have selected the customer for whom we are generating the sale order.
Now we can confirm the sale order
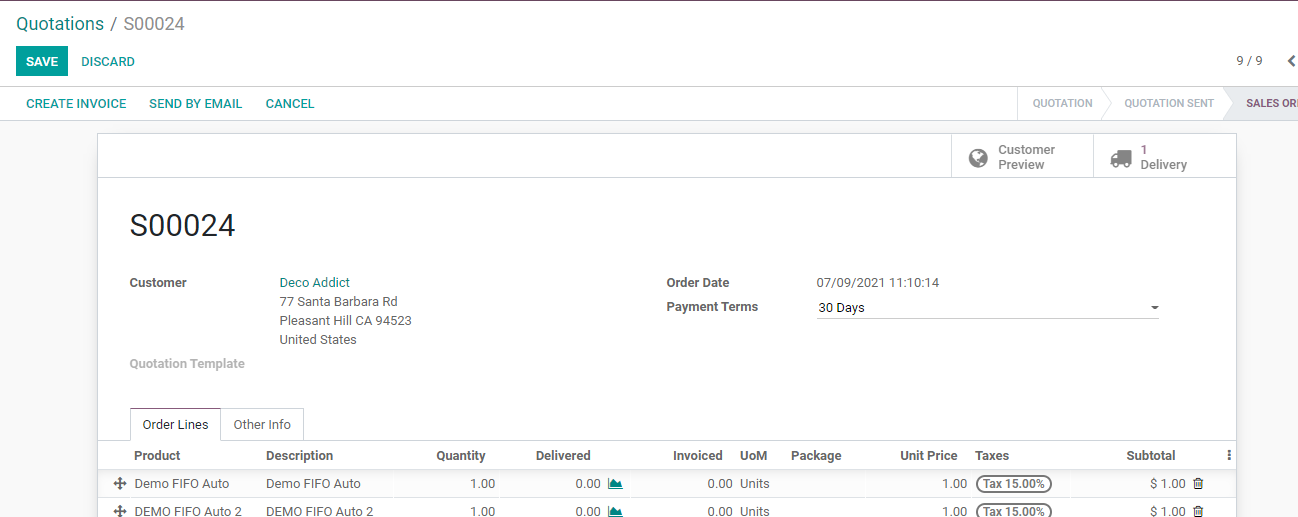
We can now go to Delivery to make the delivery.

We can validate the delivery here.
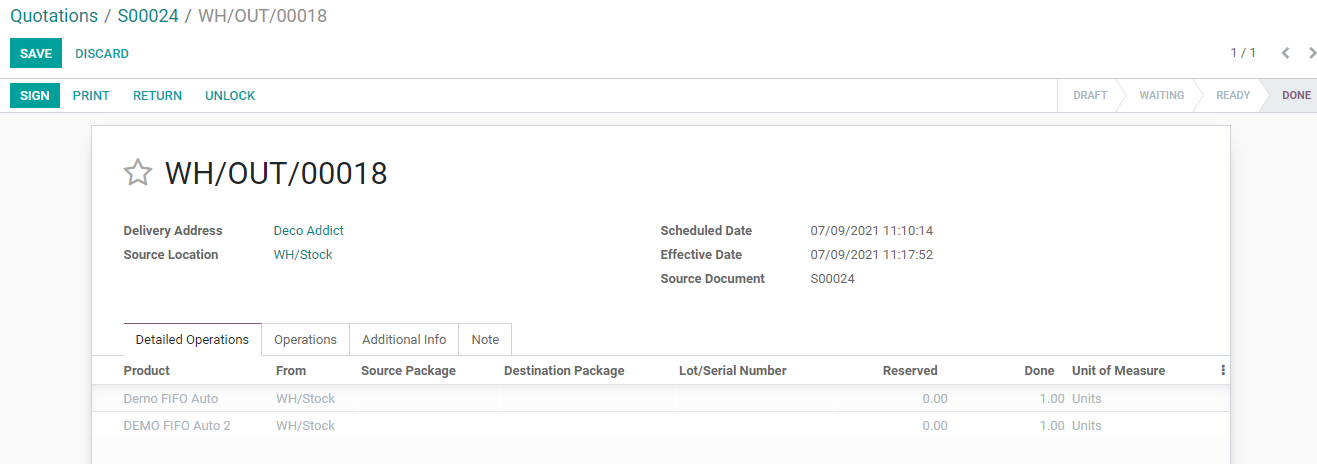
The delivery has been validated. So we can check the product details now by clicking on the product.
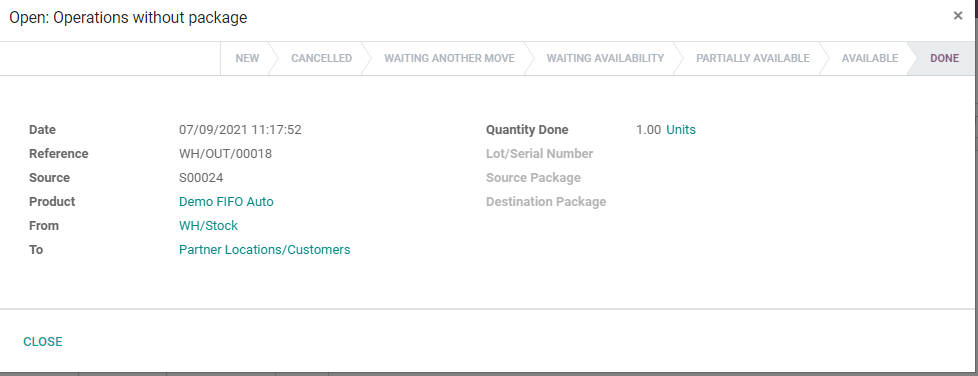
In the above pic, we can find that excess cost or the cost for shipping can be found added to the cost.
This is how the ended cost is managed with Odoo inventory.