Every business organization allows its customers and vendors due dates to perform the payment for their products and services. This allows the business to run smoothly for both the concerned parties and avoid a clash in fund shortage. While doing so there may be various bills and invoices kept pending and provided with due dates, which is unable to be tracked in a large business organization.
This is where the Odoo tool to follow up the payments in the accounting module comes as a handy tool and does the task for the user in an effective manner. This function allows all the invoices and the payments to be followed up and indicates the due date along with visual colour representations allowing the user to understand them easily. The follow-up function also has the options to notice the customers and the vendors on the due payment bills.
The cash of a company may be affected at instances where the payments by the customers and vendors are not done in a systematic and up to date manner. At such instances, the debt amount by the customer to the company will be increased and in turn, will affect the company's operation since the cash flow will be disrupted. Similarly the same is in the case of a payable amount by the company to its vendors.
The company or the user should be up to date in the payments or come upon an agreement with the vendor to manage a healthy relationship. Since the user should have a track of the amount of money to be paid by the customer and the liable amount by the company to its vendors the Odoo platform has the feature where the user can view the aged payments, both receivable and payable reports.
This blog will describe what are ageing reports in Odoo and how to create follow up to track payments.
Ageing Reports
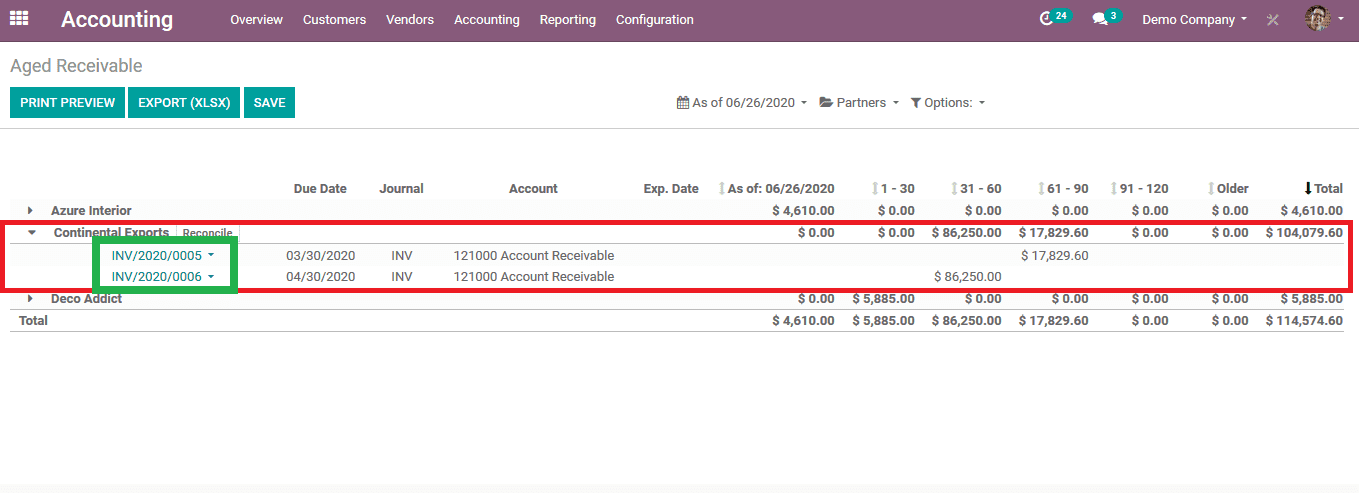
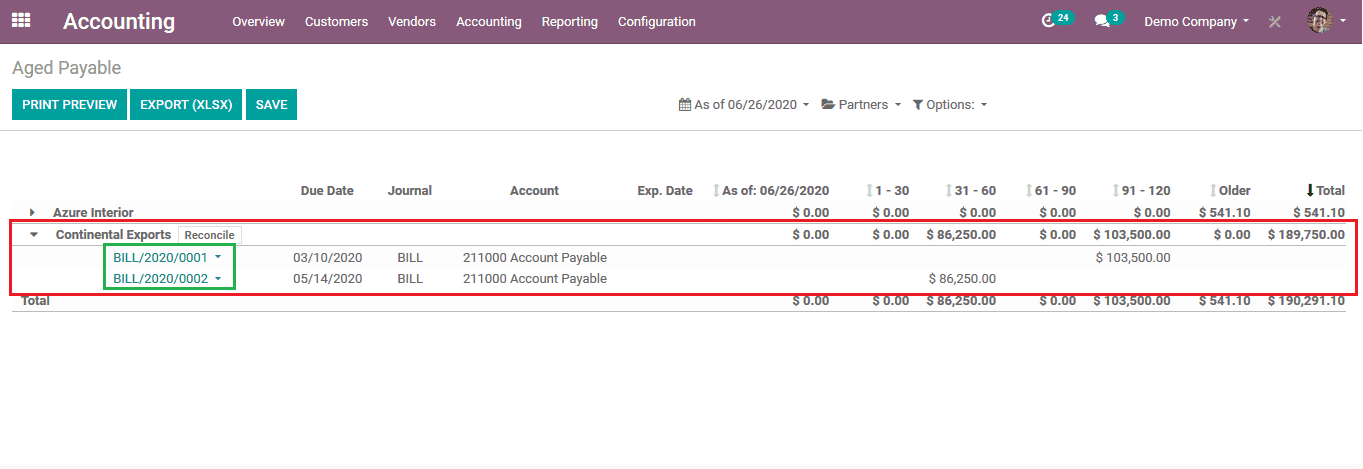
As mentioned earlier the company should have a track of the payments due and liable so in the Odoo platform, the user is provided with the help of a report called ageing reports which describes about the payable and receivable amounts for the user. The ageing reports are of two types aged receivable and aged payable each performing the assigned tasks respectively. The aged reports can be viewed from the reporting menu of the accounting module.
The structure of the report is similar in case of the payable or the receivable one. It is provided with the list of invoices along with the due date information. The user can view the amount as categorized based on the date. The initial column depicts today's date followed by date category duration 1-30,31-60,61-90,91-120 and older. The duration is considered from the due date of payment to be made. The total amount is depicted in the last column. The images below describe the aged receivable and aged payable reports
The understanding of follow up can be better explained by an example as described below.
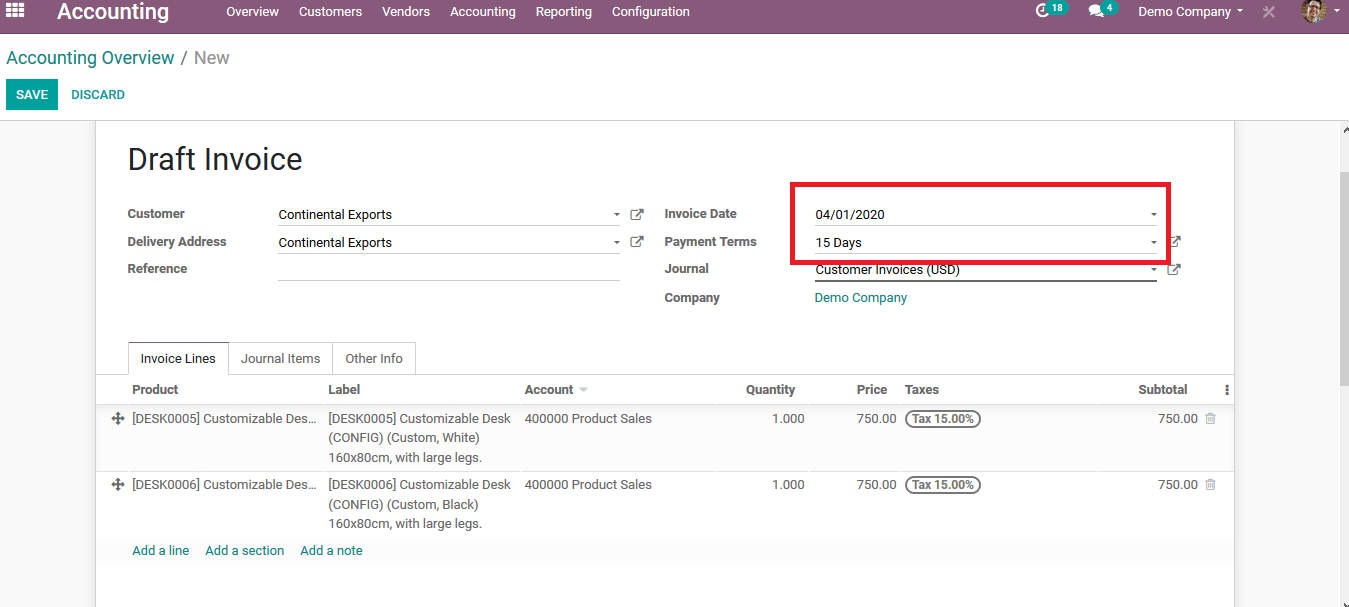
Step 1: An invoice is created to a customer in the accounting module upon the purchase of certain products. This initially sent it to the customer but the customer neglected to pay. To illustrate, an invoice is created for continental exports for the amount of 1723$ which they are expected to pay to the user 15 days post the creation of the invoice. The invoice is edited and posted for further processing.
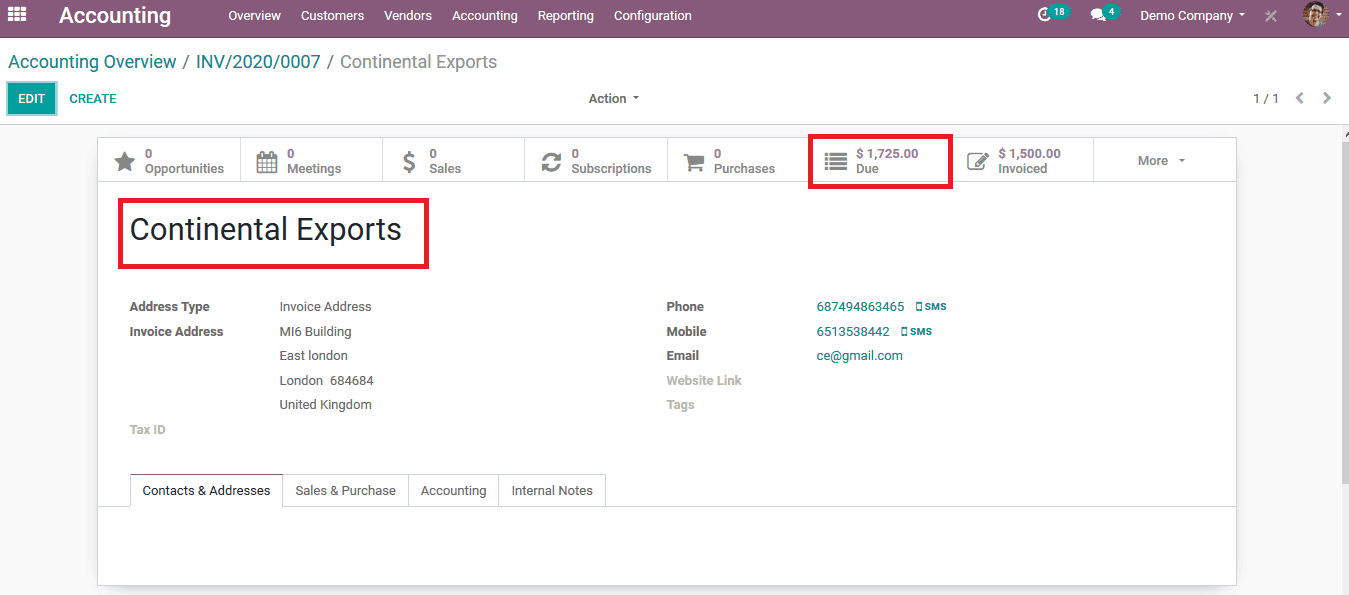
Upon selecting the customer icon from the list the details of the customer are mentioned along with the due amount which he/ she is liable to pay towards the user. The due amount can be the total of a combination of bills or invoices. These are the amount to be collected from the customer for their product or services.
Selecting the due icon from the customer window the user can view the due amount details including the invoice numbers. AS seen in the below image it depicts the company information, the due invoice details along with the separate due dates. The user can send an email from the same window as it allows the user to edit the default template information. The user can also select the due date of the next remainder which would be auto-generated to the customer upon not being paid.
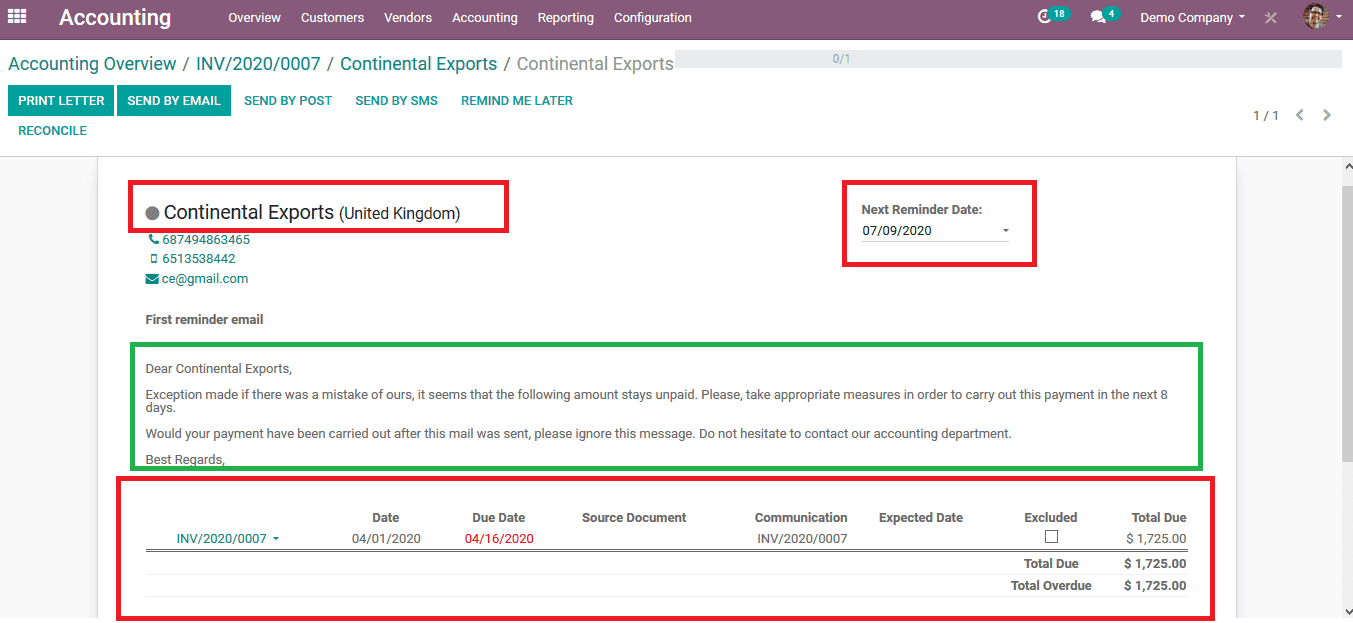
The user can print the letter and store it if needed else can send the letter via email, post or SMS. he user can always choose the option to remind later of the due follow up. At instances such as that the user needs to exclude certain invoices from being paid by the user by enabling the exclude option subsequent to each invoice.
The below image depicts the format of the letter which is generated upon printing the letter. The letter contains all the information of the due bill along with the customer details.

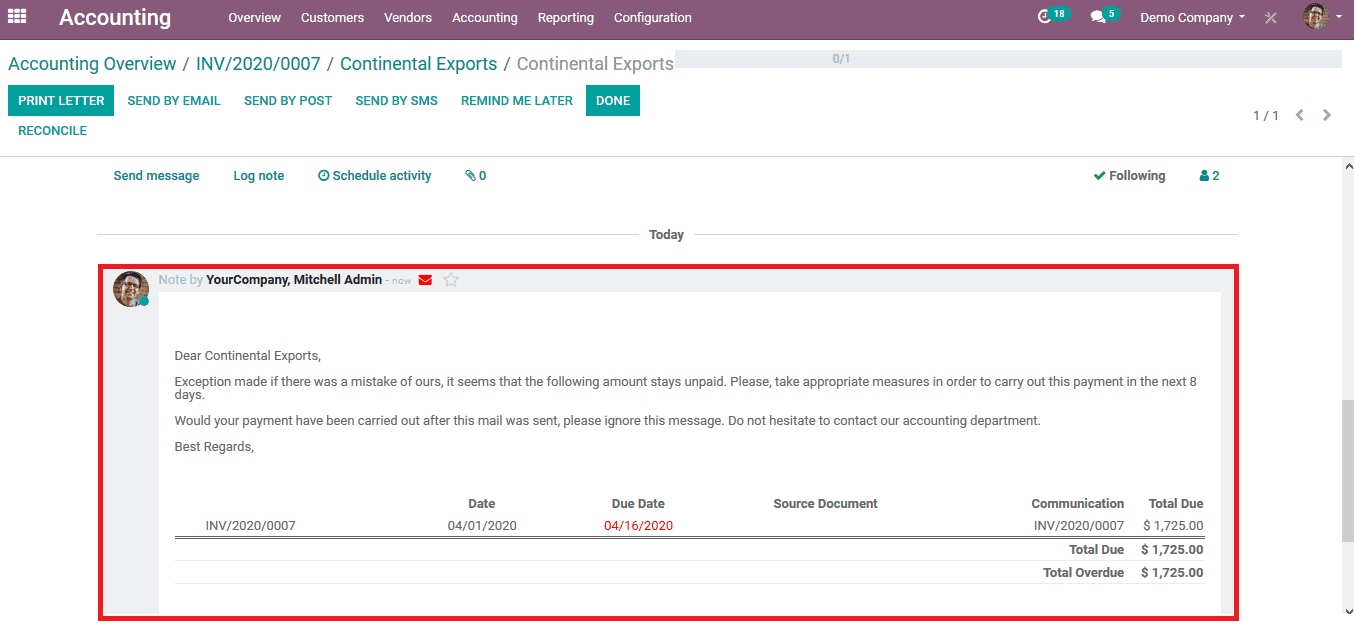
The activity done on the due payments section can be viewed on the activity registered down below of the same customer and the invoices generated. The below image depicts the activity register of the customer where the user has sent a due report letter via email.
Create follow-ups
The follow up can be custom created by the user as per the need thus allowing them to generate the required attributes to the follow-up request. This ability to create follow up tasks by the customer allows the user to ask for the due payments from the customer with certain detailed customization specifications.
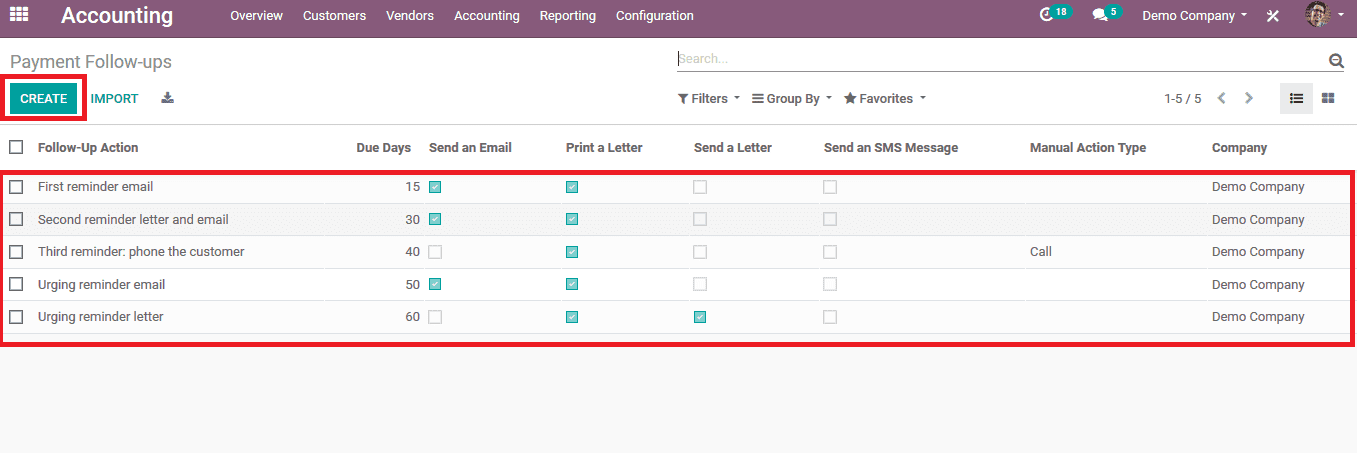
Step 1: To create a follow-up report in the accounting module from the settings menu select the option of follow up levels. Upon selection of the menu, a page displayed at the below image opens up. There are various options to follow up reports for the user to choose from and can customize them by enabling and disabling the options present in them.
Step 2: If the user wants to create certain customized follow-ups he/she can always choose the create option or can import the ones which have been preserved in an external source file.
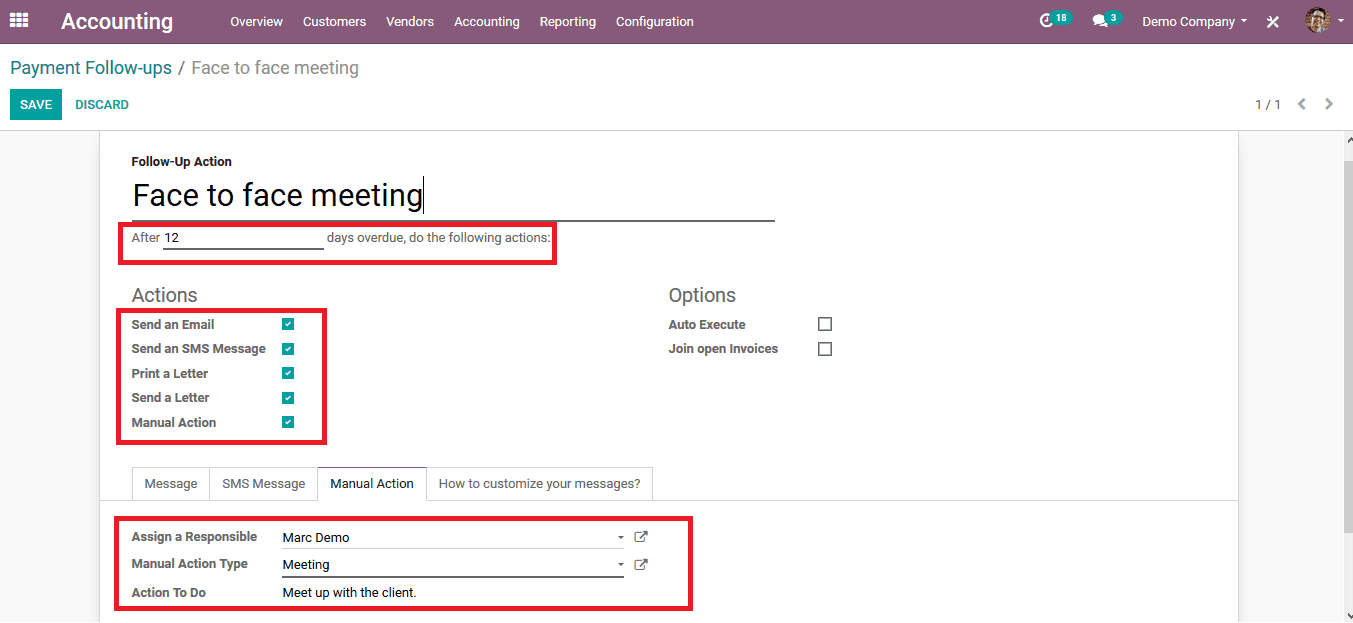
Upon selecting to create the user can fill in the details in the pop-up menu along with the name of the follow-up. There is an option to select the date after which the follow-up action should be initiated. The user can select the mode of action from the options such as sending an email, SMS message, letter or else a manual action.
The manual action should be assigned to a responsible person the user can assign an employee of the company to do so and the manual action should be selected. The user can provide a custom made message upon the activity to be performed. In case of modes of action other than manual actions which can be auto executed can be selected by enabling the icon of auto-execute
Step 3: Save the details entered and to initiate follow up action on a customer who has a bill payment due select the follow-up reports from the customer menu of the accounting module.
Step 4: Select the customer and from the action, menu selects the option to process follow up reports.

As of now, the follow-up report is proceeding as per the request.
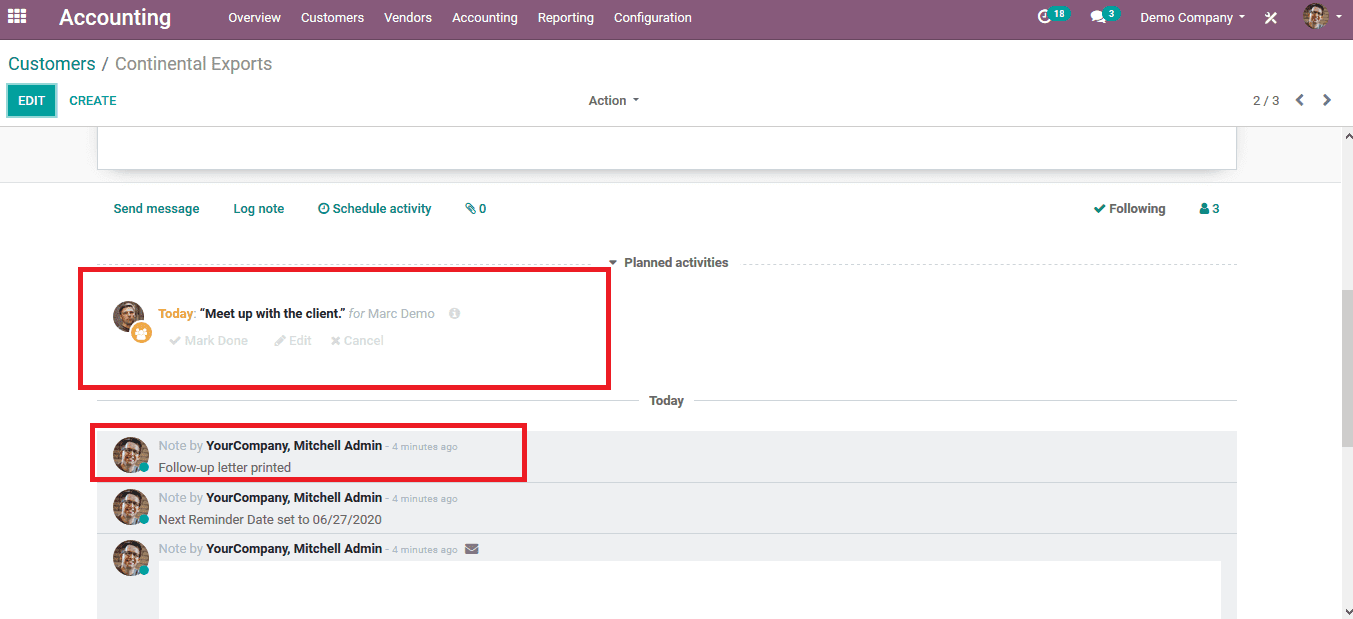
Step 5: To view the follow-up request being processed from the customer tab in the accounting module select the respective customer who has a due payment
Scrolling down to the activity tab on the customer the user can view all the scheduled activities and the log entries. Since the meeting is scheduled today it displays the details of the meetings.
Follow up option in Odoo can come as a handy tool since it allows the users to track the payment dues of various customers in a single menu and take actions upon them from the same menu.