The new Odoo 19 Accounting module makes it simple to automate asset creation and confirmation. As a result, asset management will become much easier and more efficient. After you verify the vendor bill for the relevant product, Odoo will automatically generate and validate the asset using this new asset automation capability. Odoo provides a single platform to handle these tasks, eliminating the need to produce and validate assets independently.
Read this article to find out more about the asset management automation in the Odoo 19 Accounting module.
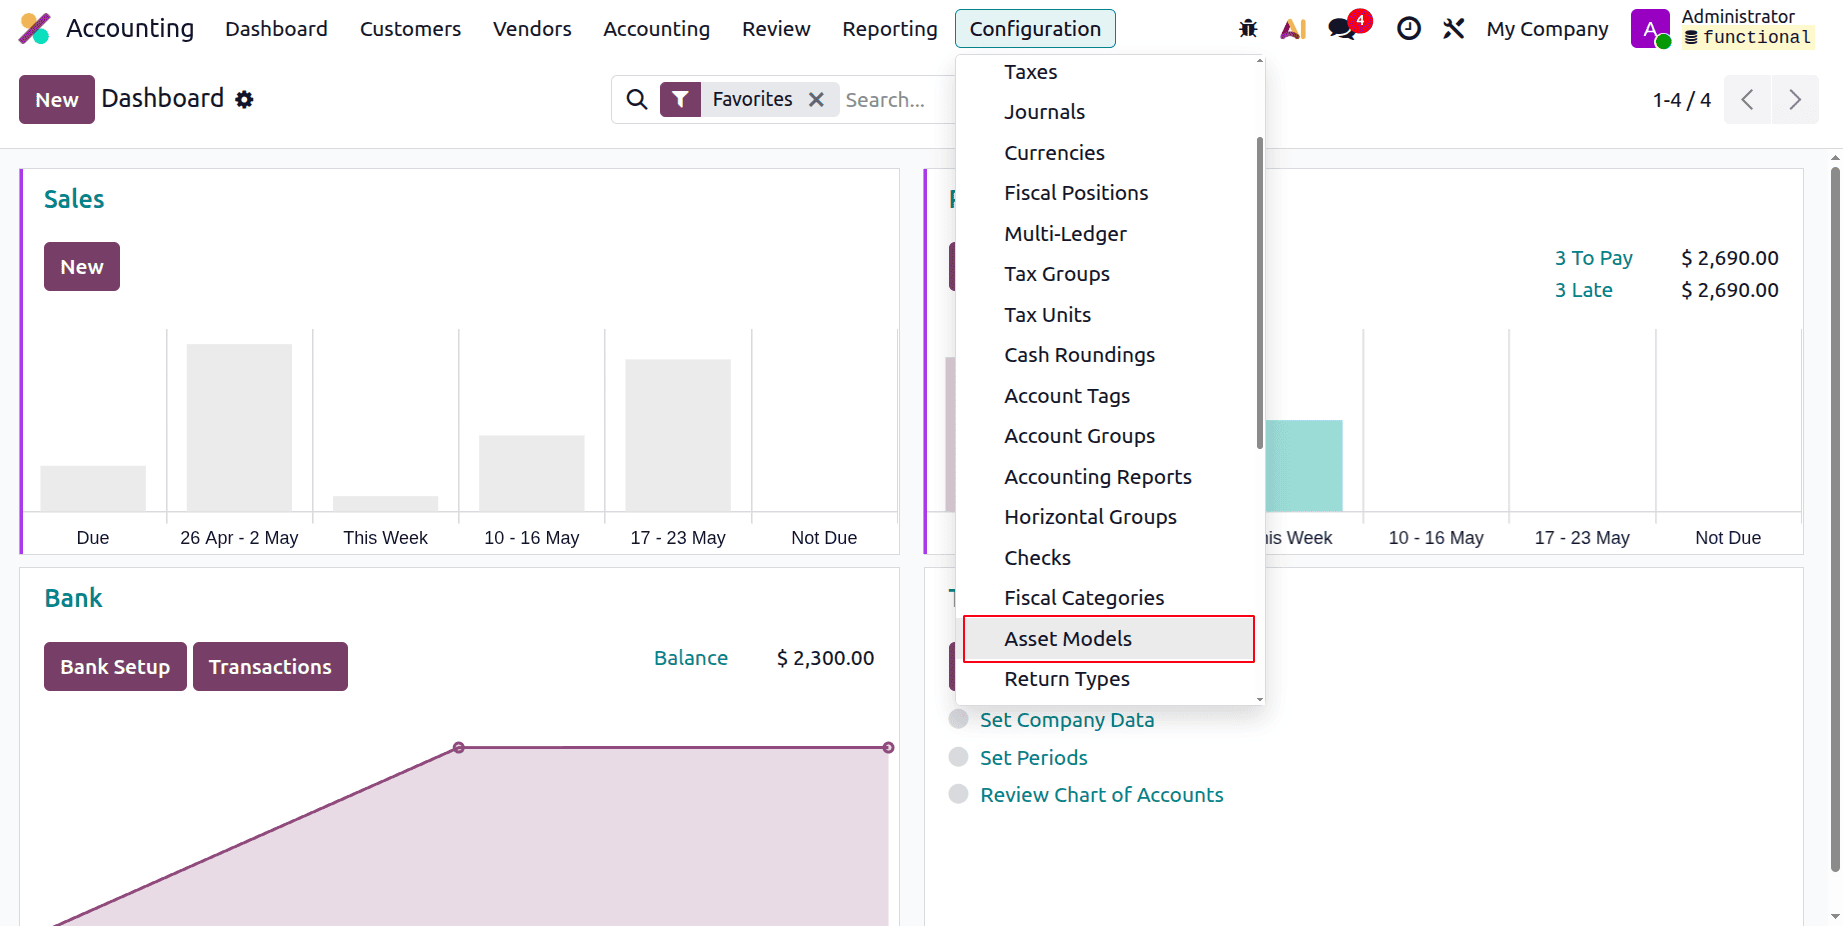
Setting up the appropriate asset model in the Accounting module is a prerequisite for managing any of your company's assets. Users can select the Accounting module from the Odoo dashboard. By choosing the Asset Models option from the Configuration menu, we can now create a new asset model in the Accounting module.
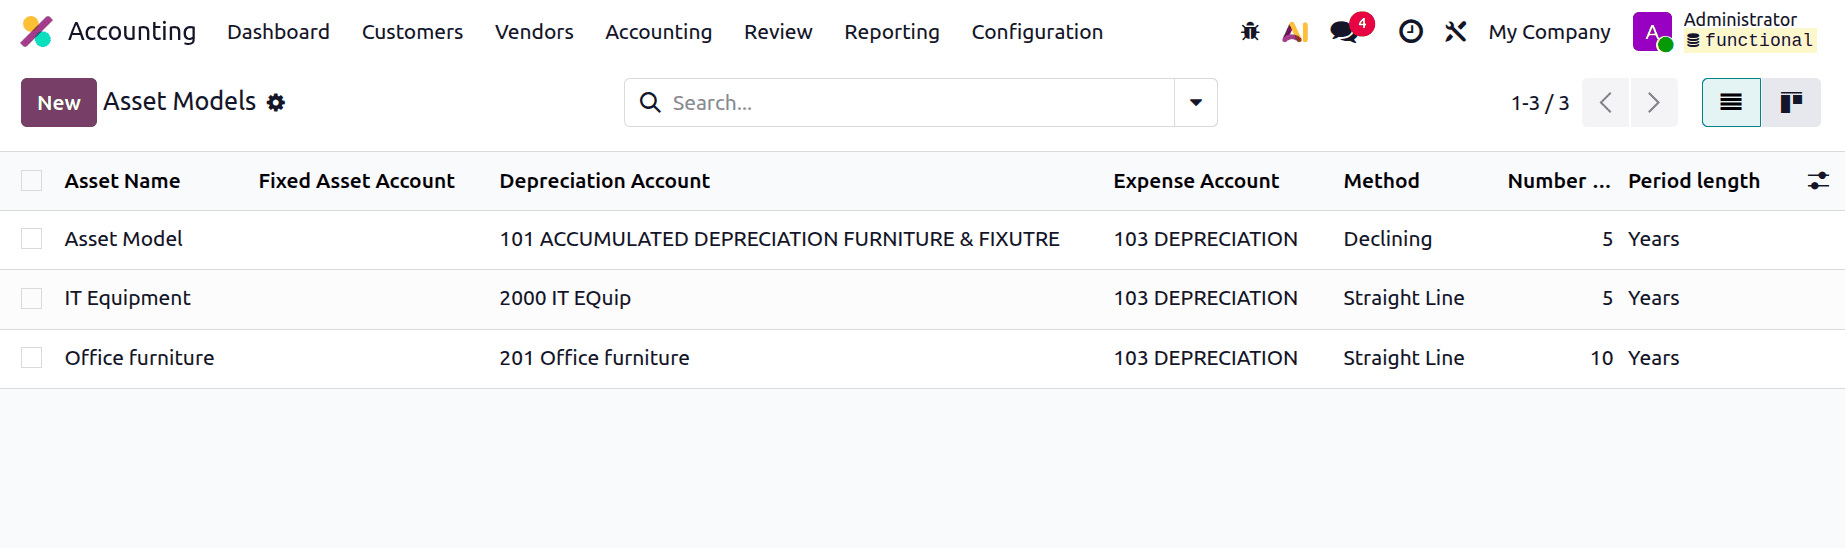
Odoo will launch a new window with a list of pre-configured asset models when you select the Asset Models option. The asset name, fixed asset account, depreciation account, method, amount of depreciation, and period duration are all included in the list preview, as seen in the image below.
The New button allows us to construct a new Asset Model. A new form view will appear when you click this button, as seen below.
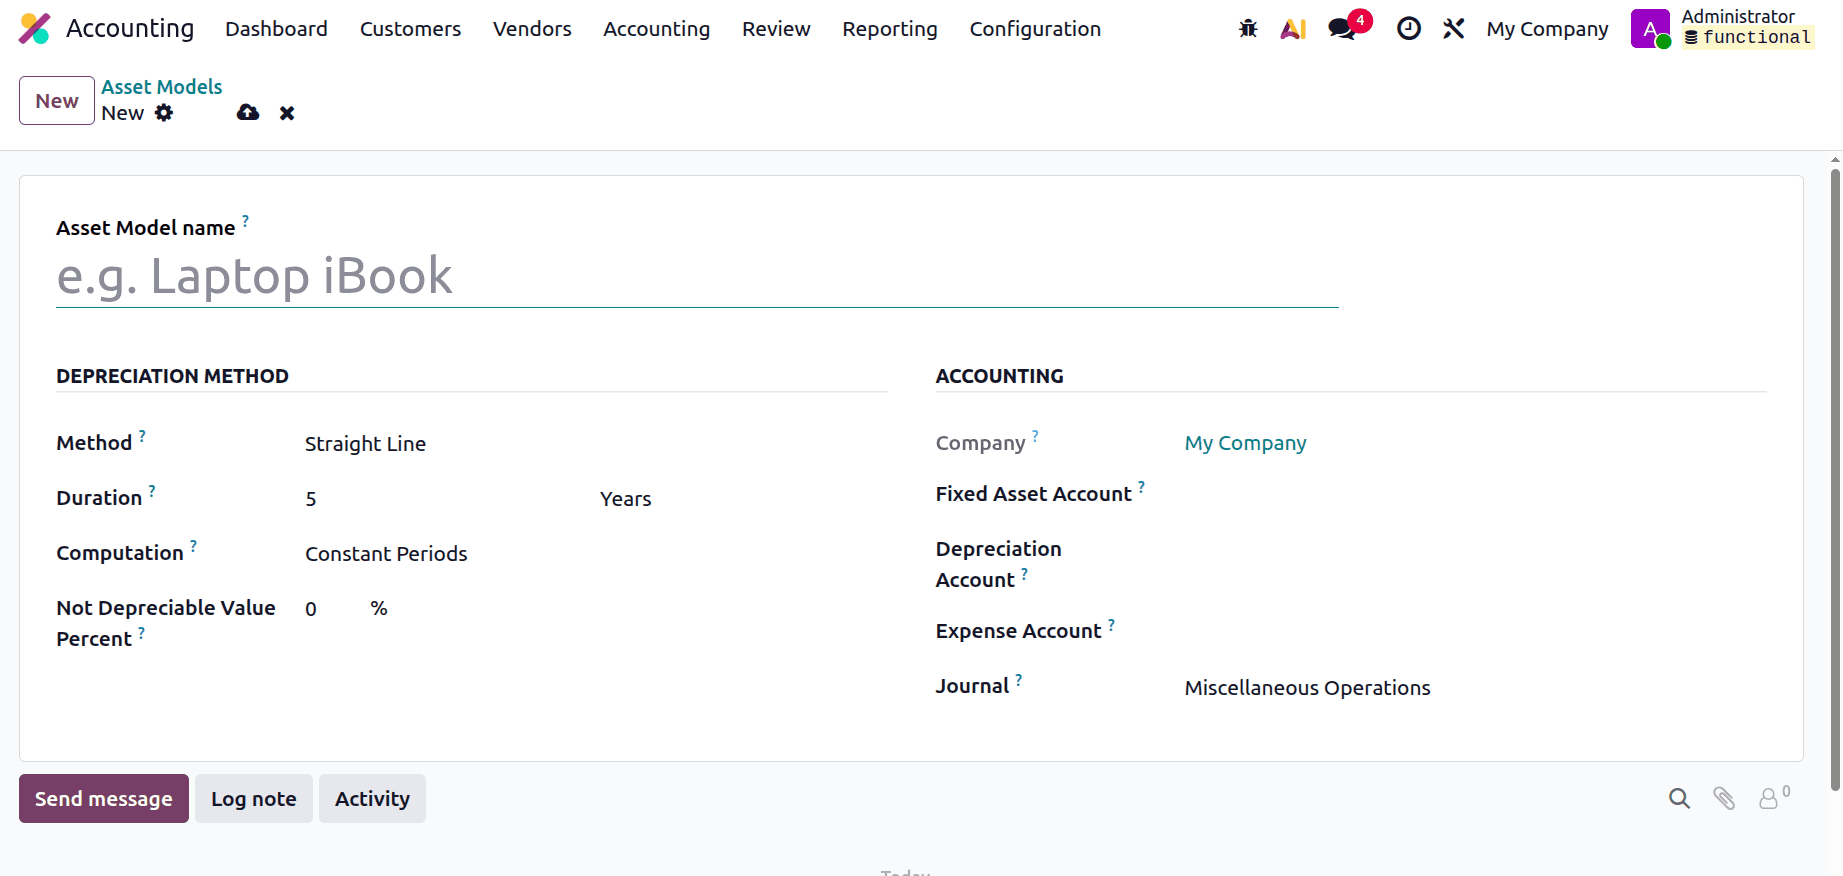
The Asset Model Name field allows you to specify the name of this specific asset model. The Depreciation Method will be used to calculate the number of depreciation lines. The approach can be Declining, Straight Line, or Declining and Straight Line.
- Straight Line: Compared to the other two depreciation methods, this one is more popular and easier to calculate.By dividing the gross value by the duration, one may get the amount of the depreciation line.
- Declining: This method multiplies the declining factor by the residual value to determine the depreciation value.
- Straight Line then Declining: This combines both Straight Line and Declining. With a minimum depreciation value equal to the Straight Line value, this approach functions identically to the Declining method.
You can input the total amount of depreciation required to depreciate your asset in the Duration section. Months or years may be used to express the period. In the Computation area, you have three options: Based on Days per Period, Constant Periods, and No Pro rata.In the form view, the name of your company will appear in the appropriate field. The Fixed Asset Account box allows you to specify which account will be used to record the asset's purchase and initial cost.
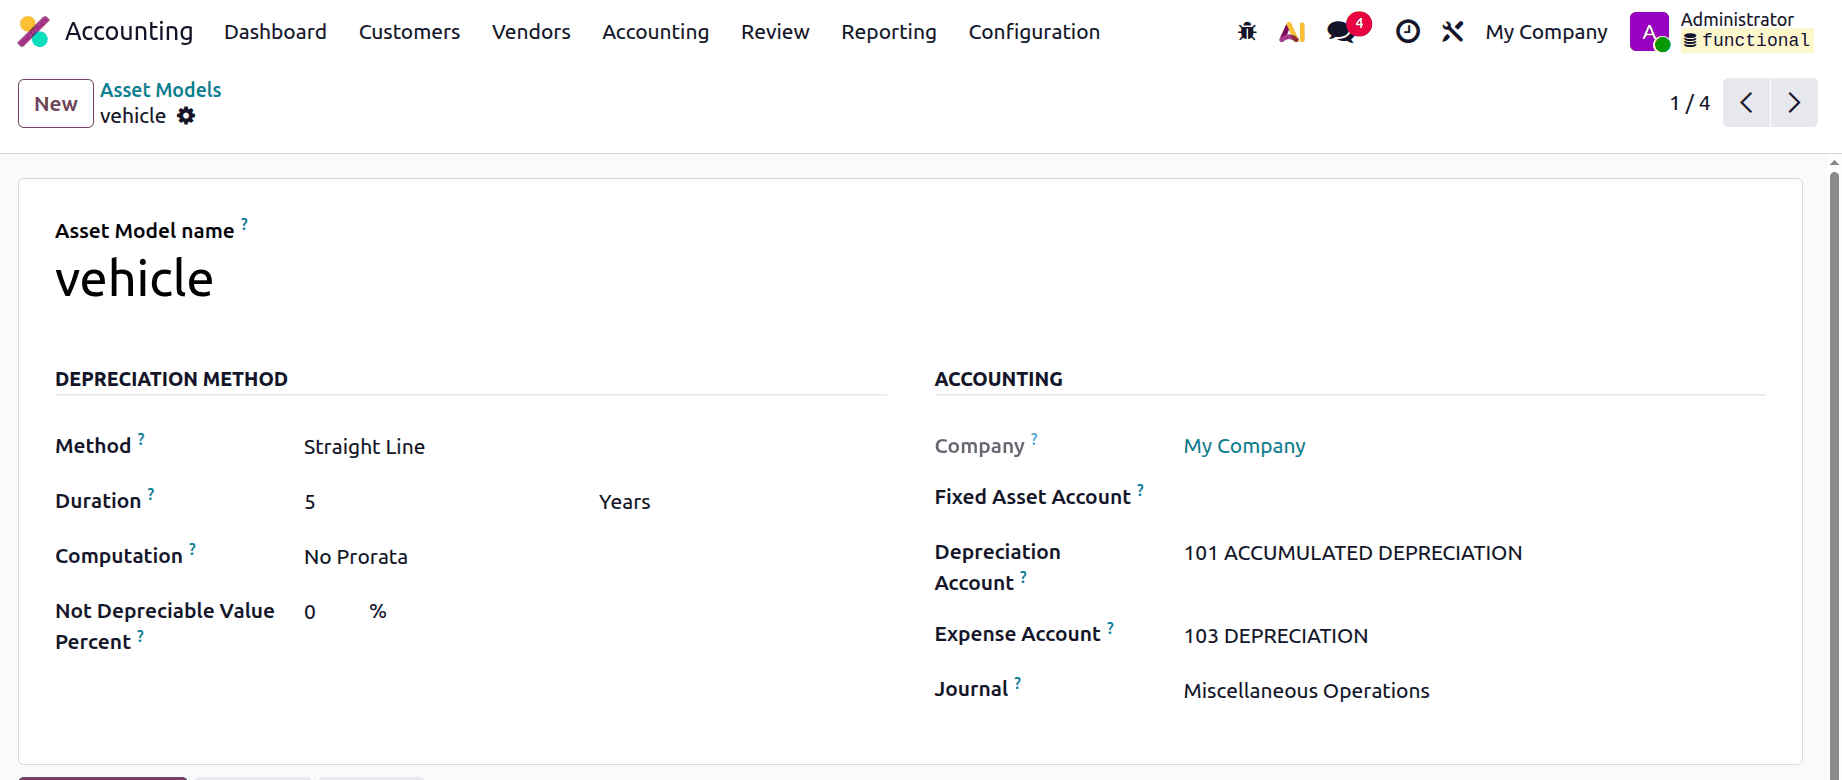
Using the Depreciation Account column, you can specify which account is utilised in the depreciation entries to lower the asset value. You can choose to automate asset management in the Depreciation Account settings. To modify the settings, utilise the internal URL provided below. If not, after creating the asset model, you can change the configuration by choosing the appropriate depreciation account from Odoo's chart of accounts.
You can record a portion of the asset as an expense by entering the account used in the periodic entries in the Expense Account column. The establishment of the new asset model is finished after the journal used to document the accounting entries for this asset model is mentioned.
Let's now examine asset management automation.
Choose the Chart of Accounts from the Configuration menu to automate the assets.
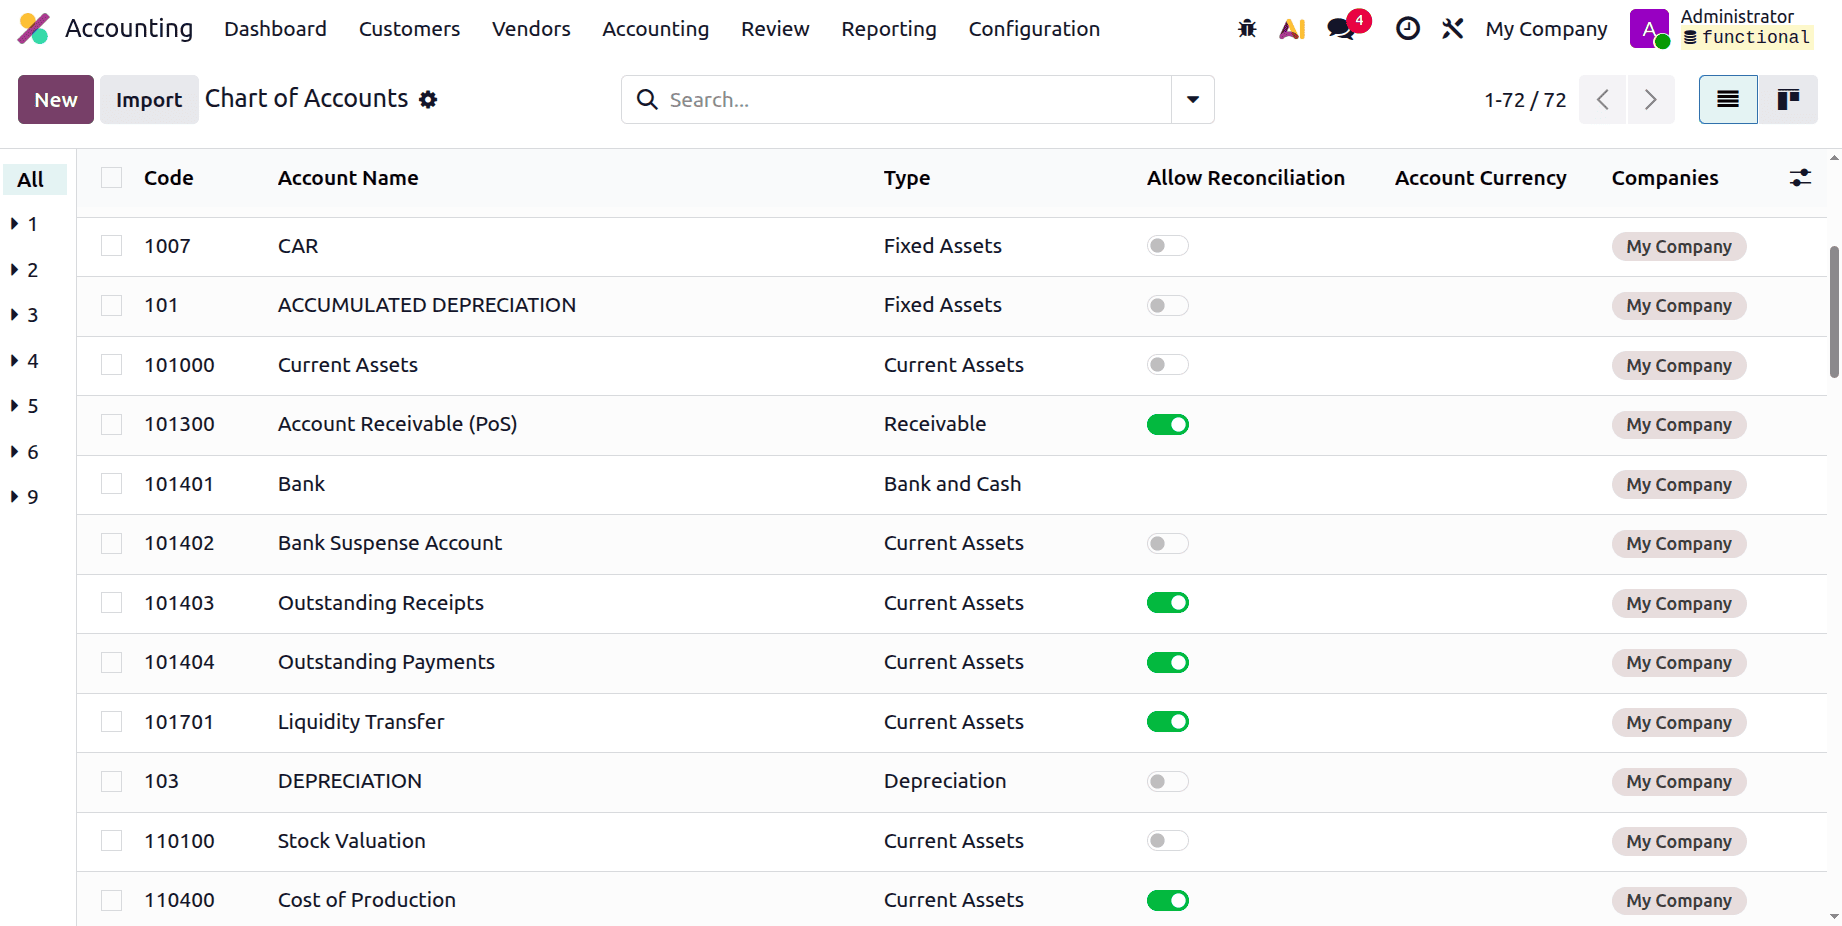
From the list presented, you may select the depreciation account that you specified in the asset model. The particular account you choose as the depreciation account will have its parameters altered.
Clicking on it will open the account's edit window in Odoo. The Asset Options are located here under the Automation tab. The Automate Asset function can help you automate asset management.
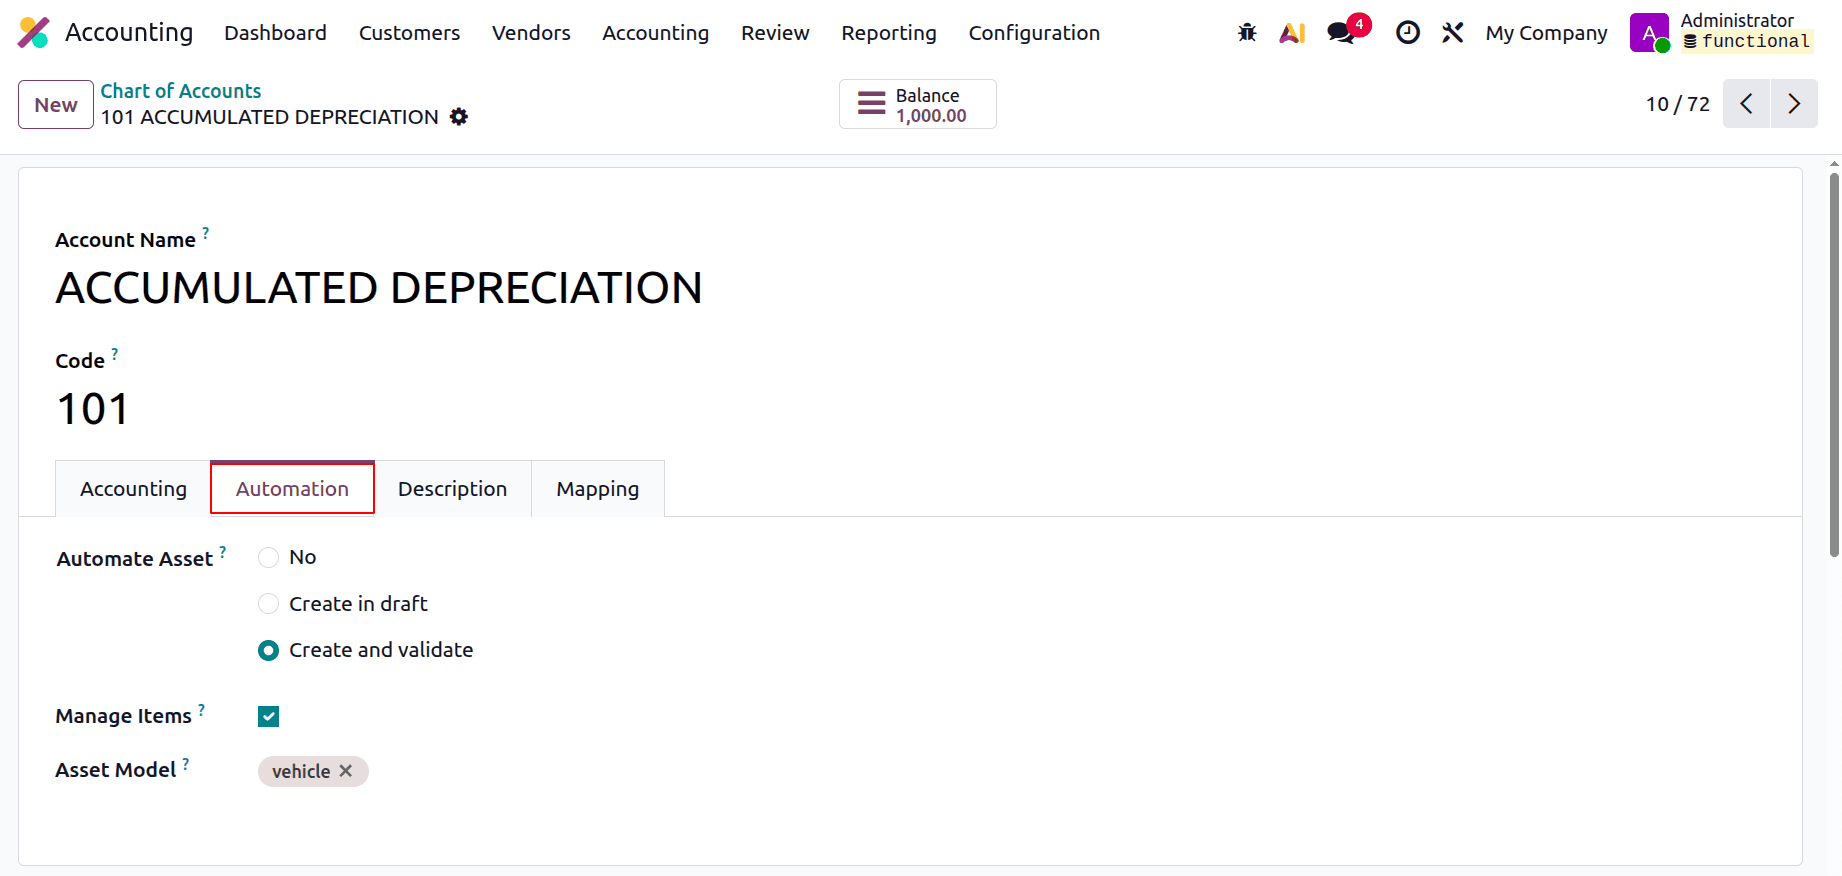
If you don't want assets to be created and validated automatically, you can set it to No. If you select the Create in Draft option, a draft asset will be created immediately after you validate the bill. Later on, the draft asset can be manually verified. When you choose the produce and Validate option, Odoo will automatically produce and validate assets. After you have confirmed the bill, the asset will be in the running status. By activating the handle Items option, you can manage several quantities of assets at once. In the relevant field, the selected Asset Model will be available.
In this case, we chose the Automate Asset column's Create and Validate option. Let's see how Odoo automatically generates and verifies assets during invoice confirmation. One approach to do this is to create a vendor bill for the item you bought. Make sure you choose the same account as the asset model when entering the details in the invoicing line of the vendor bill.
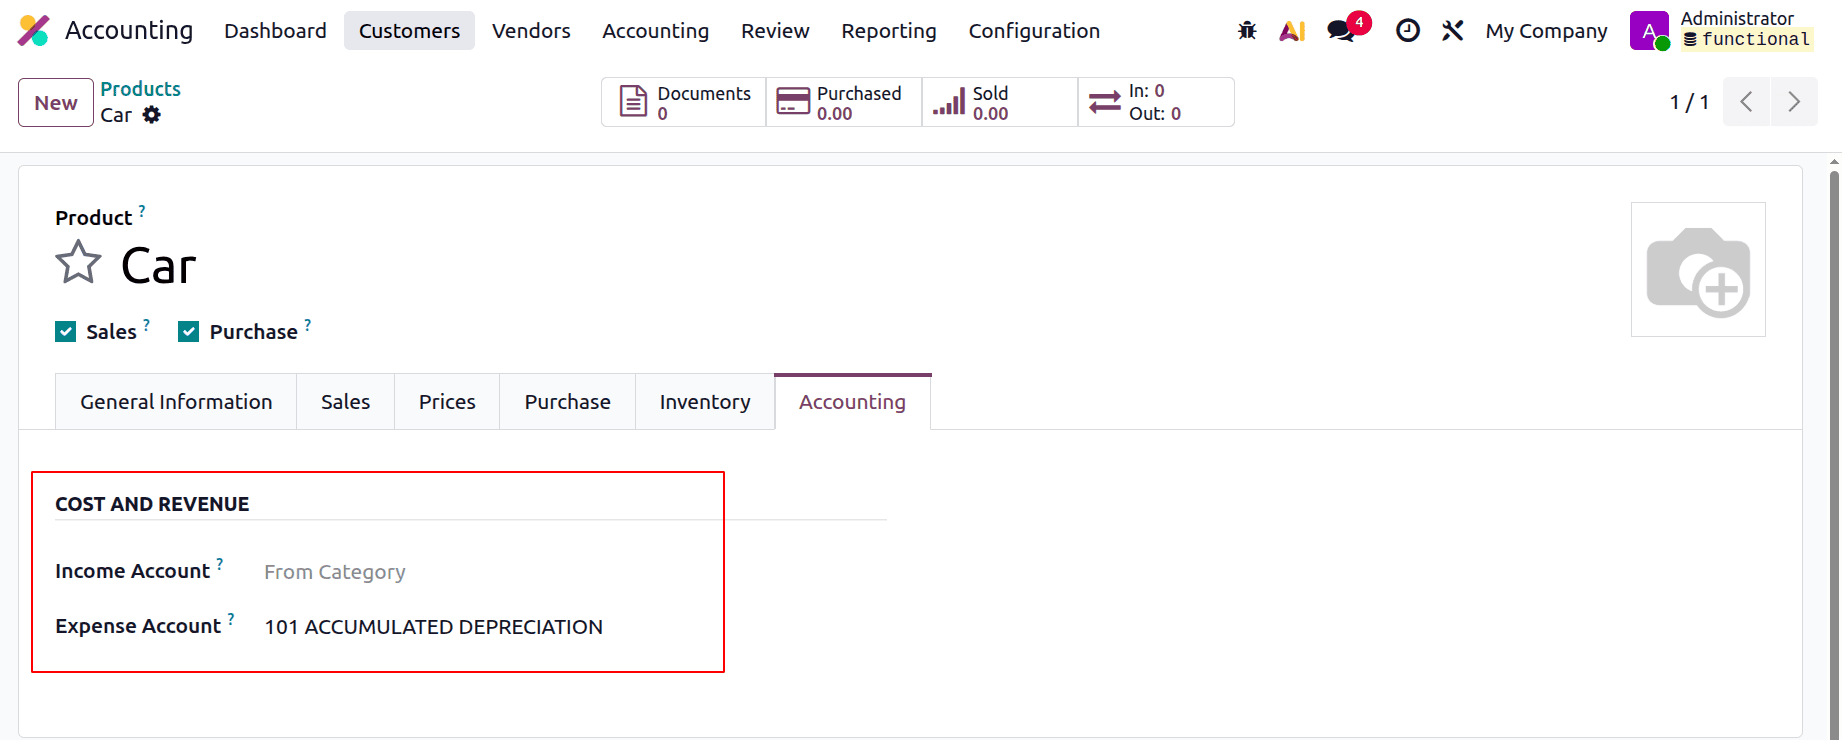
So let's make a new product called Car for it. The General Information includes the cost. To add accounts, click the Accounting tab after that. Depreciation should be set as an expense account.
Next, draft a fresh vendor bill. Prior to adding the product car with cost on the invoice line, enter the vendor details.
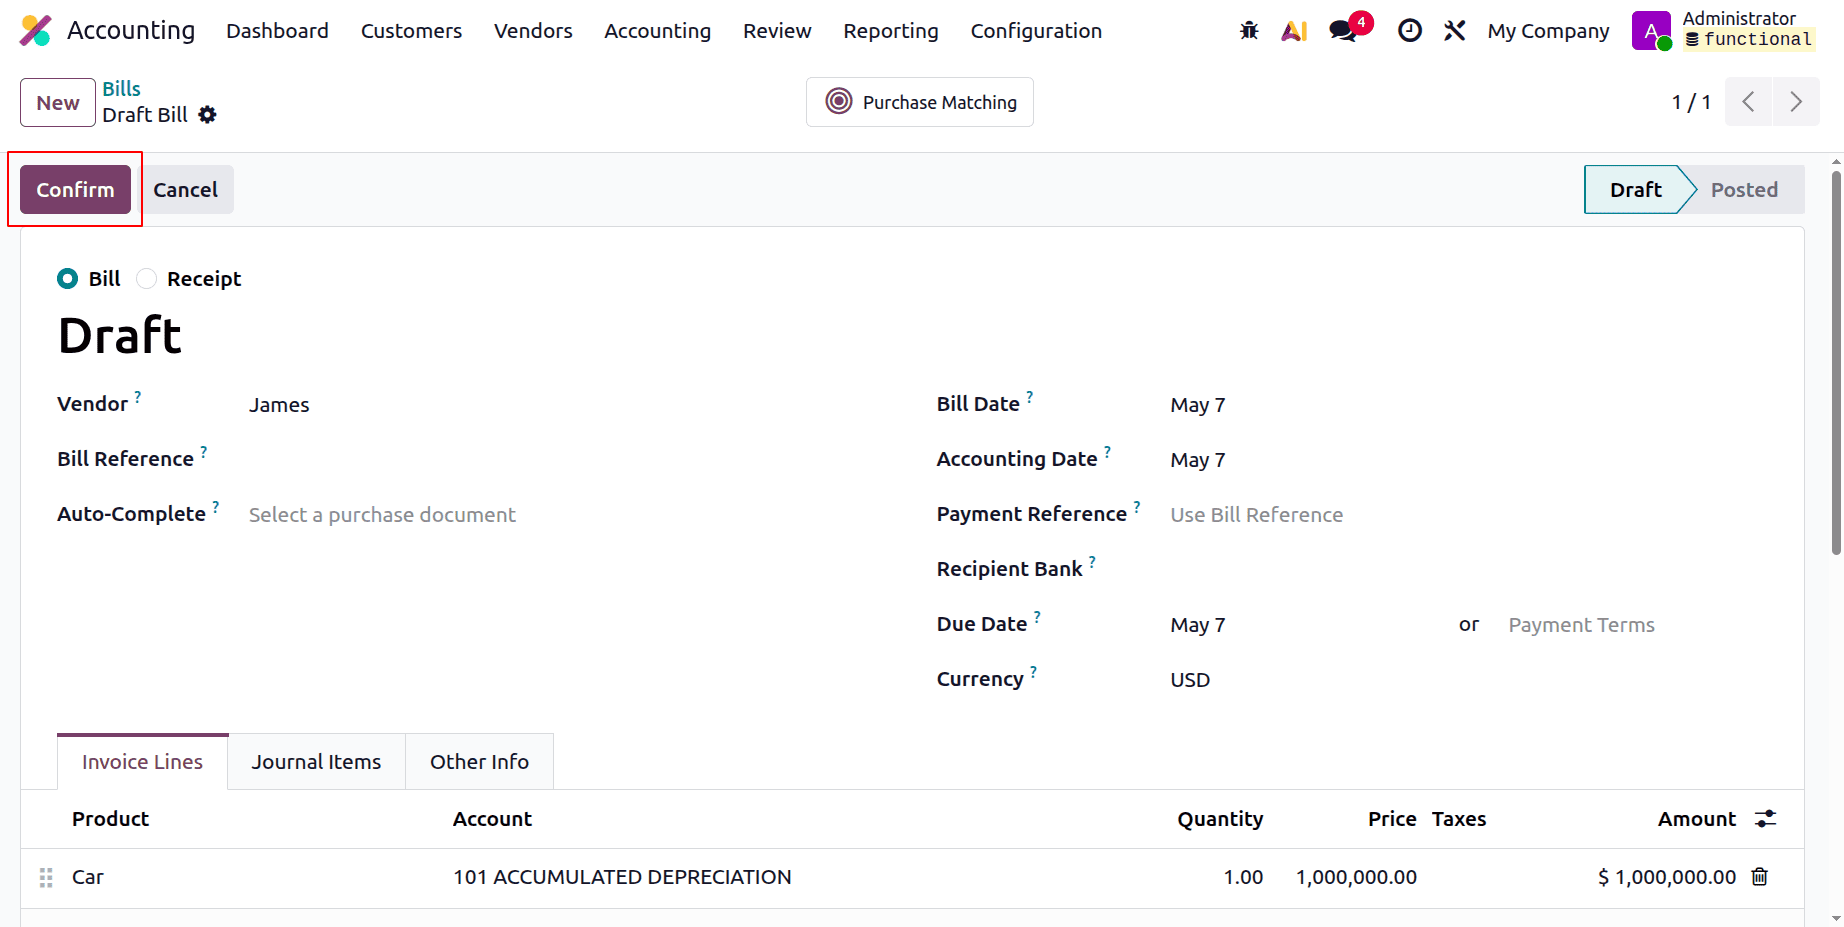
To verify the vendor bill, click the Confirm button. As soon as you validate the bill, a new smart button called Assets will appear on the screen. The smart button will display the assets for each quantity separately if the bill was made for several quantities.
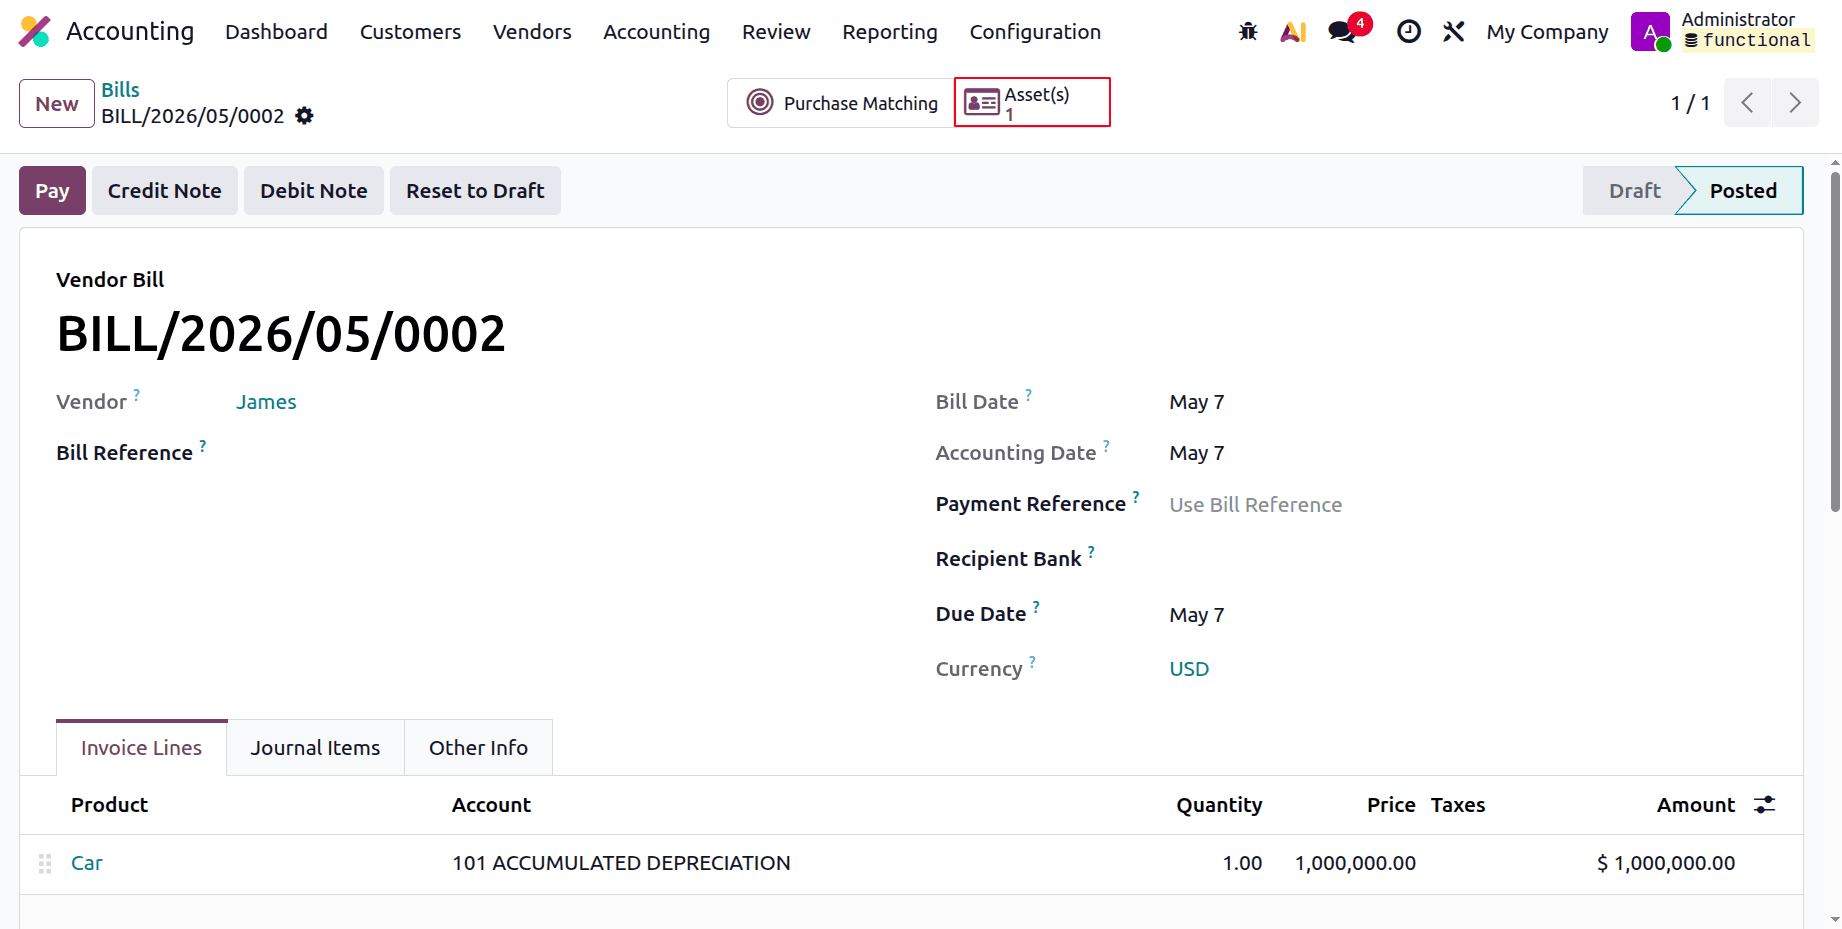
You can view the automatically generated assets by clicking this button, which opens a new window.
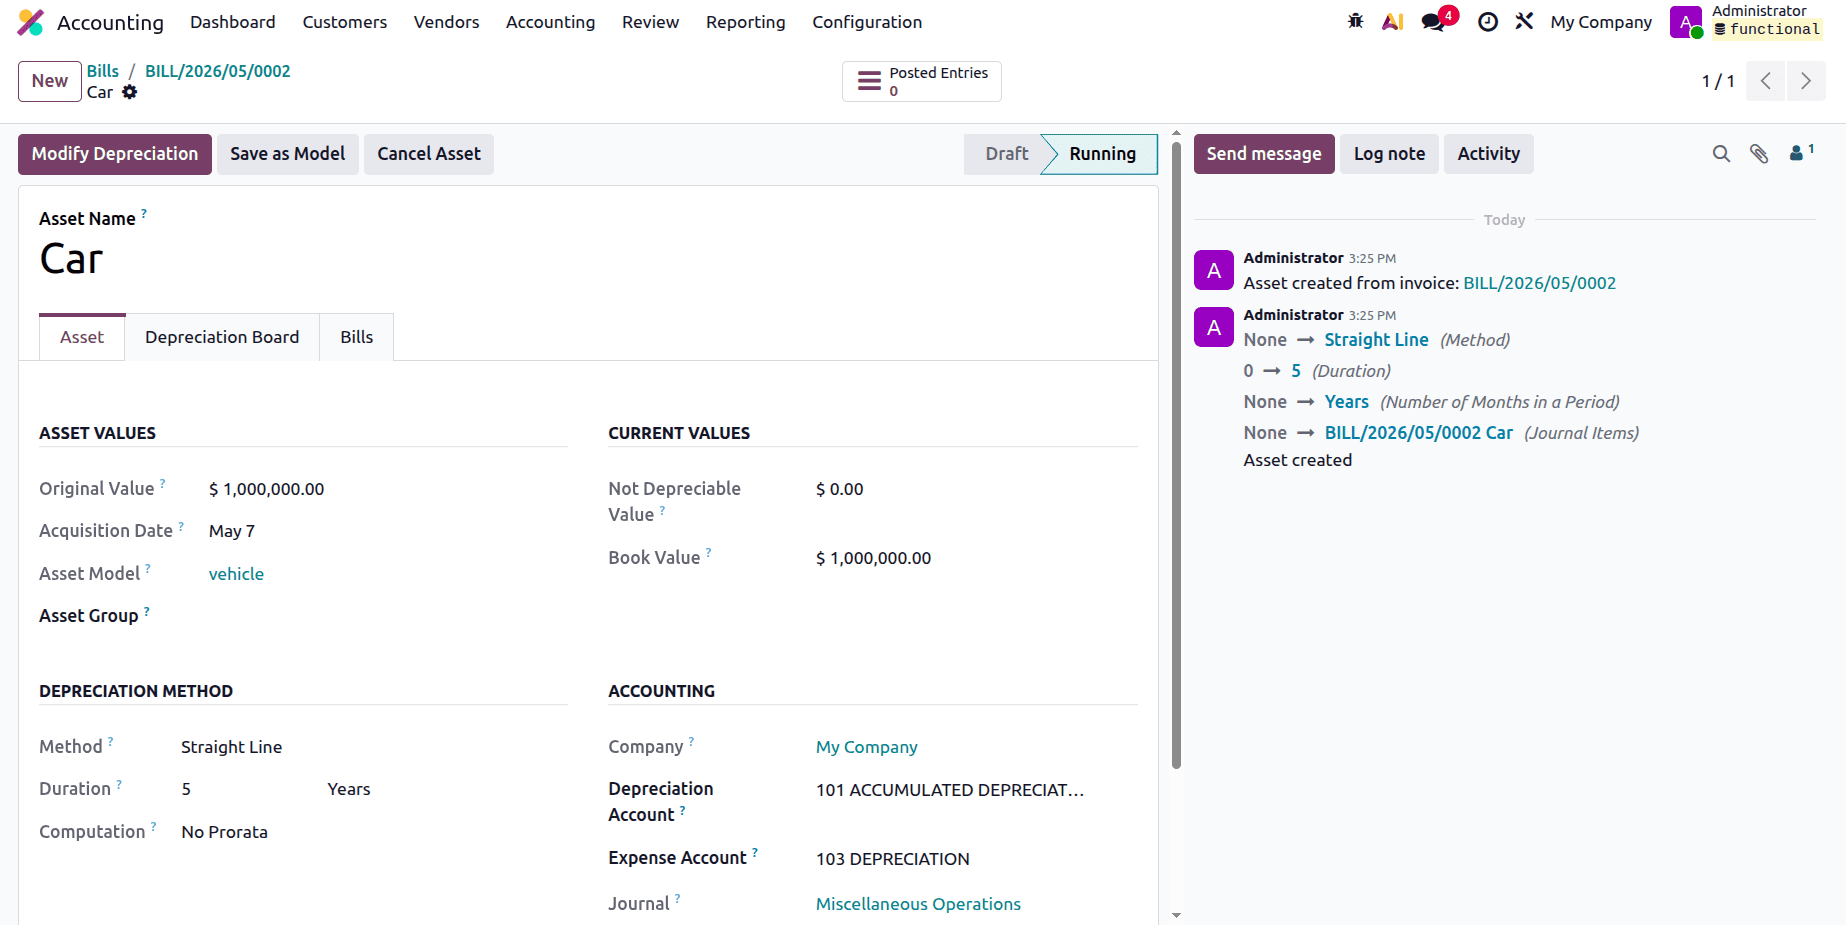
The asset is in the Running stage, which indicates that Odoo generated and verified the new asset automatically, according to the screenshot. The information about the impending depreciations can be found on the Depreciation Board tab. The current depreciation can be changed by clicking the Modify Depreciation button.
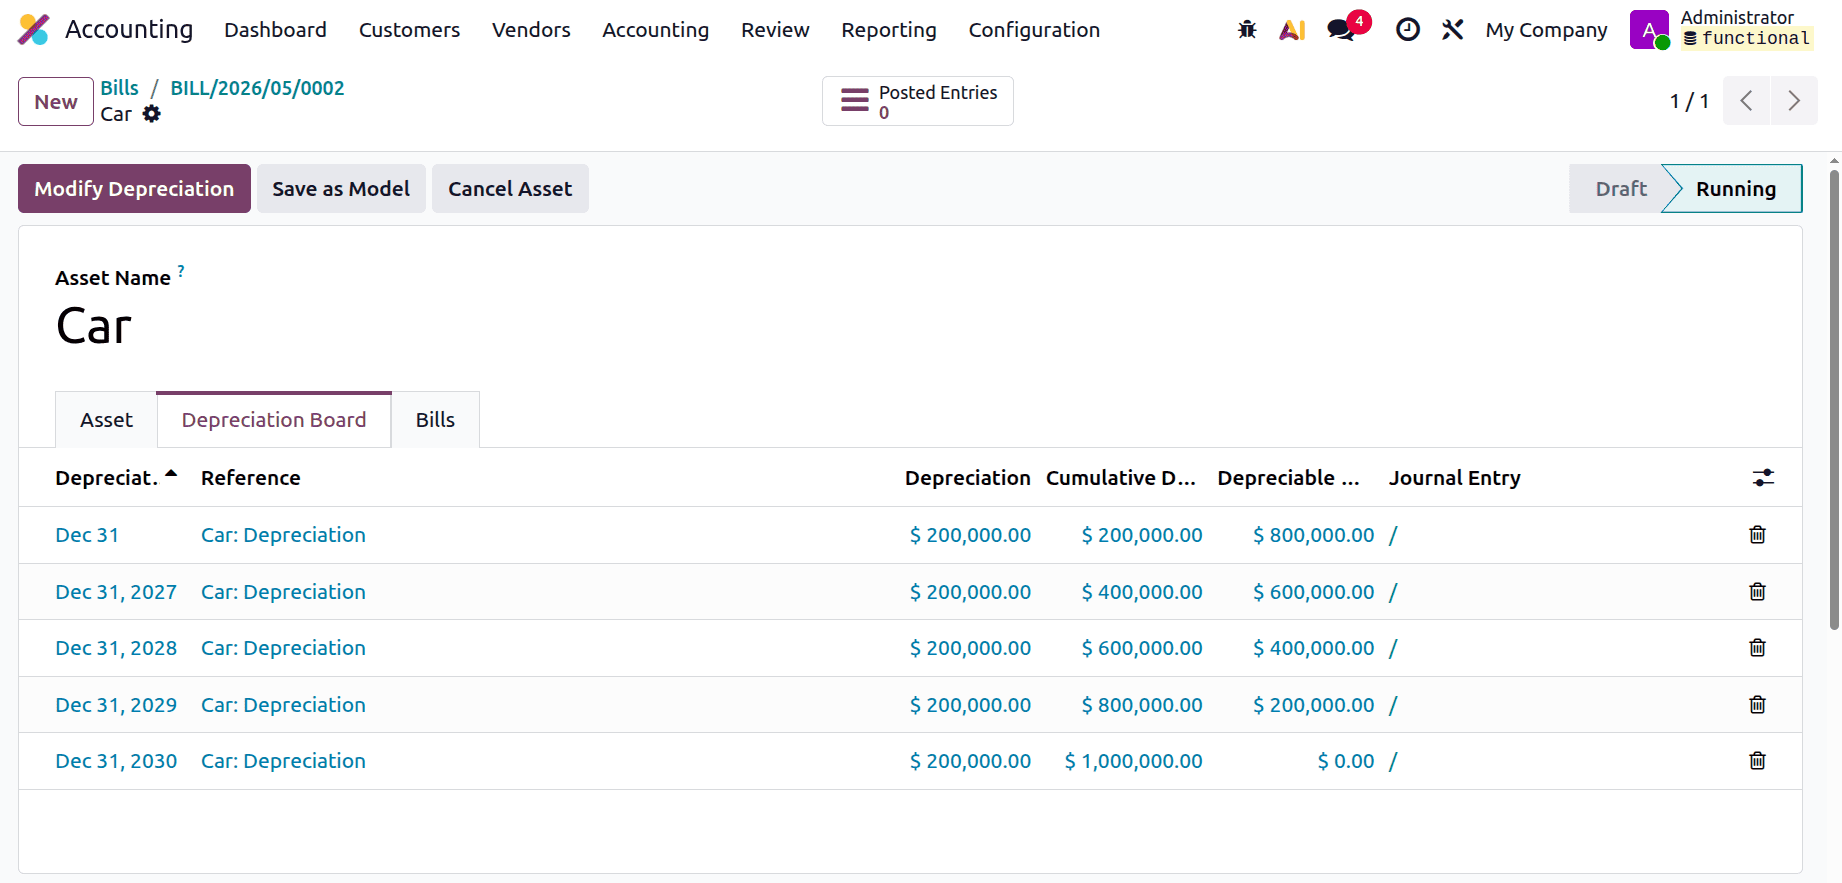
In this case, the computation method is the Straight Line with No prorata. $1000000 is the total bill amount or book value. It lasts for five years. Therefore, the monthly depreciation amount is (1000000/5 = 20000.00).
Click the Posted Entries smart tab to see the Journal entries.
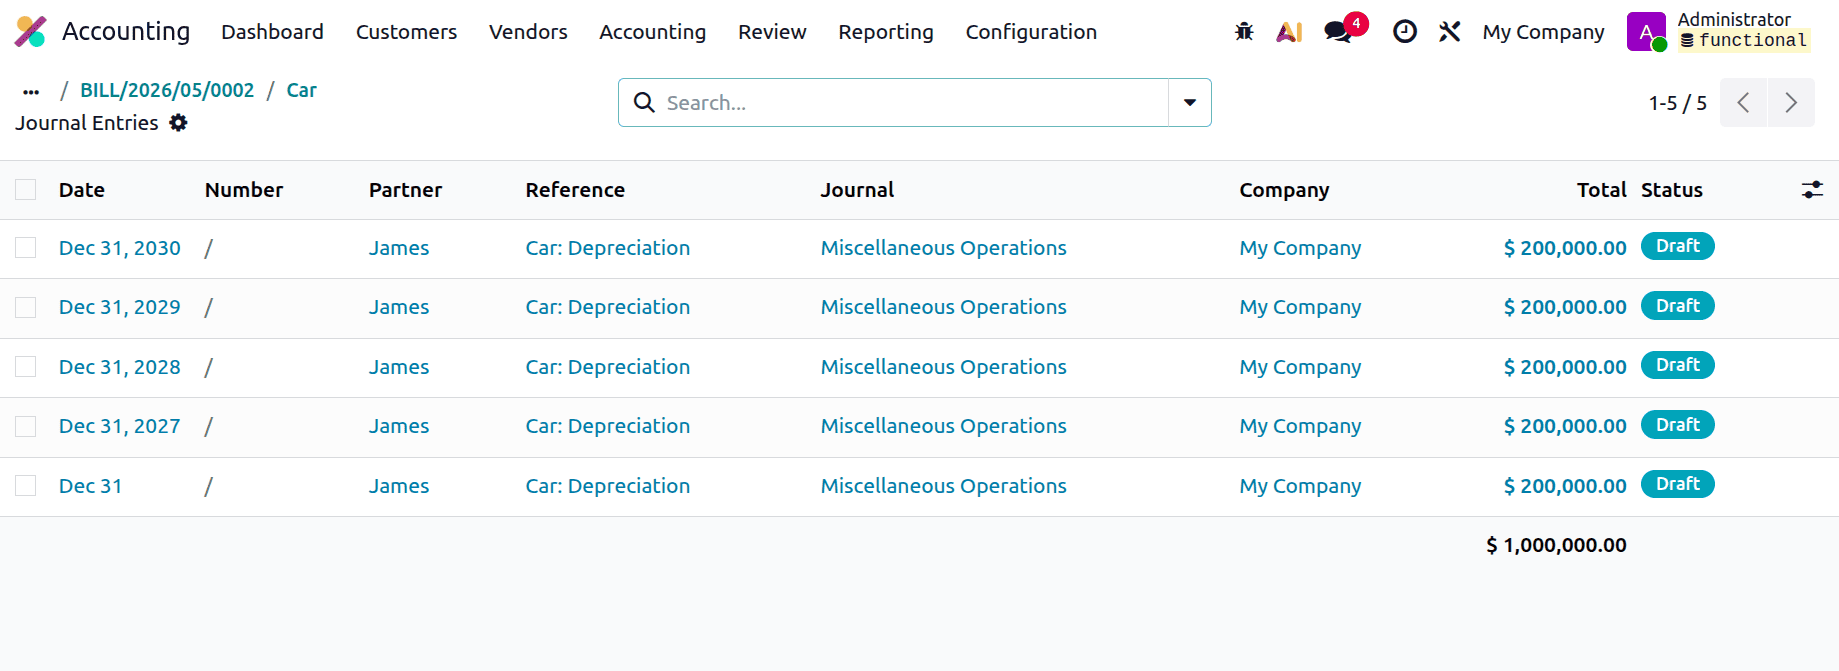
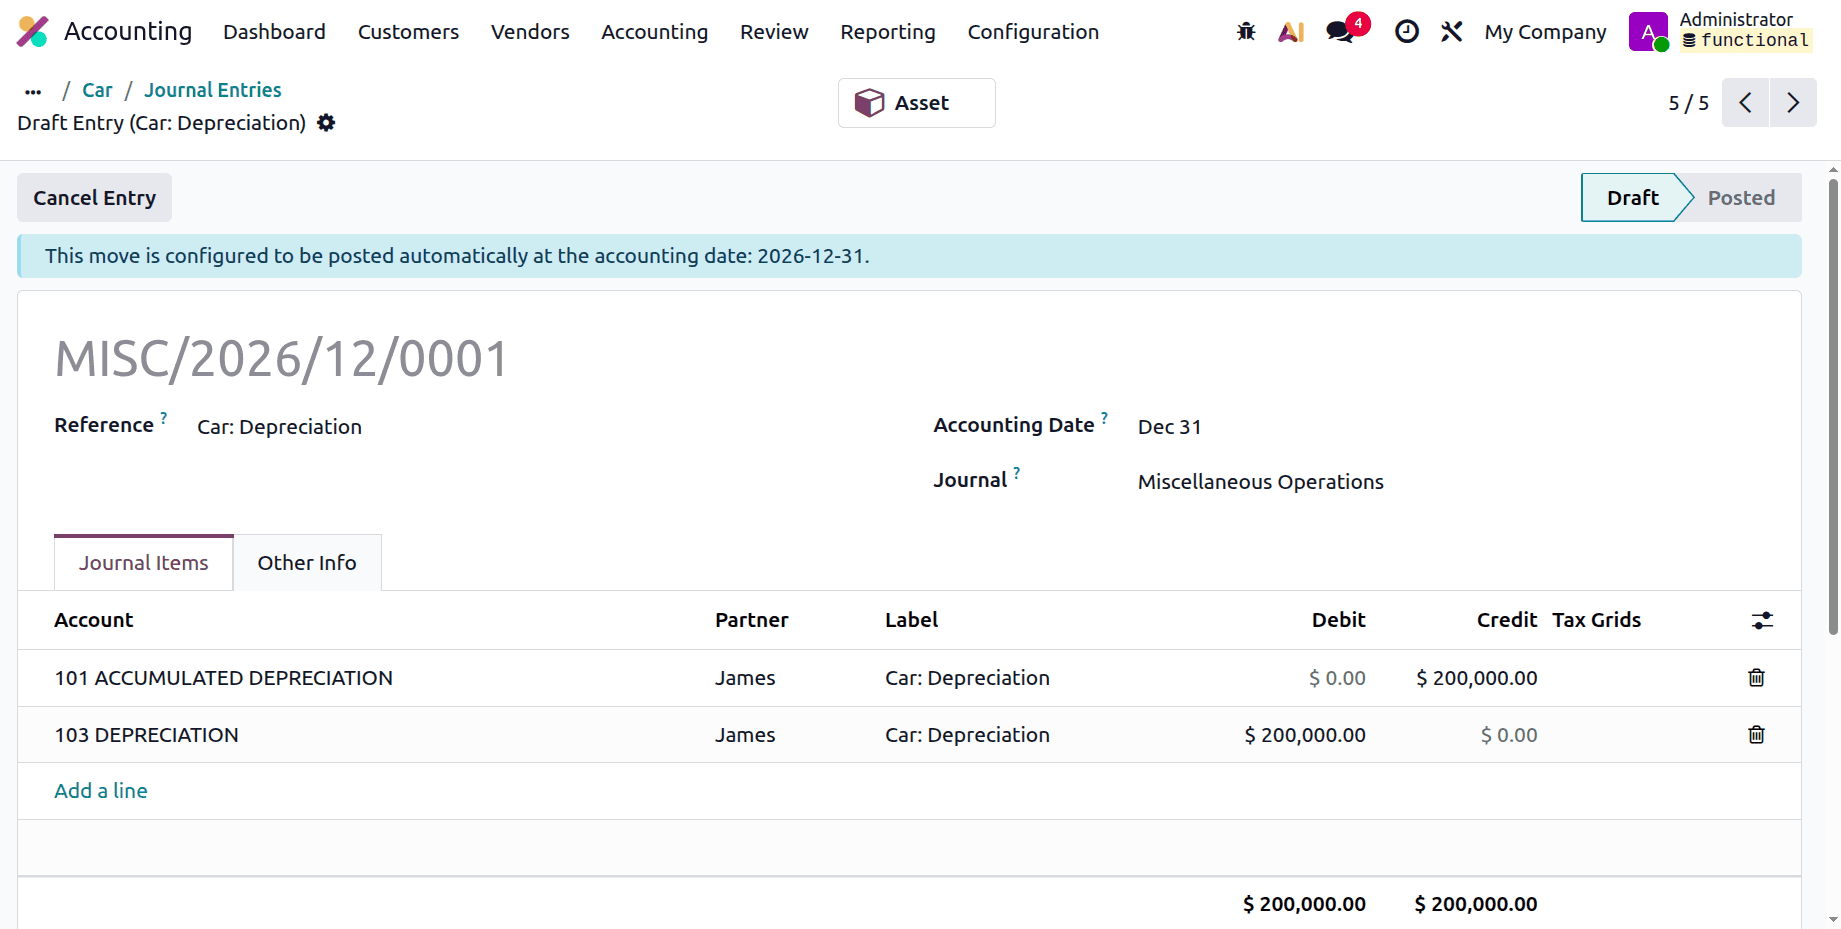
Let's examine one entry. The sum is credited to the Depreciation Account and the Expense Account, as indicated below.
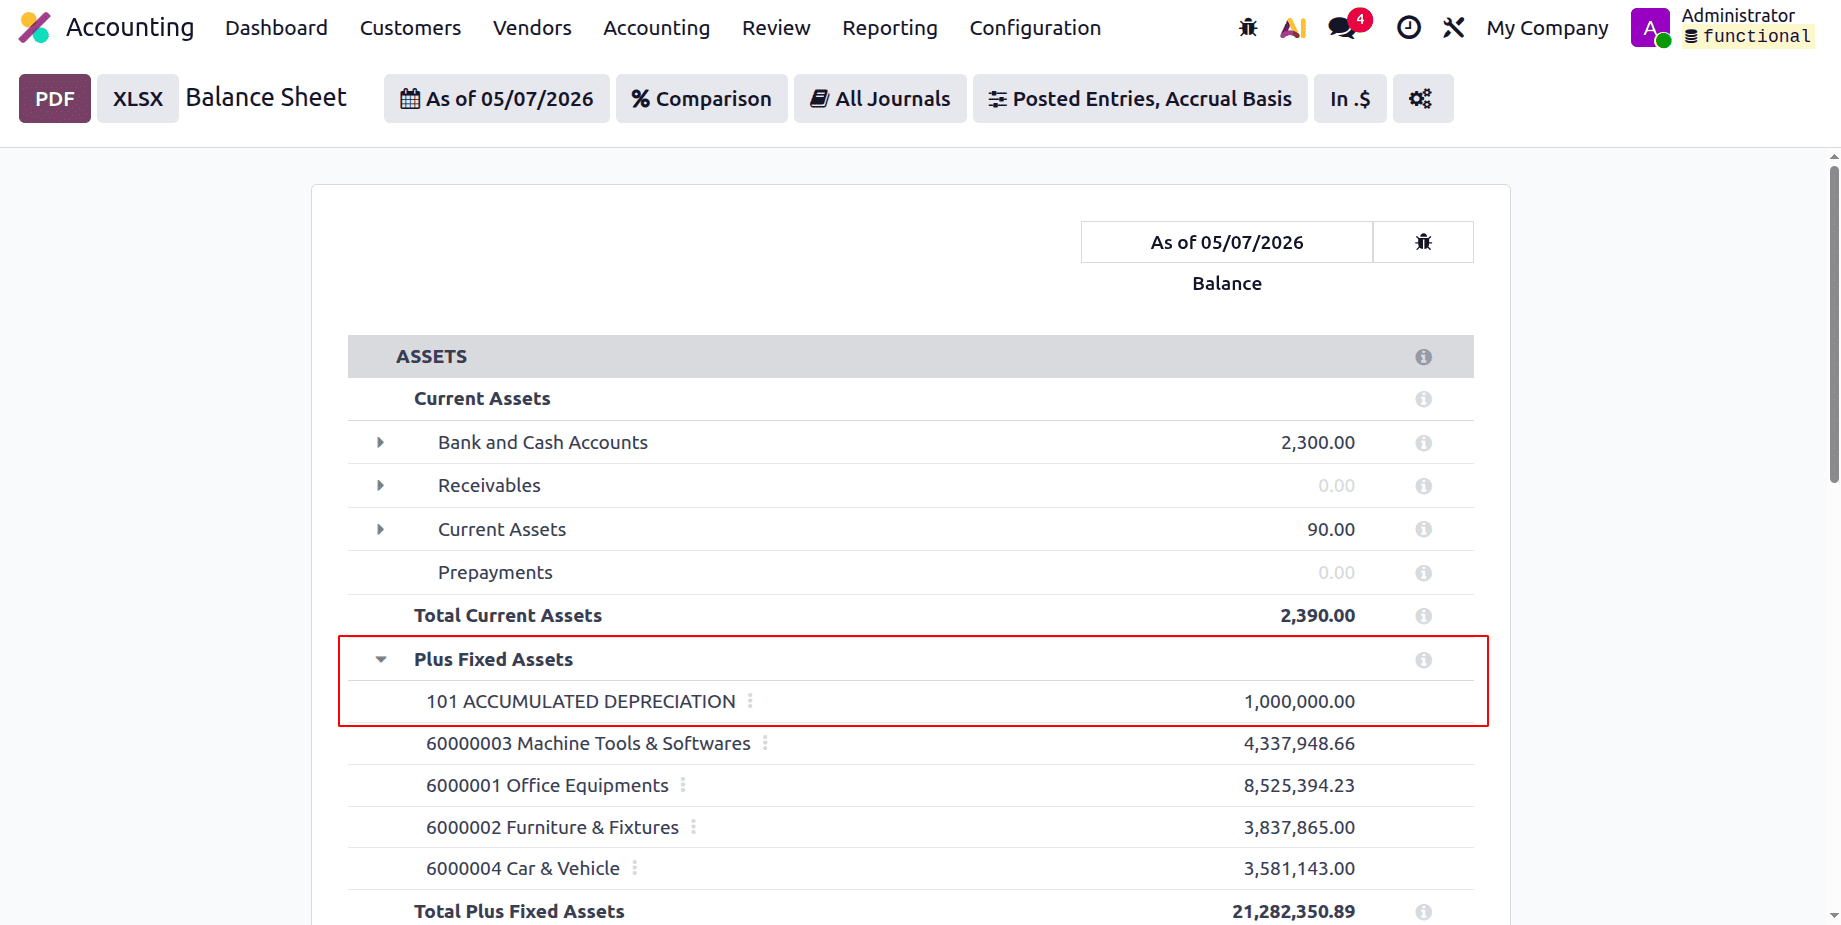
The Depreciation account and its sum are then visible inside the Balance Sheet, as indicated below.
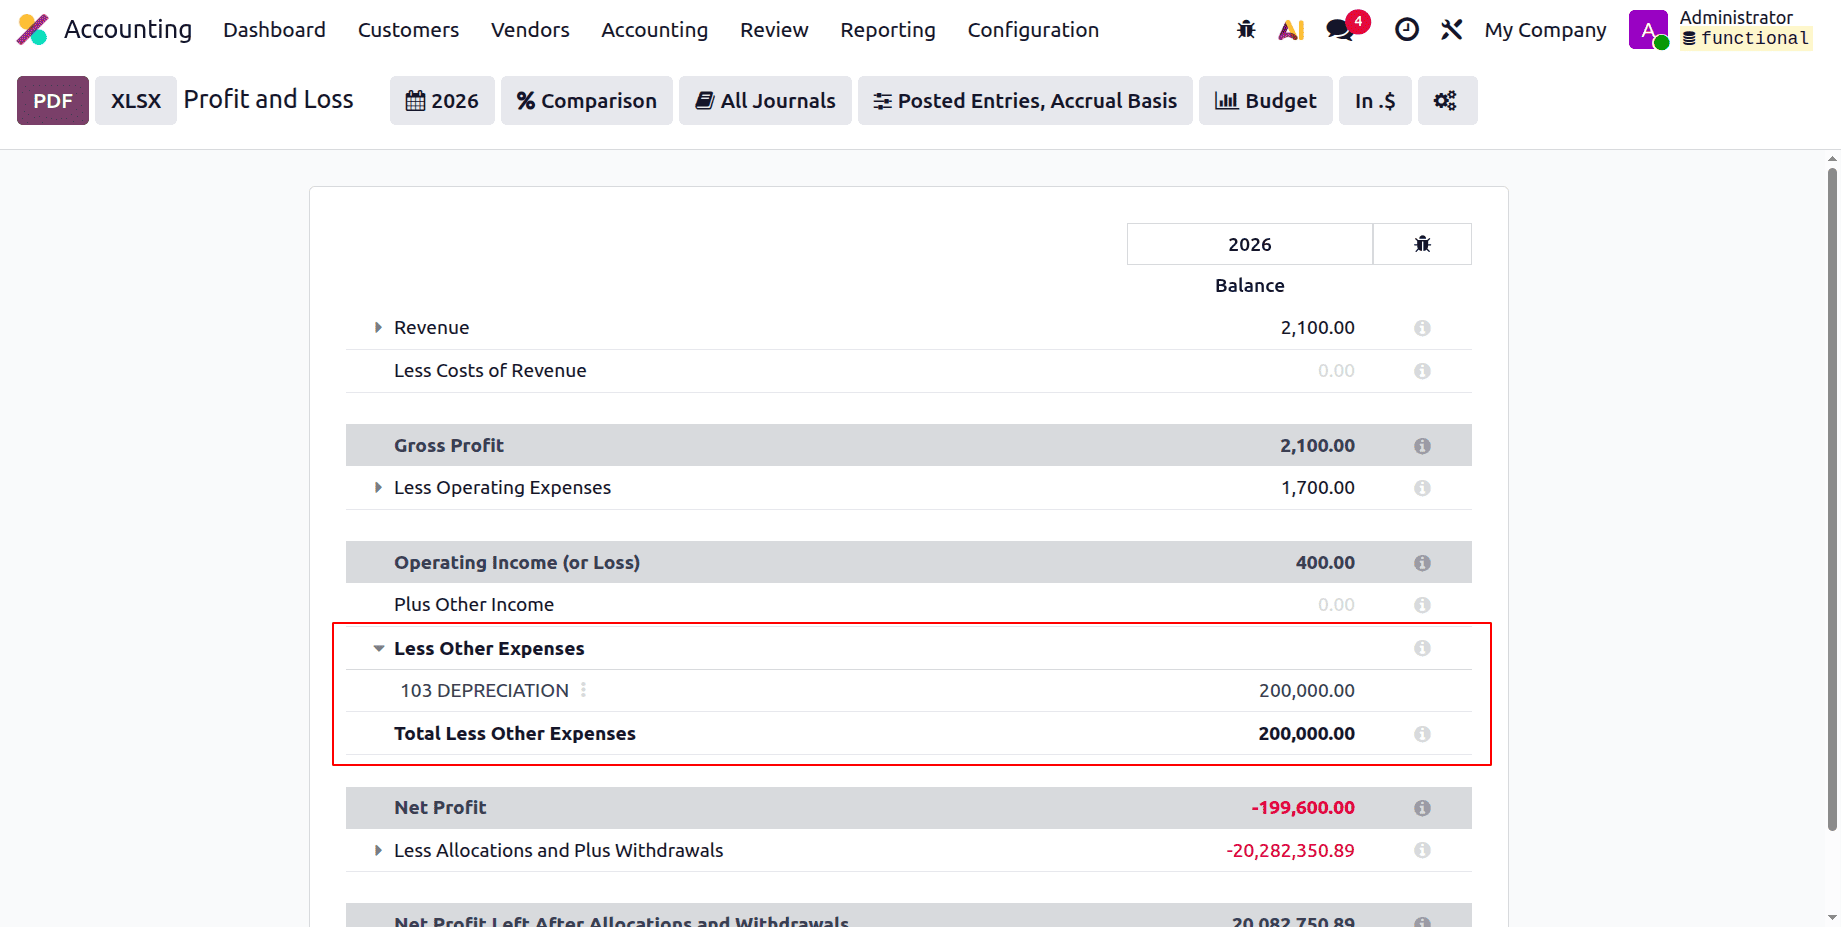
Next, view the Asset Expense by looking at the Profit & Loss report.
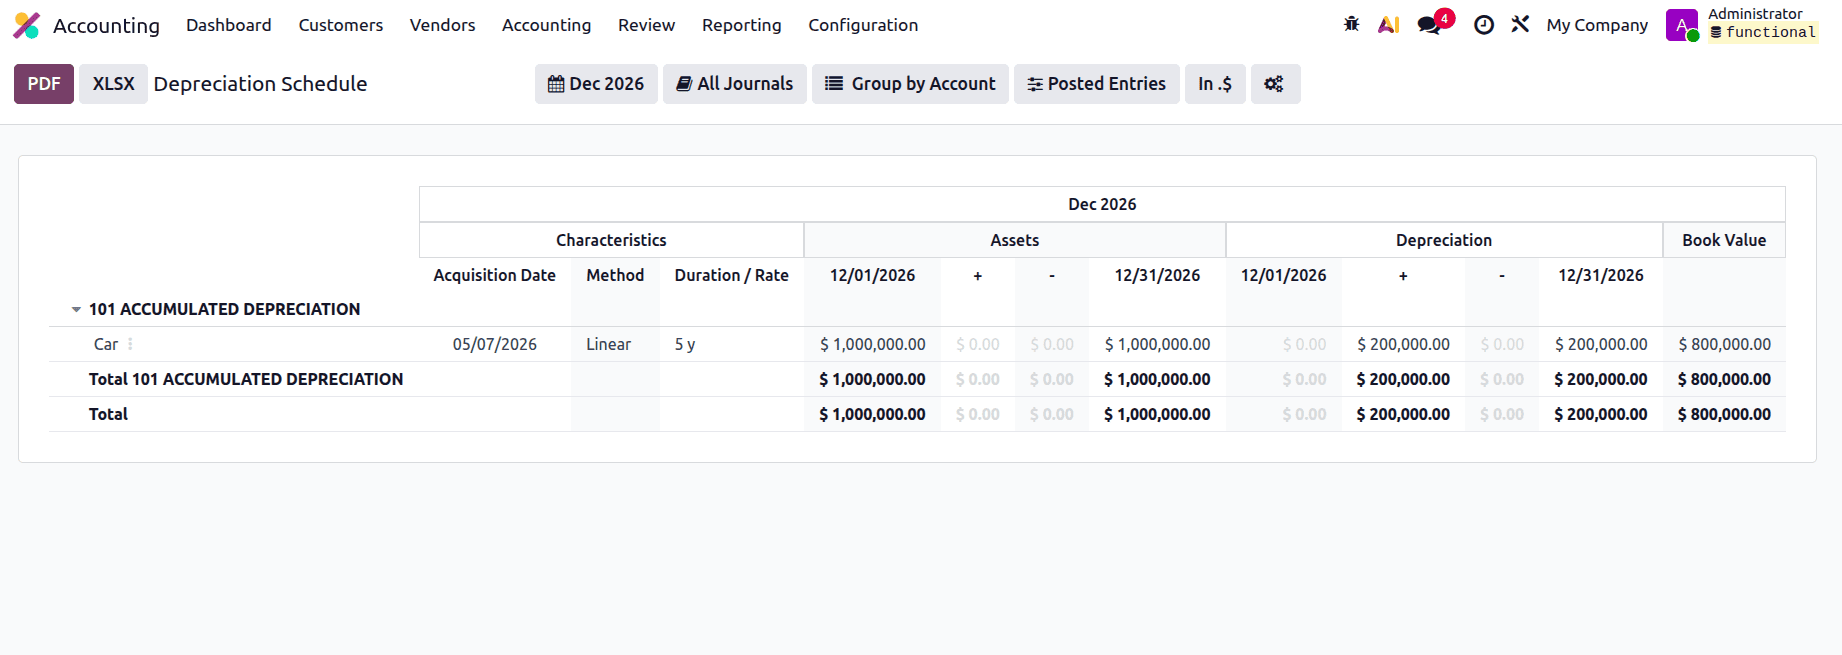
There is a Depreciation report available under the Review menu. The reports are shown below.
The asset management process is now more efficient thanks to Odoo 19 Accounting's new automatic asset generation and validation capability.
To read more about How to Automate Asset Management in Odoo 18, refer to our blog How to Automate Asset Management in Odoo 18.