In an online learning environment, encouraging student interaction is essential for retention and engagement. Odoo 18 facilitates this by incorporating a forum function into its eLearning module. Students can discuss, share ideas, and ask questions beyond the course materials in a dedicated forum for the subject. Whether you’re starting a brand-new online course or making improvements to an already-existing one, including a forum promotes interaction between teachers and students. This blog helps you set up a course forum in Odoo 18.
Choose the eLearning module in Odoo 18.
Create a New Forum
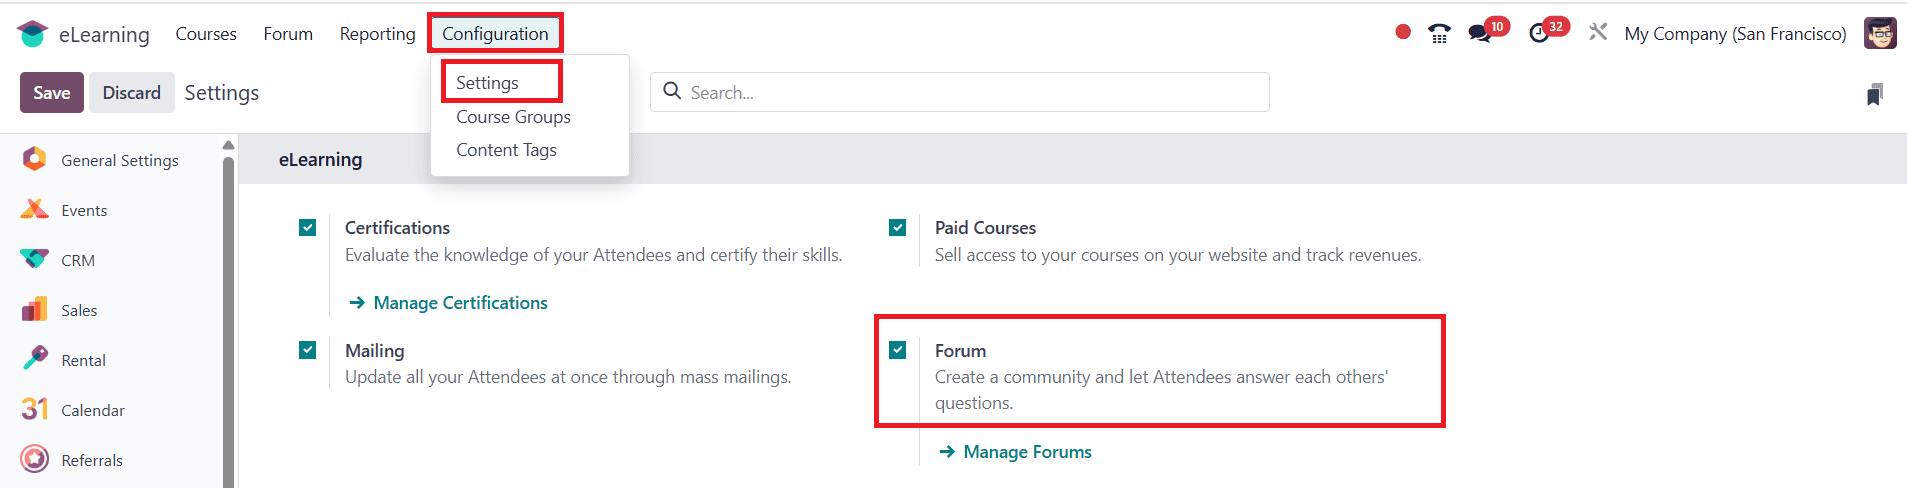
Enable the Forum from Configuration > Settings to start creating a new forum, as shown below:
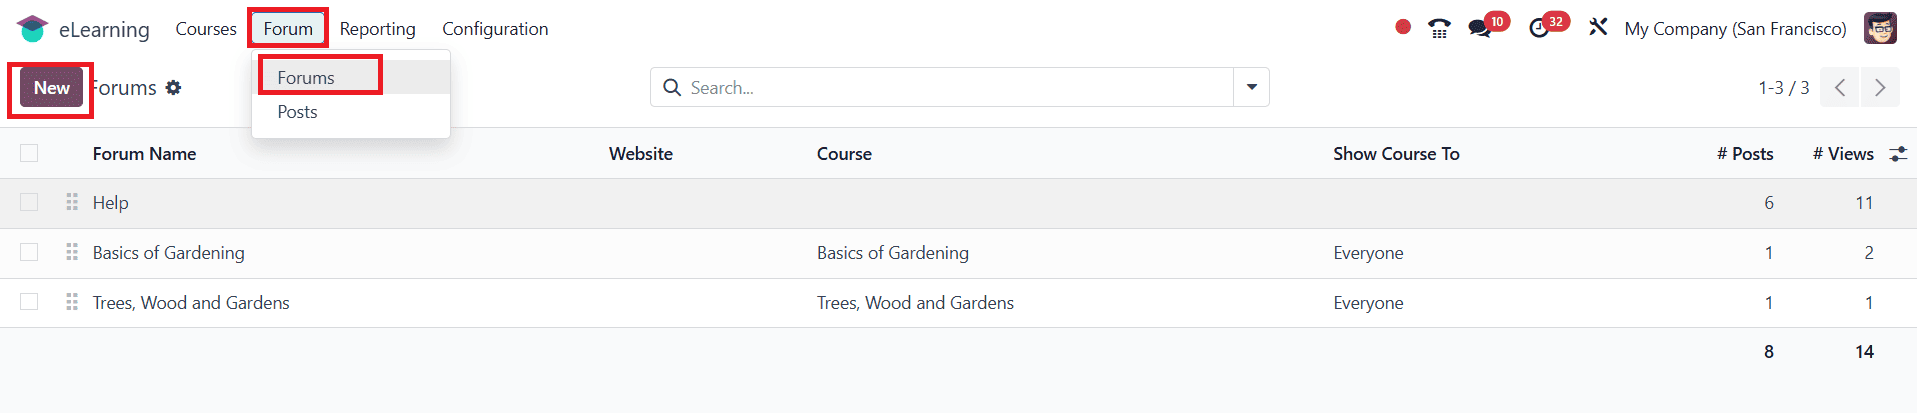
Next, navigate to Forum > Forums, and click the New button as shown below:
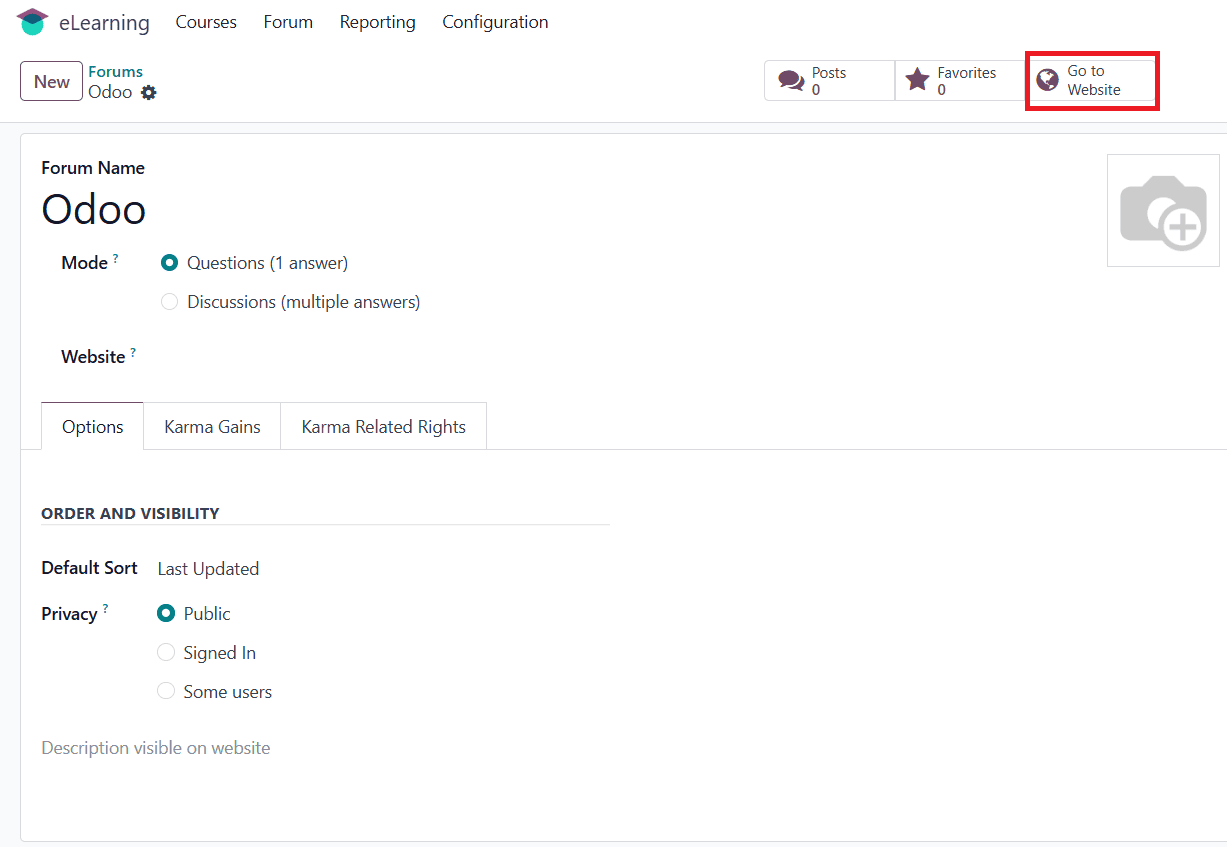
Provide a name for your forum in the Forum Name option. You can select Mode as Questions (one answer can be added to a single post) or Discussions (many answers can be added to a single post). From the Options tab, you can set the Default Sort order, such as Last Updated, Newest, Most Voted, Relevance, or Answered. You can set Privacy to Public (everyone can see the forum), Signed In (only signed-in users can see the forum), or Some Users (only a specific group can see the forum). You can also add a website link under the Website option. You may include a description, which appears on the website, if required.
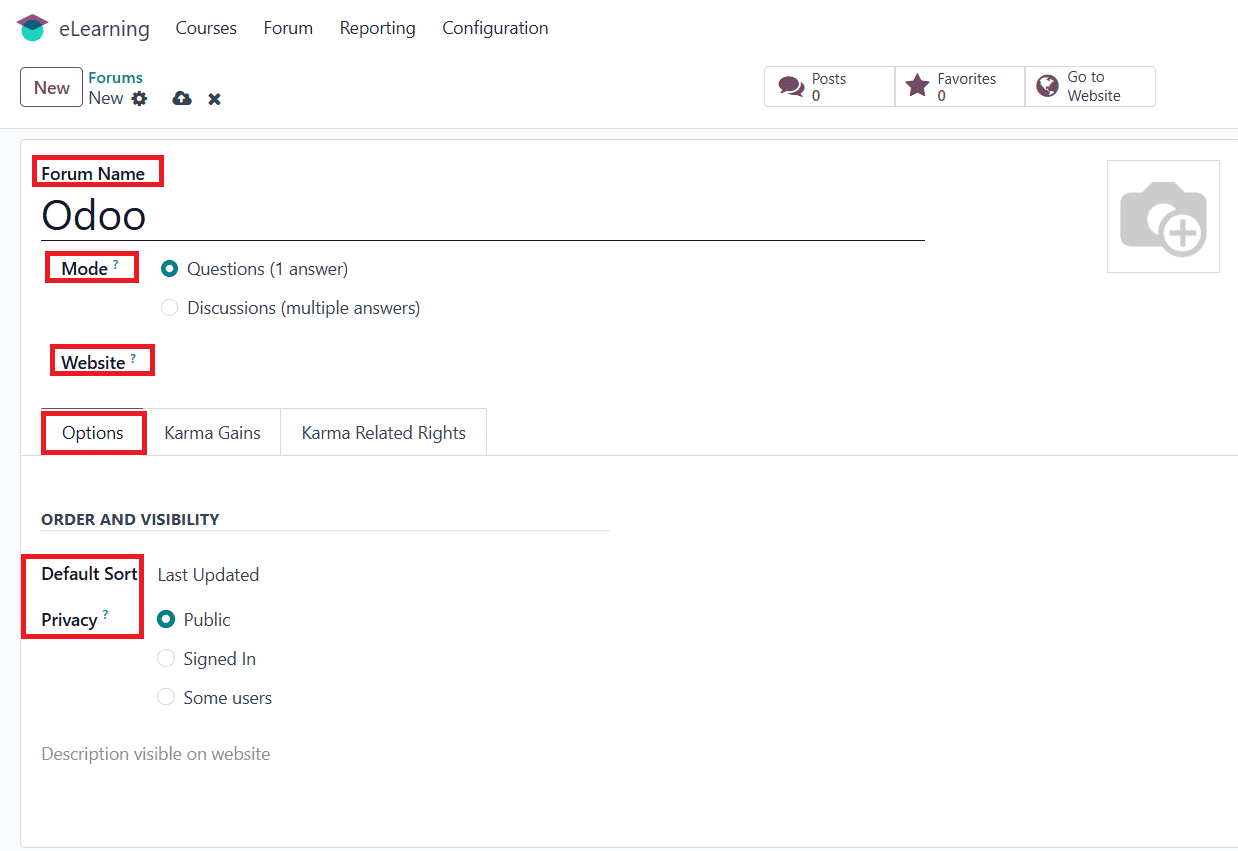
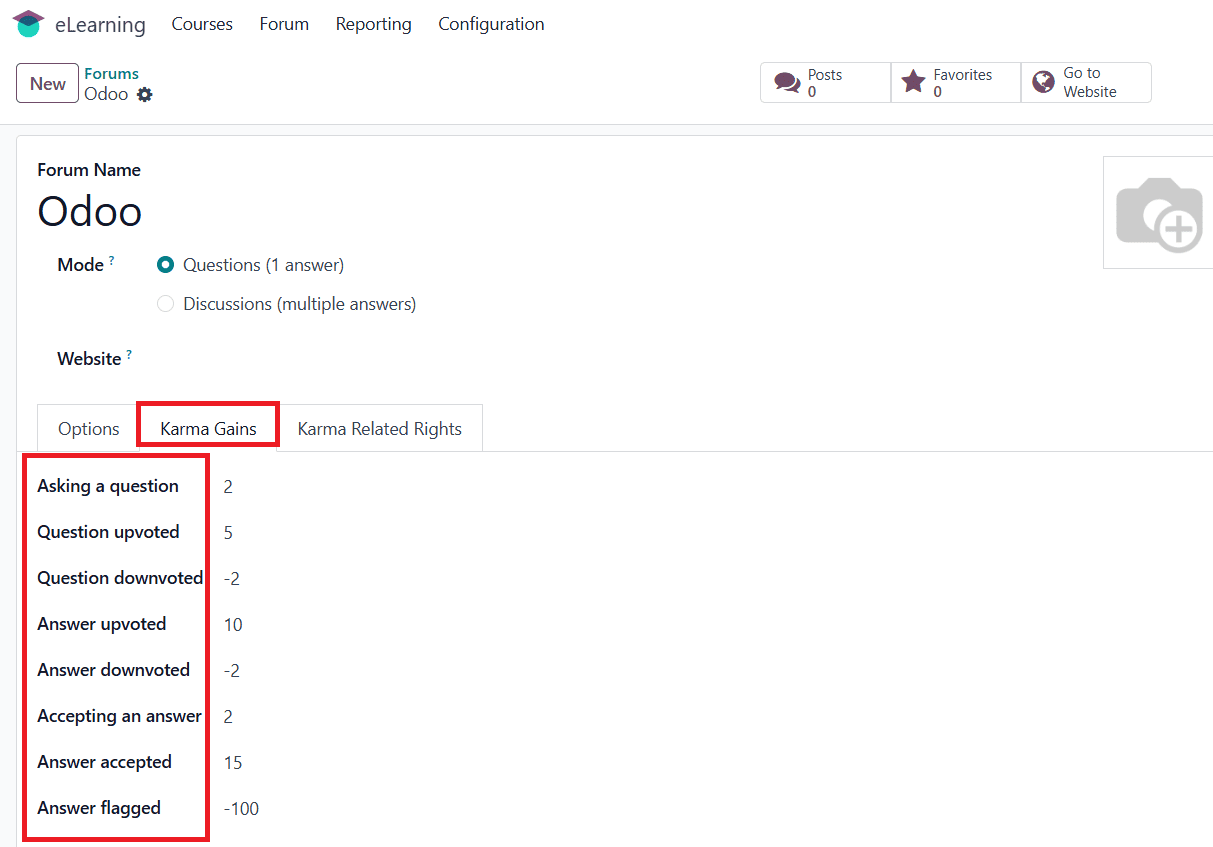
Under the Karma Gains tab, you can see the provided karma points for each forum interaction. Karma Gains are the points that the user earned through active participation on the forum.
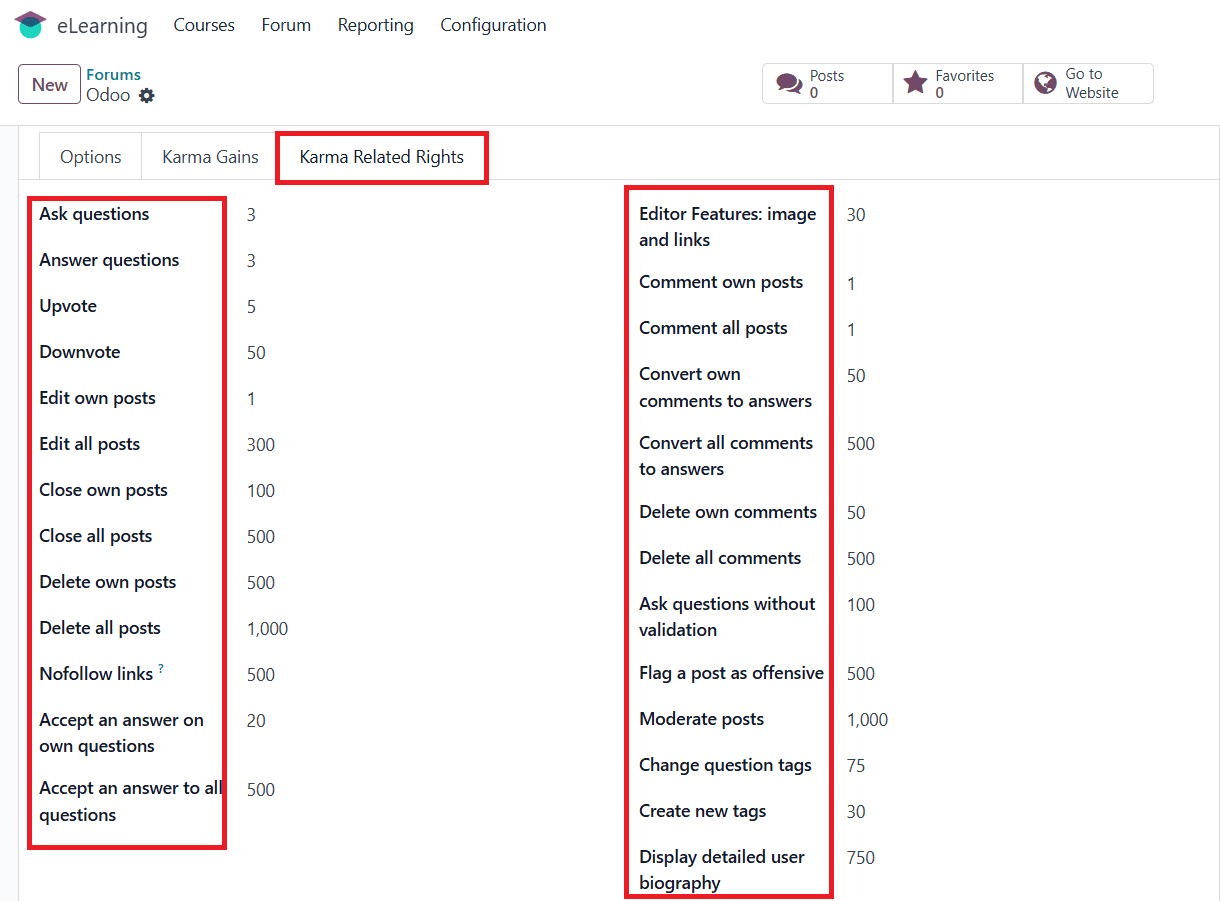
The Karma Related Rights tab displays the permissions and restrictions for users, depending on their karma points.
Then click on the Go to Website option as shown below:
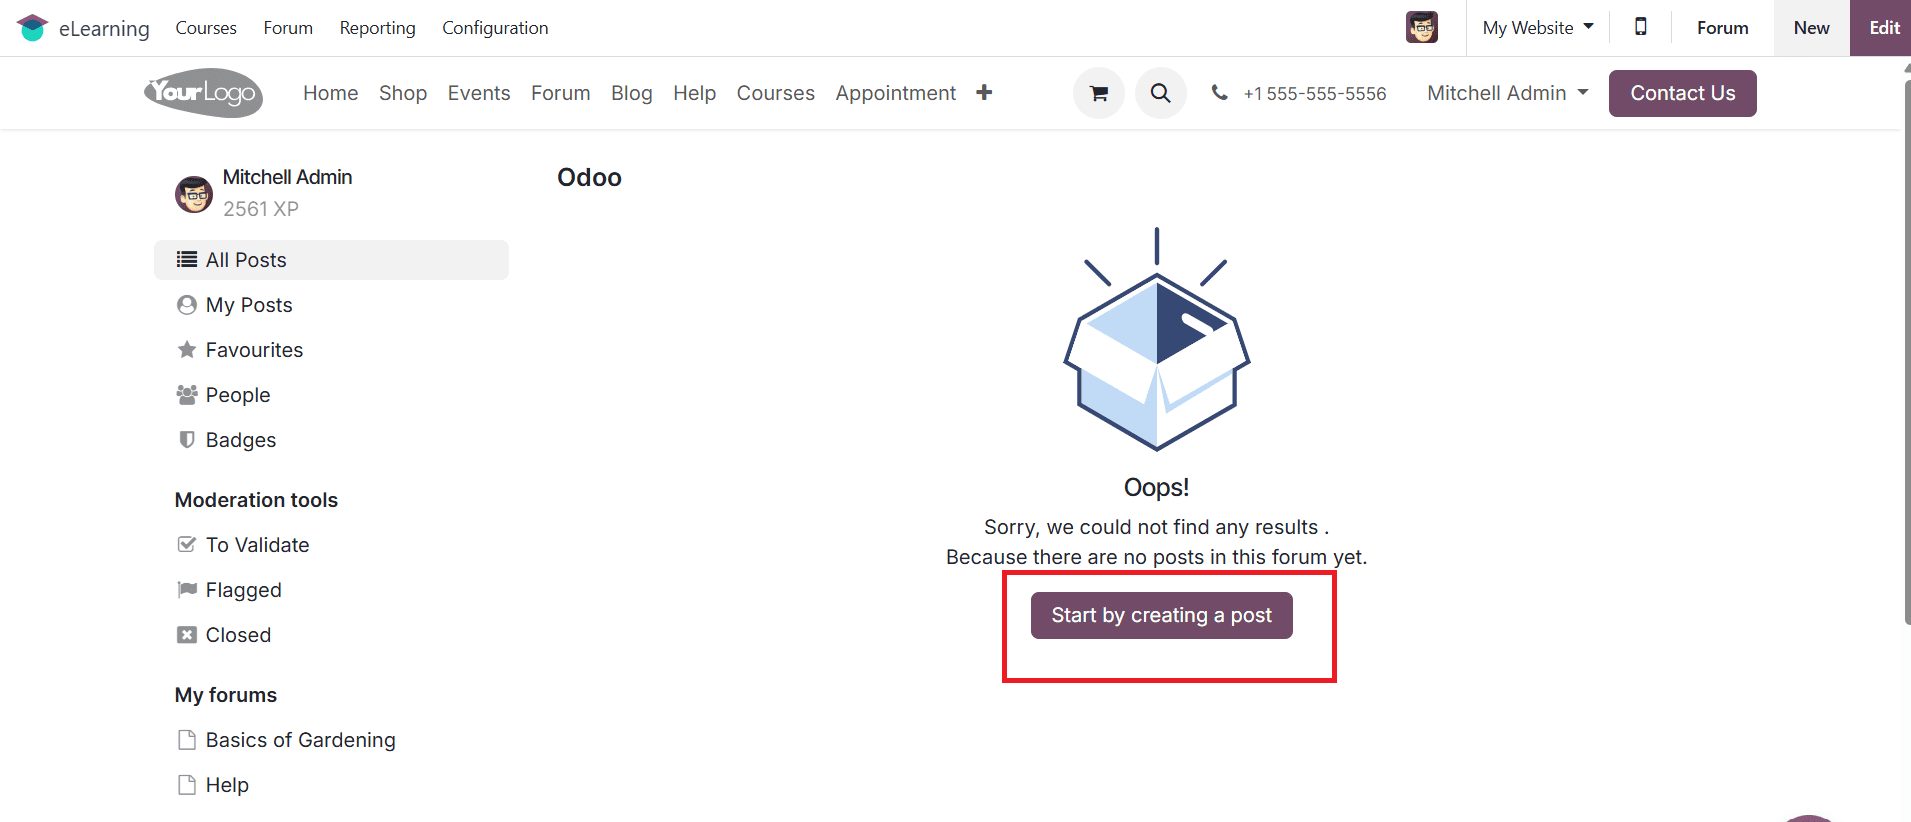
If there are no posts in the forum, the website will display this information. To create a post, click the Start by creating a post button as shown below:
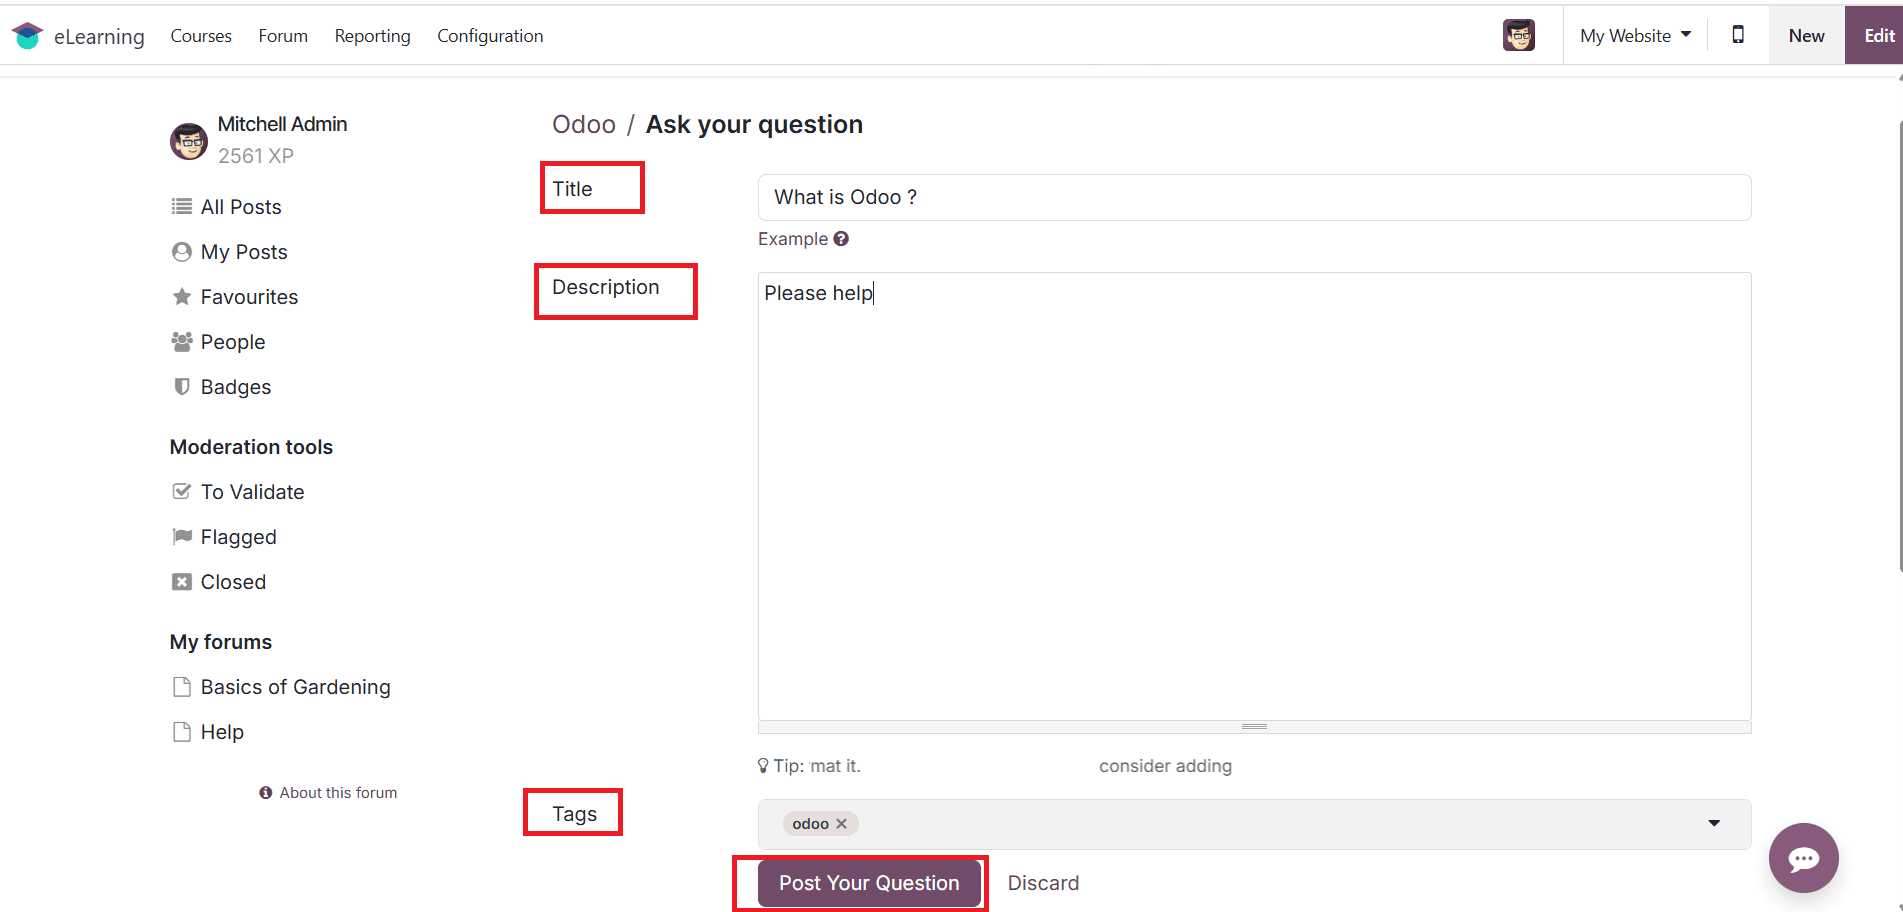
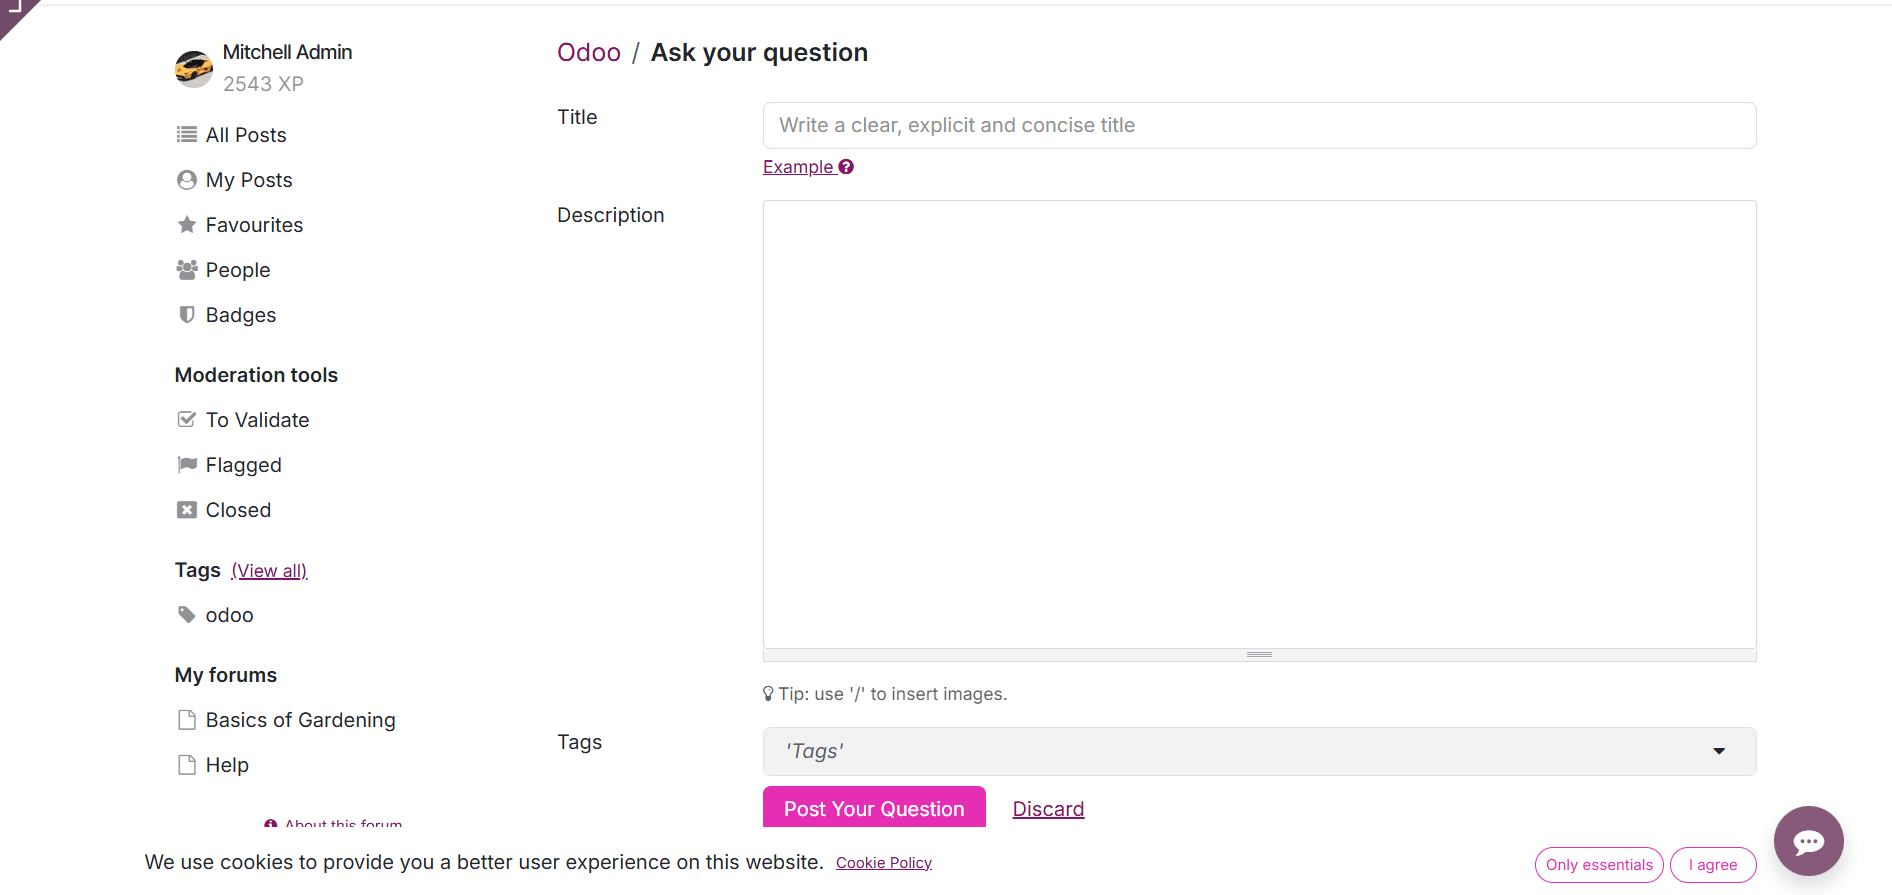
You can enter your question under the Title field. Additionally, you may add a Description and relevant Tags based on your post content. Once done, click the Post Your Question button as shown below:
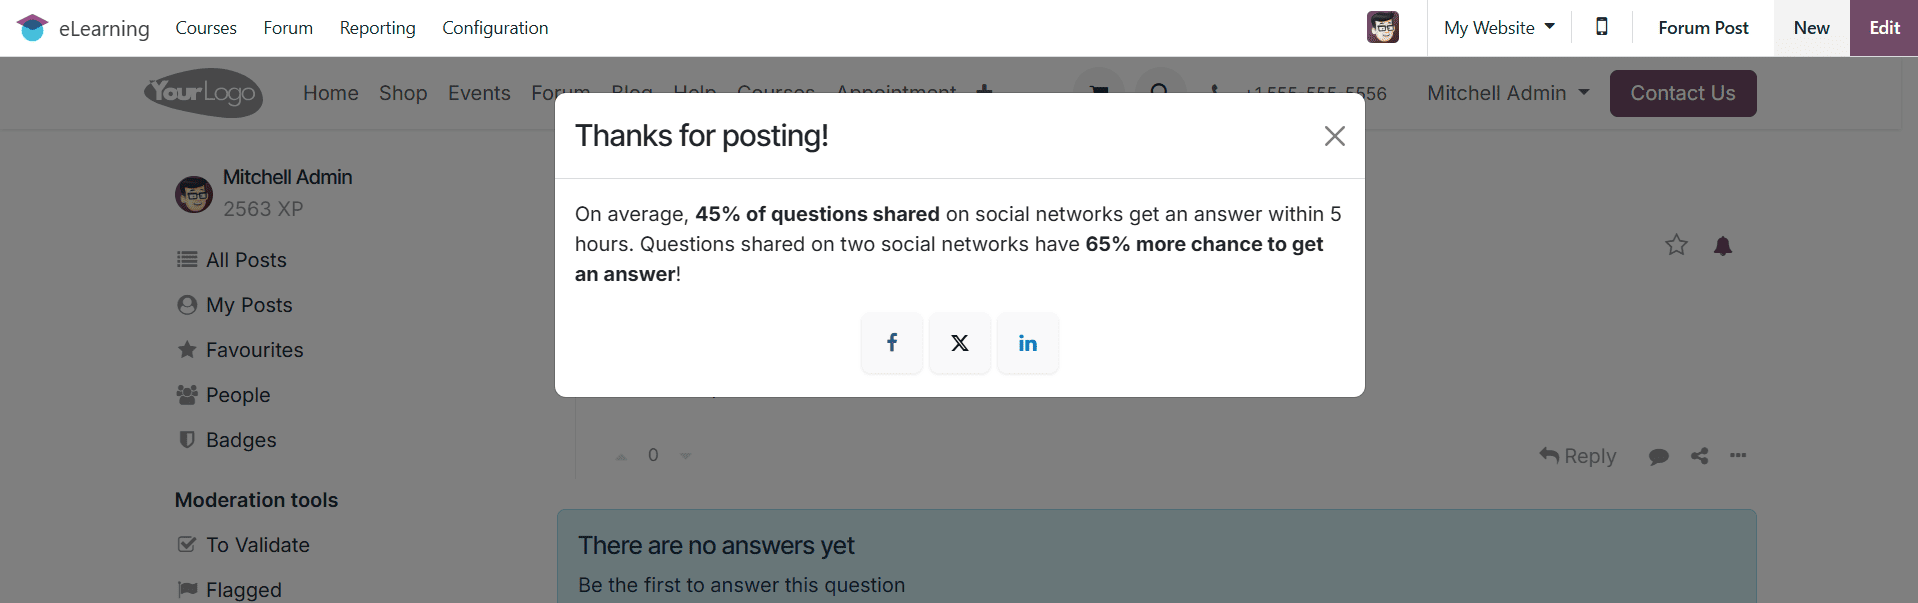
A pop-up screen appears, showing you the chances of receiving answers for your post. You can also share the post through Facebook, LinkedIn, and Threads.
You can see here that your question has been successfully posted. You can also see if anyone answers your question. Click the Reply button to post your response to someone’s answer. Click on the three-dotted line to access the options, such as:
- Edit: click the edit button to edit the questions or answers.
- Close: click the close button to close the question section.
- Delete: click the delete button to remove questions, answers, or comments. If needed, you can also undelete it.
- Create Ticket: click the create ticket button to convert the post or questions into a helpdesk ticket.
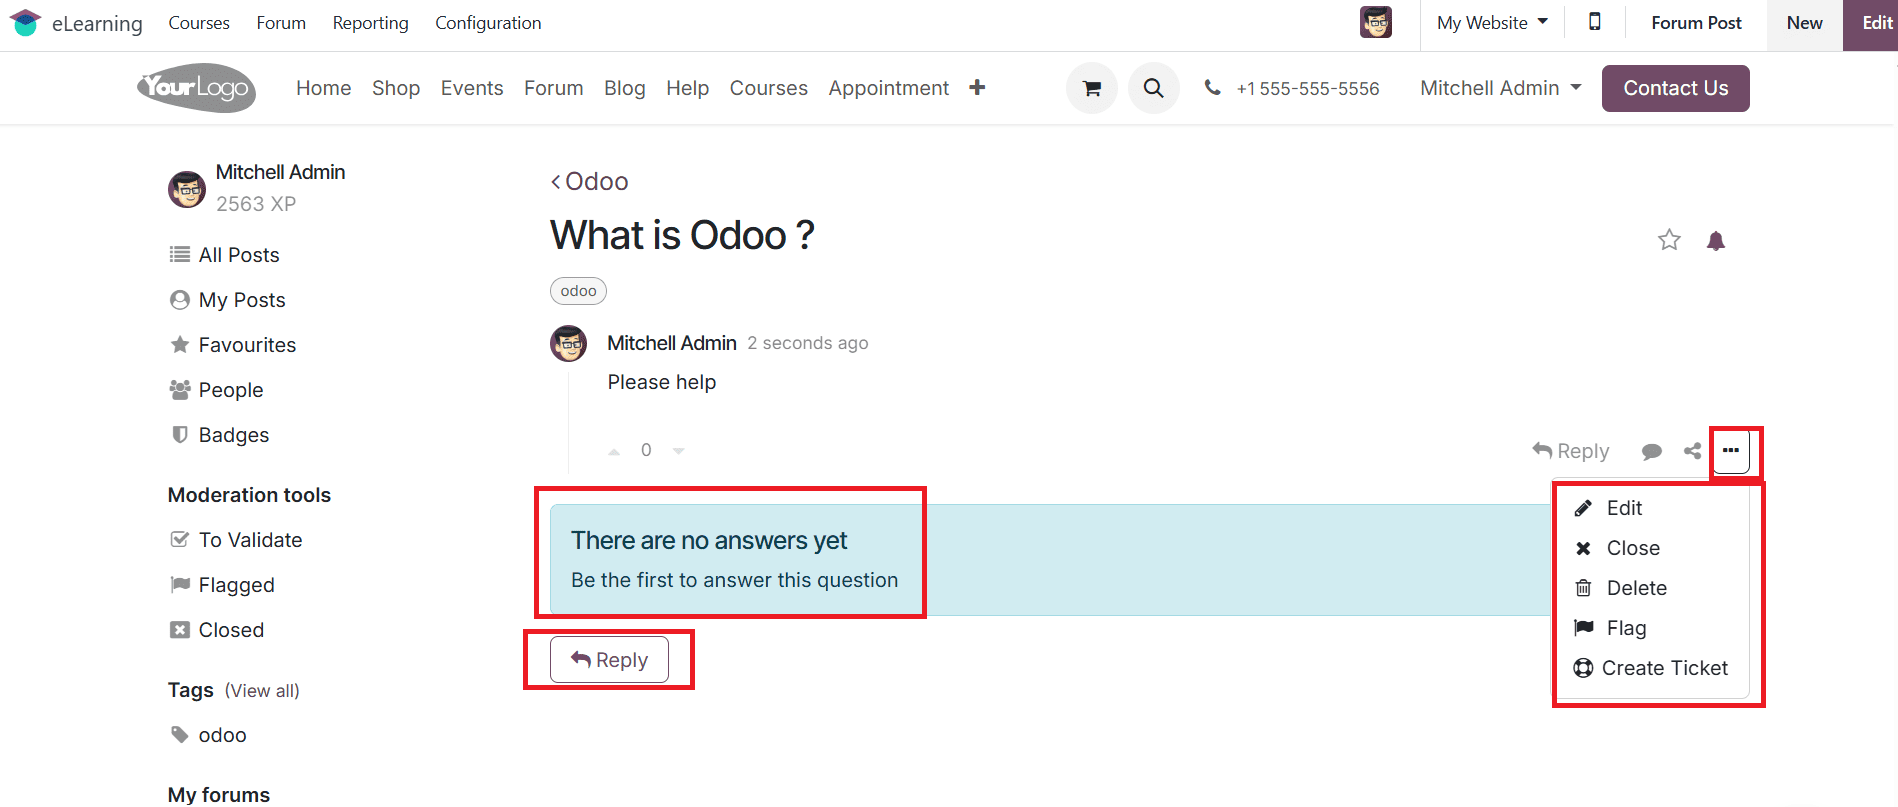
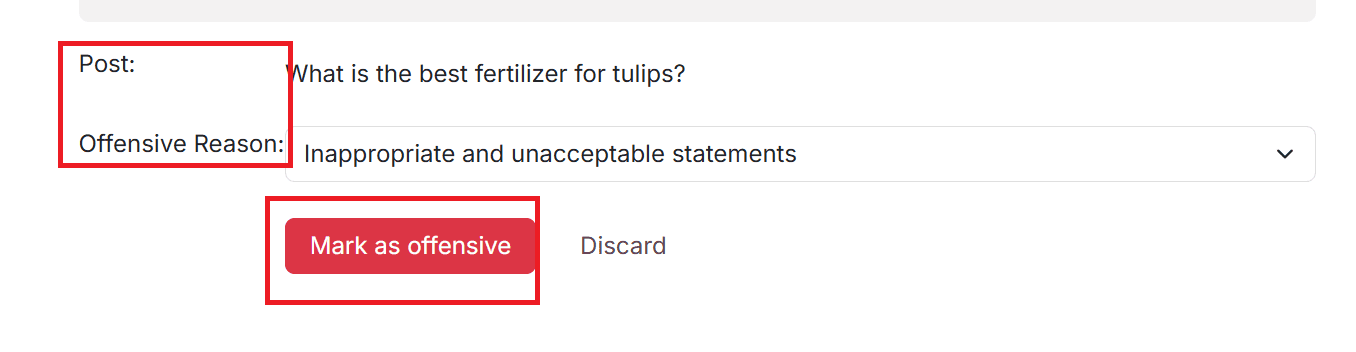
- Flag: click the flag button to mark the questions or answers that have been flagged as offensive. To remove the offensive flag from the post, click on the Accept button, or to confirm the post as offensive, click on the Offensive button as shown below:
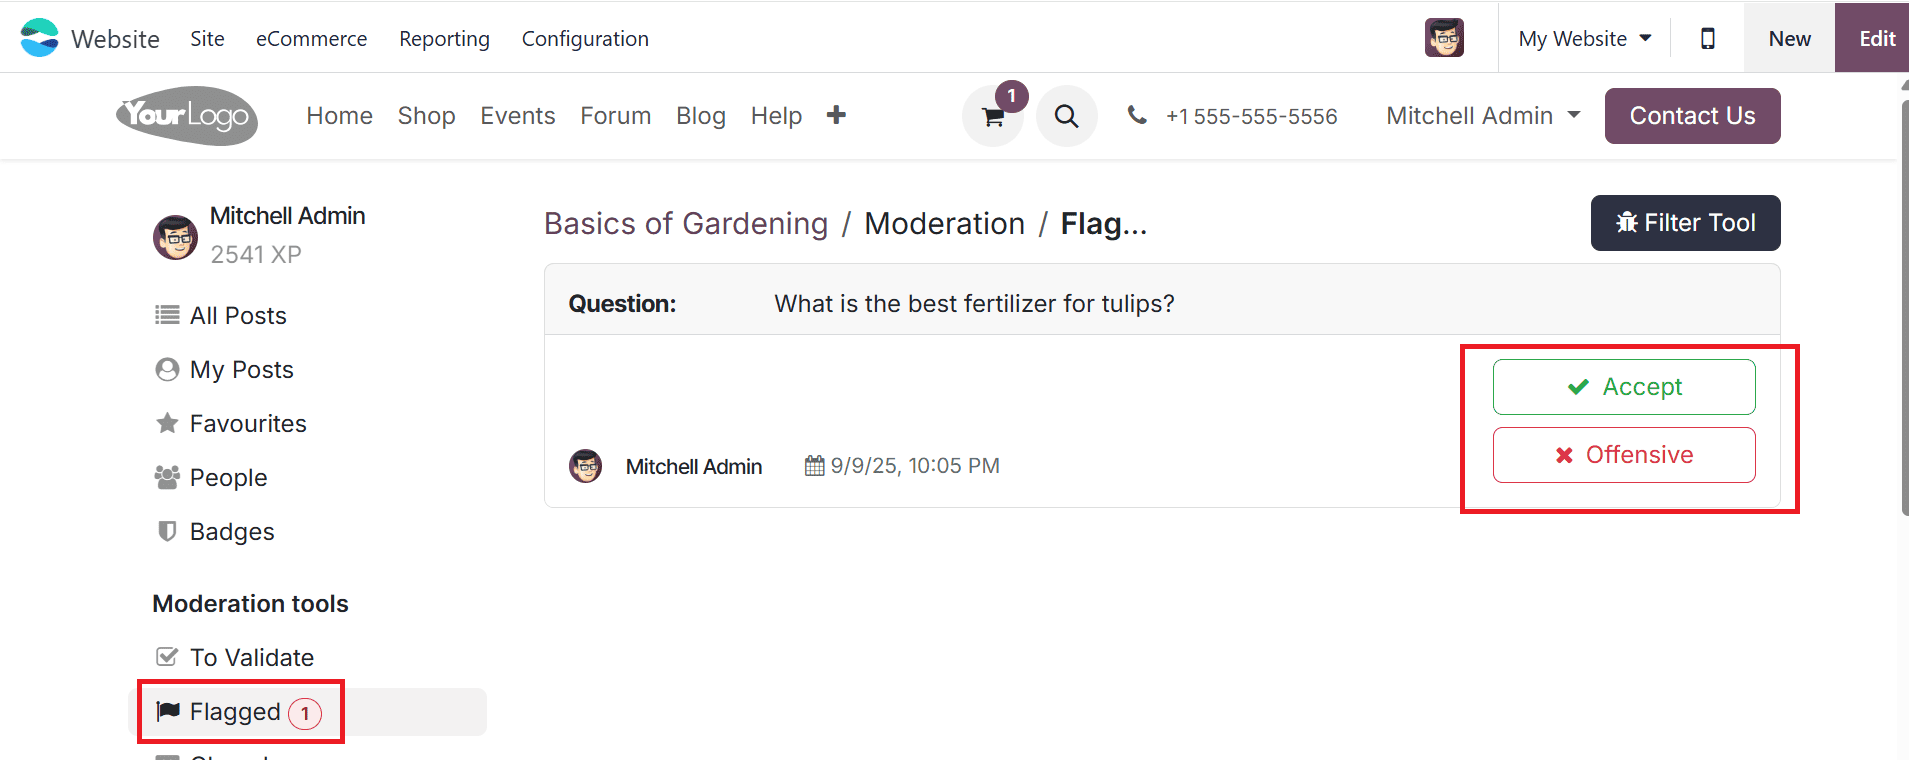
A new window will open where you can add an offensive reason for the post and click on the Mark as offensive button. Then the post will be hidden from the users.
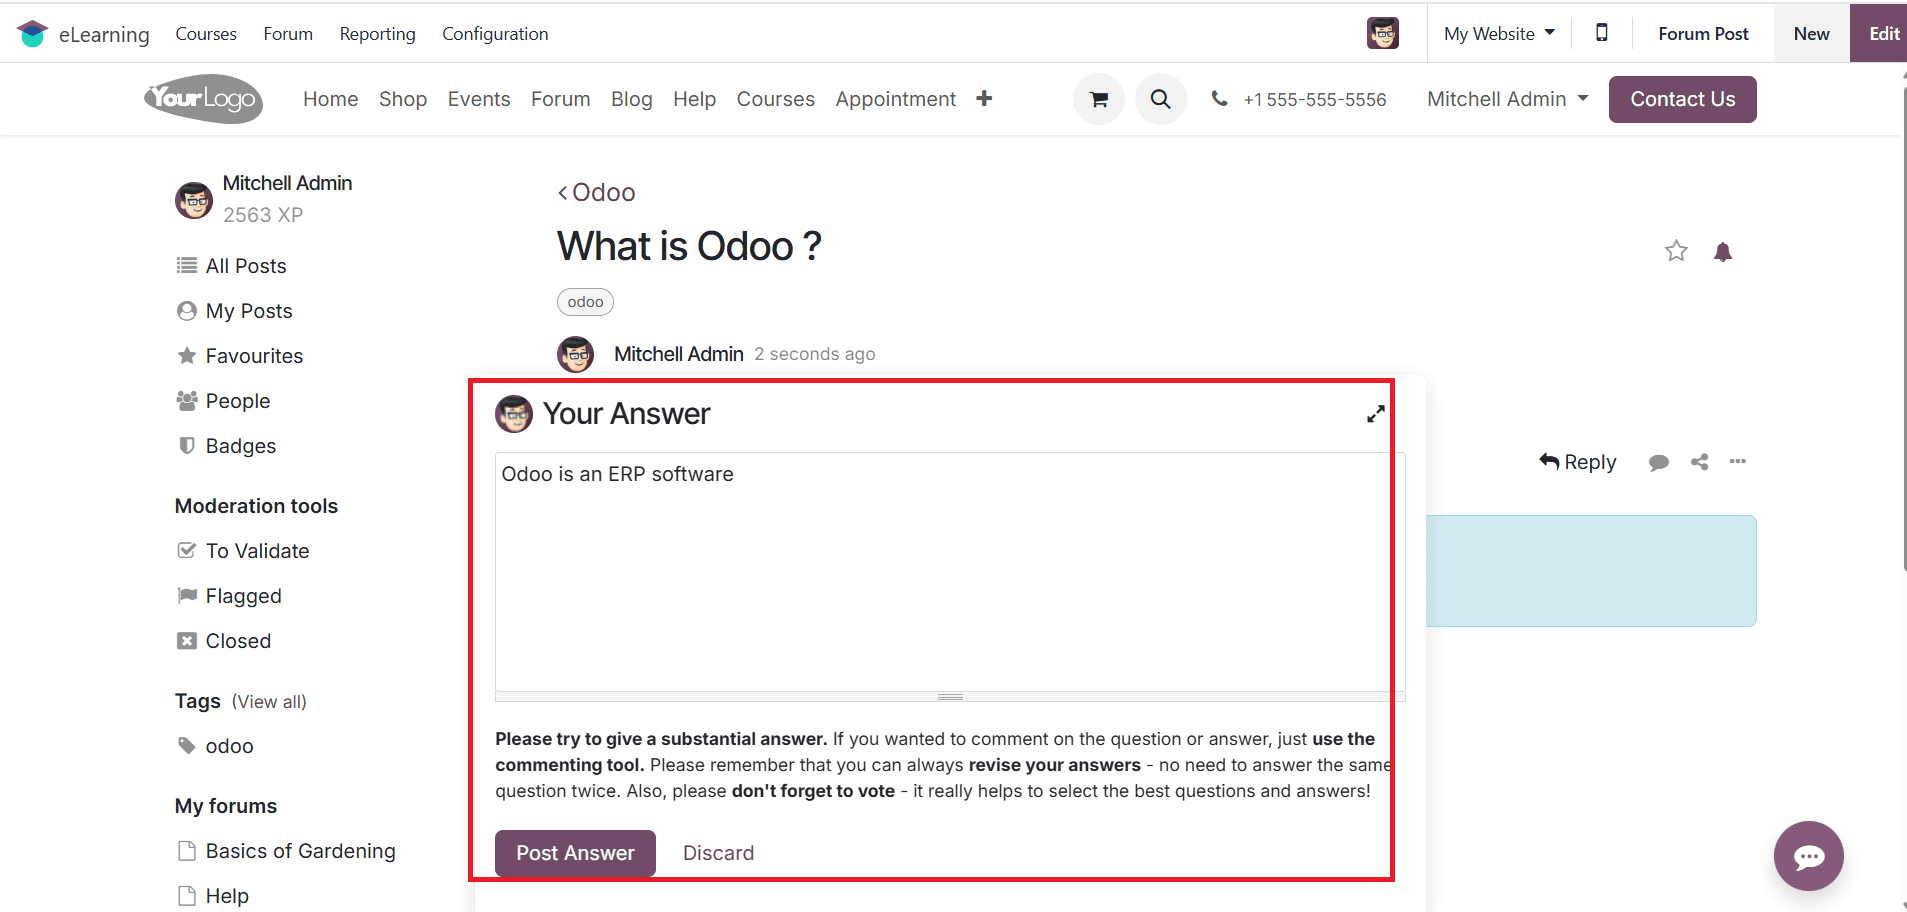
When you click the Reply button, a pop-up screen appears, allowing you to add your answer to the question. Then click on the Post Answer button as shown below:
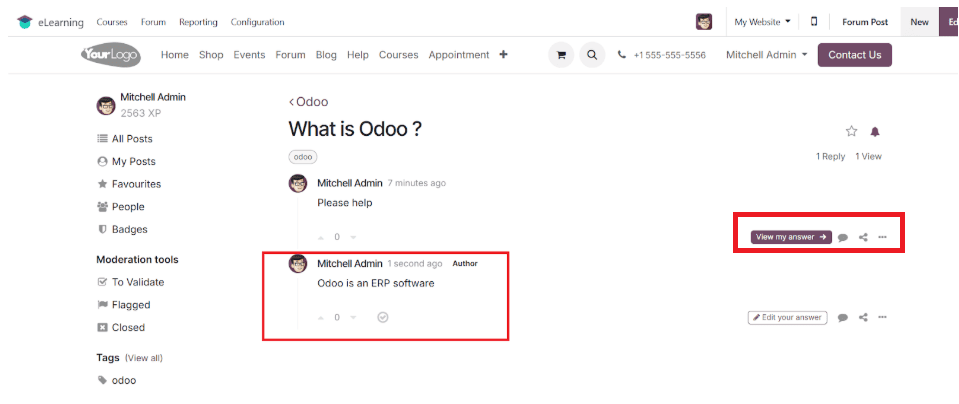
On the left side of the screen, you can see the options such as Posts, My Posts, Favorites, People, and Badges. You can also see validated, flagged, and closed under the Moderation Tools. Under the My Forum section, you can see a Help option and the forum you have created. You can also view the tags added to your forum under the Tags section. Here, you can see all the answers given to the specific question. When you click on View my answer, you can see all the answers to the question. Click on the speech bubble button to comment on a question or answer. Click on the share node button to share the question to Facebook, Twitter, or LinkedIn. Click on the three-dotted line to view the options such as Edit, Close, Delete, Flag, and Create Ticket, which are explained above.
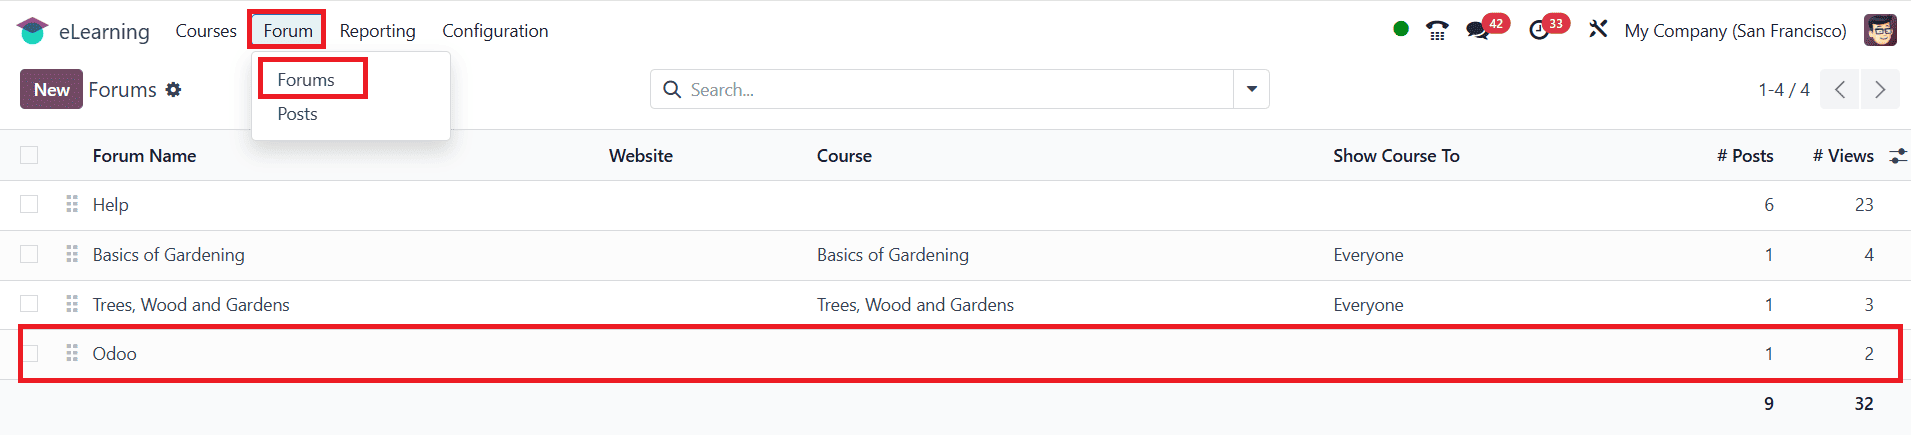
Under the Forum > Forums, you can see the newly created forum as shown below:
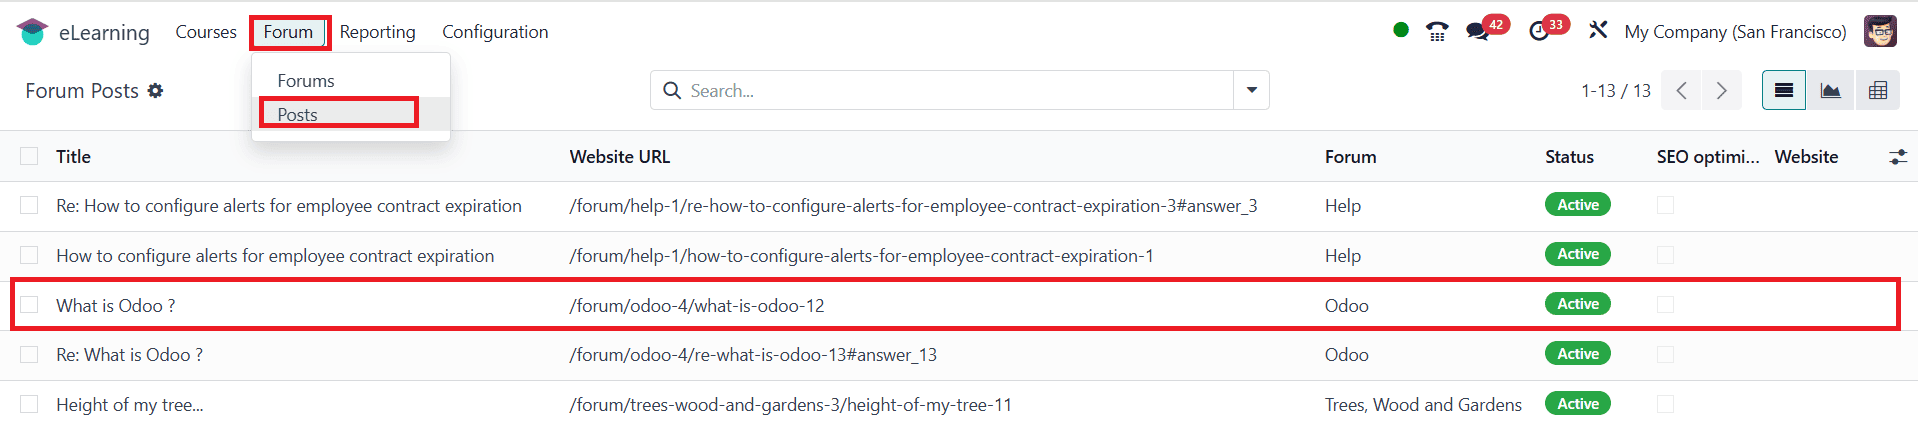
Under the Forum > Posts, you can see the newly created post as shown below:
Create a New Course Forum
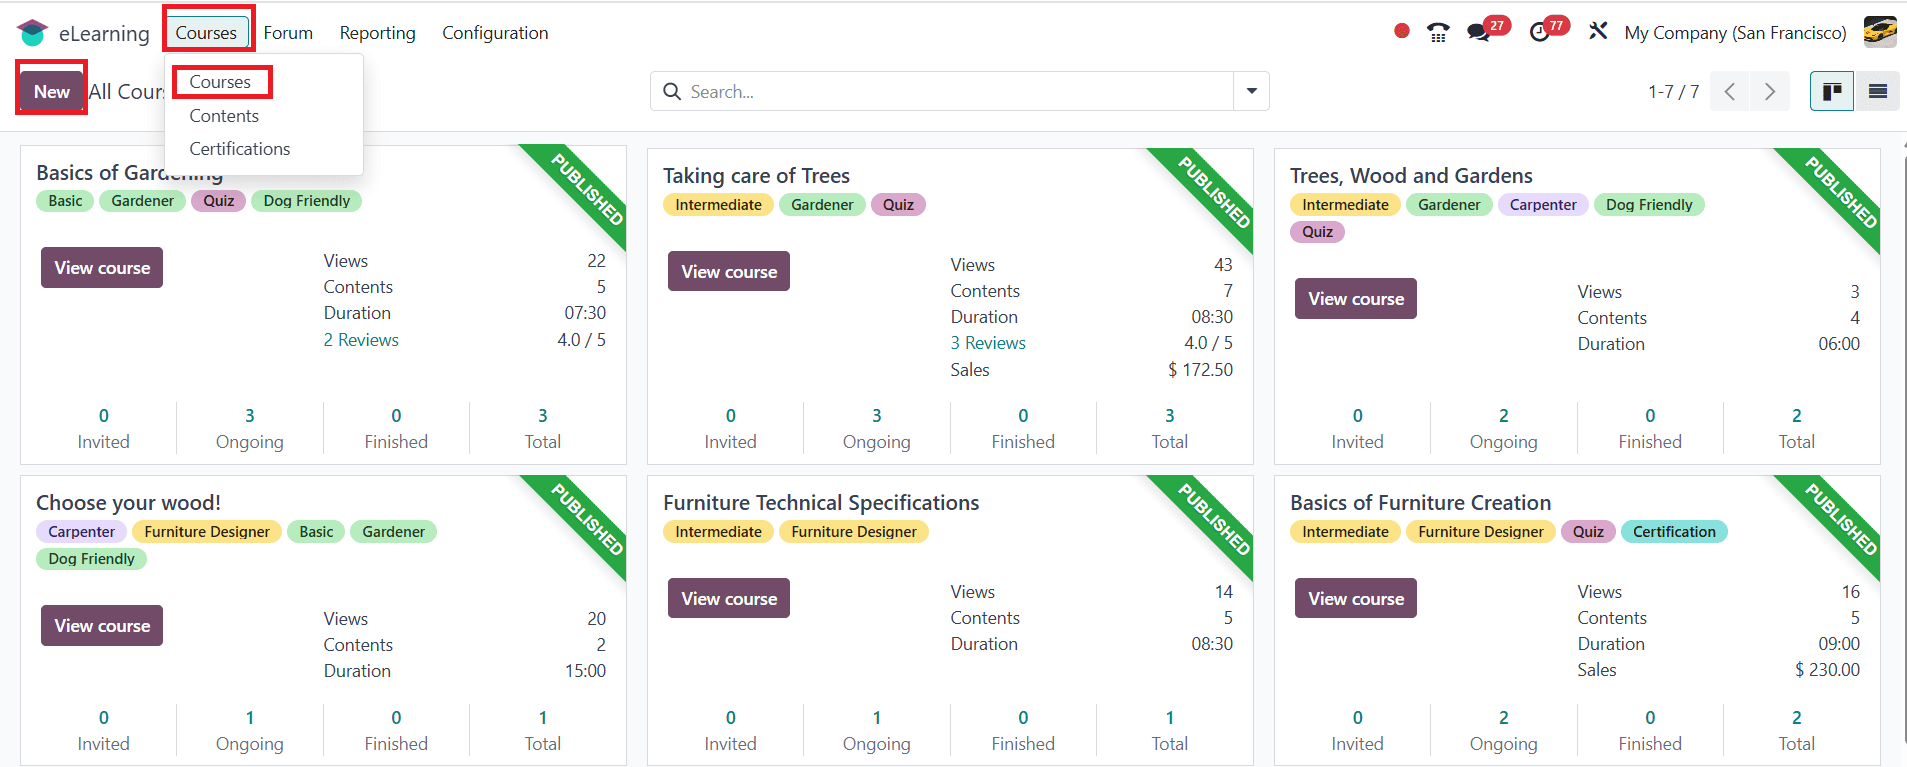
To create a new course, go to the Courses > Courses. Then click on the New button as shown below:
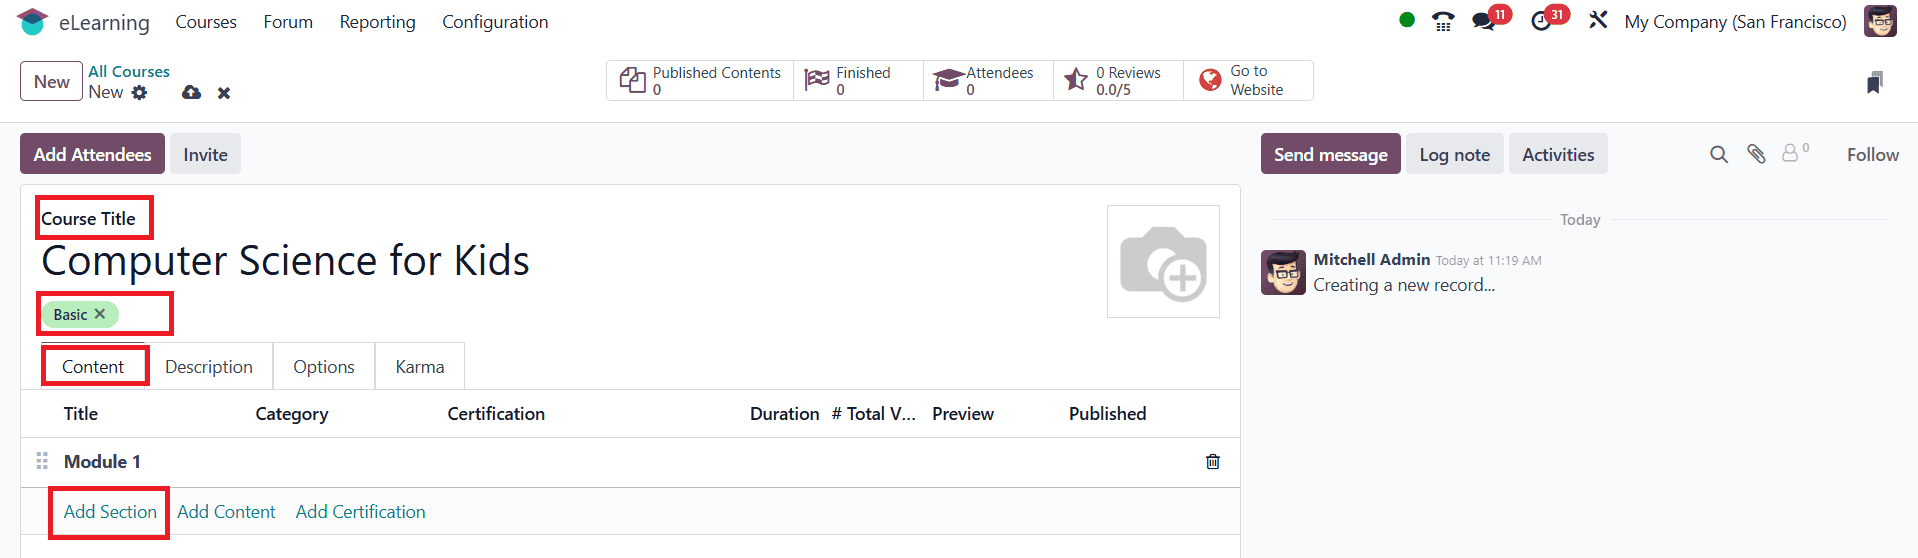
You can add a title for your course under the Course Title option, and assign tags using the Tag field. Under the Contents option, you can add options such as Add Section, Add Content, and Add Certification. Click the Add Section button to add a section for your content, as shown below:
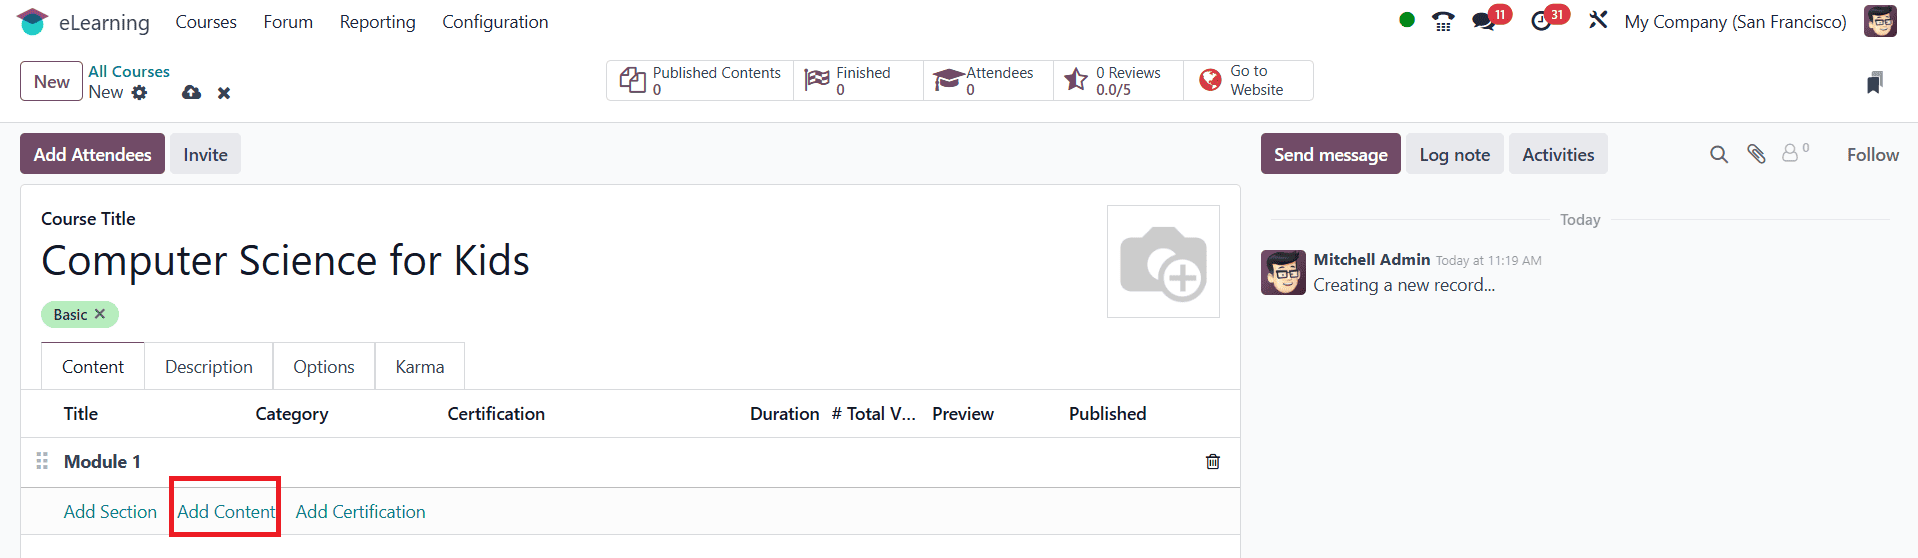
Then, click on the Add Content option to create content for your course as shown below:
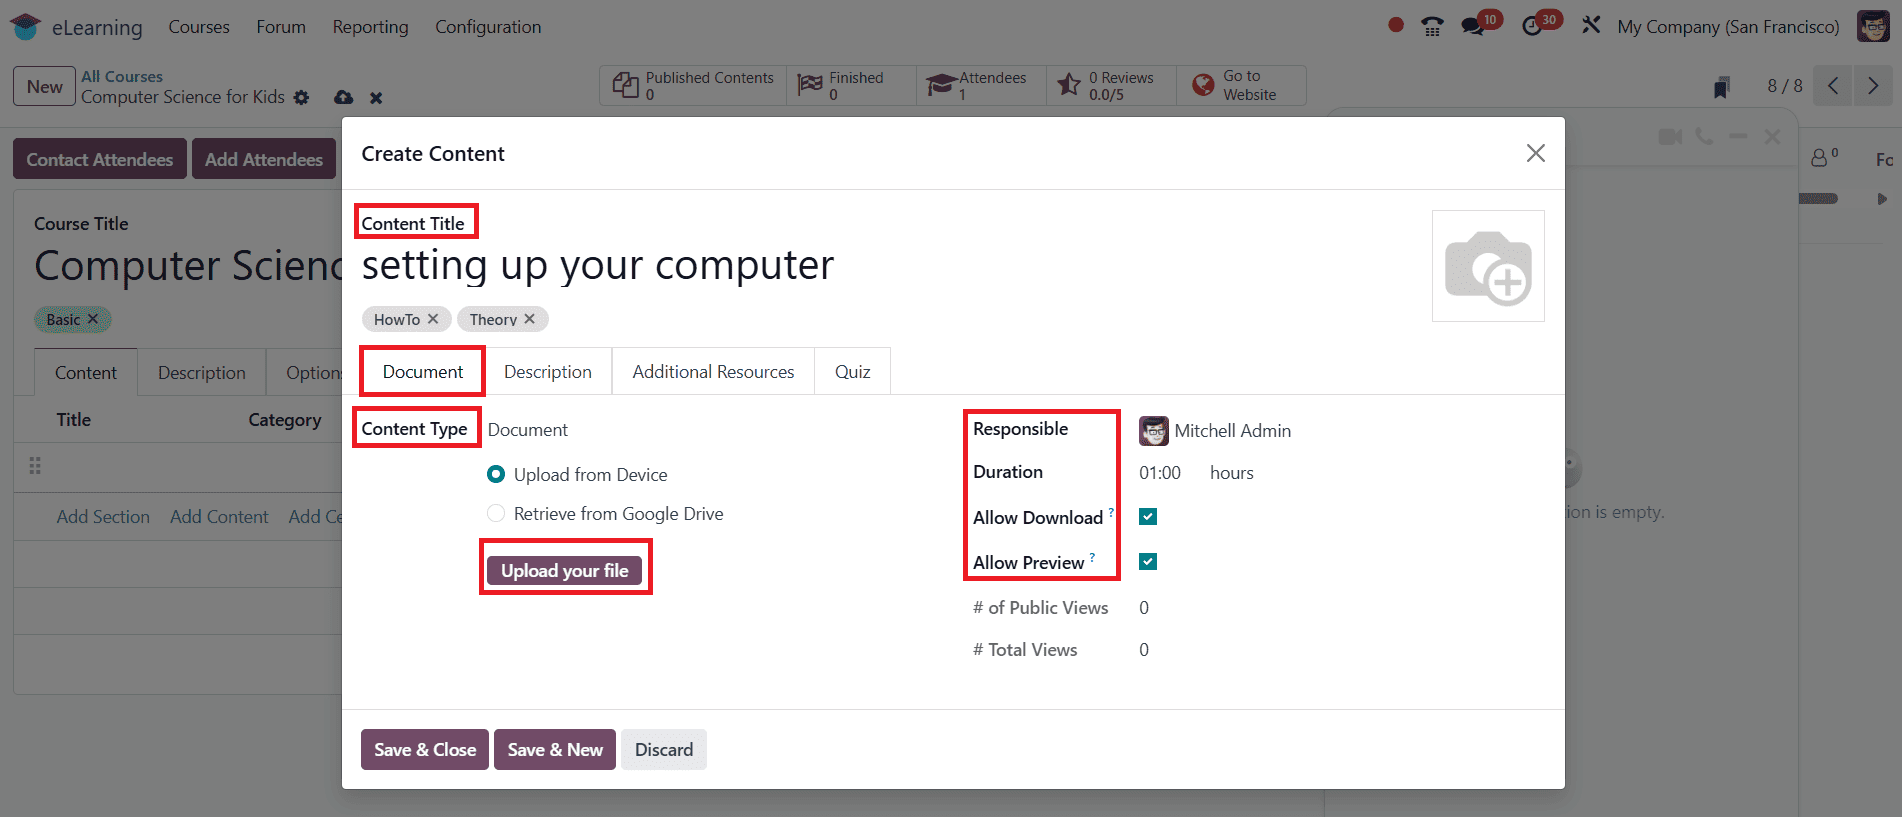
A pop-up screen will appear, allowing you to add a title for your content in the Content Title Field and include relevant tags in the Tags field. Under the Document tab, you can select Content Type, Responsible, and Duration. If needed, you can also enable options such as Allow Download (users can download the content, if it is in a document) and Allow Preview (the course is accessible to everyone).
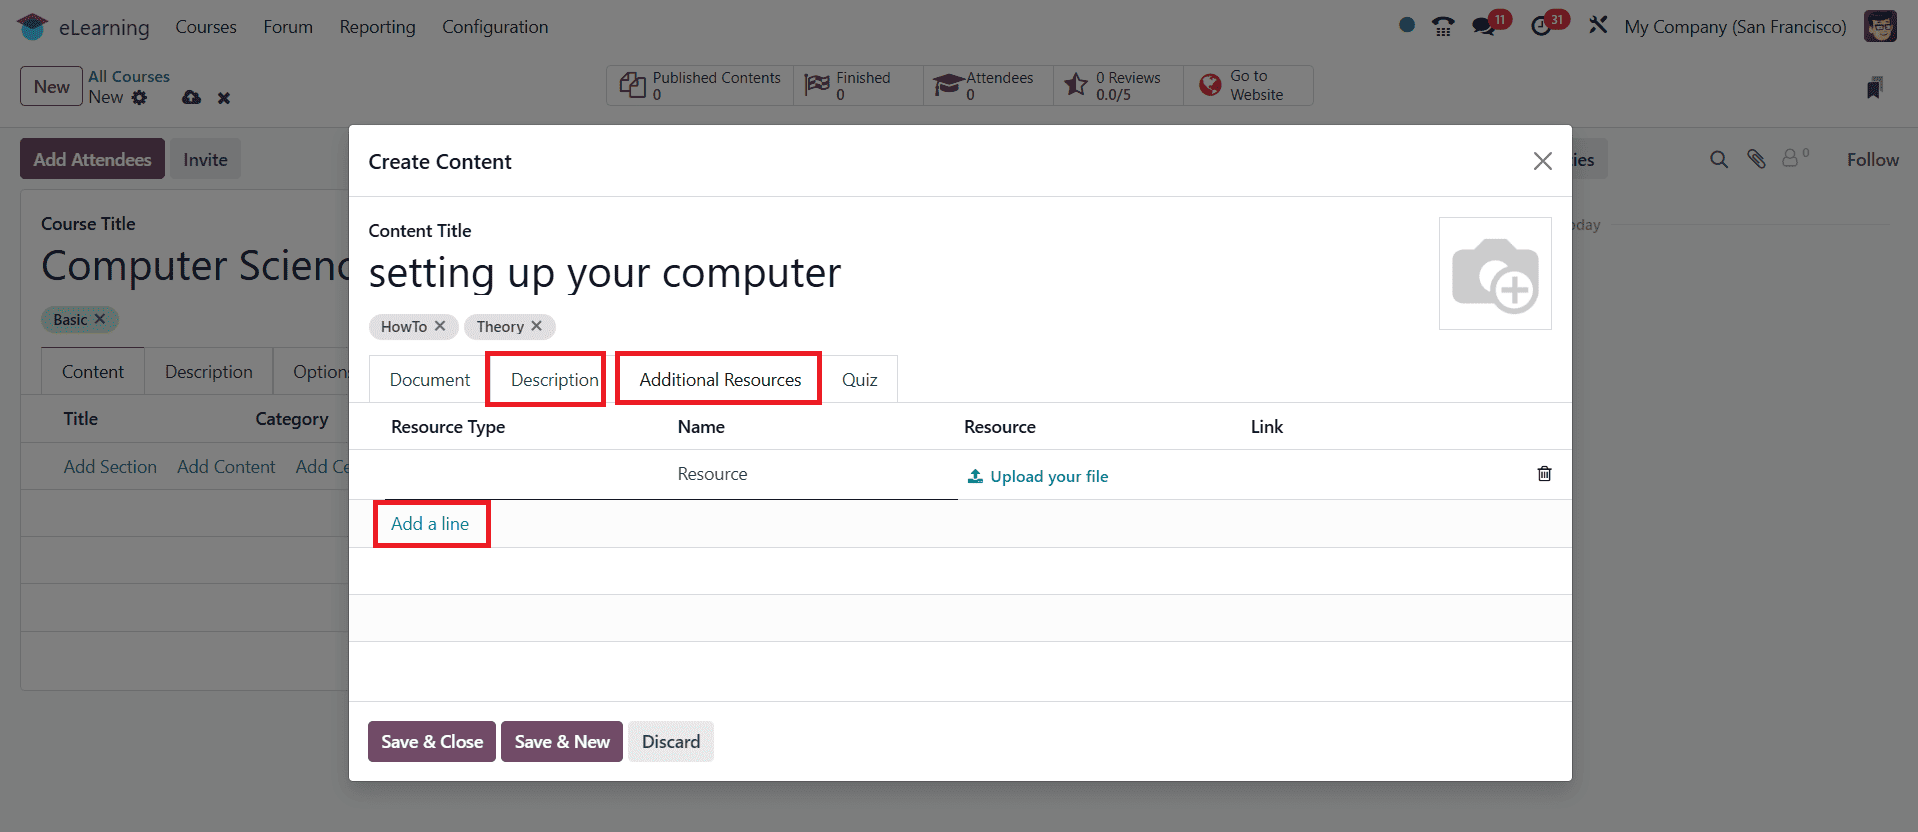
Under the Description tab, you can add a short description about your course content, which appears in the About section of the course. In the Additional Resources tab, you can attach a link or file by selecting the Add a line option.
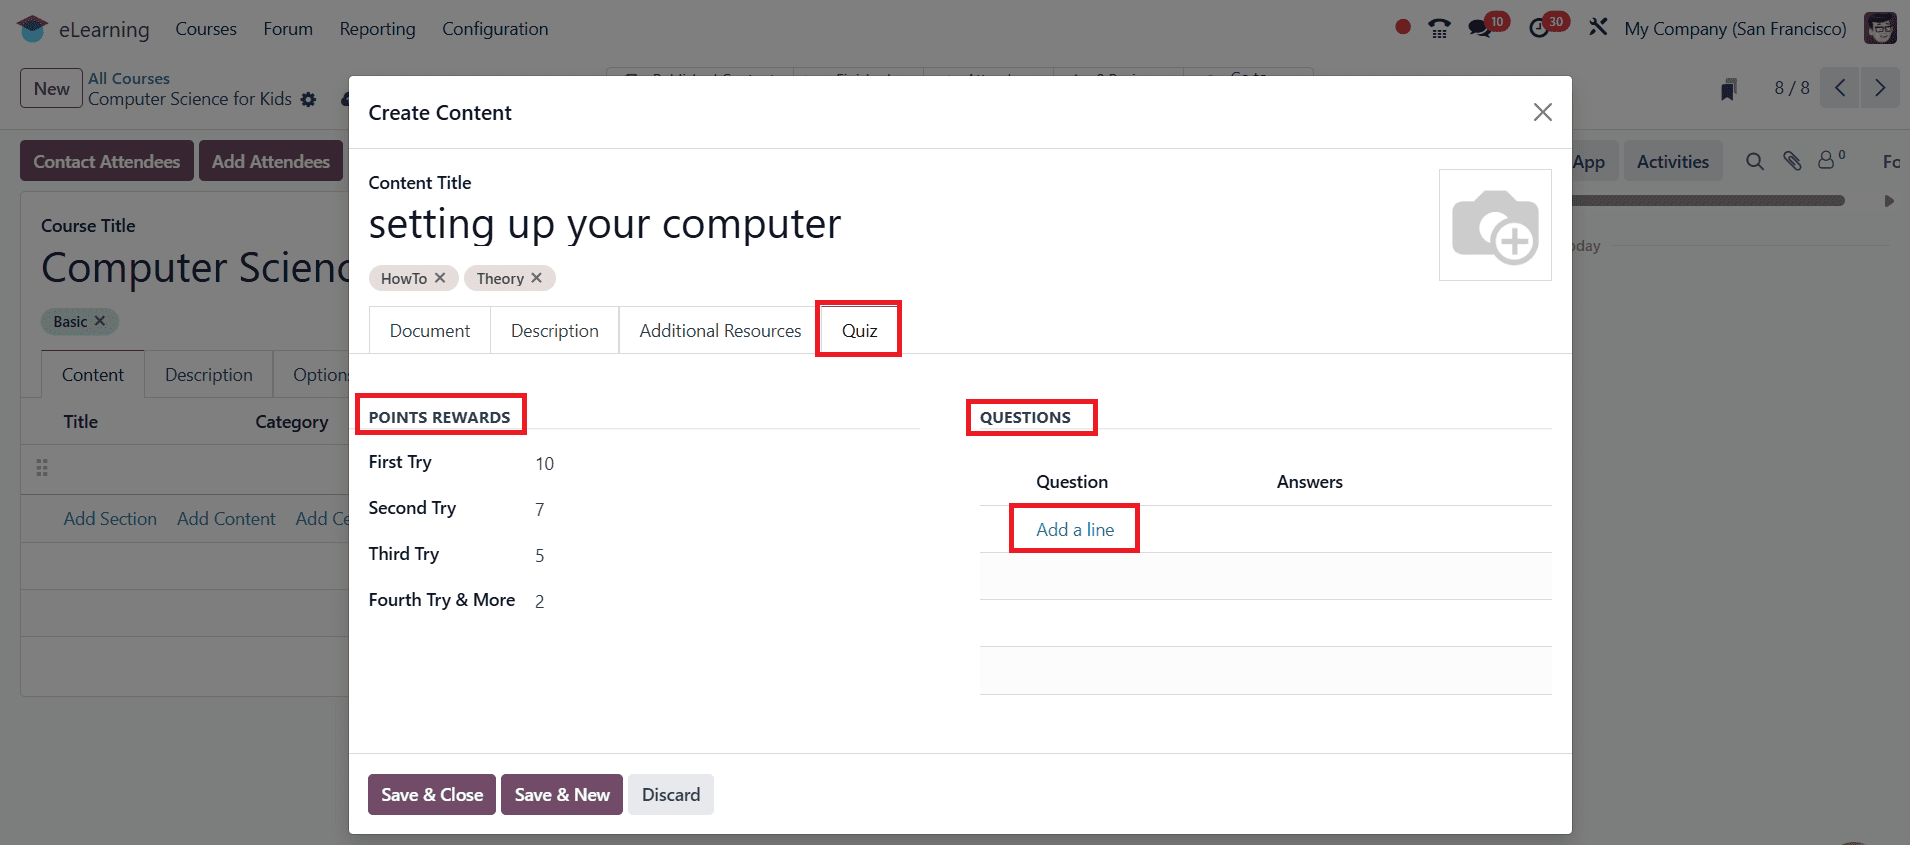
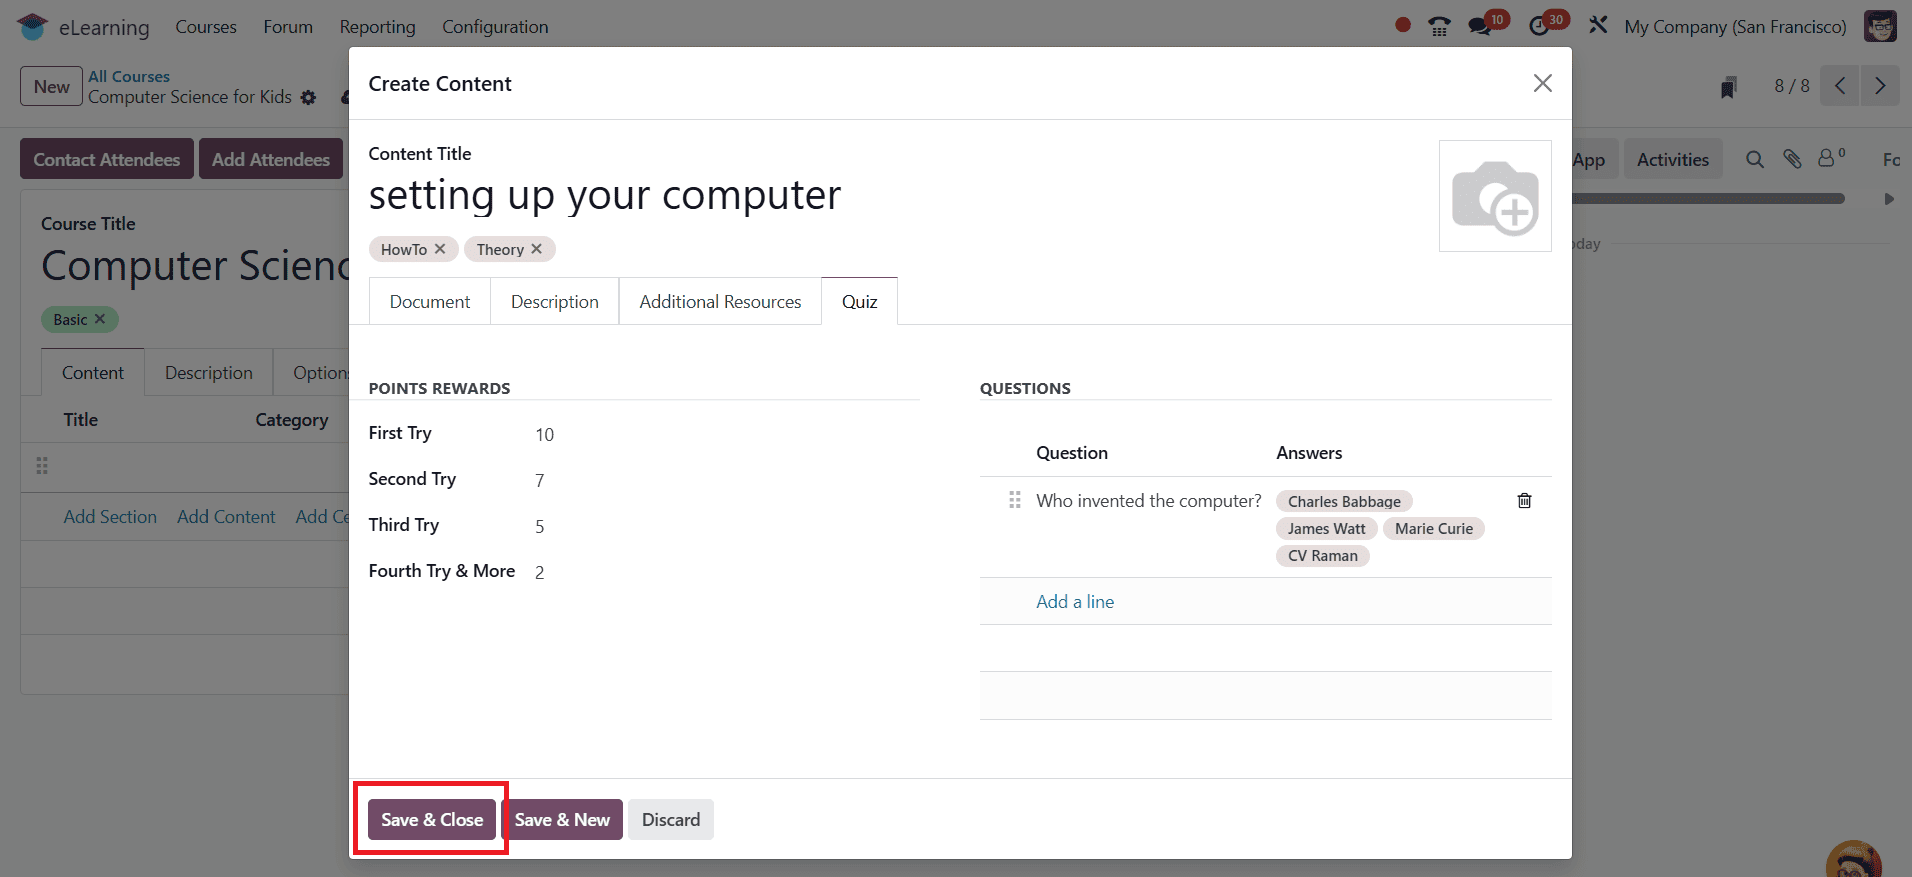
Under the Quiz tab, you can view options such as Points Rewards (displaying karma points for each attempt to answer the questions) and Questions. Under the Questions option, you can add questions by clicking on Add a line, as shown below:
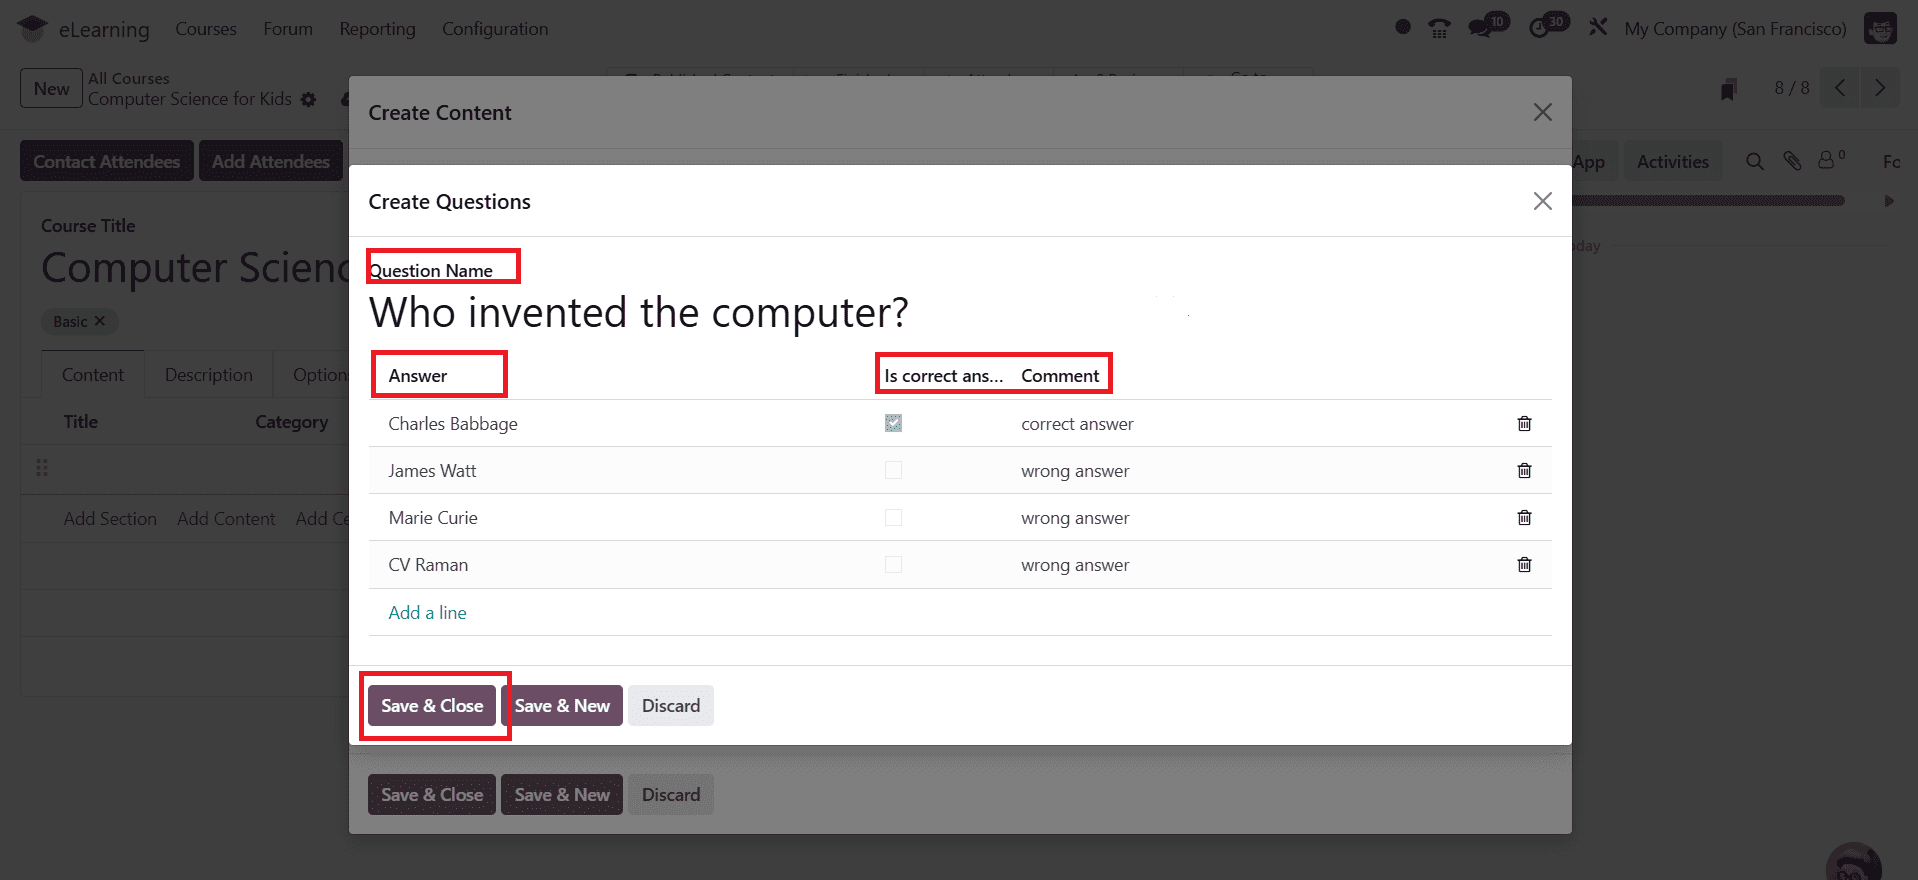
A pop-up screen appears, where you can add a question under the Question Name option. You can add multiple answers by selecting the Add a line option. Then, mark the correct answer and provide comments on which ones are correct and which are wrong. Then click on the Save & Close button or click on the Save & New button to create more than one question.
Under the Questions options, you can see the created question. Then, click on the Save & Close button or the Save & New button to make more than one content item.
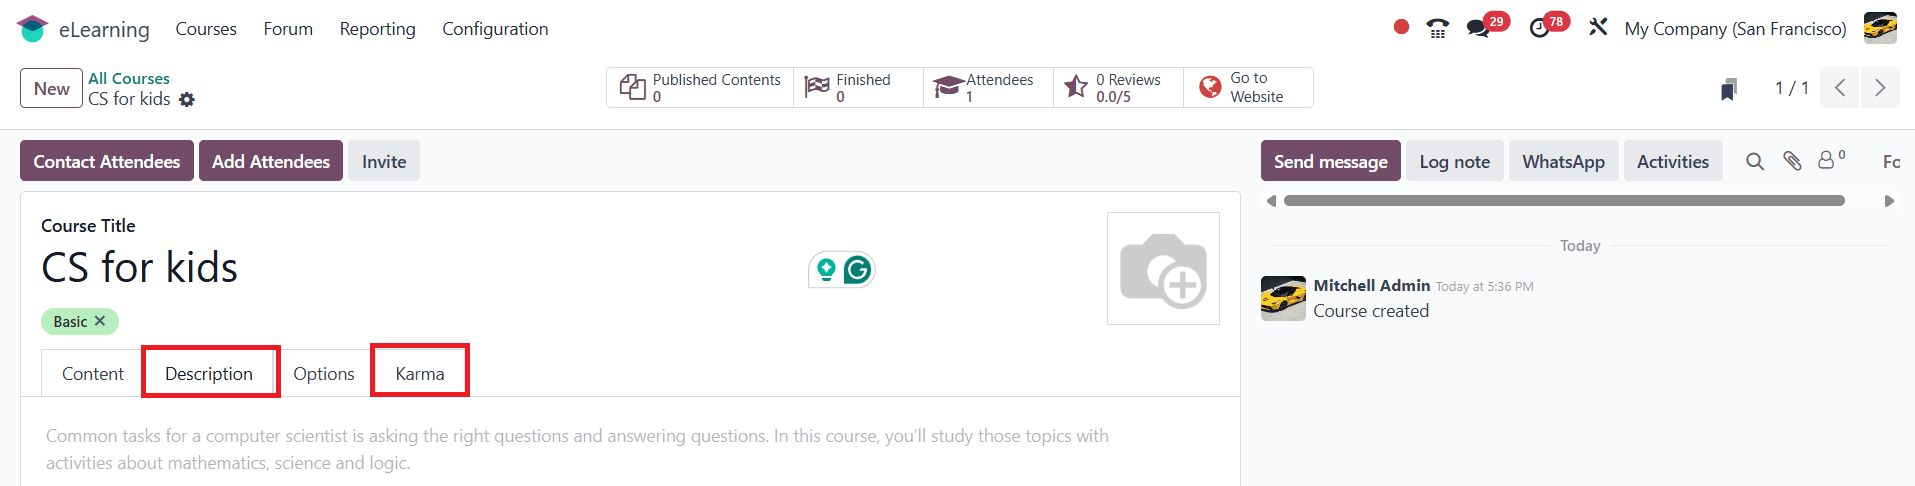
Under the Description tab, provide details or an overview of your course. Under the Karma tab, you can see the karma points under the Rewards and Access Rights option.
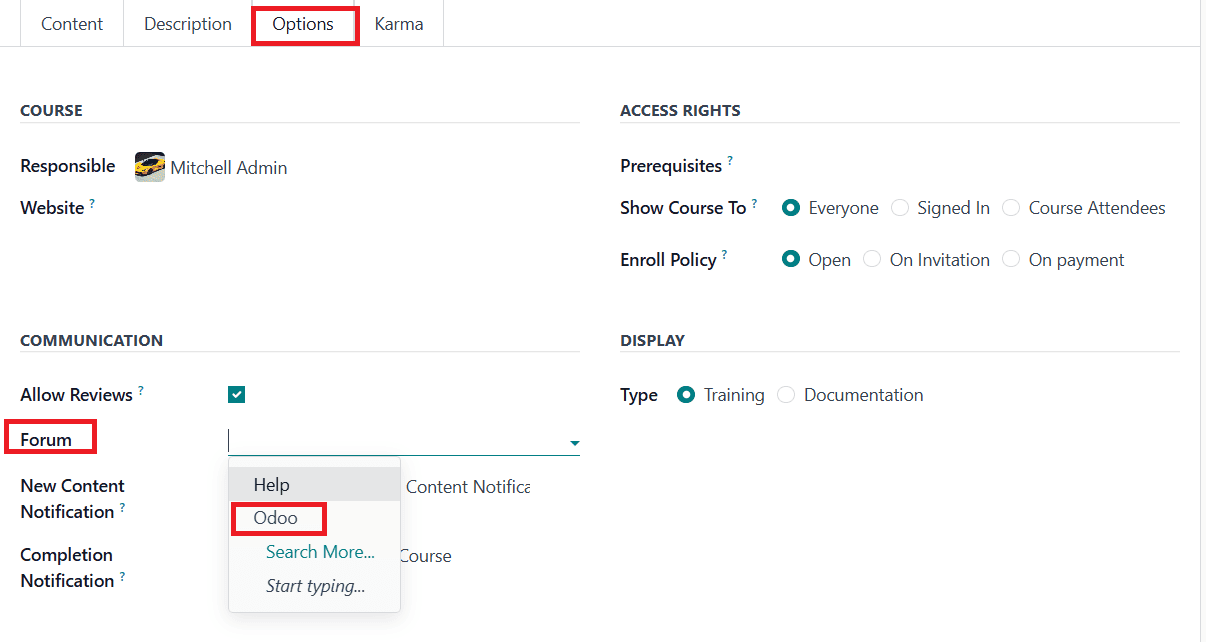
Under the Options tab, you can add the Responsible and Website details under the Course option. Under the Access Rights option, you provide details for options such as Prerequisites, Show Course To, and Enroll Policy. Under the Display option, you can select Type as Training or Documentation. Under the Communication option, you can enable Allow Reviews. Alerts can be set up to notify users about New Content Notification and Completion Notification. In the Forum option, you can select the newly created forum as shown below:
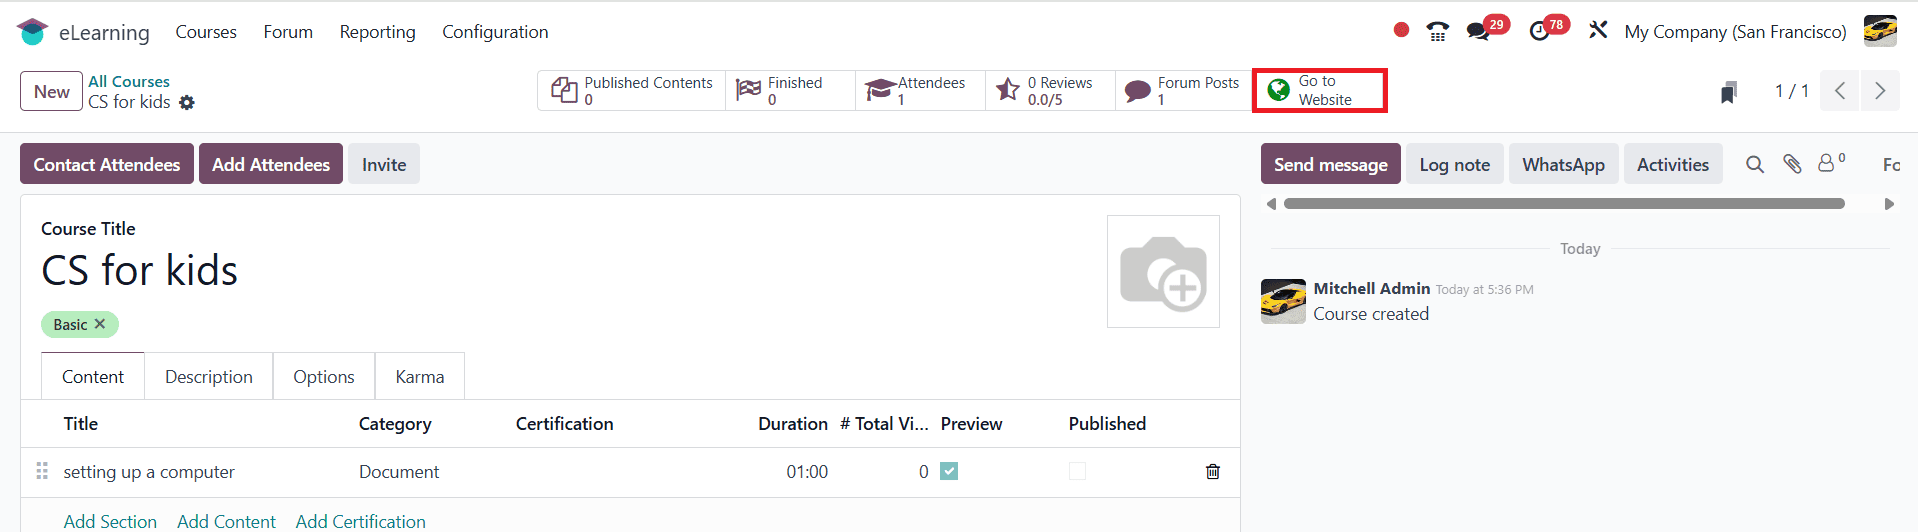
Next, click the Go to Website button as shown below:
Then enable the Published option to make the course available on the website. Here, you can see the content created for your course. To view the forum, click on the Forum option as shown below:
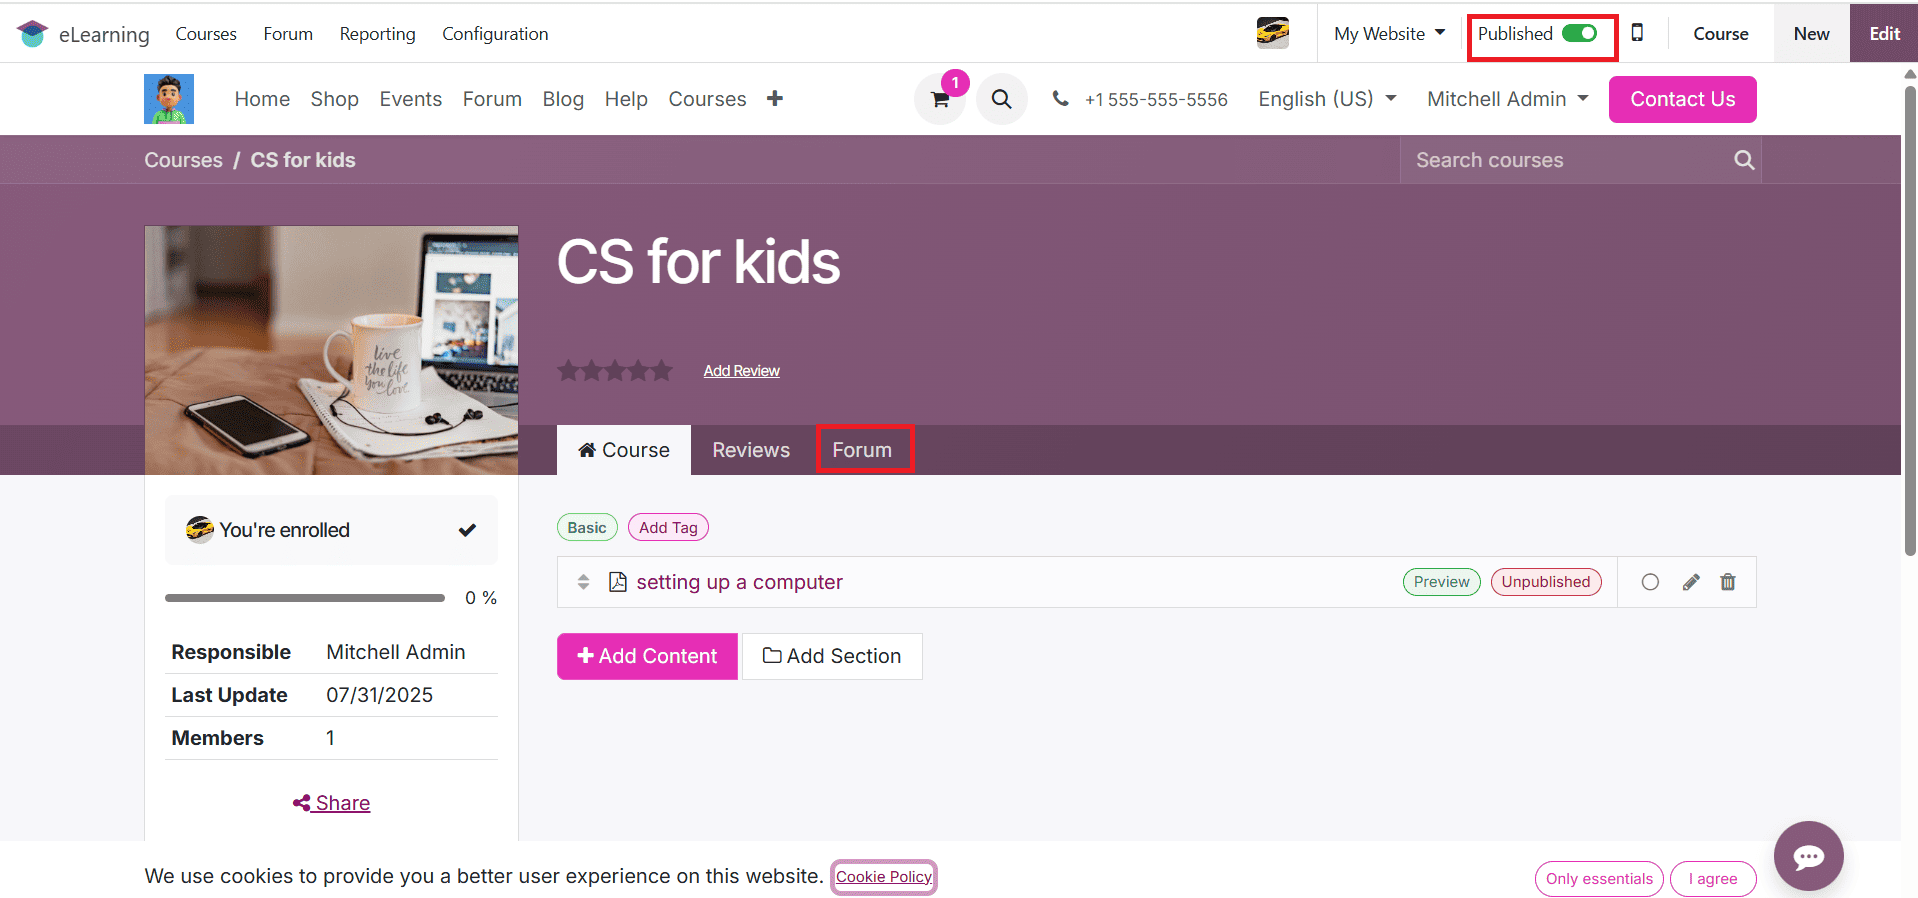
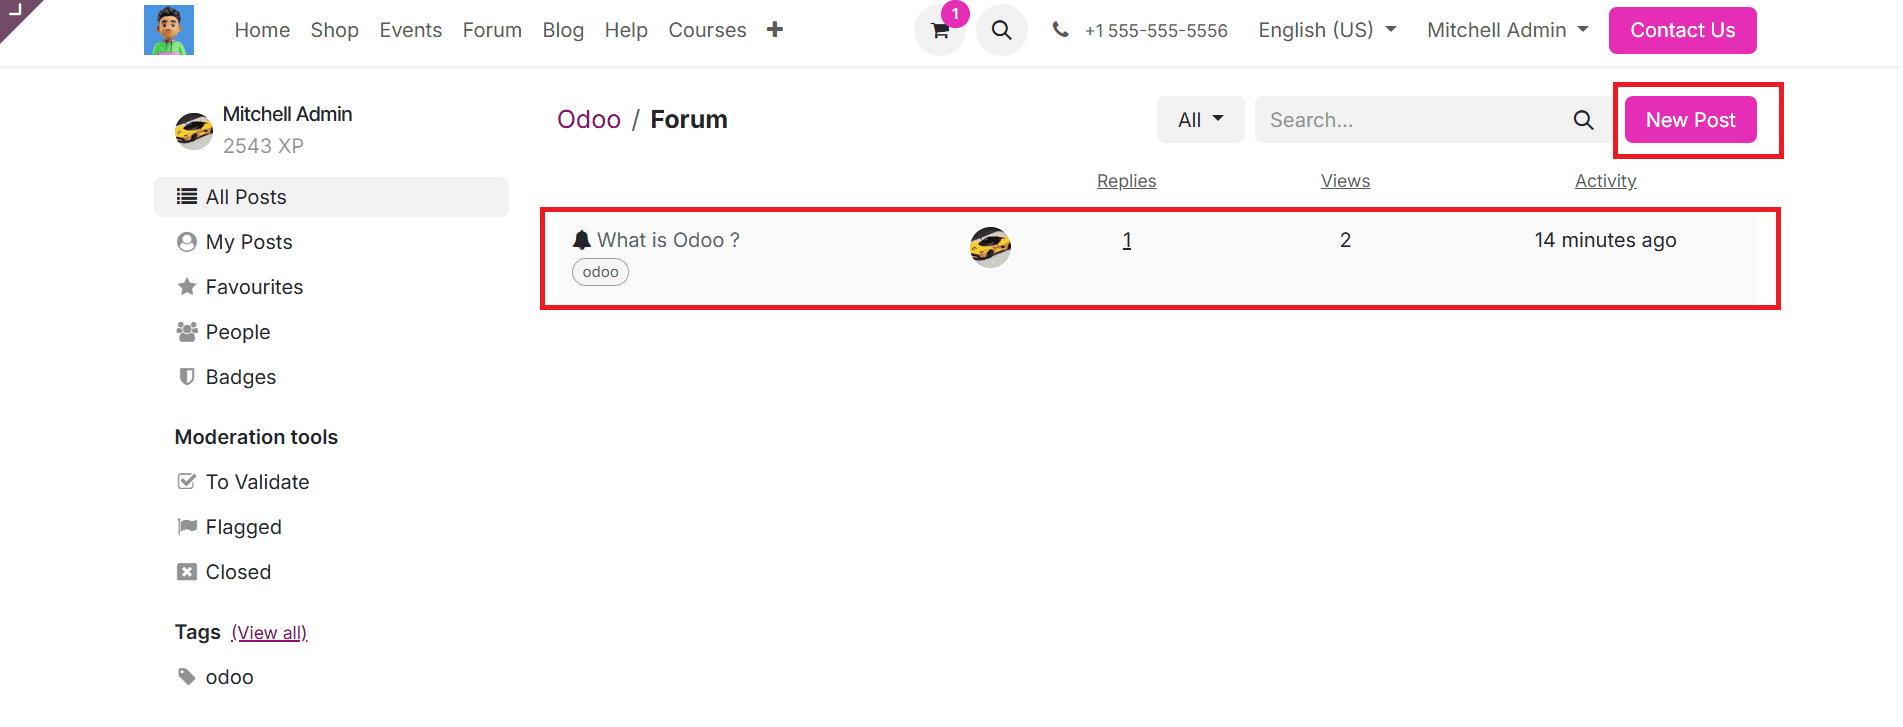
Here, you can see the question created under the forum option. You can also view the Replies, View, and Activity of the forum. You can also make a new post on the forum by clicking on the New Post as shown below:
Here, you can directly create a new question for your forum. To post the question on the forum, click on the Post Your Question button as shown below:
One effective strategy to increase student involvement and engagement in learning in Odoo 18 is to create a course forum. You can give students a place to ask questions, exchange ideas, and encourage one another with a few clicks. By centralizing course-related inquiries, it not only improves the learning environment but also reduces the need for recurring help. Passive learners can actively moderate and promote participation. Odoo 18’s forum features increase participation and improve the way your online courses are offered.
To read more about How to Configure an e-Learning Course in Odoo 18, refer to our blog How to Configure an e-Learning Course in Odoo 18