Odoo's Expense module's expense digitization streamlines and updates how companies handle employee spending. In the past, businesses relied on manual processes like spreadsheets, paper receipts, and email approvals, which frequently resulted in mistakes, delays, and a lack of transparency. By offering a completely digital approach that allows employees to effortlessly record expenses by uploading receipts, managers to verify them instantly, and accountants to enter them straight into the business's books, Odoo addresses this issue.
Odoo guarantees faster, more accurate, and completely paperless cost tracking with features like mobile access, automatic data extraction, receipt scanning, and accounting connection. In addition to saving time, this enhances compliance, lowers the possibility of fraud, and provides companies with greater insight into their spending patterns. In the end, Odoo 18 expenditure digitization enables businesses to improve financial control, expedite reimbursement procedures, and establish a smooth employee experience.
Now, let us look at how it works in the Odoo Expense module.
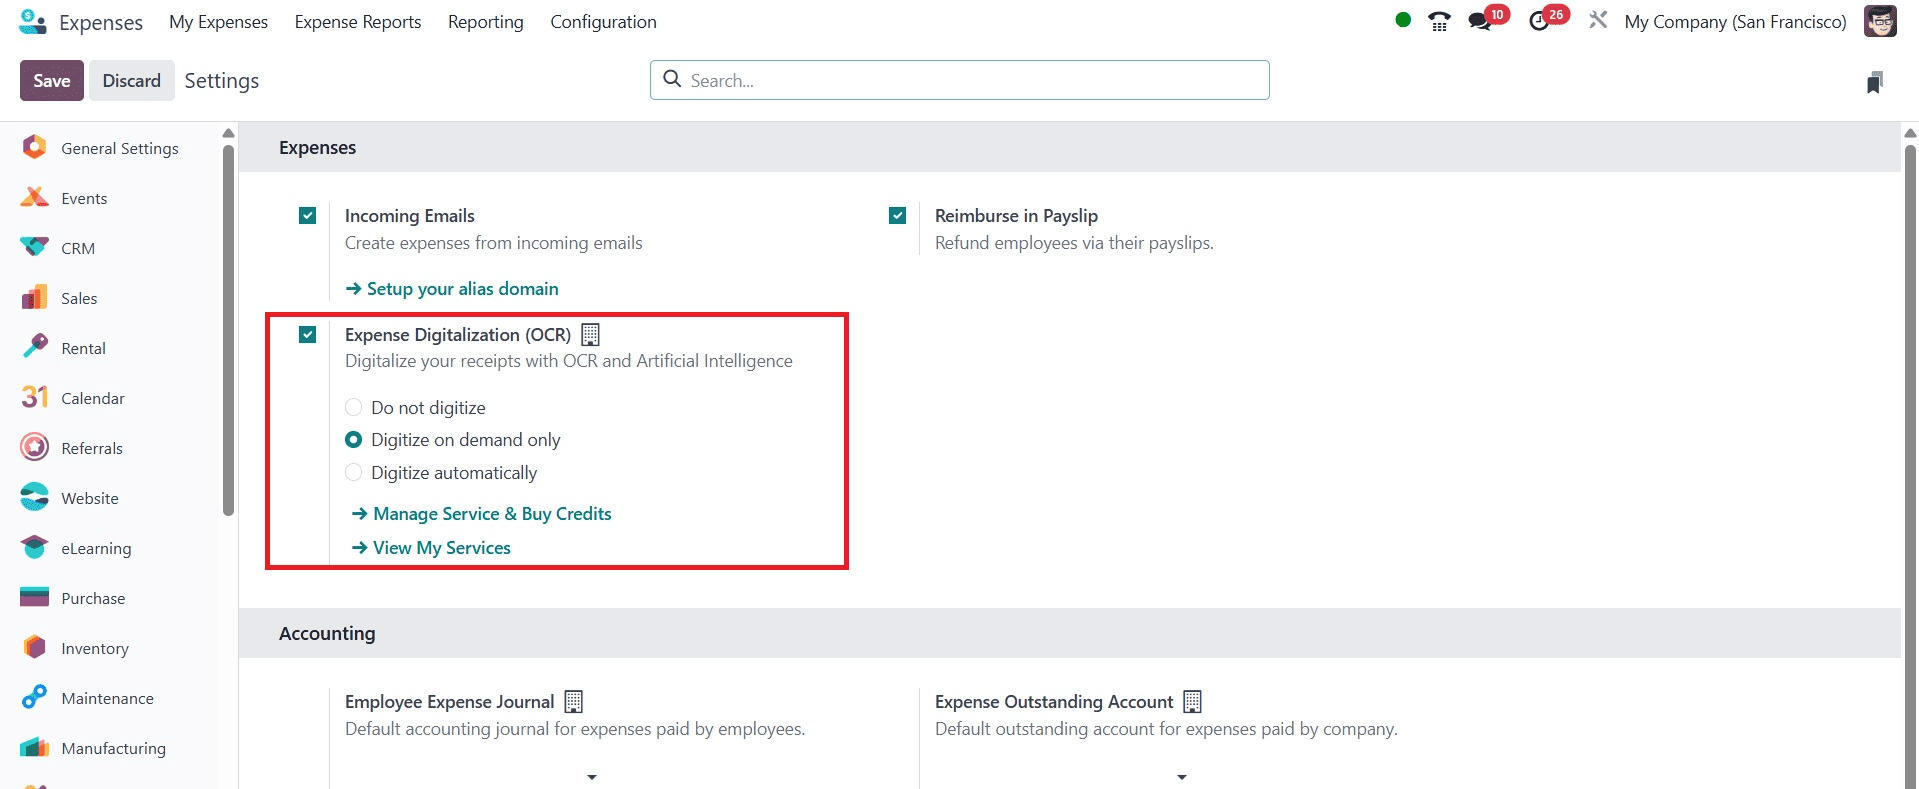
You can choose how to digitize the expense bills once this option has been activated. Depending on your needs, you can select Do not digitize, Digitize on Demand Only, or Digitize Automatically from the settings option of the Expense module.
Don't digitize: Selecting this option turns off the digitization of receipts entirely.
We won't scan or use AI or OCR to process any receipts.
Digitize automatically: In this configuration, Odoo automatically scans and extracts data from each submitted receipt using its optical character recognition (OCR) and artificial intelligence (AI) technologies.
The expense record is then filled in using the information that was extracted.
Digitize on demand only: Users can only convert their submitted receipts into structured expense entries when they want to utilise Odoo Expenses' Digitise on Demand feature.
Digitize on Demand Only
This feature allows the user complete control over not having every receipt automatically scanned. The system performs digitization only when the Digitize button is clicked. When activated, Odoo uses OCR and AI to read the uploaded document, then extract details from the document and automatically fill the expense form. This makes the creation of expenses faster and more accurate, while also avoiding unnecessary digitization and saving OCR credits. It is especially useful for companies that want the benefits of AI recognition but prefer to trigger it only when needed, rather than processing every document by default.
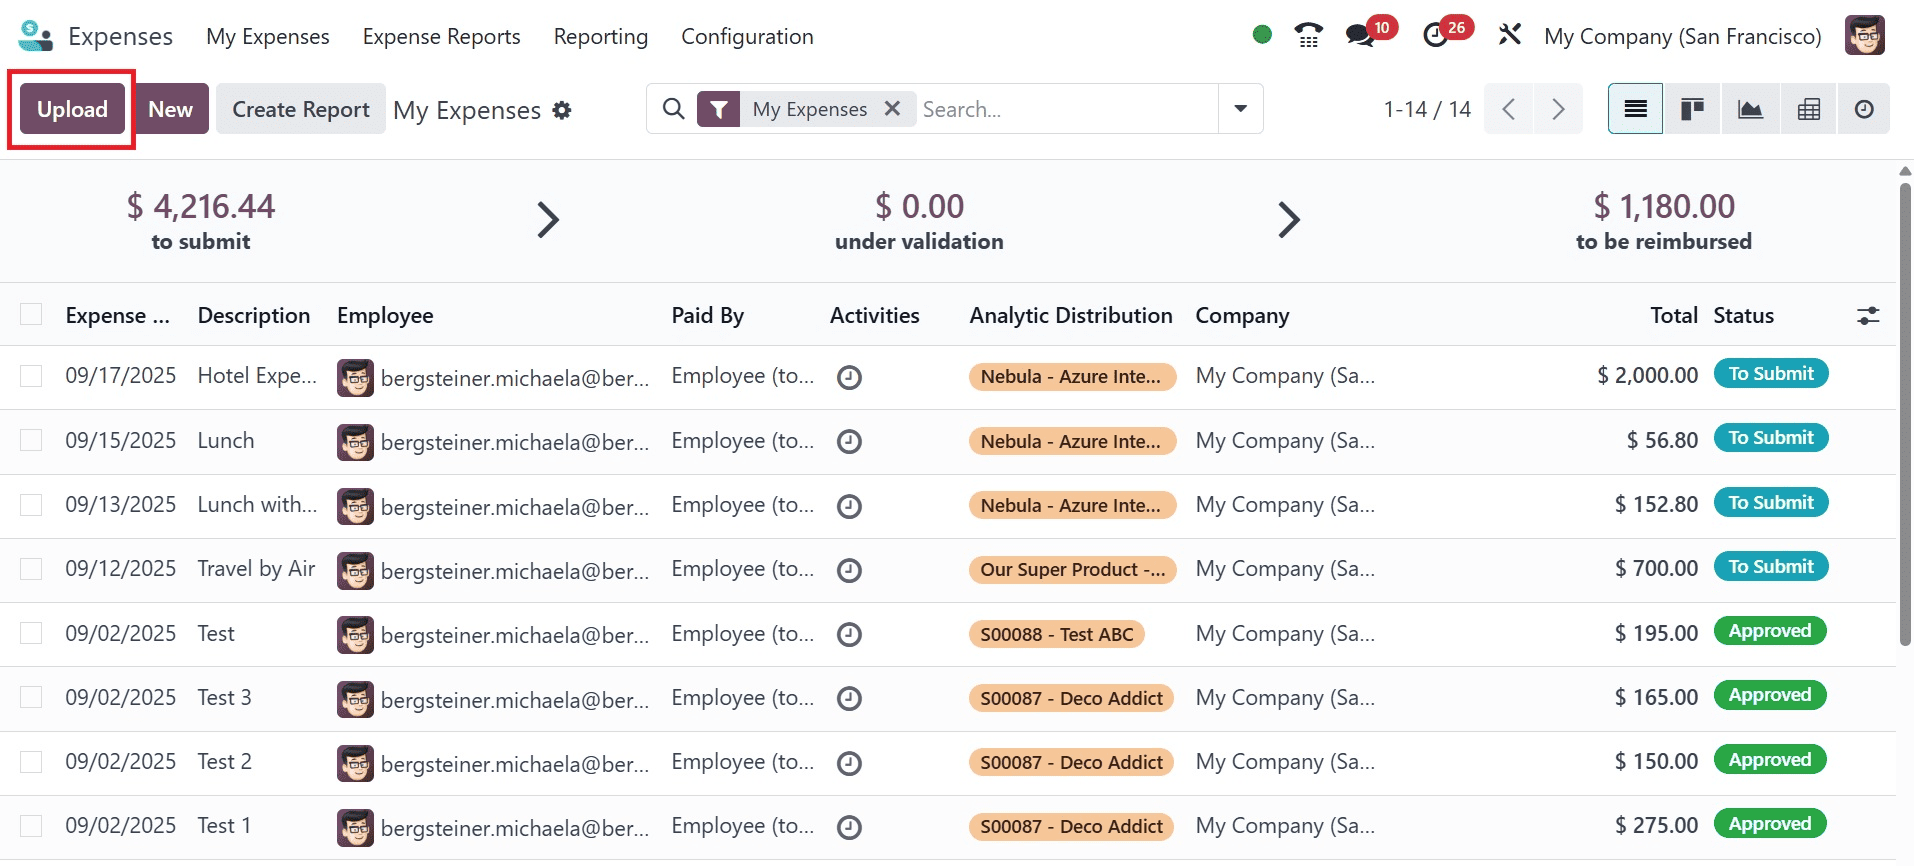
Here, we'll upload a customer invoice using the Upload button from the My Expense menu. On selecting the upload icon, you will get the pop-up to select a particular file, as in the image below.
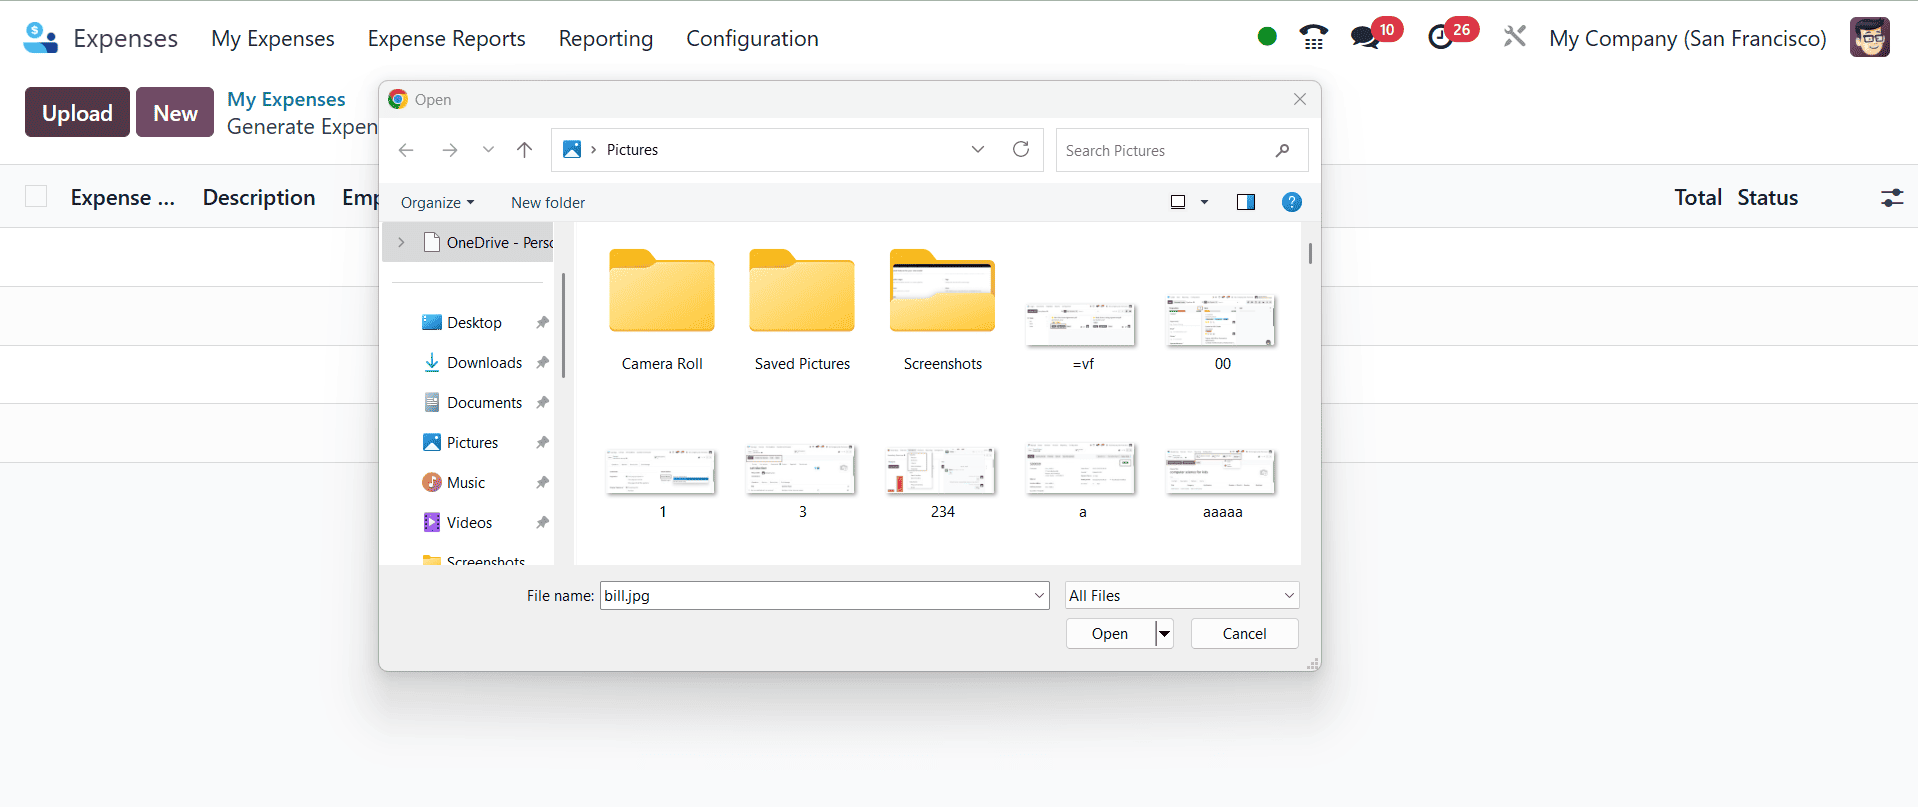
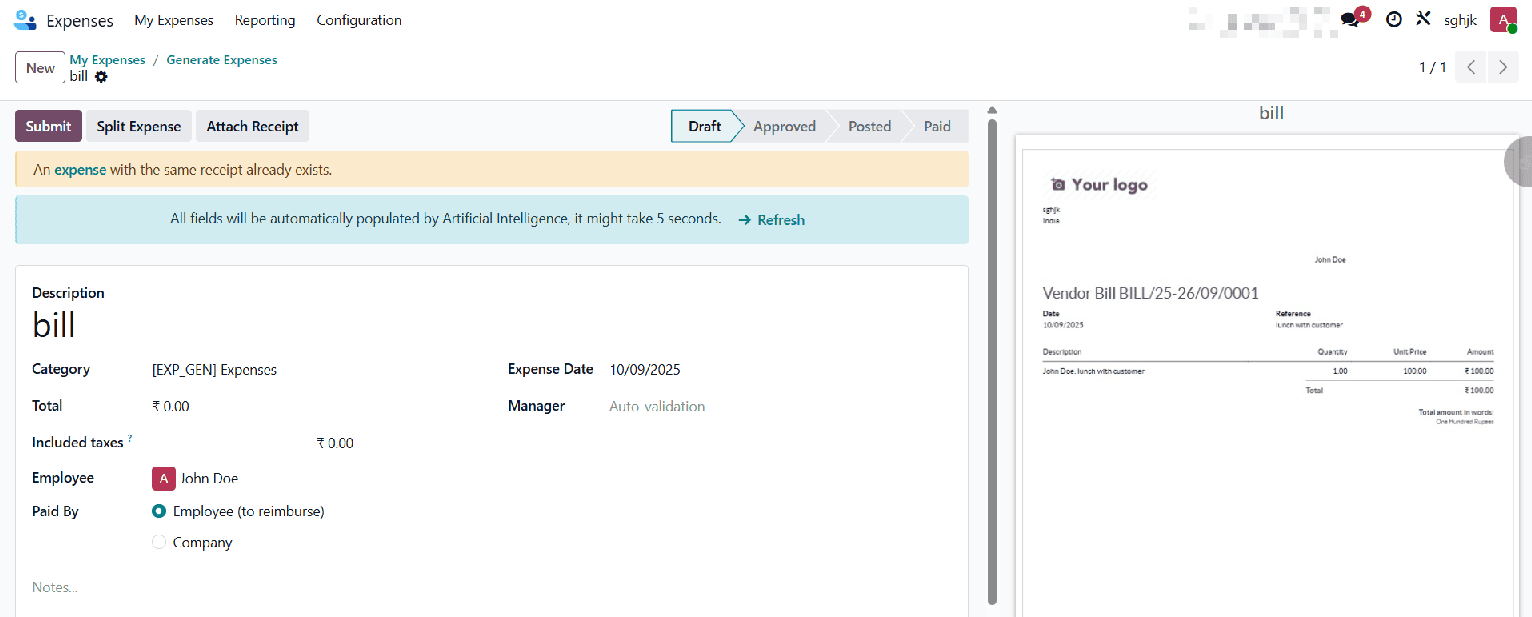
Then select the particular one, and you can have the page, as in the image below.
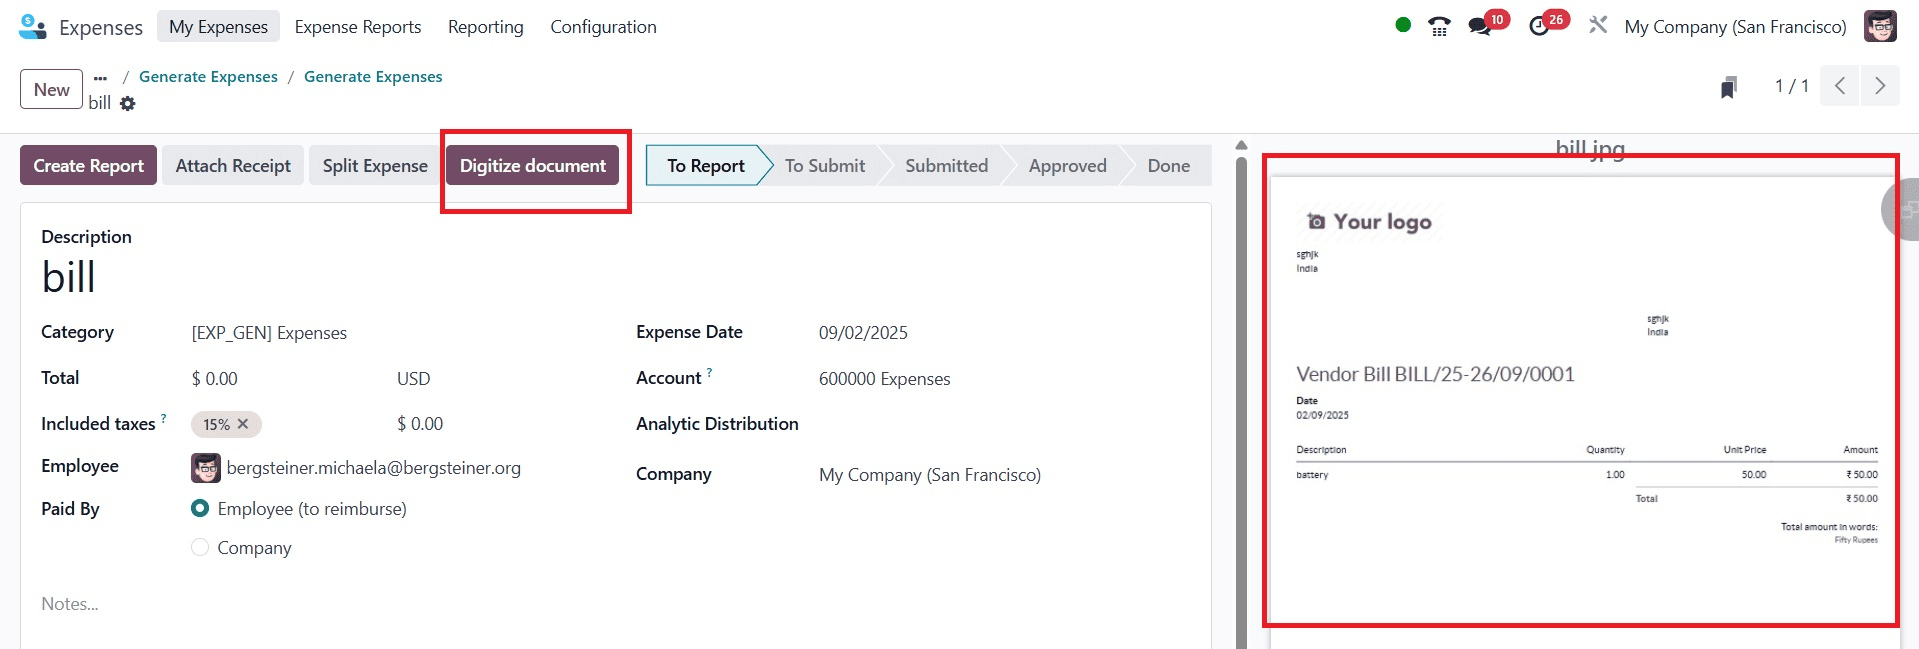
Here, the Digitize Document option helps to add the bill to your system. For that, click on the Digitize Document button.
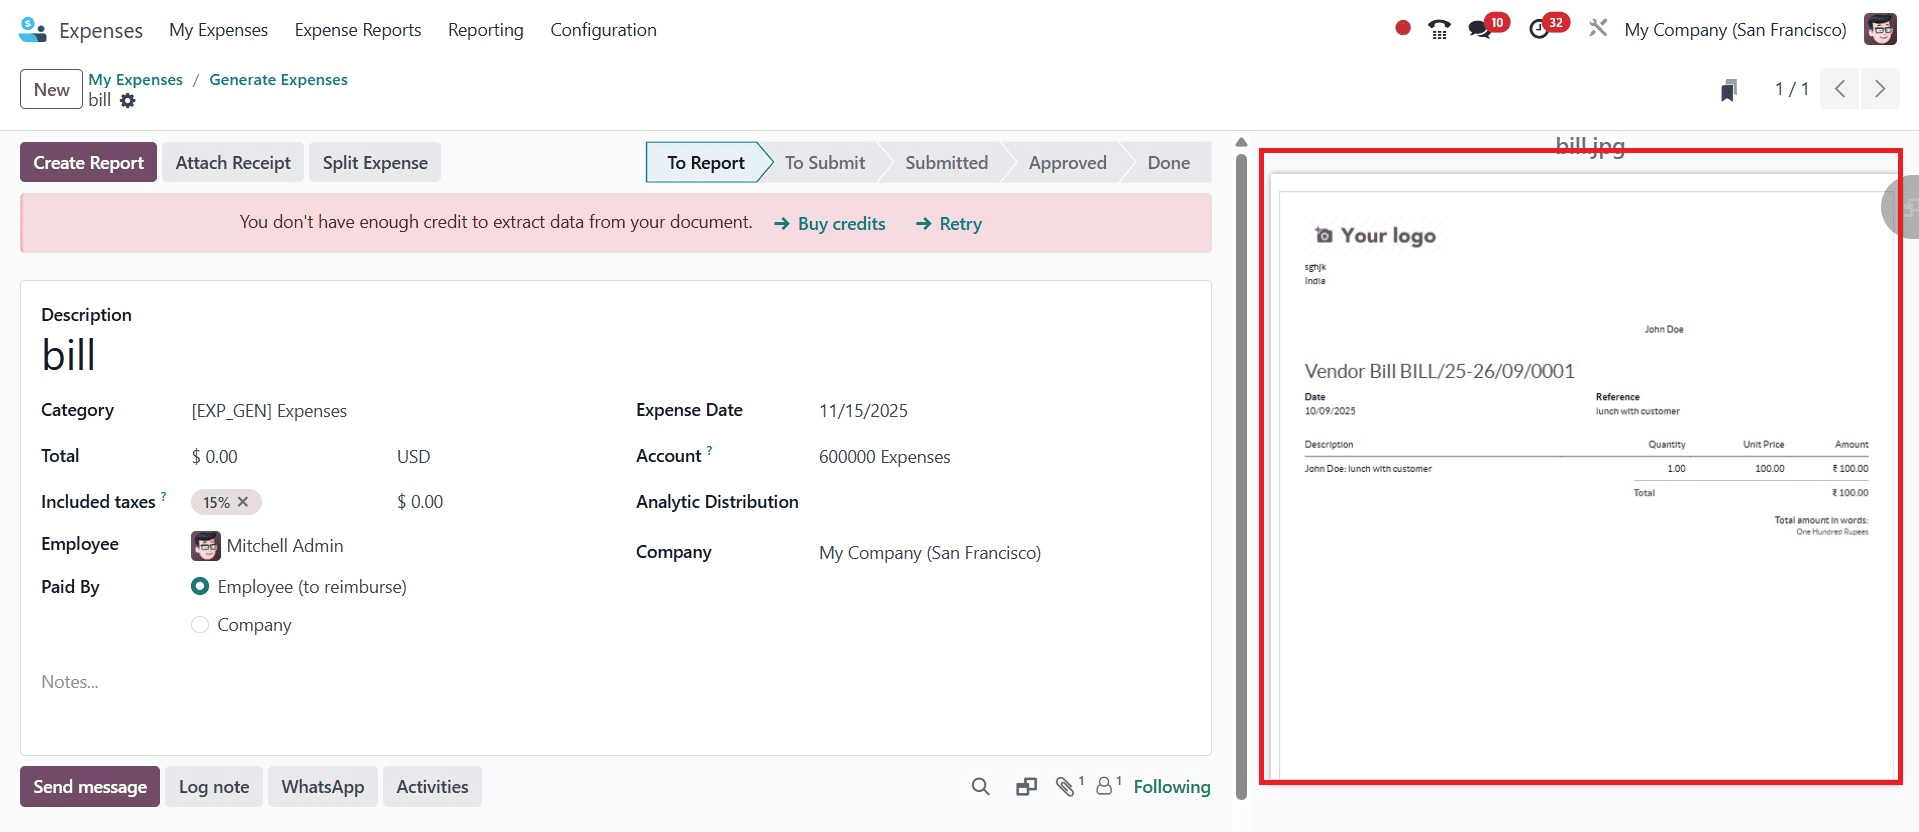
On refreshing the page, the process will be carried out based on your preferences, and the data will be automatically entered into the fields on the invoice as indicated below.
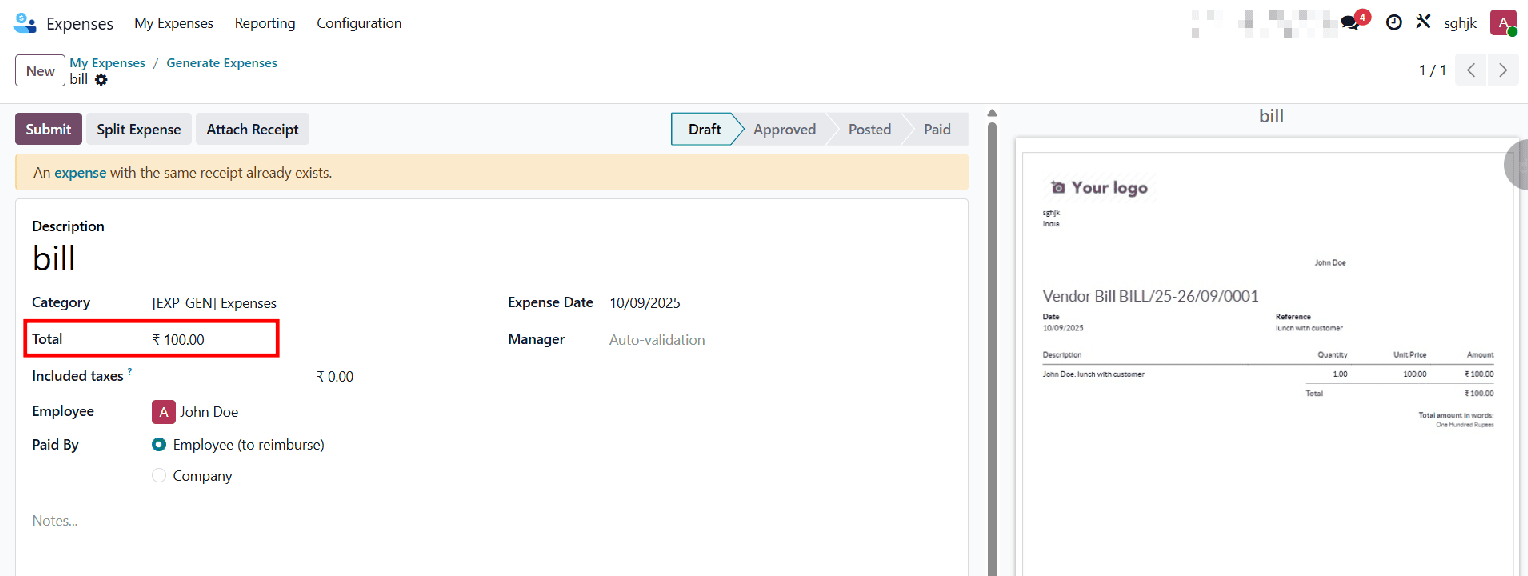
Here, the data is extracted from the bill to the system for digitizing, as in the above image.
You can verify the information and make any required modifications after the PDF or scanned document's details have been extracted to your computer. Keep in mind that extracting data from invoices requires purchasing credits. Finally, confirm the invoice and complete the process.
Digitize Automatically
The integrated AI-powered Optical Character Recognition (OCR) feature or a specific email alias can be used to automatically digitize expenditures. Prepaid credits are needed for this feature, which is a component of an In-App Purchase (IAP) service.
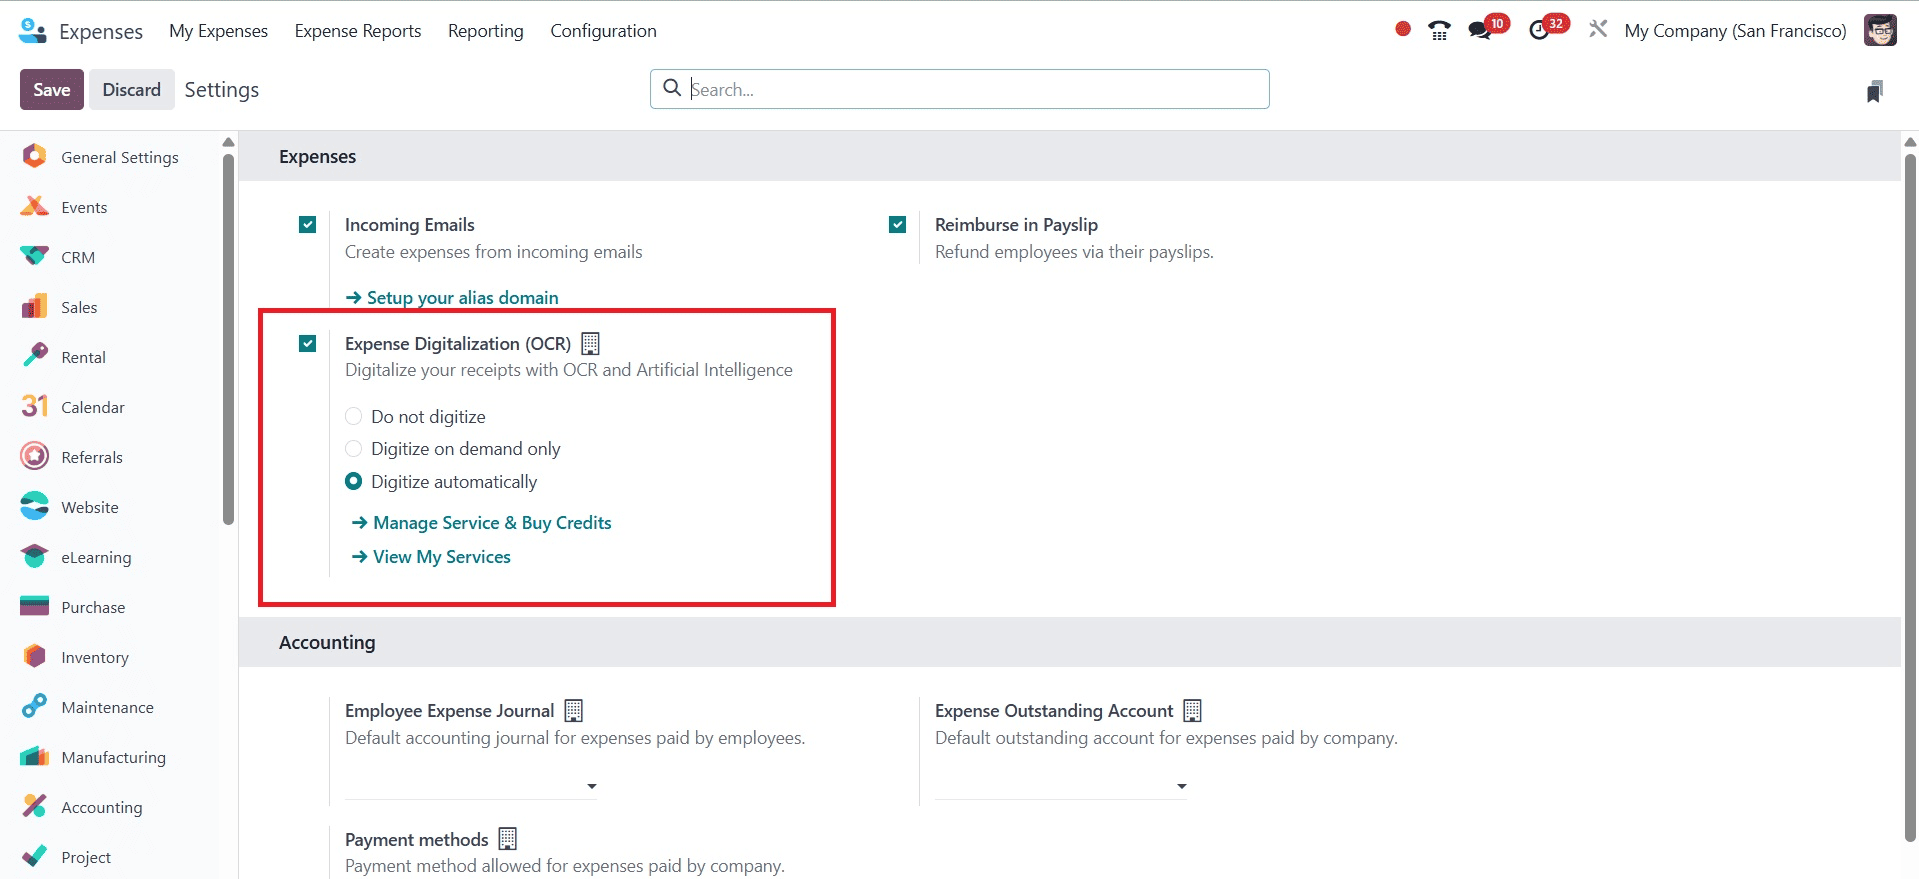
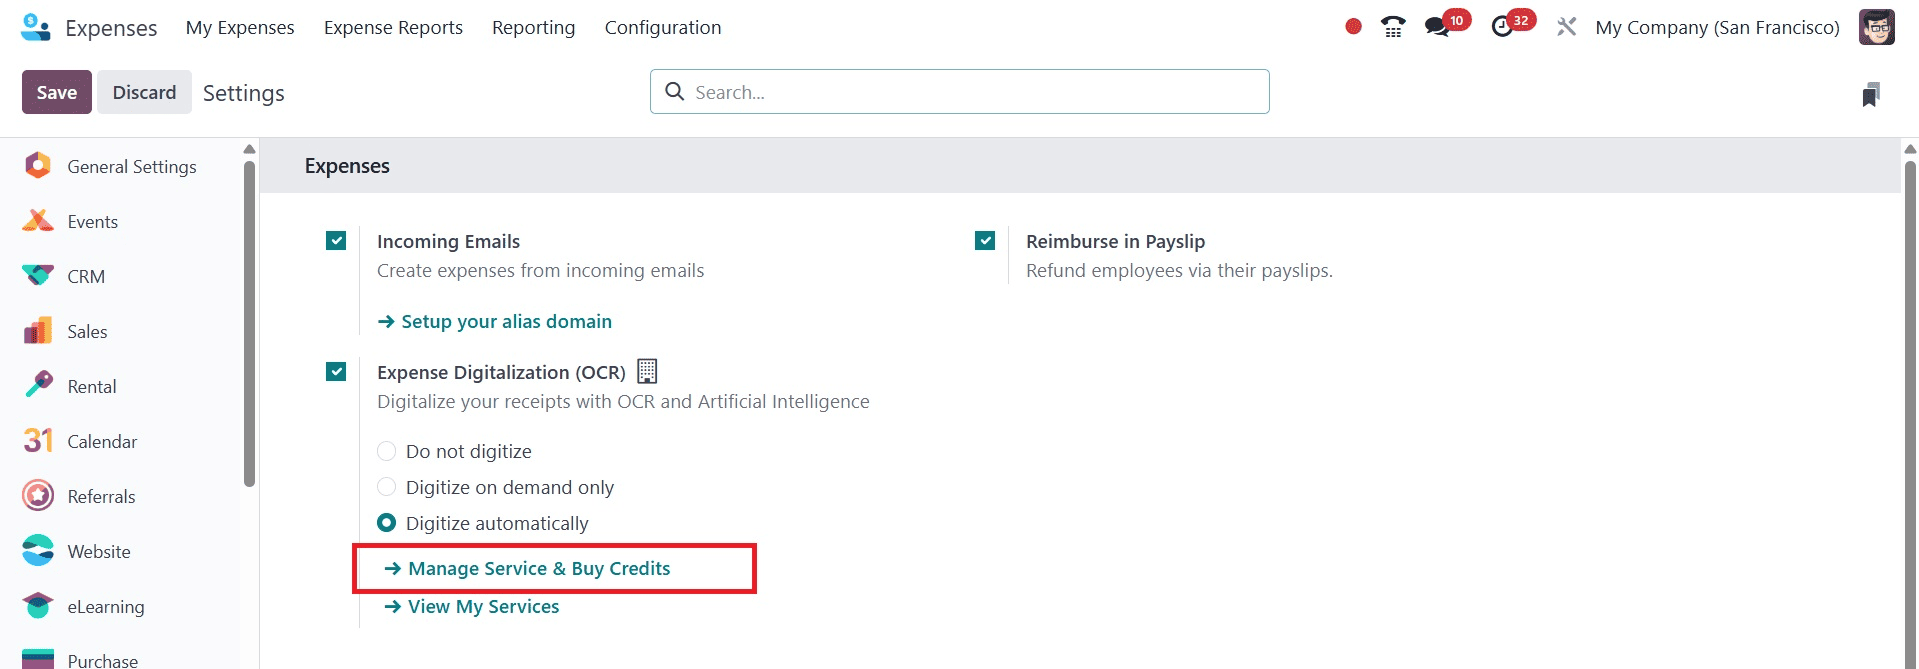
Navigate to Configuration > Settings after opening the Expenses application.
Turn on the Expense Digitization (OCR) option in the Digitization section.
Choose "Digitise Automatically" as your chosen approach. The choices are "Do not Digitize" and "Digitise Only On-Demand".
To implement the modifications, click the Save button.
Initially, we will use the Upload button from the My Expense menu to upload a customer invoice for automatic digitization. You will see the pop-up to choose a specific file when you click the upload icon, as seen in the picture below.
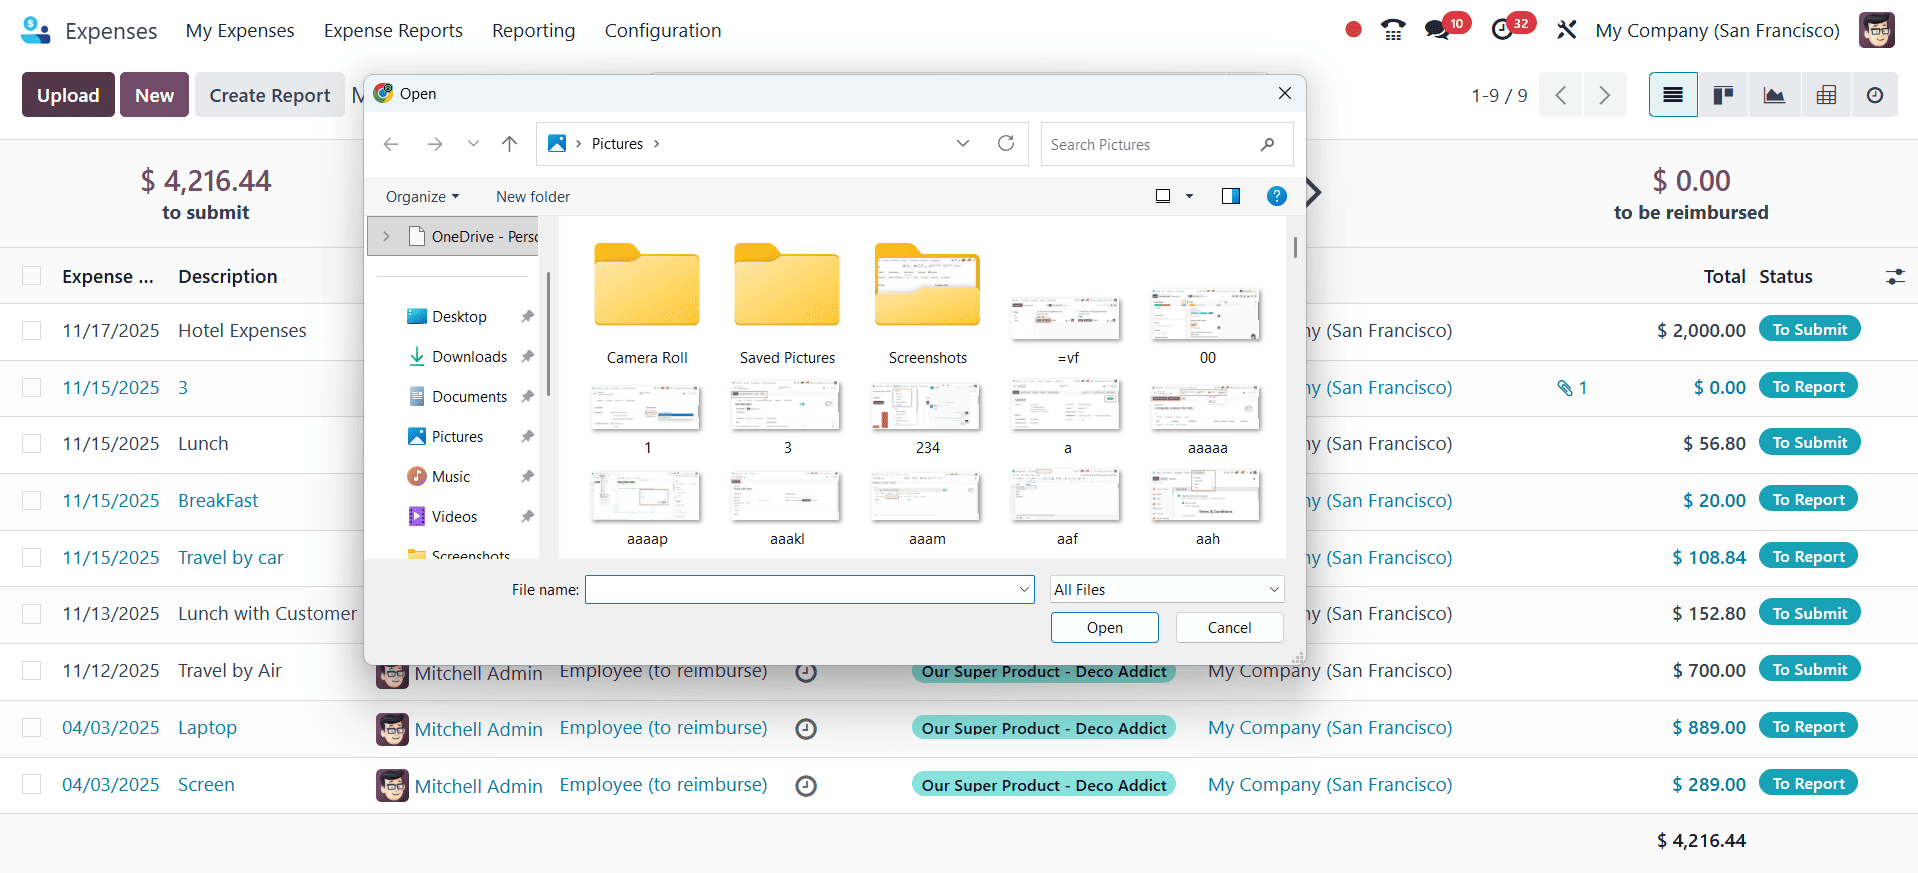
After that, you can choose the specific one and obtain the page, as shown in the picture below. The details from the attachment will be updated automatically.
Click the Upload button or the Attach Receipt icon in the Expenses app's My Expenses section. In order to generate a new expense entry, the system will automatically extract data from the uploaded image or PDF. Here, you are not provided with the Digitize Document icon, as before. It will be processed automatically.

The procedure will be completed in accordance with your selections upon page refresh, and the information will be automatically input into the invoice's fields.
One credit is used for each document that is digitized. Credits can be bought straight from the Expenses settings page or via Settings > Odoo IAP > Manage Services and Buy Credits.
The Odoo 18 Expense module's expense digitization replaces human entries with automated workflows, streamlining the entire reimbursement and cost management process. With only a few clicks, managers may verify and approve, and staff members can easily upload receipts, classify expenses, and submit them. In addition to cutting down on paperwork, this guarantees accuracy, compliance, and expedited processing.
Odoo 18 builds an open and effective expense ecology by utilizing capabilities like OCR scanning, mobile accessibility, and accounting connectivity. In the end, digitization gives companies the ability to save time, cut down on mistakes, and improve financial control.
To read more about An Overview of the Expense Module in Odoo 18, refer to our blog An Overview of the Expense Module in Odoo 18.