The Odoo ERP solution makes it easier to plan and create events, which are essential for companies to interact with their audience and consumers. As part of a new company strategy, these events help market items, develop recognition, and open up new commercial opportunities. Event management teams experience less stress thanks to the Odoo Events module, which enables businesses to oversee all event implementation-related tasks. The module streamlines the creation and publication of events, automates ticket sales, and sends participant reminders and confirmation emails.
While making sure they are well-received by potential clients, this enables businesses to concentrate on their core business operations, such as conferences, seminars, cultural events, and charitable programs. All things considered, the Odoo ERP solution gives companies a more effective and efficient approach to handle their events.
A crucial tactic for guaranteeing the success of any event is inviting and interacting with the right audience. Businesses can effectively determine their ideal audience, send customized invitations, and sustain continuous interaction before, during, and following the event with the Odoo 18 Events Module. To assist organizers reach the right people at the right time, the module offers segmentation capabilities, automated reminders, and tailored communication. Event organizers may improve the overall participant experience, raise participation rates, and create lasting relationships by utilizing these elements.
After installing the module, you can either select an event that has already been made, as shown below, or create a new one using the New button on the Events module's main dashboard. The creation page will be, as in the image below.
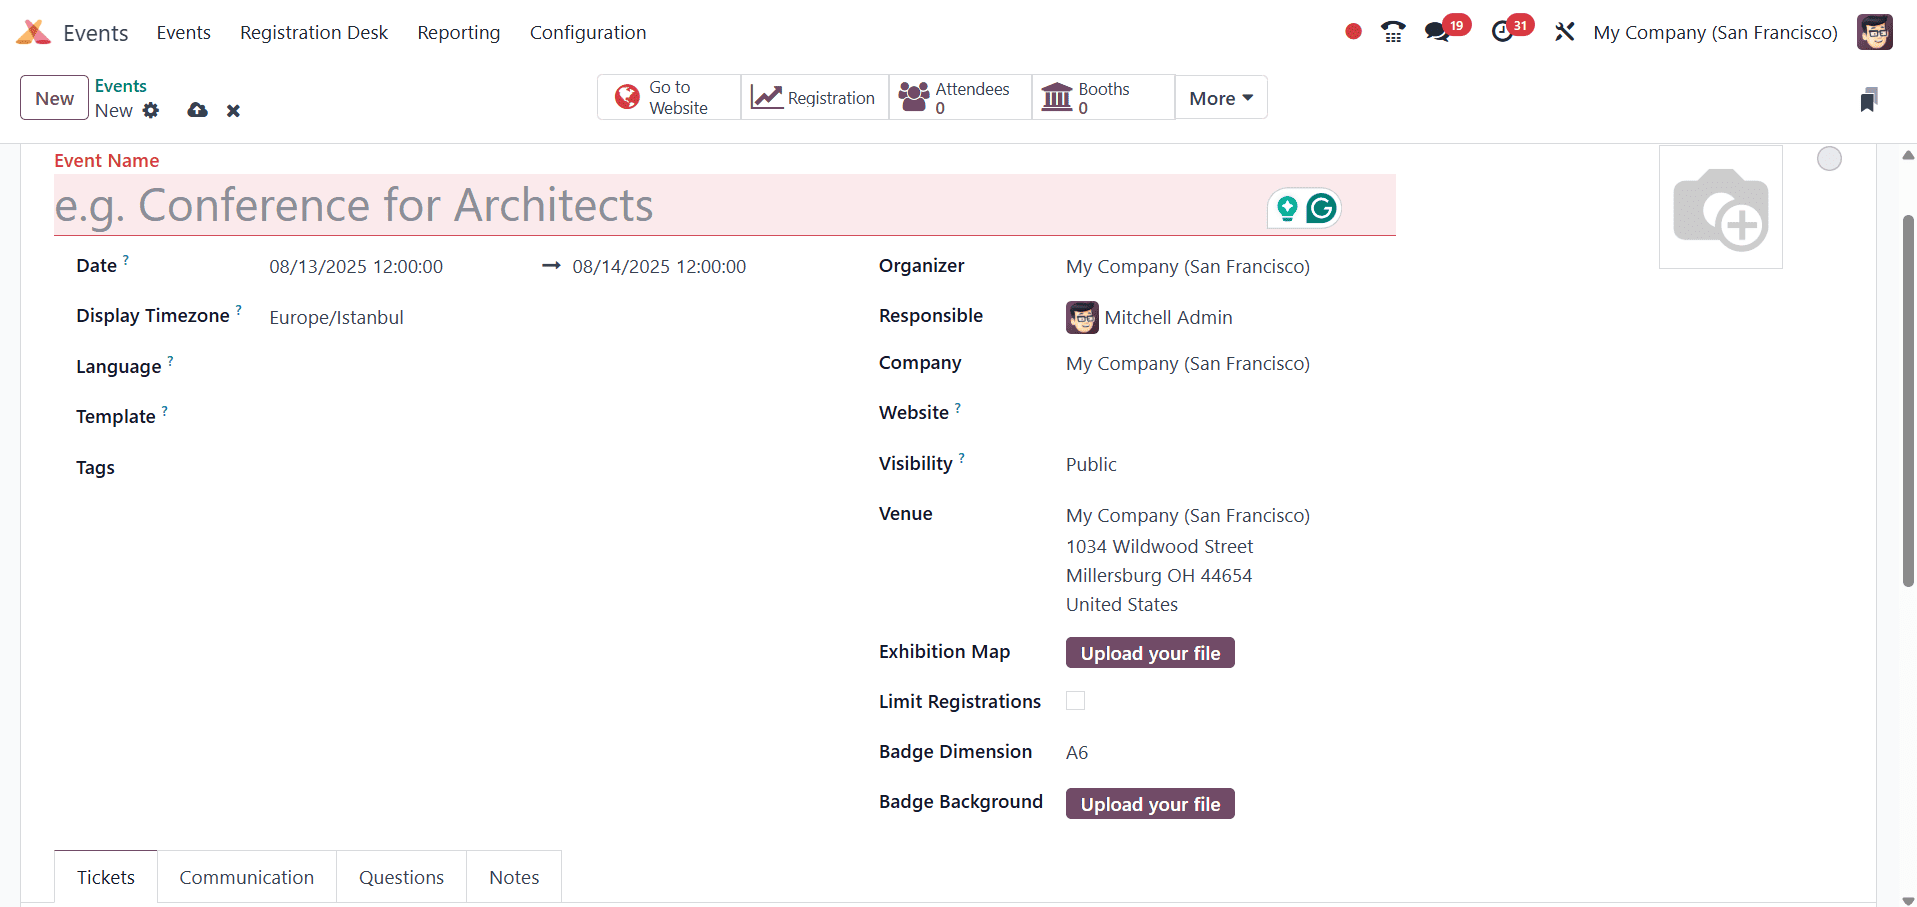
There, provide the Date when the event is planned to occur (in your local time zone) is the date. This is a necessary field that is automatically filled in but can be changed.
Display Timezone: The time zone where the website's event dates and times will be shown. This is a necessary field that is automatically filled in but can be changed.
Language: If required, specify a particular language into which all event communications should be translated. Make sure to specify this field appropriately if event-related messages are being delivered to receivers who speak a different language because it is blank by default.
Template: Choose a pre-configured event template from the resulting drop-down menu.
Tags: Add any corresponding tags to briefly describe the event (e.g. Online, Conference, etc.). Multiple tags can be added per event.
Organizer: Name the organization that is planning the event (a business, a contact, or an employee).
Responsible: Assign this event's responsibility to a user in the database.
Company: Indicate which database firm this event is associated with. Only while working in a multi-company setting does this field show up. This is a necessary field that is automatically filled in but can be changed.
Website: Decide to limit this event's publication to a particular Odoo-created website. The event can appear on every website in the database if this field is left empty. See the documentation on Multiple websites for further information.
Venue: Input the specifics of the event. Relevant data is extracted from the Contacts application and entered into this field. As an alternative, venue details can also be manually entered in this section. The venue name, address, city, zip code/region, and nation must be entered at the very least.
Exhibition Map: if desired, click the Upload your file button to upload an image of the event venue map.
Limit Registrations: If this option is selected, a cap on the number of registrations will be added to the event. The appropriate cap must be placed in the designated blank space before attendees.
Badge Dimension: For event badges, choose the preferred print format size. A4 folding, A6, or 4 per sheet are the available options.
Badge Background: if desired, click the Upload your file button to upload a custom background image for event badges. Proceed to the four tabs at the bottom of the event form for more customization when the aforementioned fields have been sufficiently completed. Tickets, Communication, Questions, and Notes are those tabs. Shown below is the screenshot of the already created event.

To invite specific individuals to the event, click the "Invite" button after creating and storing the event data. A mail configuration window will open as a result.
Here, as illustrated below, we may configure the Mailing Type, Subject, Recipients, and Filters to obtain targeted contacts, etc.
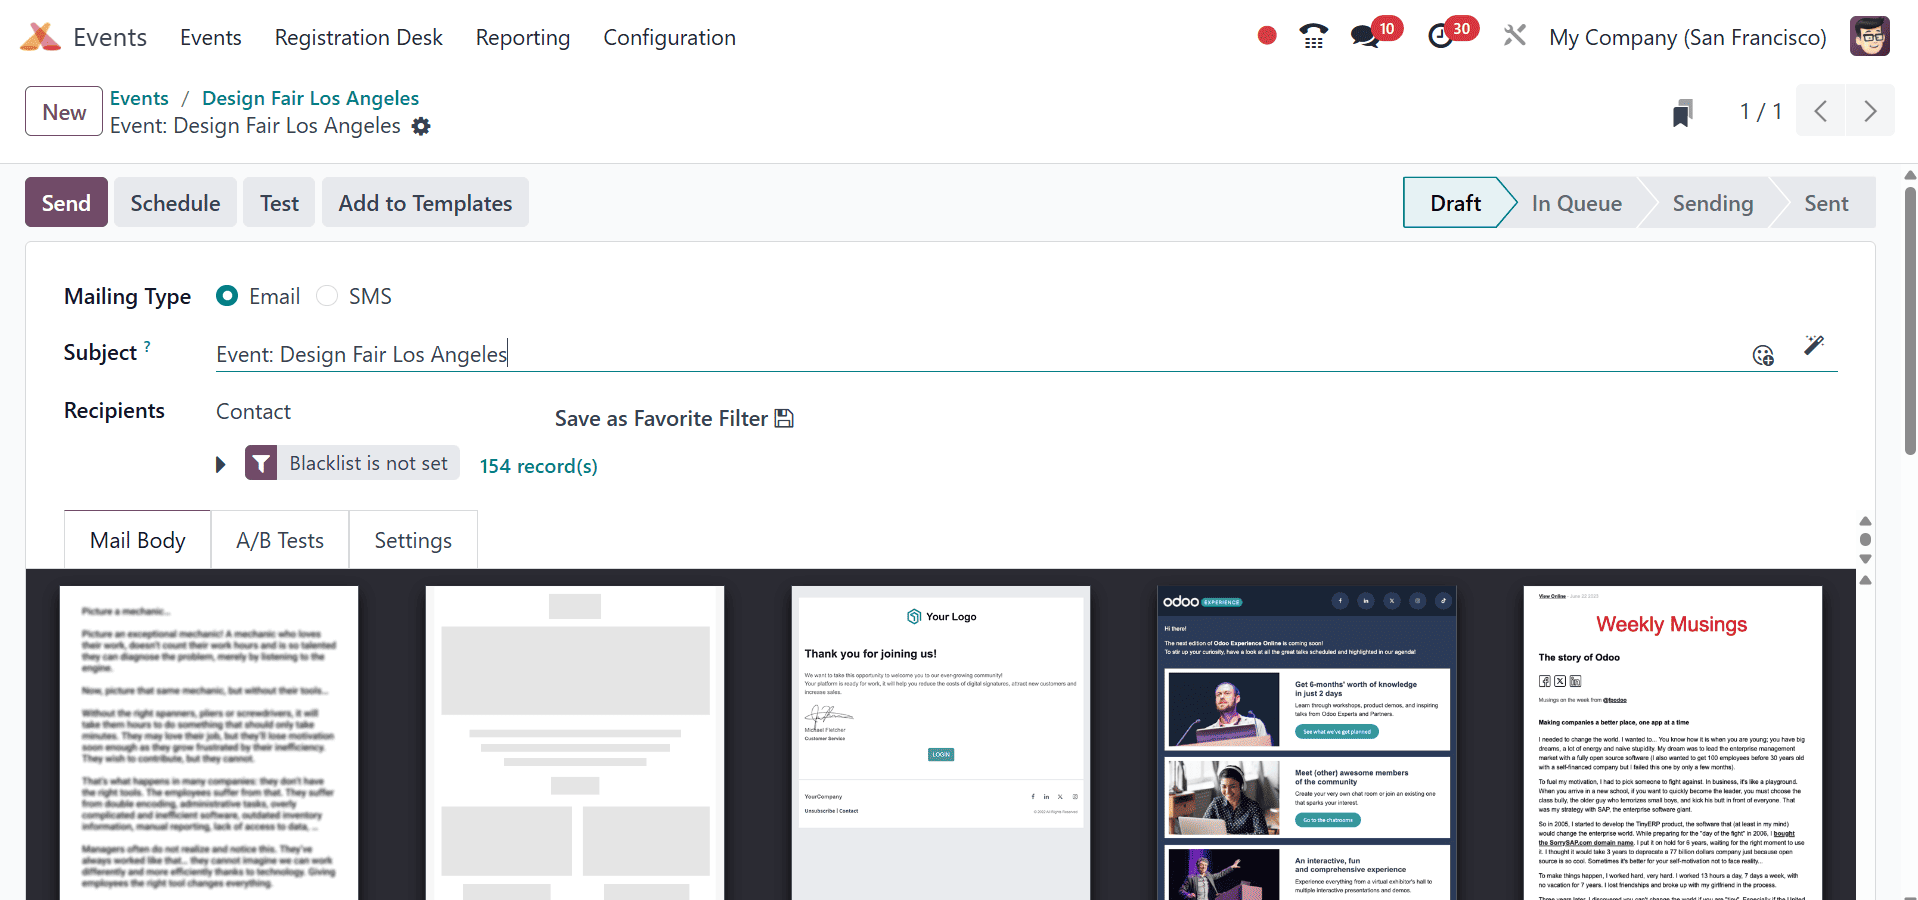
The Recipients field has a number of metrics that we can use to set recipients' filters. Next, proceed to the A/B Tests, Settings, and Mail Body tab regions.
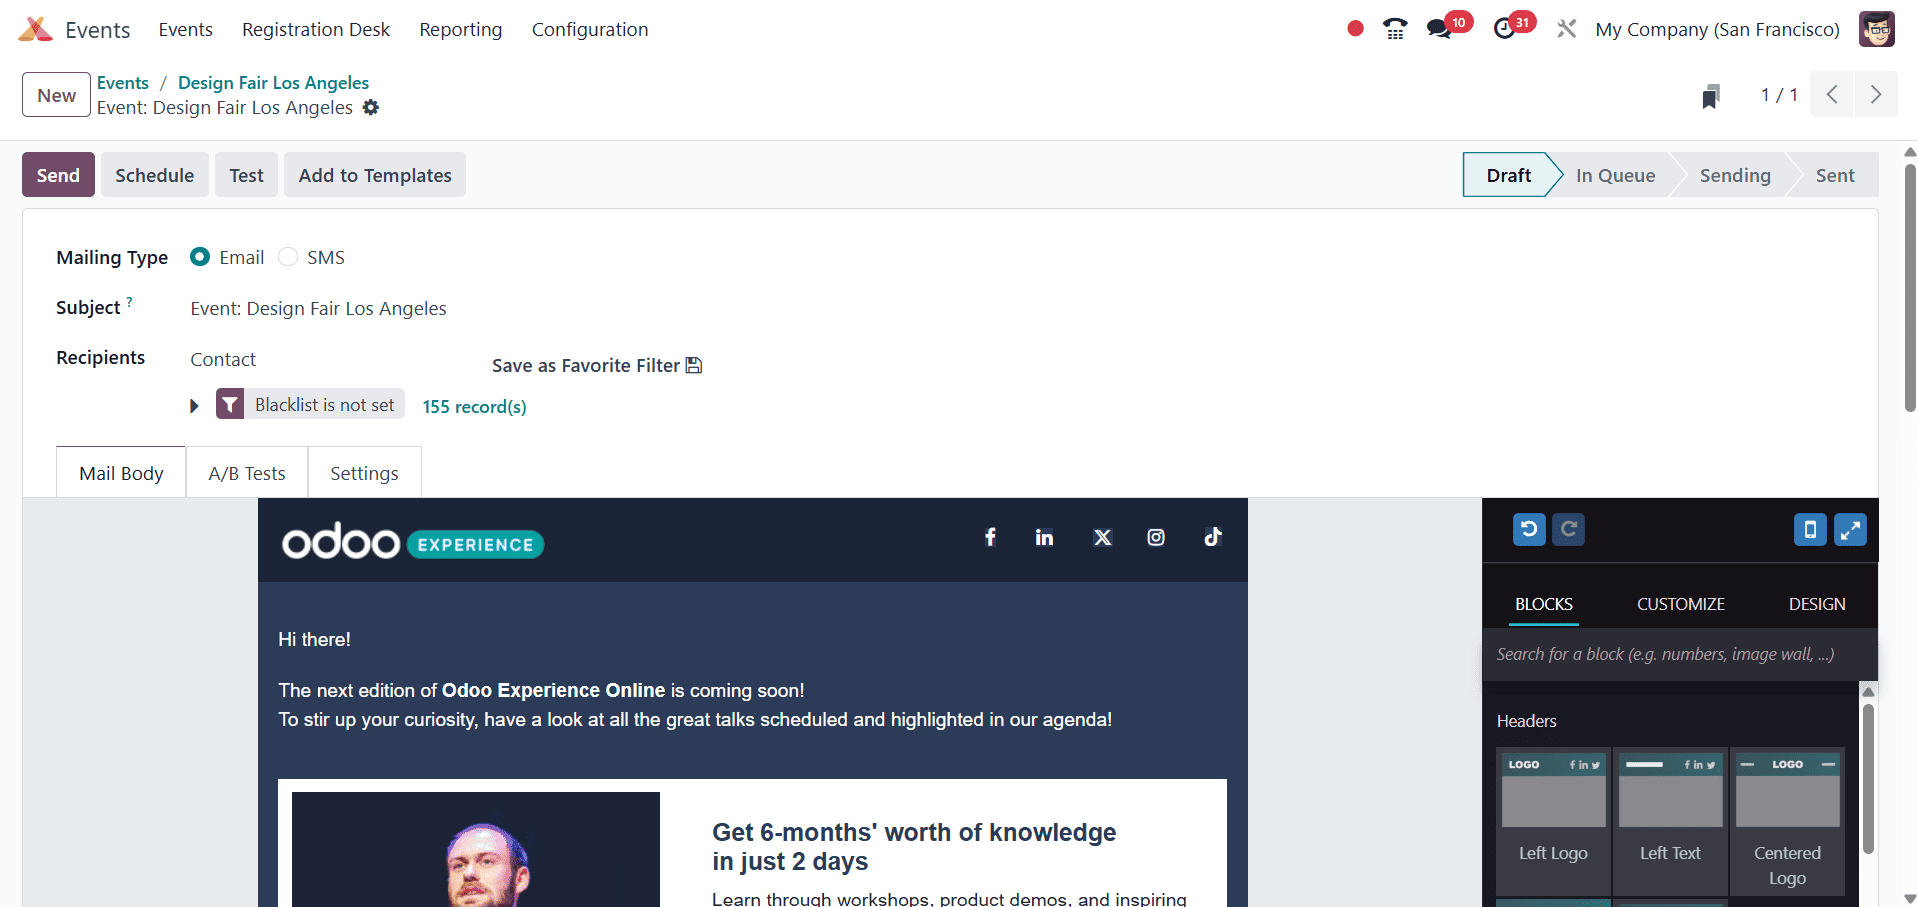
To choose the desired letter body from the Mail Body tab, just drag & drop. Use the editing tools and features at the right end of the window to tailor your email to your needs after selecting a Mail body, as shown in the example below.
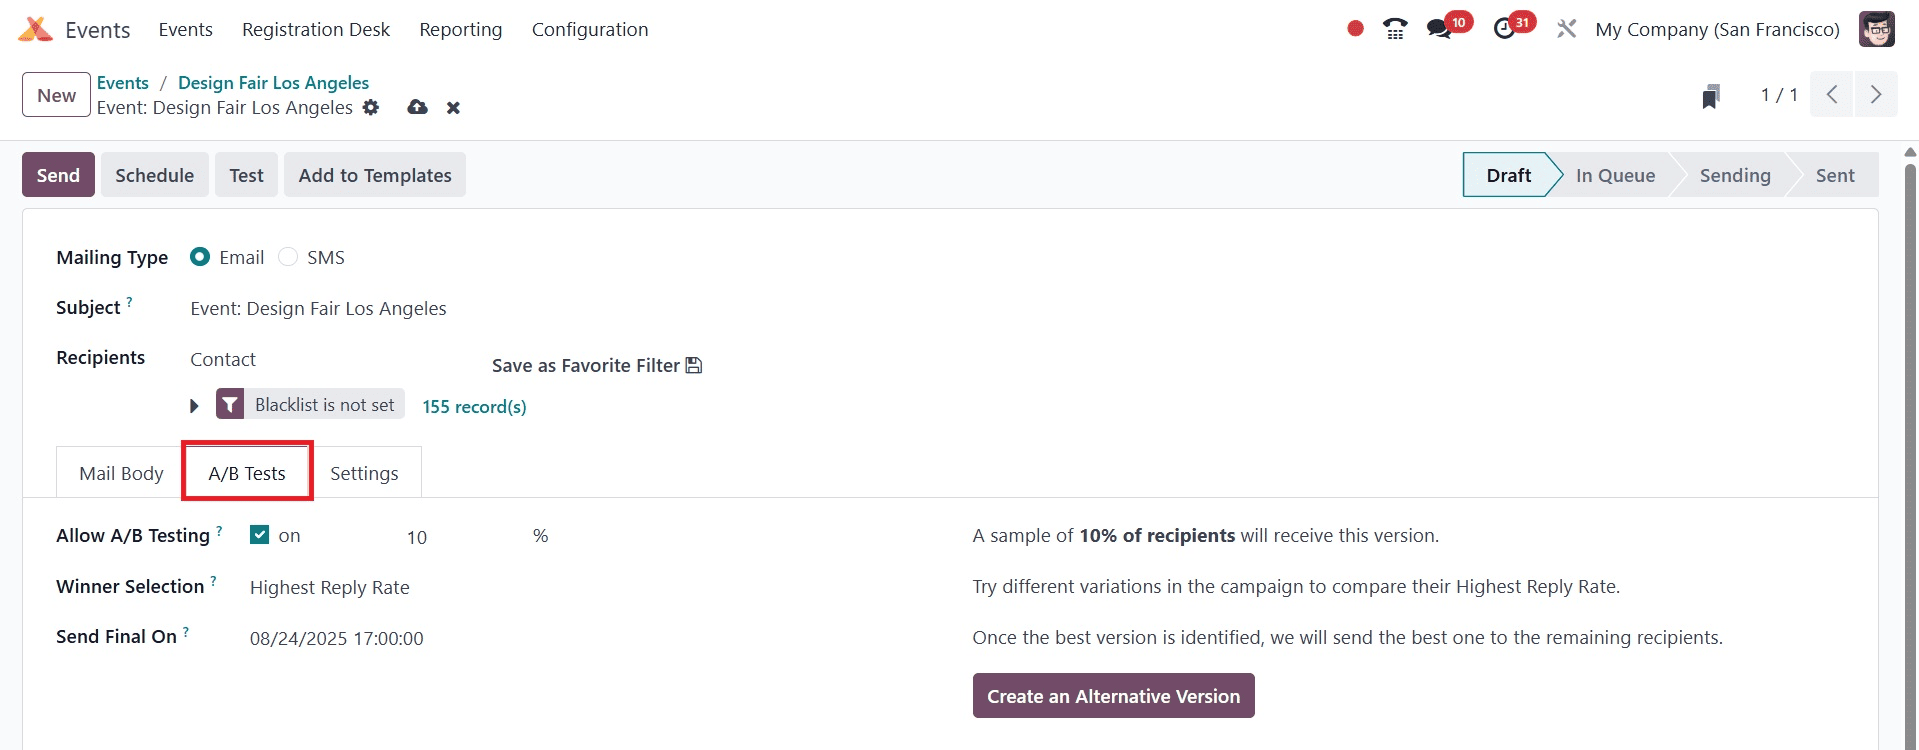
Odoo A/B testing allows users to publish two versions of a page at the same time and evaluate the effectiveness of each version. Users can activate or deactivate this functionality by checking a box. After activating the feature, users can choose the Winner Selection process using methods including manual, Leads, Quotations, Highest Open Rate, and Highest Click Rate.
The "Send Final On" data column allows you to specify the announcement's expiration date. Using the "Create Alternative Version" button, users can also create a new mail setup form and design an alternative message body. This allows users to compose, compare, and deliver a compelling message.
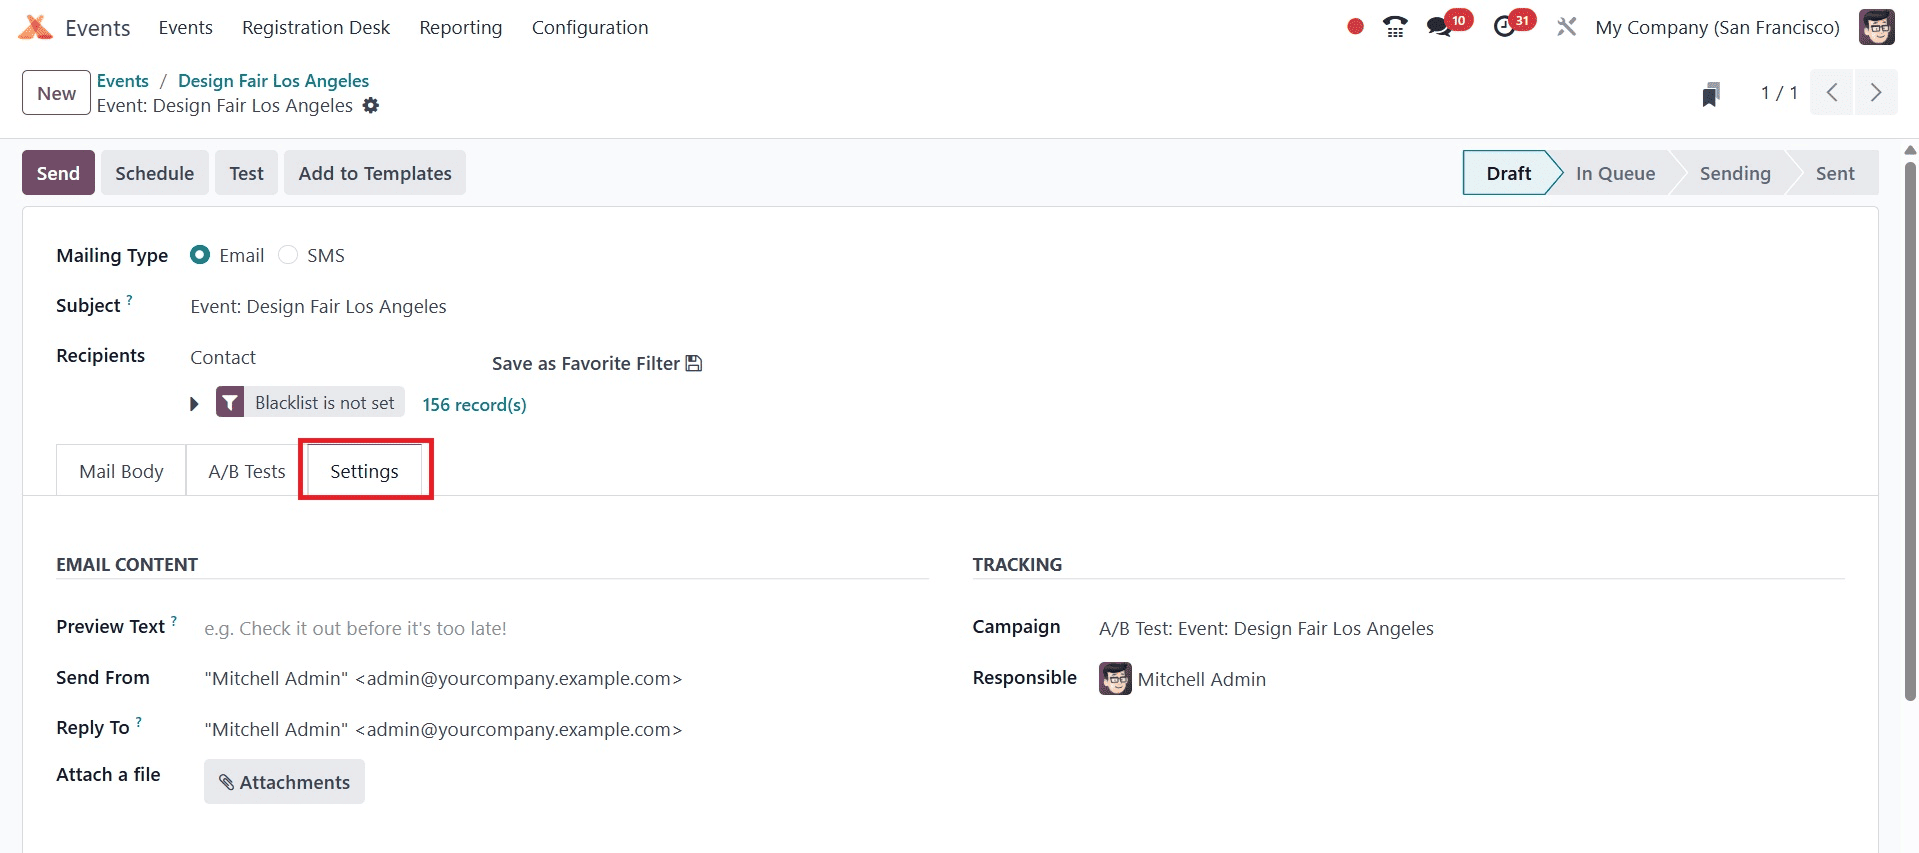
The options pertaining to email content and tracking can be altered in the settings tab area. As seen in the screenshot below, they can compose a preview text, attach files and documents, send from the sender's email account, reply to the recipient's email address, designate the responsible user, and more.
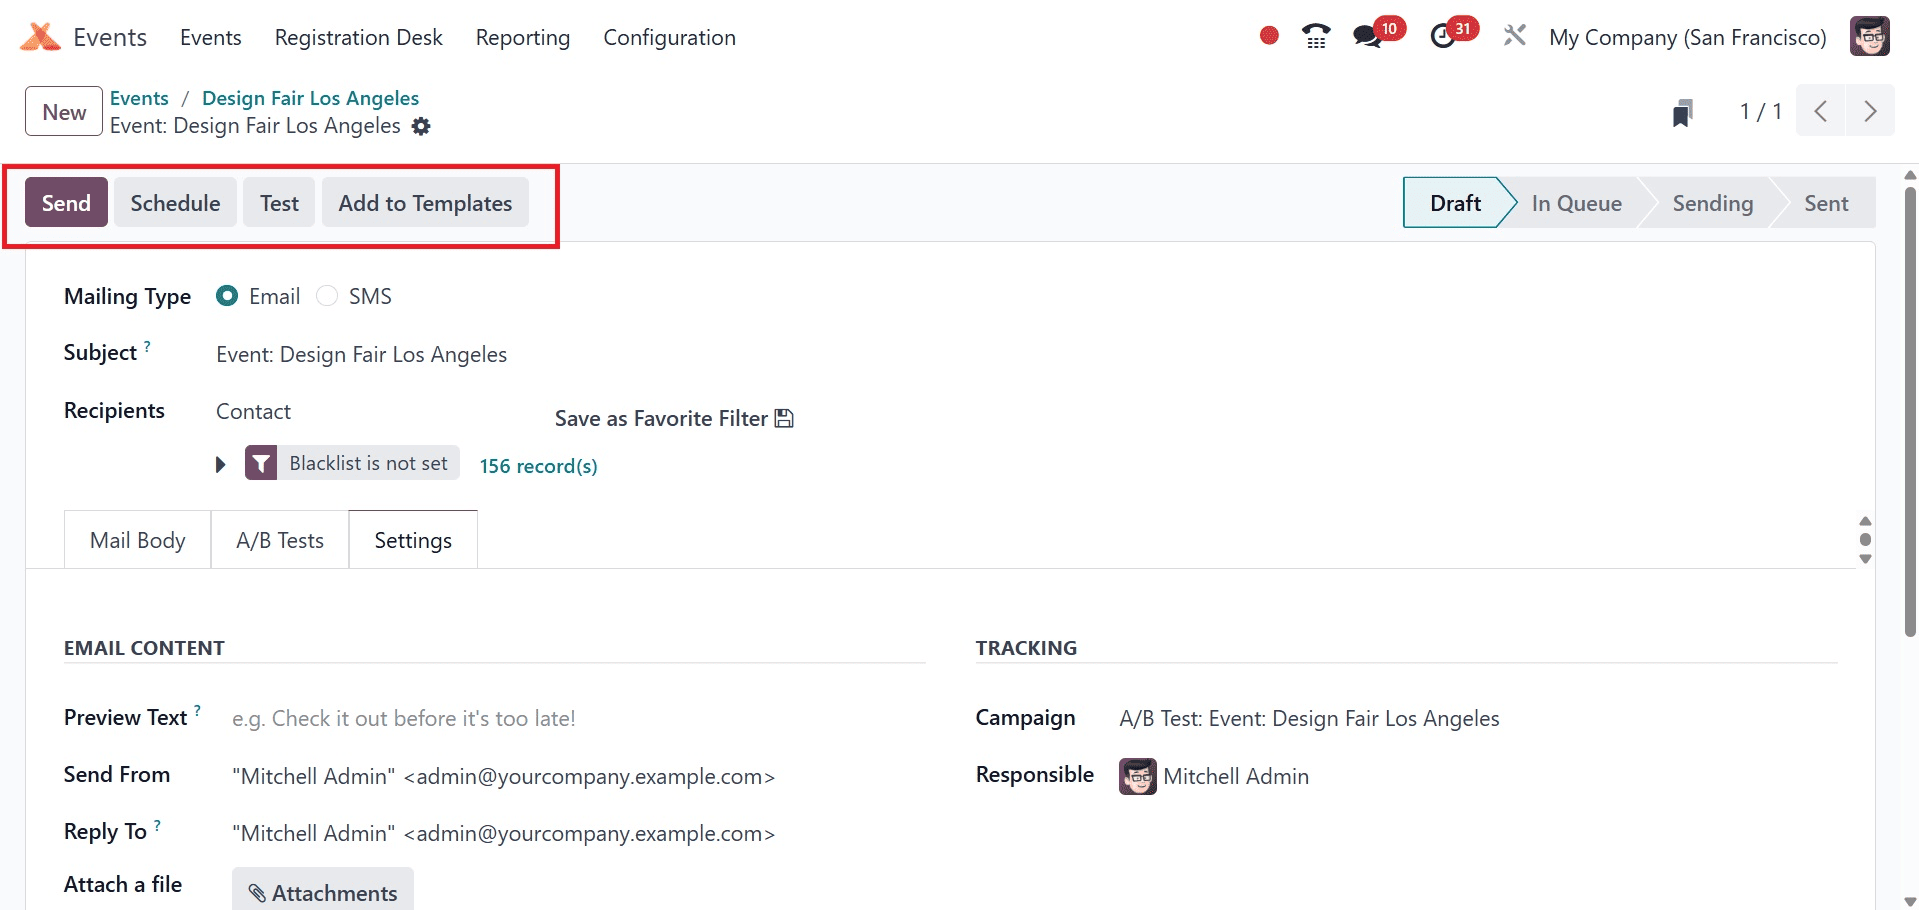
We can utilize the Send and Schedule options to send the email immediately or later when the recipient information and email body have been saved.
Here, we are inviting the chosen candidates by mail right away. Then, as indicated, click the Send to all button in the pop-up box.

From the top of the form view, we can display the details of the sent and unsent emails as a notification after the mail has been sent.
To give comprehensive details about each individual email, the form will additionally include extra smart tab sections labeled Opened, Replied, Clicked, Leads, Quotations, Invoiced, Received, and Bounced, as seen below.
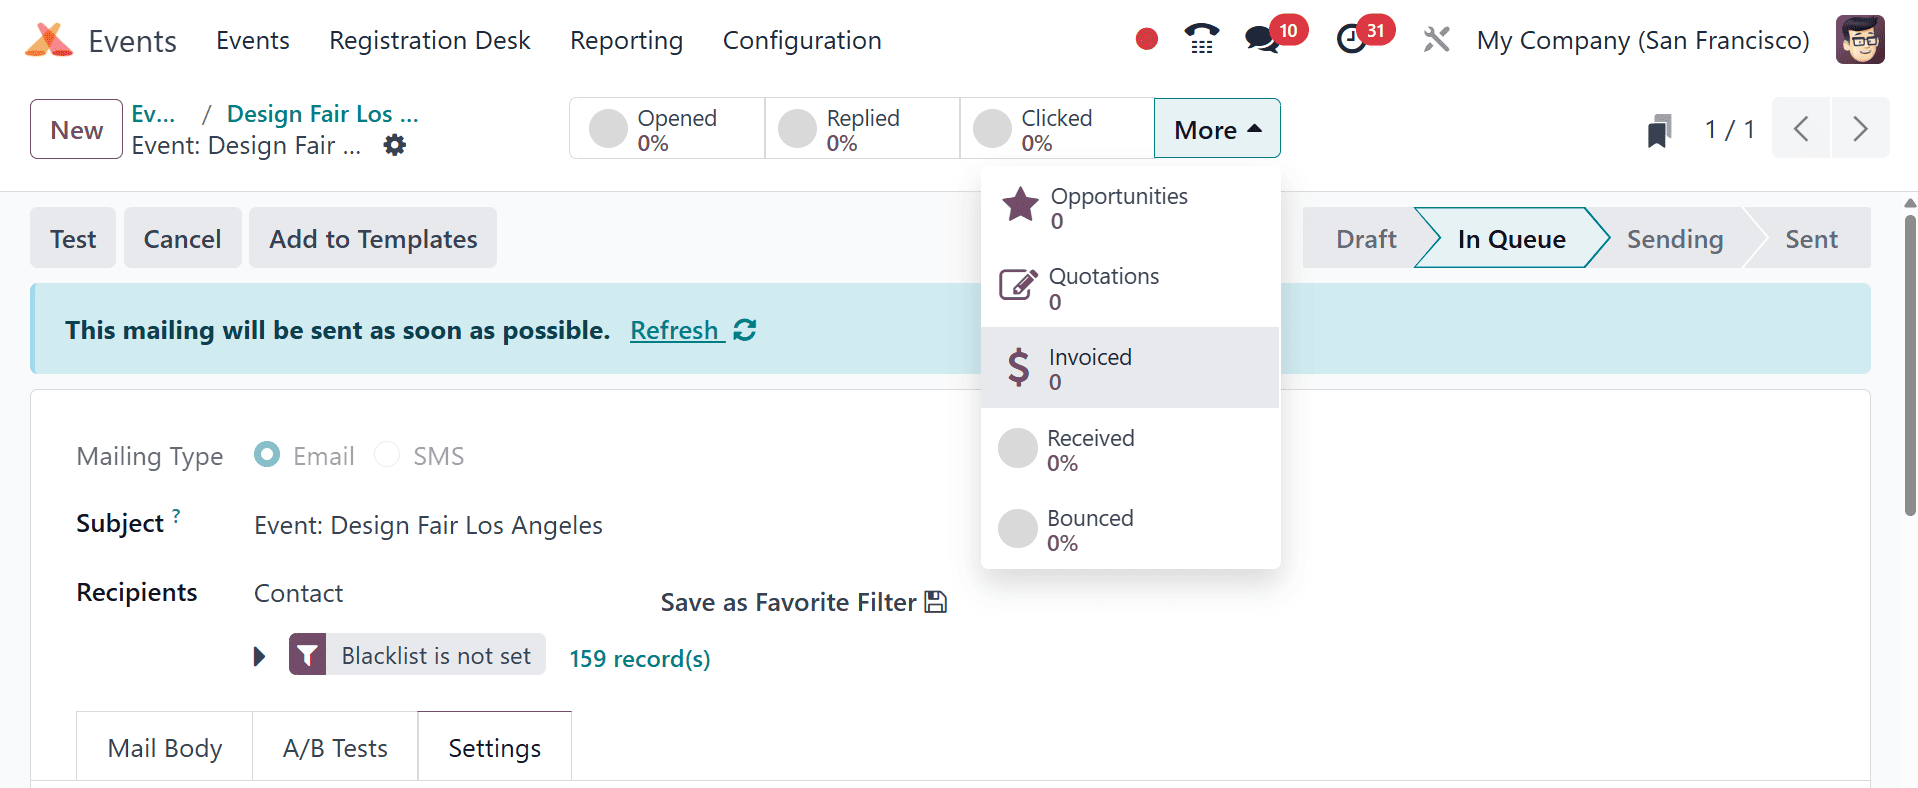
We can see the status of each sent email thanks to these smart buttons. After the receiver answers, the mail will be added to the relevant smart button area.
To allow people to register for the event, all you need to do after creating a new event is post it on your Odoo website. From the main event setting form, select the 'Go to Website' smart button option to accomplish this.
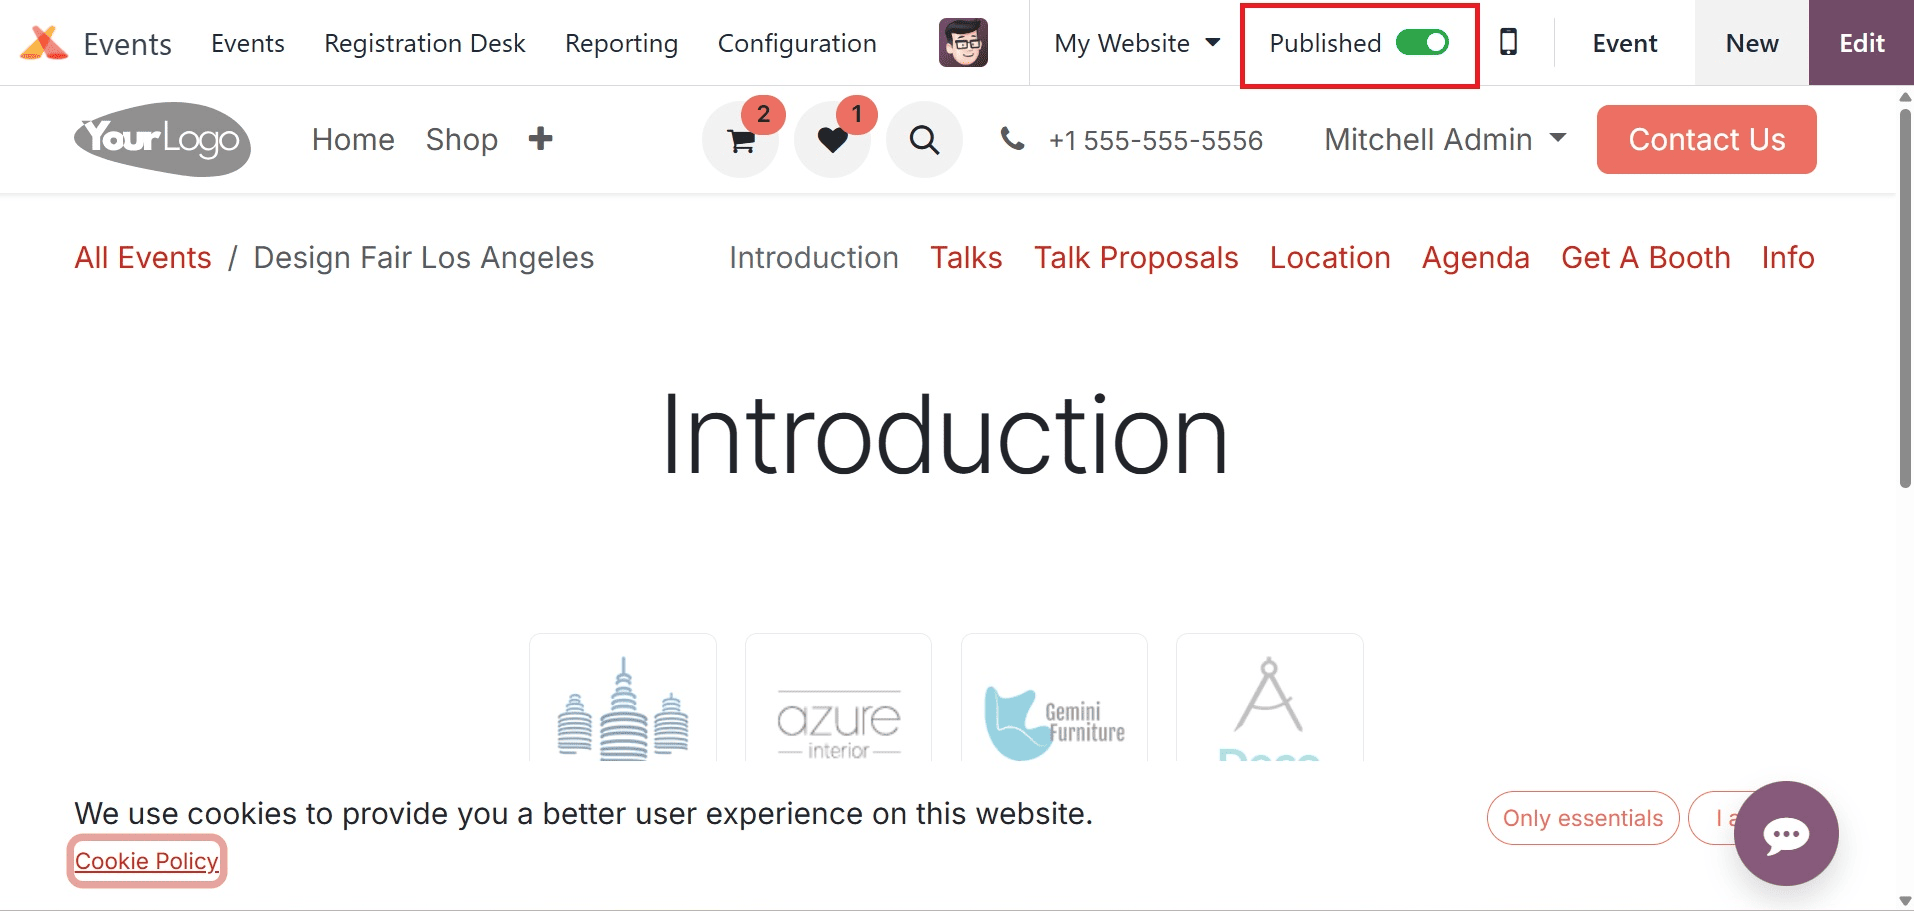
This will take you to the Odoo website window, where you may examine your event in detail. Your event's current status is 'Unpublished'. 'Published' can be changed by clicking on the corresponding buttons.
Event planners can use Odoo 18 to invite certain groups based on their demographics, interests, or past contacts in order to boost engagement and attendance. This tactic boosts marketing and networking efforts, improves audience relations, and amplifies the event's impact—all of which add to the effectiveness and efficiency of event management.
Event promotion is made easier and participation is increased with the Odoo 18 Events Module's ability to invite and interact with specific attendees. The module assists event planners in providing more meaningful and pertinent interactions through audience segmentation, customized messaging, and automatic follow-ups. Businesses can improve event results and audience satisfaction by utilizing these tools to build stronger ties with their audience in addition to increasing attendance.
To read more about How to Invite Your Targeted Participants for an Event in Odoo 17 Event App, refer to our blog How to Invite Your Targeted Participants for an Event in Odoo 17 Event App