A purchase order, which formally documents the agreement between the supplier and the customer and details the items, quantities, and agreed prices, is necessary to provide clear communication and responsibility. Because invoices include information for financial reporting and payment processing, they are equally important as legal evidence of the transaction. Together, they help a company keep correct financial records, steer clear of disputes, and expedite the purchase process.
Oversees the procurement procedure. In Odoo 19, users can use two different modules to handle purchase orders and billing. Odoo 19 Accounting and Odoo 19 Purchase are the two modules. One interesting aspect of the two halves is their connection. As a result, in these cases, the vendor bills and the purchase order must match. Avoiding errors or overpayment can be achieved by making sure that the goods or services delivered match the order and that the purchase order and bill match. This process encourages accountability, audit readiness, accurate record-keeping, and a decrease in financial inequities.
Let's now examine how Odoo 19 handles bill/purchase order matching. Let's open the purchasing module for that. In this case, the purchasing division made the decision to buy a few new products to stock the business. Make a fresh request for quotes for the vendor. To add a new RFQ, click the new button.
Aka Foster is the Vendor in this instance. Enter additional information such as the Reference, the expected arrival date, the order deadline, etc. After that, you can add items to buy from the products tab.
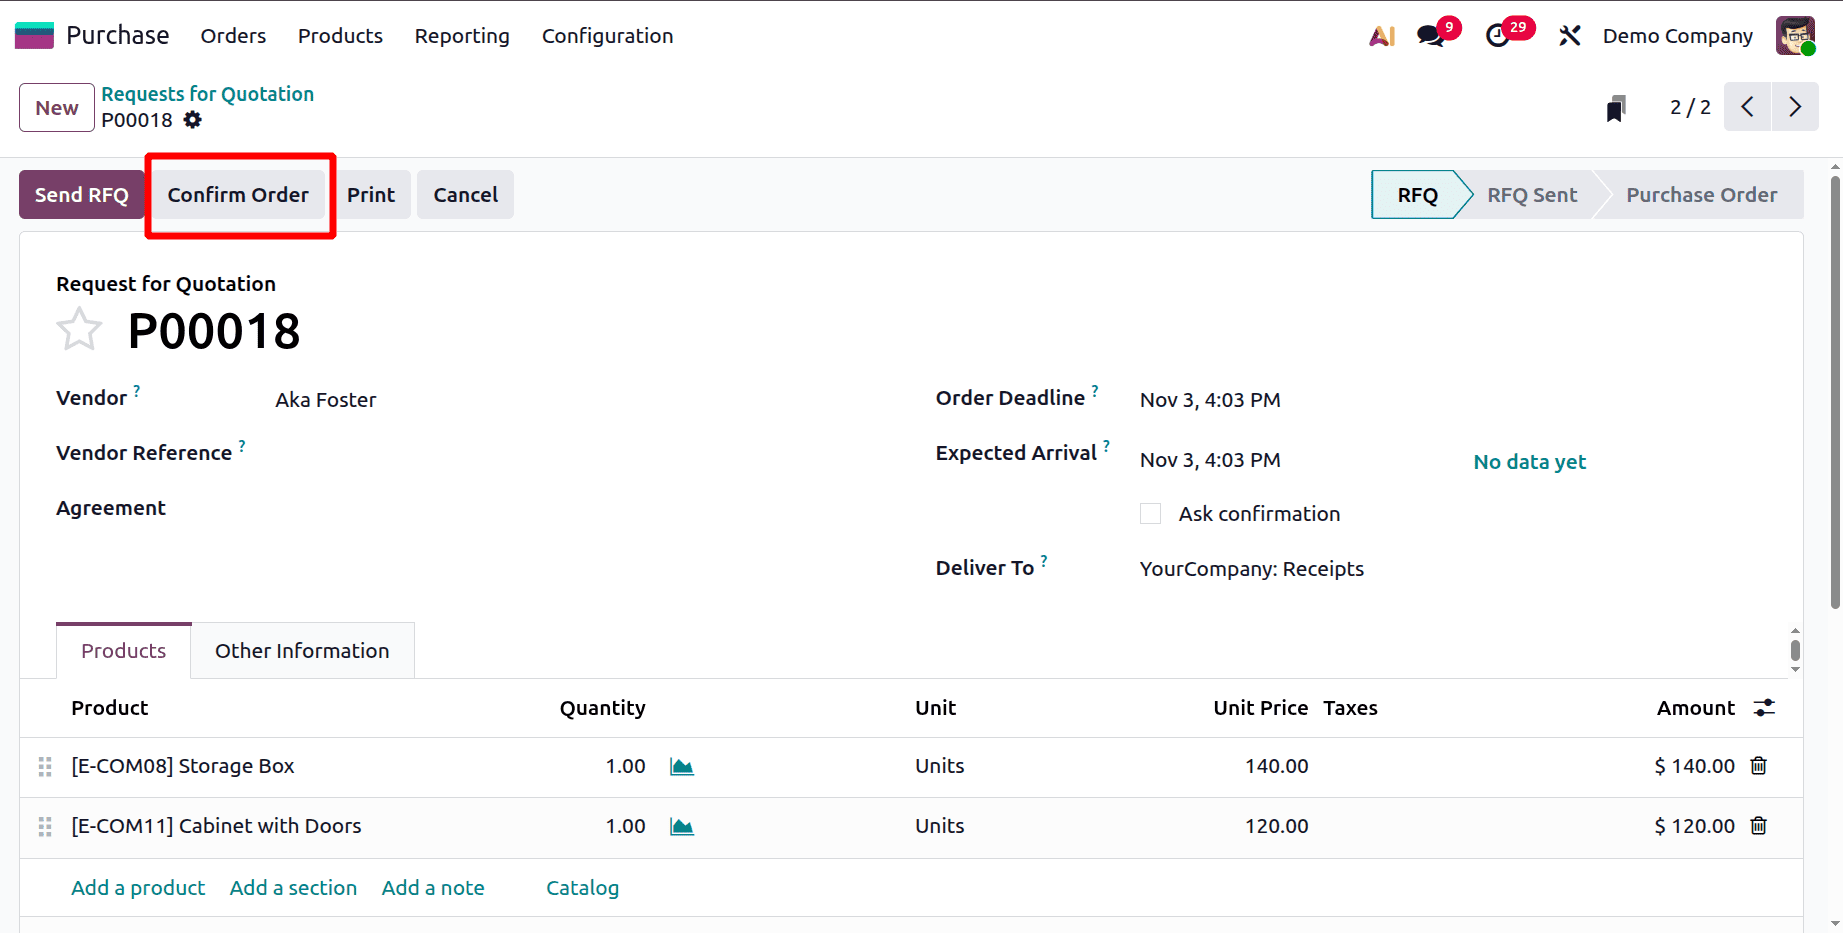
Product names, quantities, and unit prices are listed on the order line. In this case, the purchasing team placed orders for two products. Confirm the RFQ.
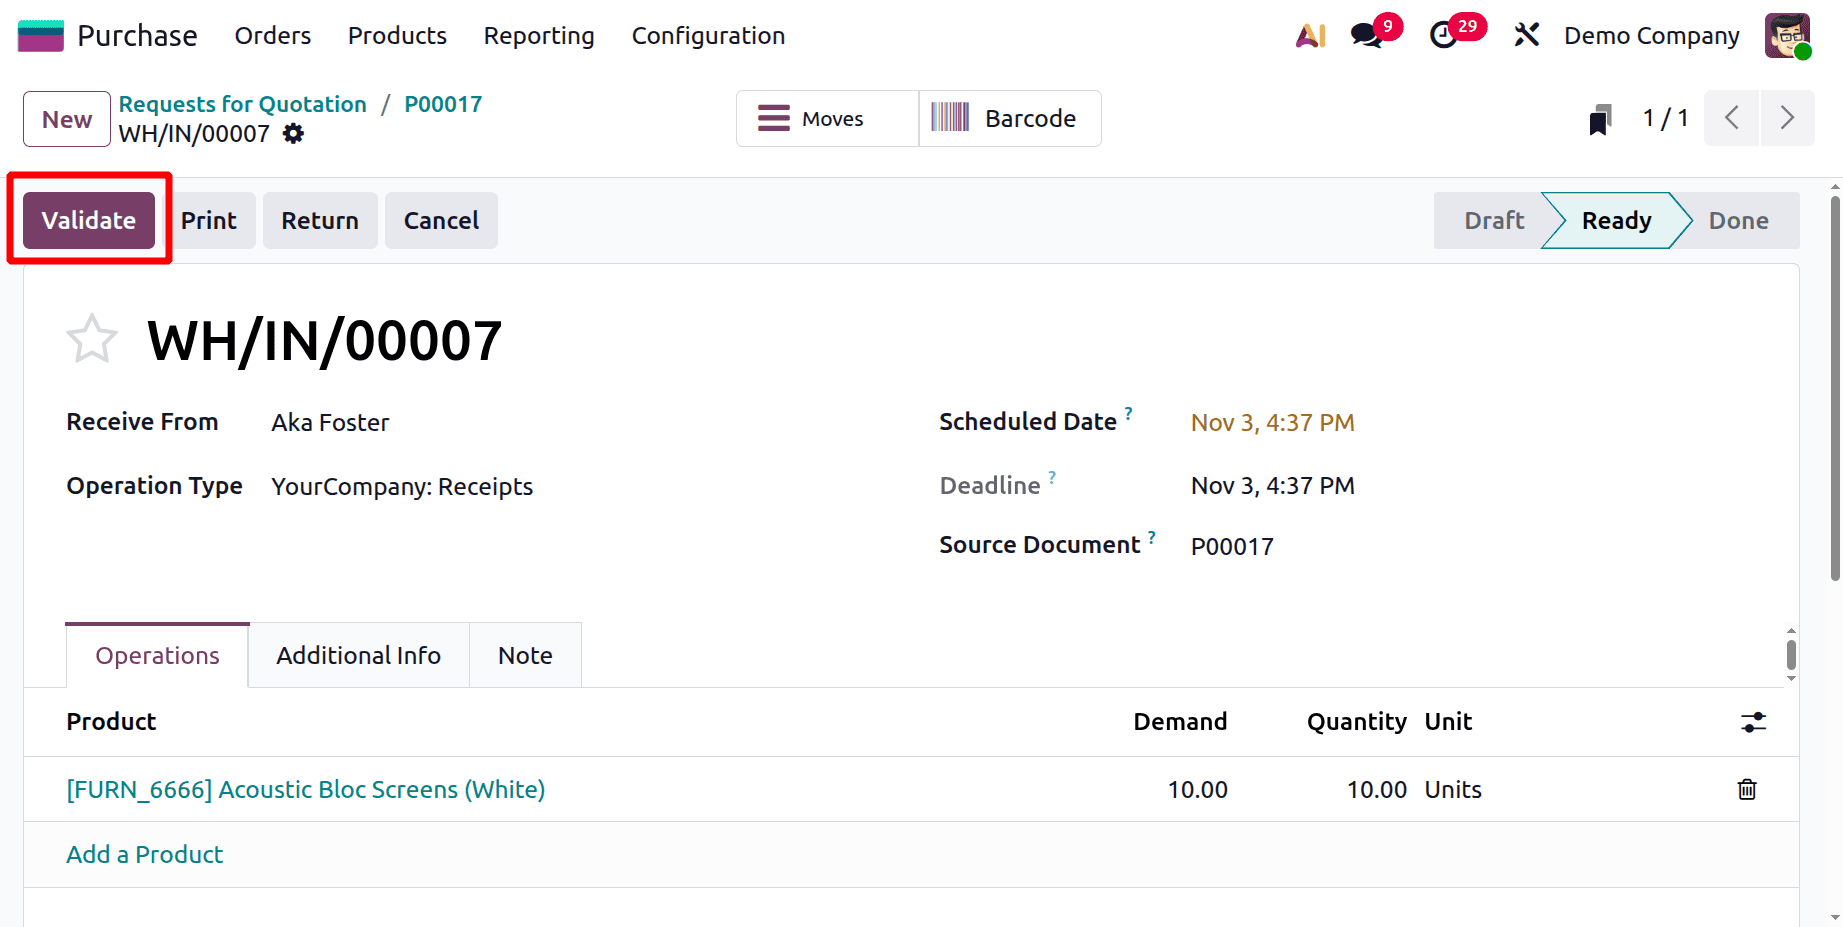
Then choose the Receipt. Validate the receipt to get products.
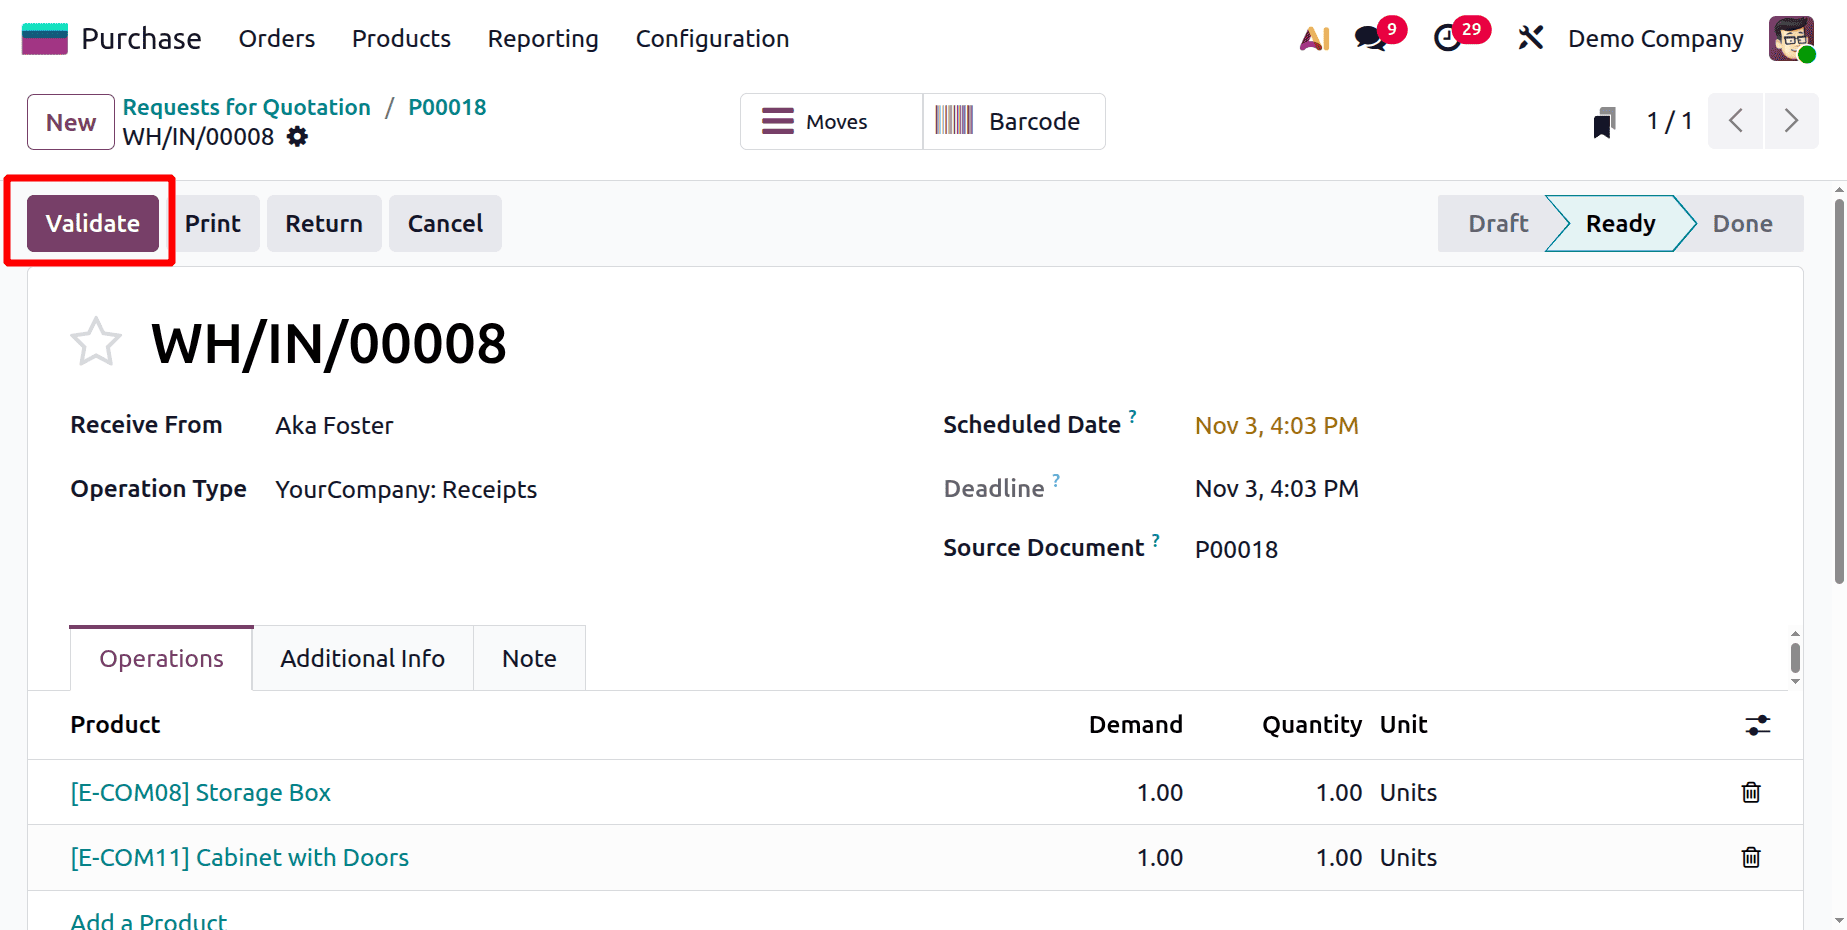
Thus, the purchase Receipt has been validated. As previously stated, the billing team is in charge of preparing the bill.
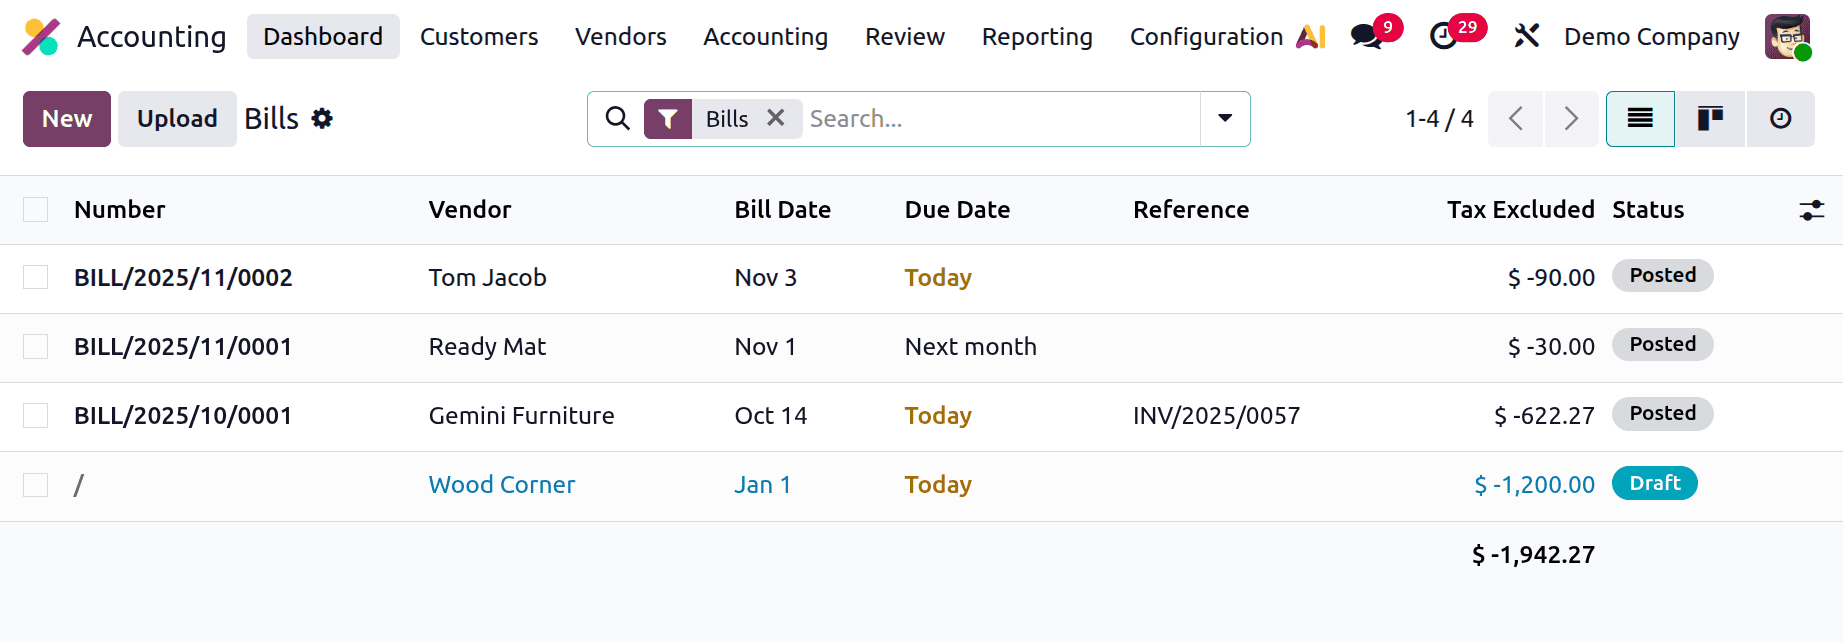
Proceeding to the accounting module, select the Bills by clicking on the Vendor menu. There, a list view of the generated bills is displayed. It displays the bill sequence, vendor, bill date, due date, reference, and other information.
Add the same vendor, Aka Foster, to this draft vendor bill. Add information such as the product and reference in the invoice lines. Click on the add a line shown in the screenshot below to add a new Label.
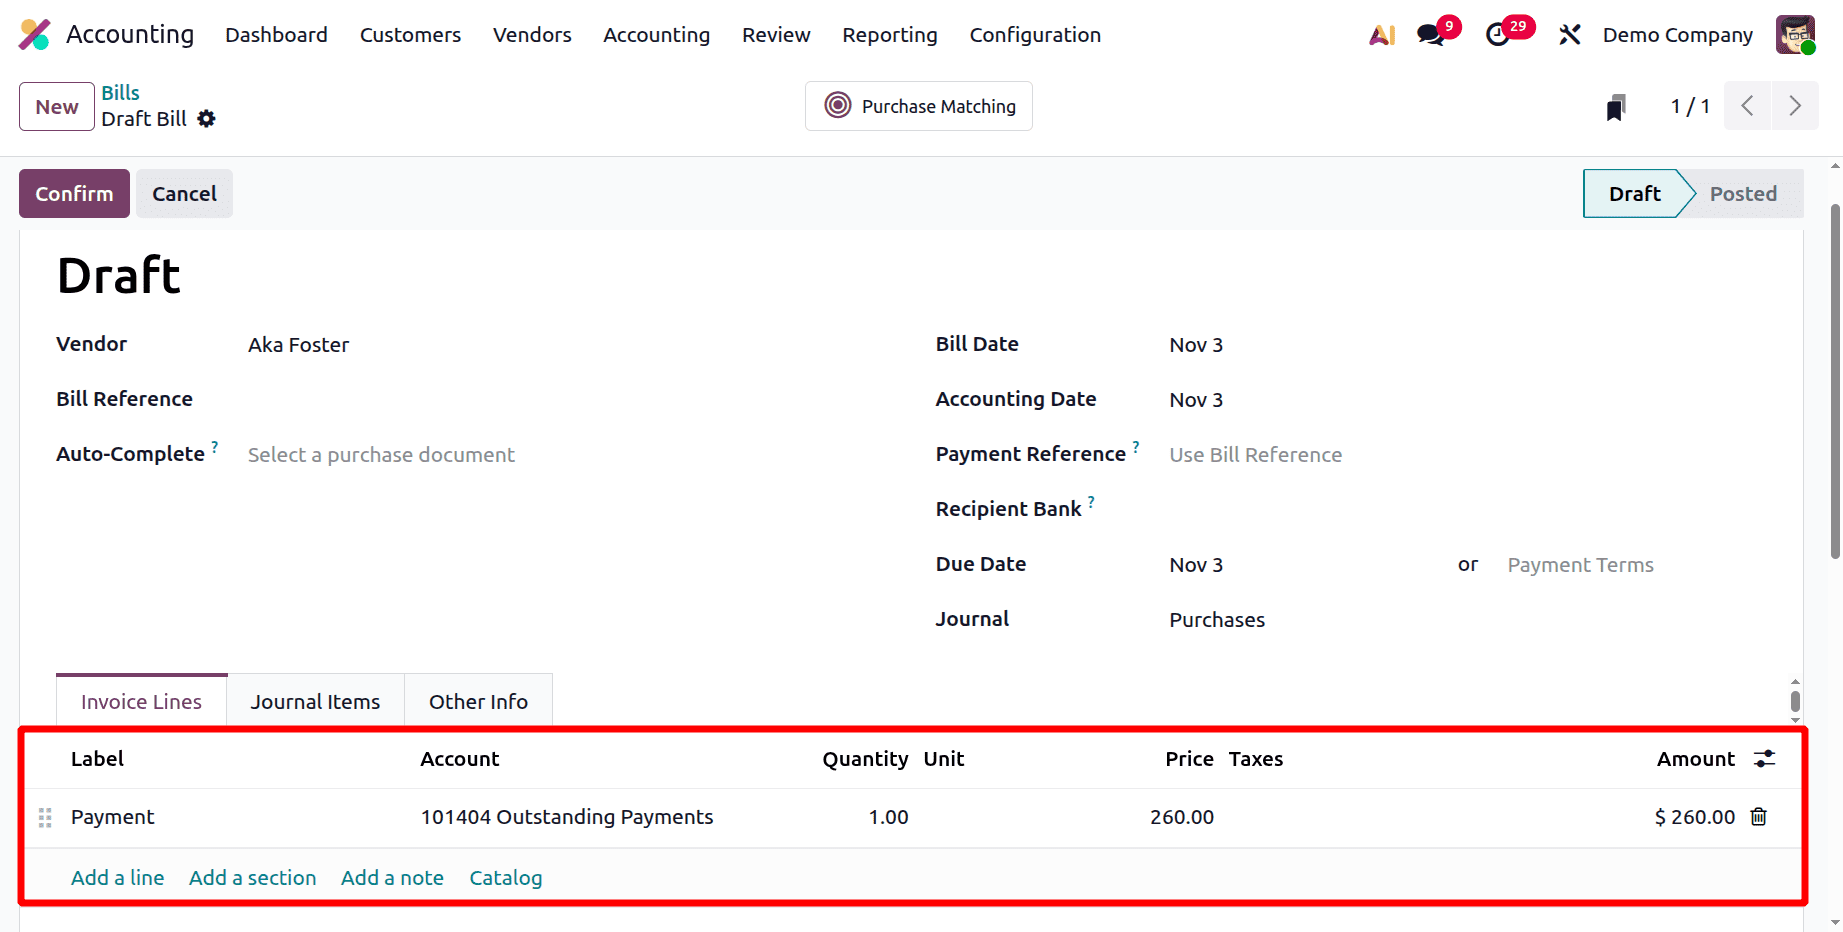
The product is then replaced with a description that reads "Payment."There, include the cost. $260 has been inserted here. After adding the bill date, make sure the bill is correct.
Here, a brand-new smart tab called Purchase Matching showed up. You can match the purchase order and the bill payment by using the "Purchase Matching" smart tab.
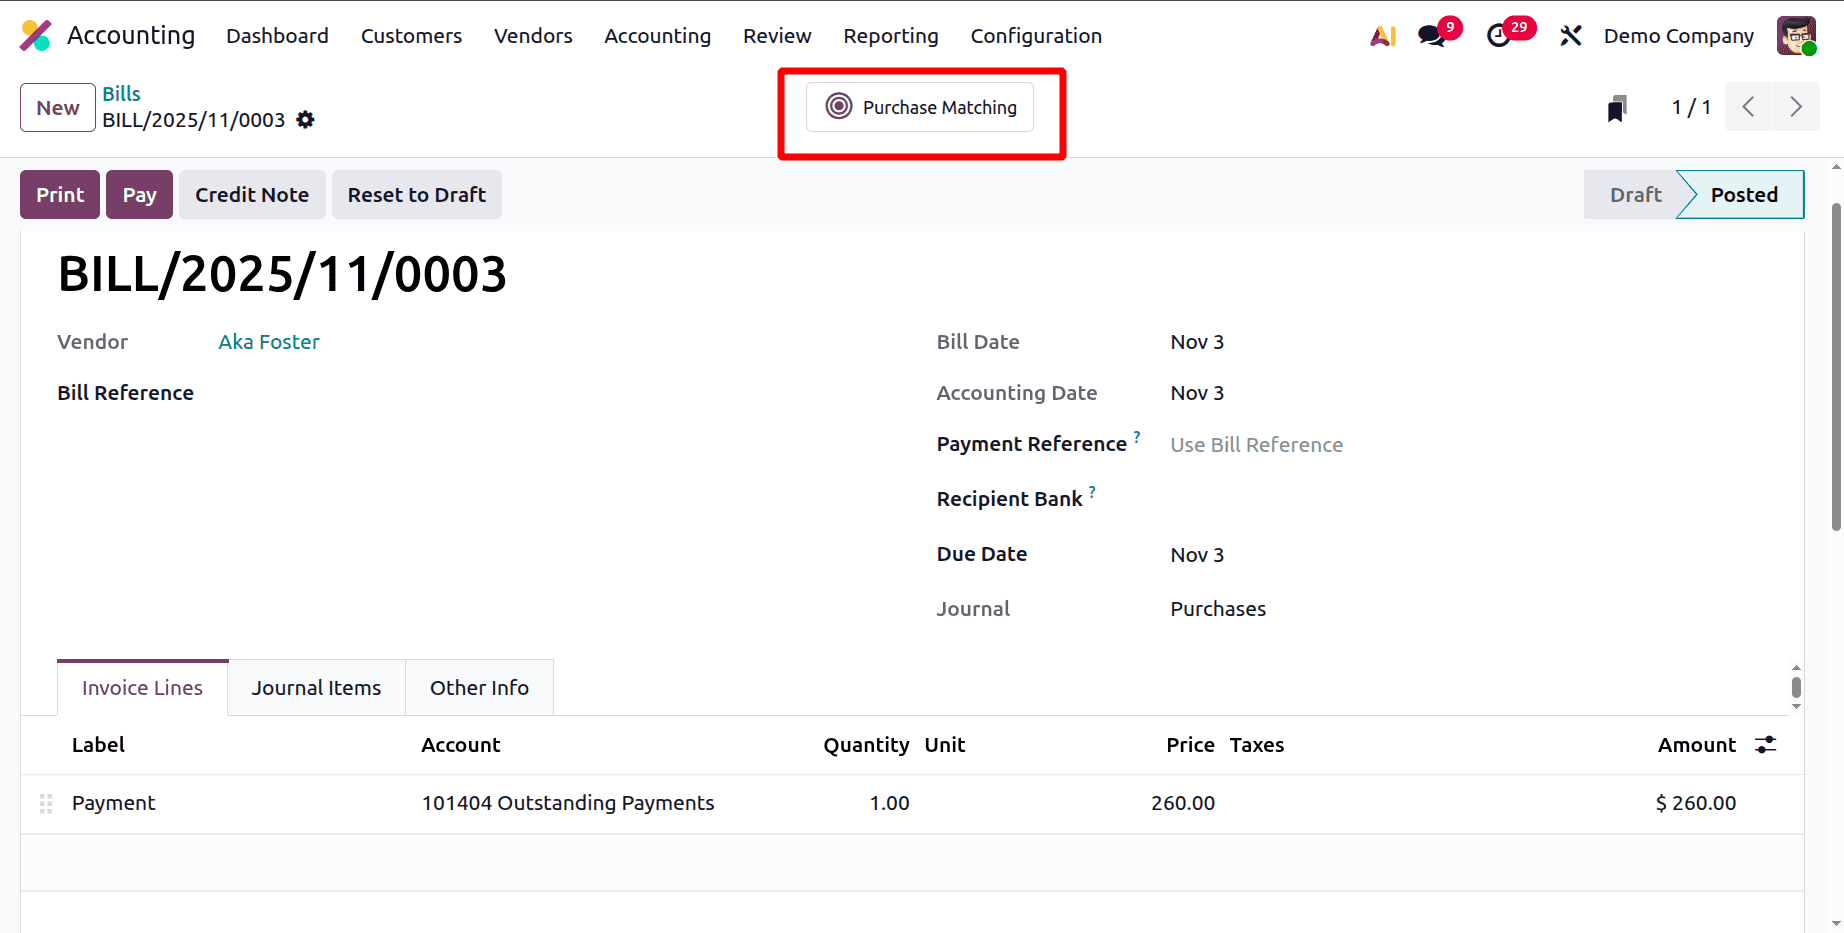
You can match the purchase order and the bill payment by using the "Purchase Matching" smart tab. To open it, click on it.
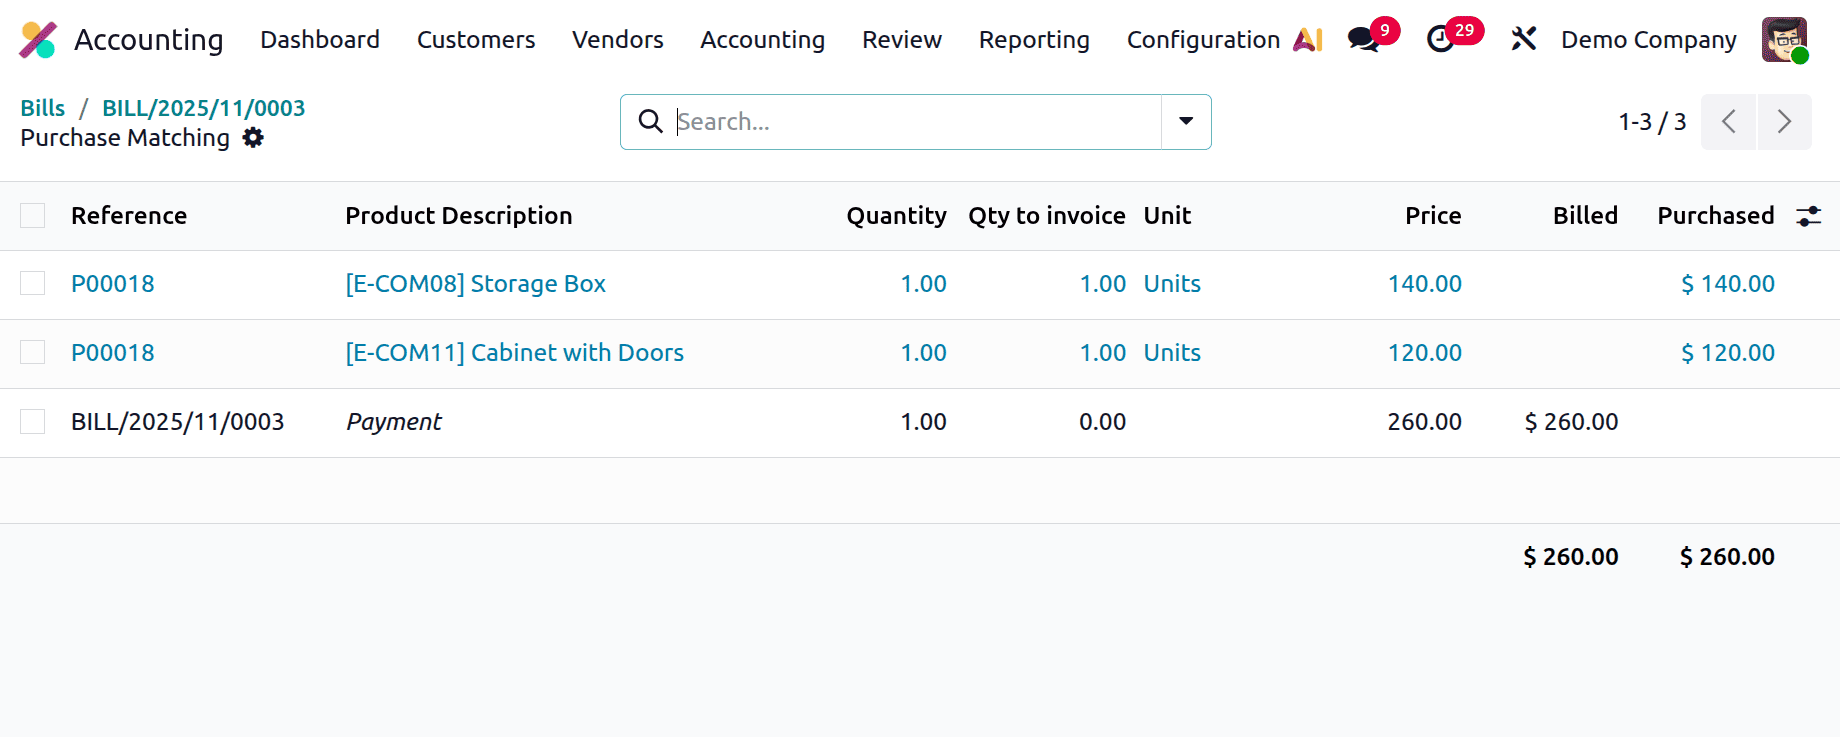
All of the purchase orders that have been made for vendor Aka Foster are listed on the smart tab. Choose the Bill and Purchase Order to include the generated payment in the purchase order.
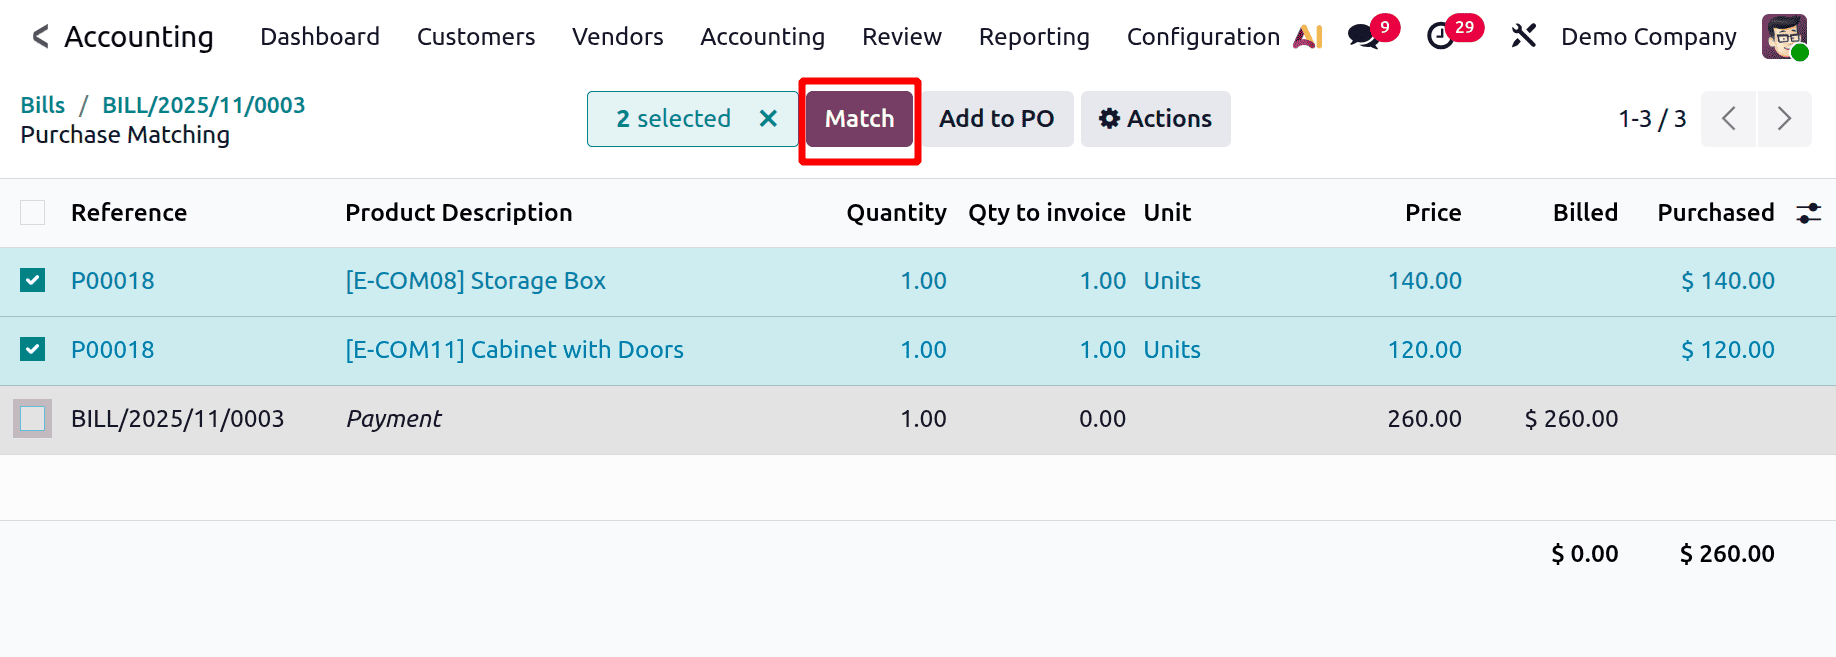
Click the "Match" button to include the payment in the purchase order.
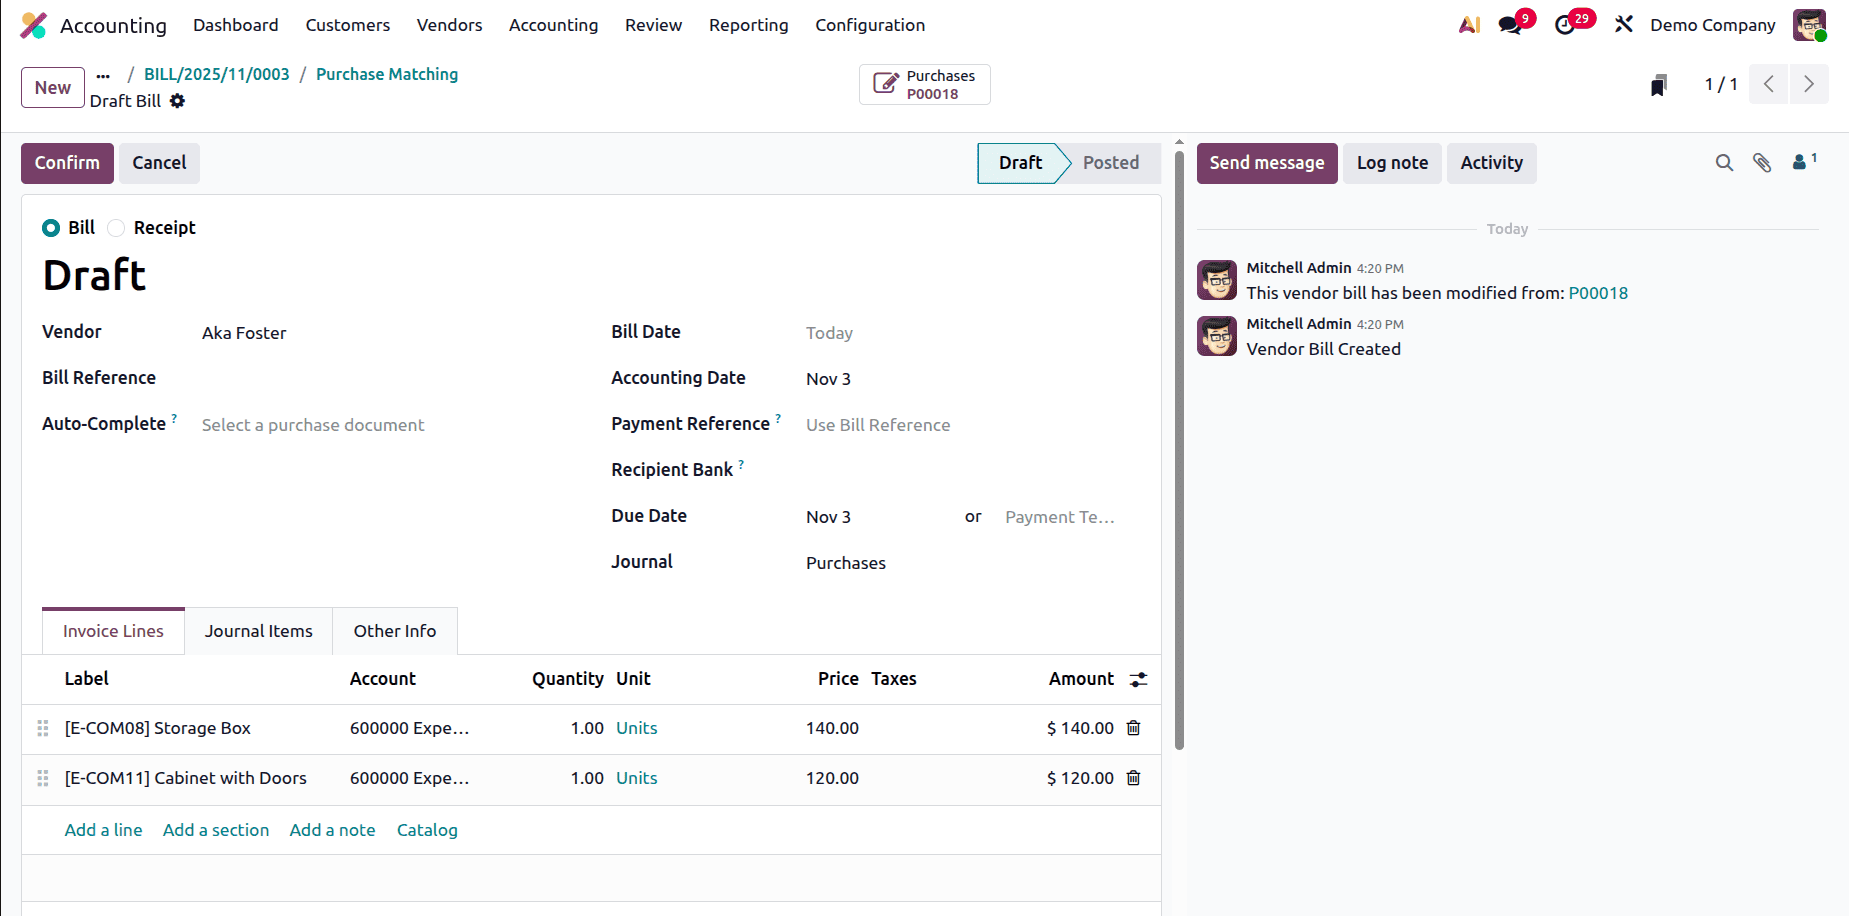
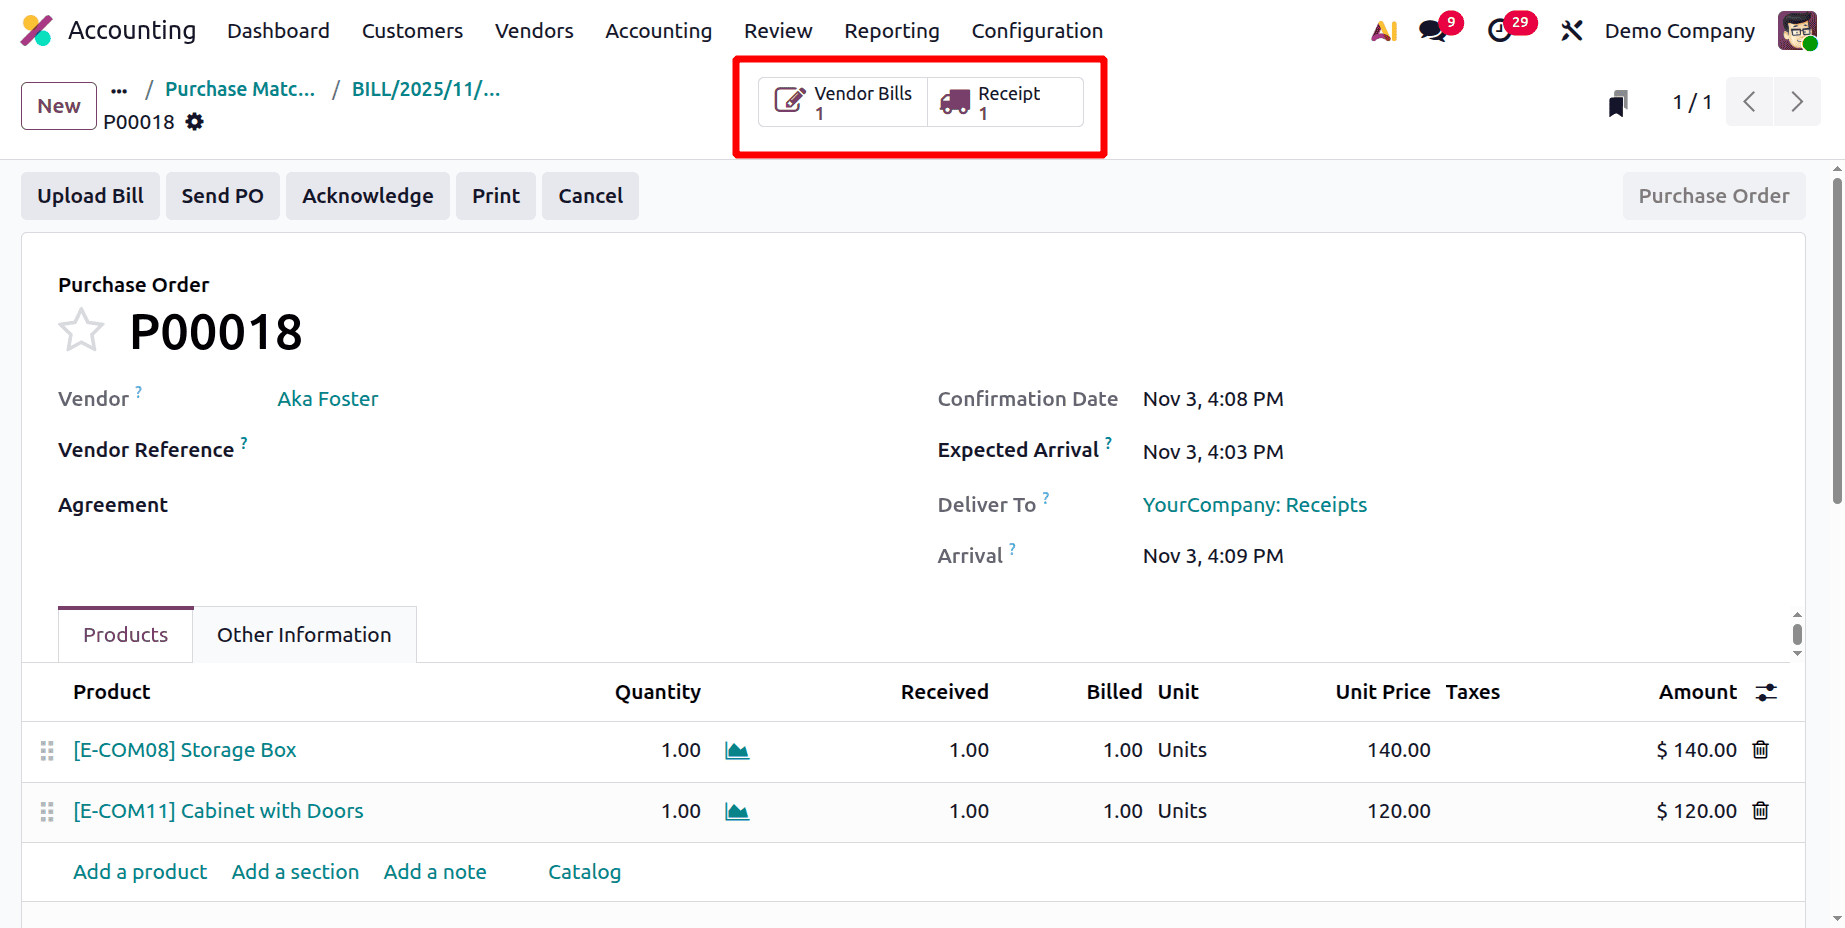
After matching the vendor bill will be added to the created purchase order as shown below. Click on the Confirm button.
While opening the Purchase order, there also the created bill can be viewed as shown below.
Adding Down Payment
An advance payment made to a supplier before to receiving the products or services is referred to as a down payment to a vendor bill in Odoo 19. It is eventually subtracted from the total amount of the final vendor bill and aids in securing the transaction. Businesses may effectively handle prepayments with this function, which guarantees precise tracking and reconciliation in the purchasing and accounting processes.
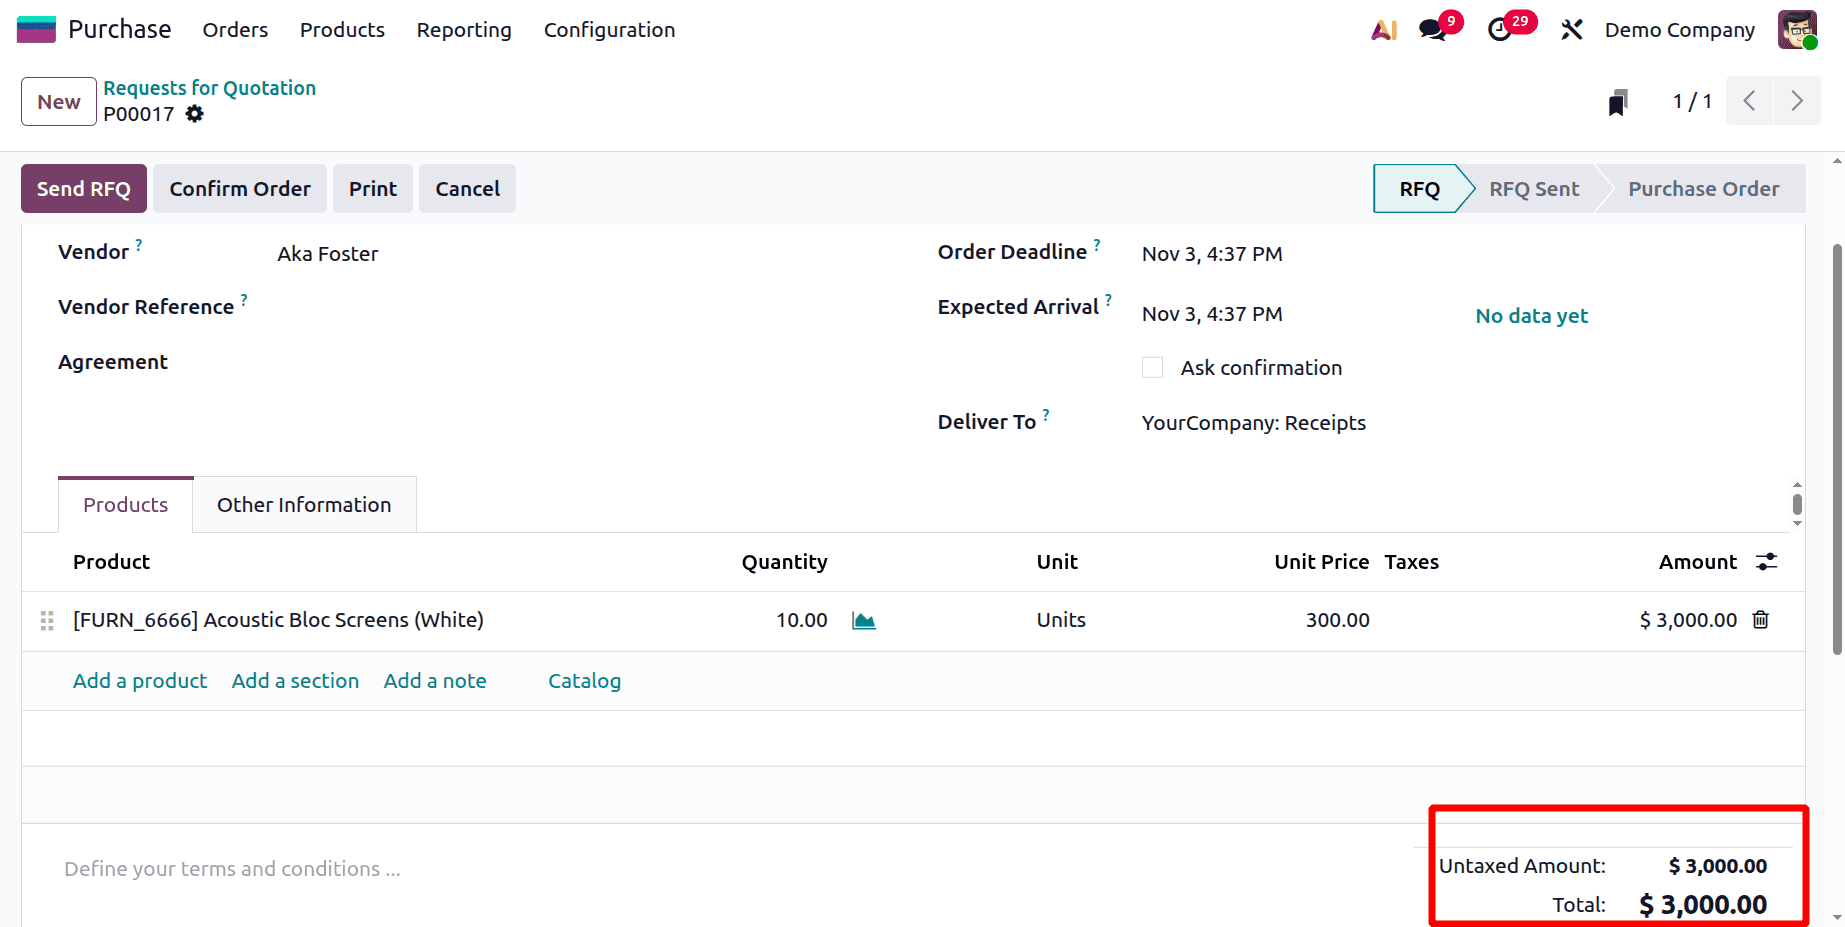
For that, let's create an RFQ again. This time, the vendor is Aka Foster, but the product chosen is Acoustic Bloc Screens (White). Confirm the order.
Then as said before, move to the Accounting module to add a vendor bill. Choose the vendor and add the label as “Down payment to P00017”. The amount added is $300, which is just 10% of the total.
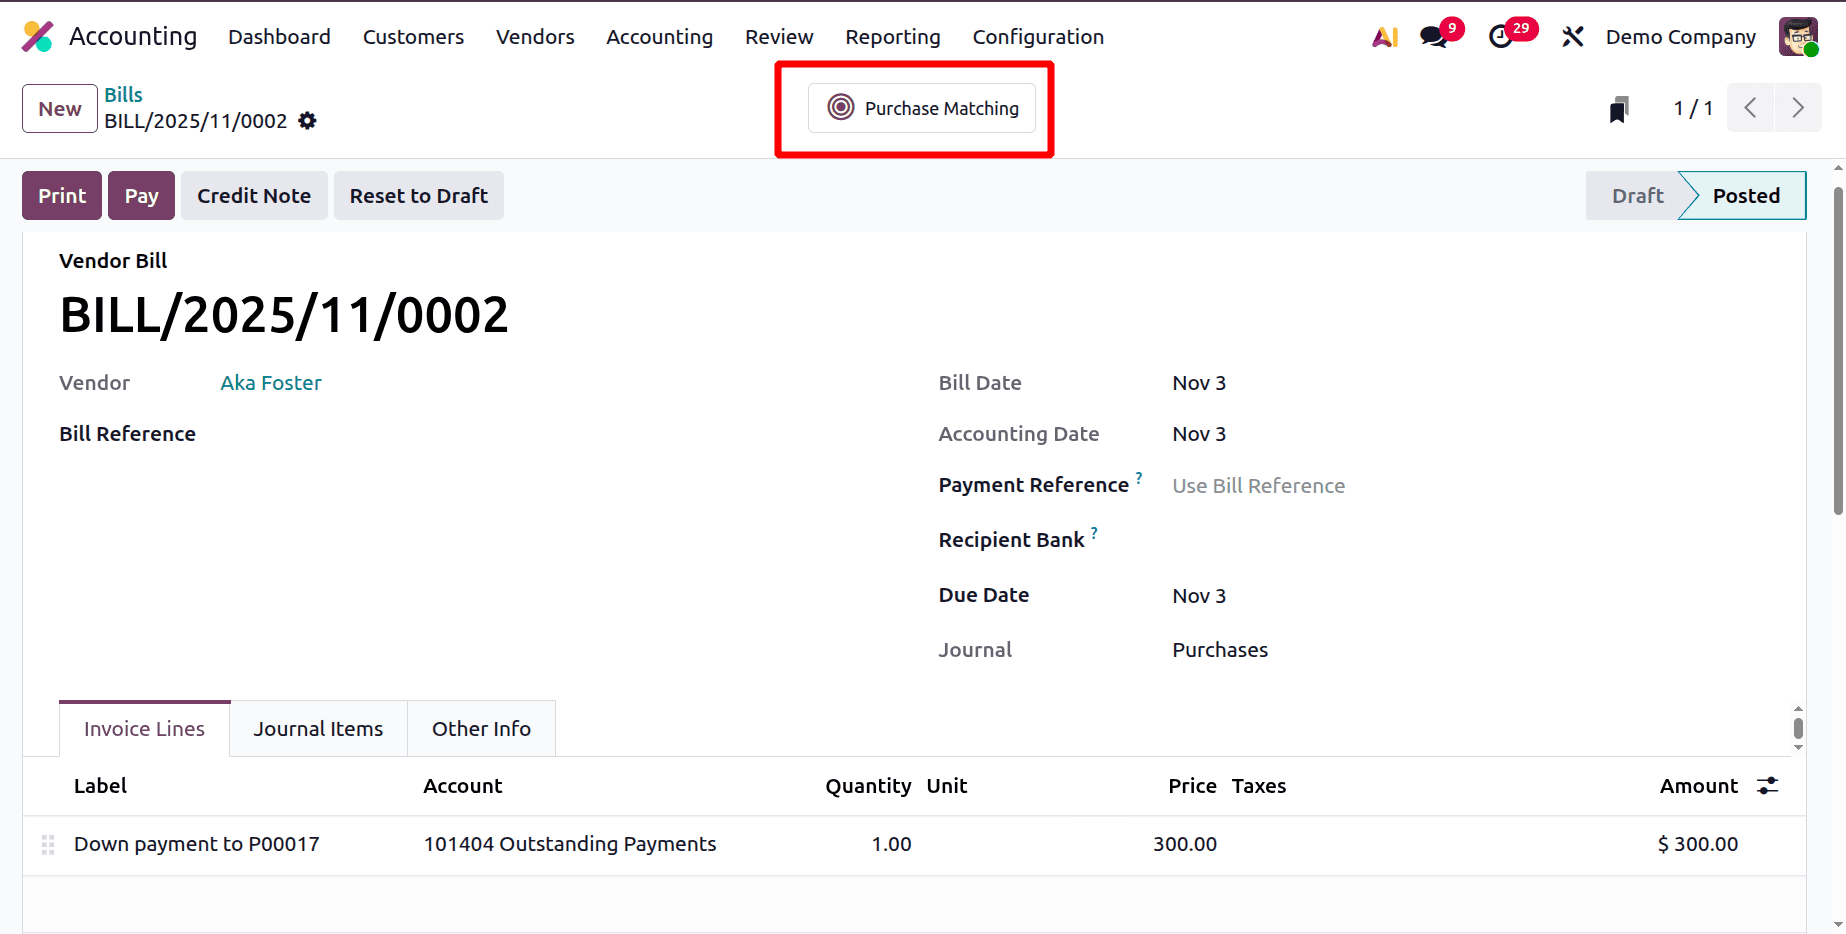
Confirm the bill, and open the smart tab "Purchase Matching”.
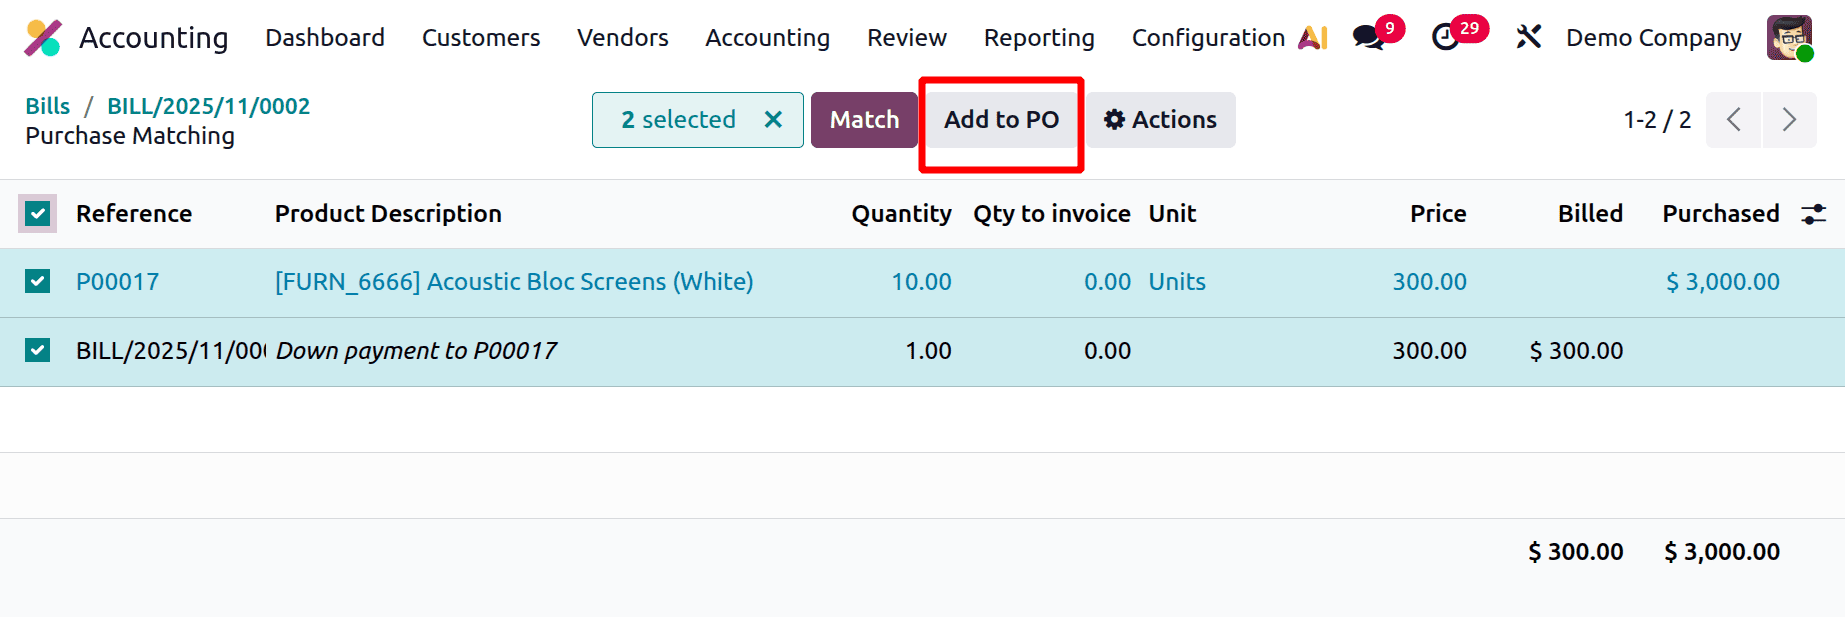
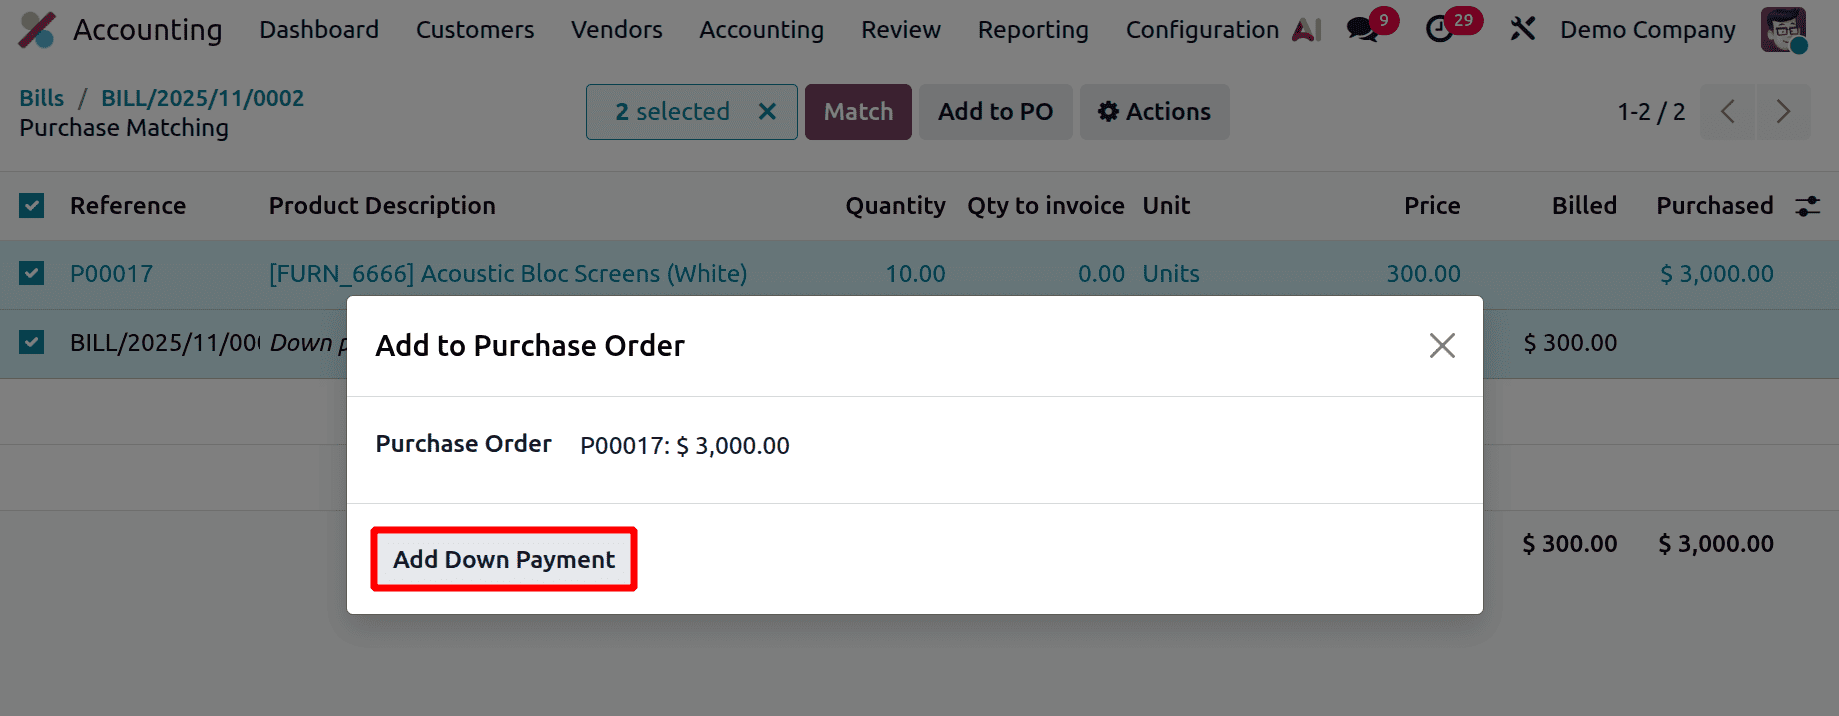
This shows the purchase order and the created bill. Choose both of them and click on the Add to PO button.
A new popup window with a field to choose the purchase order will then show up. Click the "Add Down Payment" option after adding a purchase order.
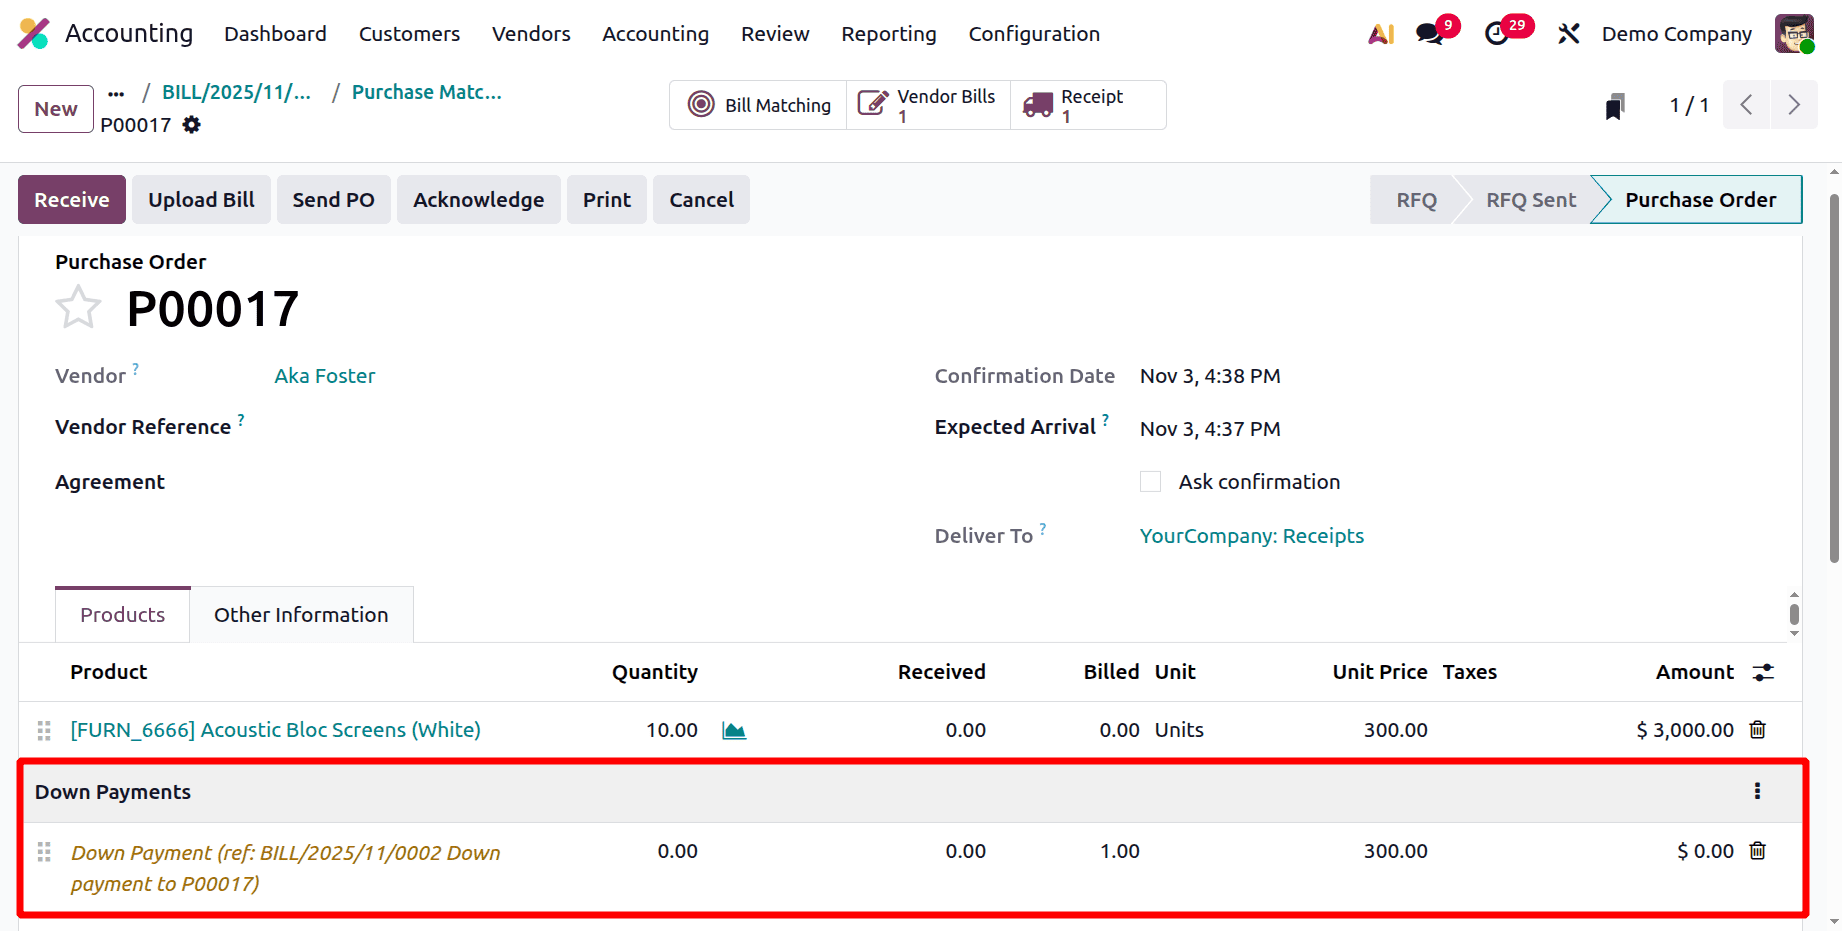
Here, a new description that matches the one on the vendor bill was placed inside the order line.
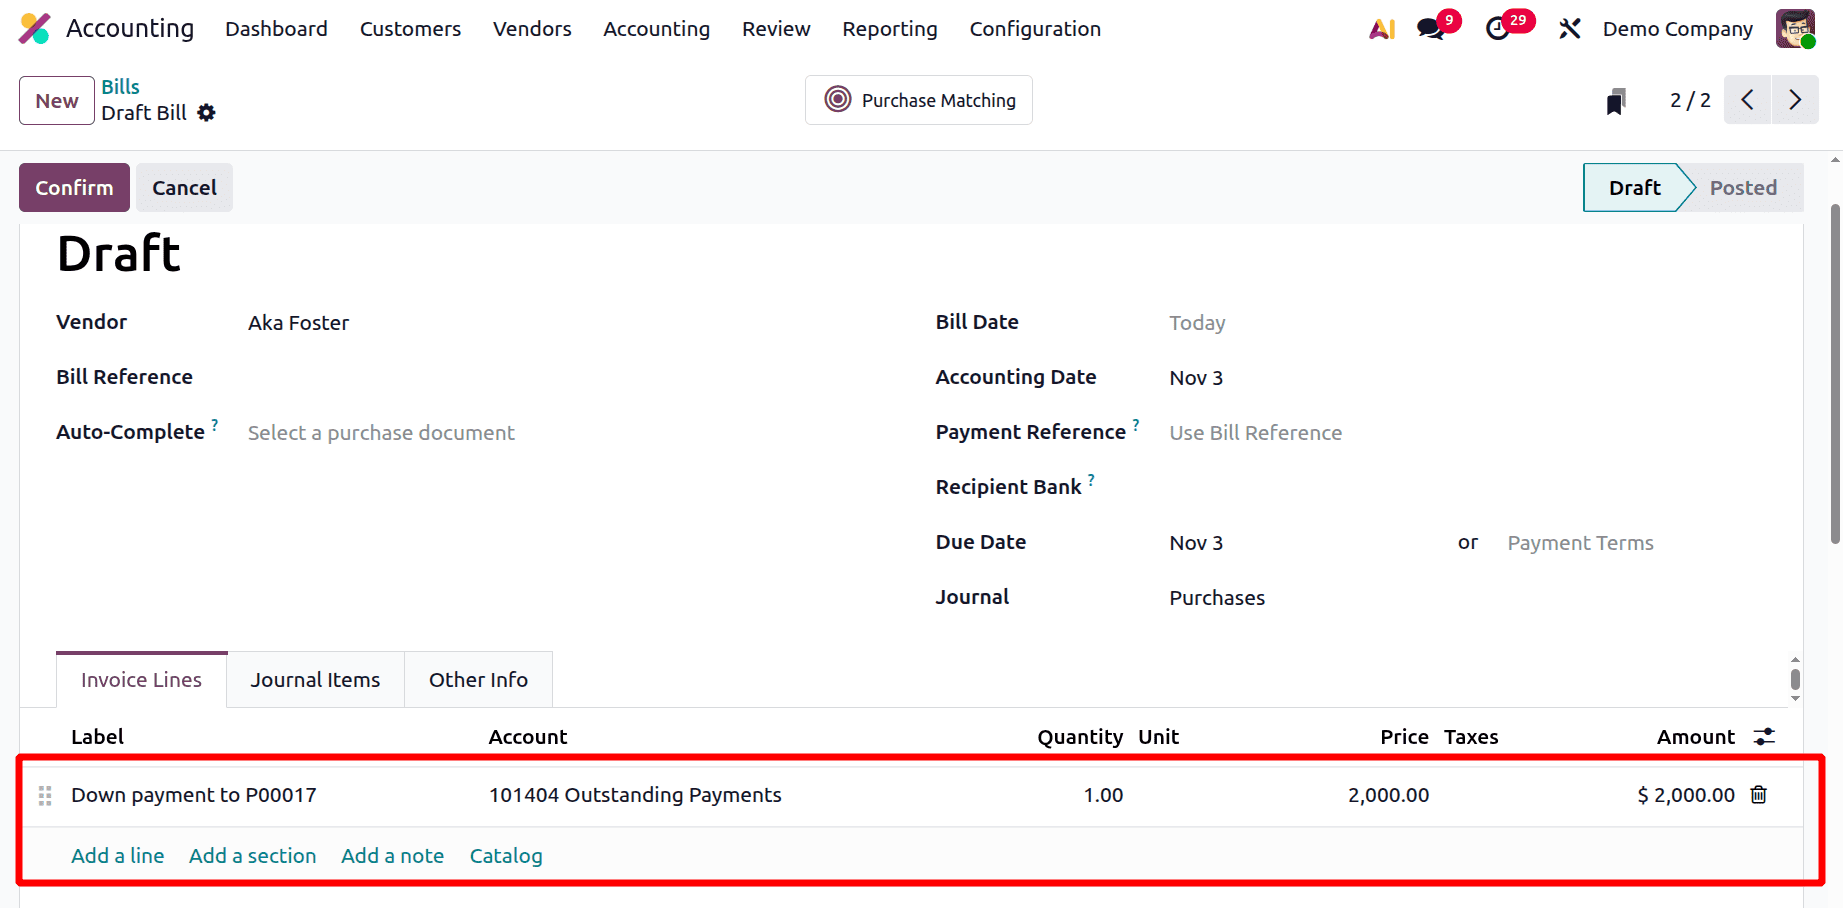
Then again, creating the bill for the second payment. This time the payment is $2000. Click on the confirm button.
After confirming the Bill, click on the Purchase Matching again.
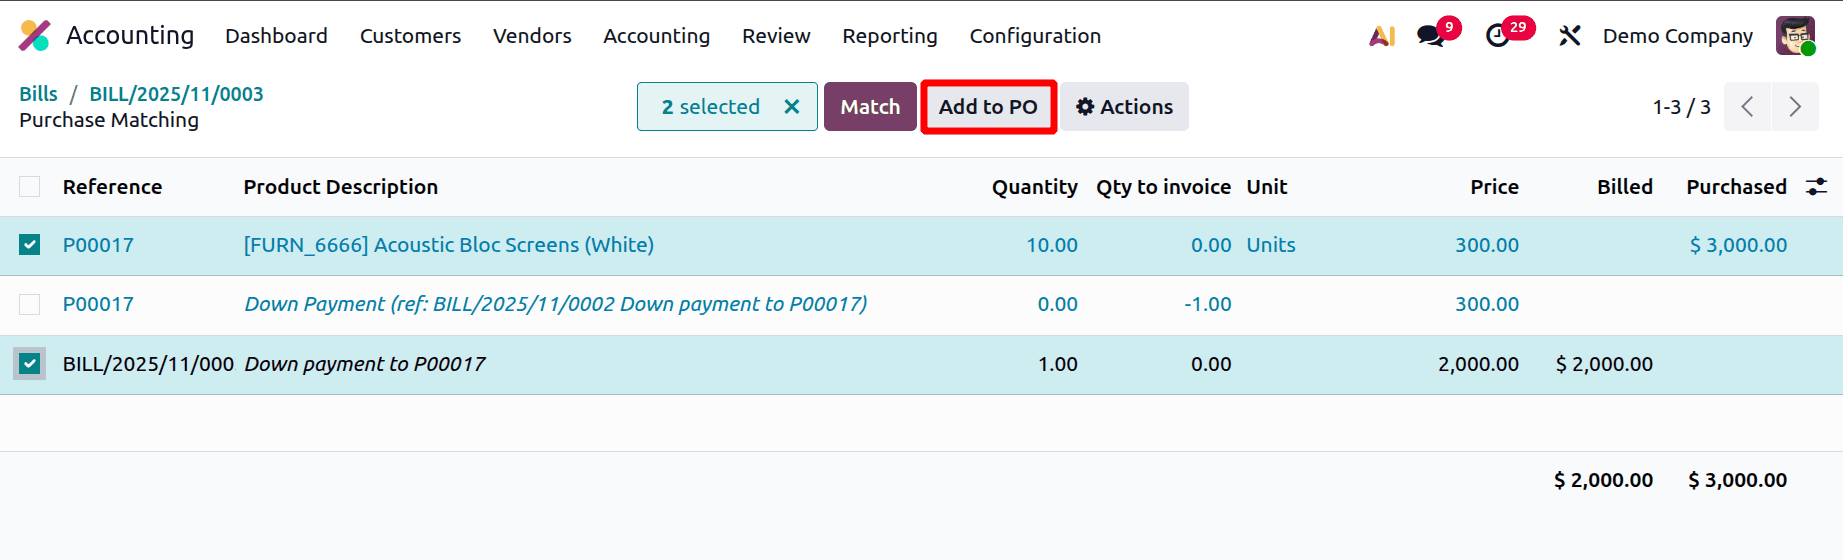
Again, the popup shows and adds the payment to the purchase order as Down payment. Then as shown below the payments will be added to the purchase order as down payments.

Go back to the purchase module and open the created Purchase Order.
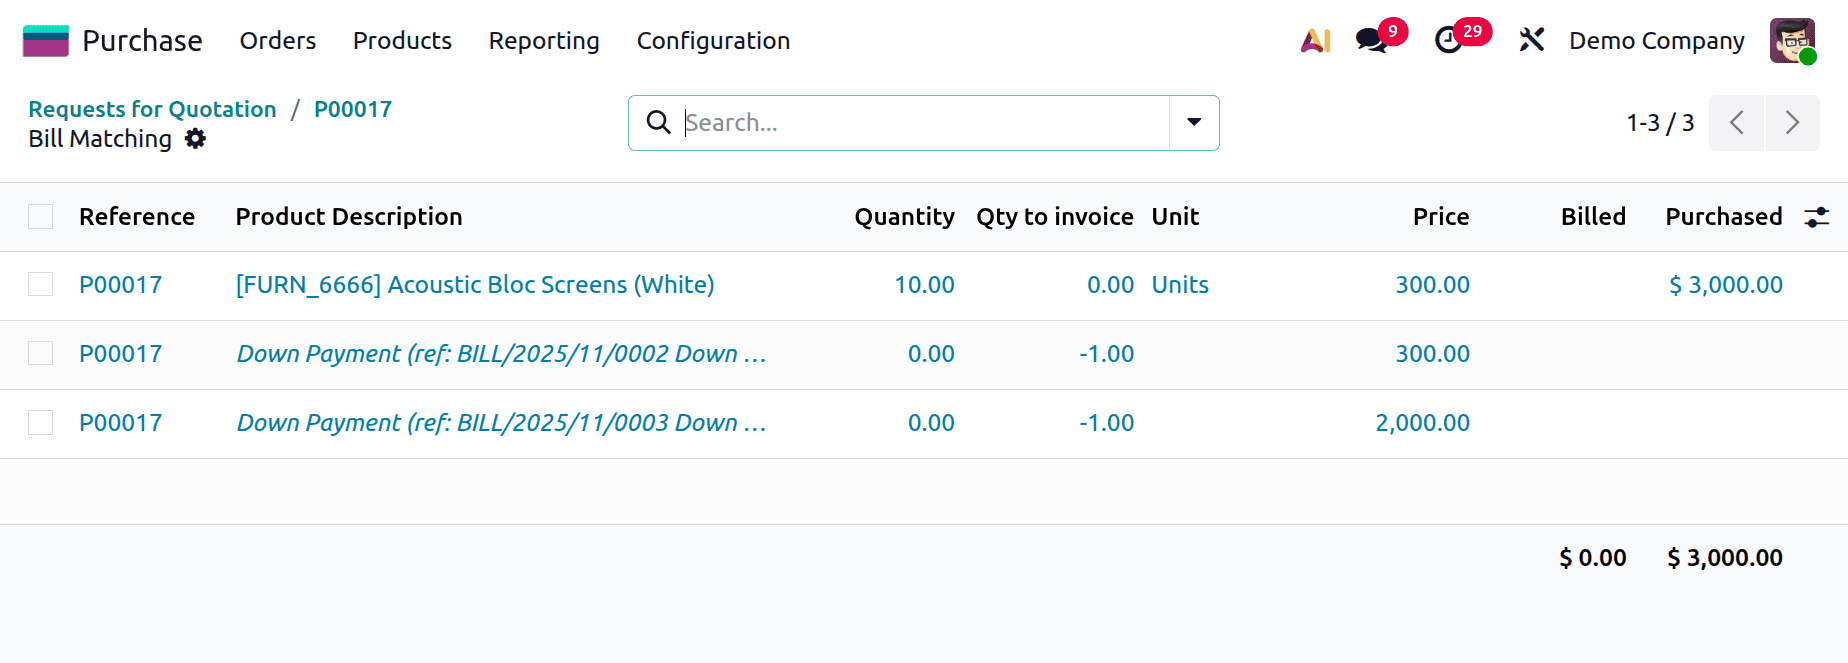
Vendor Bills and Bill Matching are the two new smart tabs that have been included. Select Bill Matching, the first smart tab.
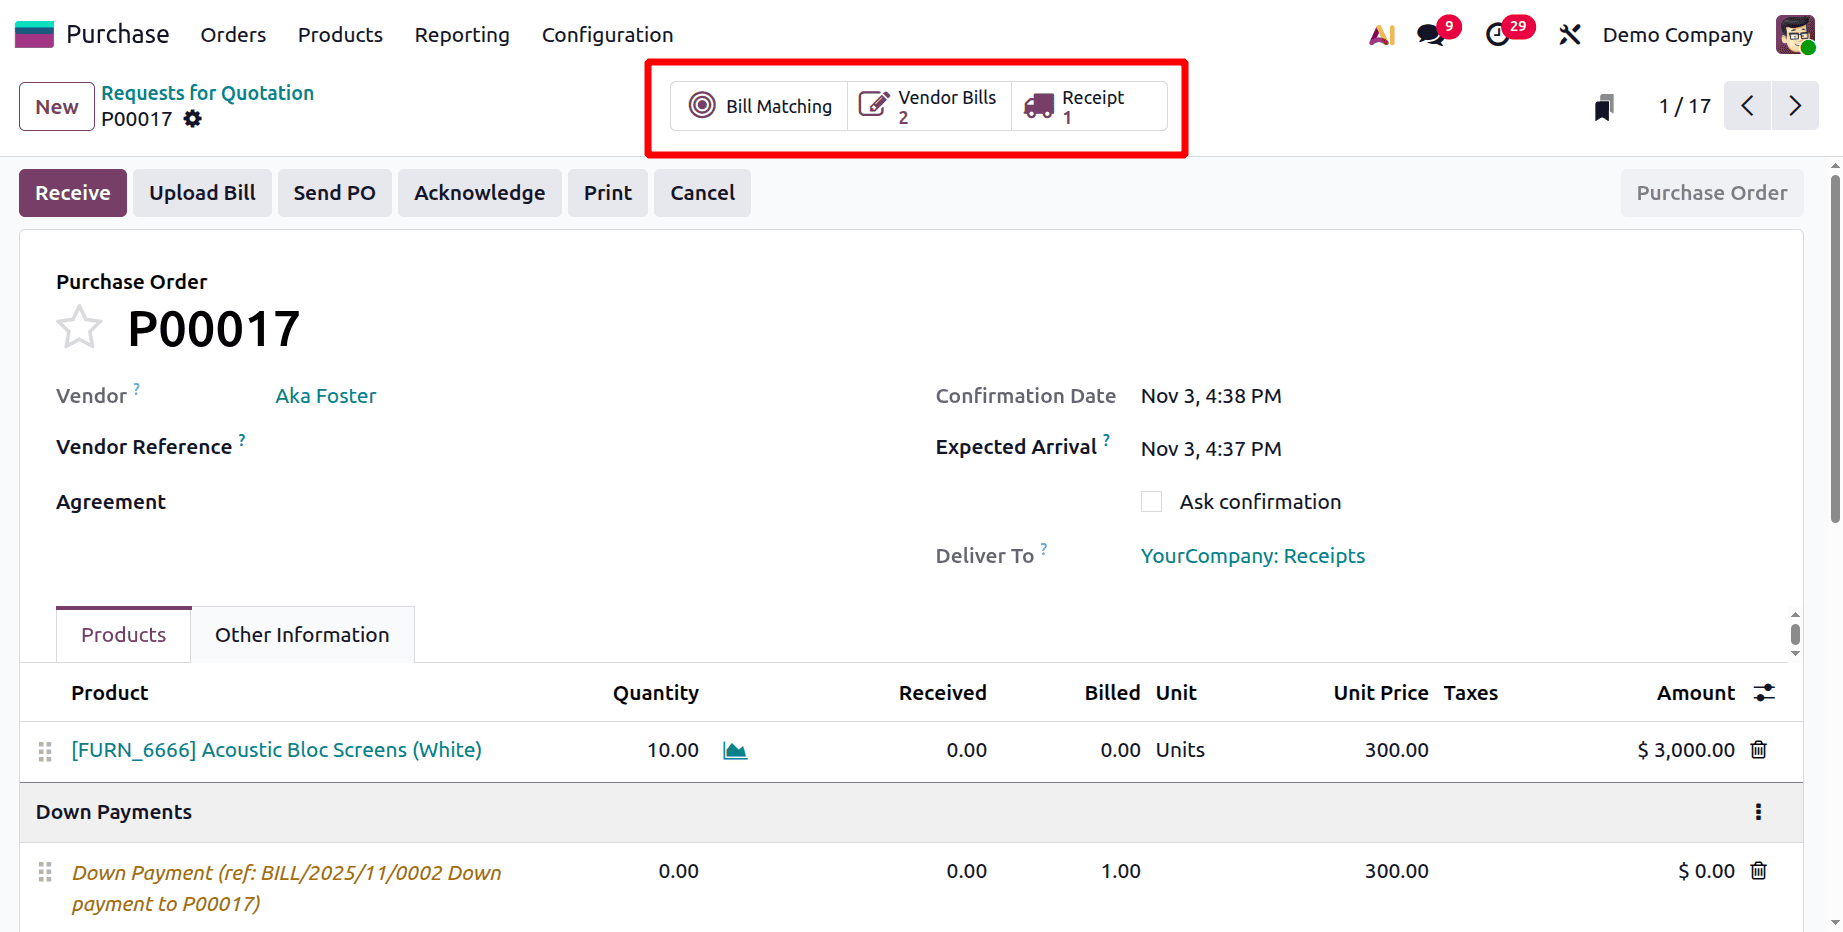
This corresponds to the Purchase Matching displayed on the vendor invoice. This implies that purchase orders and vendor bills can be matched from this location as well.
To obtain the merchandise, click the "Receive" button on the purchase order. Making the bill for the remaining amount is the next step.
The selected purchase order will then open in that location. Go back to the purchase to verify the purchase order. Open the purchase order that was previously created.
Click on the Vendor Bill. which shows all the created bills. To add the final bill click on the New button. The bill was then settled. Let's examine the lines of the invoice.
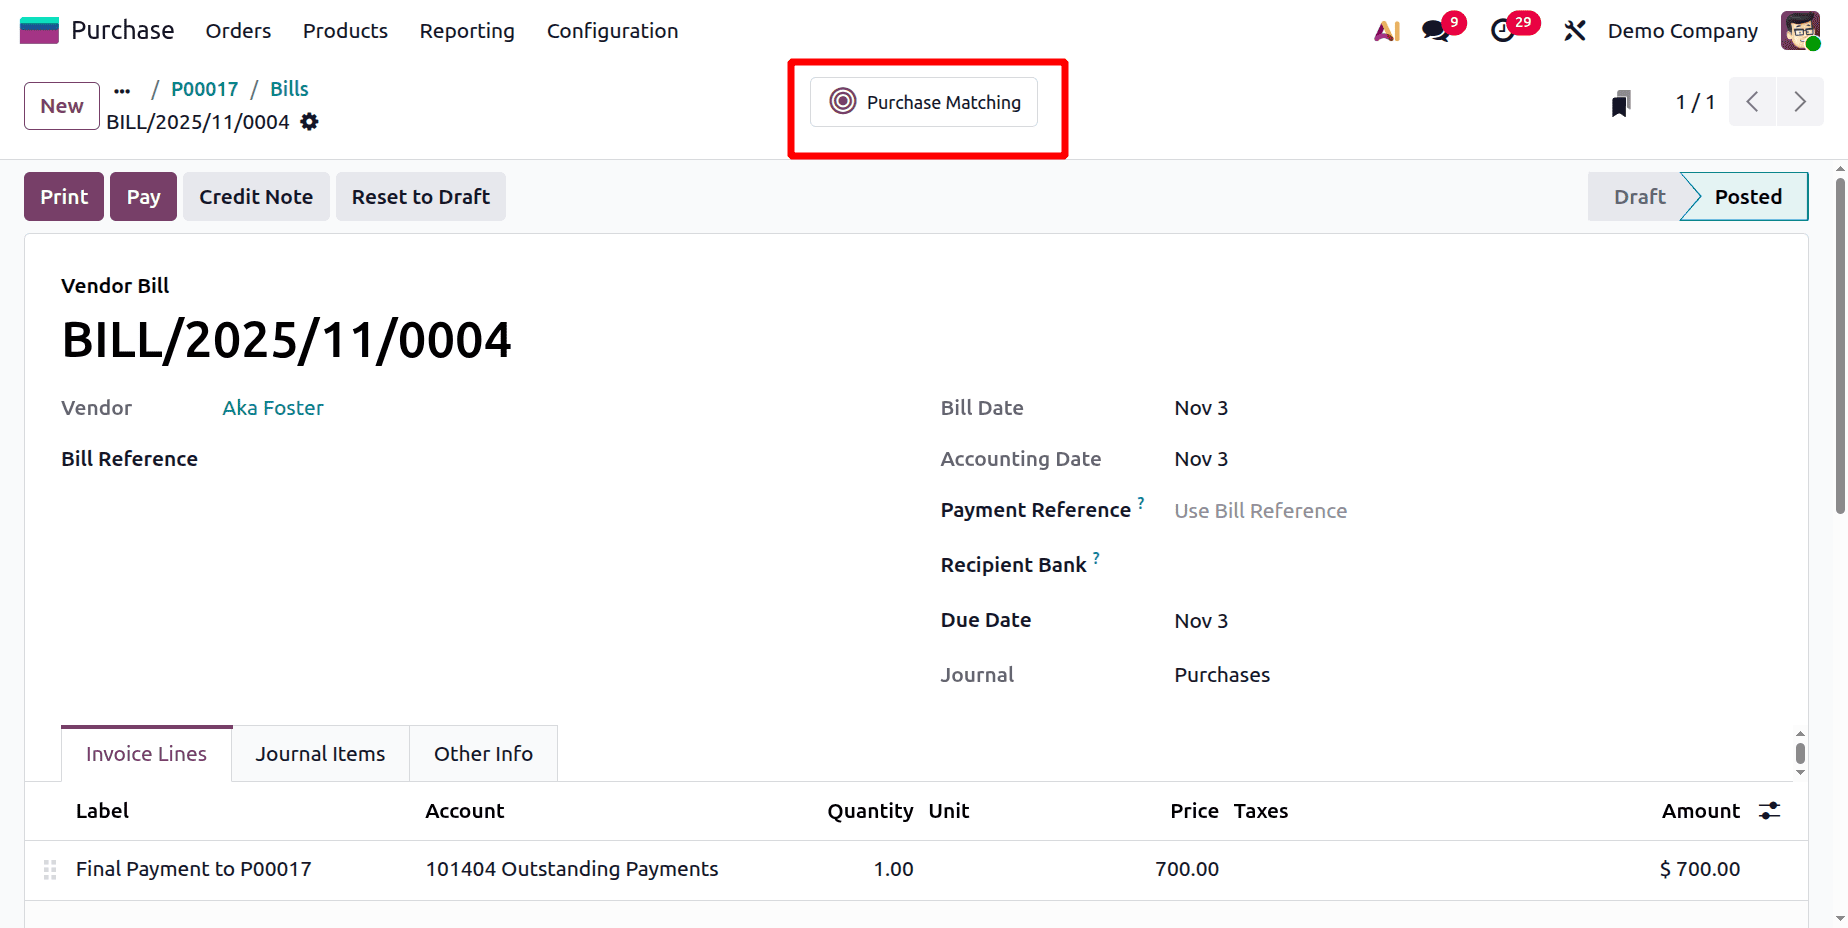
Here, add the final amount to the purchase. And confirm the bill. then click on the Payment Matching again.
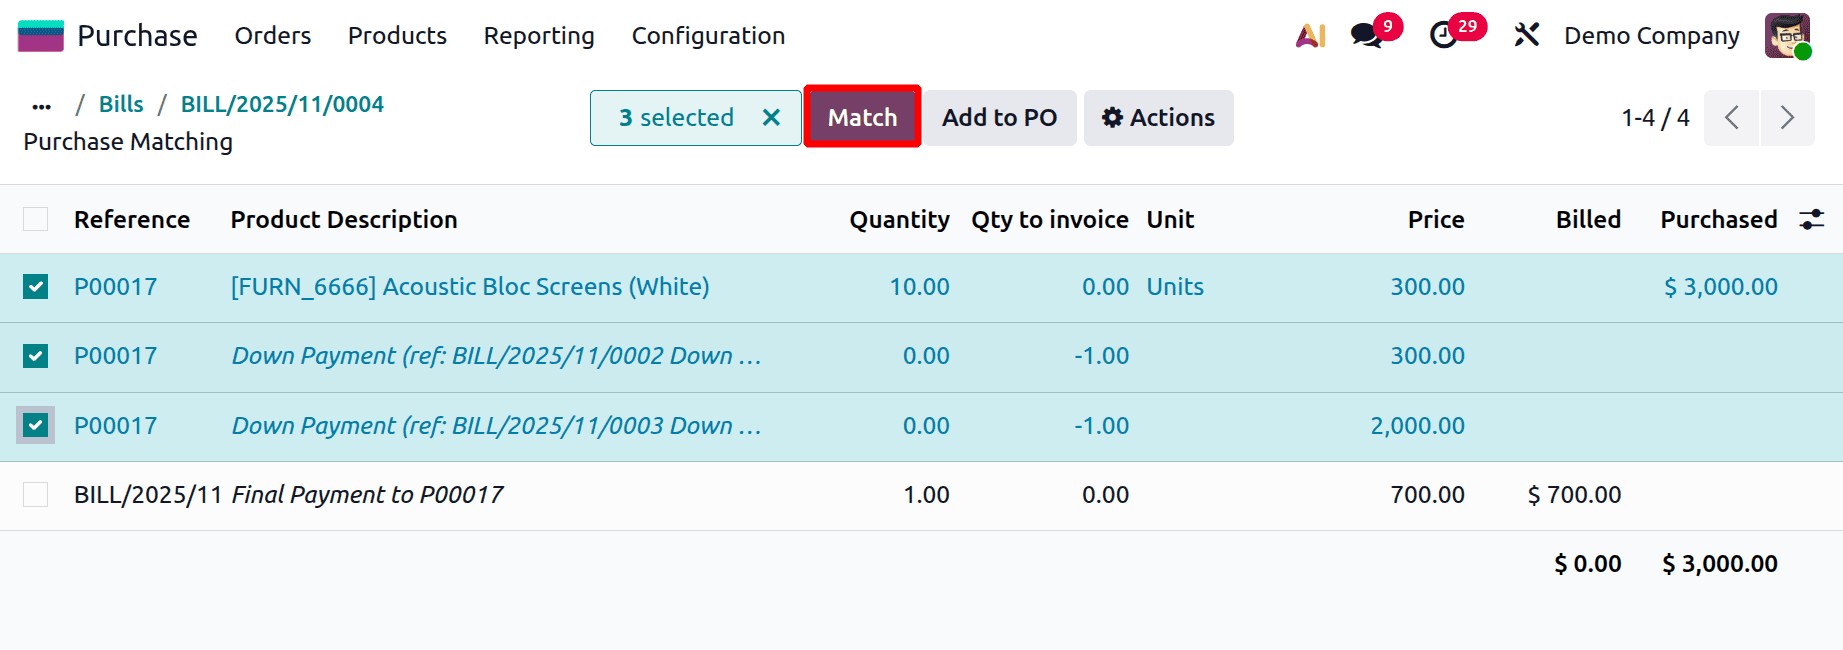
Choose the down payments and purchase orders, then click on the Match button.
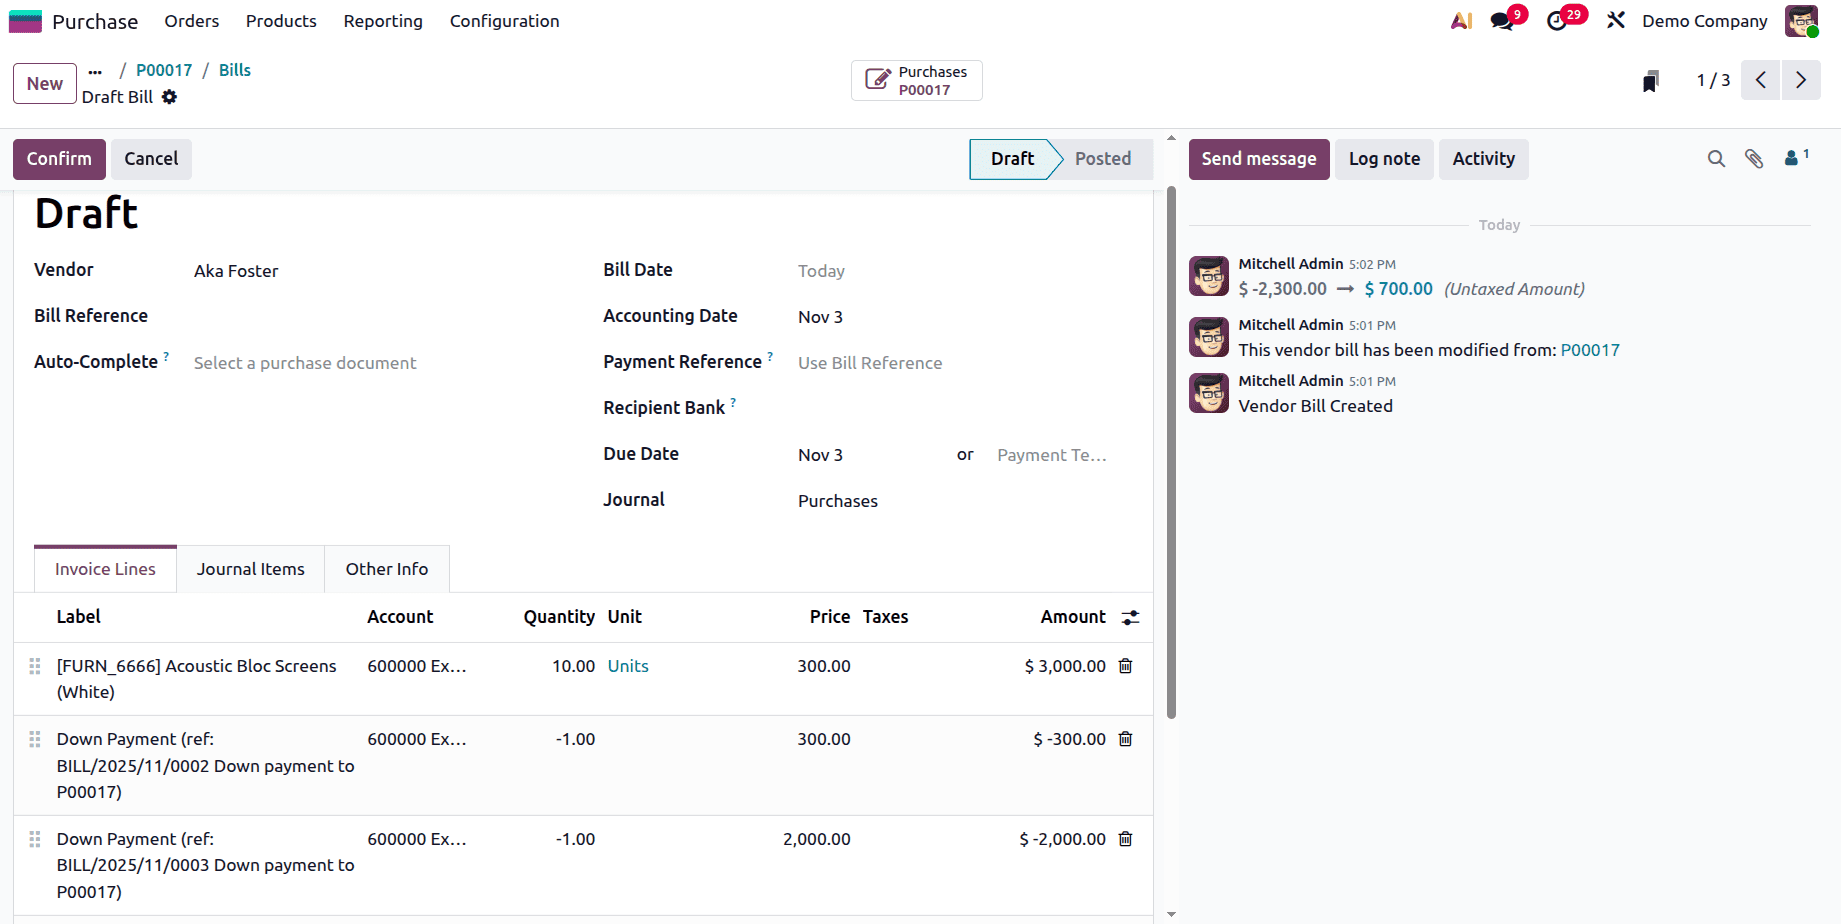
As shown, there will create a new vendor bill. Check the Invoice Line. Here, the cost of the items added to the purchase order is displayed. A negative symbol indicates the amount that has been added to the vendor bill.

In this case, the $2300is reduced by the amount on the vendor bill. Therefore, users need to pay just $700.
In conclusion, matching a vendor bill with a purchase is made incredibly simple with Odoo 19. It will increase financial precision, prevent irregularities, and foster trust in business operations.
To read more about How to Match Bill/Purchase Order in Odoo 18 Purchase, refer to our blog How to Match Bill/Purchase Order in Odoo 18 Purchase.