A vendor bill is a document that a supplier gives to a company that lists the products or services they have rendered and the total amount owed. Usually containing details such as item descriptions, quantities, pricing, and due dates, it functions as a formal request for payment. Until they are paid, vendor bills are tracked as accounts payable in accounting.
Vendor bills are important because they provide a formal record of a company's financial obligations to its suppliers. They make it easier to keep accurate track of spending and confirm that the agreed-upon items or services were delivered. Effective vendor bill management encourages on-time payments, which preserves positive supplier connections and may result in advantageous credit terms. By providing information on the company's spending habits, they also play a crucial part in financial planning and budgeting. Furthermore, effective accounting, auditing, and adherence to financial standards all depend on vendor bills.
There are some changes in Odoo 19, because there is no Create Bill option from the purchase. Let's check how bills add up for a purchase.
Upload Bill
Create a new RFQ. While creating a new RFQ add the details like vendor name, then add product, quantity, and price. Then confirm the purchase order.
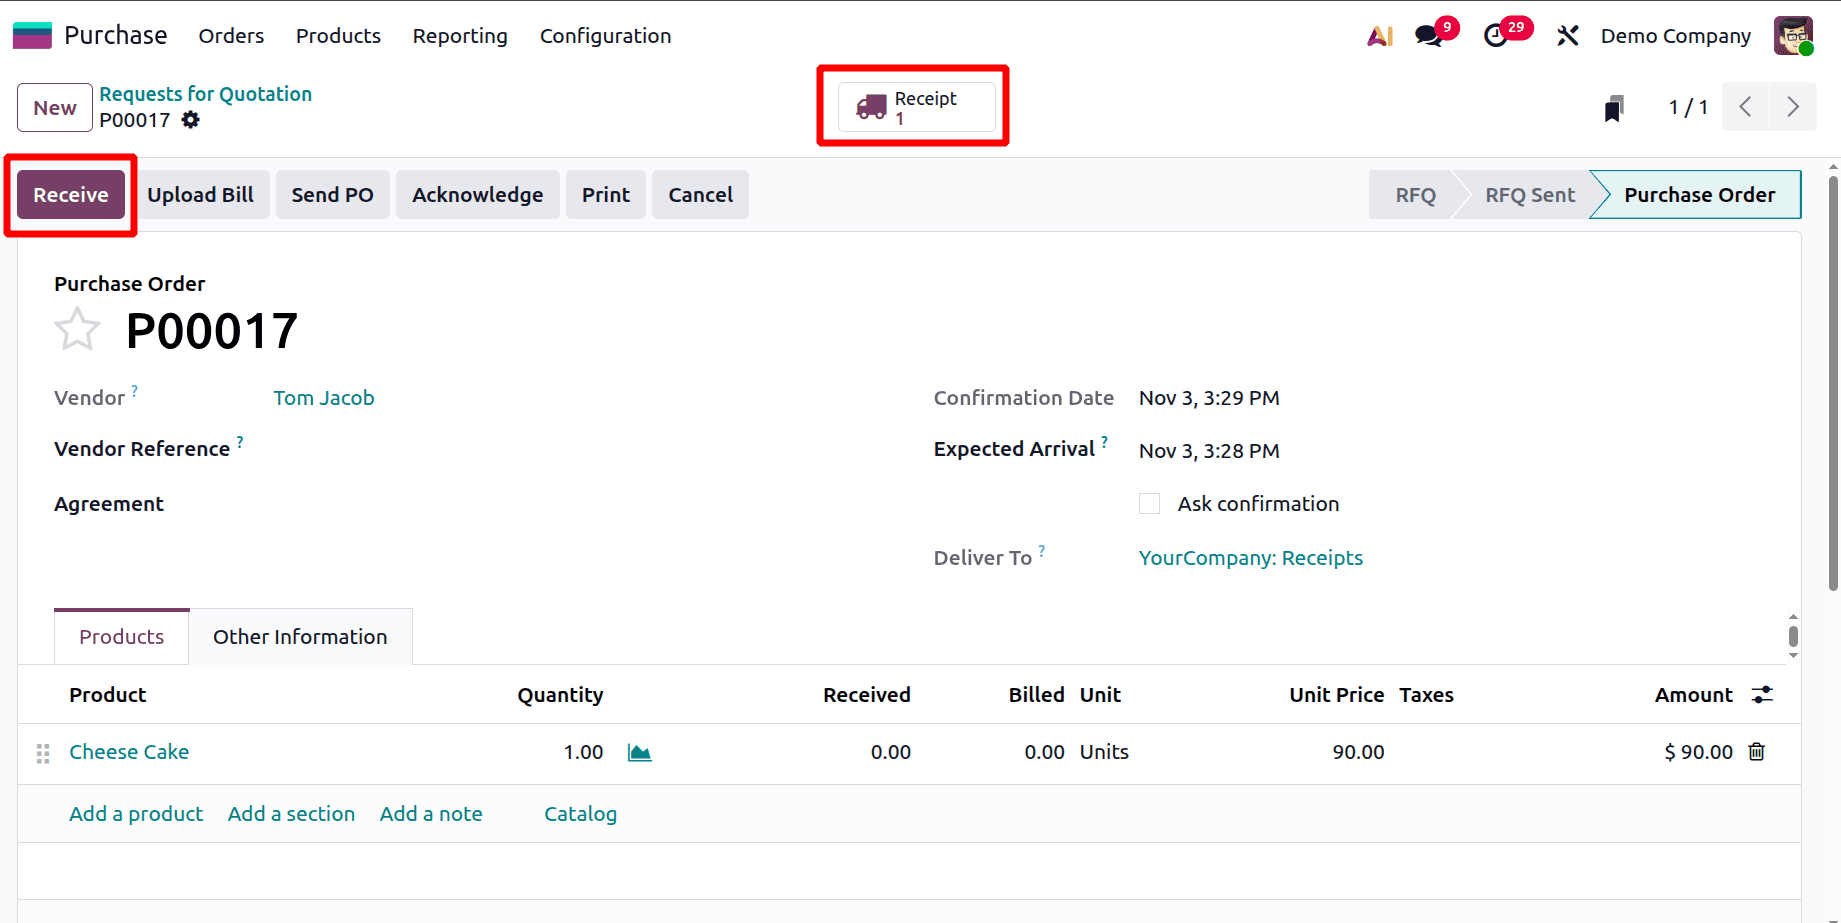
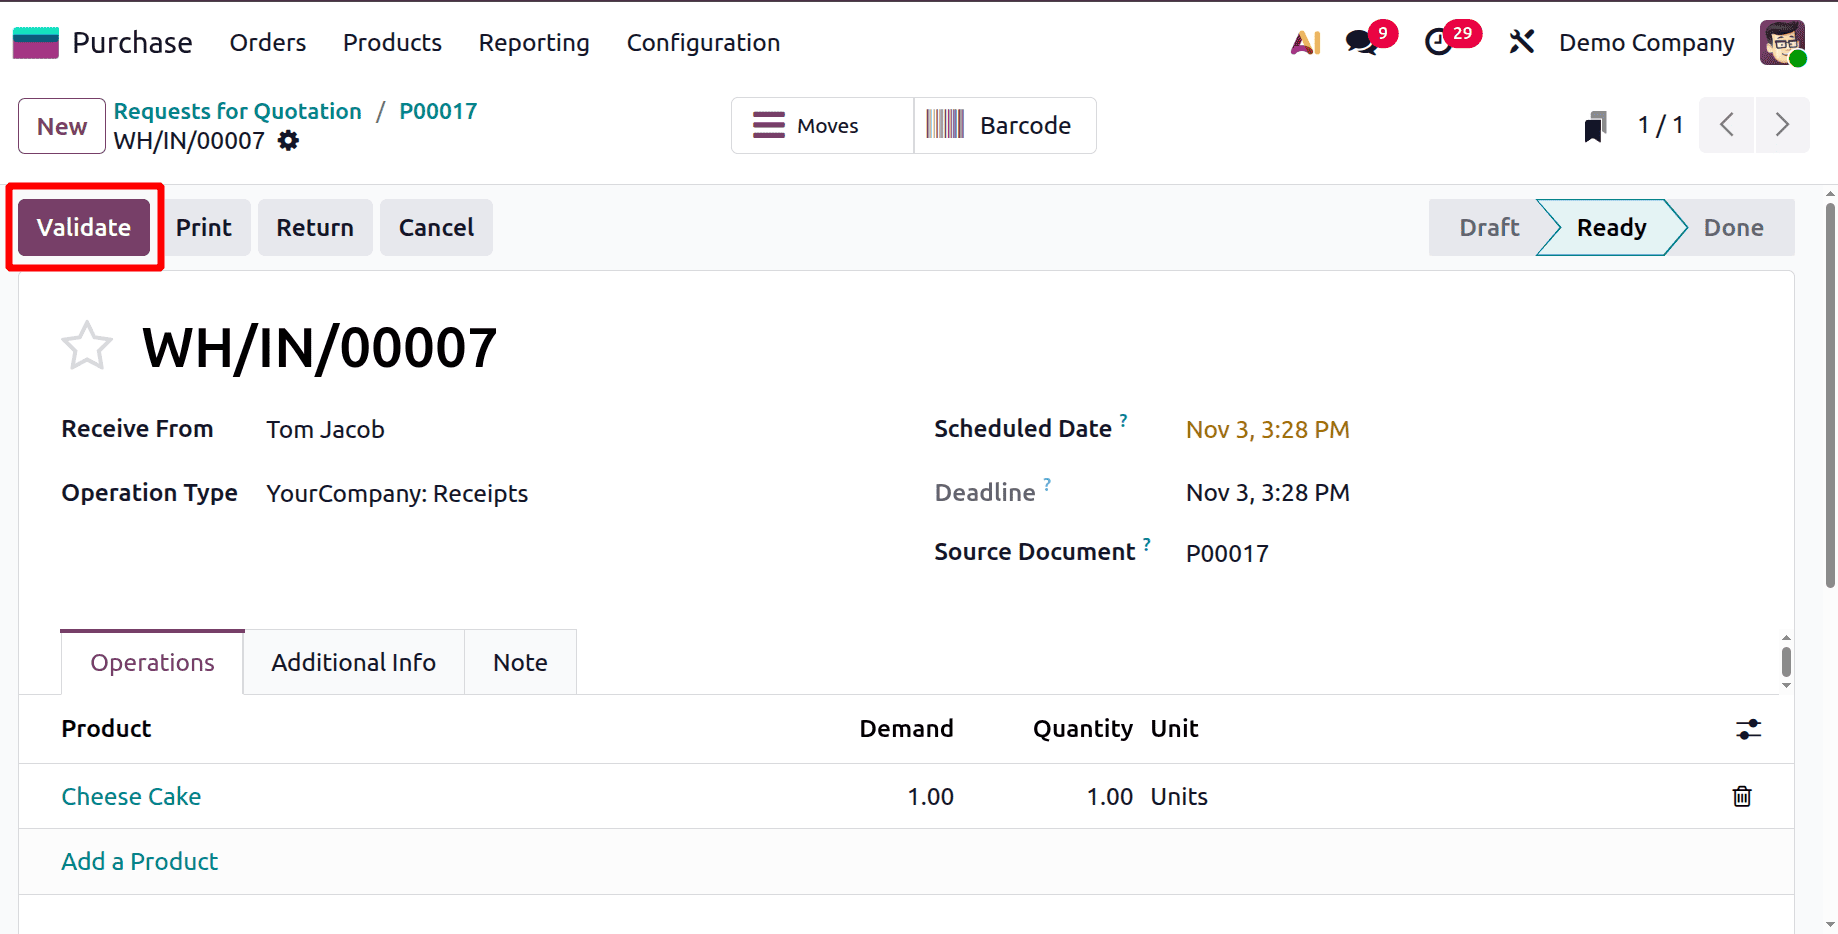
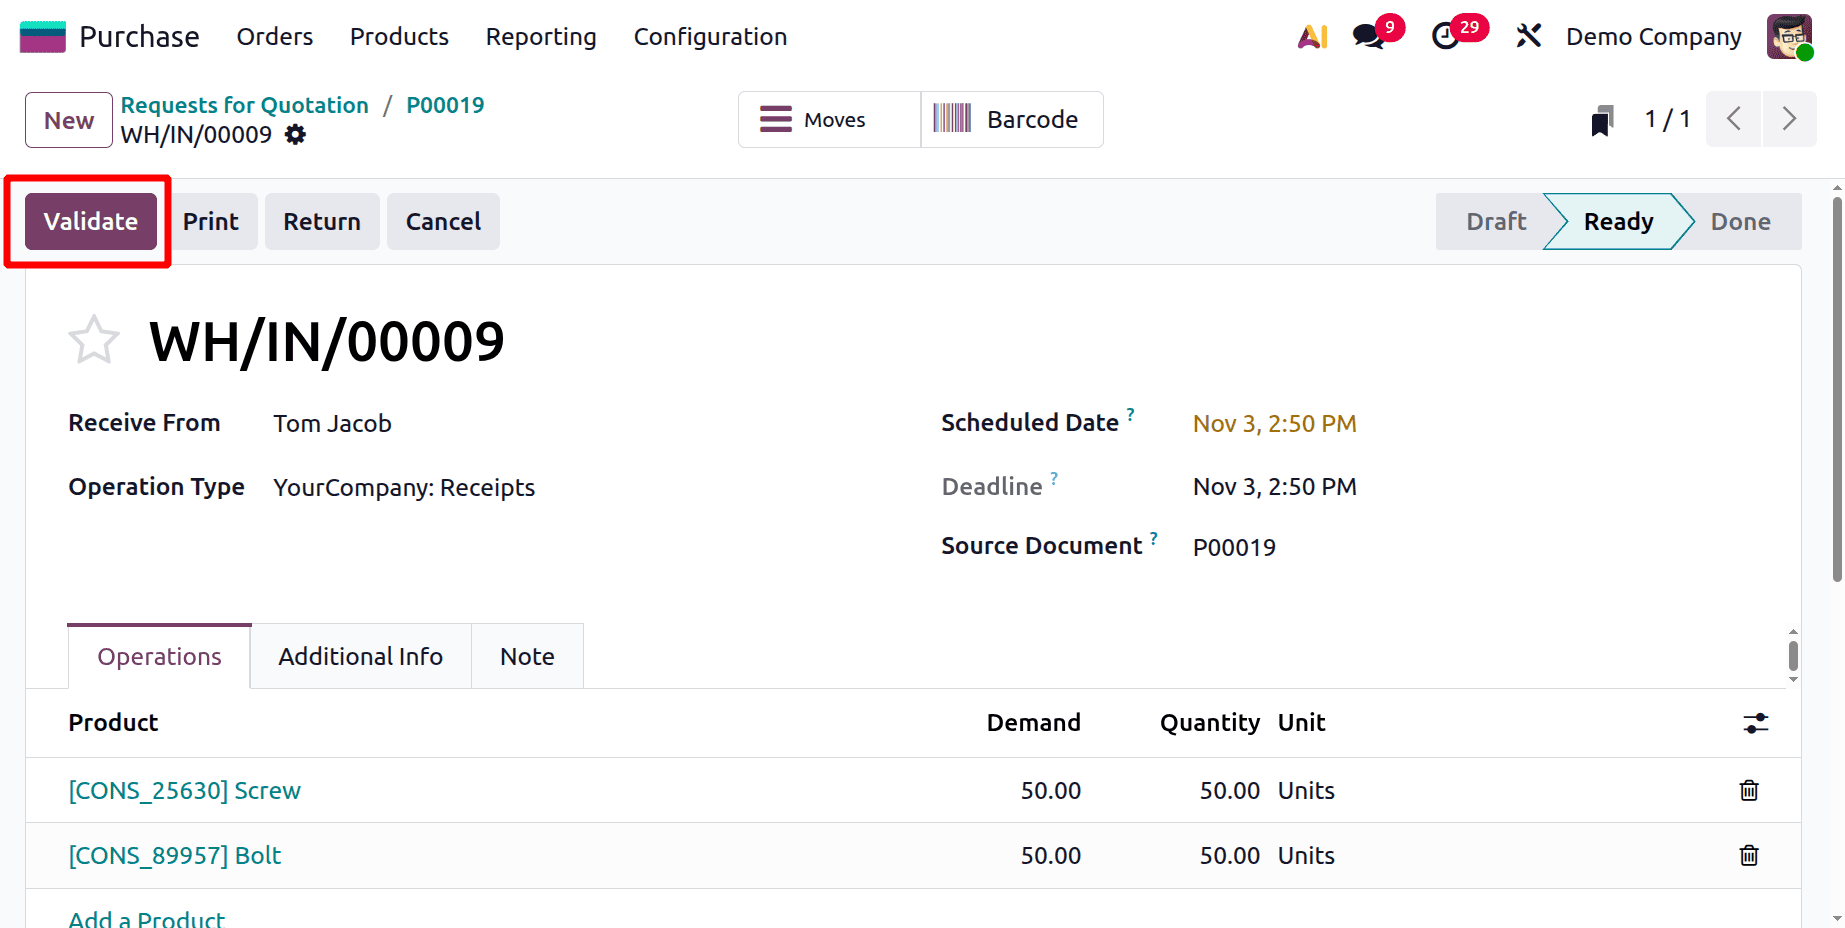
Then receive the Goods. For that, click on the Receive button, or open the smart tab Receipt. Then, validate the receipt transfer.
Then go back to the Purchase Order again. There is a button named Upload Bill. By using this button, the users can directly upload the bill to this purchase order.
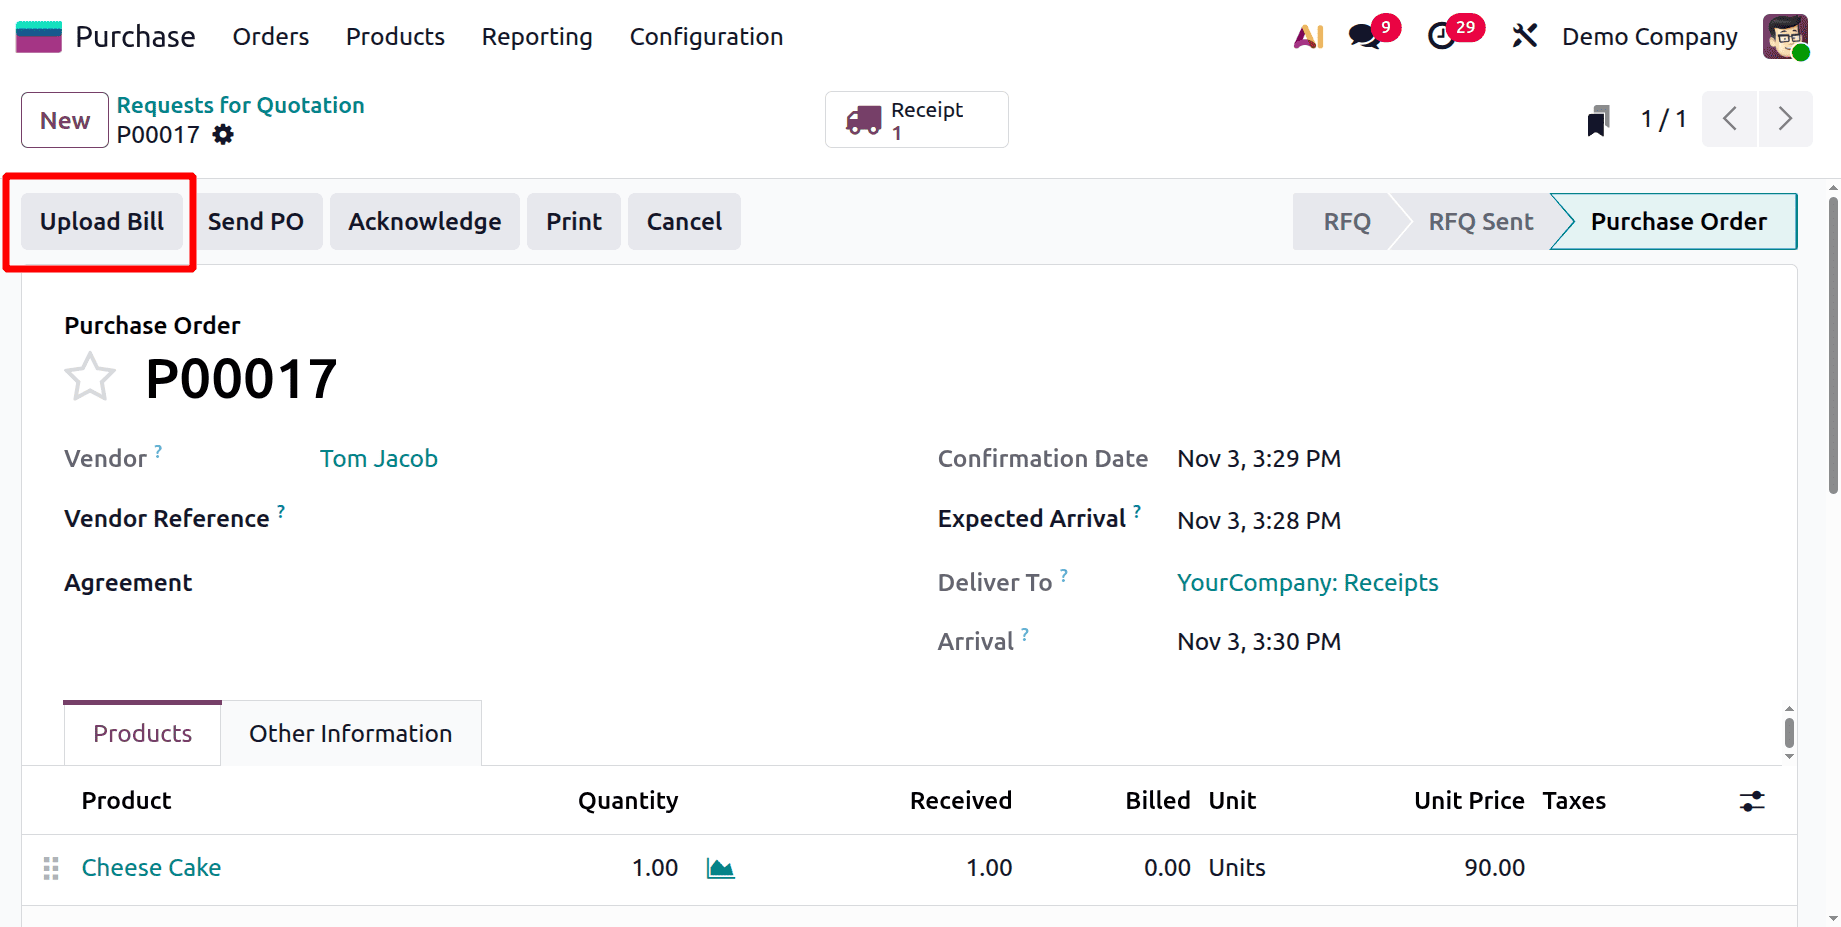
After uploading the bill, users can confirm the bill.

Purchase bill from Accounting
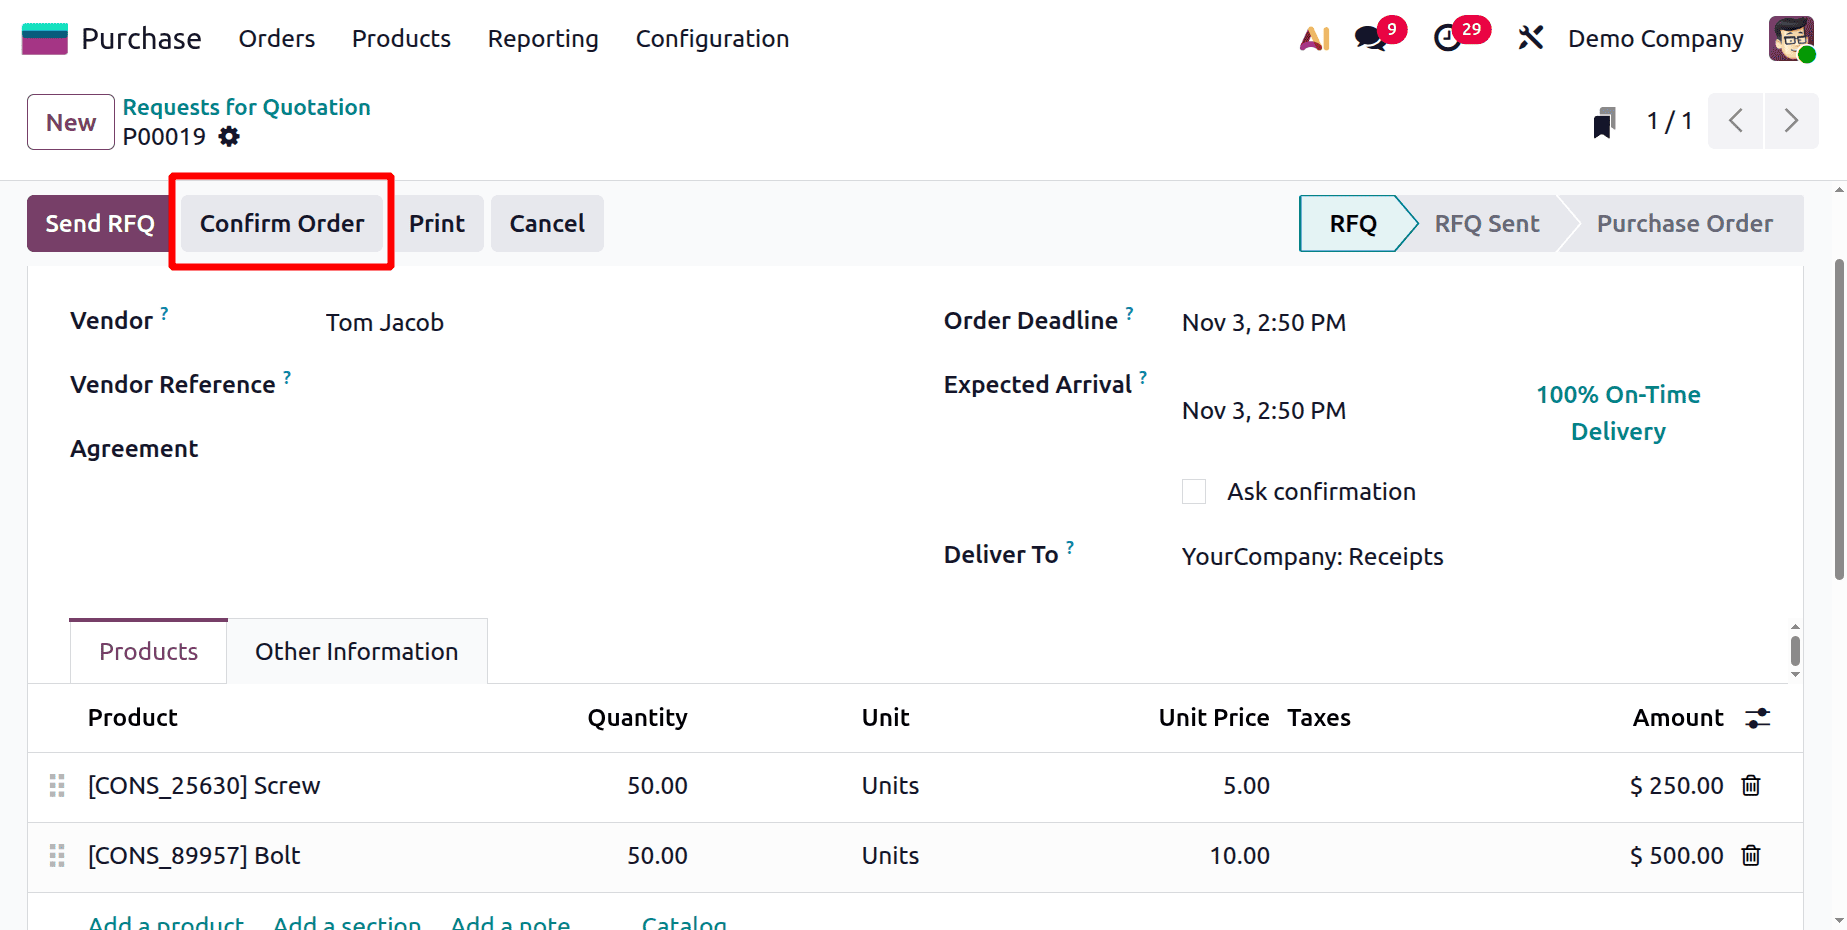
Then the next method is creating a purchase bill from accounting. Let's check how it works. For that, move to the purchase module, then click on the New button to add a new RFQ.
Add the vendor name first, then list the products with their quantities and unit prices. The first product is a bolt, which costs $10 a unit, and a screw, which costs $5. There is a confirmation button at the top of the screen. Thus, press the Confirm button.
Confirm the RFQ to get the product. Click on the "Receive" button, and the Receipt will open as shown below. To transfer the product to company stock, click the Validate button.
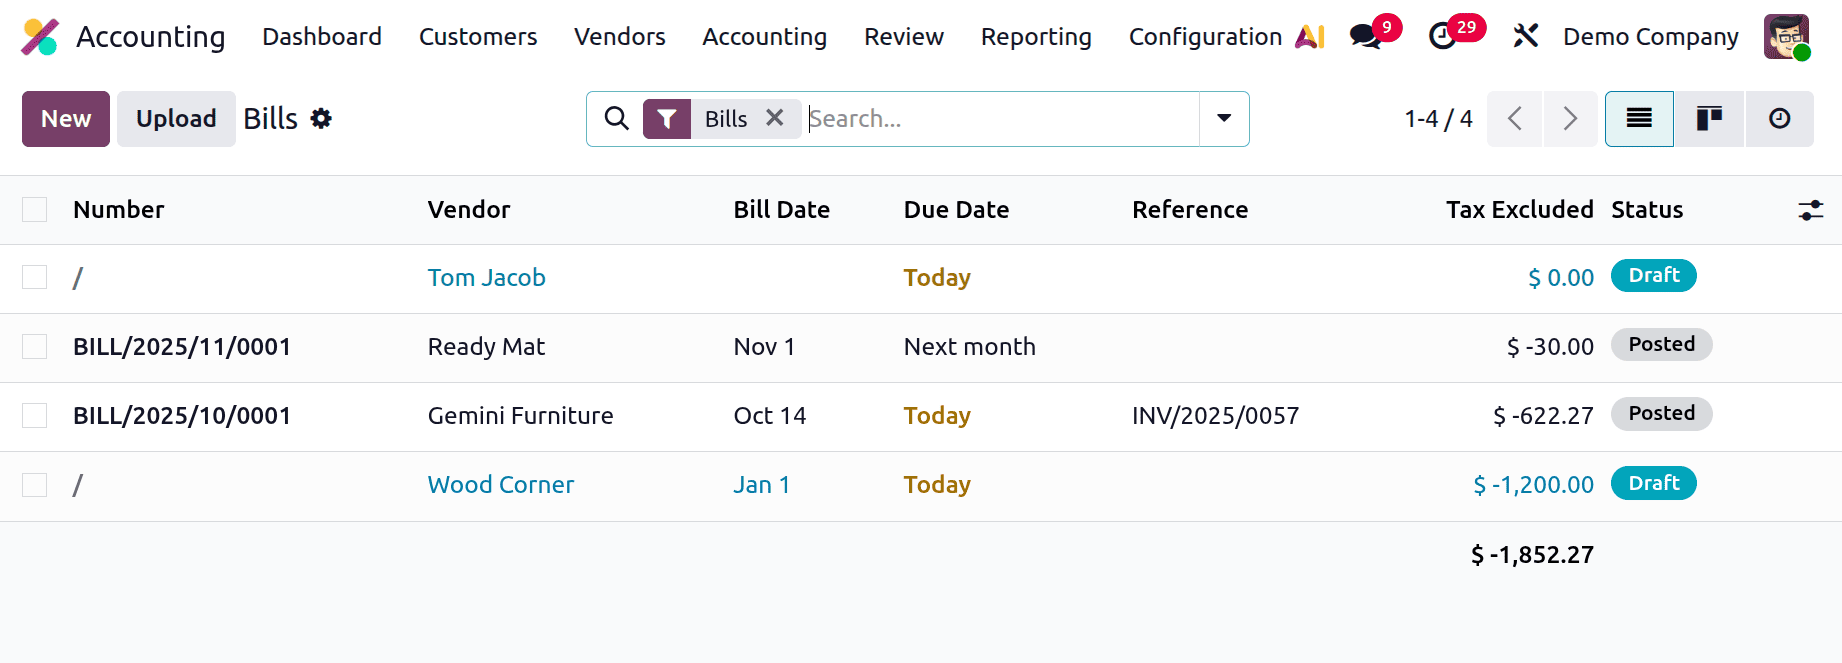
Then move to the Accounting module to add Bill. For adding a new bill, choose bill from the Vendor menu.
To add a new bill, click the New button.
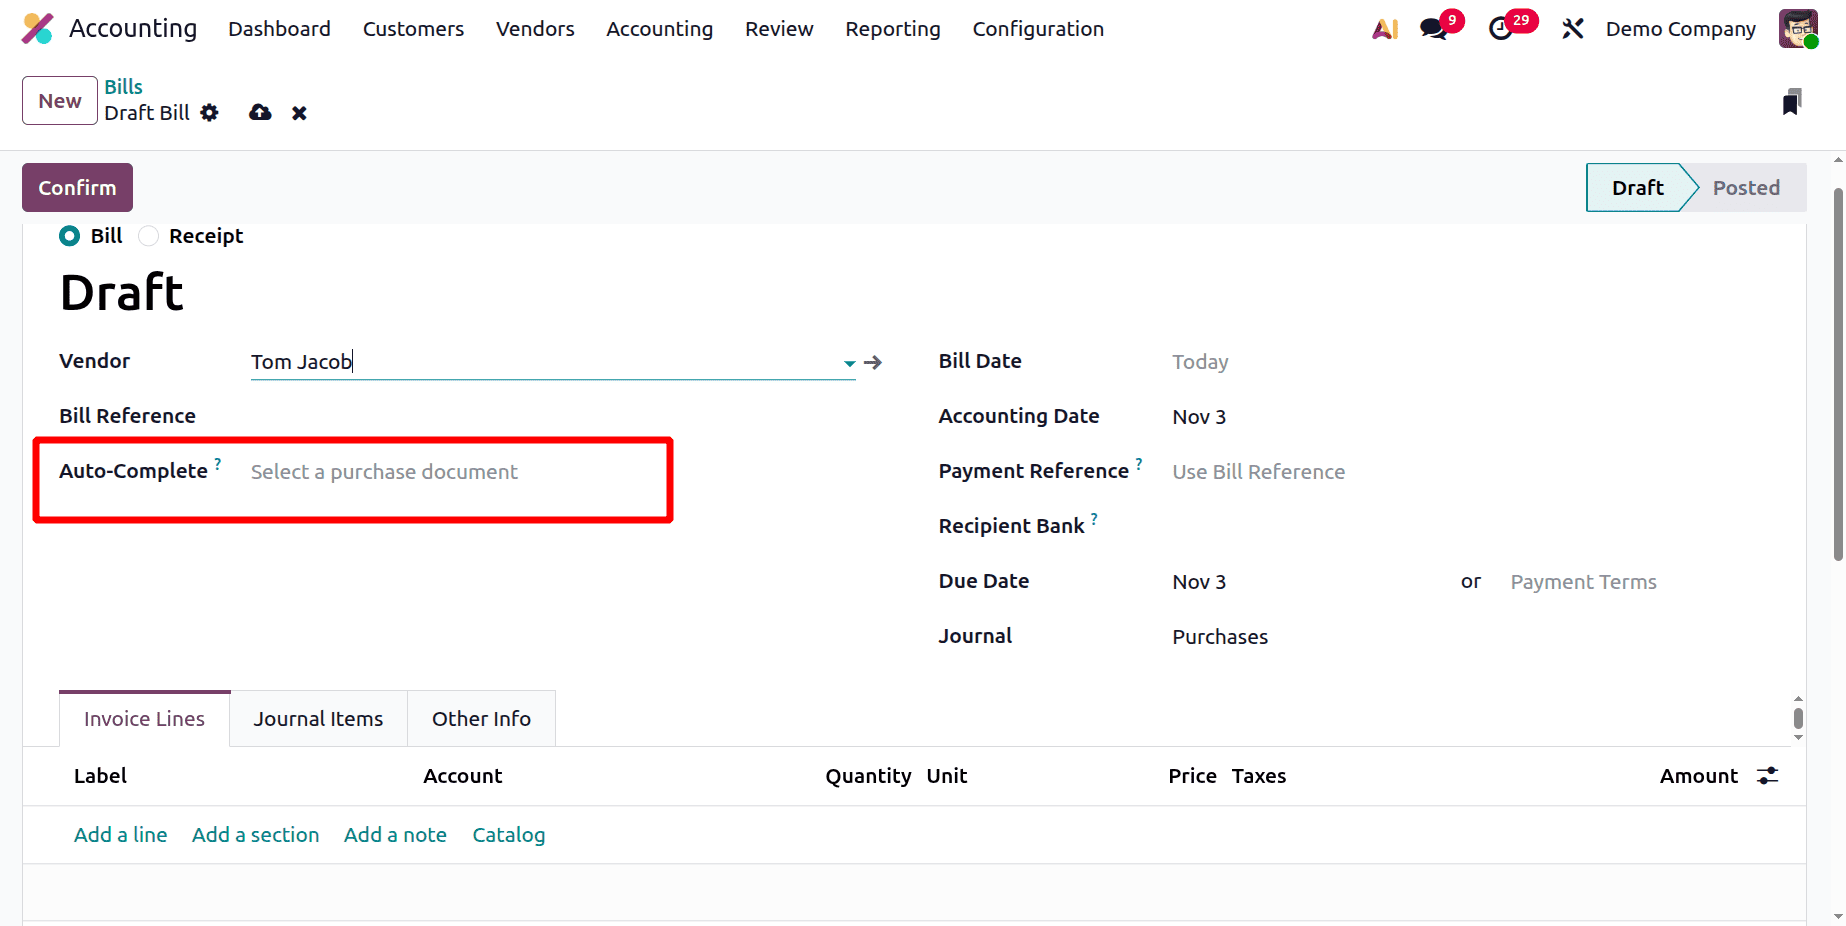
Click on the New button. Add the vendor first. There is an Auto-Complete field. Choose the purchase order to auto complete the Invoice line.
So either choose the purchase order there or manually update the Invoice Lines.
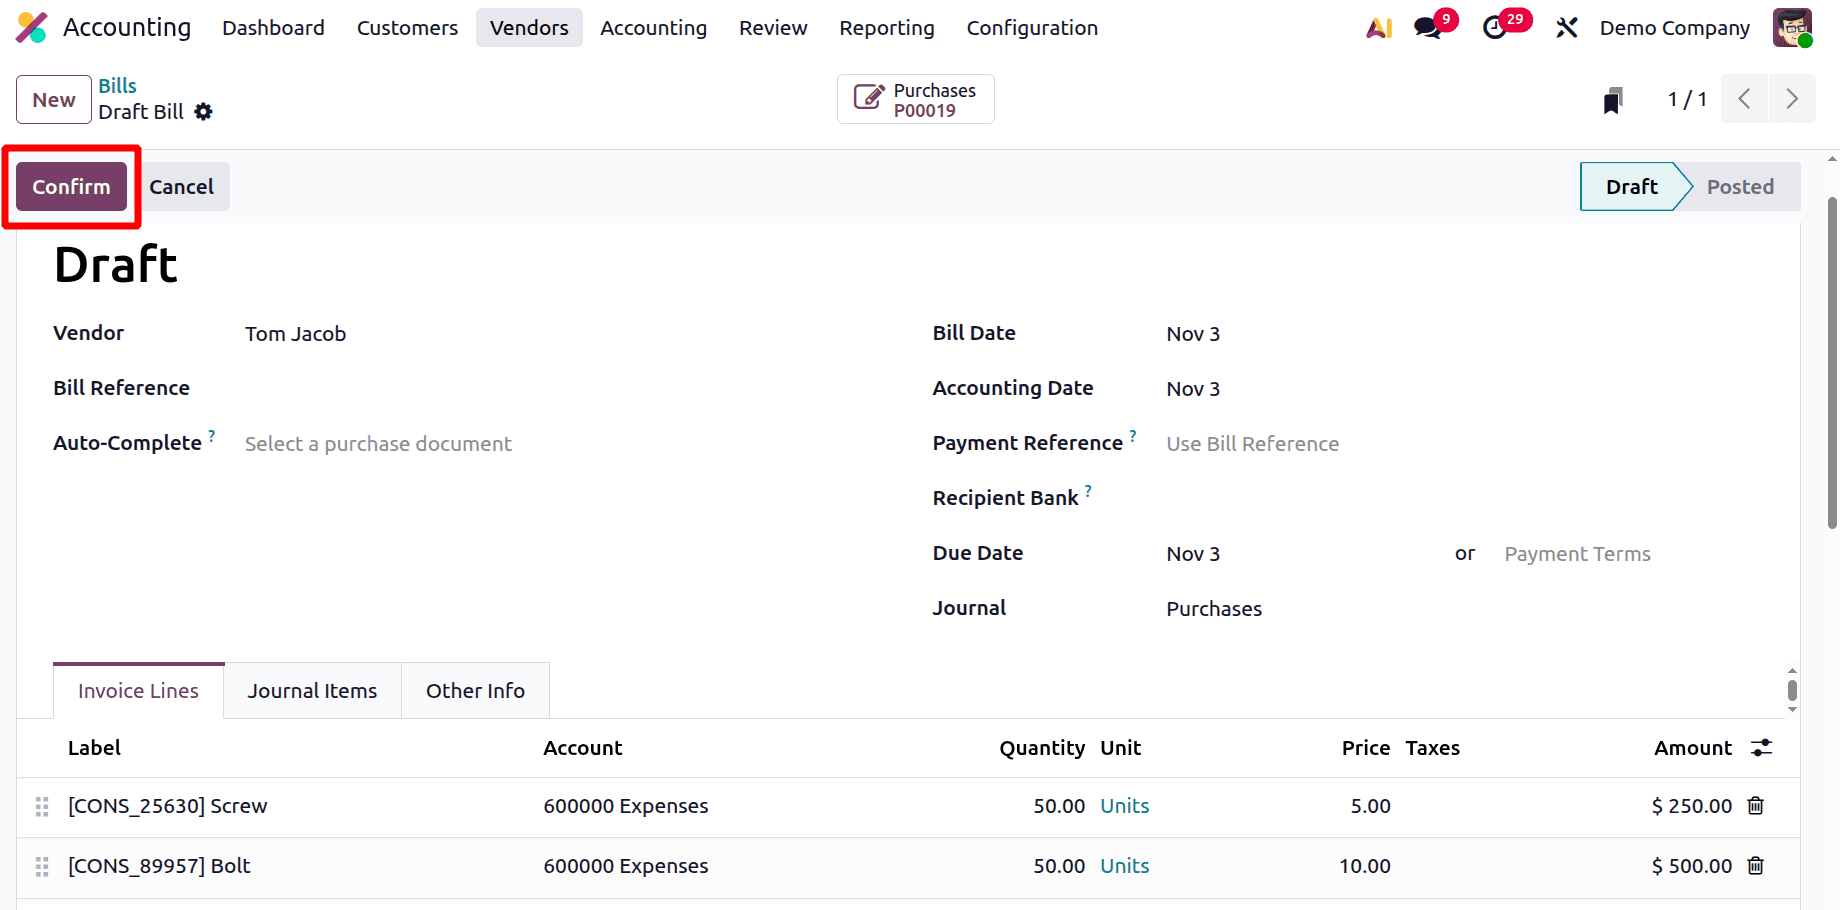
Check that the products updated inside the Invoice line are correct. Then click on the Confirm button.
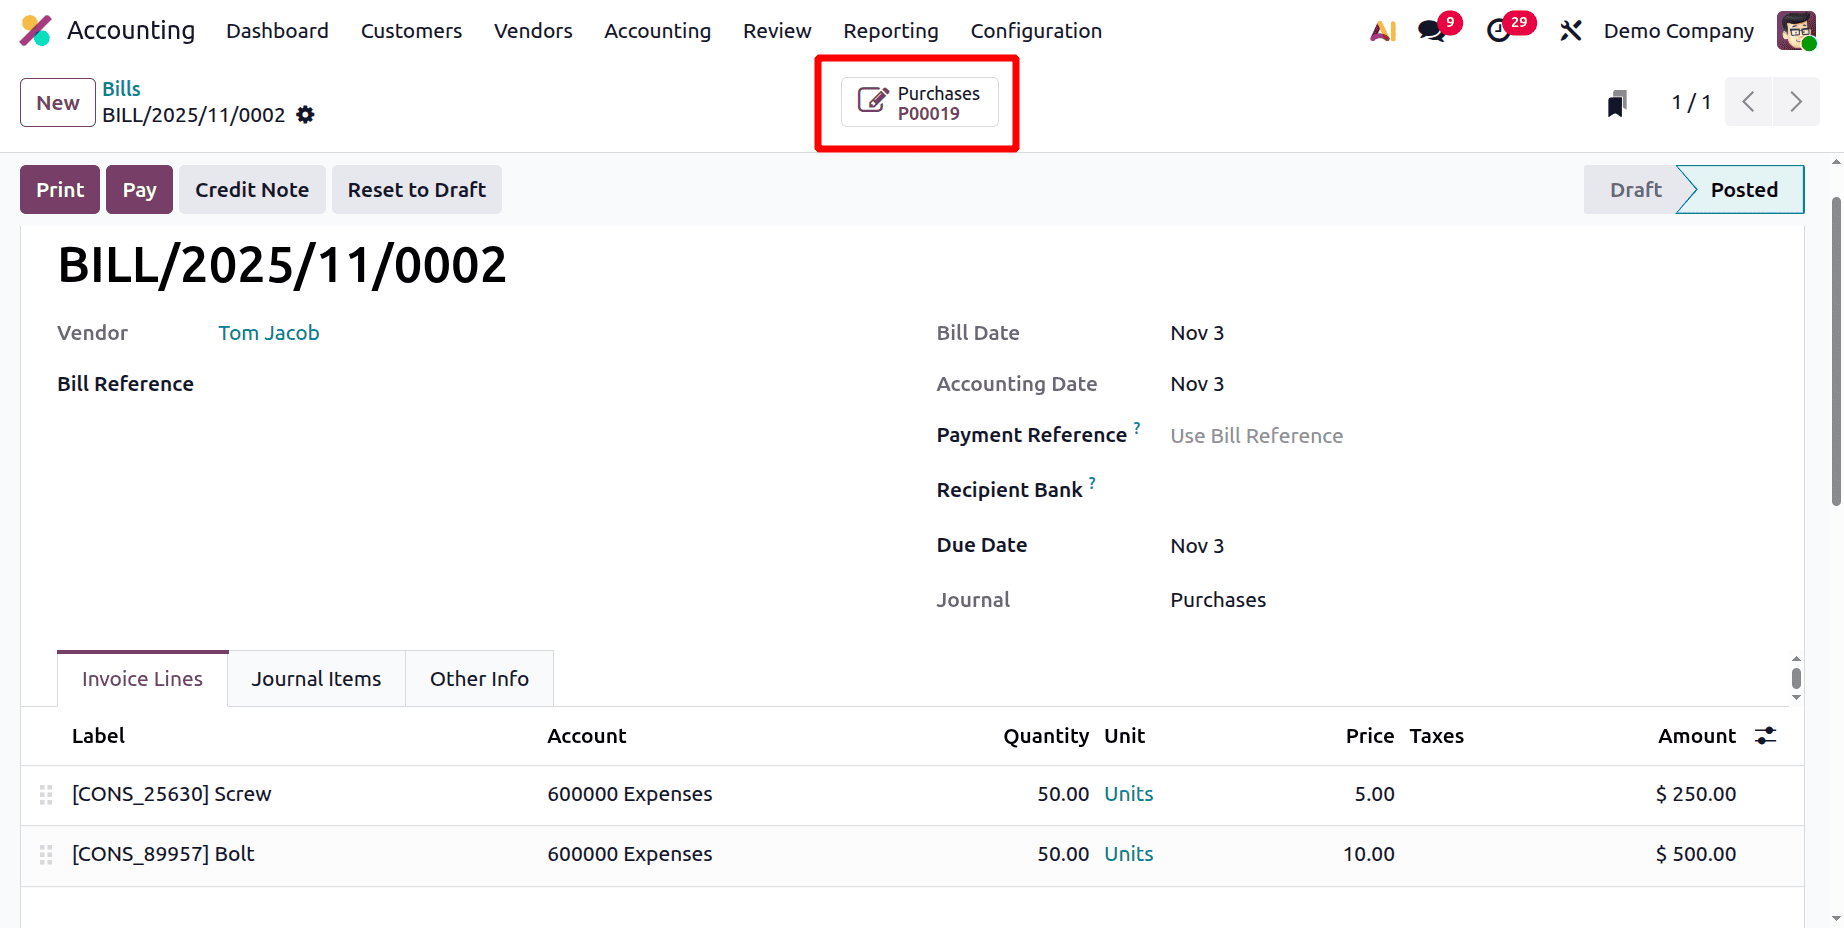
After confirming the Bill, there shows a smart tab named "Purchase," and the purchase is the same as what we previously created.
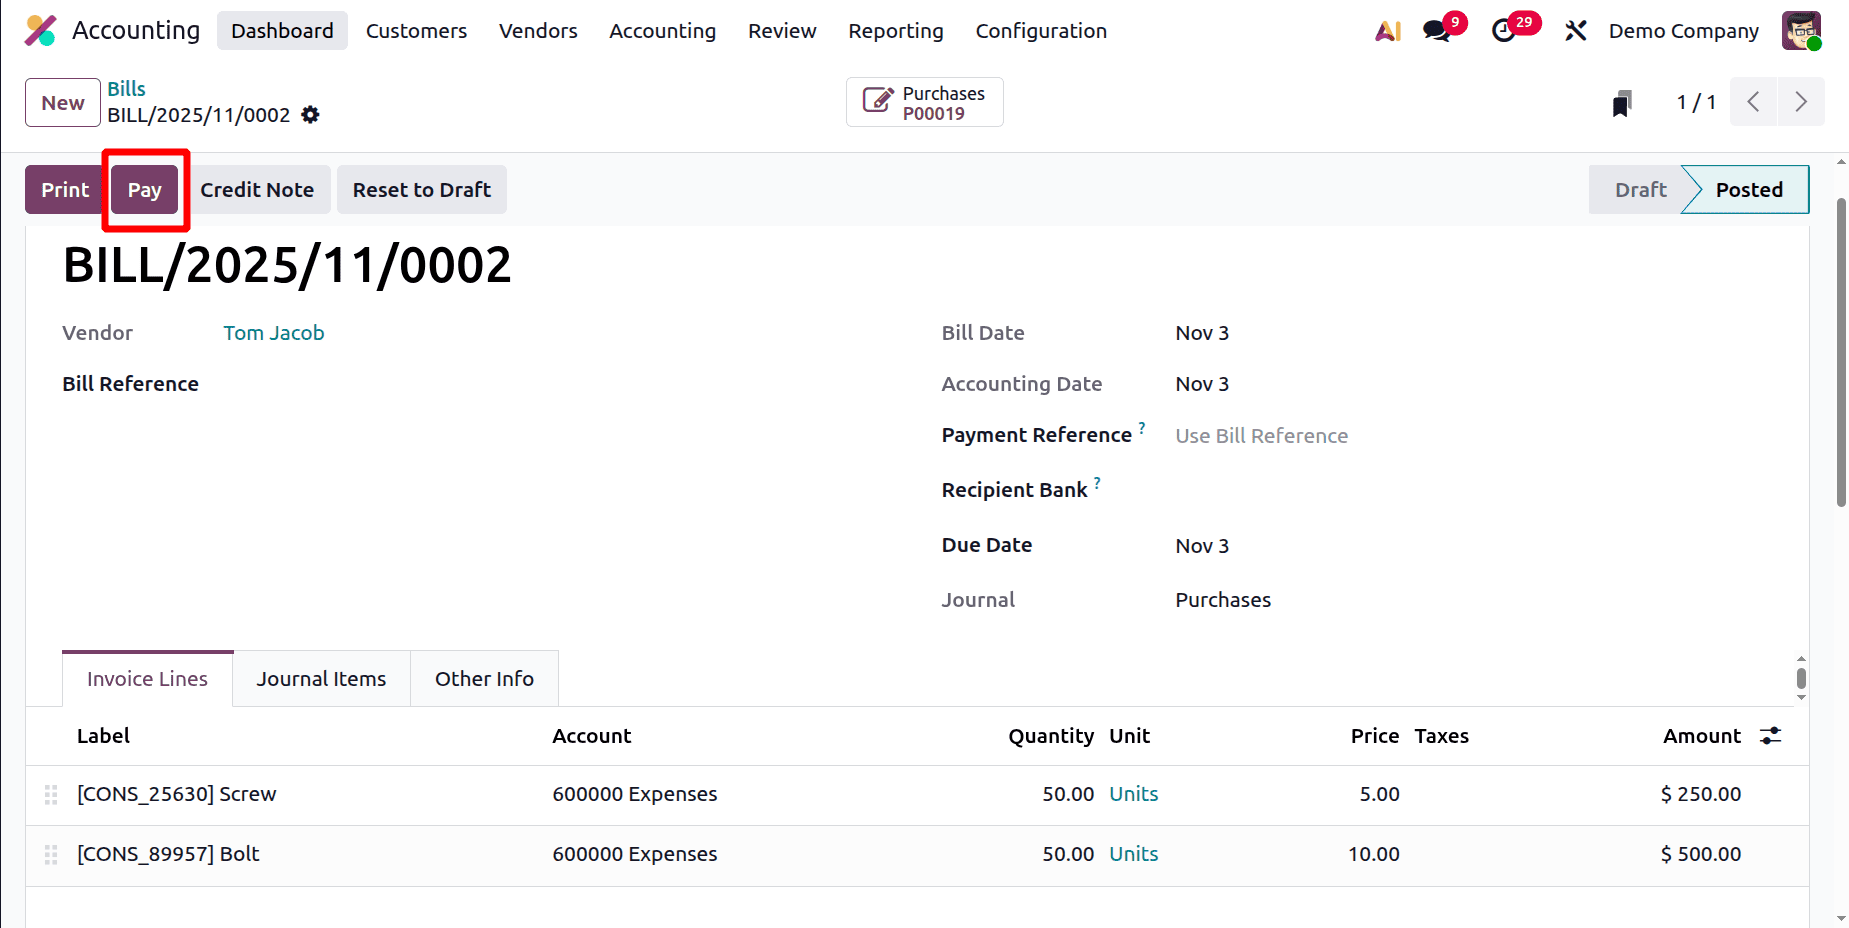
Before moving to that, let's complete the payment first. Click on the Pay button to add the payment.
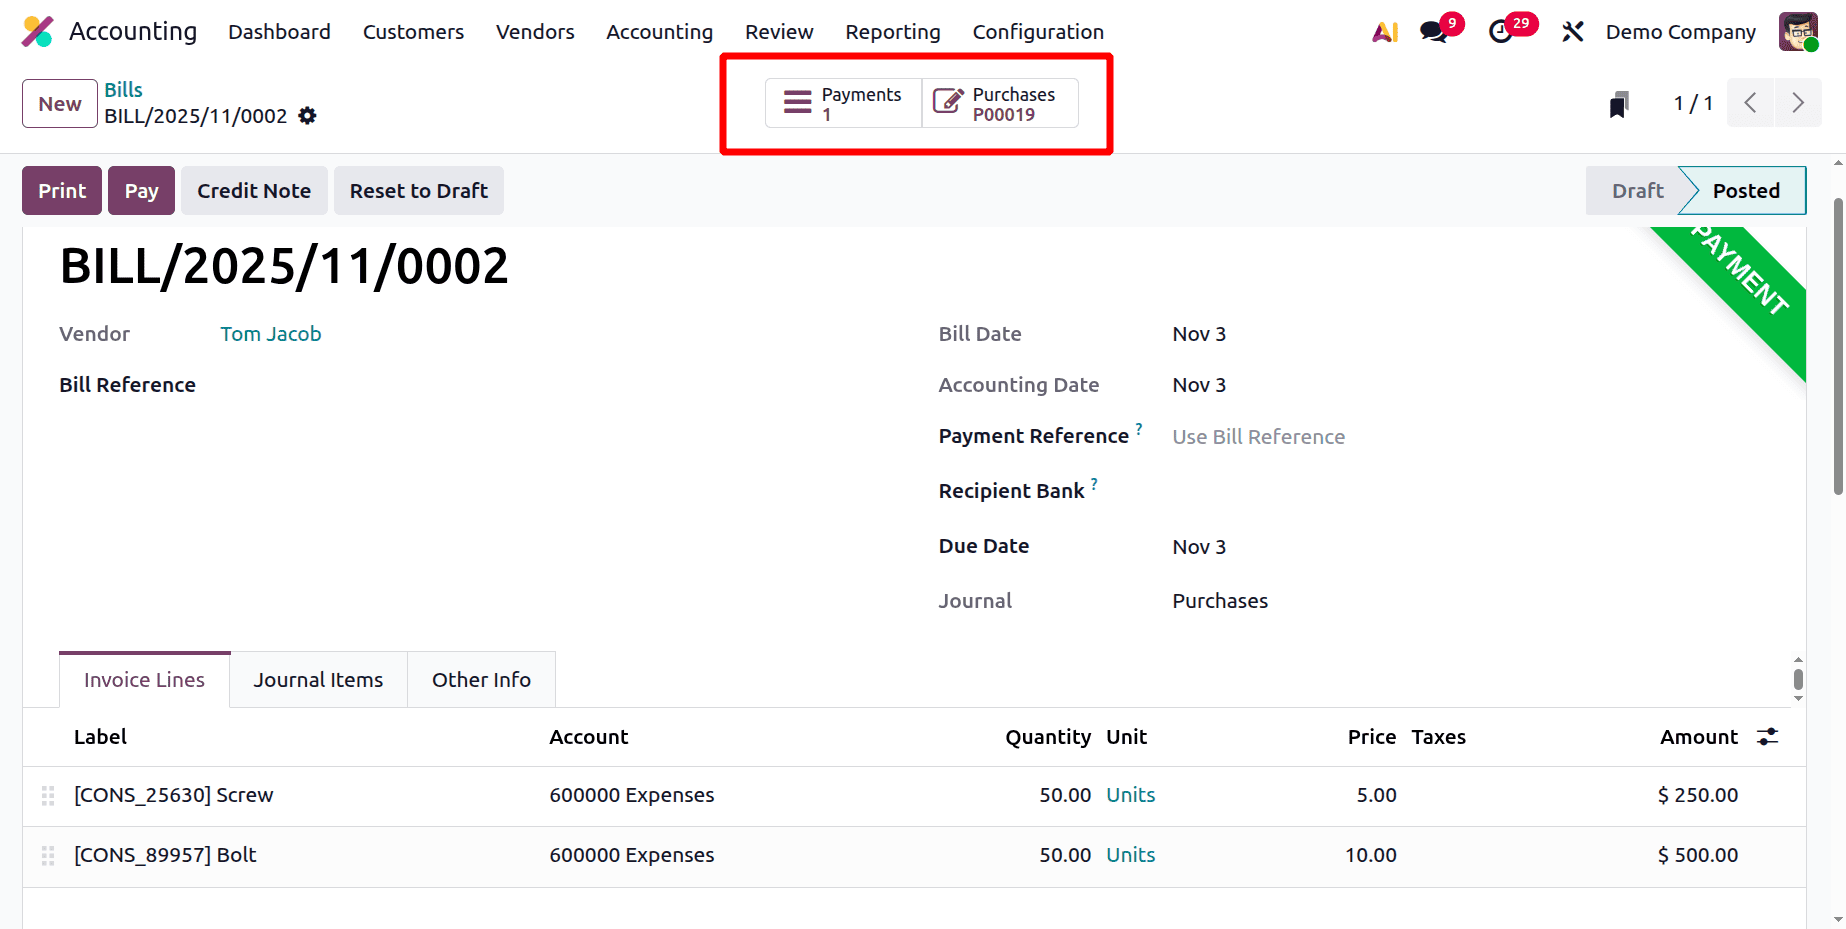
After completing the payment, a smart tab named Payment will additionally be added to the bill. To check the payment details, click on the smart tab Payment.
Click on the purchases smart tab to check the purchase order. Which will lead to the previous purchase order as shown below.
Here the purchase order is opened. Check the smart tabs, one is Vendor Bill and the second one is Receipt.
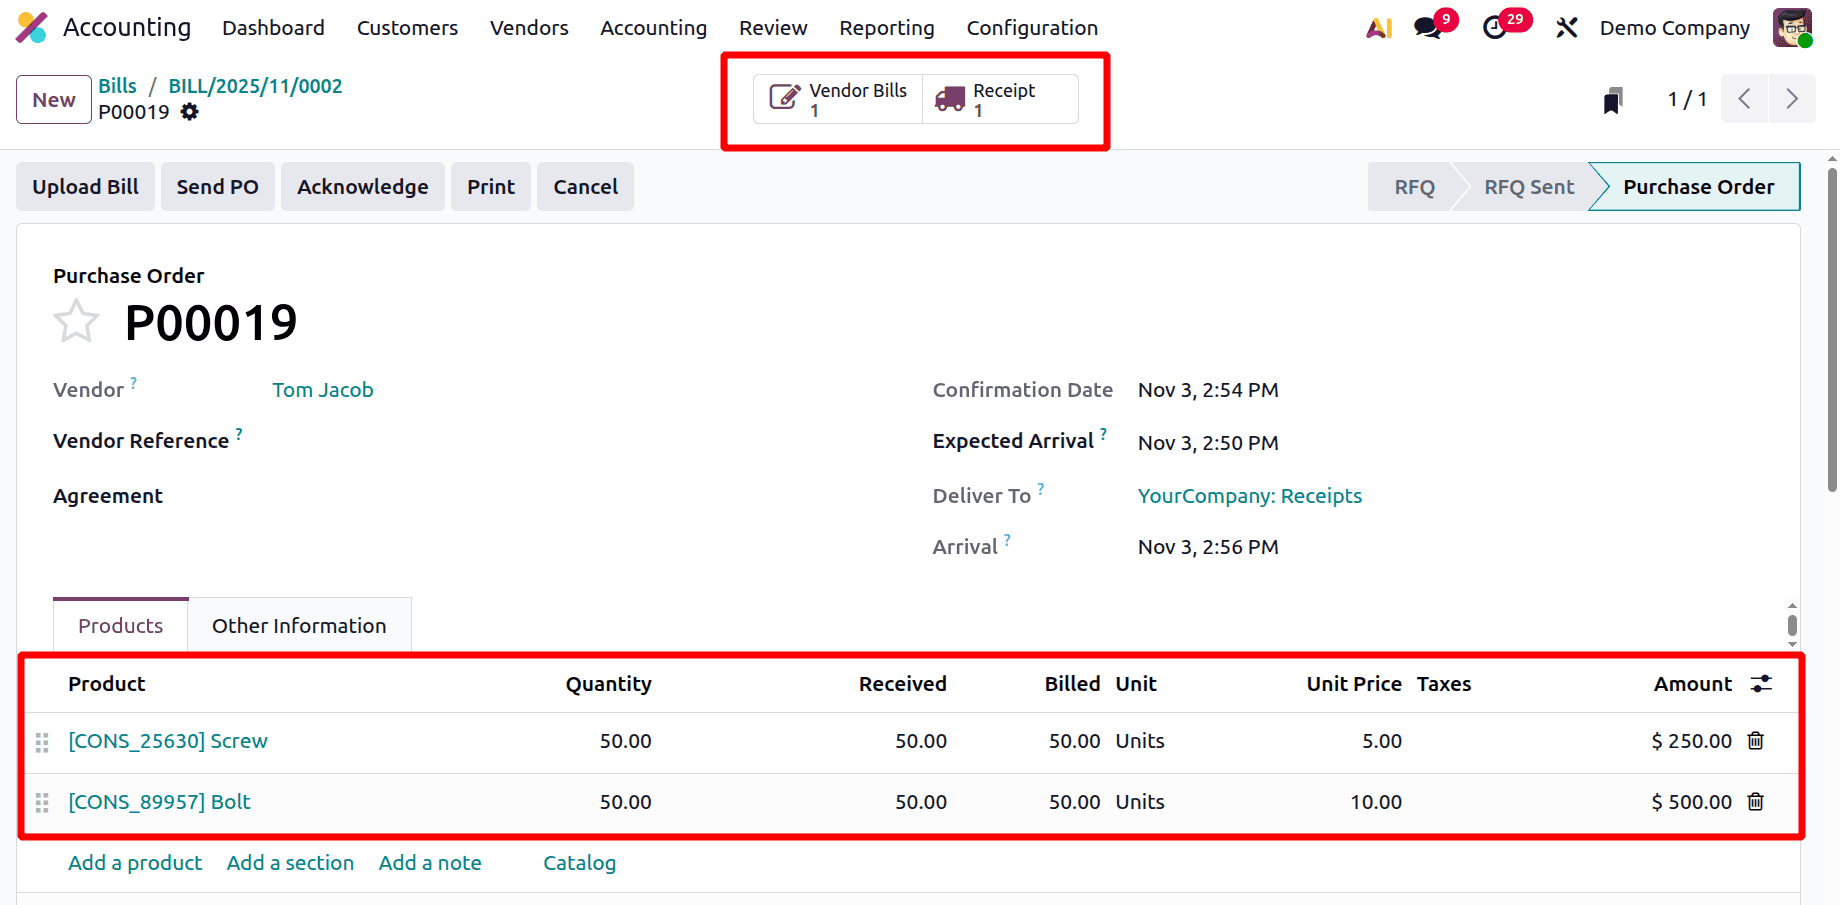
Look at the Products tab. According to the products tab, the first product is screw, and 50 units have been ordered, 50 have been received, and 50 have been billed. The second item is bolts, for which the amounts that were ordered, received, and billed are identical.
Simply said, the billing procedure is finished.
To know more about Bill matching check the below link :
https://docs.google.com/document/d/1SKCRrzNavlQiaKyMOCmivOeNaqIkQXv-4d3lJy-a79g/edit?usp=sharing
To sum up, creating a bill for a purchase order in Odoo 19 is a crucial step in ensuring that accounting and purchasing activities run smoothly together. Businesses can keep accurate records and optimize their financial workflows by following the methodical stages, which include issuing and confirming a purchase order, verifying product receipts, and preparing the vendor bill. The user-friendly interface and automation features of Odoo 19 save human labour, lower billing errors, and increase vendor transaction transparency. In addition to increasing productivity, this integrated method offers improved control over cash flow and spending tracking. In the end, becoming proficient with Odoo 19's bill generation process aids businesses in improving accuracy, compliance, and the efficacy of their overall financial management.
To read more about How to Match Bill/Purchase Order in Odoo 18 Purchase, refer to our blog How to Match Bill/Purchase Order in Odoo 18 Purchase