Widget class is one of the important structures in POS and it is the basic building blocks of the user interface(UI).
In this blog, I'm going to explain how to create a custom screen in point of sale module. Currently, in Odoo, we already have some examples of screens. For example, list of partner’s, floor screens and payment’s screen.
So now let’s see how to add a custom screen in POS.
To create a custom screen, first, we want to initialize pos_screen or screens and gui.
var gui = require('point_of_sale.gui');
var pos_screens = require('point_of_sale.screens');
Then declare a variable to inherit the screen widget.
var CustomScreenWidget = pos_screens.ScreenWidget.extend({
});
In this way, we can inherit all methods from ScreenWidget to the CustomScreenwidget variable.
template: 'CustomScreenWidget',
In Qweb, define a template like below,
<t t-name="CustomScreenWidget">
<div class="custom-screen screen">
<div class="screen-content">
<section class="top-content">
<span class="button back">
<i class="fa fa-angle-double-left" />
Cancel
</span>
<span class="button next oe_hidden highlight">
Apply
<i class="fa fa-angle-double-right" />
</span>
</section>
<section class="full-content">
<div class="window">
<section class="subwindow collapsed">
<div class="subwindow-container collapsed">
<div class="subwindow-container-fix custom-details-contents" />
</div>
</section>
</div>
</section>
</div>
</div>
</t>
If you need any styles for the screen, then you can define styles in css files.
This Qweb template will be rendered every time when runned the renderElement method.
renderElement: function () {
this._super();
this.$('.back').click(function () {
this.gui.back();
});
this.$('.next').click(function () {
// some actions
});
},
The method renderElement is redefined and In this example, this method is used for actions of buttons like back and next.
By default all the screens except which are called after downloading POS are hidden. So to open a screen we need to define it.
gui.define_screen({
name:'custom_screen',
widget: CustomScreenWidget
});
In order to open a screen, click on the action button.
this.$('.next').click(function () {
// some actions
this.gui.show_screen('custom_screen');
});
These are the basic things to add a custom screen in pos.
Now let’s look at an example.
Show all Orders in POS.
To list all possible orders in POS, we need to define a ScreenWidget in point of sale.
Let's see how to customize it.
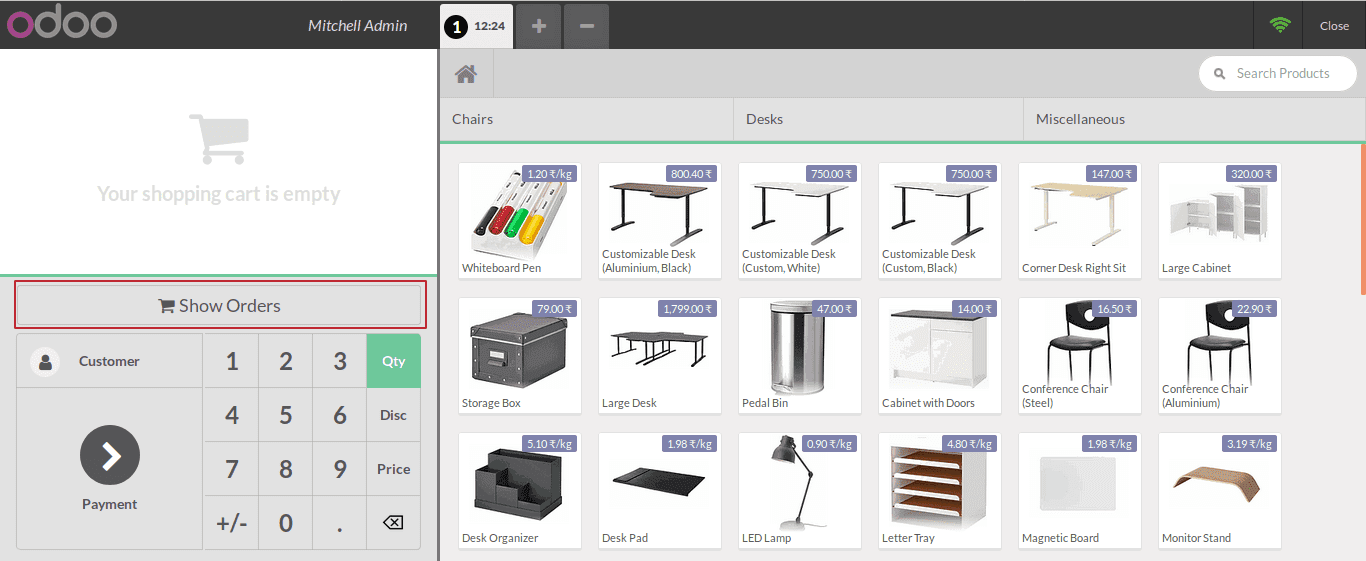
First, we need to create a button in pos.
Create a template for Show Orders button.
<t t-name="ShowOrderButton">
<div class='control-button'>
<i class="fa fa-shopping-cart" />Show Orders
</div>
</t>
Then define the show order button in js.
var ShowOrderButton = pos_screens.ActionButtonWidget.extend({
template: 'ShowOrderButton',
button_click: function(){
if (this.pos.get_order().get_orderlines().length === 0){
this.gui.show_screen('ShowOrdersWidget');
}
else{
this.gui.show_popup('error',{
title :_t('Process Only one operation at a time'),
body :_t('Process the current order first'),
});
}
}
});
pos_screens.define_action_button({
'name': 'Show Order',
'widget': ShowOrderButton,
'condition': function(){
return this.pos;
},
});
Then you can see a button like as below.
When clicked this action button, it shows a screen with the list of all pos orders. Before that, we need to define a template using Qweb.
<t t-name="ShowOrdersWidget">
<div class="clientlist-screen screen">
<div class="screen-content">
<section class="top-content">
<span class='button back'>
<i class='fa fa-angle-double-left'/>
Cancel
</span>
<span class='searchbox' style="margin-left:217px !important;">
<input placeholder='Search Orders by ref' />
<span class='search-clear'/>
</span>
</section>
<section class="full-content">
<div class='window'>
<section class='subwindow collapsed'>
<div class='subwindow-container collapsed'>
<div class='subwindow-container-fix order-details-contents'>
</div>
</div>
</section>
<section class='subwindow'>
<div class='subwindow-container'>
<div class='subwindow-container-fix touch-scrollable scrollable-y'>
<table class='client-list'>
<thead>
<tr>
<th>Reciept Ref.</th>
<th>Partner</th>
<th>Session</th>
<th>Amount Total</th>
</tr>
</thead>
<tbody class='show-order-list-lines'>
</tbody>
</table>
</div>
</div>
</section>
</div>
</section>
</div>
</div>
</t>
<t t-name="ShowOrderLines">
<tr class='order-line' t-att-data-id='order.id'>
<td><t t-esc='order.pos_reference' /></td>
<td><t t-esc='order.partner_id[1]' /></td>
<td><t t-esc='order.session_id[1]'/></td>
<td><t t-esc='order.amount_total'/></td>
</tr>
</t>
In order to create a new show order screen, first, we want to plug the following.
var gui = require('point_of_sale.gui');
var chrome = require('point_of_sale.chrome');
var core = require('web.core');
var models = require('point_of_sale.models');
var PosModelSuper = models.PosModel;
var pos_screens = require('point_of_sale.screens');
var QWeb = core.qweb;
var _t = core._t;
Then define the screen widget in js.
var ShowOrdersWidget = pos_screens.ScreenWidget.extend({
template: 'ShowOrdersWidget',
init: function(parent, options){
this._super(parent, options);
this.order_string = "";
},
auto_back: true,
show: function(){
var self = this;
this._super();
this.renderElement();
this.$('.back').click(function(){
self.gui.back();
});
var pos_orders = this.pos.pos_orders;
this.render_list(pos_orders);
var search_timeout = null;
if(this.pos.config.iface_vkeyboard && this.chrome.widget.keyboard){
this.chrome.widget.keyboard.connect(this.$('.searchbox input'));
}
this.$('.searchbox input').on('keyup',function(event){
clearTimeout(search_timeout);
var query = this.value;
search_timeout = setTimeout(function(){
self.perform_search(query,event.which === 13);
},70);
});
this.$('.searchbox .search-clear').click(function(){
self.clear_search();
});
},
perform_search: function(query, associate_result){
var new_orders;
if(query){
new_orders = this.search_order(query);
this.render_list(new_orders);
}else{
var orders = this.pos.pos_orders;
this.render_list(orders);
}
},
search_order: function(query){
var self = this;
try {
query = query.replace(/[\[\]\(\)\+\*\?\.\-\!\&\^\$\|\~\_\{\}\:\,\\\/]/g,'.');
query = query.replace(' ','.+');
var re = RegExp("([0-9]+):.*?"+query,"gi");
}catch(e){
return [];
}
var results = [];
for(var i = 0; i < self.pos.pos_orders.length; i++){
var r = re.exec(this.order_string);
if(r){
var id = Number(r[1]);
results.push(this.get_order_by_id(id));
}else{
break;
}
}
var uniqueresults = [];
$.each(results, function(i, el){
if($.inArray(el, uniqueresults) === -1) uniqueresults.push(el);
});
return uniqueresults;
},
// returns the order with the id provided
get_order_by_id: function (id) {
return this.pos.pos_orders[id];
},
clear_search: function(){
var orders = this.pos.pos_orders;
this.render_list(orders);
this.$('.searchbox input')[0].value = '';
this.$('.searchbox input').focus();
},
render_list: function(orders){
var self = this;
for(var i = 0, len = Math.min(orders.length,1000); i < len; i++) {
if (orders[i]) {
var order = orders[i];
self.order_string += i + ':' + order.pos_reference + '\n';
}
}
var contents = this.$el[0].querySelector('.show-order-list-lines');
if (contents){
contents.innerHTML = "";
for(var i = 0, len = Math.min(orders.length,1000); i < len; i++) {
if (orders[i]) {
var order = orders[i];
var clientline_html = QWeb.render('ShowOrderLines', {widget: this, order: order});
var orderline = document.createElement('tbody');
orderline.innerHTML = clientline_html;
orderline = orderline.childNodes[1];
contents.appendChild(orderline);
}
}
}
},
});
gui.define_screen({name:'ShowOrdersWidget', widget: ShowOrdersWidget});
return {
ShowOrdersWidget: ShowOrdersWidget
}
});
To get all POS orders, firstly need to load the pos model.
models.load_models({
model: 'pos.order',
fields: ['id', 'name', 'session_id', 'state', 'pos_reference', 'partner_id', 'amount_total','lines', 'amount_tax','sequence_number', 'fiscal_position_id', 'pricelist_id', 'create_date', 'statement_ids'],
domain: function(self){ return [['company_id','=',self.company.id]]; },
loaded: function (self, pos_orders) {
var orders = [];
for (var i in pos_orders){
orders[pos_orders[i].id] = pos_orders[i];
}
self.pos_orders = orders;
self.order = [];
for (var i in pos_orders){
self.order[i] = pos_orders[i];
}
},
});
models.PosModel = models.PosModel.extend({
_save_to_server: function (orders, options) {
var result_new = PosModelSuper.prototype._save_to_server.call(this, orders, options);
var self = this;
var new_order = {};
var orders_list = self.pos_orders;
for (var i in orders) {
var partners = self.partners;
var partner = "";
for(var j in partners){
if(partners[j].id == orders[i].data.partner_id){
partner = partners[j].name;
}
}
new_order = {
'amount_tax': orders[i].data.amount_tax,
'amount_total': orders[i].data.amount_total,
'pos_reference': orders[i].data.name,
'partner_id': [orders[i].data.partner_id, partner],
'session_id': [self.pos_session.id, self.pos_session.name]
};
orders_list.push(new_order);
self.pos_orders = orders_list;
self.gui.screen_instances.ShowOrdersWidget.render_list(orders_list);
}
return result_new;
},
});
After all these things one can list all pos order under the Show Orders button. When clicking on this button it shows a screen like below,
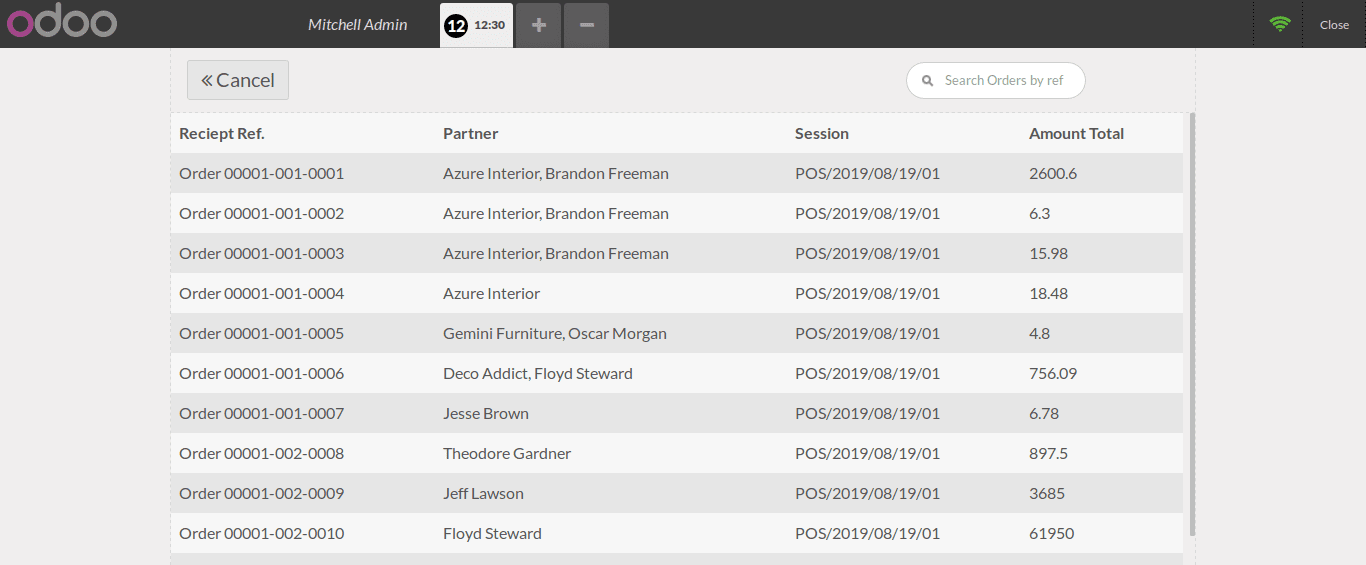
This is how the custom screen is added in Odoo Point of Sale. Hope the blog was useful.
You can also have look on Odoo 13 POS