Effective marketing campaign management is necessary for a smooth business workflow. Traditionally the task requires a lot of effort and time and still, they are susceptible to eros and campaign fails. So it is important to manage and overview the campaigns efficiently. Odoo has a set of dedicated features to help you manage business campaigns efficiently.
This blog will give you a detailed note on the Campaign management feature in Odoo 15 Email Marketing module.
The Email marketing module of Odoo is filled with advanced features for providing you with maximum efficiency in marketing management. Campaign management is one of the advanced features in the module which you can effectively use for improving the efficiency of your campaign management.
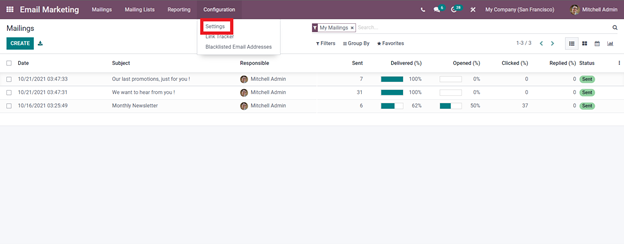
The campaign management feature can be accessed from the dashboard of the Email marketing module. But before that, you must activate the feature from the Email marketing module. To activate the feature go to the Configuration settings from the dashboard of the Email marketing module as shown below.
Click on it to go to the settings page as shown below.
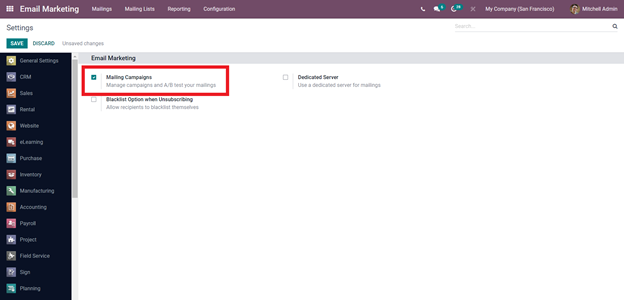
Activate the feature by clicking on the Mailing campaign option. The feature will be activated instantly. And make sure that you have activated the Dedicated server and configured it before saving to avail the feature. Odoo will let you create a dedicated server. If you want to create a dedicated mailing server activate the feature and click on configure Email server option as shown below.
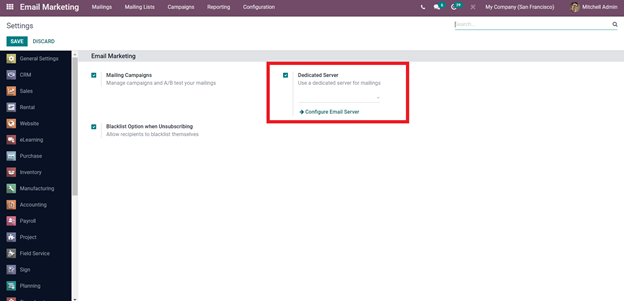
Odoo will lead you to a configuration space to configure the new Dedicated email server as shown below.

From here click on the create button and a final configuration page will be shown to configure the dedicated mail server as shown below.
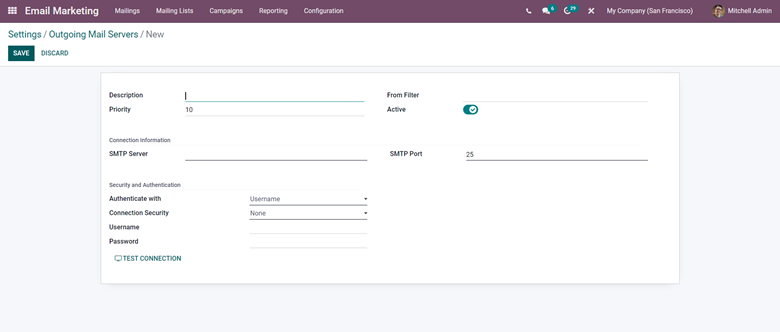
Click on the Save button after configuring and entering the details as shown above.
After all of the configurations, a new tab will appear on your email marketing dashboard called Campaigns as shown below.
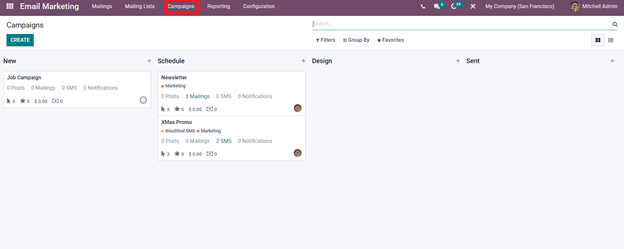
Click on it to create, view, and manage campaigns easily. The above-given image shows the campaign section. To create a new campaign click on the Create button to activate the configuration section for configuring the new campaign as shown below.
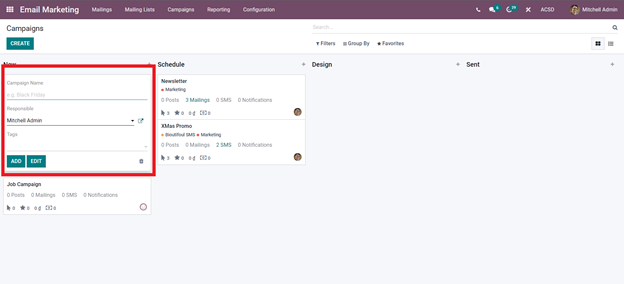
From here you can configure the new campaign. Enter the details along with the Name of the campaign. And one of the added advantages is that you can assign the person who is responsible for the new marketing campaign by simply clicking on the Responsible tab and choosing anyone from the drop-down option. Note that this feature is a privilege to the executives and not necessarily to other employees. After that add the tags and click on Add button to create the new campaign. After saving the Campaign box will be available in the section given below.
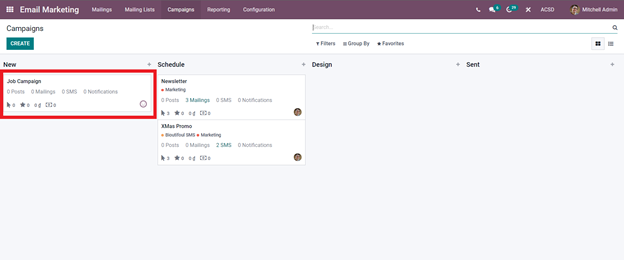
The quick display as shown above on the campaigns will display important data related to the campaign for quick access. You can have details on the number of Posts, Mailings, SMS, Notification. The page can efficiently stack the campaigns and let you have a clutter-free environment. You can use this efficient campaign management system to quickly access the desired campaigns at any time without any hurdles.
From the campaigns, the menu clicks on the campaign to configure and view it as shown below.
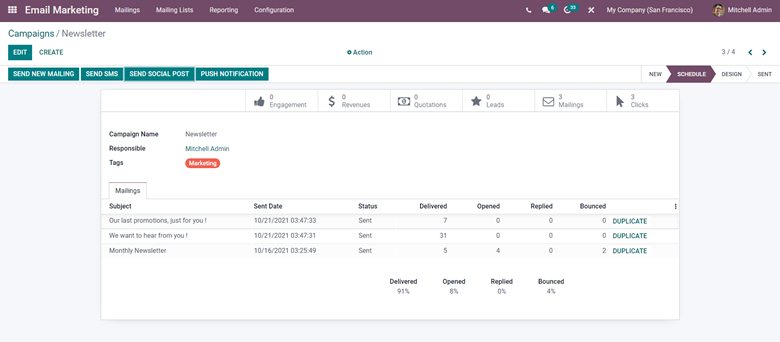
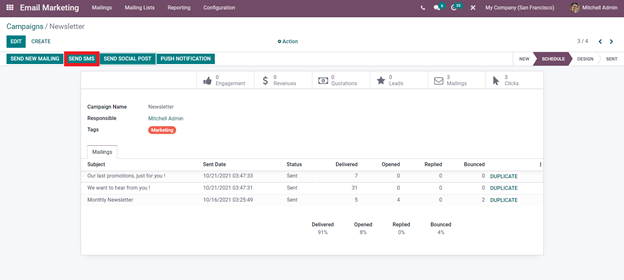
You can view all of the details on the campaign from here. You can view details on the mails that you have sent and who you send it to. You can perform edits from here click on the Edit button. You can edit the name of the campaign at any point and the person who is responsible for leading the campaign.
Odoo has provided you with four channels or mediums for sending emails to customers. The channels include Send New Mailing, Send SMS, Send Social Post and Push notification as highlighted below which you can use effectively to connect with the customers or the clients.

Click on any of the channels to send the emails accordingly. Click on the Send new mailing to configure and send emails to your customers. Odoo will instantly give you the email configuration tab as shown below.
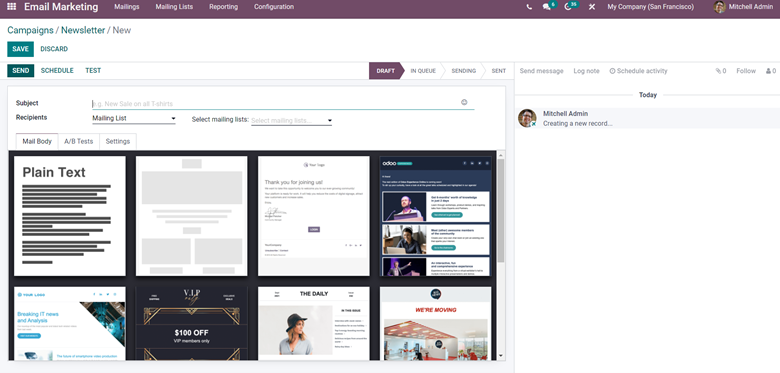
Create your mail from here with the advanced mail building system of Odoo. You can easily design or craft and send Emails effortlessly from here. All you have to do is enter the Subject and form Recipients under the mailing select the recipients that you wish the mail to be sent to. From the Settings tab, you can change the sender address and the sender's name or assign the mail to someone else under your business organization.
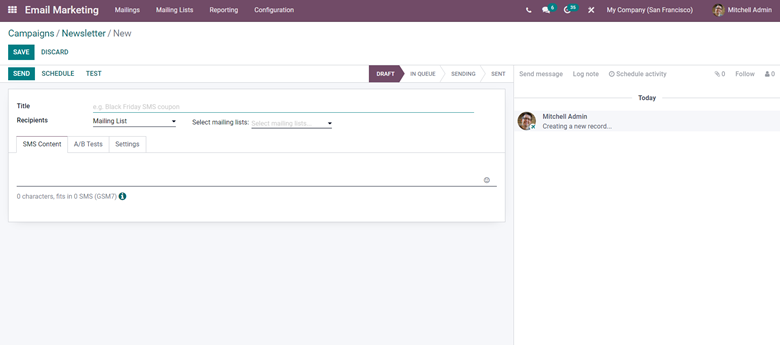
If you want to send the campaign via SMS click on the Send SMS button as highlighted below.
This channel will allow you to configure the campaigns through SMS. A configuration page will open up as shown below.
Similarly, you can use other channels such as the Send social post and Push notification option to send the campaign information. After the configurations click on the save button and will save the created mail and will be saved in draft throughout the process of editing. As highlighted below.
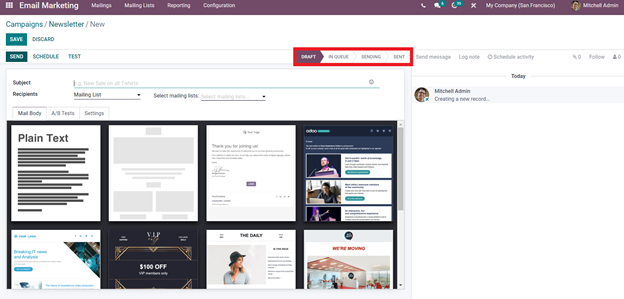
You can track the procedures from here. After clicking on the send the button will display Sending and Sent accordingly and the process is complete.
The feature is available in other applications of Odoo related to marketing. The feature is very easy to configure up and use as you have already seen above. The feature is essential for letting your customers know about the new campaigns that you are launching under the business so that they can actively participate in them. Odoo allows you to send the campaigns through emails, SMS, and social media posts. Choose the channel that you want to send the information through according to the nature of your business management. If your business is based on a social media platform then you can utilize Odoo to have maximum communication with the viewers with the social media posts that you can generate from Odoo similar to, mails and SMS.
The channels can help your campaigns to have direct communication with the customers. You can target their interests according to their previous purchasing habits with the support of Odoo to send them campaigns accordingly. Such campaigns play a huge role in maintaining crucial customer-to-business relationships and with the active participation of the customers, you can actually keep track of them and those who are not active in campaigns. You can use this crucial data to find out the nature of your customers and whether they are interested in your business to keep them sticking to your business for a very long time. Keeping your customers invested in your business, products, and services is crucial for a successful future of the business and the products.