Email Marketing
Email marketing is used for sending advertisements or commercial messages to a group of individuals or customers using the email communication system. This advanced technology will help your company to attract new customers to your business. The Odoo 15 Email Marketing module is the best tool for improving your marketing strategy. A good marketing strategy will always pave the way for success in your business. Email marketing is a cost-effective business strategy widely used for businesses to enhance communication with customers. You can use the Odoo 15 Email Marketing module to connect directly with people and clients.
In this chapter, we will discuss the Email Marketing module in Odoo 15.
When you open the module, you will land on the Mailings dashboard of the module.
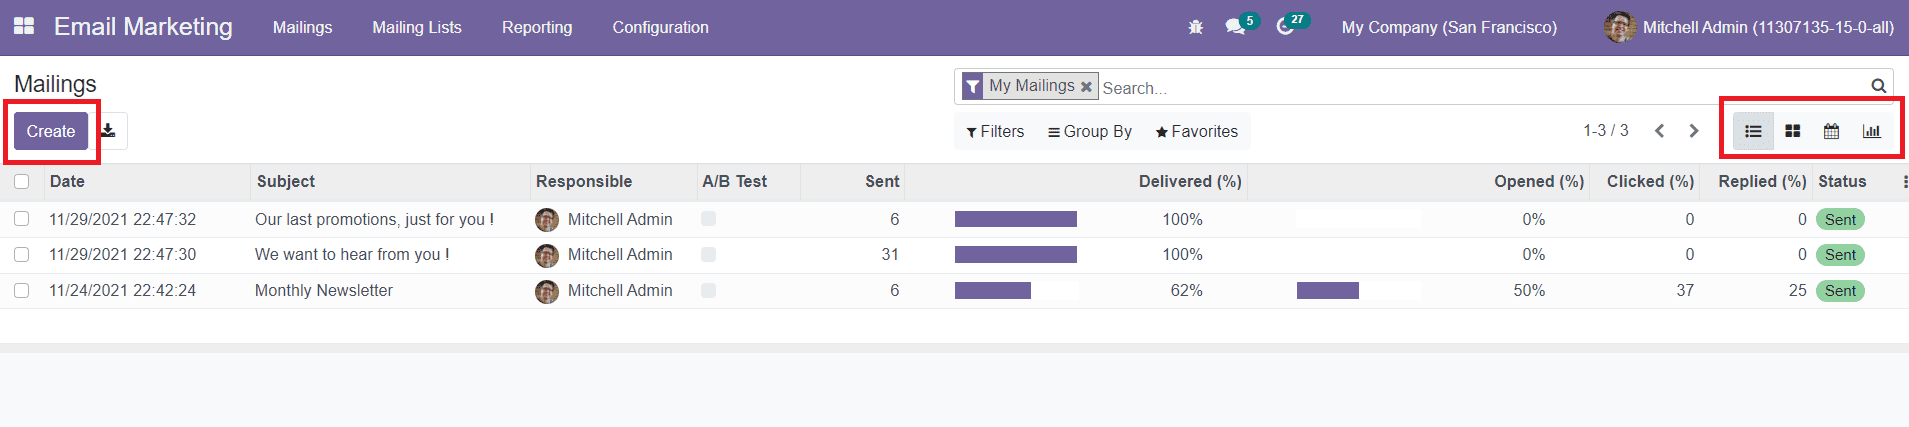
In this window, you will get all created mails in Kanban, List, Calendar, and Graphical views. The list view of this window will show the Date, Subject, Responsible, sent details along with the percentage of Delivered, Opened, Clicked, Replied, and Status. You can create mail for your customer or a group of recipients on this platform. For this, you can click on the ‘Create’ button.

In the new mail creation window, you can mention the subject of the mail in the Subject field. In the Recipients field, you can mention the list of recipients from the drop-down menu. If you want to send this mail to all your contacts in your system, you can select Contacts from the drop-down menu. The drop-down menu will show various default mailing lists. You can select a suitable one from these options, or else you can customize a mailing list from the Mailing Lists menu given in the main menu bar of the Email Marketing module. Under the Mail Body tab, you can select a suitable mail body for your mail. By selecting one from the given models, you can start designing your mail according to your requirements.
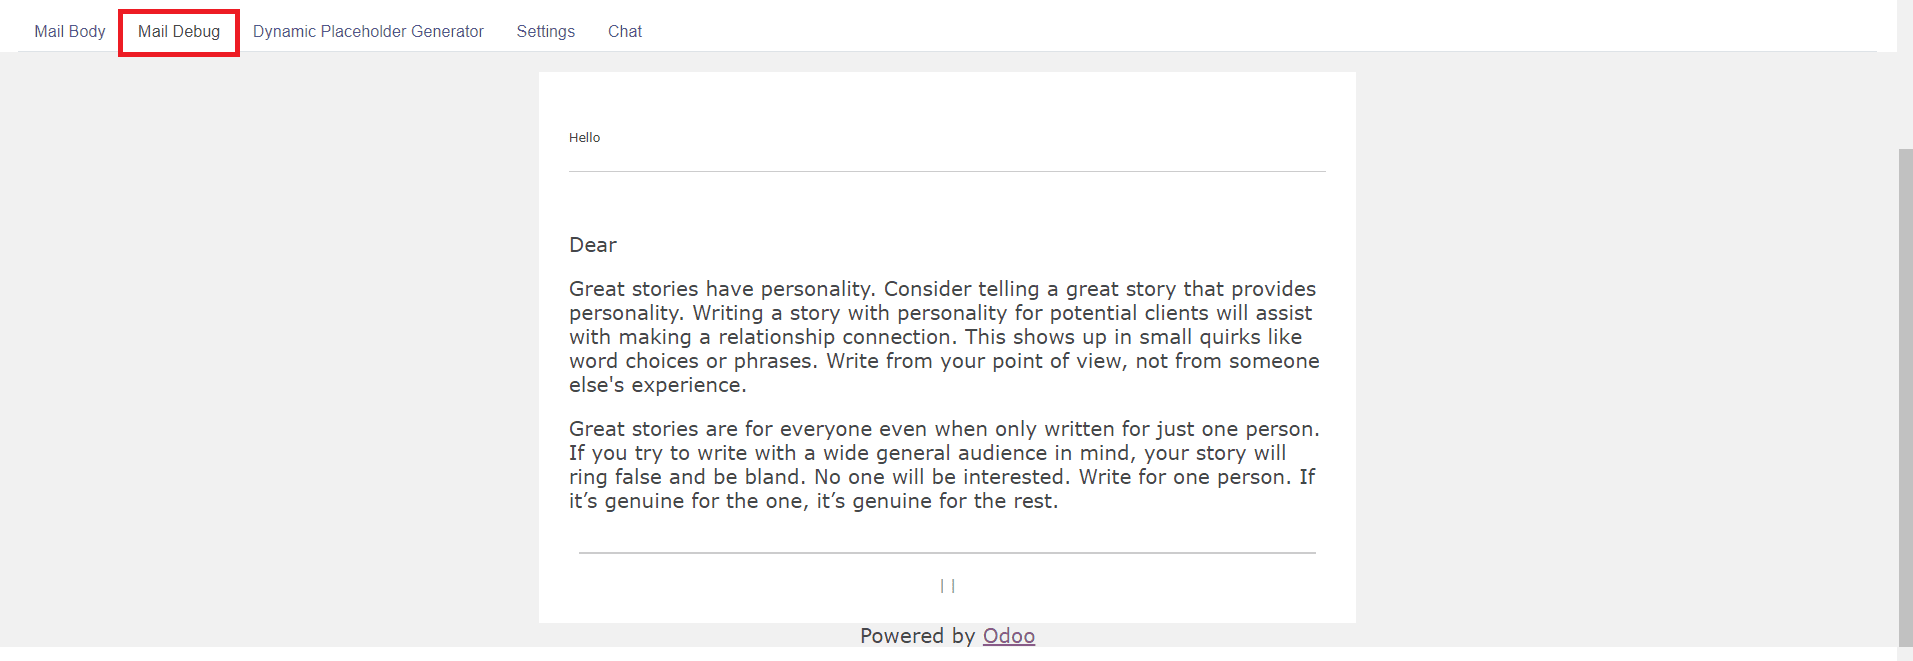
The Mail Debug tab will provide a preview of the drafted email with a header, footer, and content as per the template selected for this mail.

Under the Dynamic Placeholder Generator tab, you can specify the Field, Sub-model, Sub-field, Default Value, and Placeholder Expression. These fields can be used to create personalized messages.
Field: Select the target field from the related document model. If it is a relationship field you will be able to select a target field at the destination of the relationship.
Sub-model: When a relationship field is selected as the first field, this field shows the document model the relationship goes to.
Sub-field: When a relationship field is selected as the first field, this field lets you select the target field within the destination document model (sub-model).
Default Value: Optional value to use if the target field is empty.
Placeholder Expression: Final placeholder expression, to be copy-pasted in the desired template field. This field can be added at the right position while drafting the mail body.
Under the Settings tab, you can add details about Email Content in the specified field.
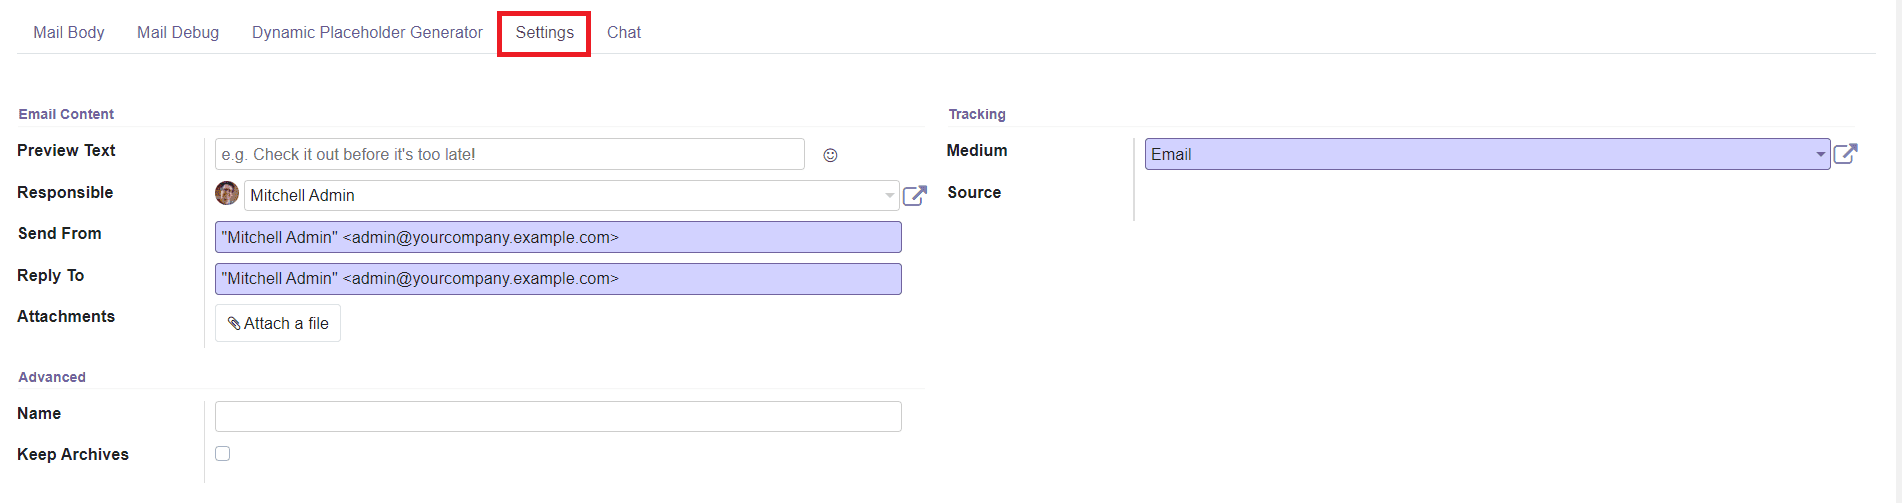
In the Preview Text, you can add a Catchy preview sentence that encourages recipients to open this email. In most inboxes, this is displayed next to the subject. You can keep it empty if you prefer the first characters of your email content to appear instead. Add Responsible officer, Send From, and Reply-To addresses in the mentioned fields. The Reply-To field includes the specified reply-to addresses to which a customer can reply after getting an email from this email marketing campaign.
In the Attachments field, you can add attachments along with this mail. In the Tracking field, you can define the UTM medium for tracking delivery methods (email, SMS, etc.). The Source field will show the source of links, e.g. Search Engine, another domain, or name of the email list.
The Chat tab can be used to start a chat with the recipient of this mail.

After creating the mail, you will see the ‘Send’, ‘Schedule’, and ‘Test’ buttons on the screen as shown below.
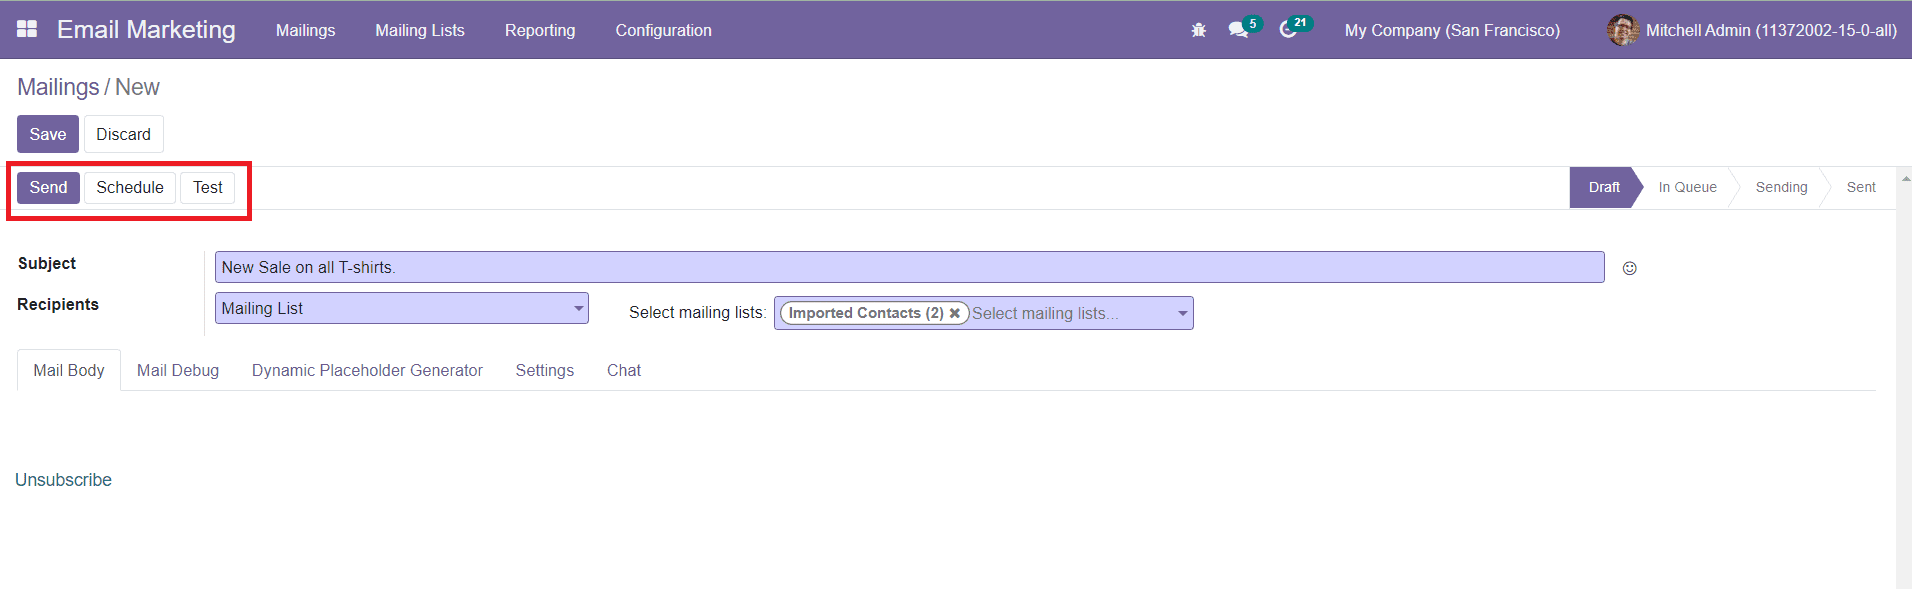
By clicking on the Send button, you will get a confirmation pop-up window to confirm the sending process.
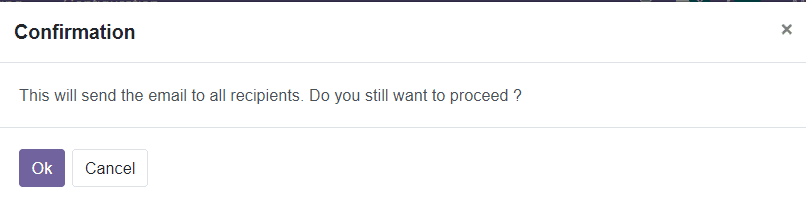
You can click on the Ok button and the mail will be sent to all recipients.
You can schedule a date to send this mail to the selected recipients by clicking on the Schedule button.
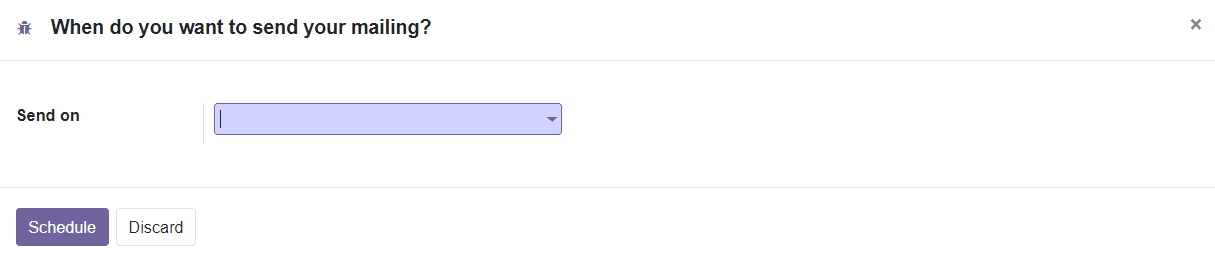
A pop-up window will appear where you can mention the sending date.
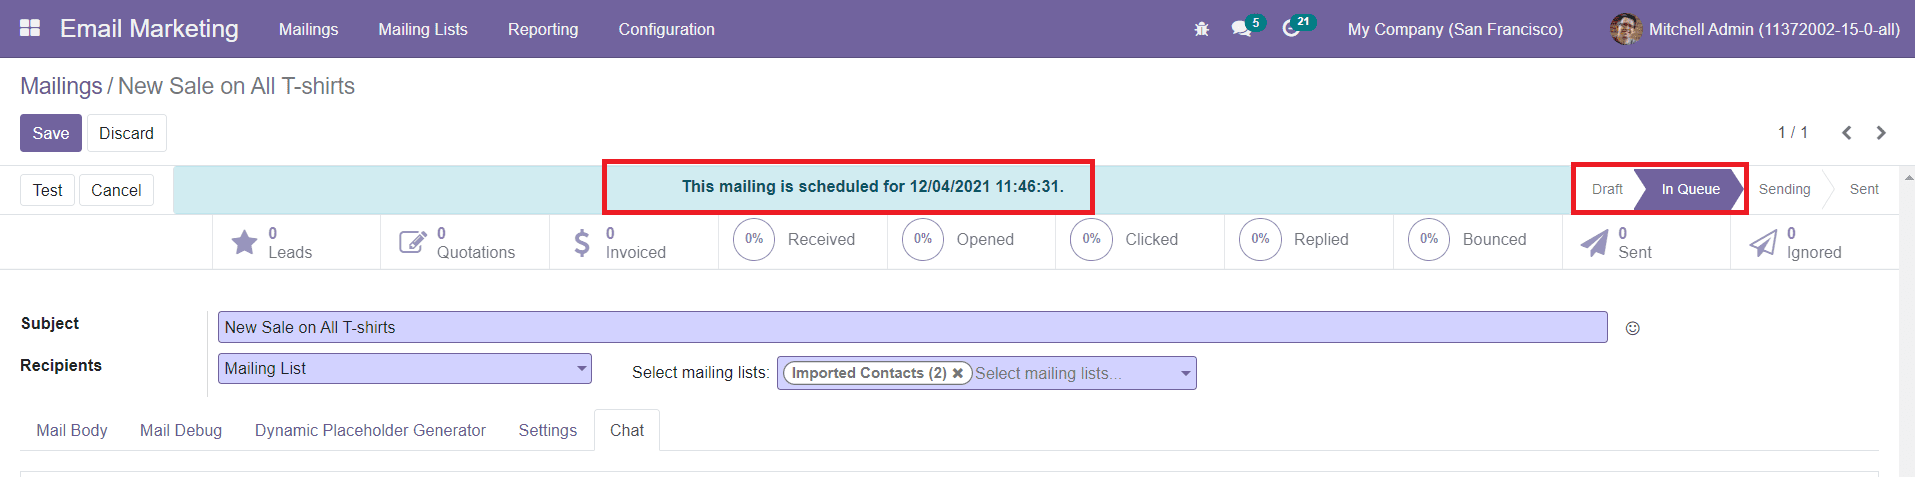
The scheduled date can be seen on the top of the screen and the status of the mail can be seen as changed from Draft to In Queue. The mail will be automatically sent on the selected date and time. The Test button will help you send a sample mailing for testing purposes. After creating and sending mail to the selected recipients, the screen will show smart buttons which will record the details of Leads created from this mail, Quotation Orders, Invoiced, and the Percentage of how many recipients Received, Opened, Clicked, Replied, Bounced, Sent, and Ignored this particular mail.
When you take the Kanban view of the Mailings, you can easily understand the status of each mail as shown below.
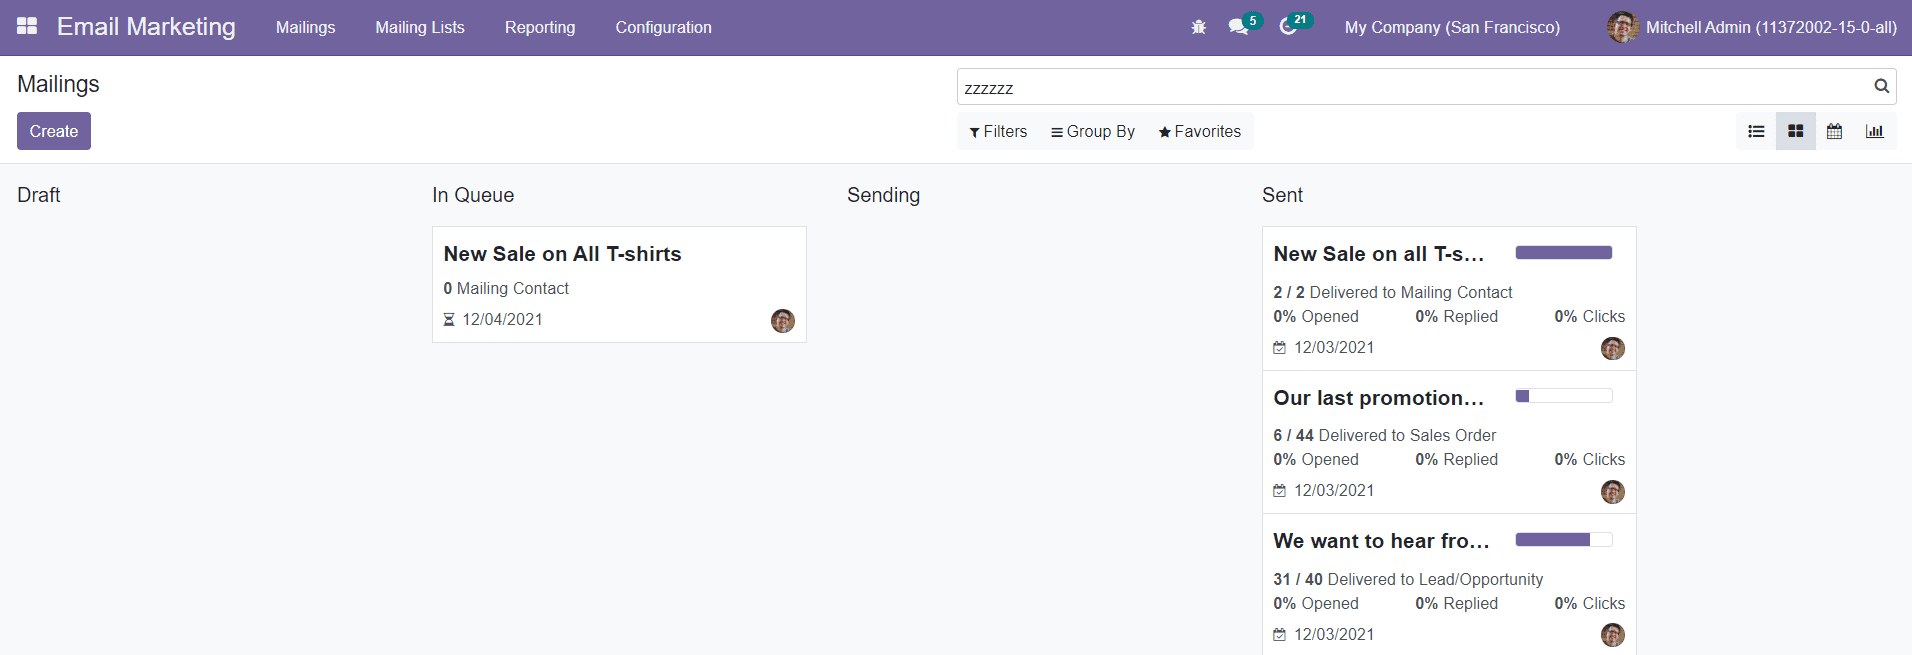
The mails can be filtered and categorized according to your demand using the default as well as customizable Filters and Group By options.