Events
The Events module in Odoo 15 provides a versatile platform to manage various types of events in an organized manner. This module will help you to take forward seminars, webinars, festivals, workshops, sponsored programs, charity events, and many more without any complications. From scheduling a suitable date for events to selling tickets online, Odoo will assist you to make your event successful by ensuring perfect organization.
In this chapter, we are going to discuss the Events module in Odoo 15.
The main dashboard of the Events module will show all events configured in the module.
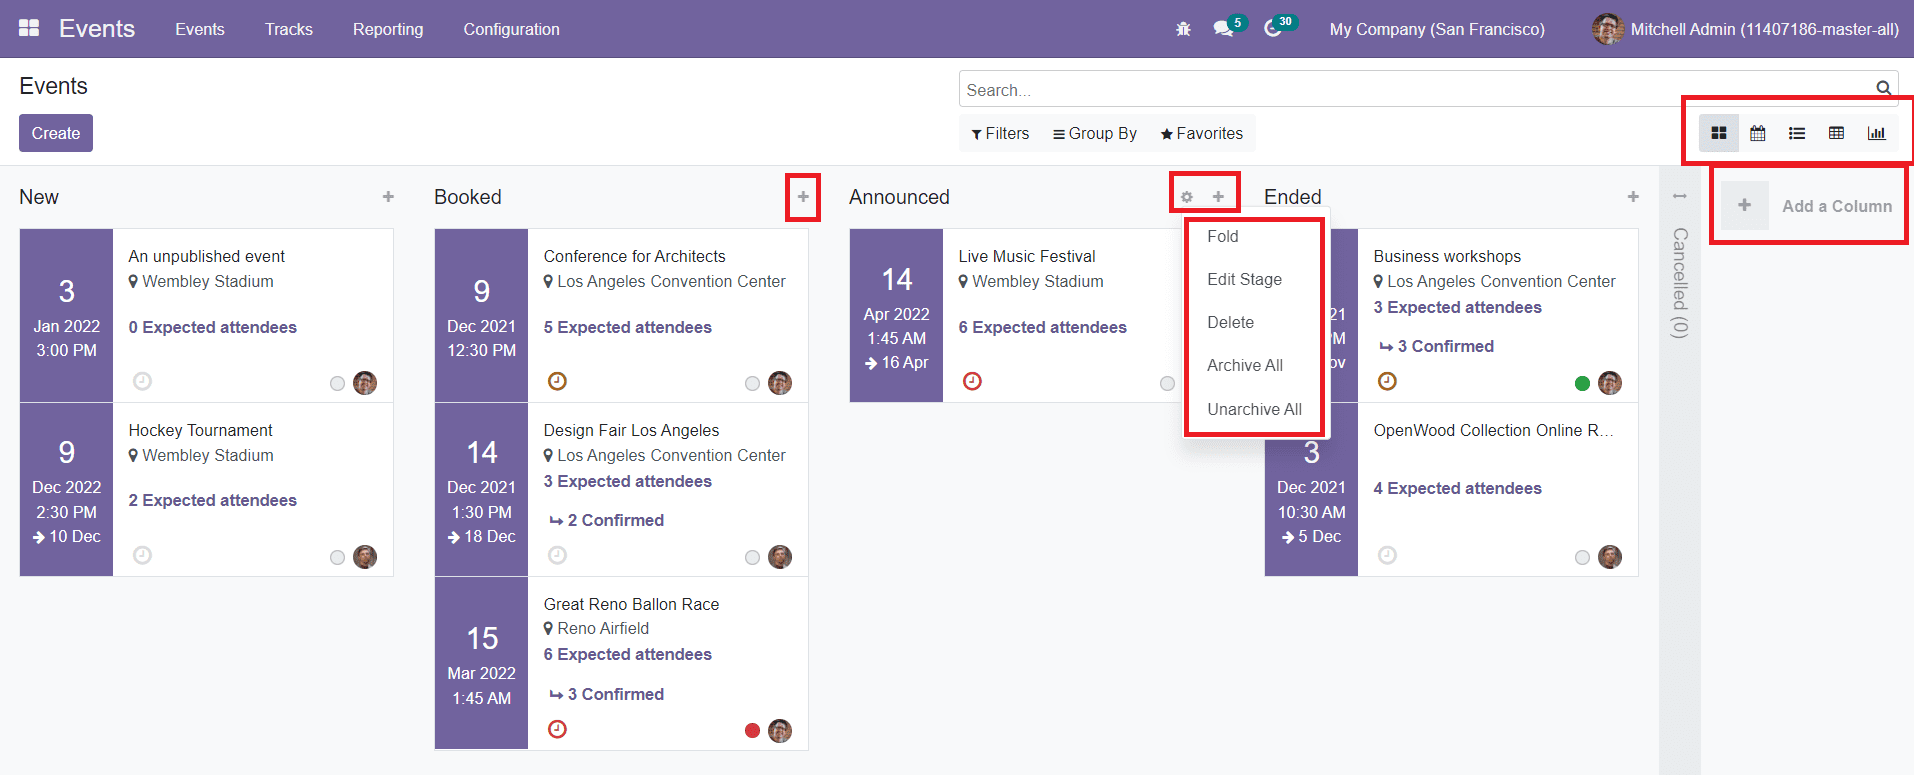
As you can see in the image above, the window displays various stages for the events in Kanban view. You can create a new stage for events simply by clicking the ‘Add a Column’ button. This will help you to add a new stage for the events configured on this platform. If you want to add new events under a particular stage, you can click on the + icon given at the top of the respective stage. The settings icon on each stage will help you to Fold the stage in Kanban view, Edit, Delete, Archive, and Unarchive. The window can be viewed in Kanban, Calendar, List, Pivot, and Graphical views.
The preview of the event in the Kanban view will show the title of the event, location, date, and time along with the expected number of attendees. The clock icon given on each event can be used to schedule activities. For sorting, you will get the Filters and Group By option on the screen. Now, you can click on the ‘Create’ button to create a new event in this module.
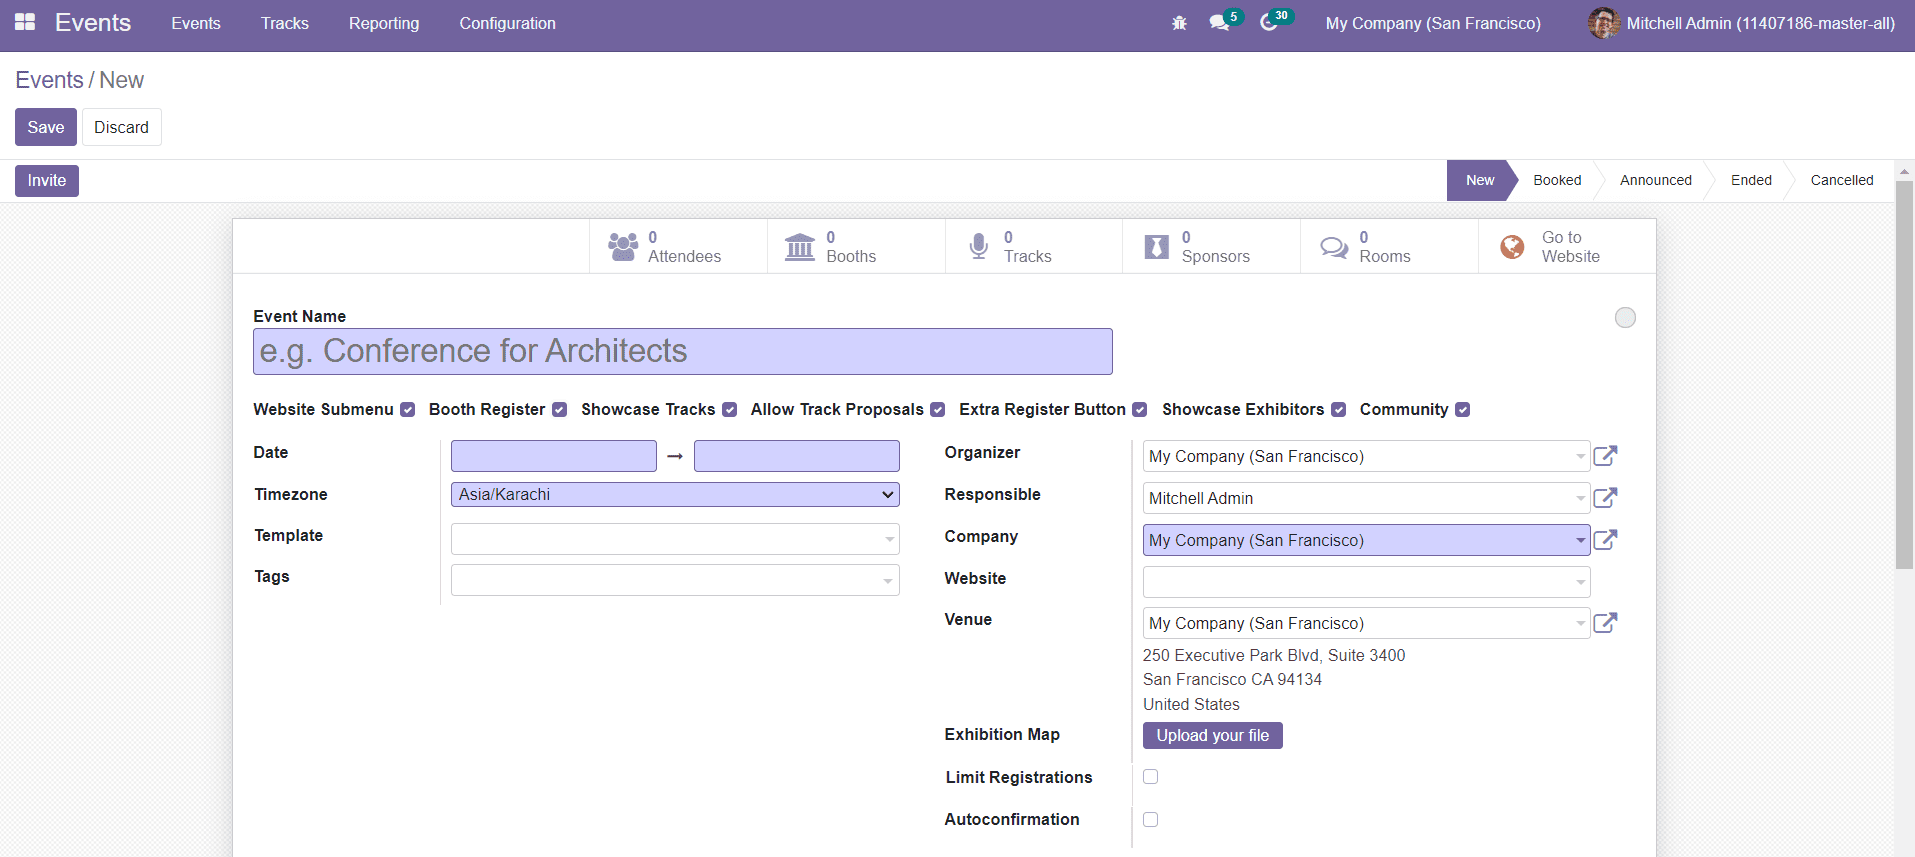
In the new event creation window, you can mention the Event Name in the given field. Below this field, you will get the Website Submenu, Booth Register, Showcase Tracks, Allow Track Proposals, Extra Register Button, Showcase Exhibitors, and Community options to activate. By activating these options, it will appear on the website view of the event.
Specify the starting & ending date, Timezone, Event Template, Organizer, Responsible, Company, Website to publish the event, Venue of the event, and upload the Exhibition Map in the corresponding fields. By enabling the Limited Registrations option, you will be able to limit the event to a particular number of attendees only. By activating the Auto Confirmation field, the registration will be automatically confirmed upon creation.
Under the Tickets tab, you can add tickets for the event using the ‘Add a Line’ button.
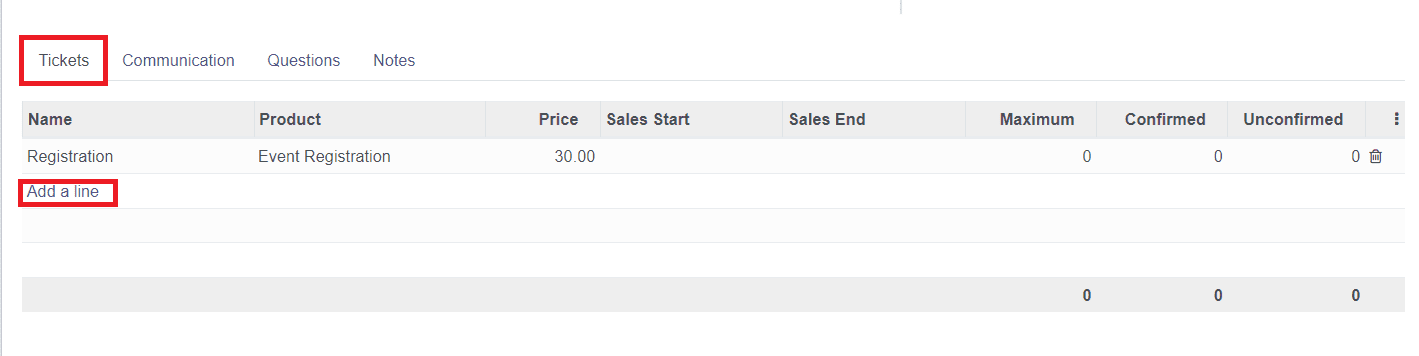
The event ticket can be configured in the product configuration window of the Sales module. You can select Event Ticket as Product Type while configuring the ticket. Along with the Price of the ticket, you can mention the starting & ending date of the ticket sale. You can define the number of available tickets in the Maximum field. The Confirmed field will show the number of confirmed or reserved tickets and Unconfirmed will show the number of unconfirmed tickets.
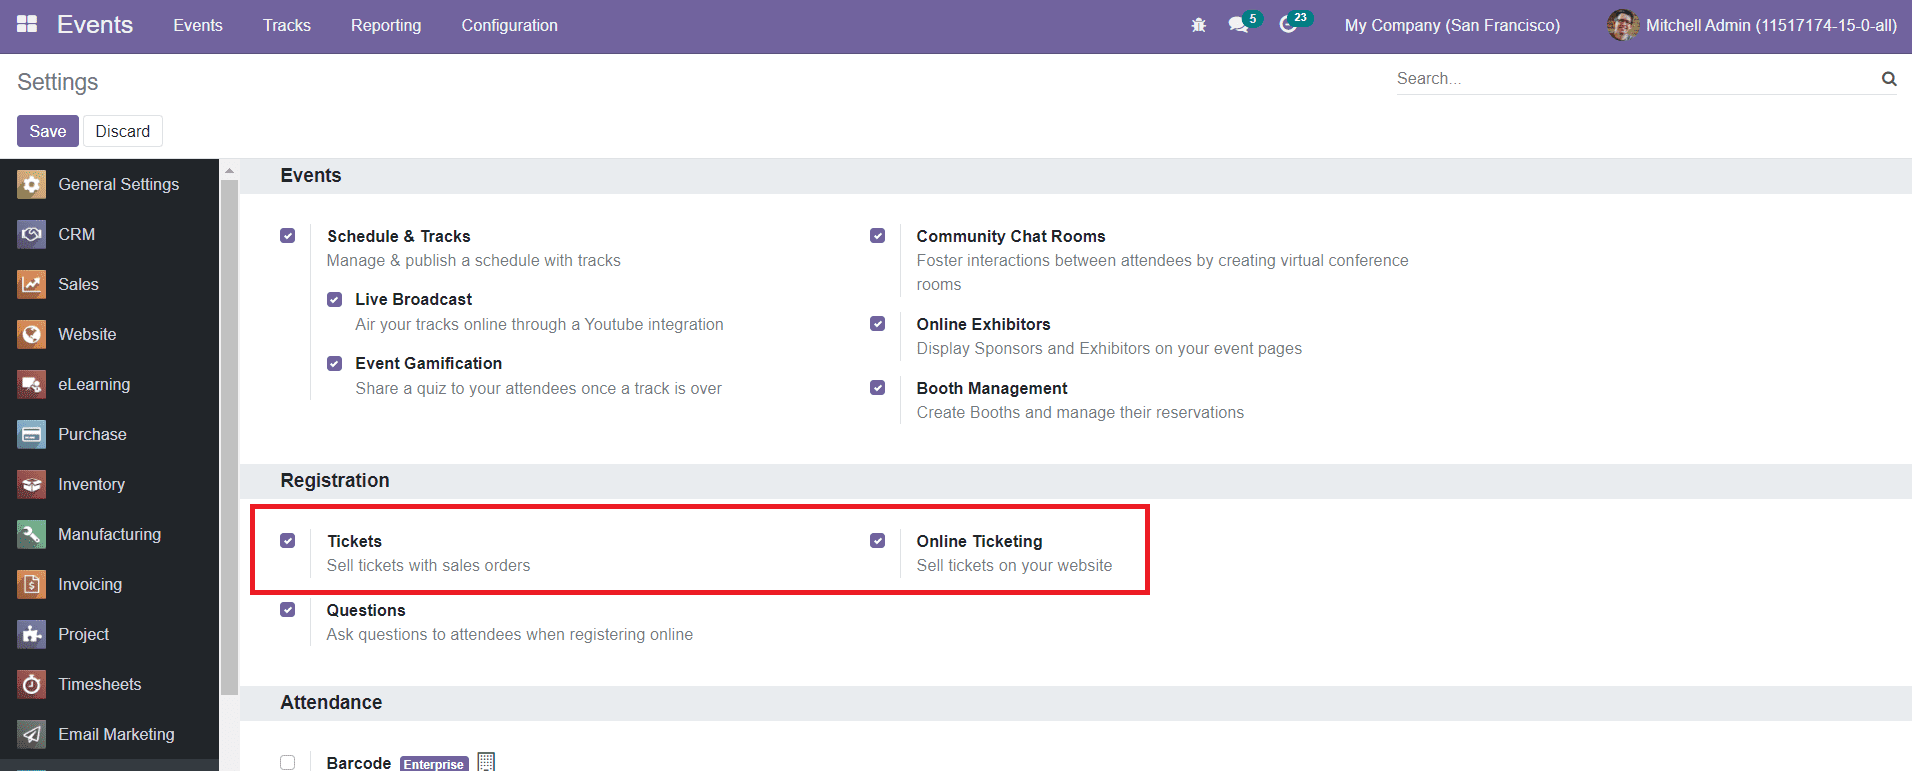
In the Settings menu, you will get the Tickets and Online Ticketing options to activate. By activating these options, you can sell tickets with sales orders and sell tickets on your website respectively.
The Communication tab can be used to mention email or SMS templates in order to communicate with the attendees.
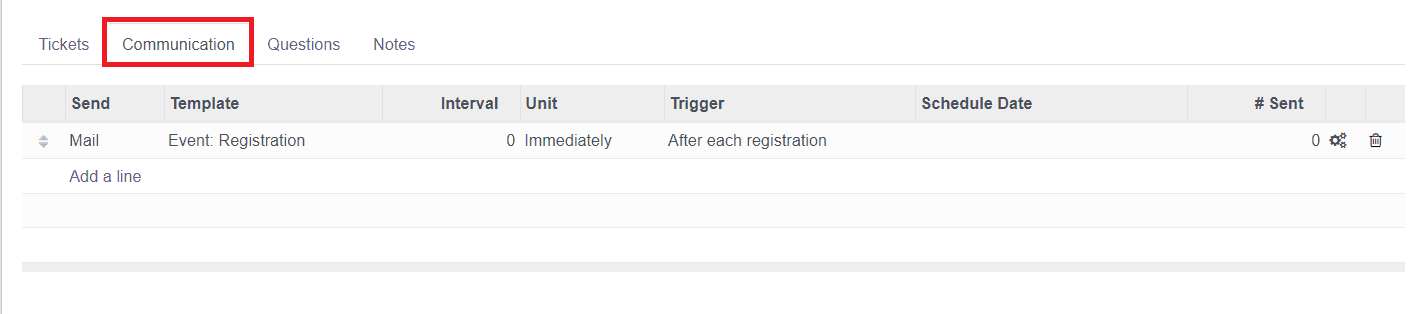
For example, if you want to send an Email/SMS to attendees after registration you can mention the email or SMS template in the Template field. You can send the mail immediately or a particular number of hours, days, weeks, or months before or after the registration. This can be mentioned in Interval, Unit, and Trigger fields. The scheduled date and number of mail/SMS sent can be seen in this tab.
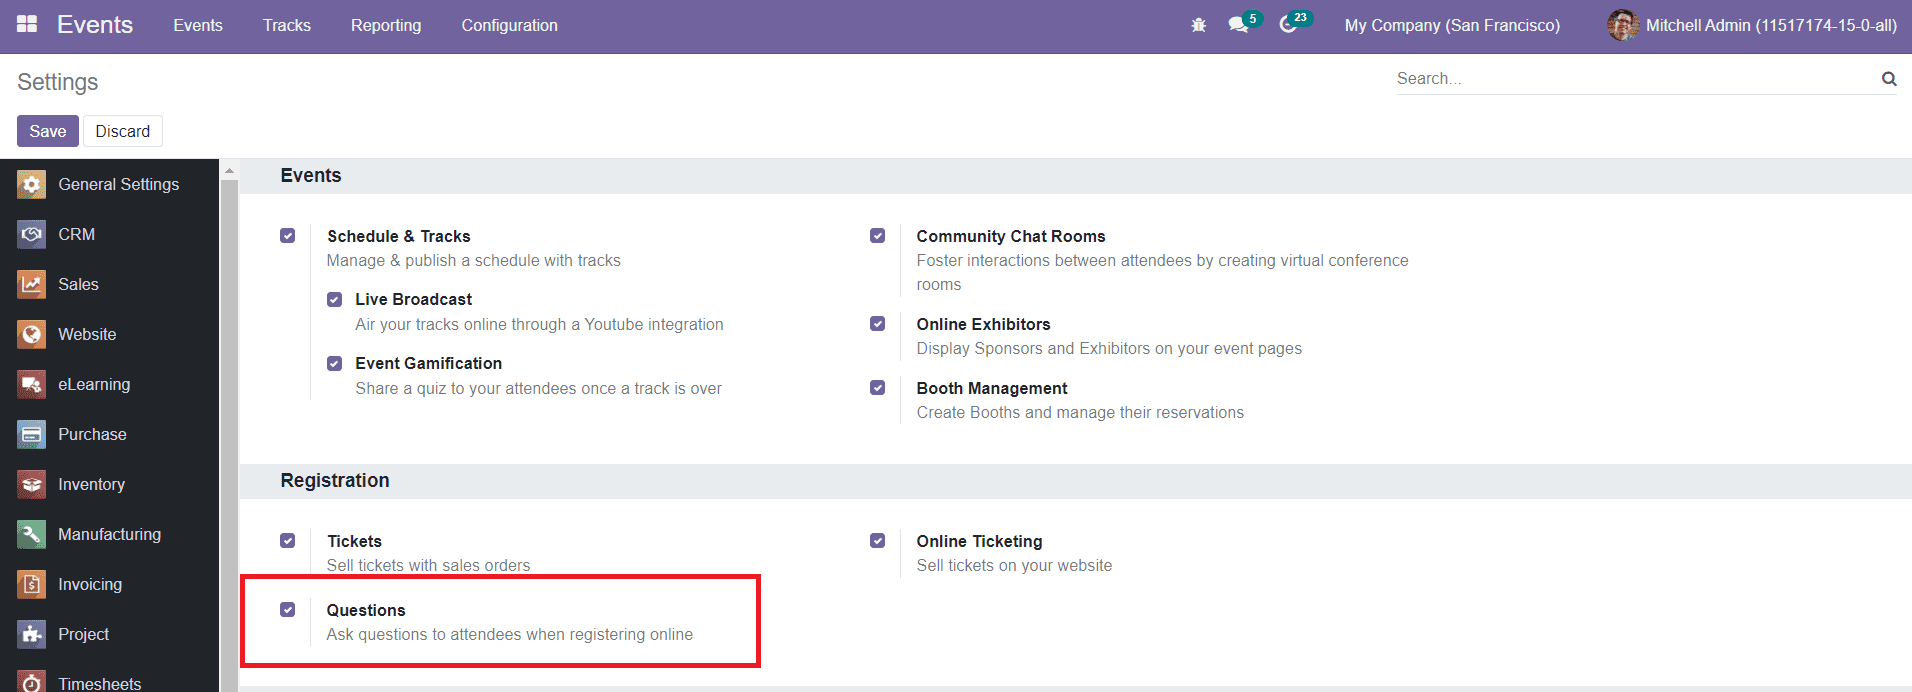
In the Questions tab, you can add questions for attendees while registering online. To get this option in the Events creation window, first, you need to activate the Questions option under the Settings module.
After activating this option, you will get the Questions tab in the Event creation window as shown below.

To add questions for the event, you can click on the ‘Add a Line’ button. You will be able to get a pop-up window as shown below.
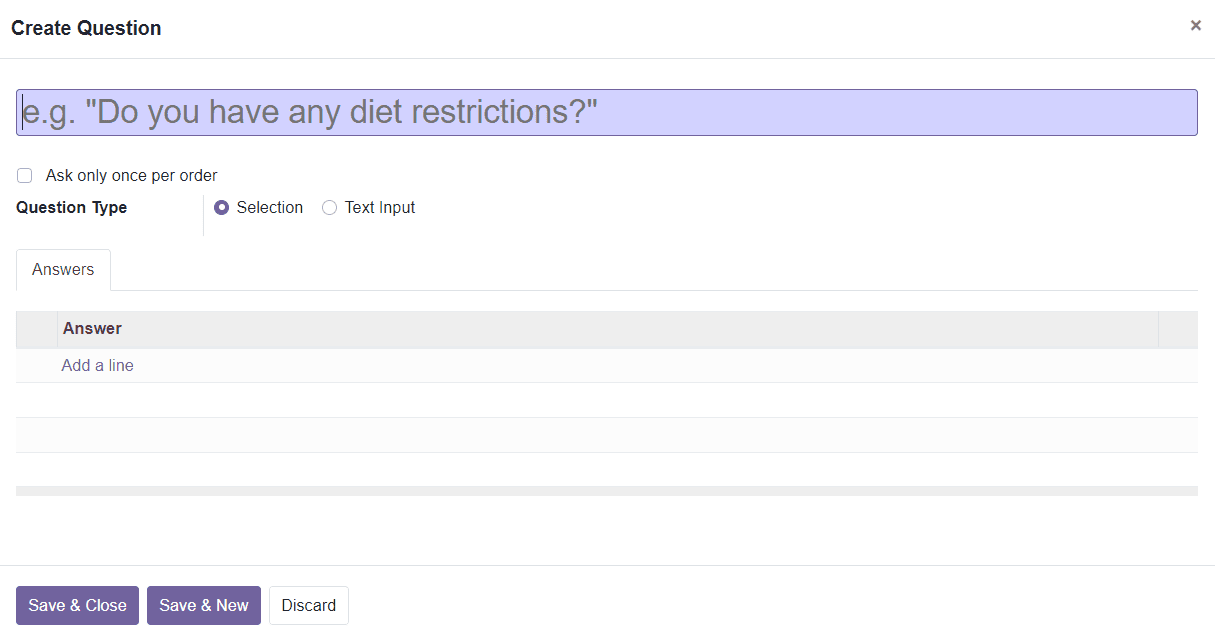
You can mention the question in the specified field. By activating the Aks Only Once per Order field, this question will be asked only once and its value will be propagated to every attendee. If not it will be asked for every attendee of a reservation. You can set the Question Type as Selection or Text Input. After adding the question, click on the Save & Close button.
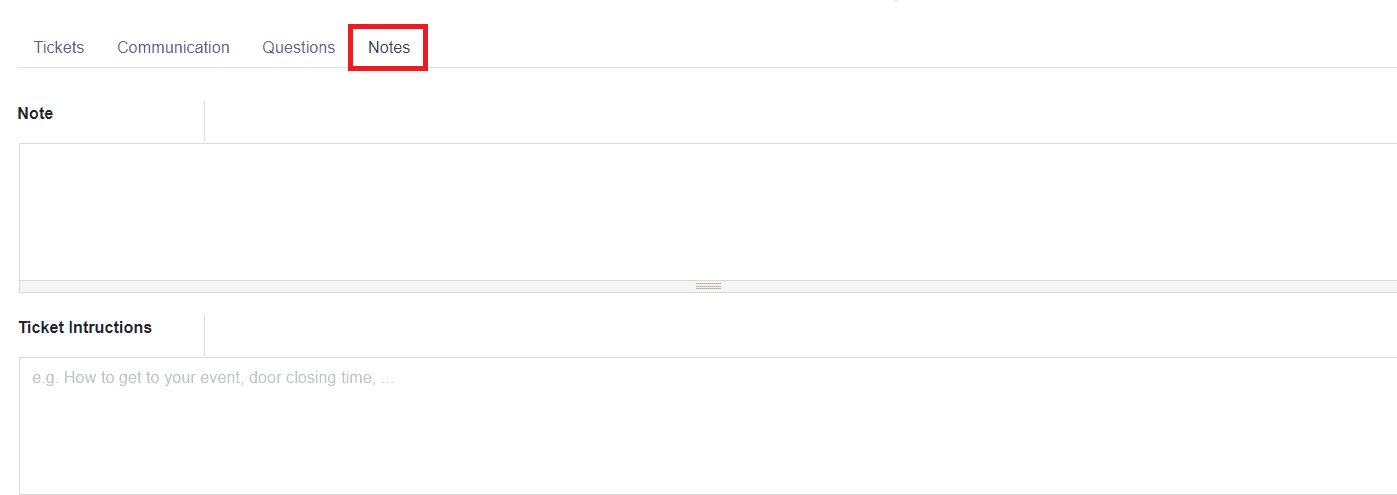
In the Notes tab, you can add notes and instructions about the event.
After adding all details about the event in the event creation window, you can click on the ‘Save’ button.
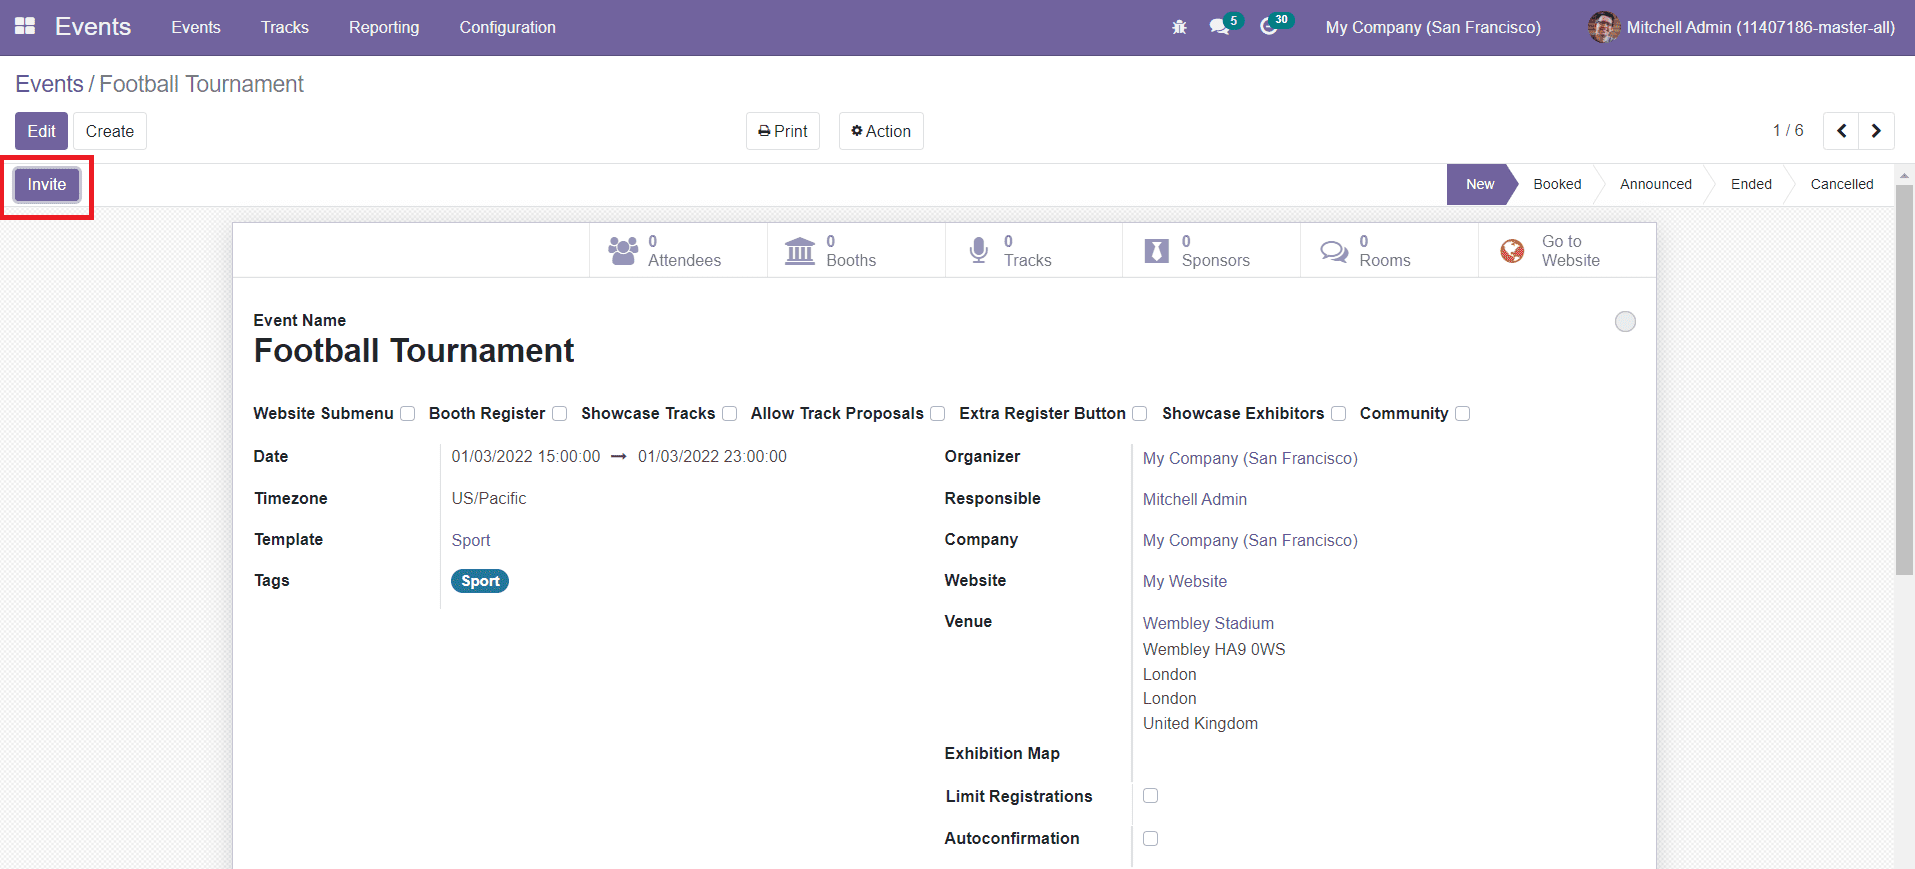
You can use the Invite button to invite participants to the event. By clicking this button, you will be directed to a new window as shown below.
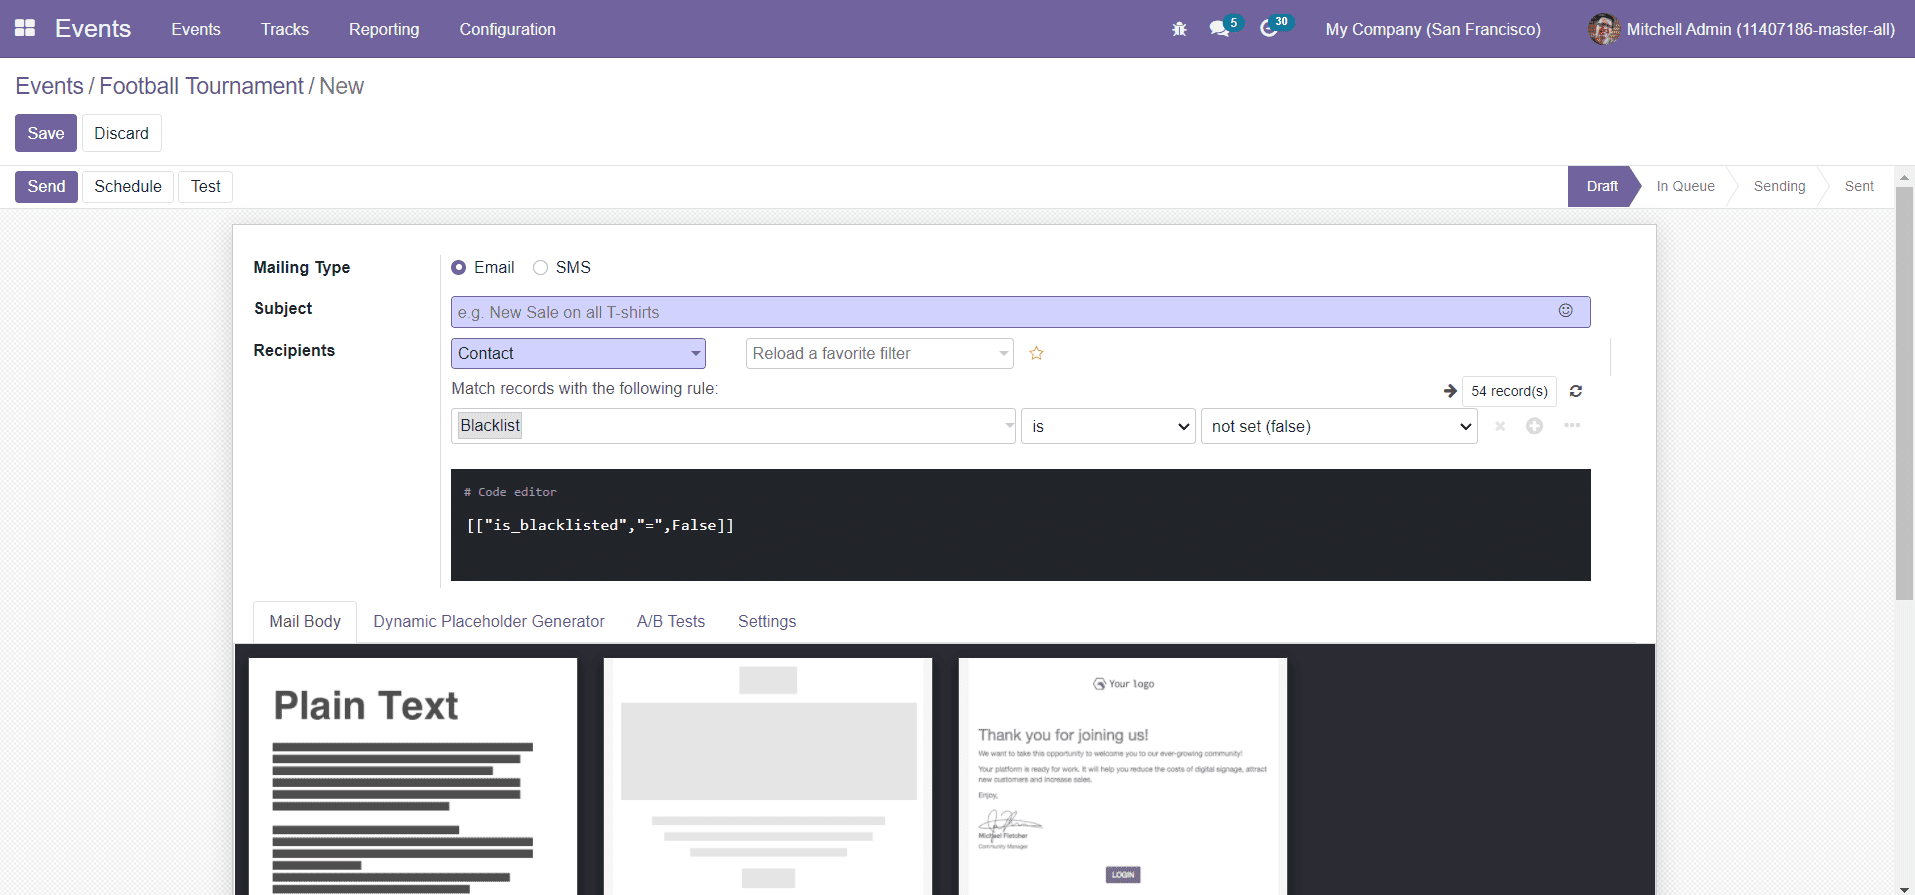
You can create and send marketing Emails or SMS on this platform just like we discussed in the Email and SMS Marketing modules. The Schedule button will help you to schedule a date for sending this SMS/Email.
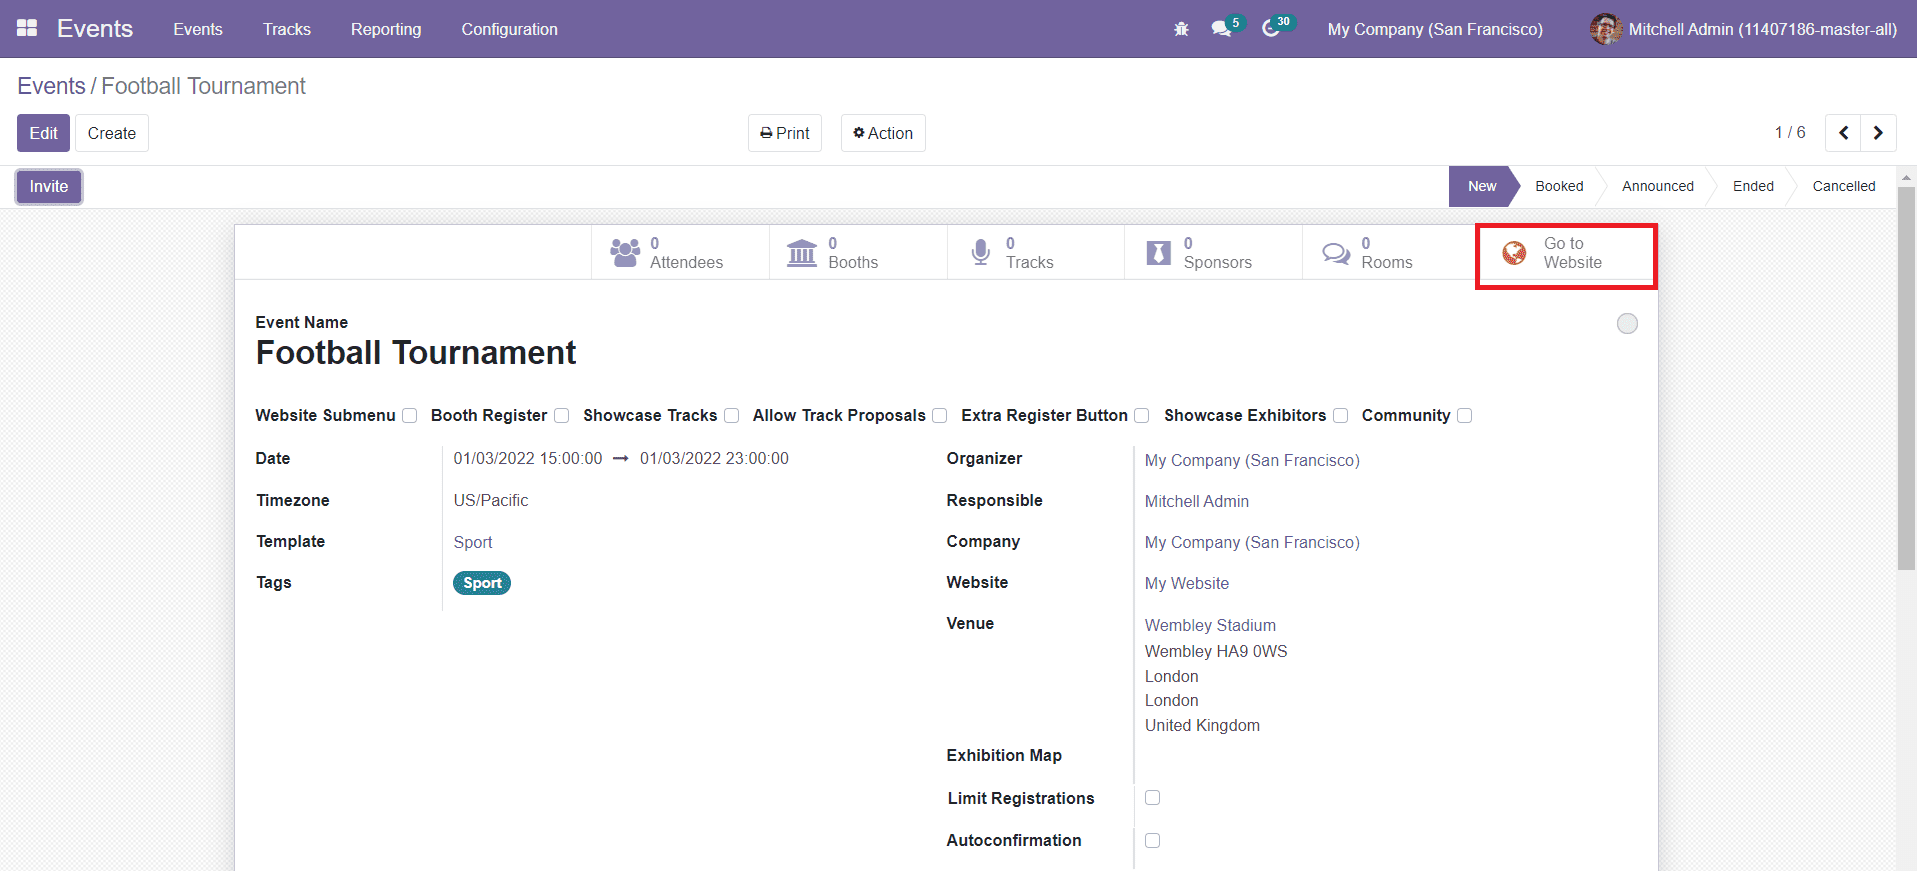
Now, click on the ‘Go-To Website’ button to publish the event on your website.
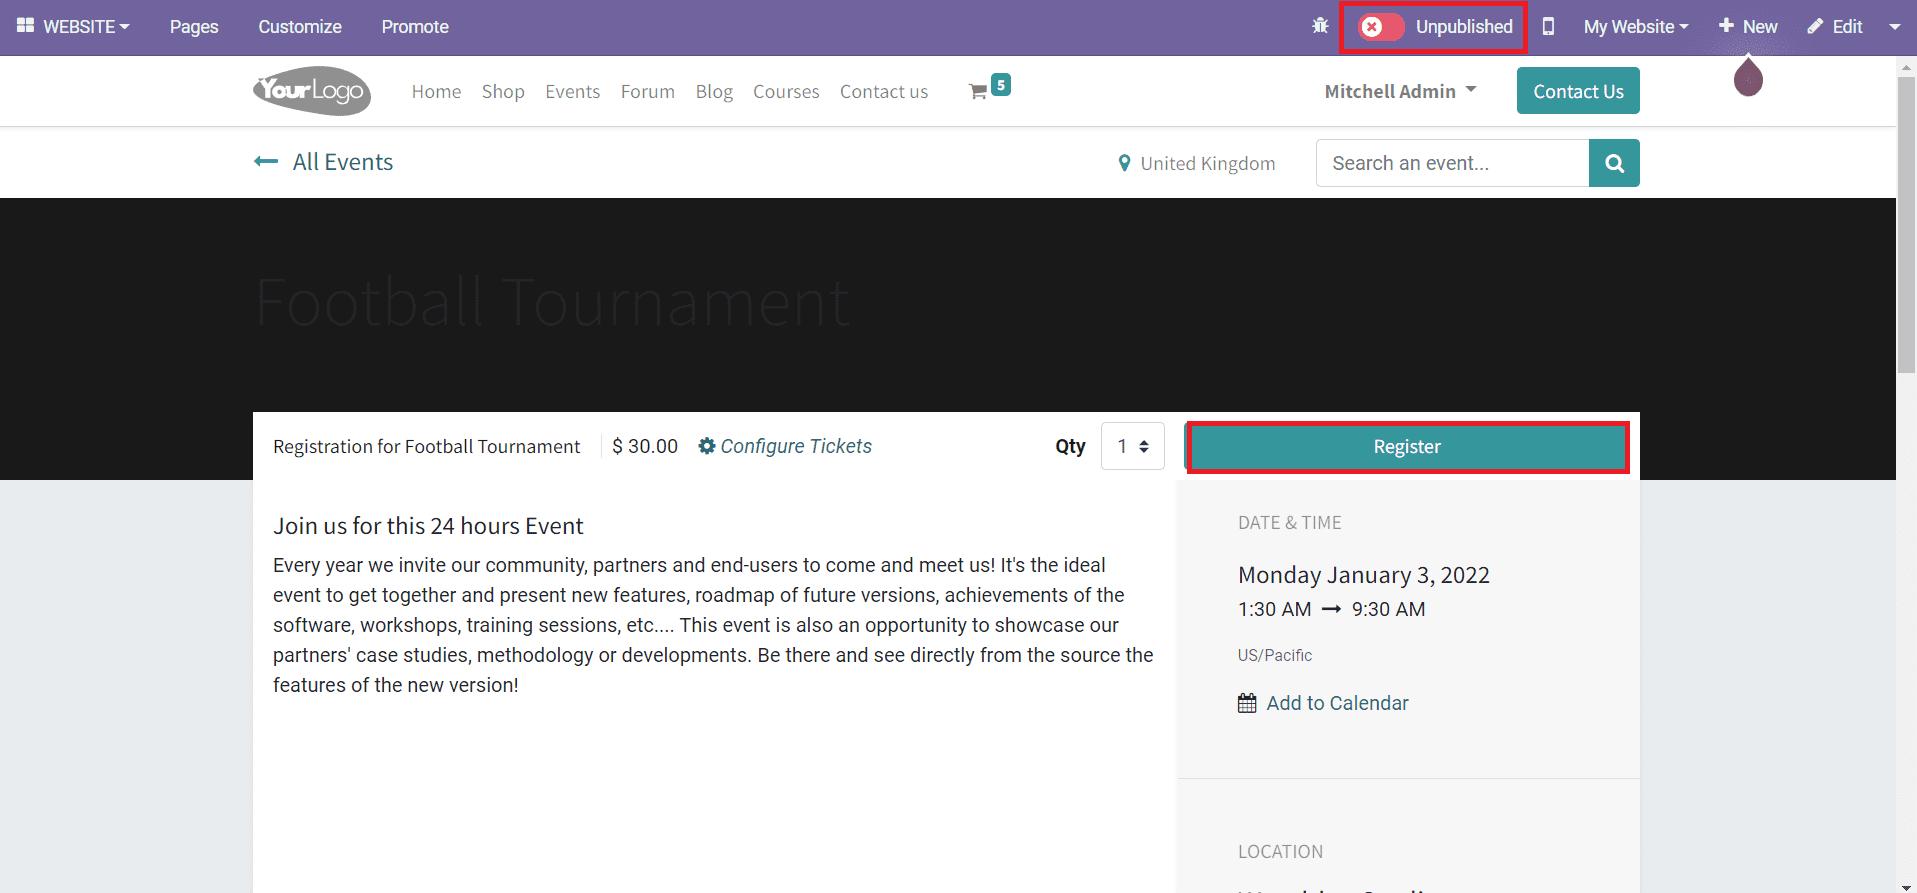
Change the ‘Unpublished’ status to ‘Published’ to publish this event on your website. After publishing the event on the website, the attendees can register for the event by clicking on the ‘Register’ button.
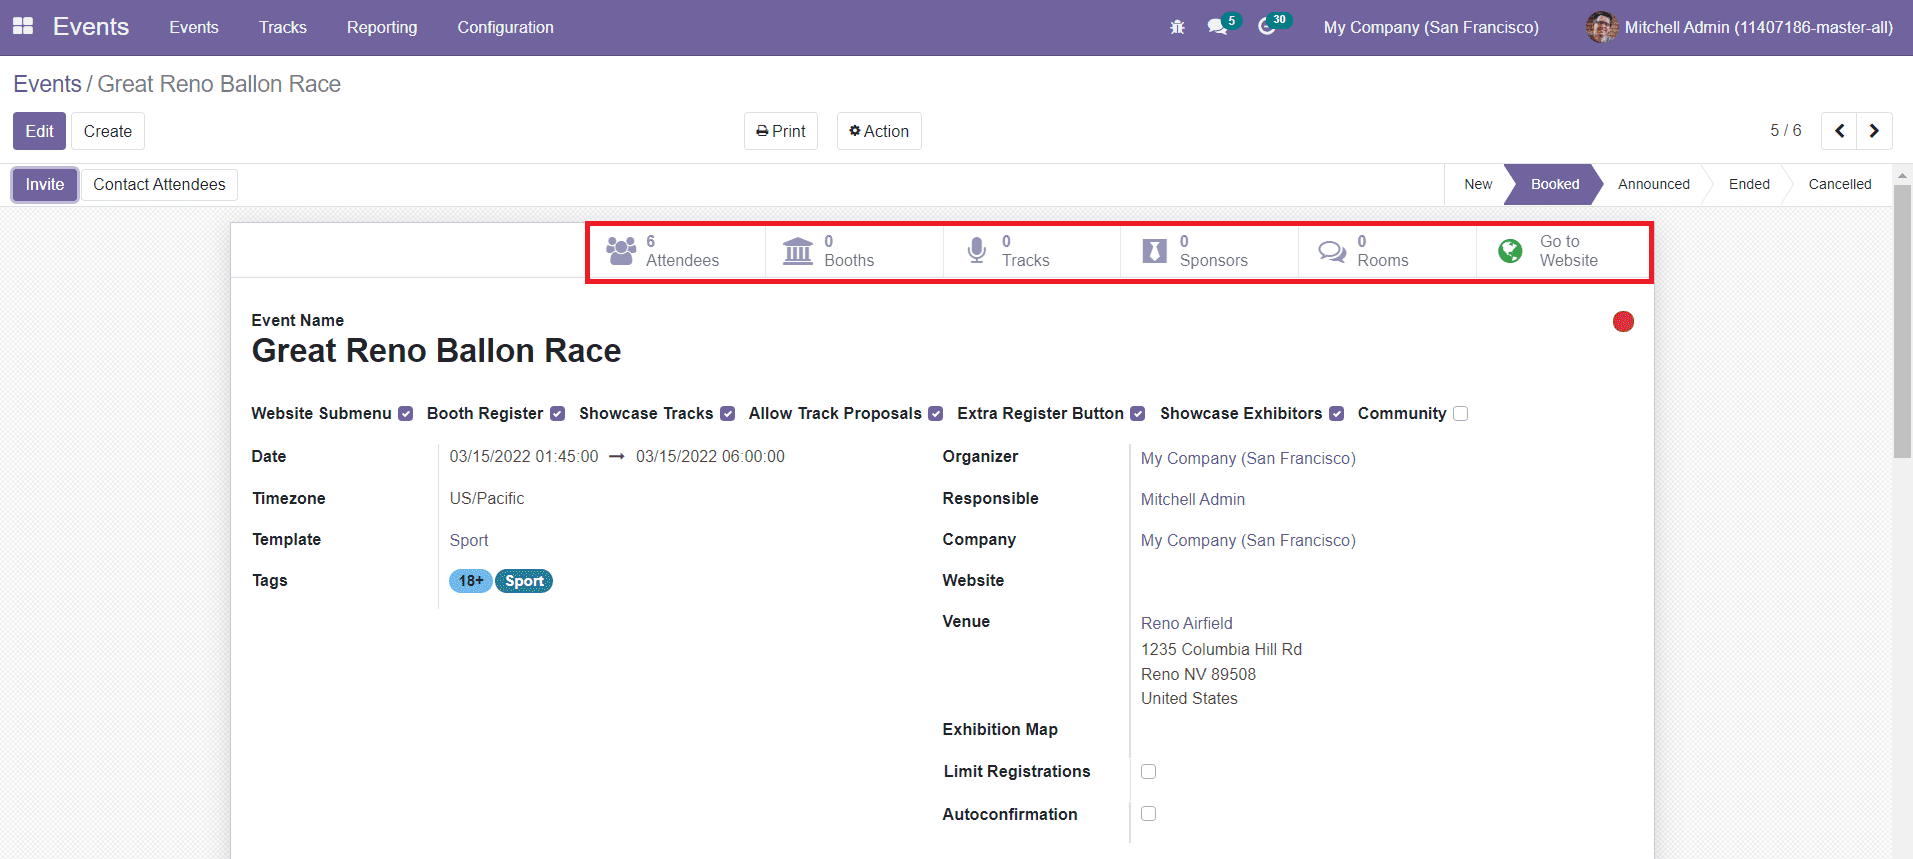
The smart tab in the window will show various advanced options. The Attendees button will show the list of all attendees registered for the event.
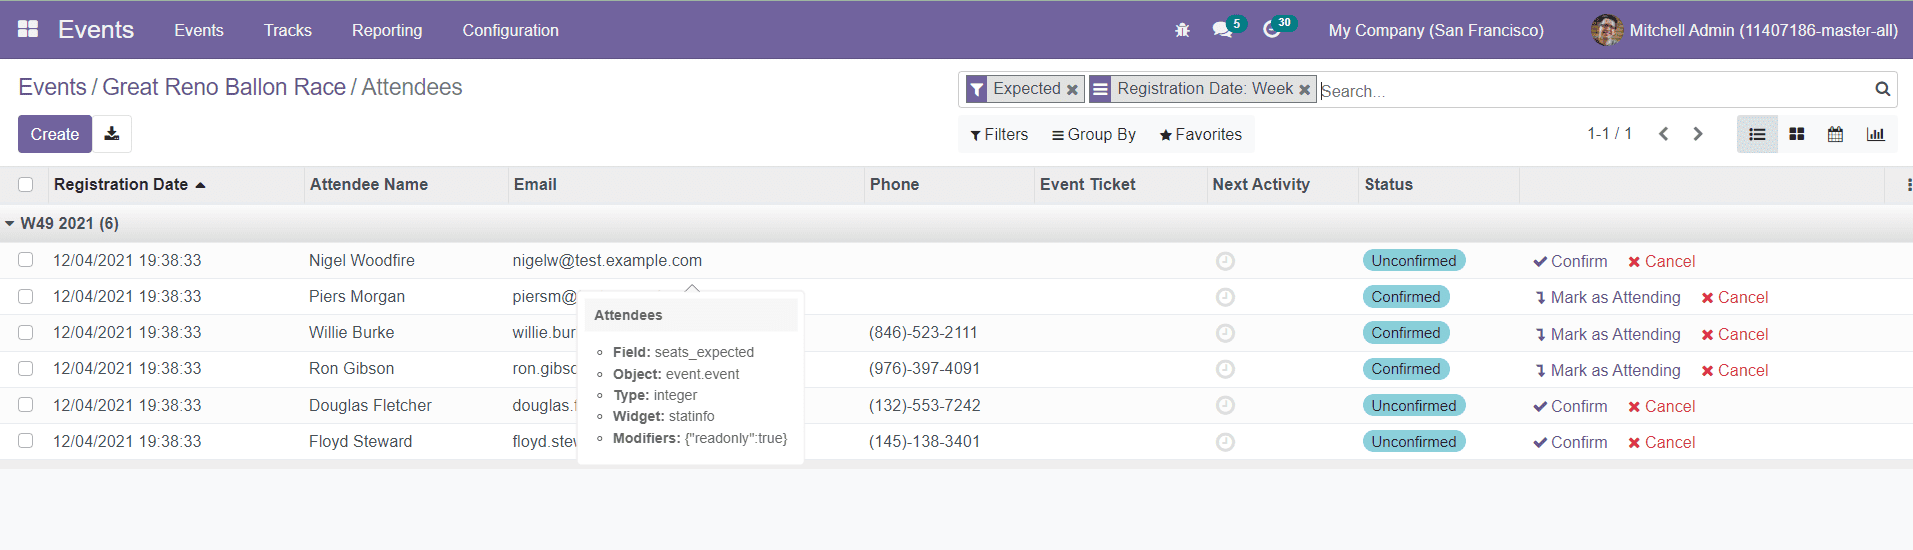
The preview of the list shows the Registration Date, Name of the Attendee, Email, Phone, Event Ticket, Next Activity, and Status. The window will also show the Confirm button to confirm the unconfirmed attendee and the Cancel button which will help you to cancel the attendee. For confirmed attendees, you will get Mark as Attending button to mark the attendance of the attendees.
In the Settings menu of the module, you will get the Schedule & Tracks, Community Chat Rooms, Online Exhibitors, and Booth Management options to activate.
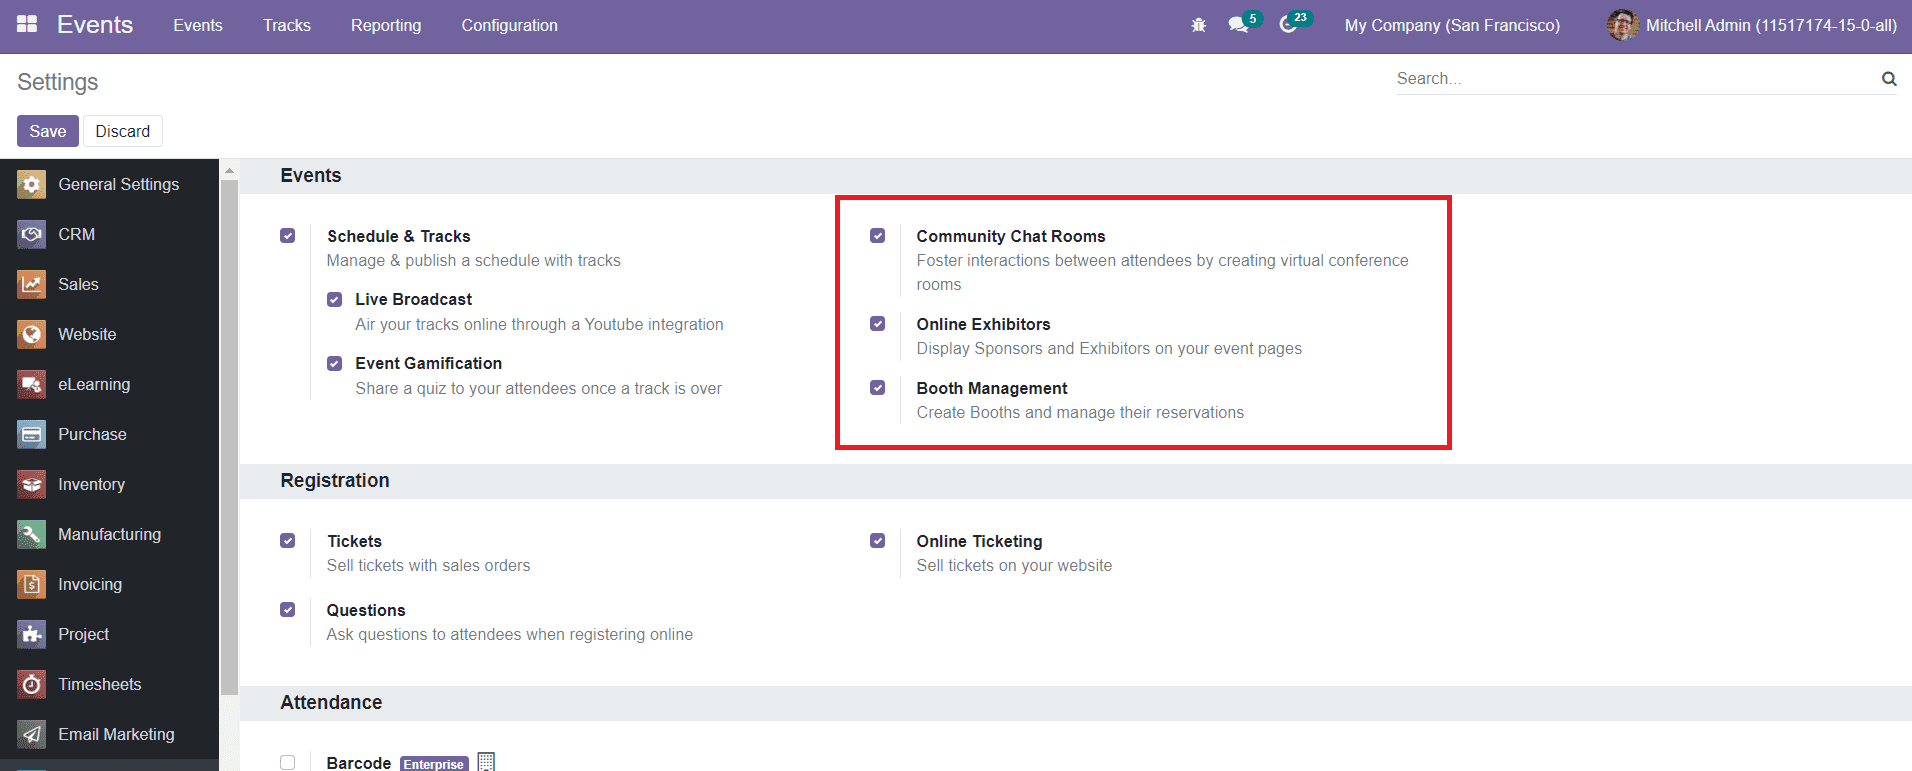
While activating these options, you will get the respective buttons on your event page. The Community Chat Room option will help you to create virtual conference rooms for attendees. The online Exhibitors option will display sponsors and exhibitors on your event pages. The Booth Management option will help you to create booths and manage their reservations.

The Booths button will show the list of booths that you rent during your event. The Tracks define your event schedule. They can be talks, workshops, or any similar activity. The details about sponsors of your program can be seen using the Sponsors button. The Chat Rooms option allows your event attendees to meet up and chat on different topics. The Contact Attendees button near the Invite button will help you to contact attendees via Email/SMS.
This is how we create new events in the Odoo Events module. Now, let’s take a look at the Event Tracks menu in this module.