Automation is the key factor of dealing with the business these days. Various business organizations have learned the need of automating business operations and are now relying on them to perform various actions. The development of various Enterprise and resource planning software(ERPs) in the new era has helped various organizations to automate business operations.
These ERPs allowed the executives and managers to control all the operations of the business in various aspects. On contrary, these lacked the adaptability and flexibility feature which limited them from being established into various business organizations. Odoo is one of the best ERPs available in the market seemed to have a better edge of advantage over the others. The Odoo software operates from a single platform therefore allowing the users to manage and monitor all the business operations of the company from a single system. In addition, the platform has the benefit of customizability which allows the Odoo to be integrated into any form of business operations. Furthermore, the user of Odoo is provided with the provision to integrate the operations and equipment based on the existing methodologies, therefore, making the platform a cost-efficient and reliable one among all other ERPs available in the market
This blog will provide an insight into:
How do schedulers work in Odoo?
How to create a new scheduler?
Schedulers in Odoo
Schedulers in Odoo often act as a calculating methodology or engine which allows the users to automate the manufacturing and purchase options of the company. Additionally, the options in Odoo allow the users to send out automated purchase quotations to the vendors as per the operational rules set by the user. The schedulers in Odoo can be customized to run and operate based on timely intervals set by the user. This provision helps the users to be updated automatically in the stocks of products and be in contact with the customers and vendors. The scheduler options can be created and customized as per the wish of the users considering the operational methodologies of their companies. The scheduling options can be made to operate manually as well in the Odoo platform, this setup can be provided for the options where automated timely scheduling is of no use.
Create a new scheduler
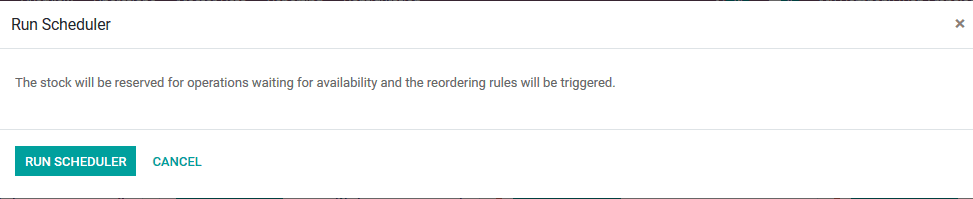
As mentioned earlier the scheduling operations can be done manually and could be automated for all the scheduling operations. In case the user decides to do the operations manually the user can do so in the inventory module of the Odoo platform. In the inventory, the module selects the operations menu and the user can view the run schedulers option. On selecting the icon the user will be depicted with a pop-up window as shown in the image below. To run the scheduling the user can select the run schedule option available or cancel the operation select the cancel icon of the window.
To create the schedulers to run automatically the user should create a new one and assign it with the Odoo platform. To do so the user should initially enable the developer mode as the automated scheduling options are not in provision for the users. To enable the developer mode select the settings menu and scroll down to view the developer options and select the icon “activate developer mode”. On enabling the developer mode the Odoo platform allows the users with provision to enable and set up various settings options to run the Odoo in the company.
On enabling the developer mode the user will be directed back to the homepage of the platform and to create schedulers select the settings menu. From the settings, dashboard the user can select the technical window and navigate to the scheduler actions menu available in the dashboard. The scheduler actions window depicts all the schedulers available in the Odoo platform, to create a new one the user can select the create option.
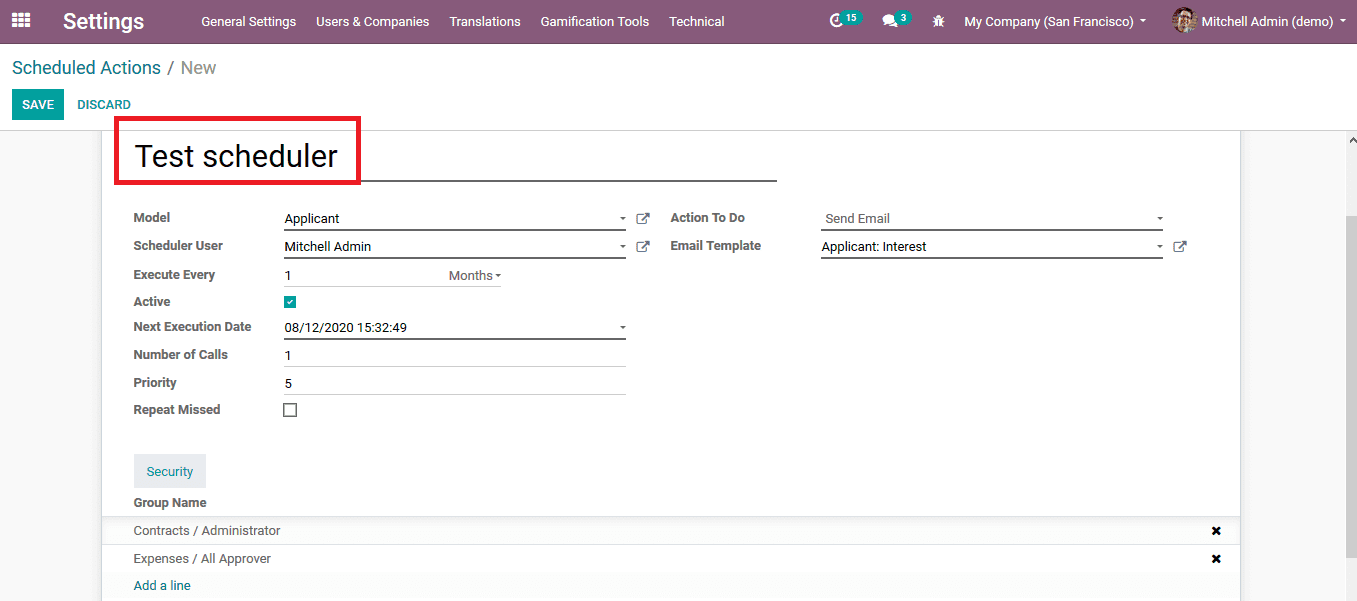
On selecting the correct option the user will be shown with the window as indicated in the below image, he/ she can provide a name for the scheduler, select a model, assign the user and the action to be performed from the default options available. On selecting to send an email to the clients or the vendors the user has the provision to select an email template from the listings or create a new one straight away from the window. The frequency of the scheduler as well as the priority for the scheduling action can be set on which it will be operated in the Odoo platform. The group of receivers of the scheduling actions can be specified from the list available by selecting the add a line option available.
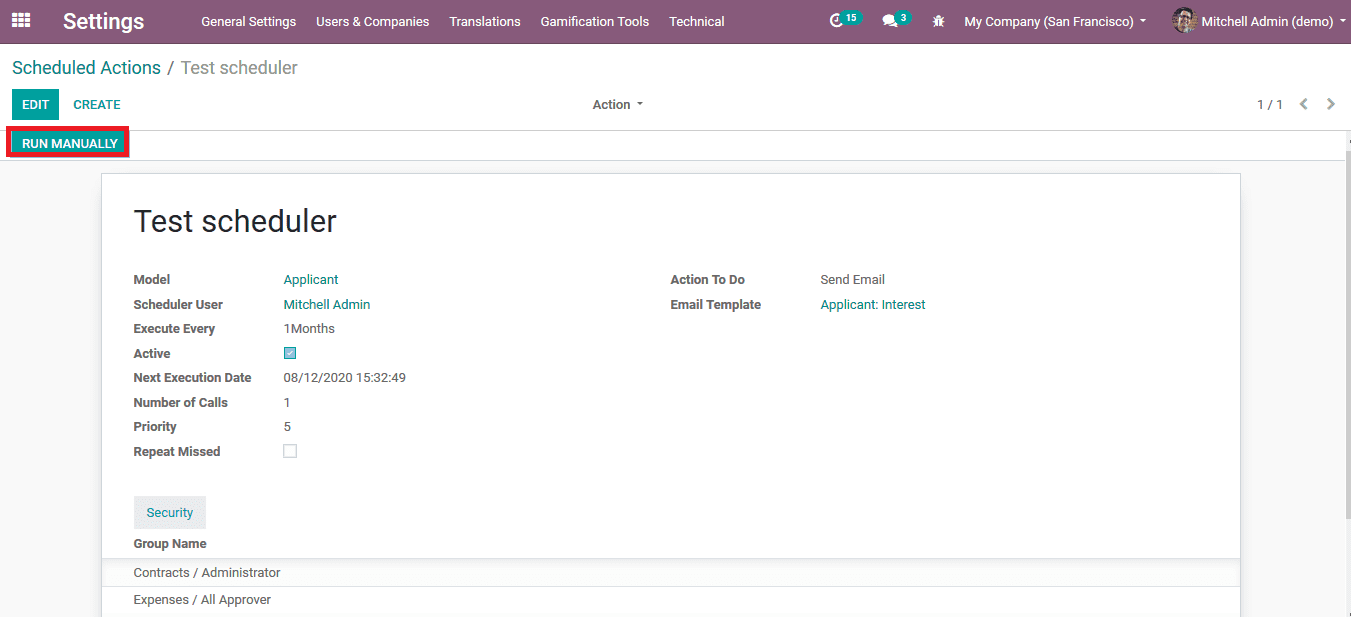
On providing the details the user should save the scheduling action to be activated in the Odoo platform. To test the scheduler the user can select the run manually icon available in the respective scheduling action.
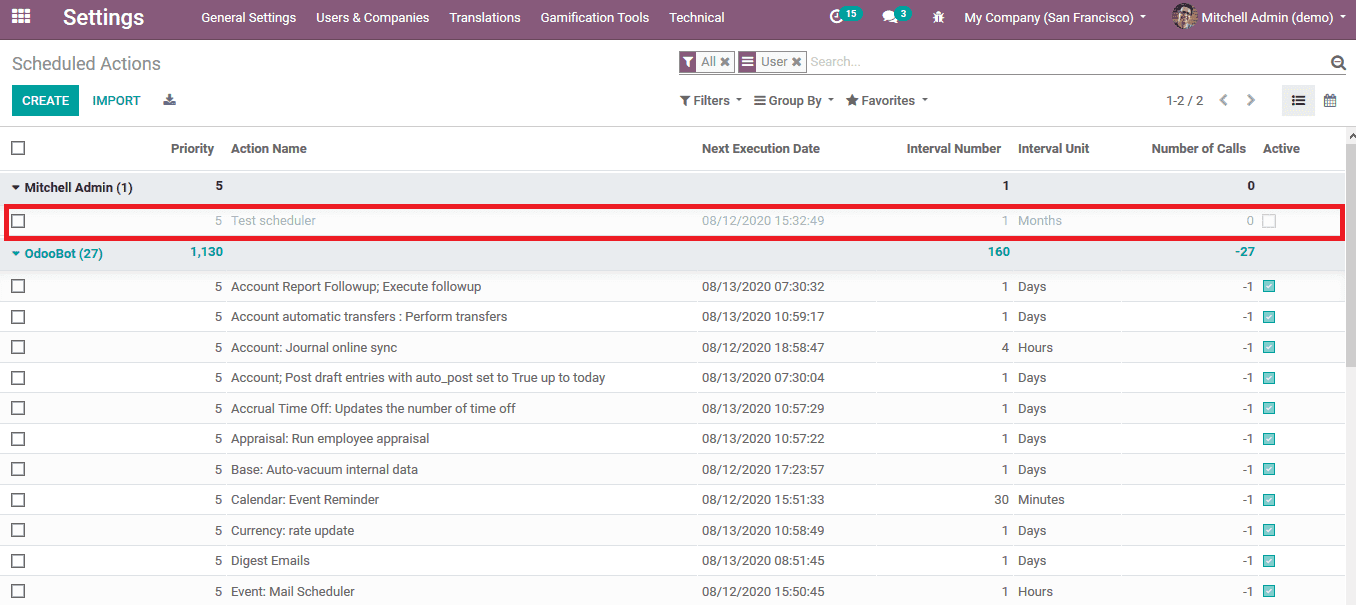
In the scheduler actions menu, the user can view all the schedulers available and import ones from an external platform if needed. The sorting options to filter and group by helps the users to extract the information of the respective schedulers available.
The scheduler functions in Odoo is a handy and reliable tool to automate the operations of the management of the company.