With the release of Odoo version 19, there are many exciting changes in the Website Builder. The Website Builder in Odoo 19 has become even more flexible and customizable. The key to this increased customizability and flexibility lies in the Dynamic Snippet Options.
If you have clicked on a snippet in edit mode and changed options such as category, layout, or design from the right-side panel, then you have already used snippet options.
In this blog, we are going to dive deep into the internal workings of Dynamic Snippet options in Odoo 19 and also show you how to create your own Dynamic Snippet options by taking an example of Dynamic Product Snippet.
This blog post would be most beneficial to you if you are:
- Creating custom website snippets
- Customizing dynamic product snippets
- Using OWL-based option panels in Odoo 19
What is a Dynamic Snippet Option?
The Dynamic Snippet Option is the section shown on the right side of the screen when the website builder is in snippet selection mode.
The snippet options enable website creators to:
- Modify the snippet’s behavior
- Apply data filters
- Customize layouts and designs
Snippet options, as seen in the Dynamic Product Snippet, may include:
- Choose product category
- Establish price range
- Manage the number of products
- Toggle design layout
Important Concept
Snippet options don’t show information.
They store information for configuration with the help of ‘data-*’ attributes and trigger the execution of the JavaScript snippet for refreshing.
How Dynamic Snippet Options Work (Big Picture)
Let’s break the whole process into steps:
Option UI (Builder Panel)
?
BuilderAction
?
HTML data-* attribute updated
?
Custom Event Triggered
?
Snippet JS Listens
?
RPC Call ? Content Reload
This approach ensures the complete decoupling of options from snippet rendering – one of the best architectural changes in Odoo 19.
Building the Option User Interface (XML Fundamentals)
Builder Components in XML are used to define the option UI.
Frequently Used Parts:
- BuilderRow > One row in the option panel
- BuilderSelect > Dropdown field
Example: Product Category Option
<BuilderRow label.translate="Product Category">
    <BuilderSelect
        action="'productCategory'"
        dataAttributeAction="'productCategoryId'">
        <BuilderSelectItem value="'all'">All Products</BuilderSelectItem>
        <BuilderSelectItem dataAttributeActionValue="category.id">
            Category Name
        </BuilderSelectItem>
    </BuilderSelect>
</BuilderRow>
Key rule
dataAttributeAction should end with Id, so Odoo can correctly map dataset values in the editor.
Understanding dataAttributeAction
This attribute is the core of snippet options.
dataAttributeAction="'productCategoryId'"
Odoo automatically converts this into:
data-product-category-id="3"
- You never manually update the dataset
- Odoo handles it automatically
- Your snippet JS simply reads:
this.el.dataset.productCategoryId
Writing the Option Component (OWL – JavaScript)
In Odoo 19, snippet option logic is written using OWL components.
Required Imports
import { BaseOptionComponent } from "@html_builder/core/utils";
import { useDynamicSnippetOption } from "@website/builder/plugins/options/dynamic_snippet_hook";
import { onWillStart, useState } from "@odoo/owl";
Significance of These
- BaseOptionComponent is the foundation of every options panel for snippets in Odoo version 19. It is what provides you with the structure you need to create your own custom options panels without having to start from scratch.
- The useDynamicSnippetOption hook is what connects the option component to the dynamic snippet. This allows the options panel to communicate with the dynamic snippet, so when the user changes something on the options panel, the dynamic snippet is automatically updated.
- The useState hook is what controls data that affects the interface, like categories, filters, or other types of data the user can select. This way, when the data is updated, the interface is automatically updated so the user can view the latest data.
- The onWillStart function is what is used to load data before the options panel is displayed. This way, when the options panel is displayed, the data the user is going to need is already loaded.
Product Option Component Example
export class DynamicSnippetProductsOptions extends BaseOptionComponent {
    static selector = ".s_dynamic_products";
    setup() {
        super.setup();
        const { fetchCategories, getModelNameFilter } =
            this.dependencies.dynamicSnippetProductsOptions;
        this.dynamicOptionParams = useDynamicSnippetOption(
            getModelNameFilter(),
            []
        );
        this.state = useState({ categories: [] });
        onWillStart(async () => {
            const categories = await fetchCategories();
            this.state.categories.push(...categories);
        });
    }
}- Loads categories once
- Feeds data to the XML dropdown
- Does not apply filters directly
The significance of a plugin is mandatory in Odoo 19
Options cannot be used in Odoo 19 without the use of a plugin, as was the case in prior versions.
The plugin does the following tasks:
- Registration of option UI
- Registration of BuilderActions
- Setting default dataset values
- Sharing of services (ORM, website context)
Plugin Structure Explained
import { Plugin } from "@html_editor/plugin";
import { BuilderAction } from "@html_builder/core/builder_action";
import { withSequence } from "@html_editor/utils/resource";
class DynamicSnippetProductsOptionPlugin extends Plugin {
    static id = "dynamicSnippetProductsOptions";
    static dependencies = ["dynamicSnippetOption", "productsDesignPanel"];
    resources = {
        builder_actions: {
            ProductCategoryAction,
            PriceRangeAction,
        },
        builder_options: withSequence(
            DYNAMIC_SNIPPET,
            DynamicSnippetProductsOptions
        ),
    };
}
This is saying to Odoo:
- What options belong to which snippet
- What actions to take if any of the options change
Setting Default Values (Very Important)
In a dropped snippet, data values might be undefined, and this is a bug.
Always set defaults:
setDatasetIfUndefined(snippetEl, "productCategoryId", "all");
This ensures:
- Predictable rendering
- No broken domains
- Stable editor behavior
BuilderAction: The Heart of Snippet Options
A BuilderAction executes when an option value changes.
Example: Product Category Action
export class ProductCategoryAction extends BuilderAction {
    static id = "productCategory";
    async apply({ editingElement }) {
        await super.apply?.(...arguments);
        editingElement.dispatchEvent(
            new CustomEvent("dynamicProductsUpdate", { bubbles: true })
        );
    }
    getValue({ editingElement }) {
        return editingElement.dataset.productCategoryId || "all";
    }
}
What Happens Internally
- Data: 'data-product-category-id' is updated by Odoo
- BuilderAction event is triggered
- Custom event is dispatched
- JS code in the snippet is executed, refreshing the content
Connecting Options to Snippet JavaScript
In the Snippet JavaScript code
this.el.addEventListener(
    "dynamicProductsUpdate",
    this.onDynamicUpdate.bind(this)
);
When executed:
- Attributes of the dataset are read
- Domain is rebuilt
- RPC is executed
- Products are re-rendered
The options code remains decoupled from rendering code.
Changing Snippet Templates (Design Options)
To change layouts such as grid, cards, thumbnails, and chips:
<ProductsDesignPanel
    showLists="false"
    showSecondaryImage="true"
    label.translate="Cards Design"/>
Editing Design Properties
For:
- Border radius
- Gap
- Color
- Hover effects
You must use the following standard classes provided by Odoo:
oe_product_image
oe_product_cart
You must follow the existing structure of the Dynamic Product Snippet XML.
Handling Edit Mode Properly
To avoid null element errors in edit mode, you must:
registry.category("public.interactions.edit").add(
    "dynamic_product_snippet.product_dynamic_snippet",
    {
        Interaction: DynamicProducts,
    }
);
This ensures that your snippet works as expected when in edit mode.
Don’t forget to make your XML and assets files available in your manifest.py file to make Odoo load your snippet and configuration appropriately.
{
   'name': 'Dynamic Product Snippet',
   'version': '19.0.1.0.0',
   'category': 'Website',
   'summary': 'Dynamic snippet to display products',
   'depends': ['base','website', 'product','web','html_builder','website_sale'],
   'data': [
       'views/snippets.xml',
   ],
   'assets': {
       'web.assets_frontend': [
           'dynamic_product_snippet/static/src/js/product_dynamic_snippet.js',
           'dynamic_product_snippet/static/src/xml/product_snippet_templates.xml',
           'dynamic_product_snippet/static/src/css/product_snippet.css',
       ],
       'website.website_builder_assets':[
           'dynamic_product_snippet/static/src/website_builder/dynamic_product_options.js',
           'dynamic_product_snippet/static/src/website_builder/dynamic_product_options.xml',
           'dynamic_product_snippet/static/src/website_builder/dynamic_product_options_plugin.js',
       ],
   },
   'installable': True,
   'application': False,
}
Steps for Adding a New Snippet Option
- Add in XML
- Define dataAttributeAction
- Create a BuilderAction
- Read dataset in snippet JS
- Trigger refresh event
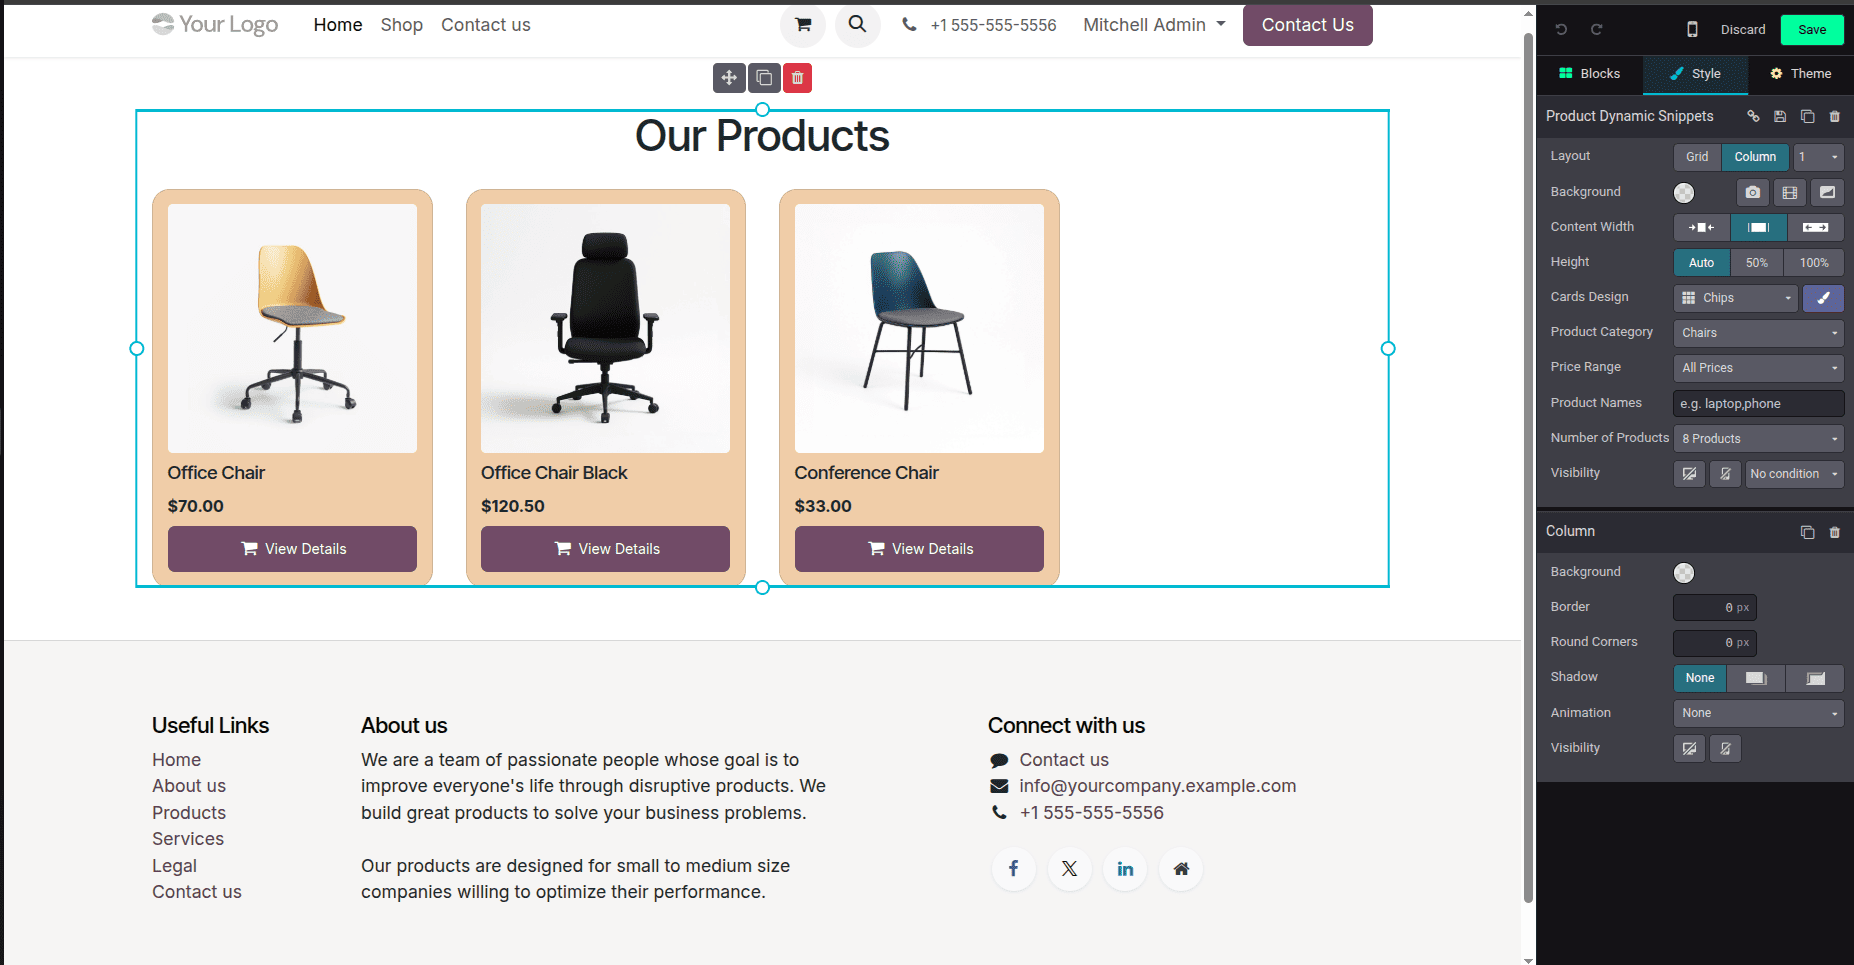
You can see the options for "product category," "price range," "product name," "card design," and "number of products" in the editor.
You can create a clean, scalable, and decoupled architecture for creating powerful website features with the help of Dynamic Snippet Options in Odoo 19.
When you know the following:
- data Attribute Action
- Builder Actions
- Plugin Registration
You can create dynamic snippets with confidence.
To read more about How to Create a Dynamic Snippet in Odoo 19, refer to our blog How to Create a Dynamic Snippet in Odoo 19.