One feature in Odoo 18 that helps organizations effectively manage and track employee spending is the Expense module. It allows employees to submit their expenses and receipts for approval by authorized individuals. Once accepted, the module expedites the process of reinvoicing expenses, marking them as payable, and facilitating efficient financial management for the business.
The employee expense module of Odoo 18 can be configured to receive incoming emails for the purpose of submitting expenses. Employees can utilize this feature to transmit their related expenses and receipts right away. The entire employee cost management process is accelerated by the expense module, which automatically records the provided data and allows authorized users to review and approve the charges within Odoo 18.
Let's examine how the procedure will be run and how an employee will submit their expenses via incoming email.
Configuring Incoming Email Server
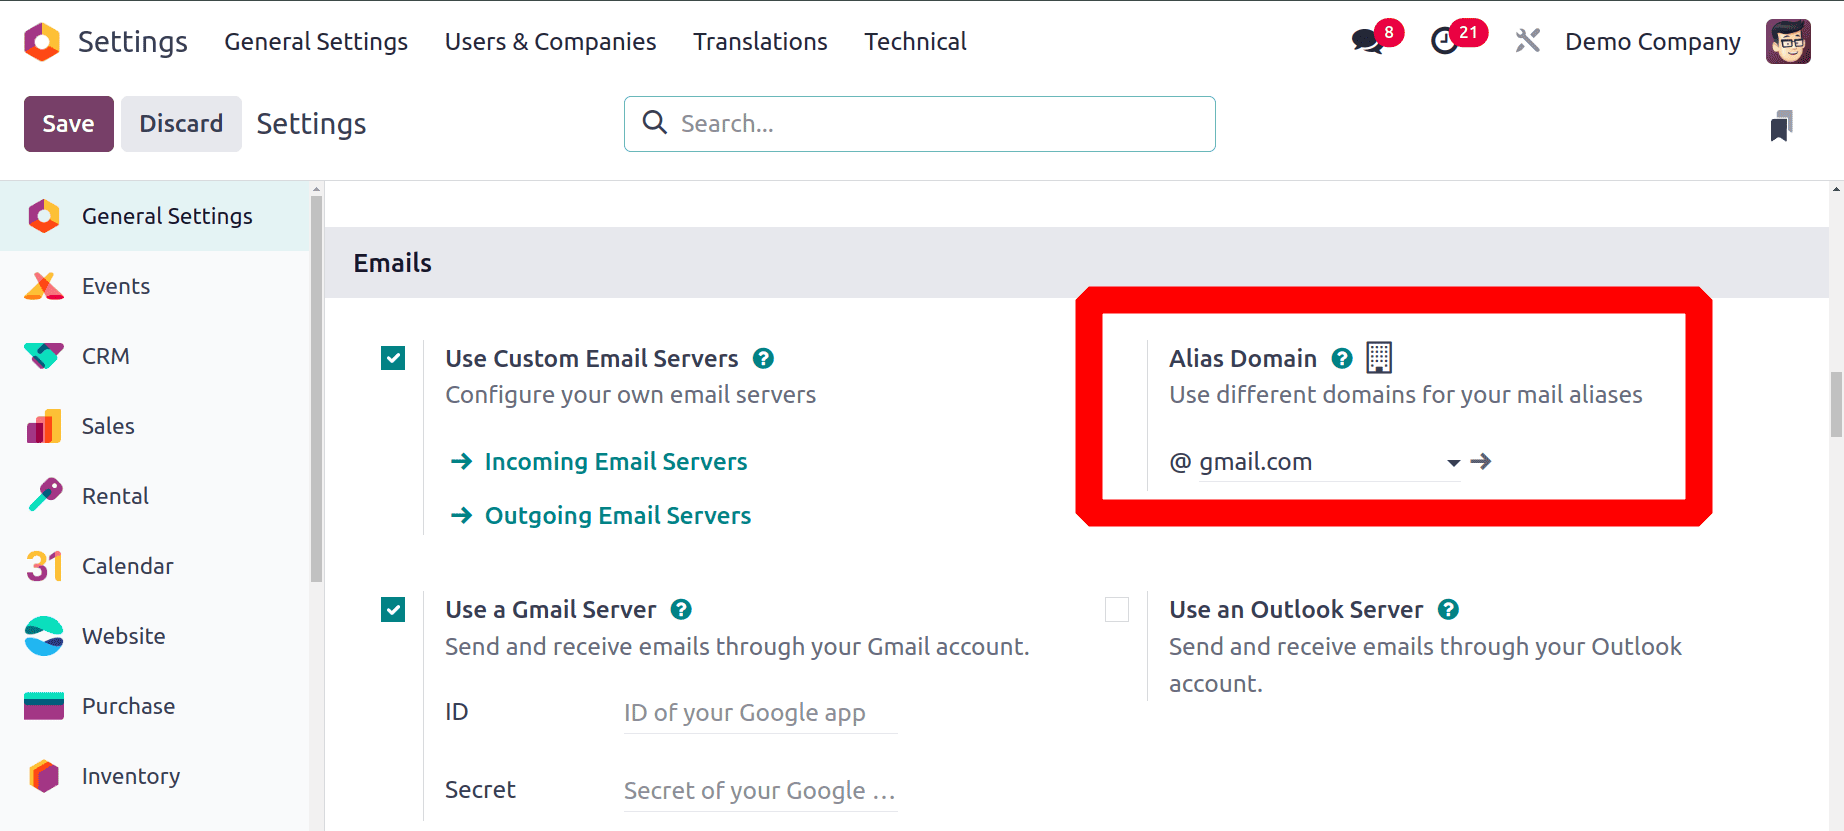
The business must first set up an incoming email server. Settings is where you may customize the email server. Initially, the user must set up a custom email server. General Settings is where you can enable this. Set the Alias Domain and activate the Custom Email server.
: Configuration > Use Custom Email Server > Save
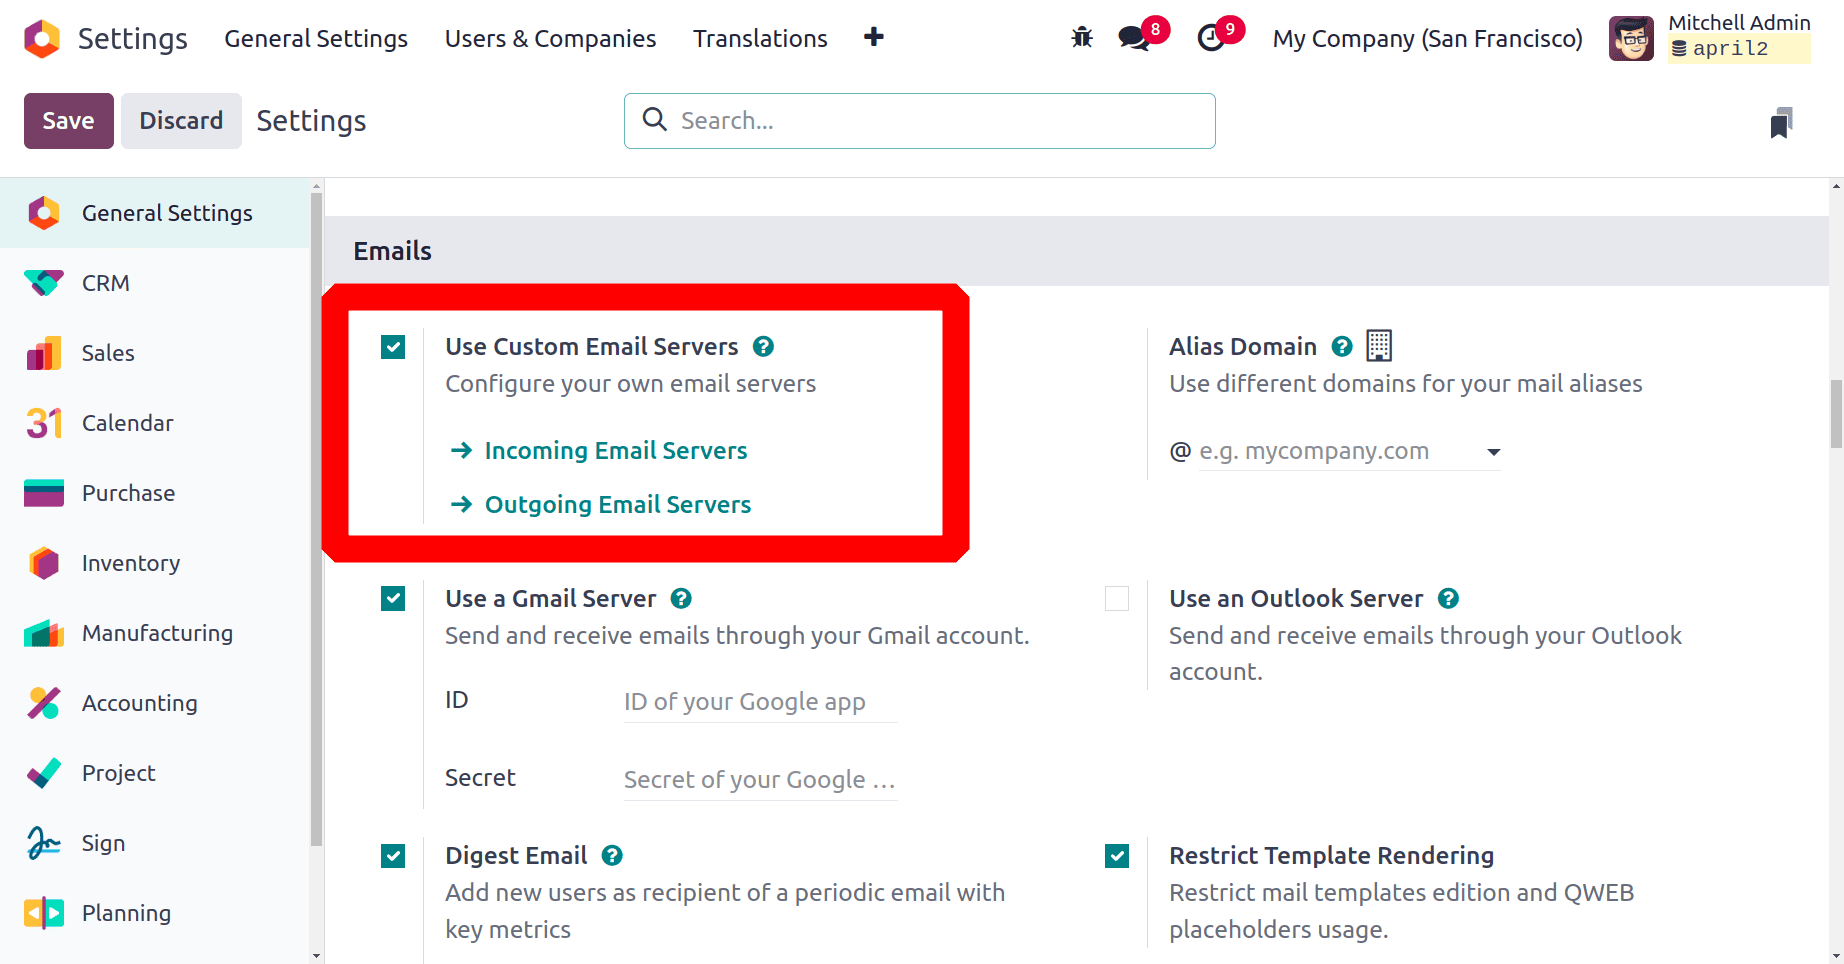
By turning on this custom email server, users can set up both an incoming and outgoing email server.
Incoming Email Server: Odoo 18's incoming mail server configuration allows the system to receive and manage incoming emails. By configuring the incoming mail server to enable different features, such as adding new records or altering existing ones based on email content, users can use emails to interact with the Odoo system.
Outgoing Email Server: Sending out emails is made possible by the Odoo configuration known as the outgoing mail server. The user can allow Odoo to send warnings, notifications, and other communications to clients and other parties by setting up the outgoing mail server.
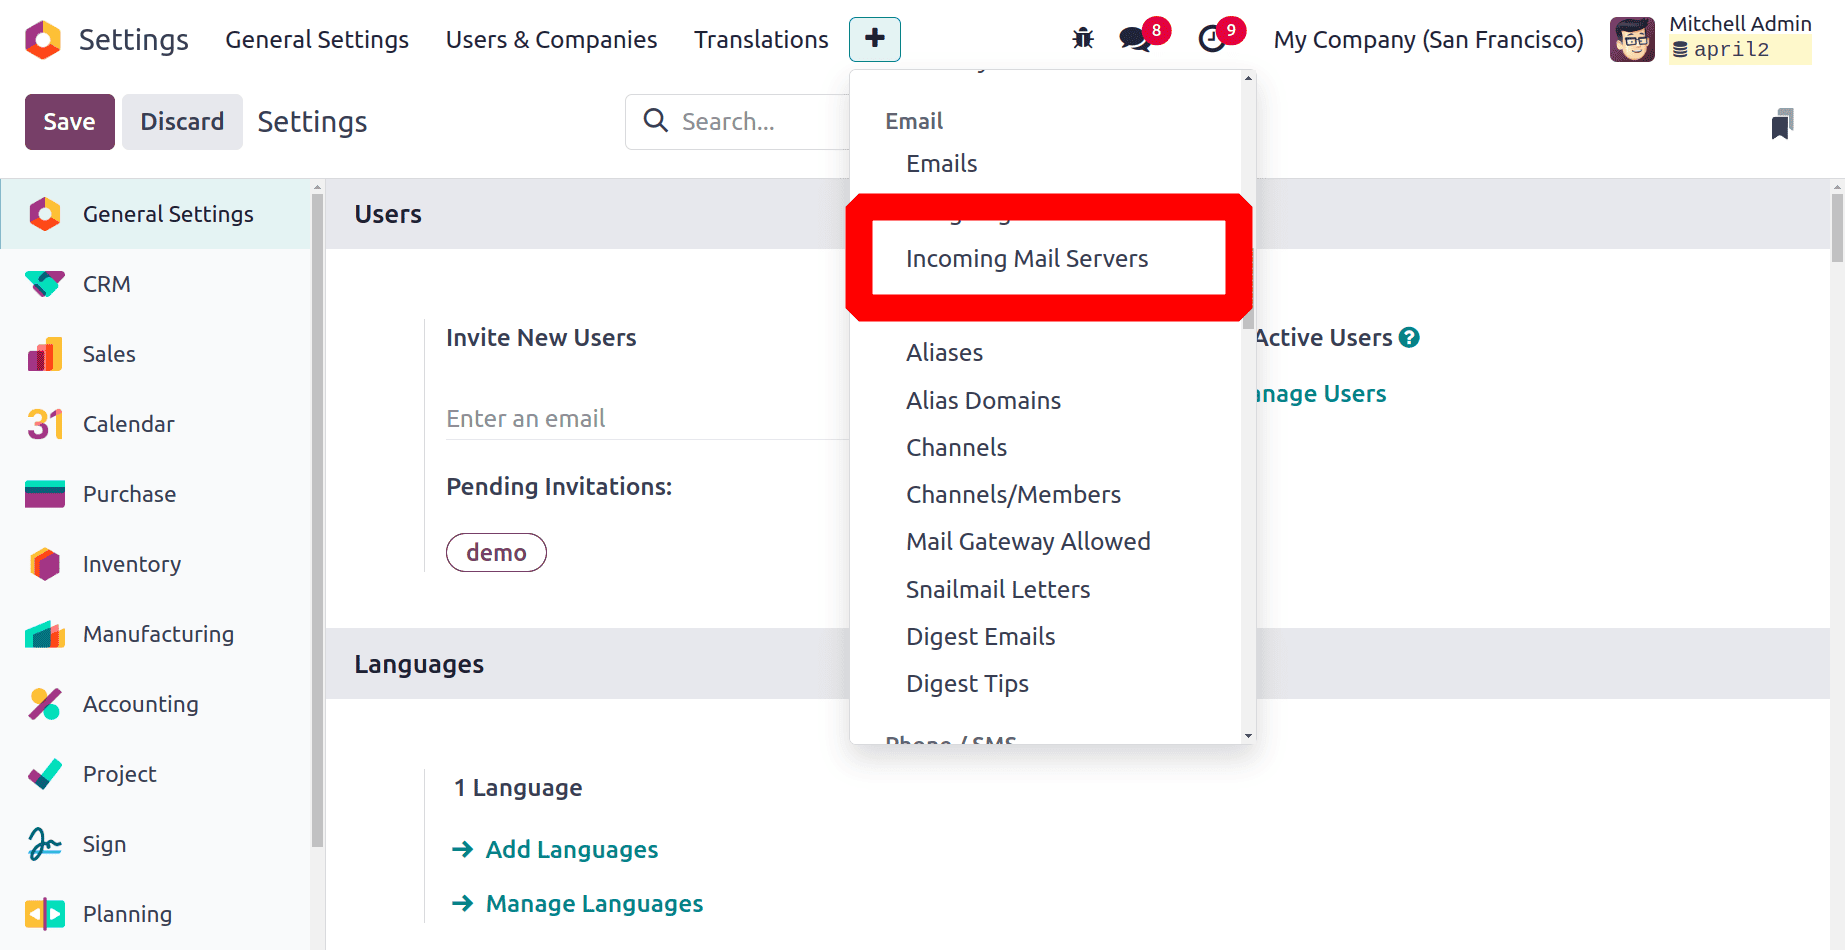
Clicking the Incoming Email Server button allows you to configure the incoming mail server after saving the setup. Alternatively, select the Incoming Email Server selection by scrolling down on the Technical page. Next, under the Email option, select the Incoming Email Server selection.
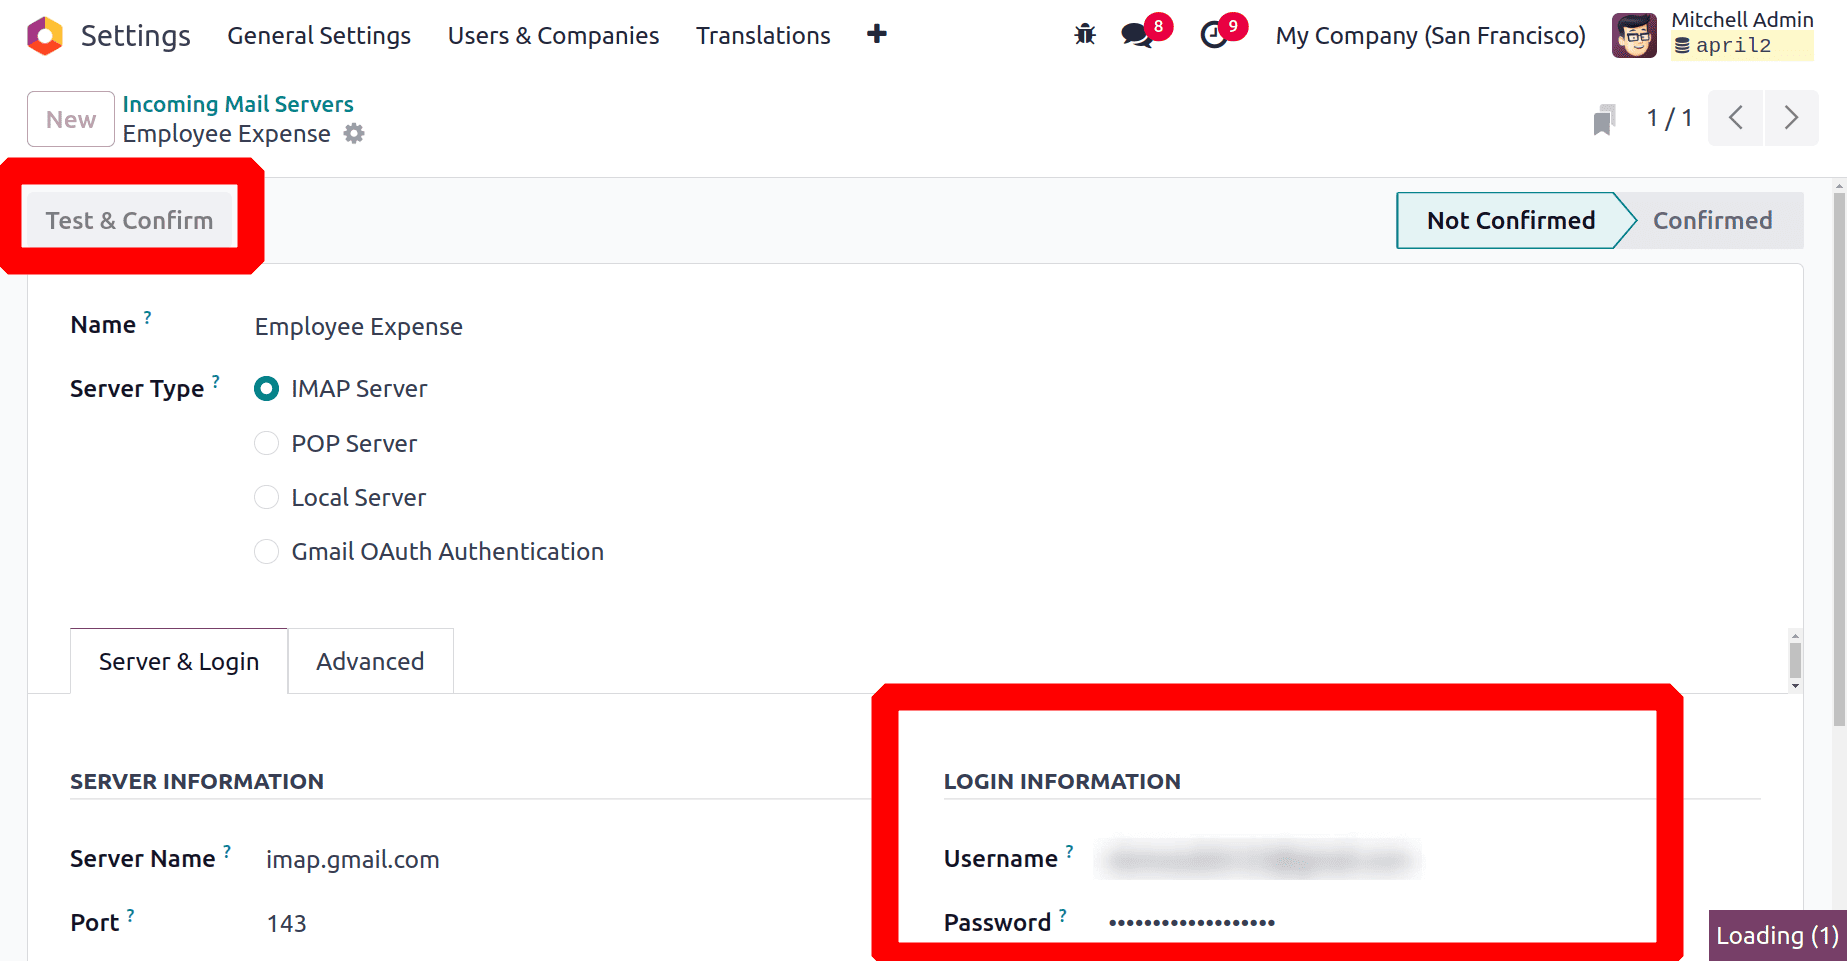
The Name section contains the name of the incoming mail server. Select the type of server. Next, include the port information and server name. Include your login details, such as your password and email address. Test the connection once the details have been added. Clicking the TEST & CONFIRM button accomplishes this.
What should be done with this freshly created incoming mail server is up to the user. The "Actions to perform on incoming mail server" section is located beneath the left-hand corner. From the list, select a task. In this instance, expense is the selected course of action.
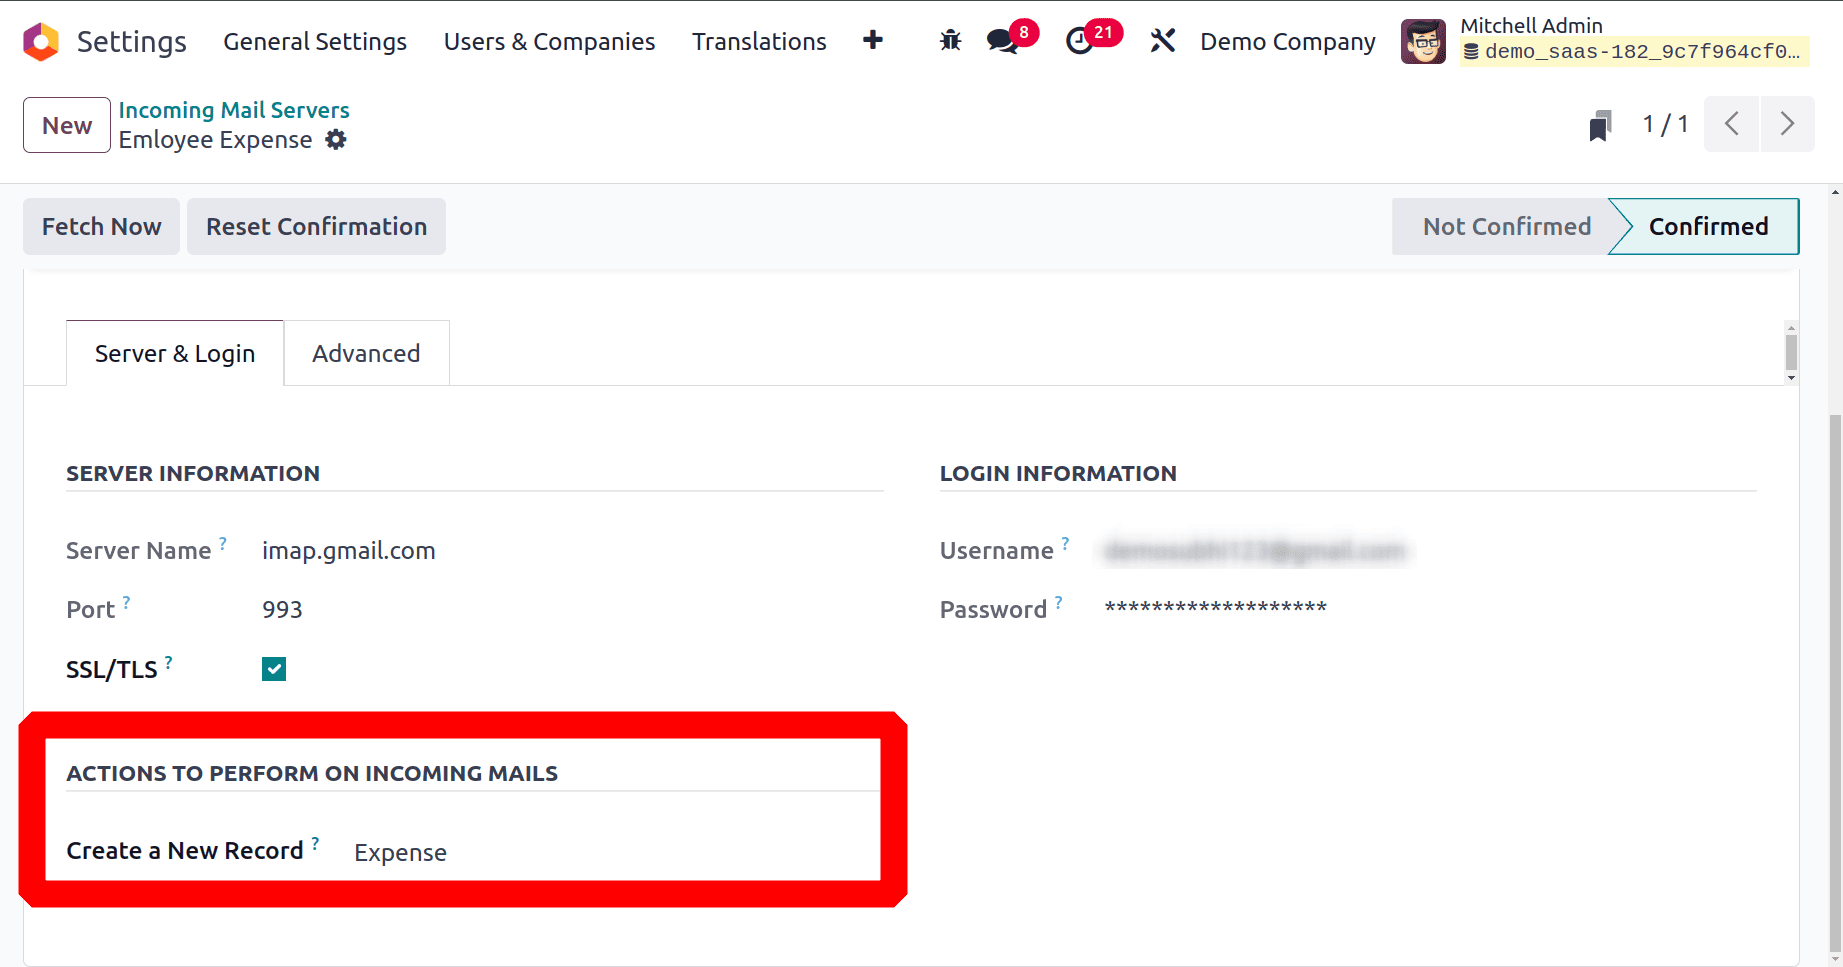
This implies that every email sent to the specified email address will be automatically recorded as an expense in this instance.
Configuring ExpenseProduct
The user must first configure an expense product before they may create expenses from the incoming email. Go to the product tab, and a new expense product can then be developed. Navigate to the "Travel Expense" expenditure product.
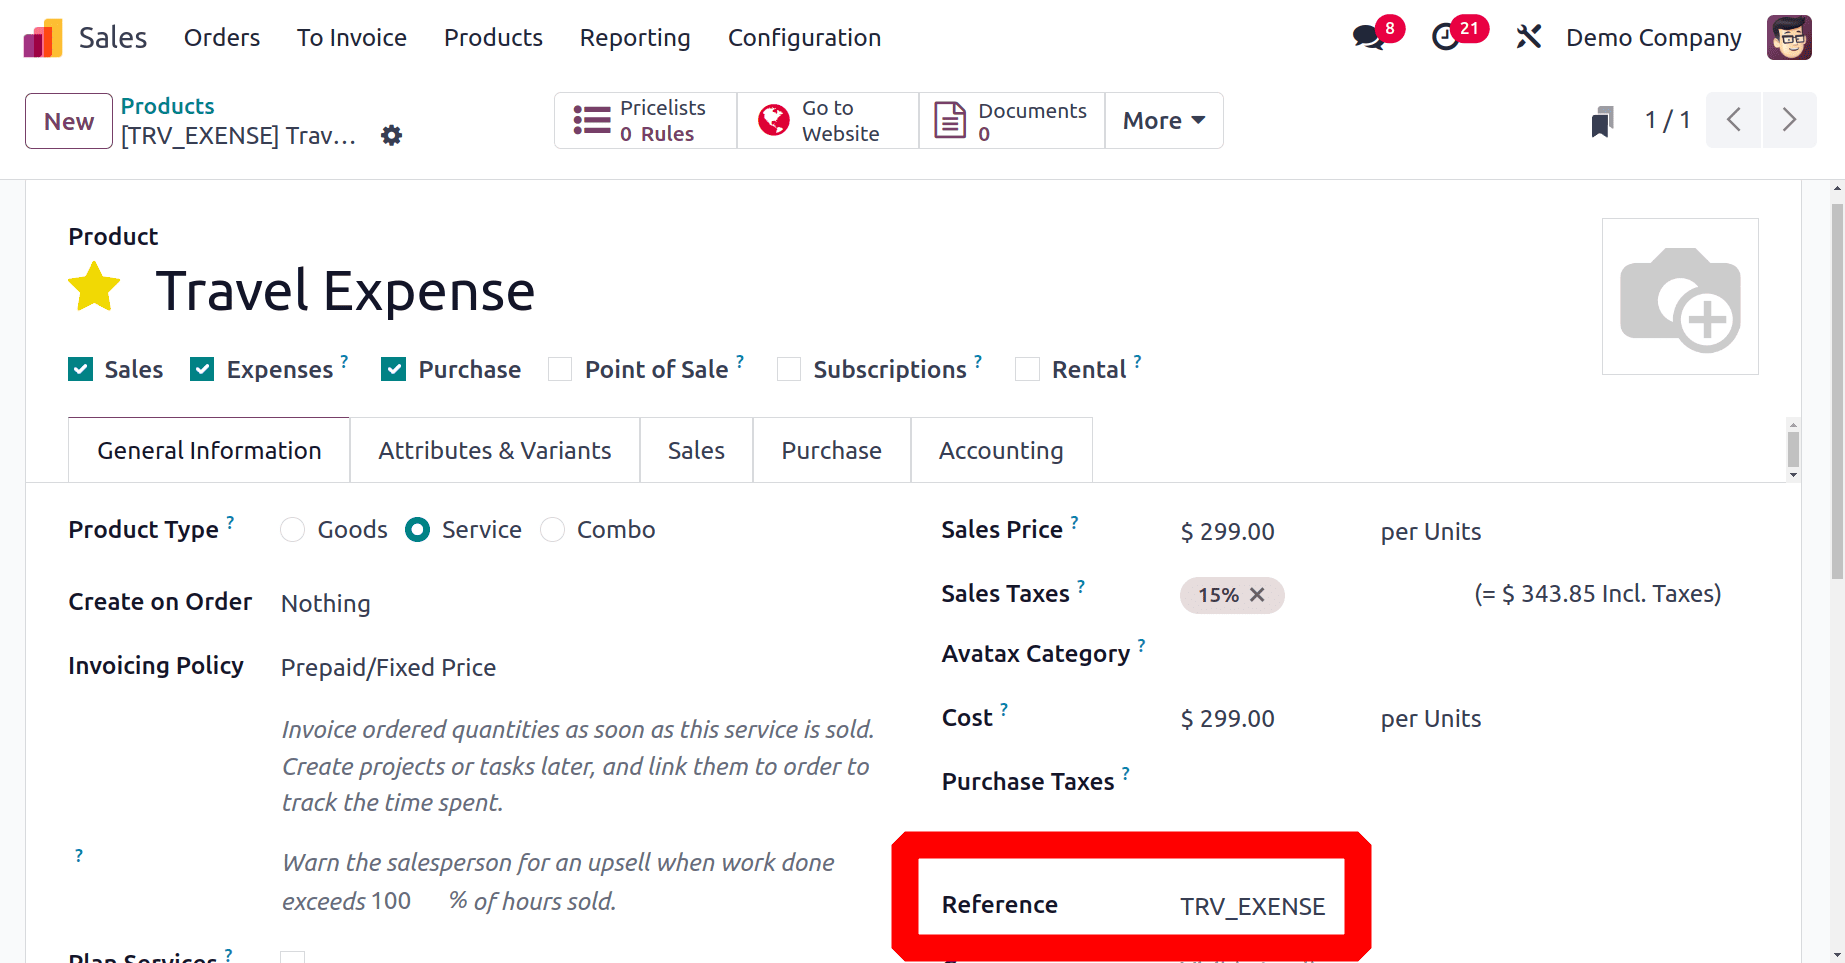
The travel expense is an expense item in this instance. This has been re-invoiced based on the sales price. To the purchase price, add $299. Internal referencing is necessary in this case. Taking into account that incoming emails are used to produce expenses using the product's internal reference. Hold onto the thing.
Creating Expenses from Email
The user must set up the option in the Expense module in order to input an expenditure from email. Select Settings from the Configuration menu of the Expense to do that. The Incoming Emails option is available.
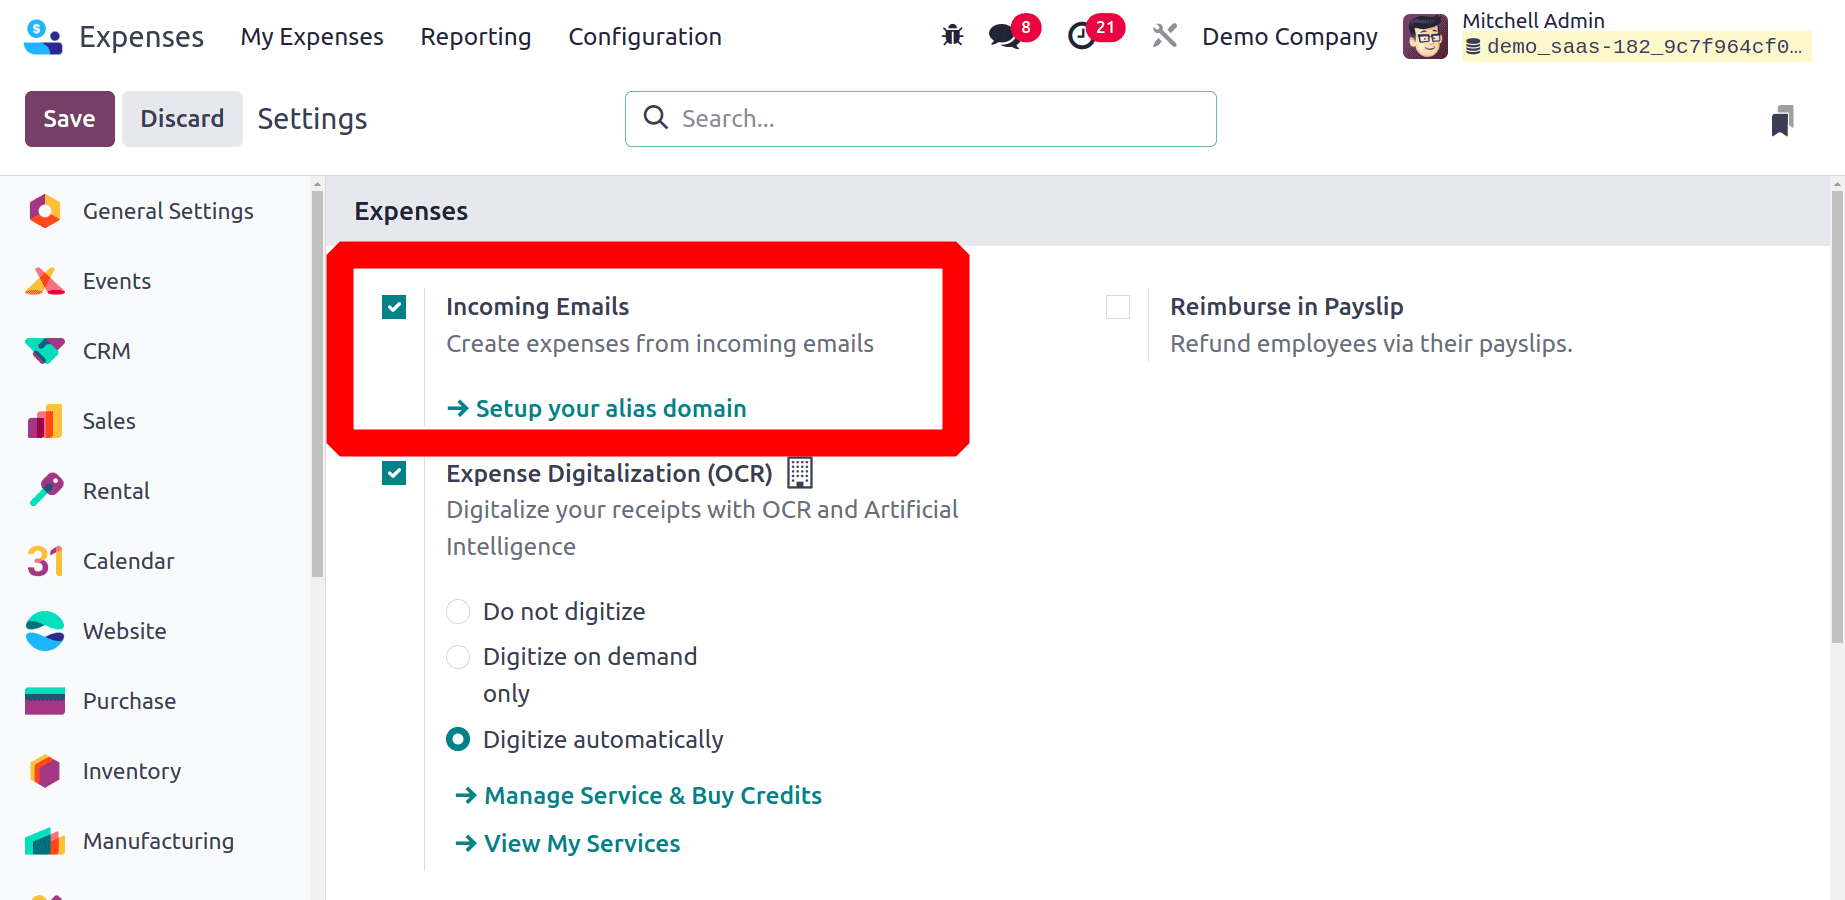
Turn it on and enter the alias, which needs to match the email address listed in the incoming mail server. Click on the Setup your alias domain. Save the configuration.
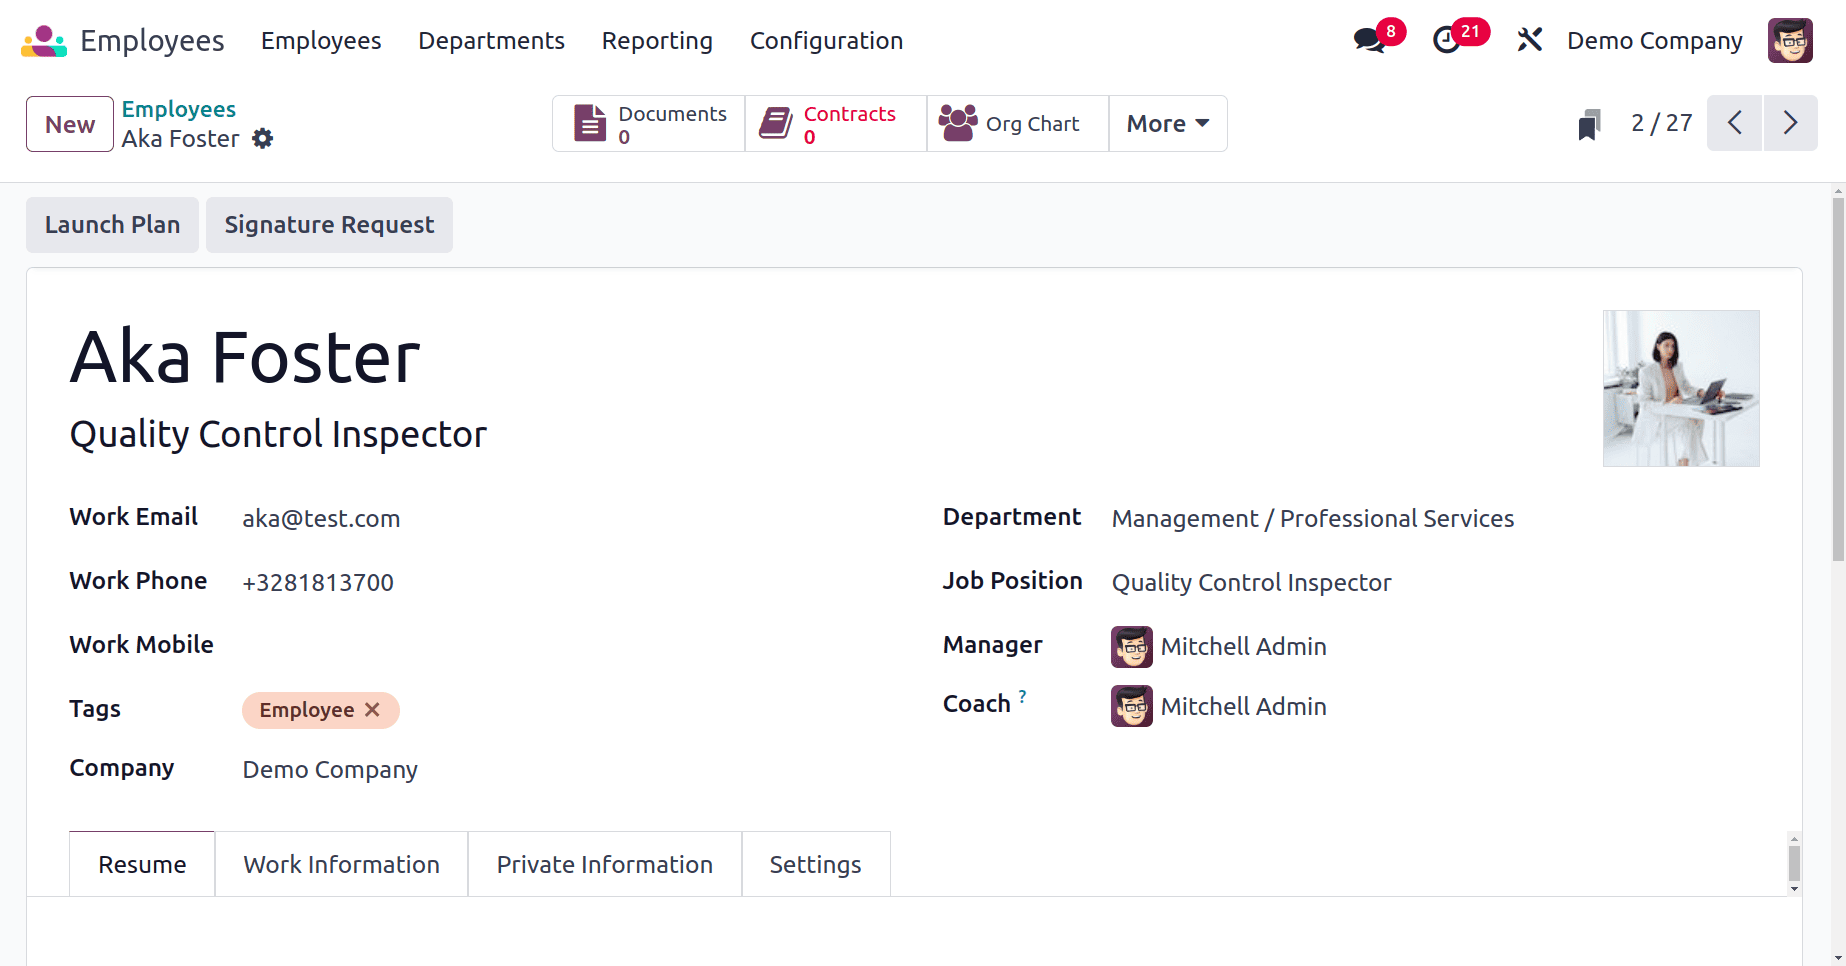
Aka Foster is one of the employees. If the Expense module is inaccessible to her. Therefore, including her expenses in a single email is simple. The employee's work email is added. Therefore, it will be recorded as a cost in the cost module if the employee sends an email from her work email to the company email.
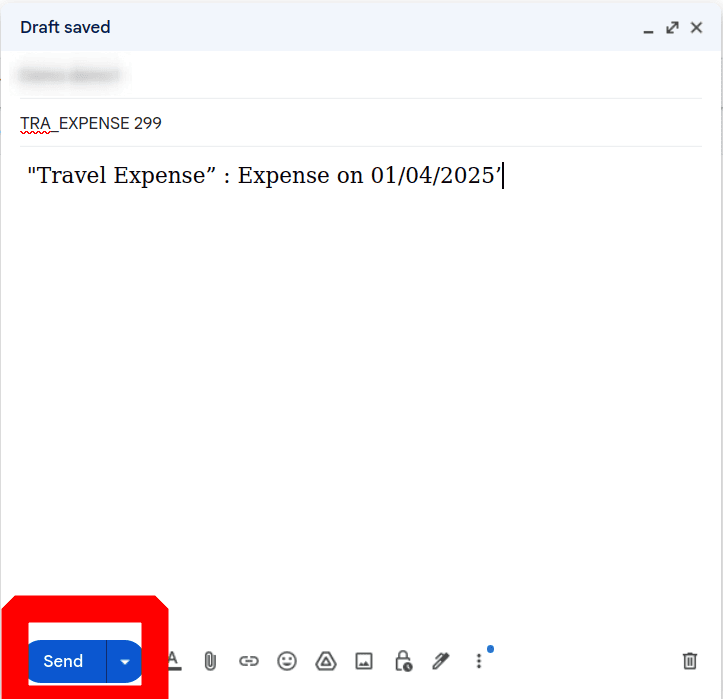
Aka Foster, an employee, emails the business. Here, the internal product reference and expense cost should be included in the email's subject line. Thus, TRA_EXPENSE 299 has been inserted as the subject. And "Travel Expense” : Expense on 01/04/2025’ is the body. Use the email address provided in the incoming email server to send the message. Forward the email.
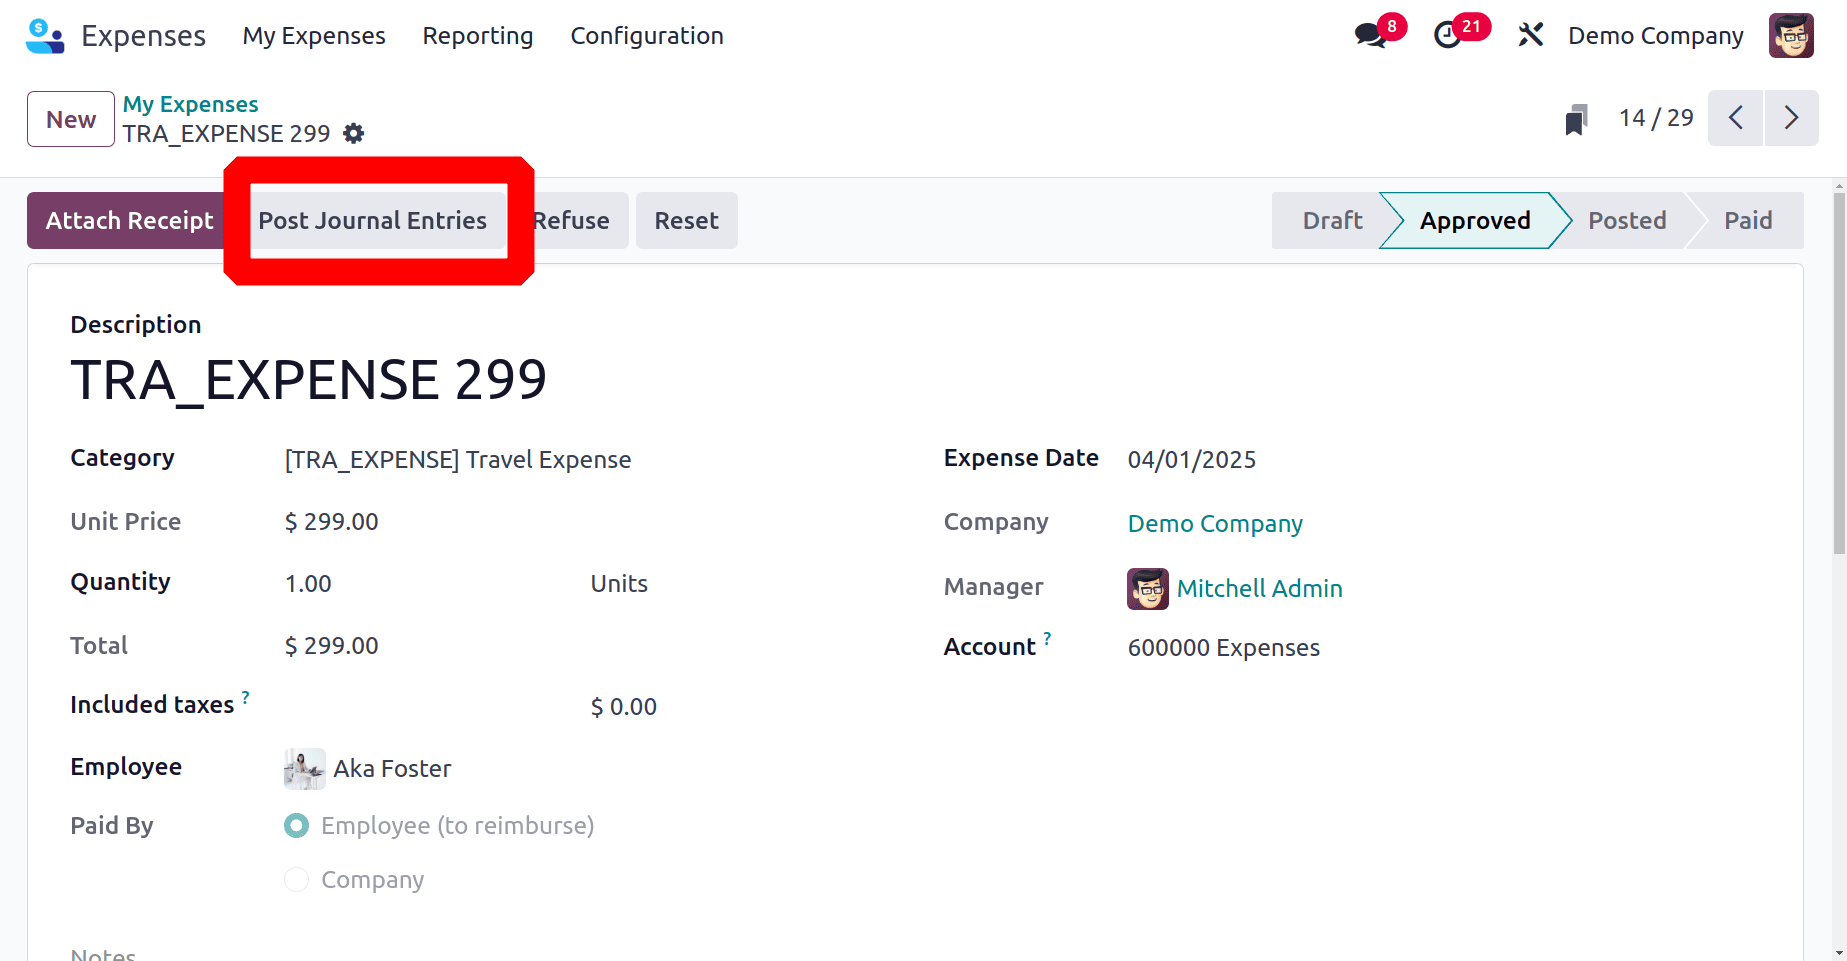
Let's move on to the module on expenses. Within the cost module, an expense will be created in relation to the sent email. Details like the date, description, and total are displayed there. This is now the "Draft" stage. Click on it so that we may open the expenditure.
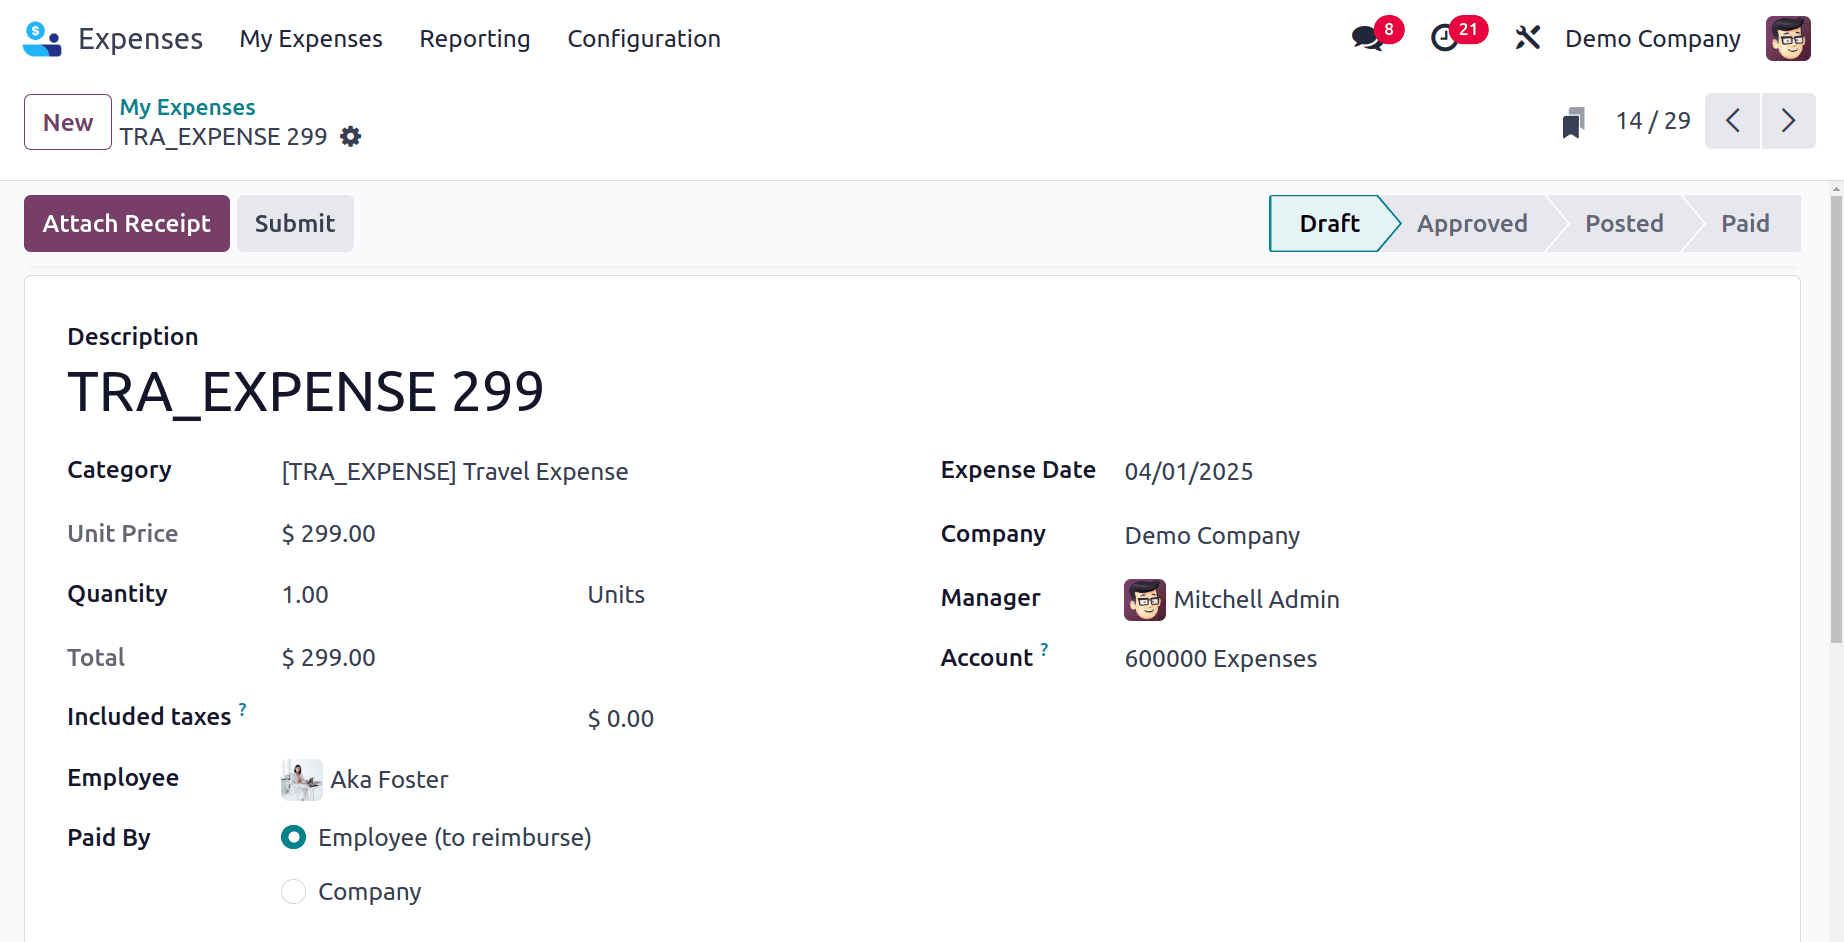
Here is a description of the subject that was included inside the email. Here, the identical product and quantity of expense are added. The email's sending date has been changed to an expense date.
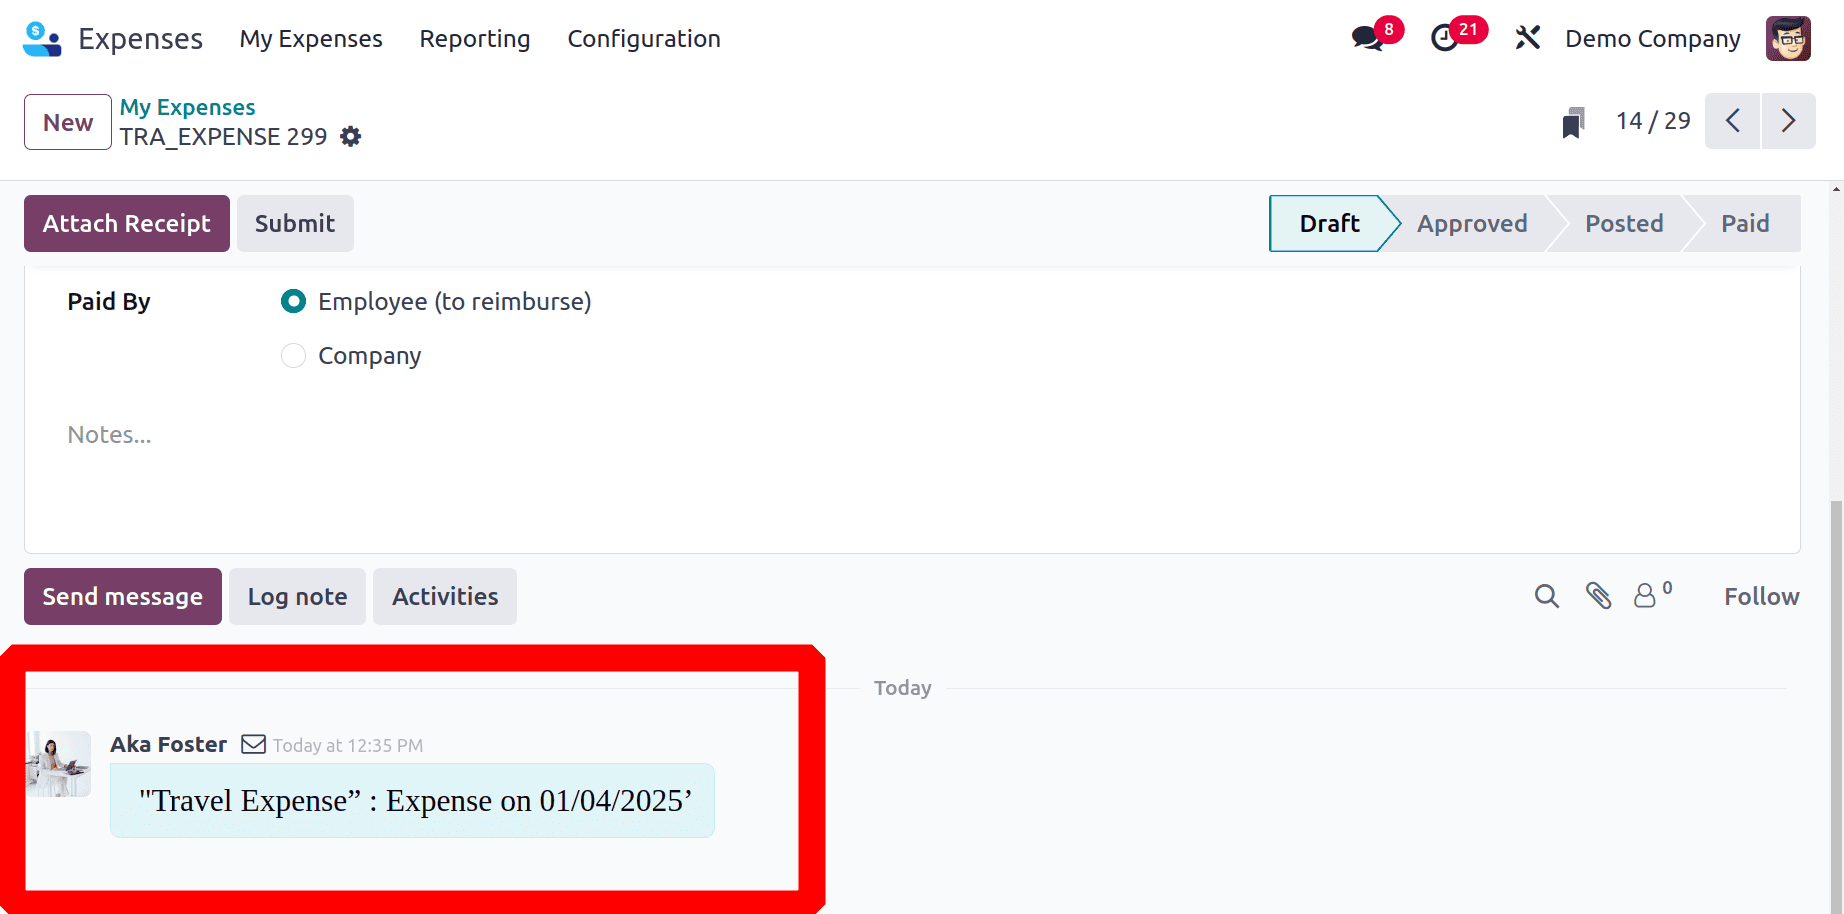
There, the email is visible, and the tree view shows that the email was the source of the spending. When a cost is created within the module, the employee receives a reply email right away. The email response includes an option to view the expense.
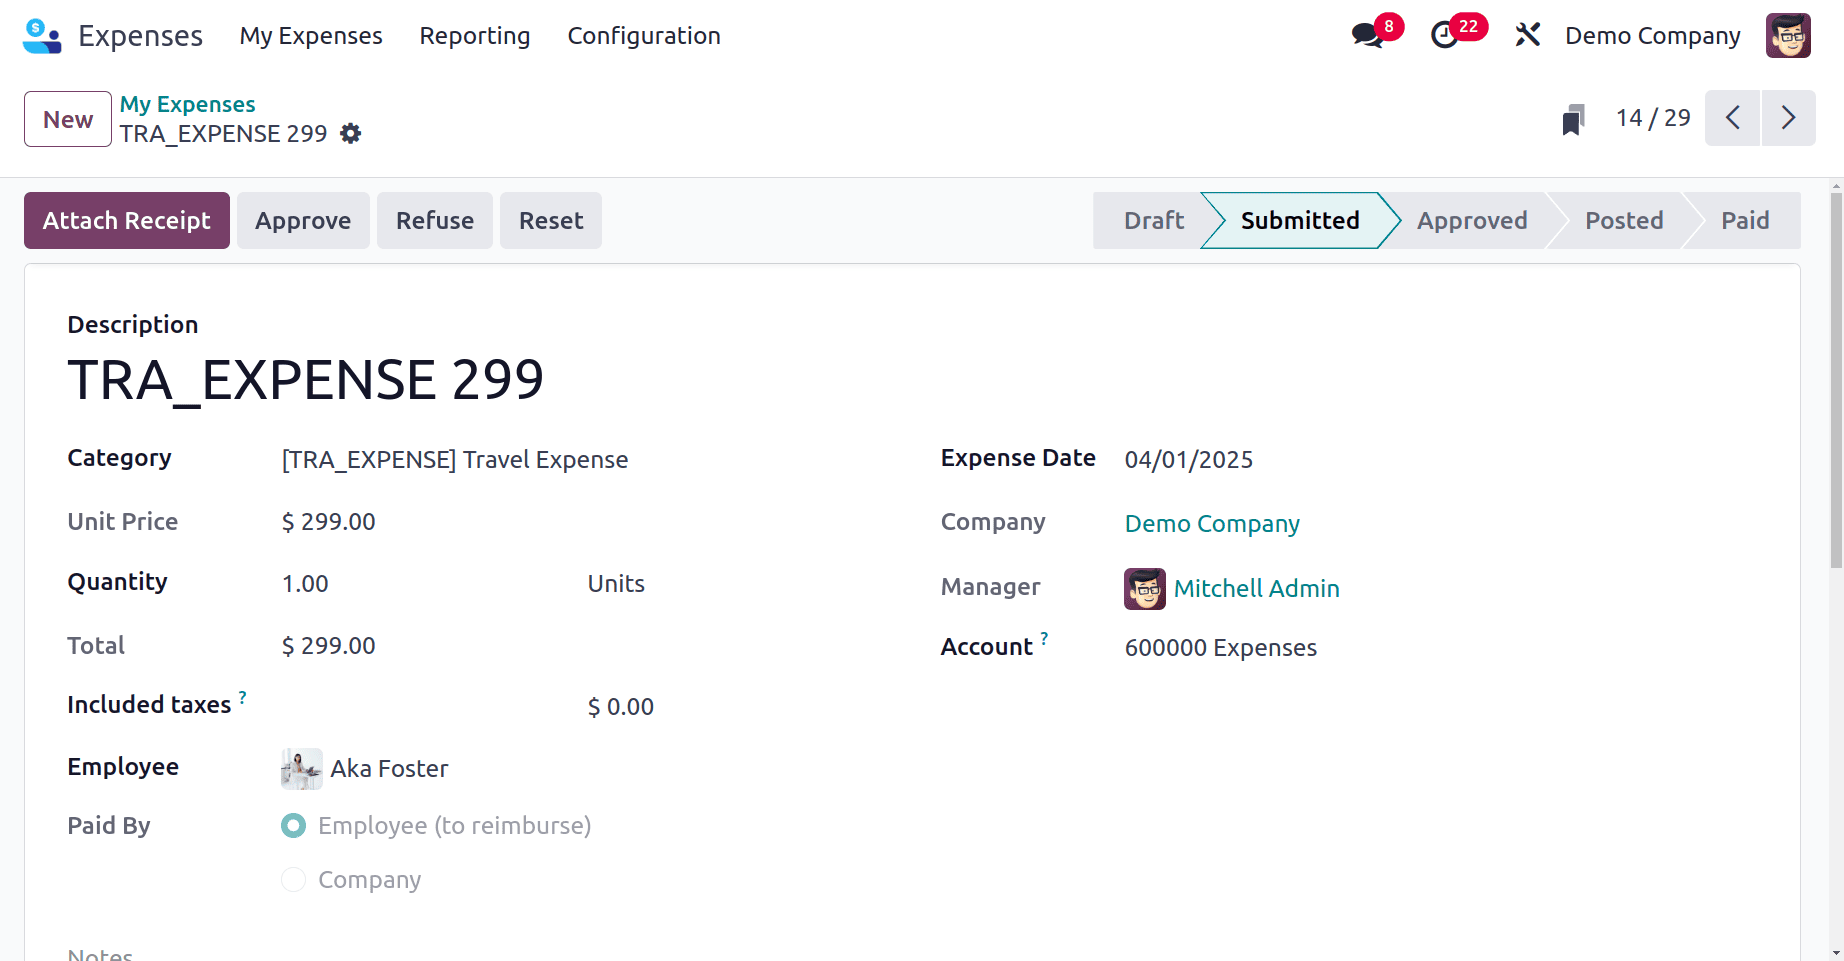
Click the Submit button to generate an expense report. Then the Manager can either approve or refuse the expense. Then click on the Post Journal Entries button.
The manager can either re-invoice the employee or pay the expense amount on his subsequent payslip after approving the expense report. Then the bill is created and can be paid.

Last but not least, customers may quickly turn email correspondence into expense reports with Odoo 18's Expense Creation from Incoming E-mail tool, which simplifies the expenditure reporting process. This feature makes it simpler to create an expense if the employee does not have access to the expense module.
To read more about How to Submit Expenses Through Incoming Email in Odoo 16 Expense App, refer to our blog How to Submit Expenses Through Incoming Email in Odoo 16 Expense App.