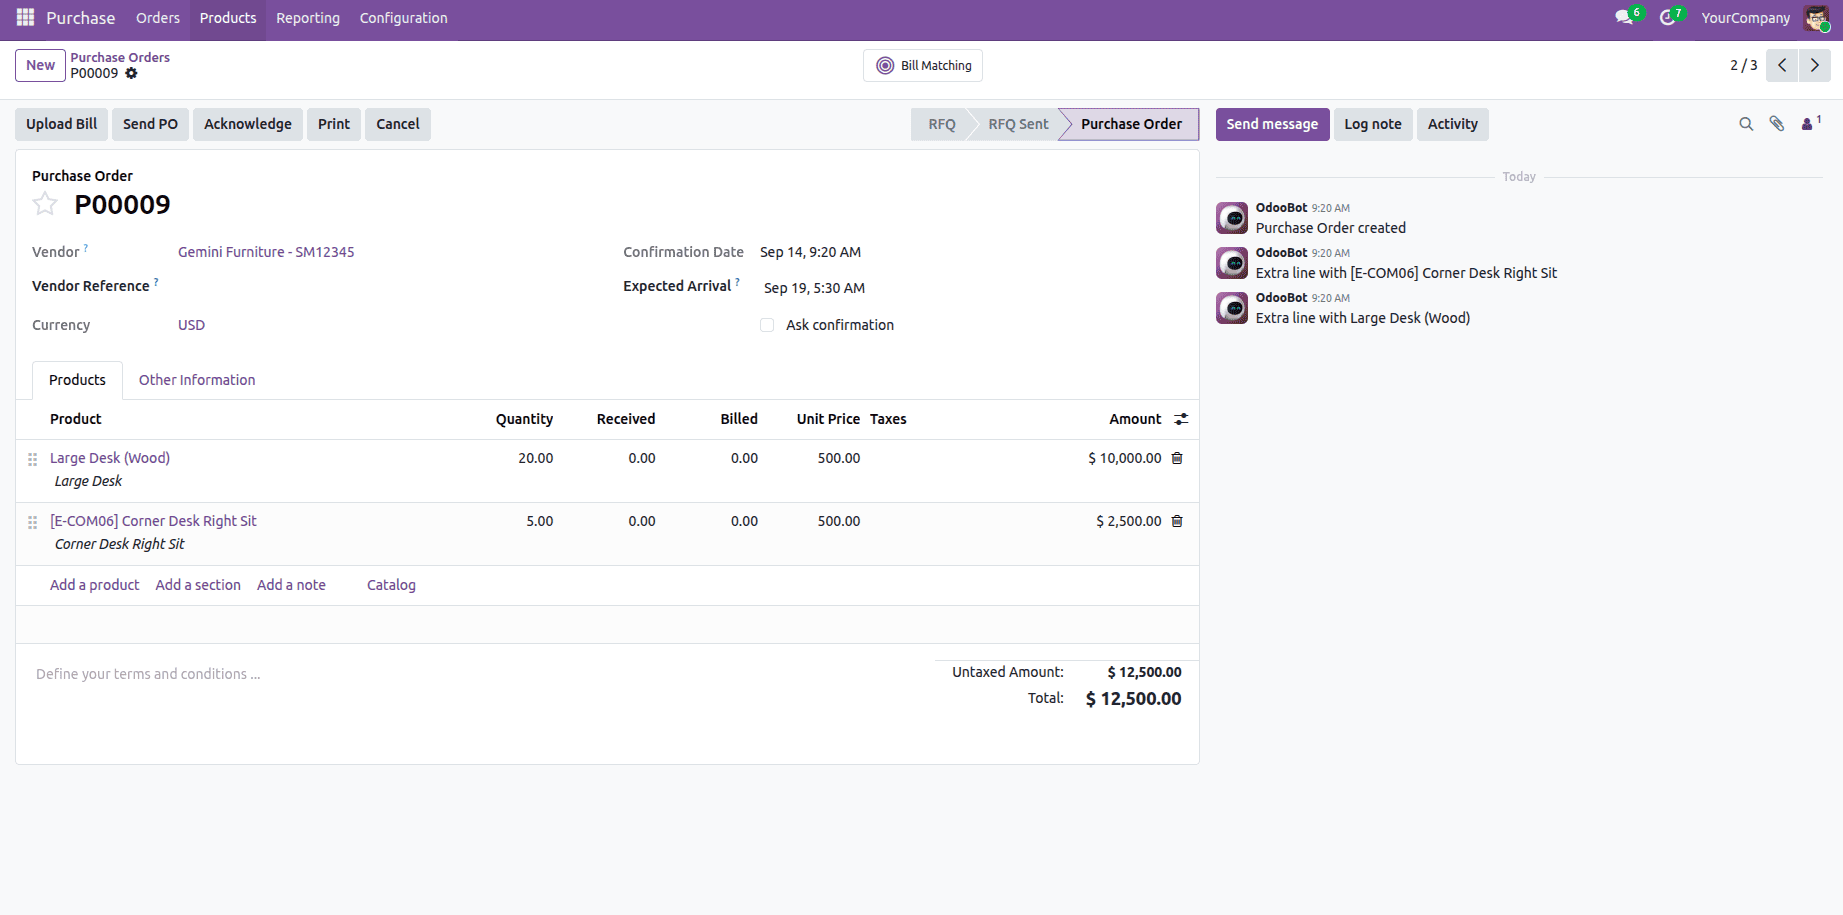
The majority of the procurement in Odoo is reportedly executed with the help of the Purchase Order. When suppliers say that they have received the order, they would proceed to the point when the goods arrive. Traditionally, the next step has been the generation of the vendor invoice after receiving the goods. The Create Bill button allowed its users to proceed from receiving the goods to billing. Earlier versions contained this button above the creation of a purchase order, therefore allowing users to easily create a bill without having to leave the purchase order form. However, it has changed with Odoo 19. The usage of the Create Bill button has been excluded from the Purchase Order. Instead, the newly developed Upload Bill feature has been added for those who get a PDF invoice from a supplier.
Nonetheless, one of the issues is that not every company has digital invoices, and many accounting departments are accustomed to producing the draft invoice directly from the purchase order before changing it. The Create Bills action is still available in Odoo 19 only in the form of a batch action in the purchase order list view, which means that users will have to go back to the list, select the order and trigger the action. This is not efficient for a team working with one order at a time, and it may confuse some users who think that the function has been deleted.
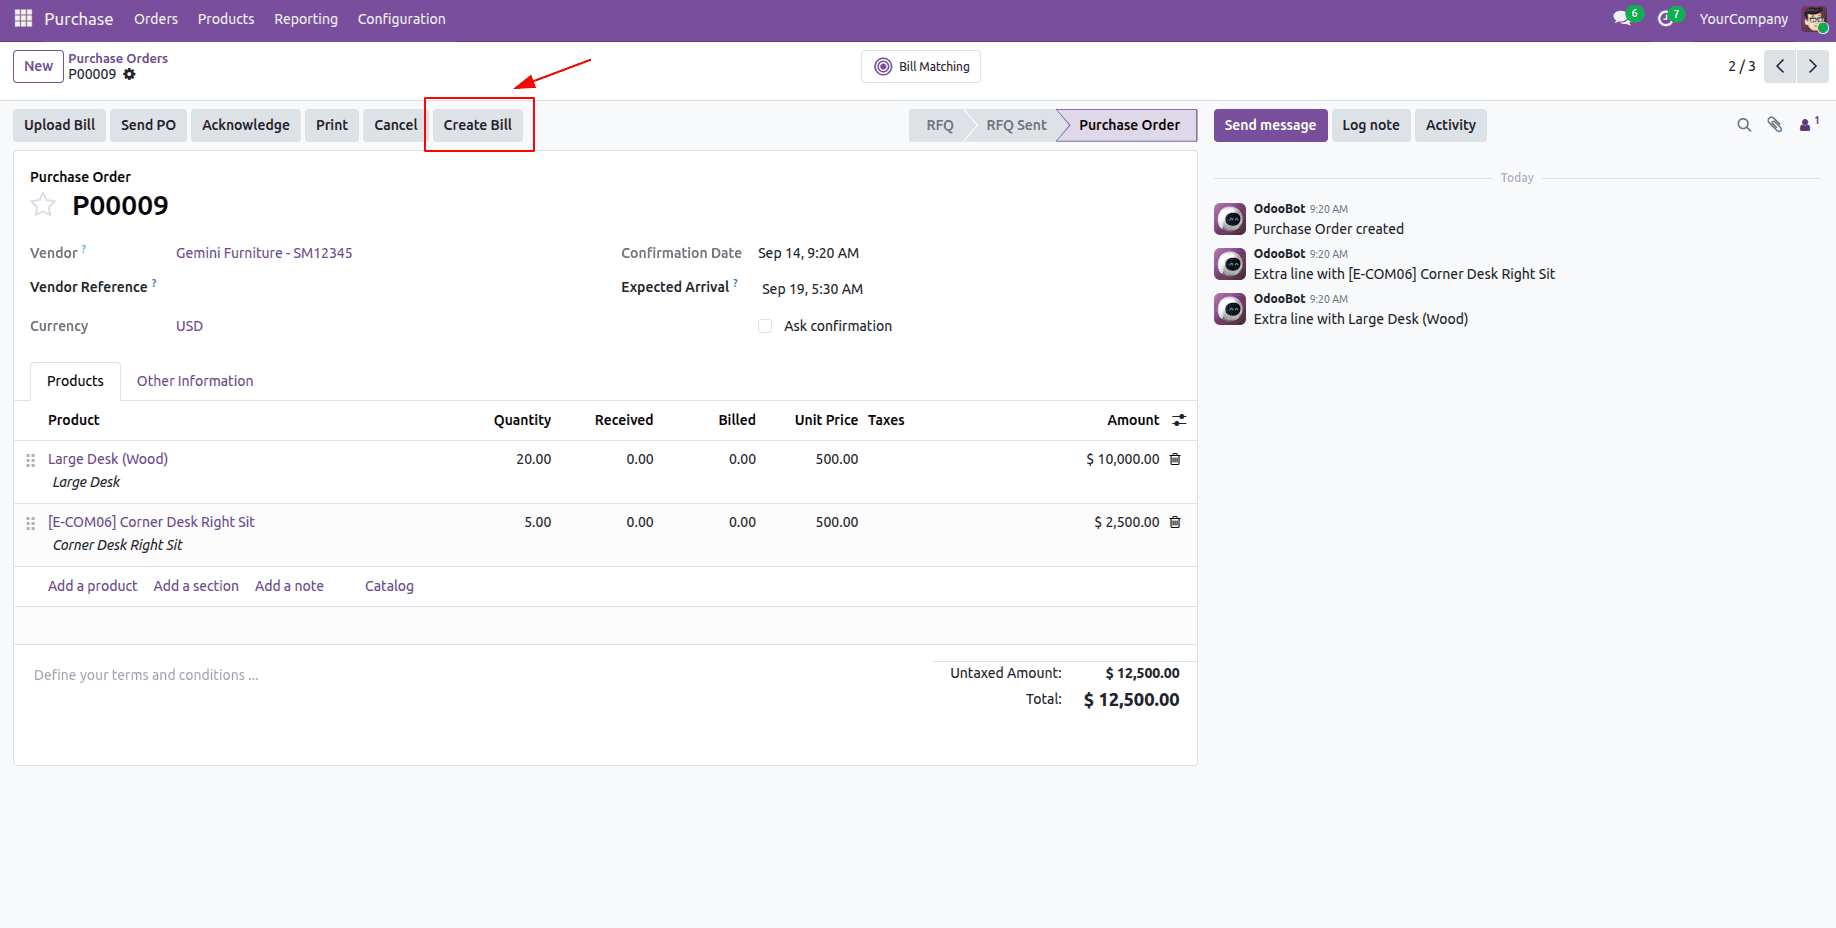
The good news is that the billing logic has not been lost. The function that the list view button is harnessing is still available on the purchase order model, which means that the button can be brought back with the help of customization of views. There is no need for a Python override, adding a new field or changing the way of bill generation in this case. In this blog post we will bring the Create Bill button to the Purchase Order form in Odoo 19 using XML standard view inheritance.
Adding the Button to the Form View
You just need one additional XML file in a custom module that depends on purchase, as the form view and method being inherited are already defined. You do not require any code in Python models.
Xml Code: views/purchase_order_views.xml
<?xml version="1.0" encoding="utf-8"?>
<odoo>
    <!--
        Core exposes "Create Bills" only as a <header> batch button in the
        purchase order list, which requires ticking records. This adds the same
        action as a normal header button on the form so it can be run from a
        single order.
    -->
    <record id="view_purchase_order_form_create_bill" model="ir.ui.view">
        <field name="name">purchase.order.form.create.bill</field>
        <field name="model">purchase.order</field>
        <field name="inherit_id" ref="purchase.purchase_order_form"/>
        <field name="arch" type="xml">
            <xpath expr="//header" position="inside">
                <button name="action_create_invoice"
                        type="object"
                        string="Create Bill"
                        class="btn-secondary"
                        invisible="state != 'purchase'"/>
            </xpath>
        </field>
    </record>
</odoo>
There are some interesting aspects to consider with this feature. The record is based on purchase.purchase_order_form, which is the original form view for the purchase order, instead of defining a new one. Thus, the new button would appear everywhere in Odoo, even if the purchase order is being opened from the Purchase app or a receipt or via a smart button. xpath is selecting the header element with position="inside". It means that the button is added to the group of header buttons of the existing header. The reason for that is there is only one header in the purchase order form; therefore, it is not dependent on other buttons that Odoo can rename or delete in upcoming releases.
The button makes use of type="object" and name="action_create_invoice," which corresponds to the same procedure being performed by Create Bills in list view. The procedure takes all of the order's invoiceable entries into account, along with product control rules, gets the amount of the vendor's bill, creates the draft bill, and displays it to the user. Thanks to Odoo's ability to use the core function instead of creating a new one, every enhancement and every bug fix concerning bill creation will affect the capability of this button.
The button's visibility is determined by the invisible attribute; in Odoo 19, the respective condition now uses a Python-like expression rather than the old attrs syntax. This condition hides the button in cases when the order state is not purchase (the order has already been issued as RFQ, sent, waiting for approval, or cancelled), because it is only possible to issue invoices for the confirmed purchase orders. Additionally, the button will be hidden when invoice_status is not to invoice. Finally, the button uses the btn-secondary class so that it appears with other header buttons and does not interfere with the primary action, and it can be changed to oe_highlight, if the users expect it to be the main action after the receipt of goods.
How the Button Behaves with Bill Control Policies
The visibility condition will behave in the same manner for both existing bill control rules relating to the different types of products in Odoo 19.
Ordered quantities: When the purchase order becomes confirmed, all the ordered quantities become billable, and the invoice_status becomes an invoice along with the Create Bill button appearing.
Received quantities: At the confirmation, nothing is billable until goods arrive, and hence invoice_status remains 'no' and the button does not appear.
Once the bill has been generated for the entire billable quantity, invoice_status transitions to invoiced, resulting in the button disappearing once more. This also solves an issue of usability: if there were no visibility condition in place, a user might hit the button again, leading to an error, "There is no invoiceable line," thrown at him. This turns out to be rather confusing for users who expect the button to function in the same way as the Create Invoice button in Sales.
In case of partial receipts received, the button will always appear when a new quantity is received, enabling the user to bill step by step in the same way as described in the core list function.
Purchase Order form before customization, showing only the Upload Bill option:
Purchase Order form after customization, with the Create Bill button available once the order is ready to bill:
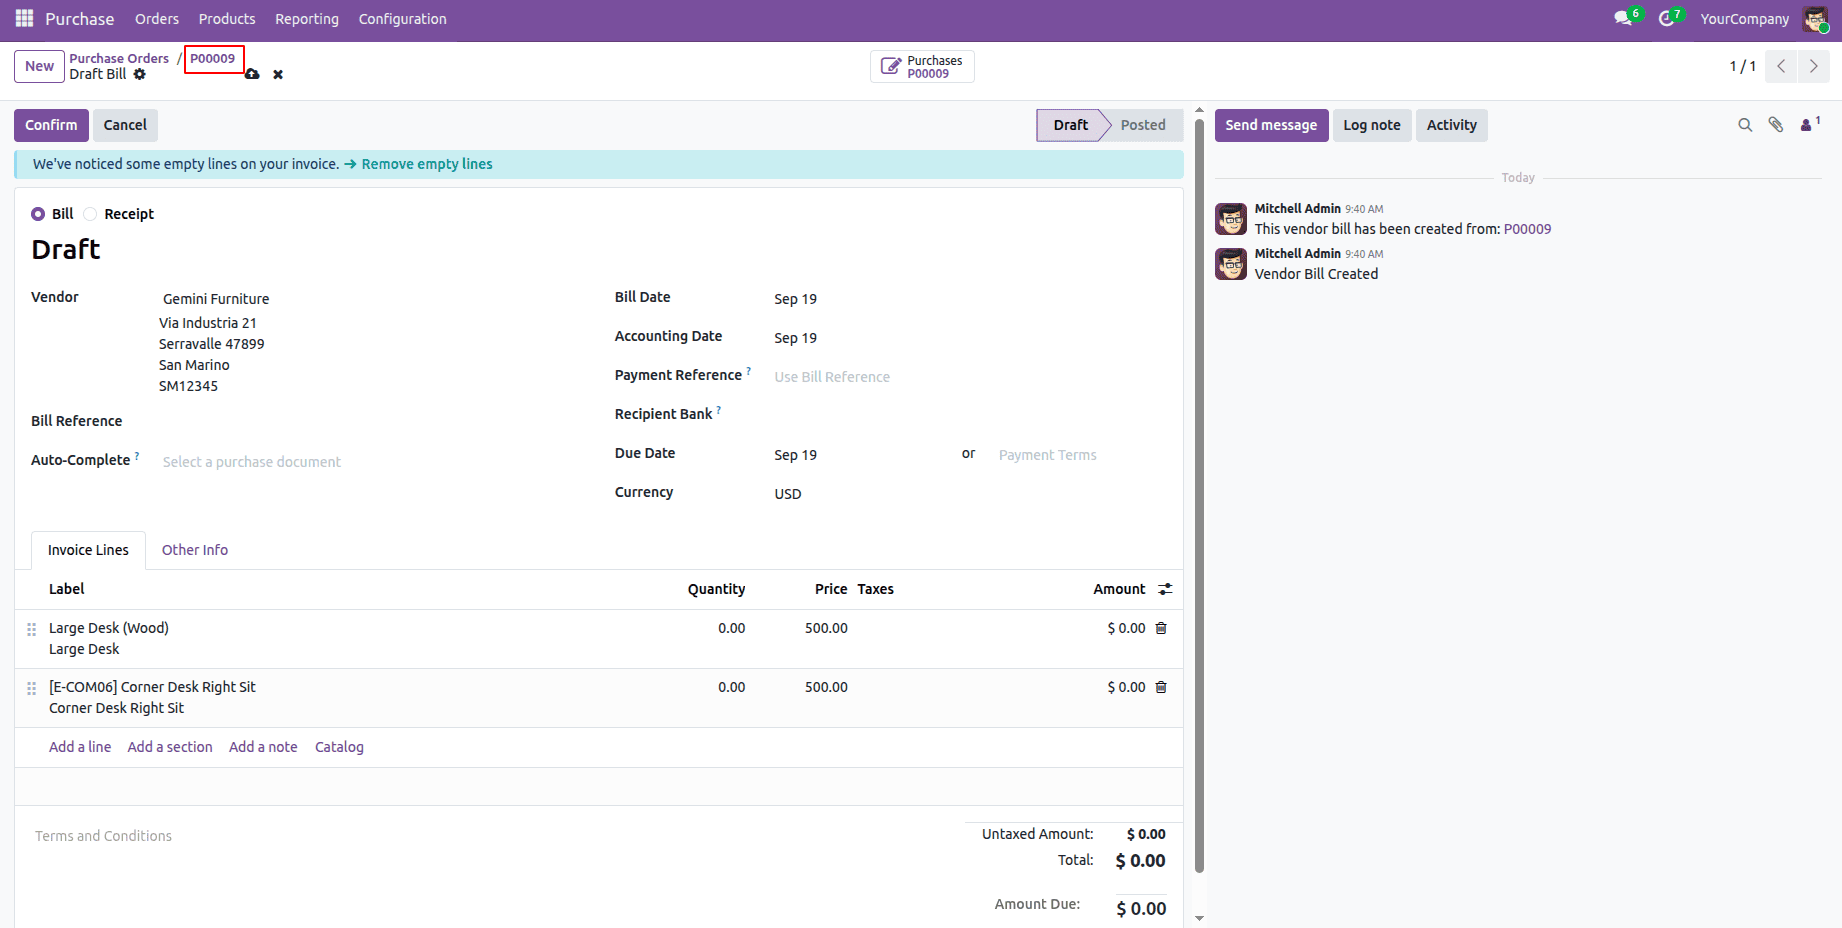
Draft vendor bill created from the button, linked to the purchase order:
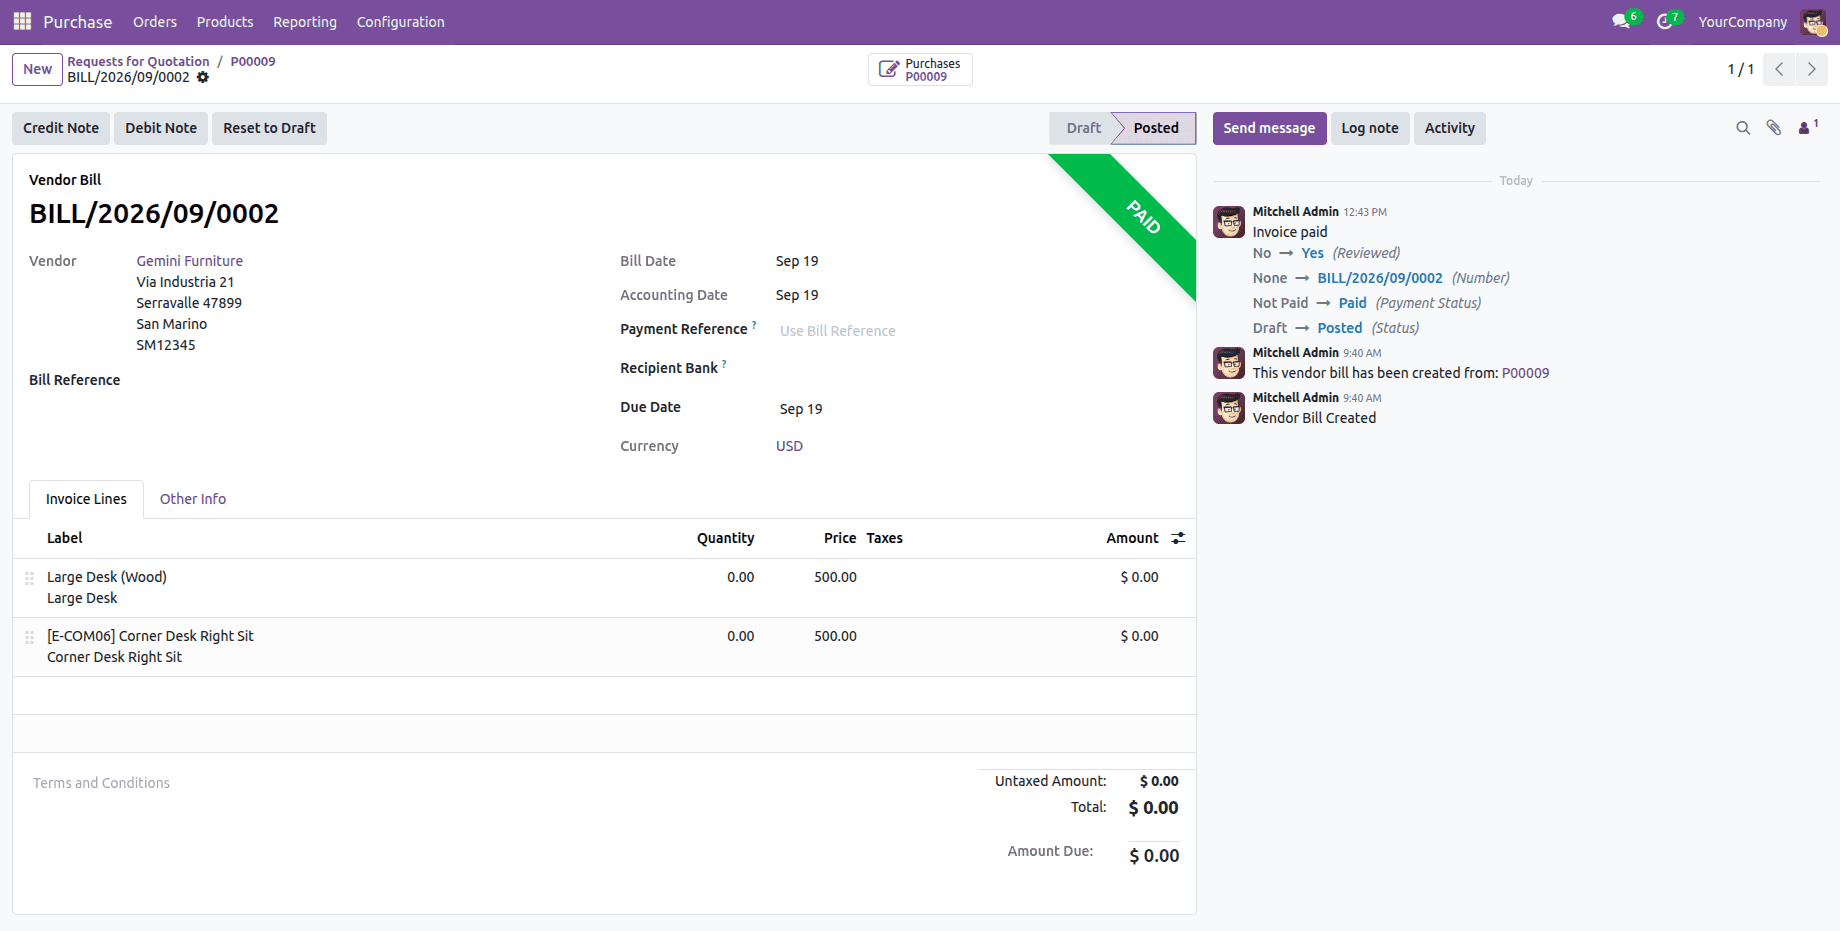
Posted vendor bill created from the button, linked to the purchase order:
The blog's objective is to demonstrate how to reinstate the Create Bill button on the Purchase Order form within Odoo 19. The initial discussion involved examining the reasons behind the absence of the button, since Odoo 19 has migrated the process from Create Bill to Upload Bill and Bill Matching, making Create Bill only a batch option from the list view. After that, the standard form view was inherited and a header button added to call the original action_create_invoice method with a visibility condition depending on the order's status and invoice state. As the solution uses the standard invoice creation method, thus keeping all the invoices creation logic, controlling policies and future fixes in Odoo's hand and letting users return to their one-click workflow process. In addition, the same algorithm can be used any time when there exists a core action of model that users need but cannot find in the interface - just find the method, inherit the form view and add the button with the necessary visibility conditions.
To read more about How to Generate a Vendor Bill for a Purchase Order in Odoo 19, refer to our blog How to Generate a Vendor Bill for a Purchase Order in Odoo 19.