Checks that are dated in the future are known as post-dated checks in Odoo. This suggests that they won't be refunded until the specified date. They are frequently used for a variety of reasons, such as late payments. A cheque that a customer gives us for a later date is referred to as a post-dated cheque (PDC).
Although Odoo does not have built-in PDC capabilities, journals can be used to achieve this. It means that one can find out how to manage post-dated cheques using Odoo 19 from this blog. To document PDC transactions for post-dated cheque transactions, we can start a new journal. Navigate to the Accounting module and choose the Journals sub-menu from the Configuration menu. All of the journals that have already been created are visible there, along with their titles, types, shortcodes, and default accounts.
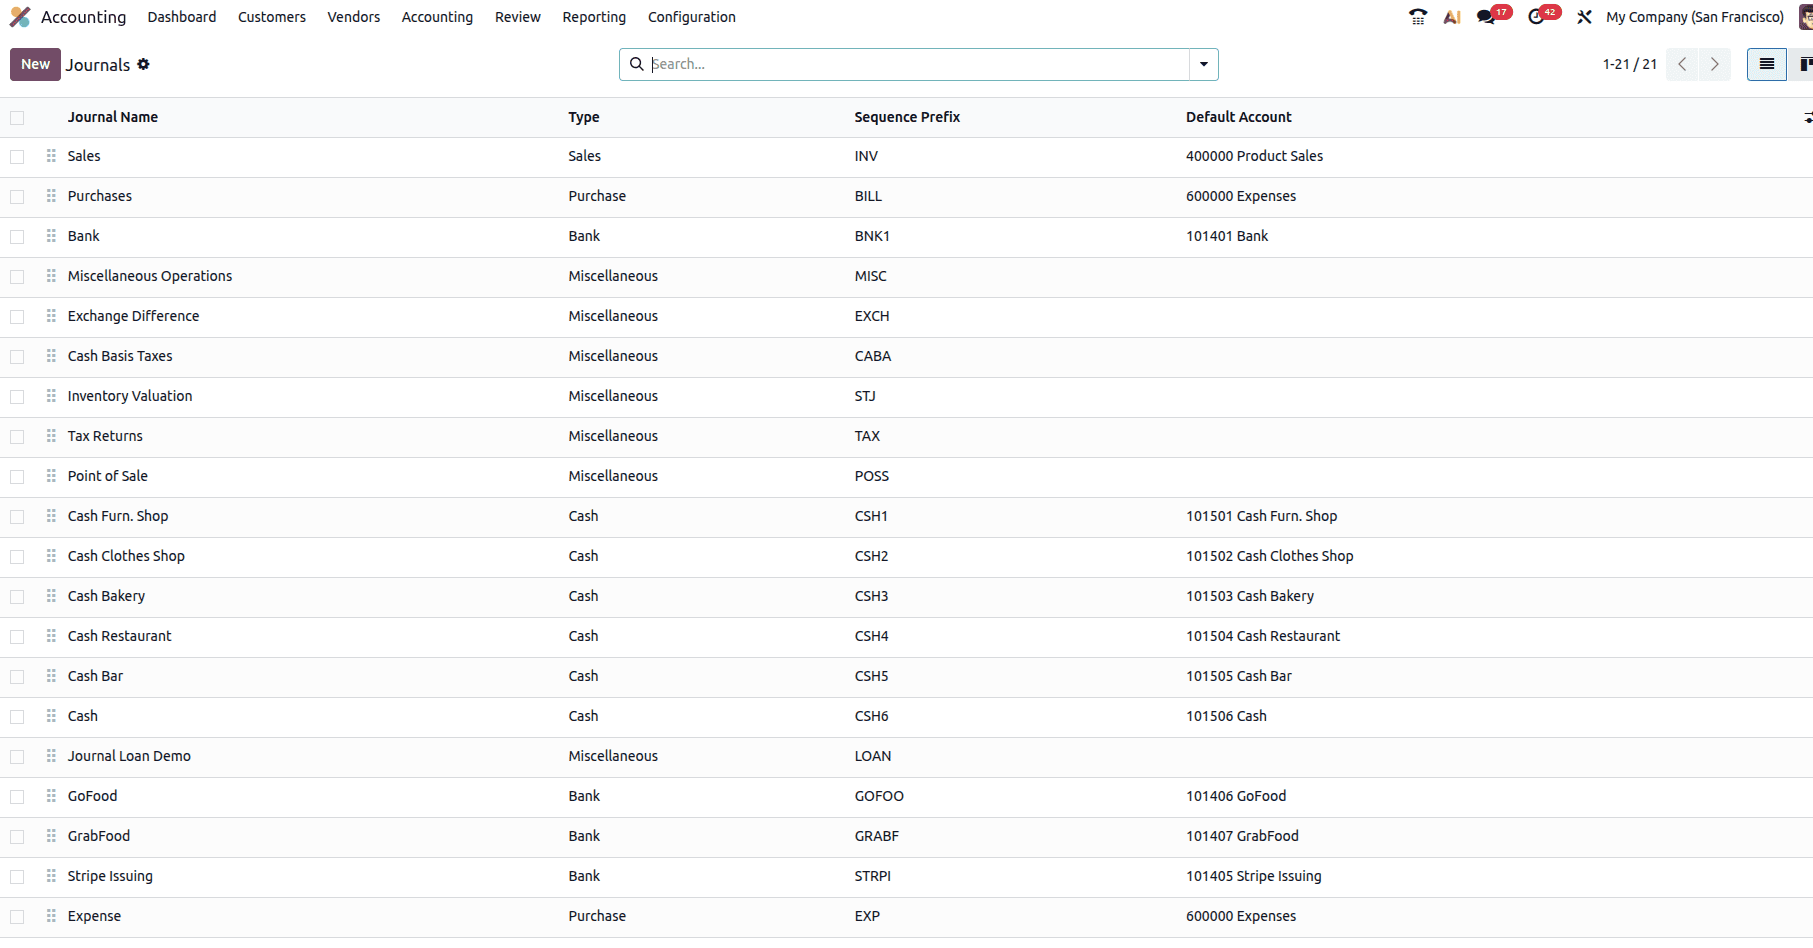
Journals that have been set up within the system are depicted in the above image. Clicking on the New button will allow us to create a new journal.
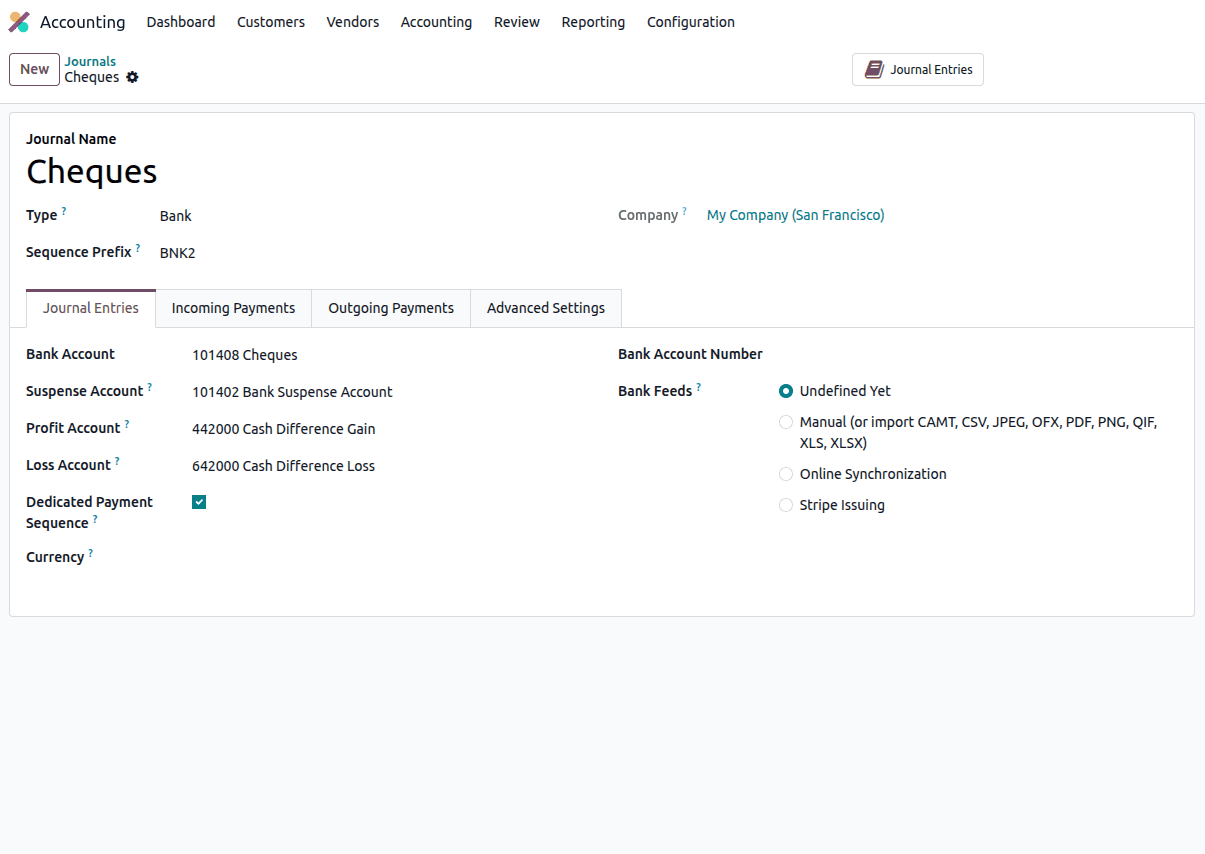
The new journal name can be given as 'Cheques', while the type of journal can be recorded as 'Bank'. Once you choose the journal type, the sequence prefix will be automatically filled, and the corresponding journal entries will be shown. The bank account will be set to 'Cheques' automatically by Odoo. It also assigns the Suspense Account, Profit Account, and Loss Account.
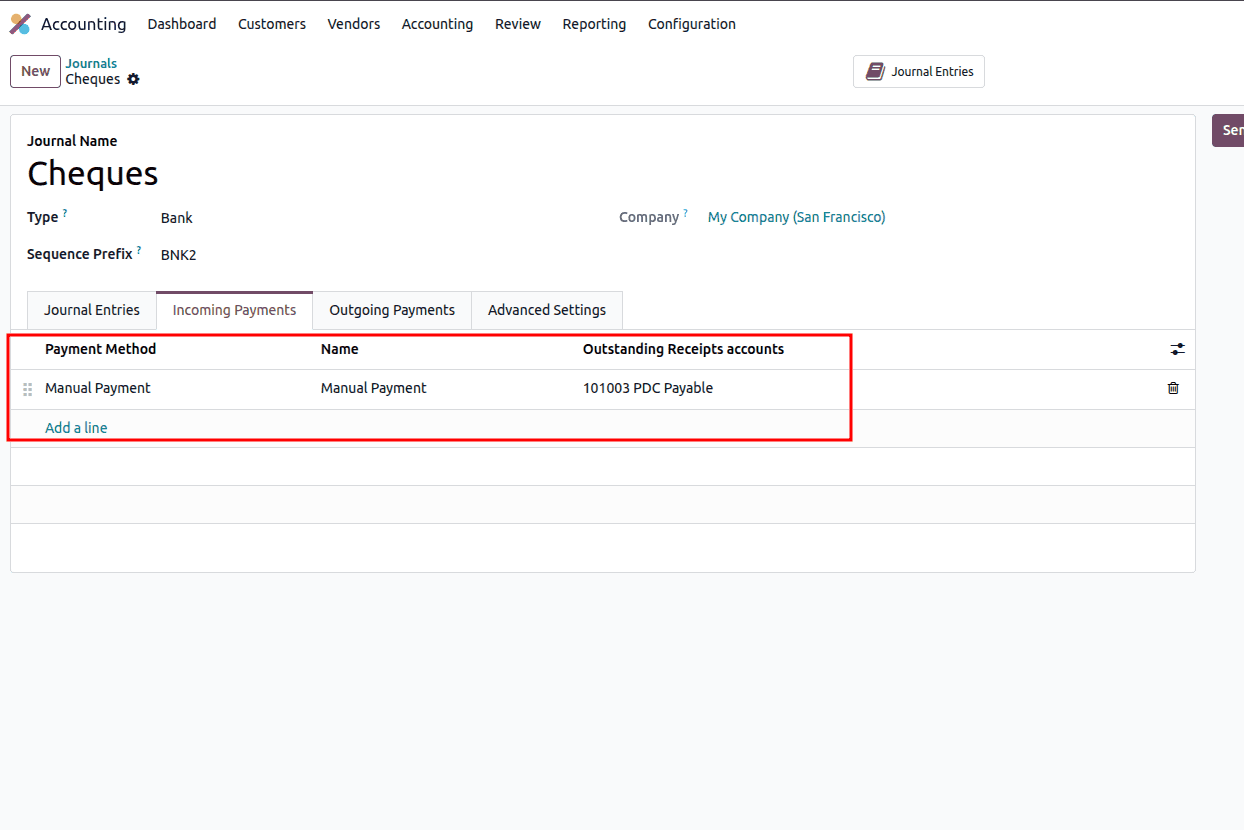
Then, click on the Incoming payments and Outgoing payments tab. Under the Incoming Payments tab, set the method of payments manually and also include the outstanding receipt account as the PDC Receivable, which is an asset account.
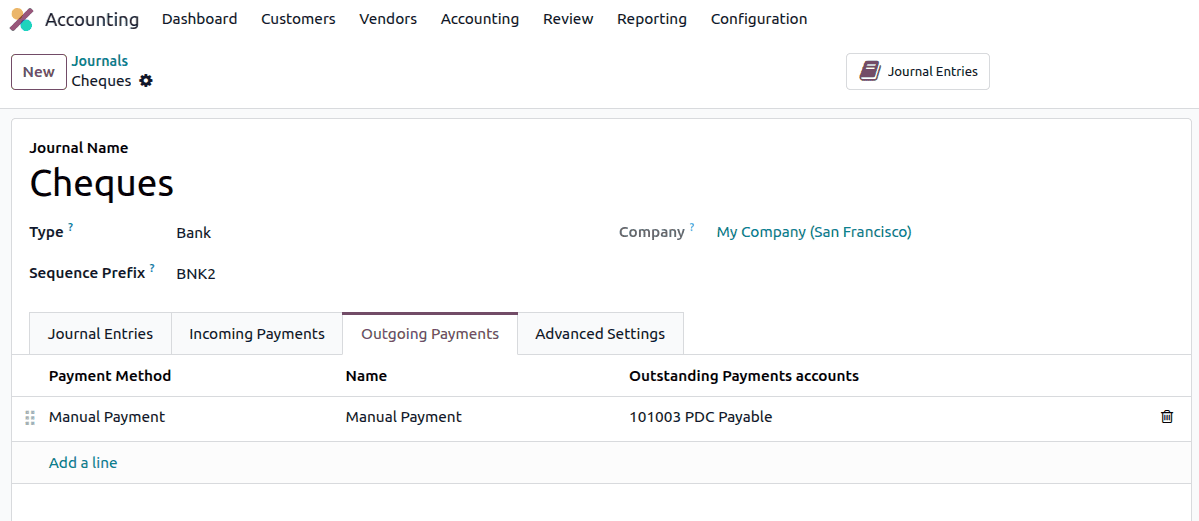
In the Outgoing Payments section, set the payment methods to manual and the account to PDC Payable.
PDC for customer invoices
Let’s see how we can set up PDC for customer invoices.
There is a period of seven days between the date of the invoice and the due date on this particular invoice. Confirm the invoice now. Once you have confirmed the invoice, its status changes from 'Draft' to 'Posted'.
Afterwards, go to the General Ledger within the Reporting menu.
Here, you can view the journal entries automatically generated by Odoo for the confirmed invoice.
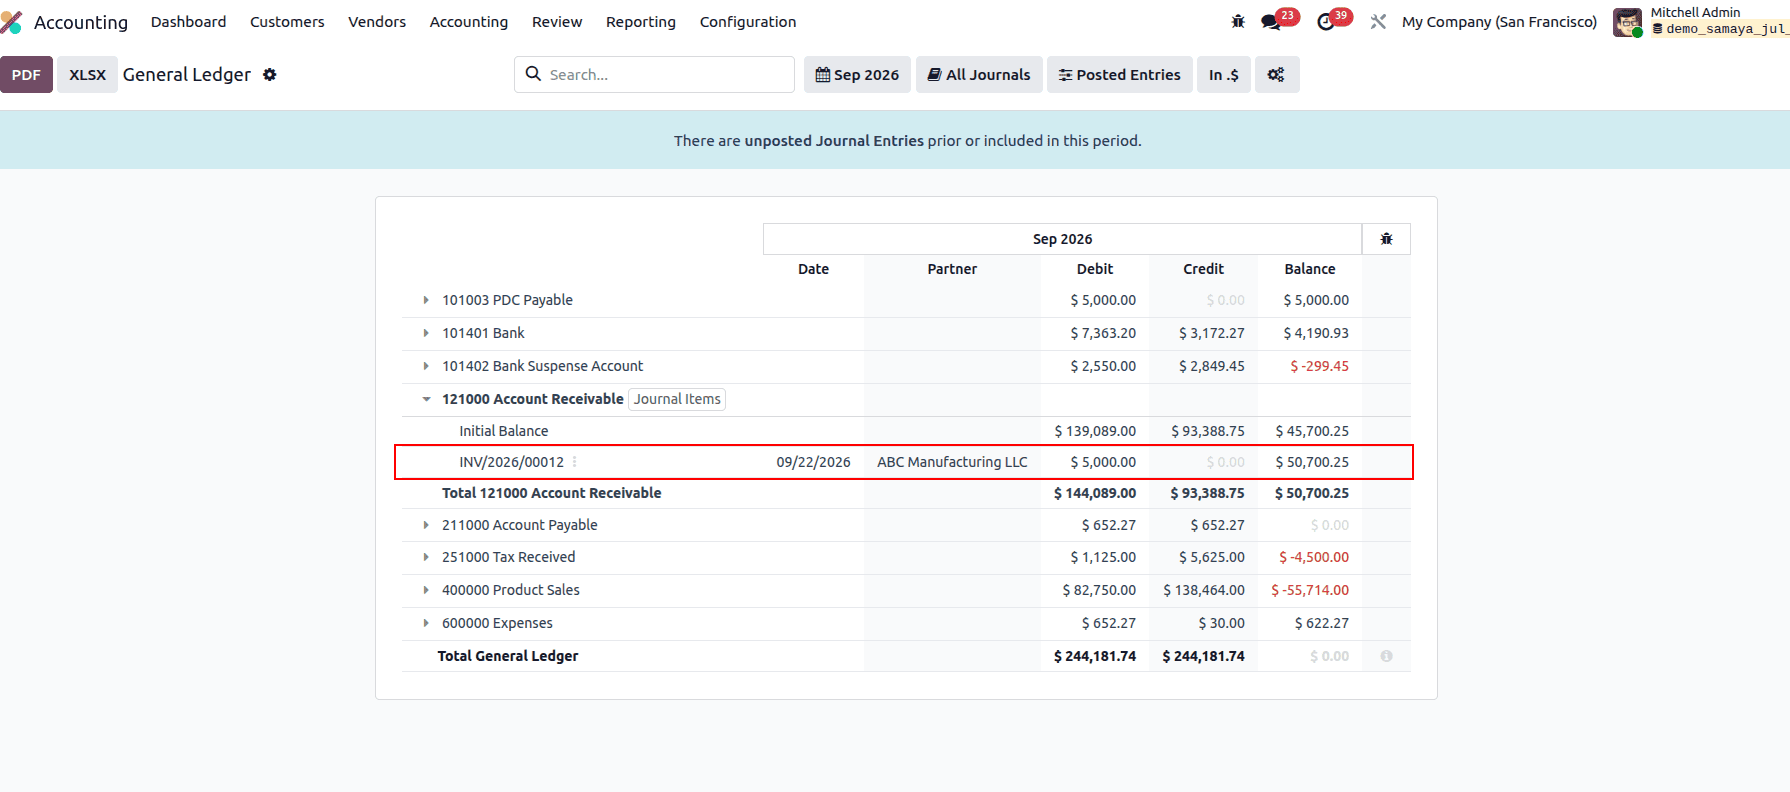
Assume that the customer has made the payment by a post-dated cheque. To record this payment, navigate to the Customers menu in the Odoo 19 Accounting application and select the Payments submenu. This page shows all existing customer payments. To create a new customer payment, click the New button.
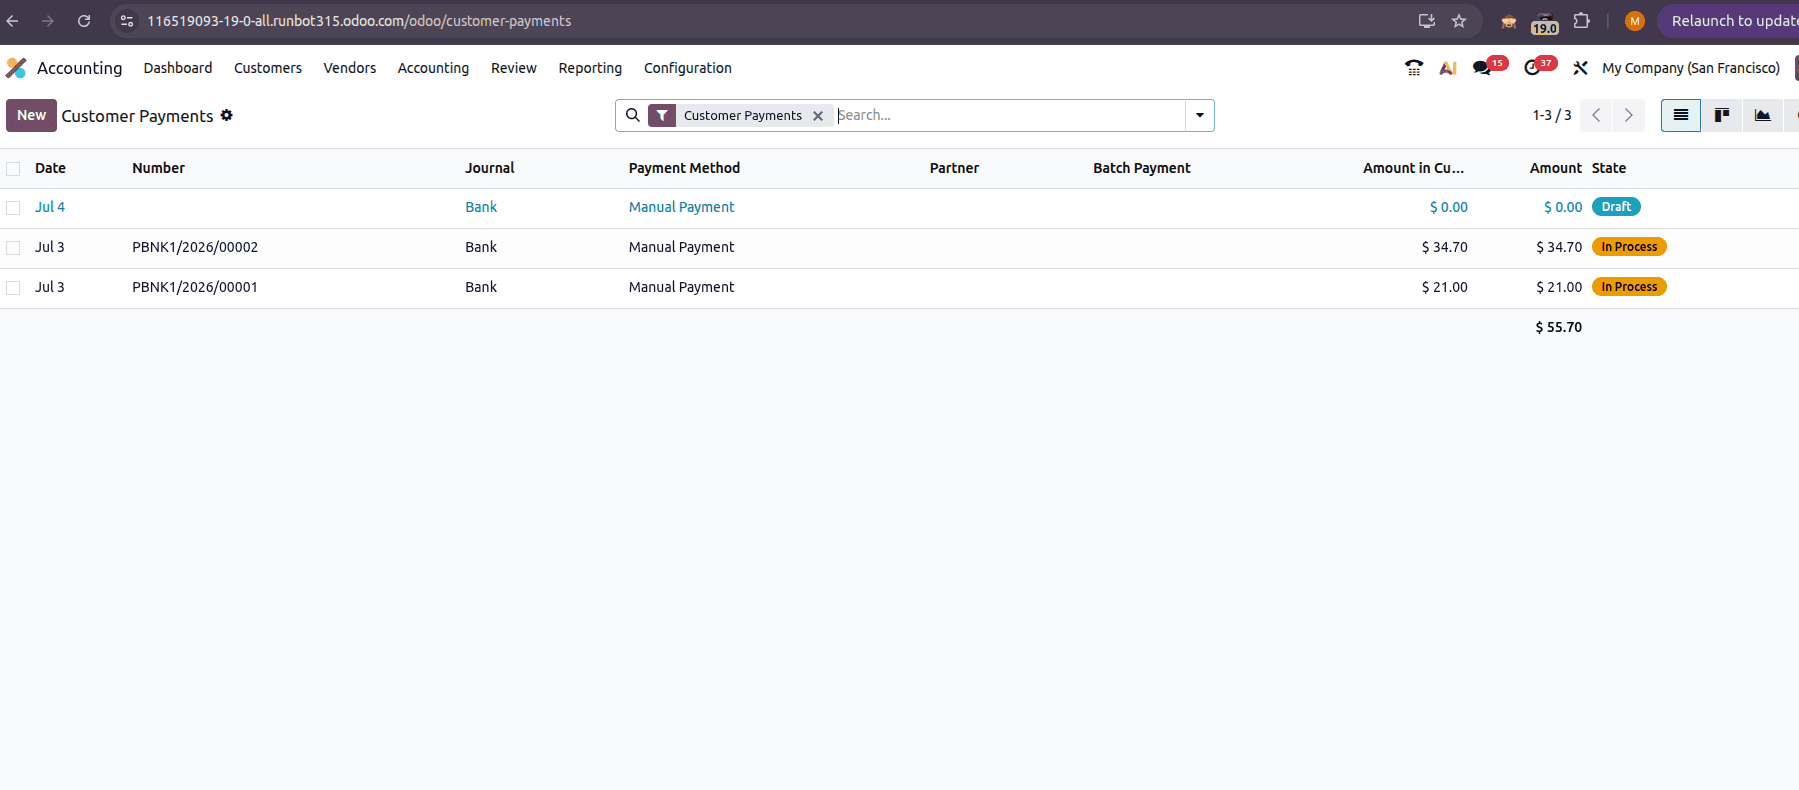
Click on the New button so that a new form will appear. The payment type will be automatically set as ‘Receive’.
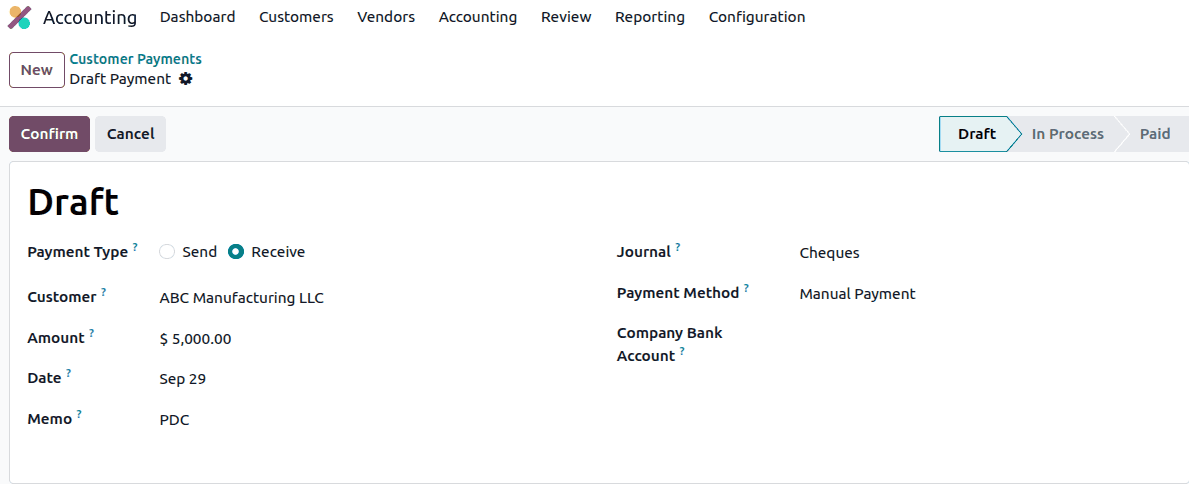
Choose the customer and provide the amount in the respective fields. The time to schedule this payment by the customer must be in between the invoice date and the due date. It should be after the invoice date but before the due date. Set the journal as ‘Cheque’ and confirm the payment.
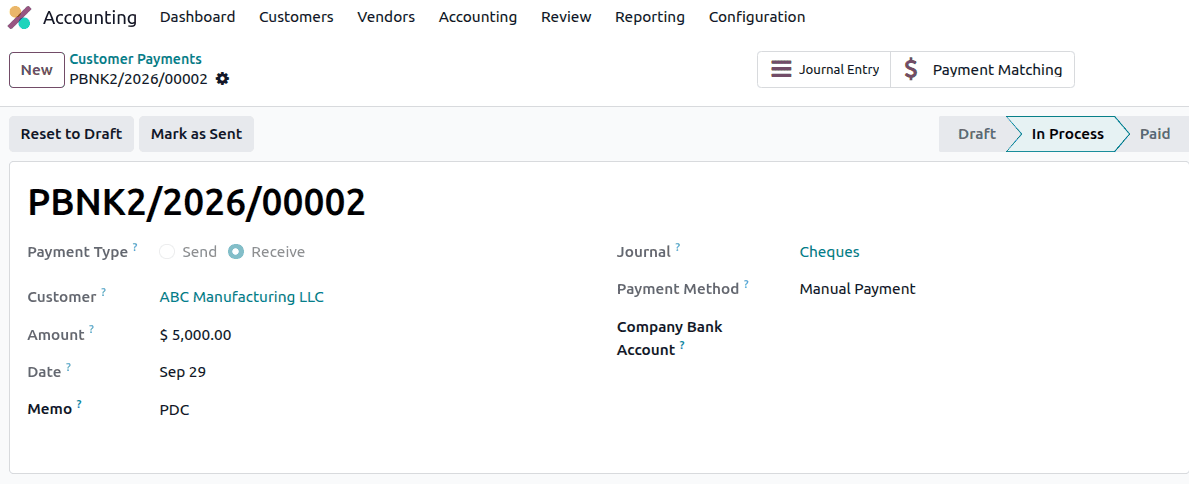
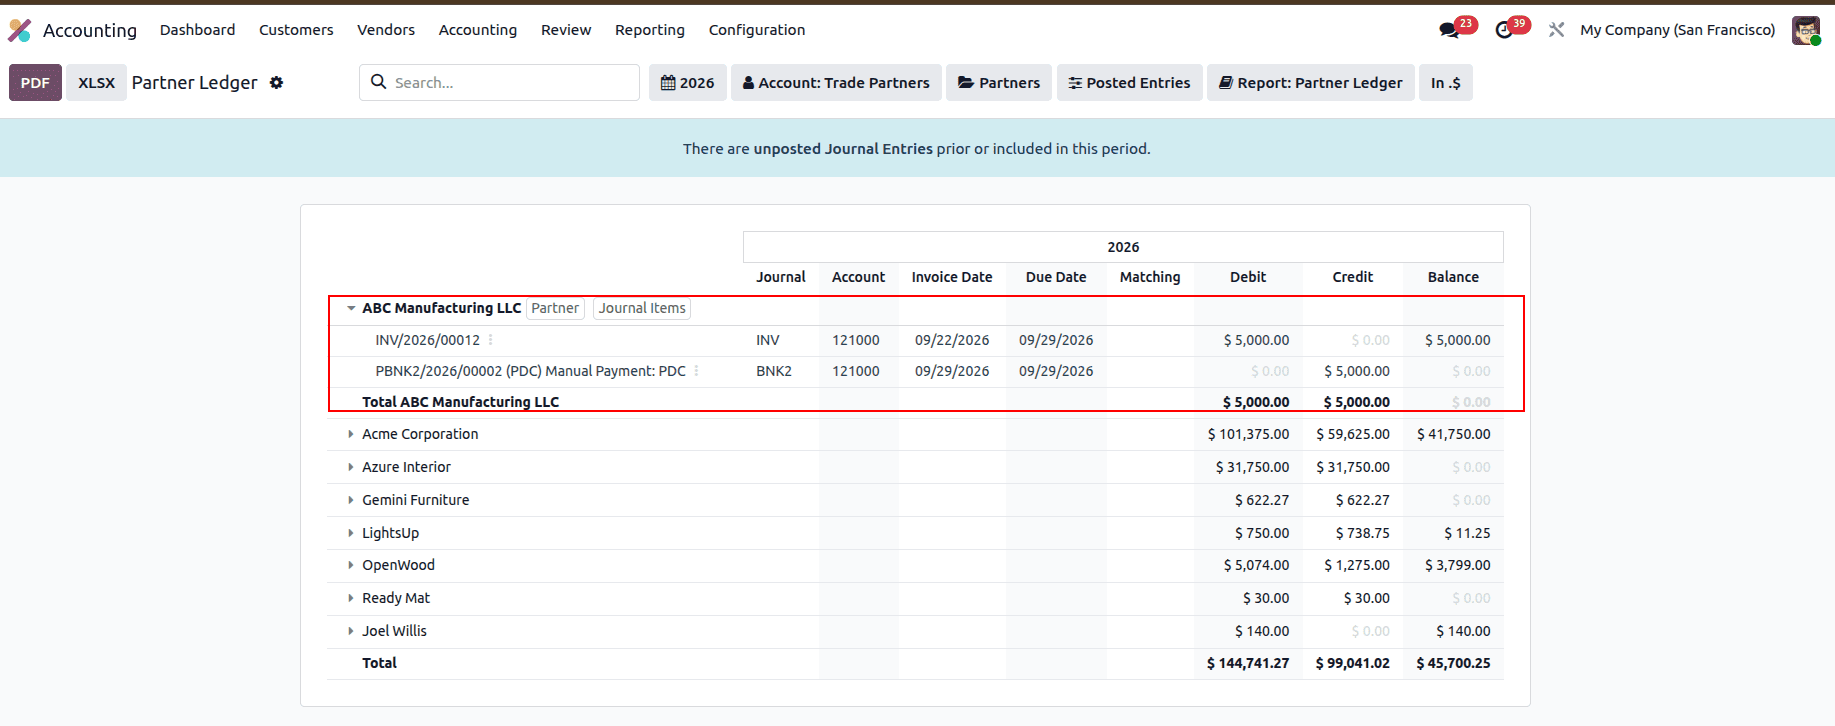
And once we switch back to the partner ledger, we will find that there will be two entries for the invoice and payment for the future date, each with its debit and credit entries.
Moving on to the invoices, we pick the invoice that we have made. At the end of the invoice page, the credits of the customer will appear, and we have the chance to enter the payments of the customer.
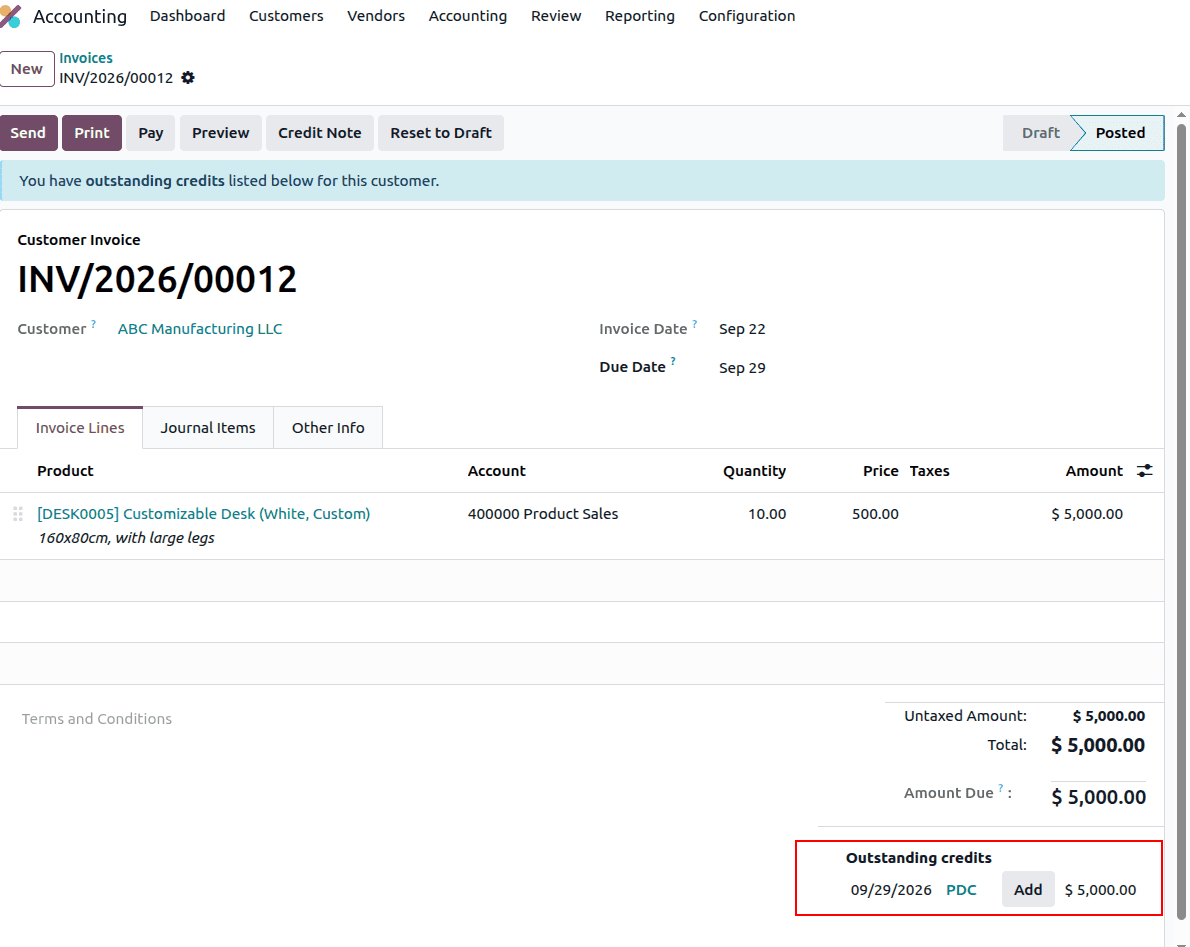
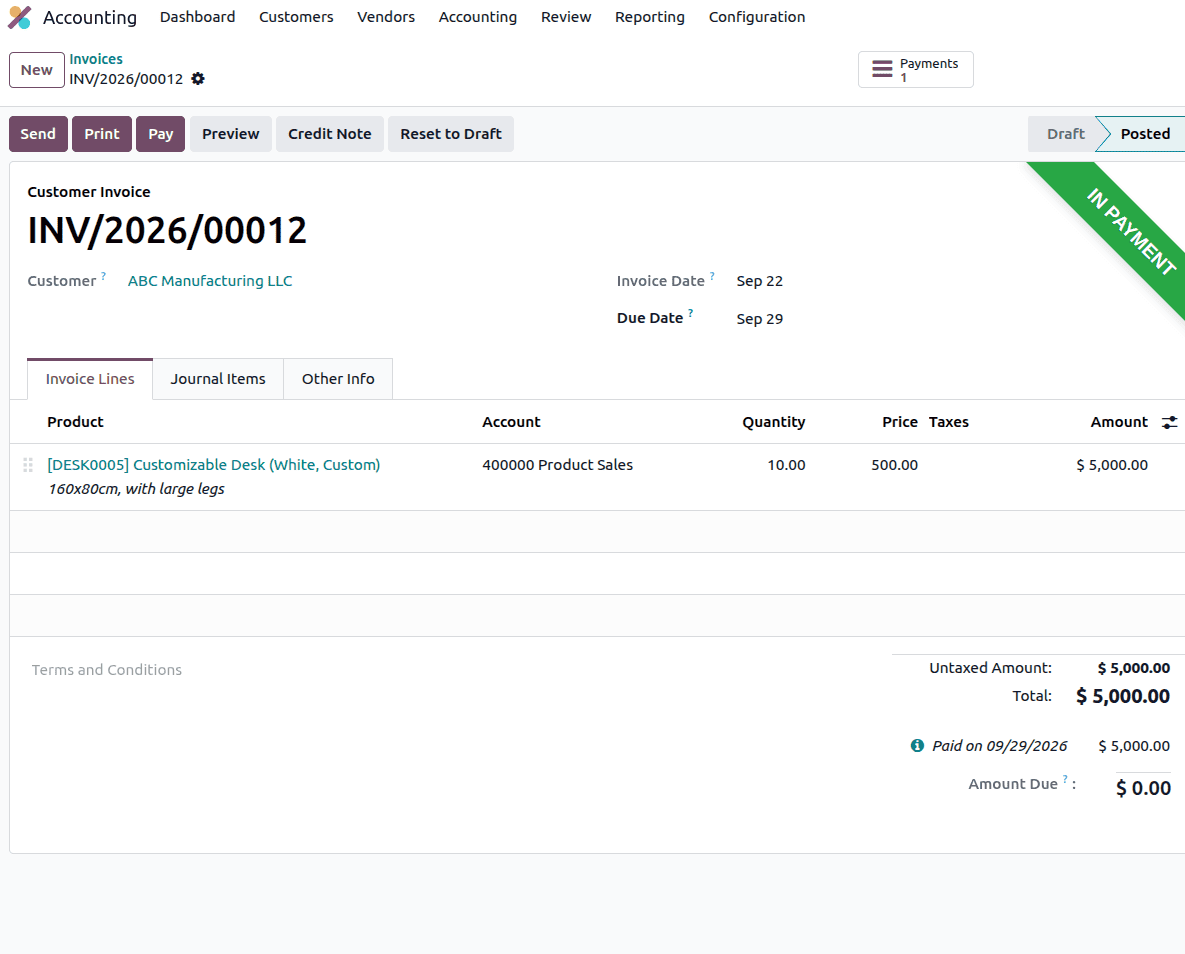
Click the Add button to include the amount written on the cheque into the invoice. After adding the cheque payments into the invoice, the invoice will be ‘In payment state’.
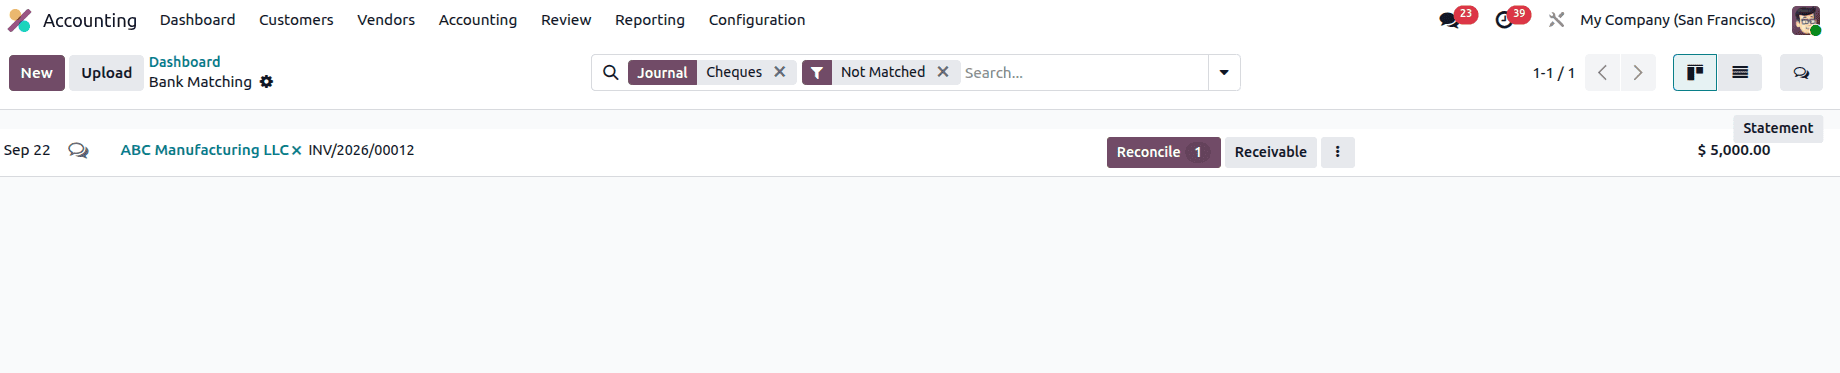
The second step would be to match the postdated cheque with the bank statement. To do this, navigate to the Dashboard of the Accounting module and create a new bank statement for the customer, ABC Manufacturing LLC, under the journal Cheques.
Then, create a new transaction for the invoice.

Click on the Reconcile tab to confirm the statement. Once you reconcile the statement, go to the invoice and verify its status.
In other words, when the reconciliation is done for the PDC statement, then the invoice will become paid.
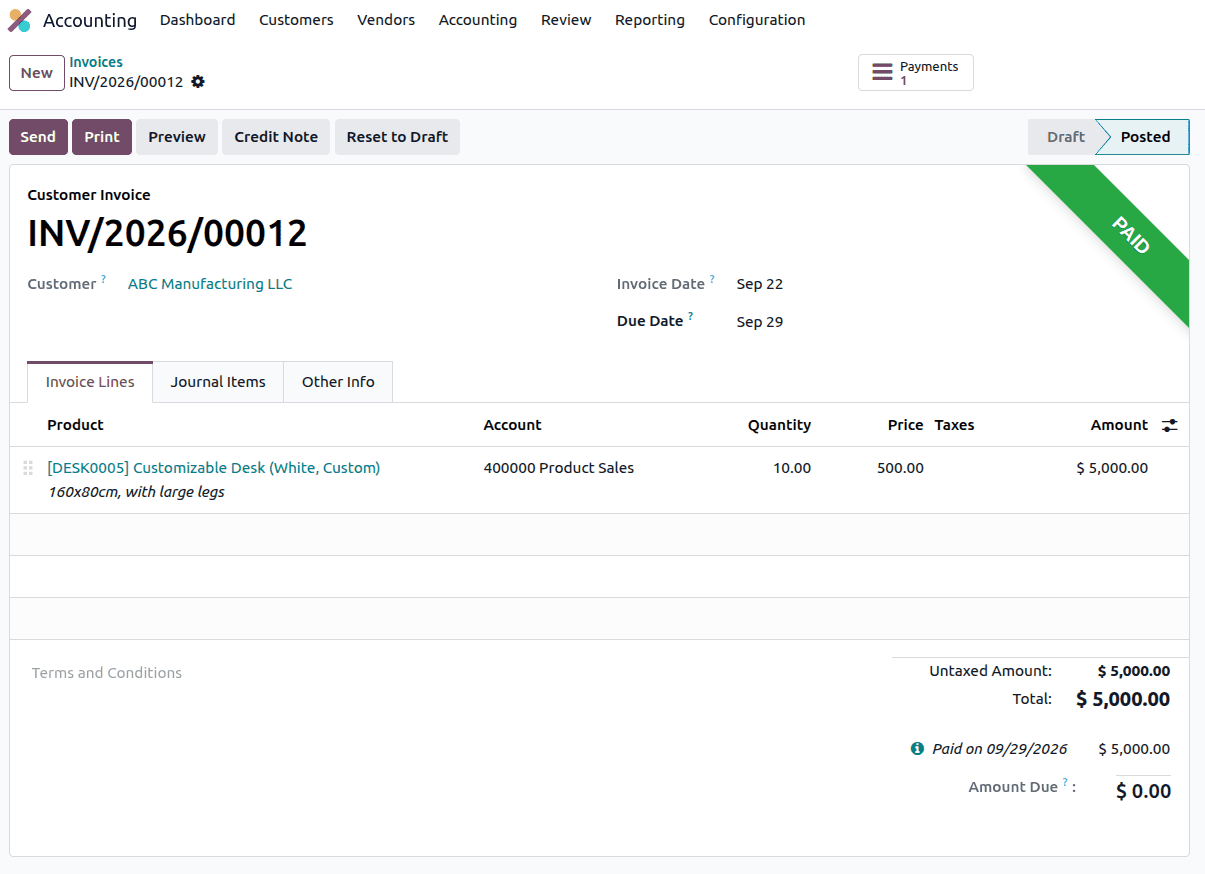
After reconciliation, the invoice shall be placed in the “Paid” status.
That is how we handle PDC with regard to customer invoices.
PDC for Vendor Bills
Now, let’s see how we can create PDC for Vendor bills.
Create a new vendor bill. On the Bill form, select the current date as the Bill Date and the future date as the Due Date.
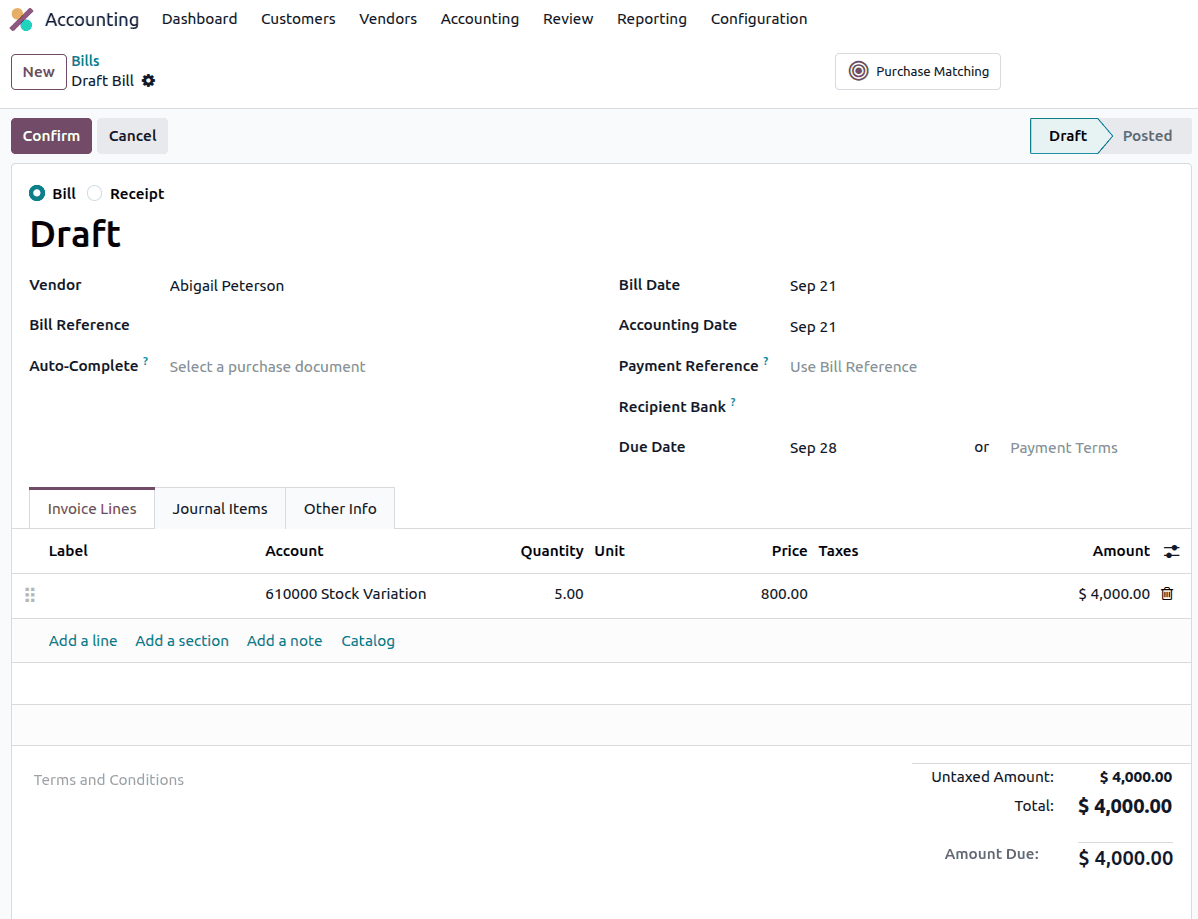
There are seven days in between the Bill Date and the Due Date in this bill. Now, confirm this bill. After confirming the bill, the status will change from Draft to Posted.
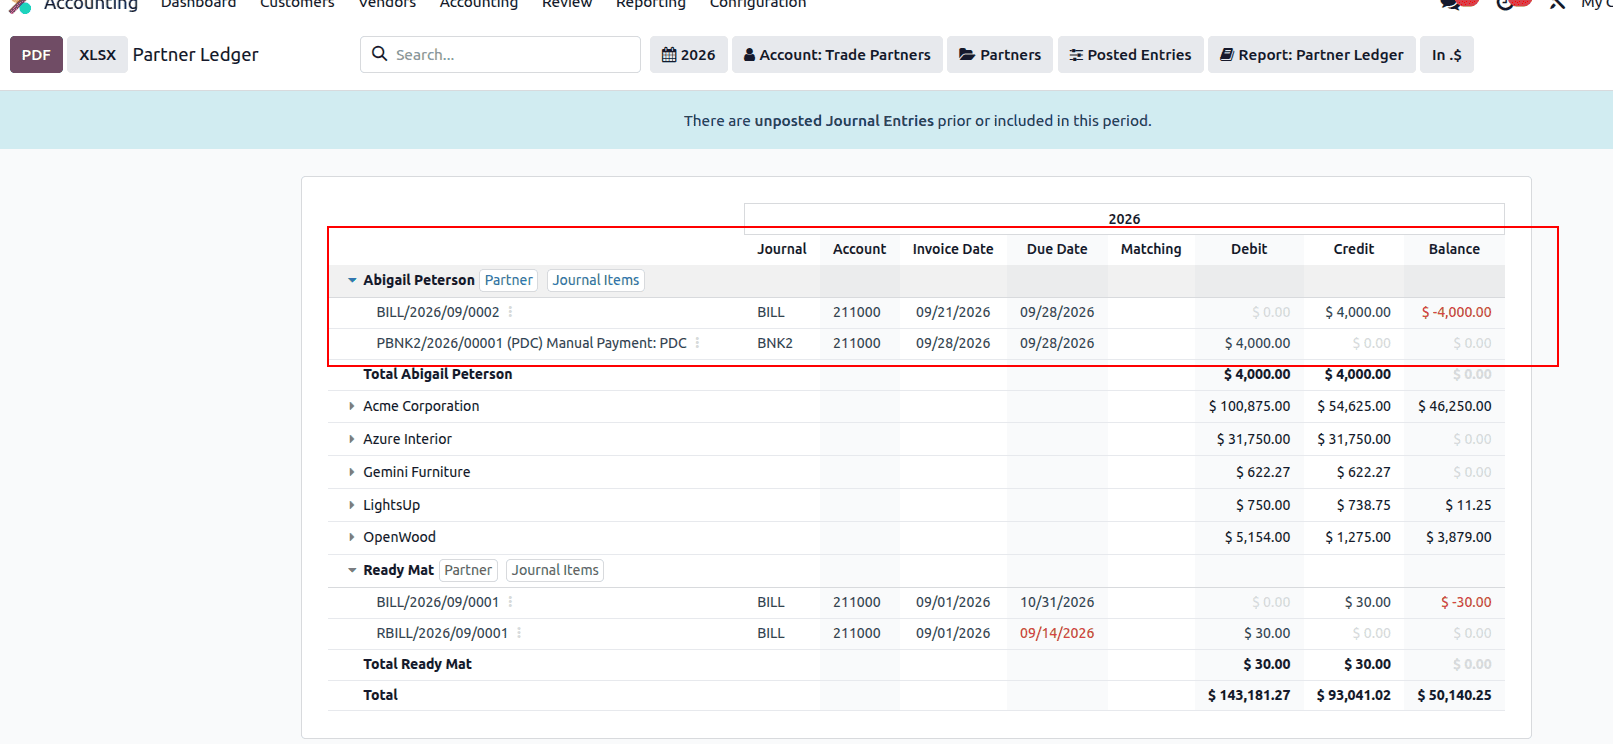
Next, navigate to Reporting > Partner Ledger. Here, you can view the partner associated with the bill. Selecting the partner displays the journal items that Odoo has generated for that partner.
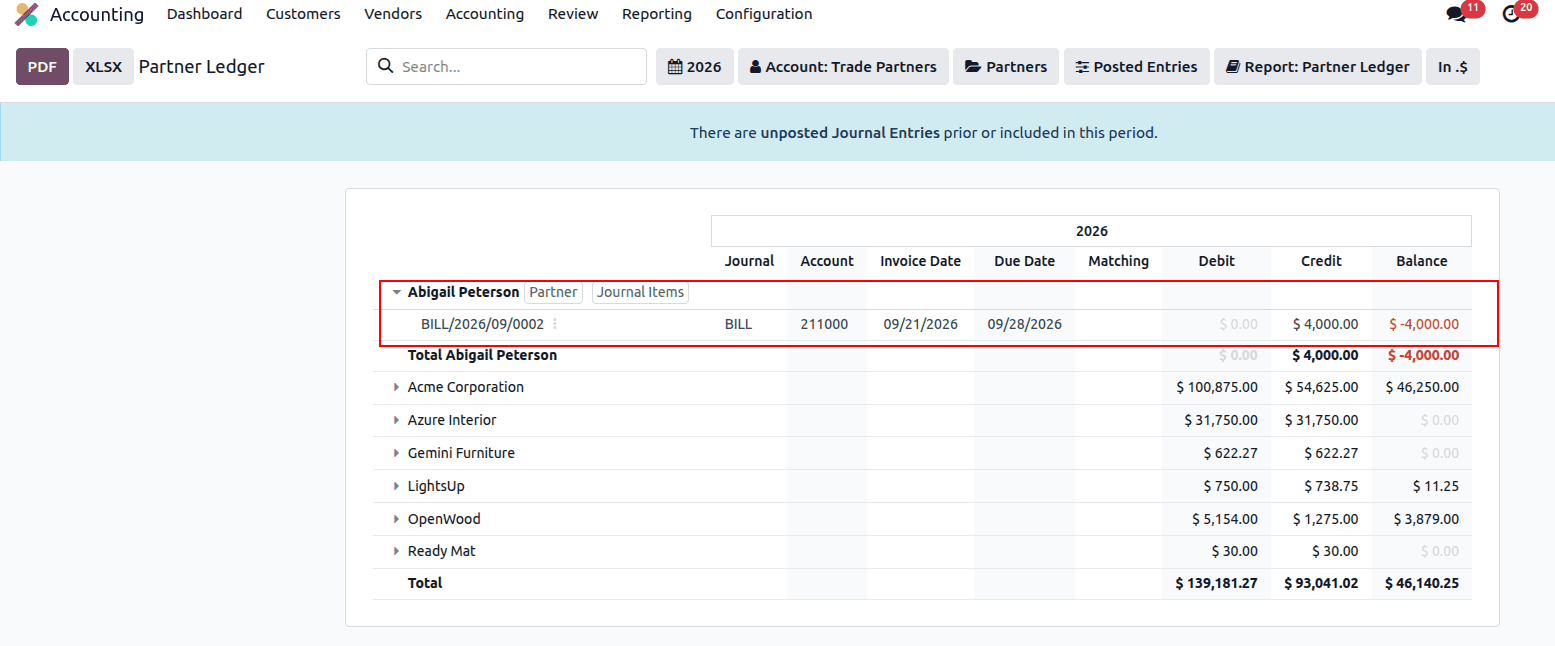
Assume that the vendor has made the payment by cheque. To record this payment, navigate to the Vendors menu in the Accounting application and select the Payments submenu. This page displays all existing vendor payments. To create a new vendor payment, click the New button.
A payment form will open, where you can enter the payment details. In this form, the Payment Type determines the nature of the payment. If the payment type is “Receive”, it means that there is a customer’s payment. If it is set to Send, it indicates a vendor payment.
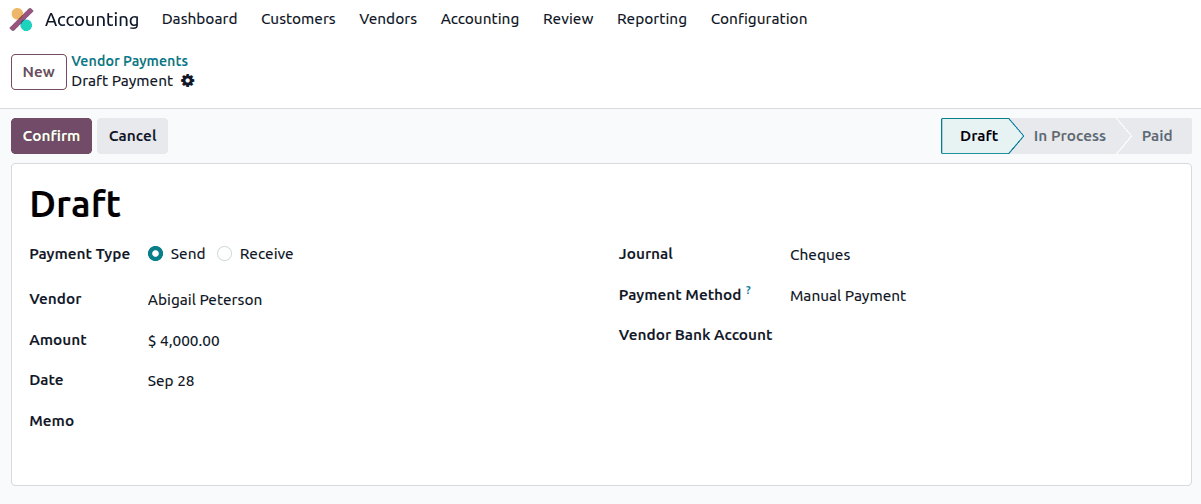
For Vendor payment, we need to add the name of the vendor on whose behalf the bill has been made; the amount would be the amount of the bill, while the vendor payment date must lie between the bill date and the due date; it must come after the bill date but before the due date. The journal of this customer payment is the cheque we have already created; press the Confirm button. In this way, we can take this payment from the draft stage to the in-progress stage. Once we do that; then the next step is to click the Validate button for validating the payment. This payment status will be posted. Then, we will see the Journal Entry Smart Tab. Once we go to this journal entry, we can see the journal entry of this payment.
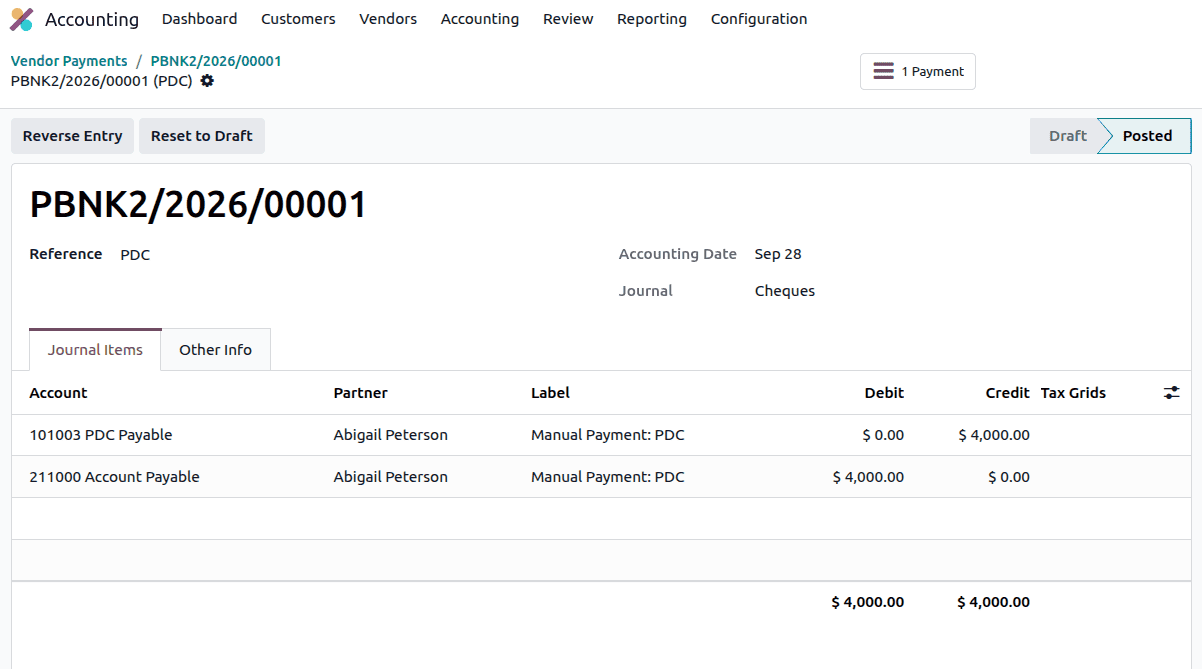
If we again go back to the partner’s account, we shall observe that there are two transactions: one for the bill and another for the payment on the feature date, and their respective debit and credit amounts.
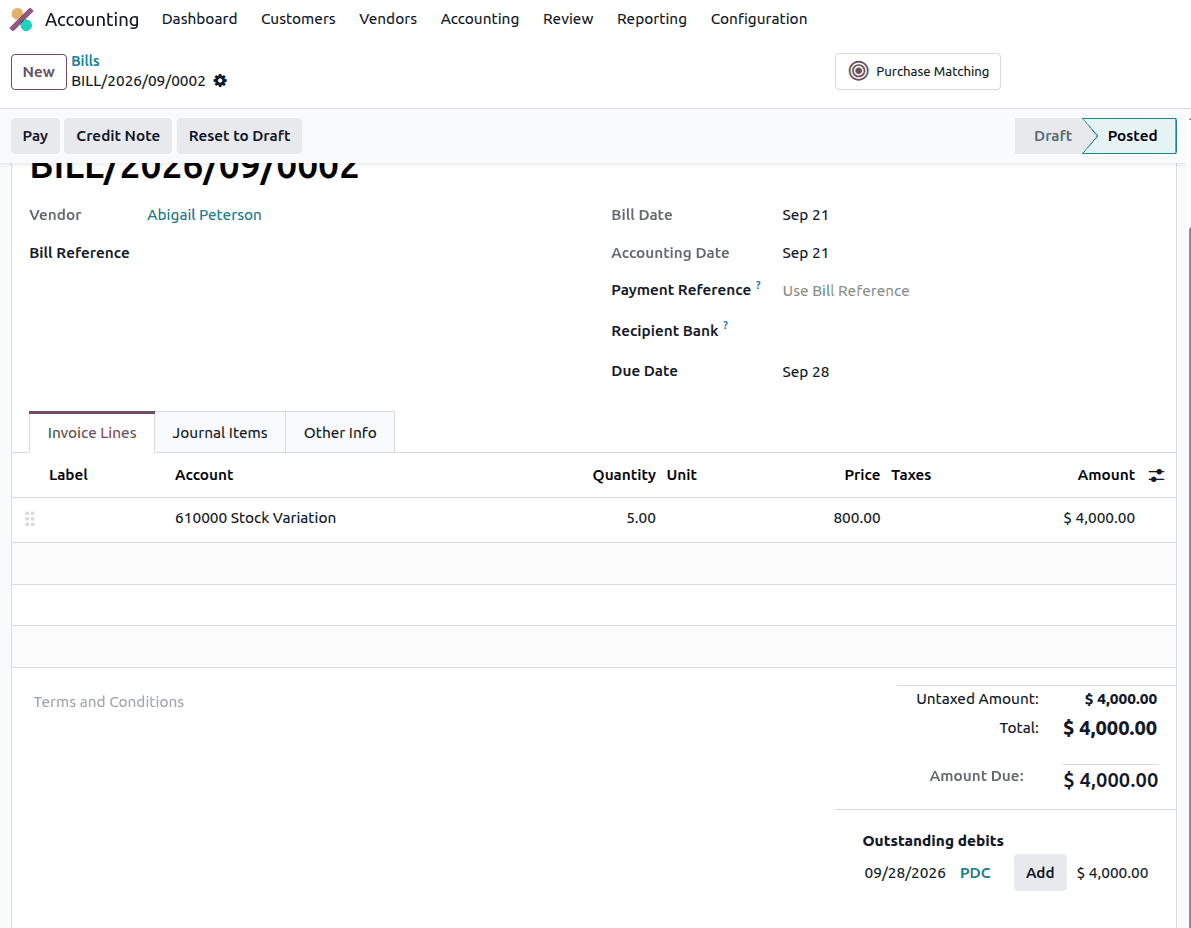
For bills, we should choose the bill that we have created. The vendor’s outstanding debits will be displayed at the bottom of the bill. We can opt to enter vendor payments.
Click on the Add button and add the amount from the cheque into the bill. In this way, when we add the cheque payment to the bill, the bill will go into the ‘In Payment’ state’.
Now, you have to match the PDC statement with the bank statement. Go to the Dashboard of the accounting module and create a new bank statement for the vendor, James.
Press the validate button for validating the statement. After the validation of the statement, go to the bill and check the status of the bill. Once you have validated the PDC statement, the bill will be in the paid status.
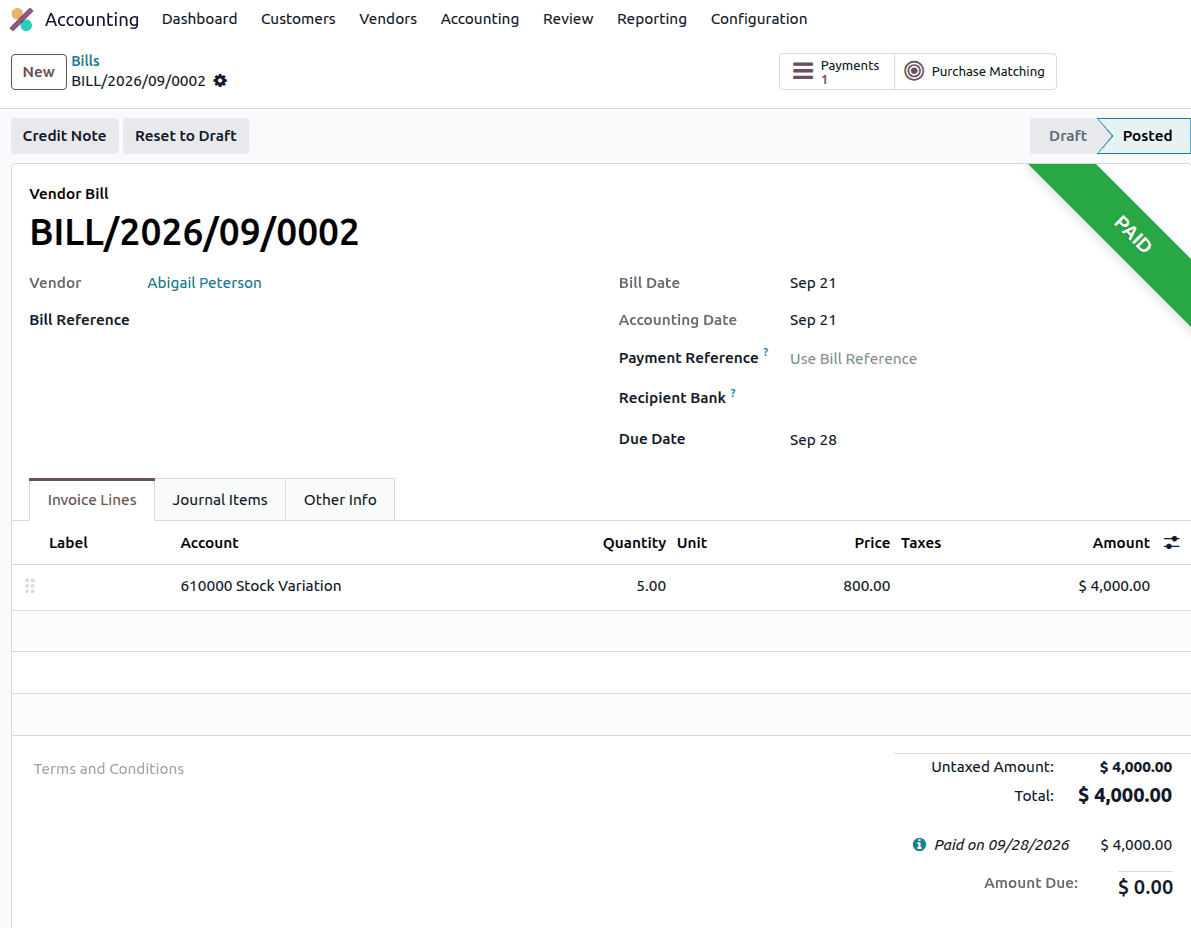
By following these steps, you can effectively manage post-dated cheque (PDC) payments for vendors in Odoo. From creating and confirming the vendor bill to recording the cheque payment, validating it, and reconciling it with the corresponding journal entries, Odoo provides a structured workflow that ensures accurate financial records and streamlined payment management.
To read more about How to Manage Post-Dated (PDC) Cheques of Customer Invoices in Odoo 18, refer to our blog How to Manage Post-Dated (PDC) Cheques of Customer Invoices in Odoo 18.