All the areas related to a business are covered by ERP software in a single database. An Odoo 15 ERP system satisfies customers with various modules and functionalities. One of the demanding tasks for an organization is managing several users in multiple companies. Within the Odoo database, it is easy to add new users and deactivate them quickly. The user is the individual who has access to the Odoo database, and we can add many users as per the need in Odoo 15.
This blog assists you to add a new user and deactivating it simply with the help of the Odoo 15 database.
We can develop a new user from the Odoo 15 Settings, and it is easy to manage all user-related data. Here, you can access the Access Rights, Preferences, Account Security, and more aspects of each user. Now, let's check out how to add and deactivate a User in the Odoo 15.
To Add a New User to the Odoo 15 Database
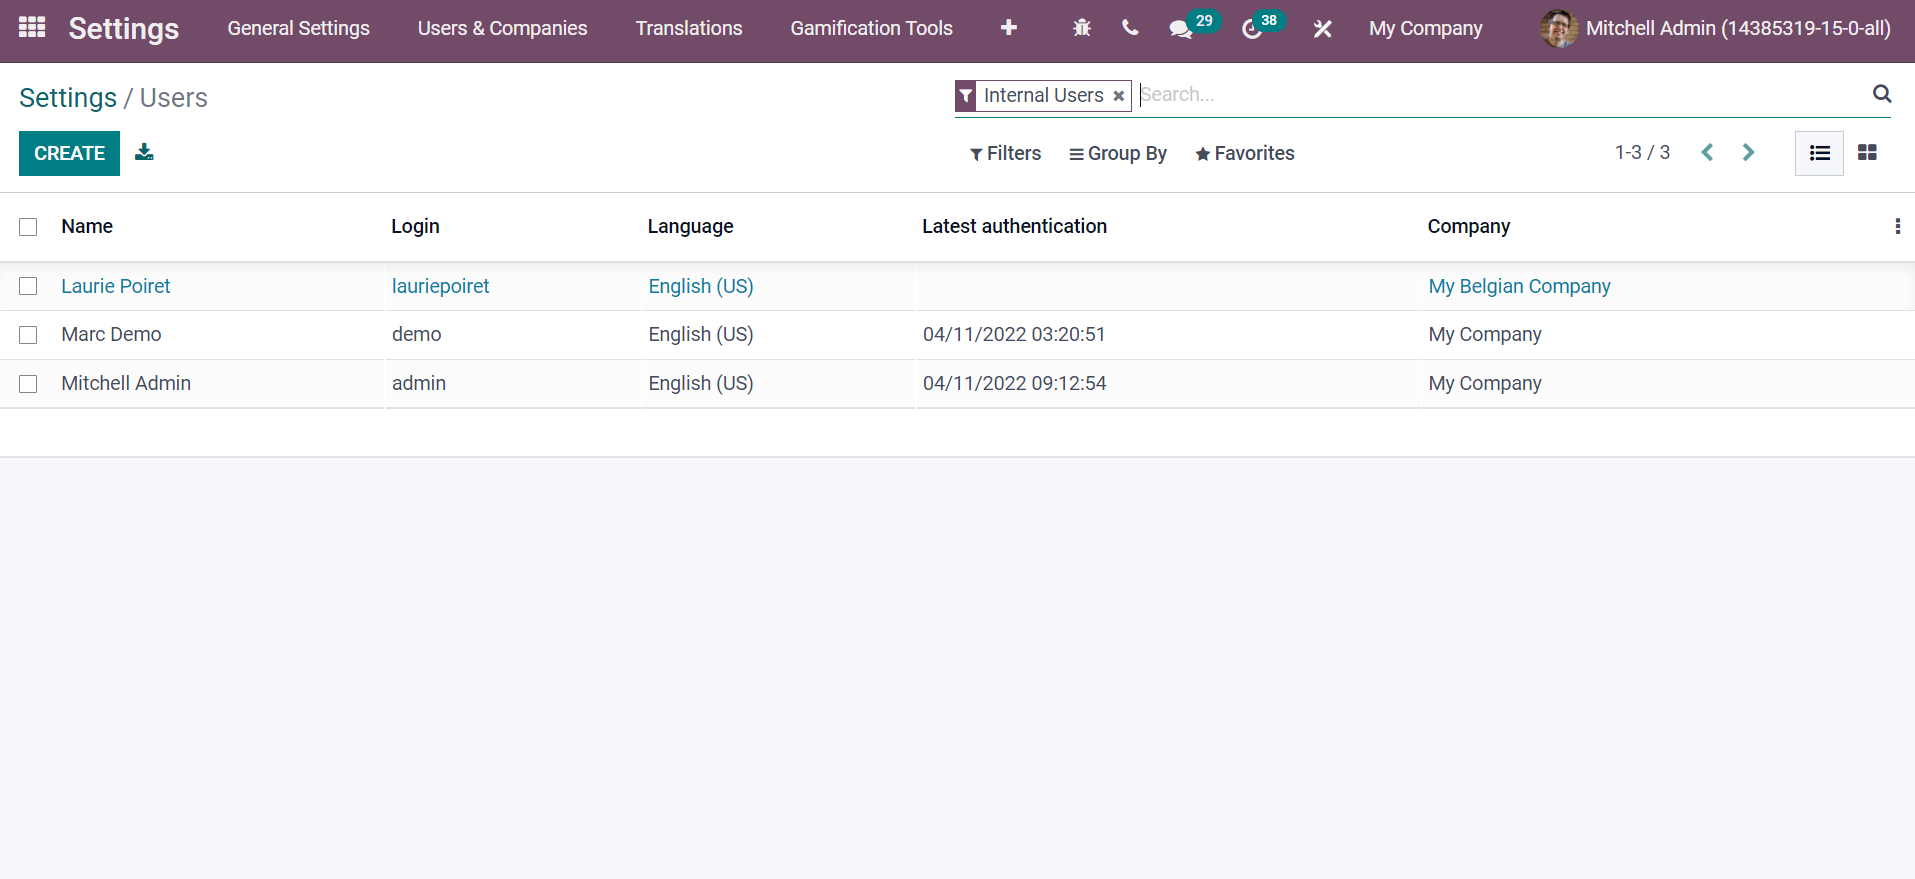
A user performs all the daily tasks with the odoo 15 platforms. It is possible to add many users for business processes inside the Odoo database. Select the Users menu from the Users & Companies tab in Odoo 15 Settings for creating a new user. We can get the lists of all created users in Odoo 15 from the Users window, as displayed in the screenshot below.
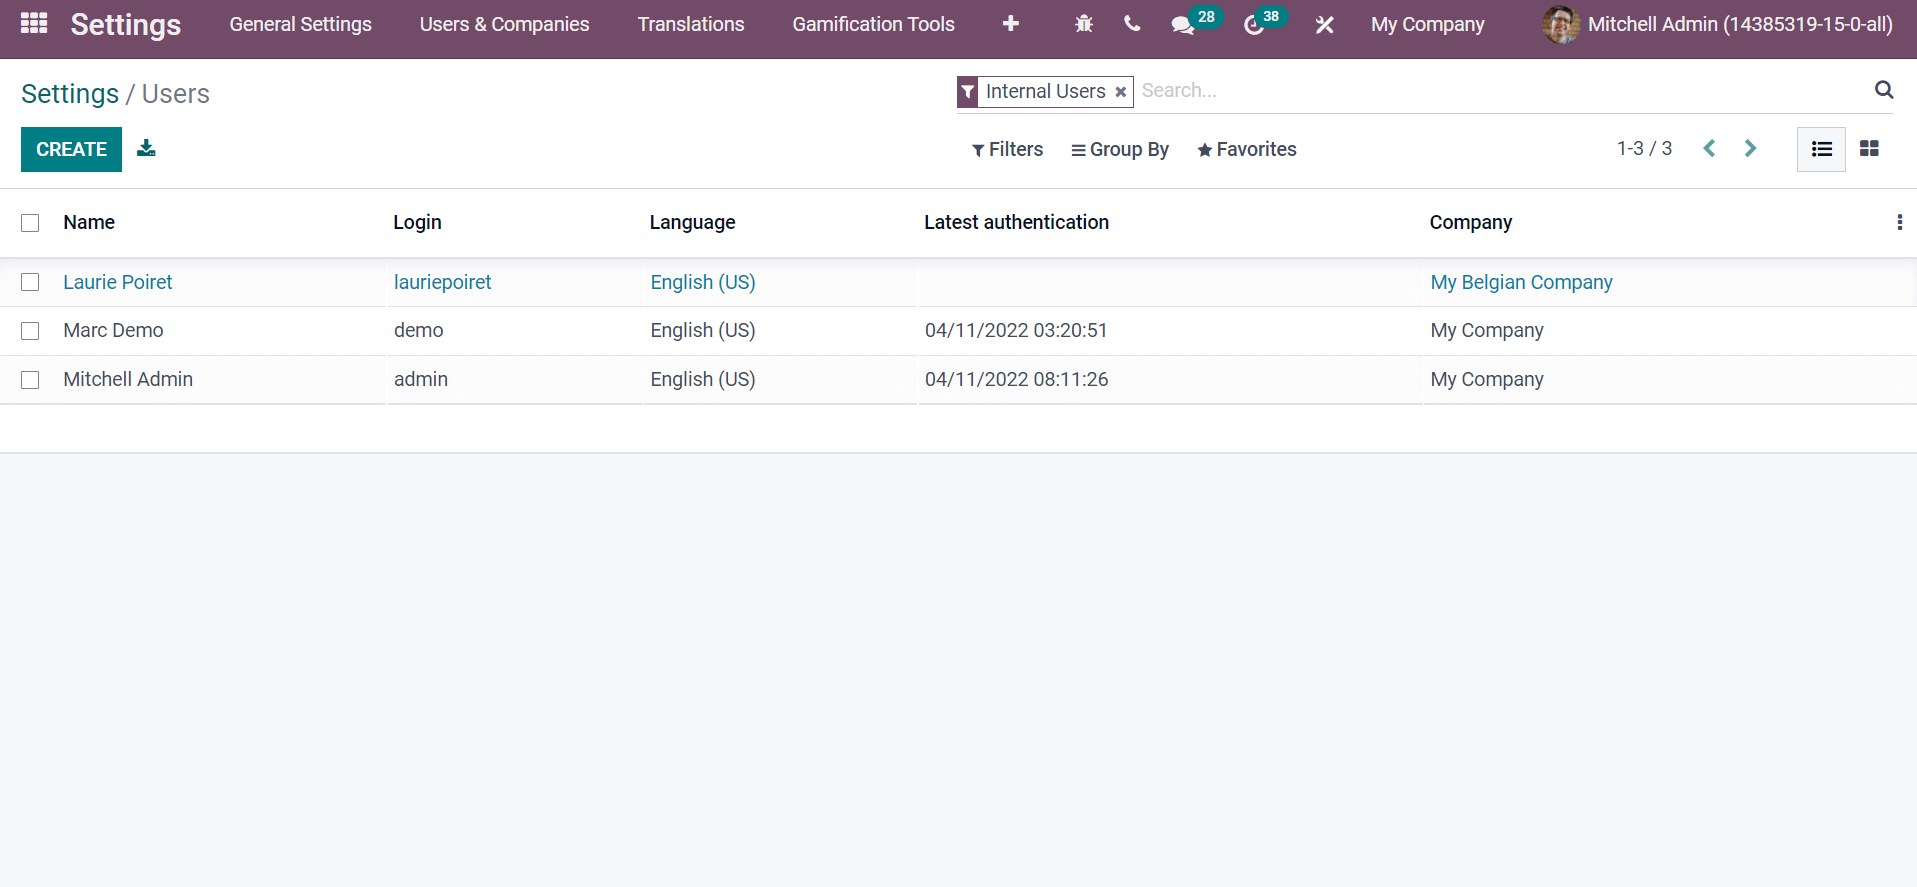
Here, you see users' information such as Name, Language, Company, log in and Latest authentication are shown in the screenshot above. The Create button enables you to generate a new User in the Odoo 15 platform. Let's create 'John David' a new user in the new window. Add the Name as 'John David', enter the user's email ID, and apply the image at the right corner of the Users window.
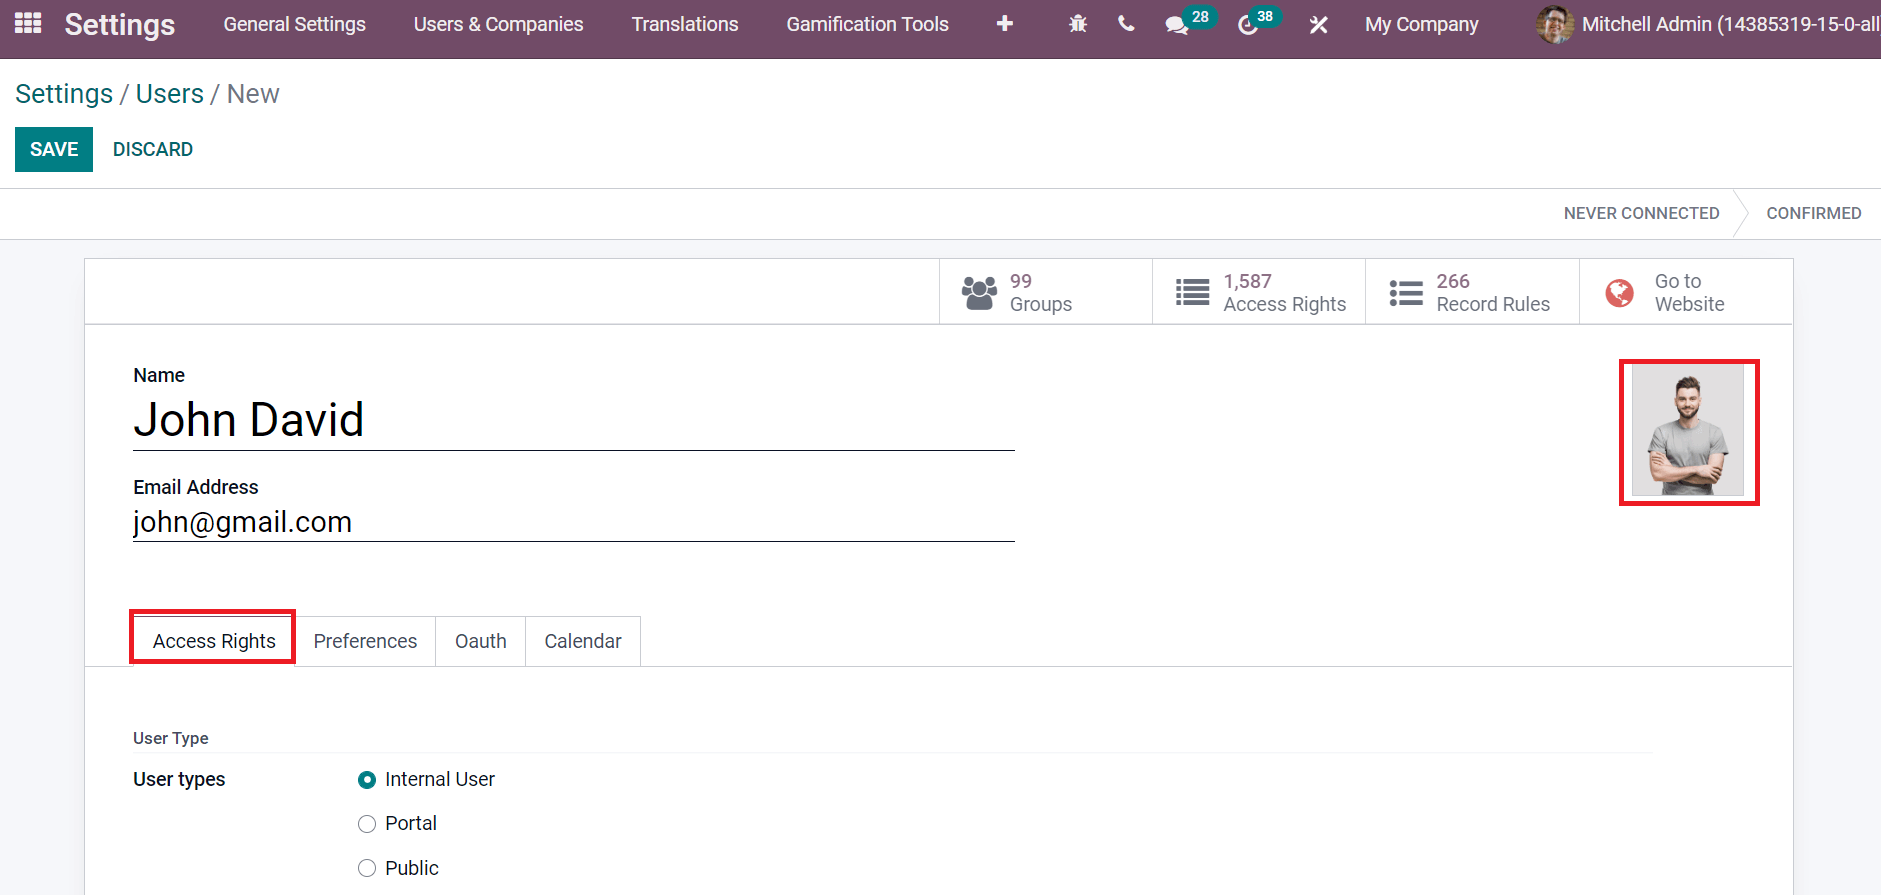
We can manage user-related rights inside the Access Rights, and User Types are Classified into three: Internal User, Portal, and Public. Specific access rights belong to Portal and Public members, such as restricted menus and record rules. Inside the Sales section, selecting the Subscriptions as Administrator means the user has the proper access to subscriptions, and See Subscriptions depicts the user has read access for subscriptions. Choose the Sales as User: Own documents only mean the user has access to his rights. User: All Documents depict users have access to all sales records, and by selecting Administrator, users have access to statistical reports and sales configuration. Later, select the Point of Sale and Sign as User: Own and Shared Templates, Employee: Send a file to sign, and more.
You can manage the HelpDesk, Project, Timesheets, and Field Service of the user inside the Services section. After that, choose your Accounting type, Purchase, and Inventory. Moreover, we can select PLM as the user uses product lifecycle management and Administrator. Users can manage the equipment by selecting Equipment Manager inside the Maintenance field. Add the Quality as User and Administrator inside the Manufacturing section, as depicted in the screenshot below.
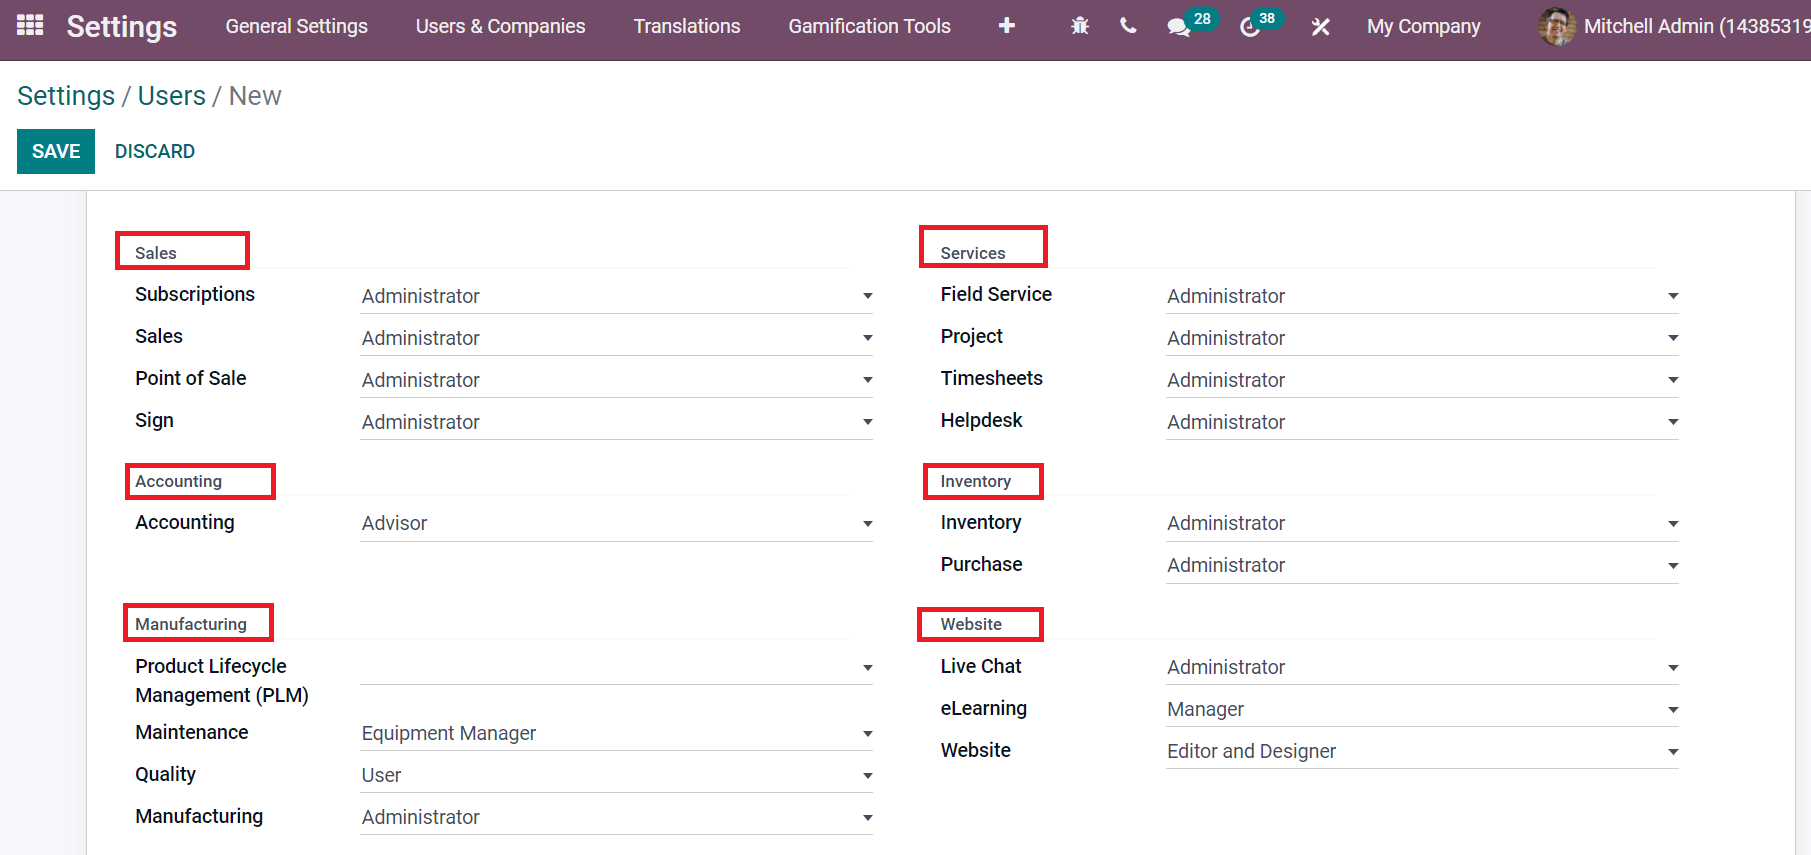
By selecting Administrator in the Live Chat field, users can delete support channels, and the User option assists users to join various channels. Choose the Website and eLearning field of the user from the Website field. In this way, you can manage Marketing, Productivity, Technical, Human Resources, Extra rights, Administration, and Other rights of a specific user from the Access Rights tab.
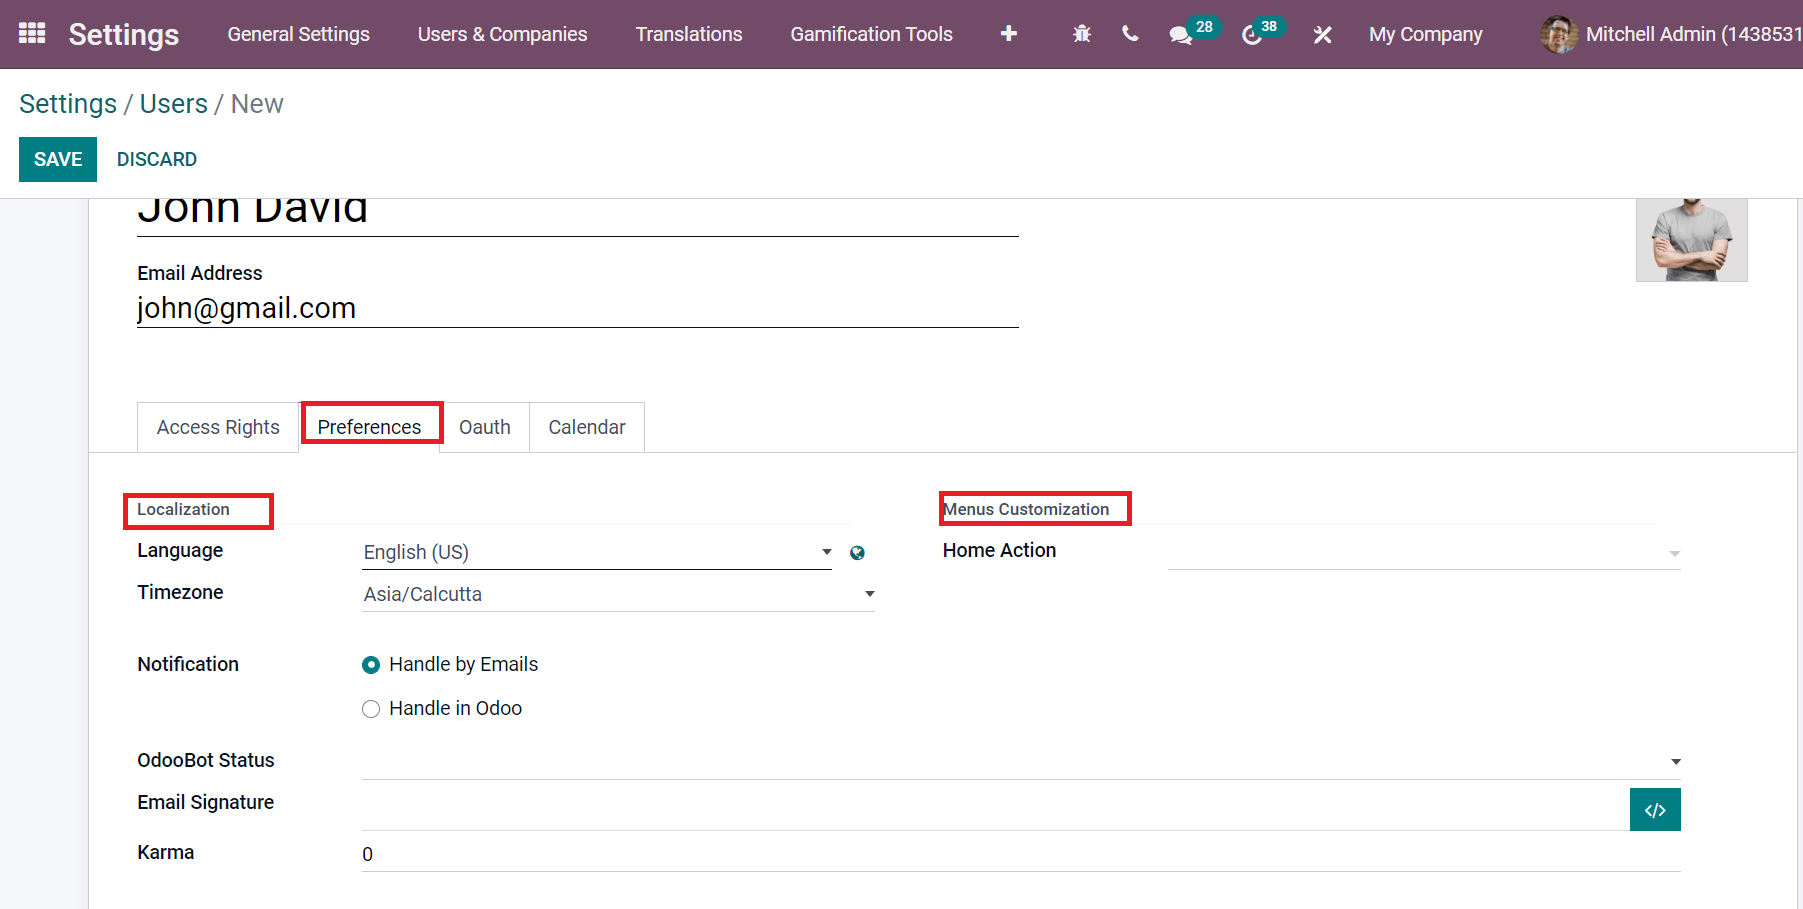
We can deal with Localization and Menus Customization of John David from the Preferences tab. Here, you can select the language of the user, and all documents sent to the contacts show as per your language chosen. The time values, documents, and data are computed regarding the timezone and select your TimeZone. Later, enabling the Notifications as Handle by Emails means notifications are sent to your email ID, and it appears in your Odoo inbox by activating the Handle in Odoo option. You can add the Email signature, OdooBot Status, and Karma points inside the Localization section. By specifying Home Action from Menus Customization, it will log on for your user (John David), as denoted in the screenshot below.
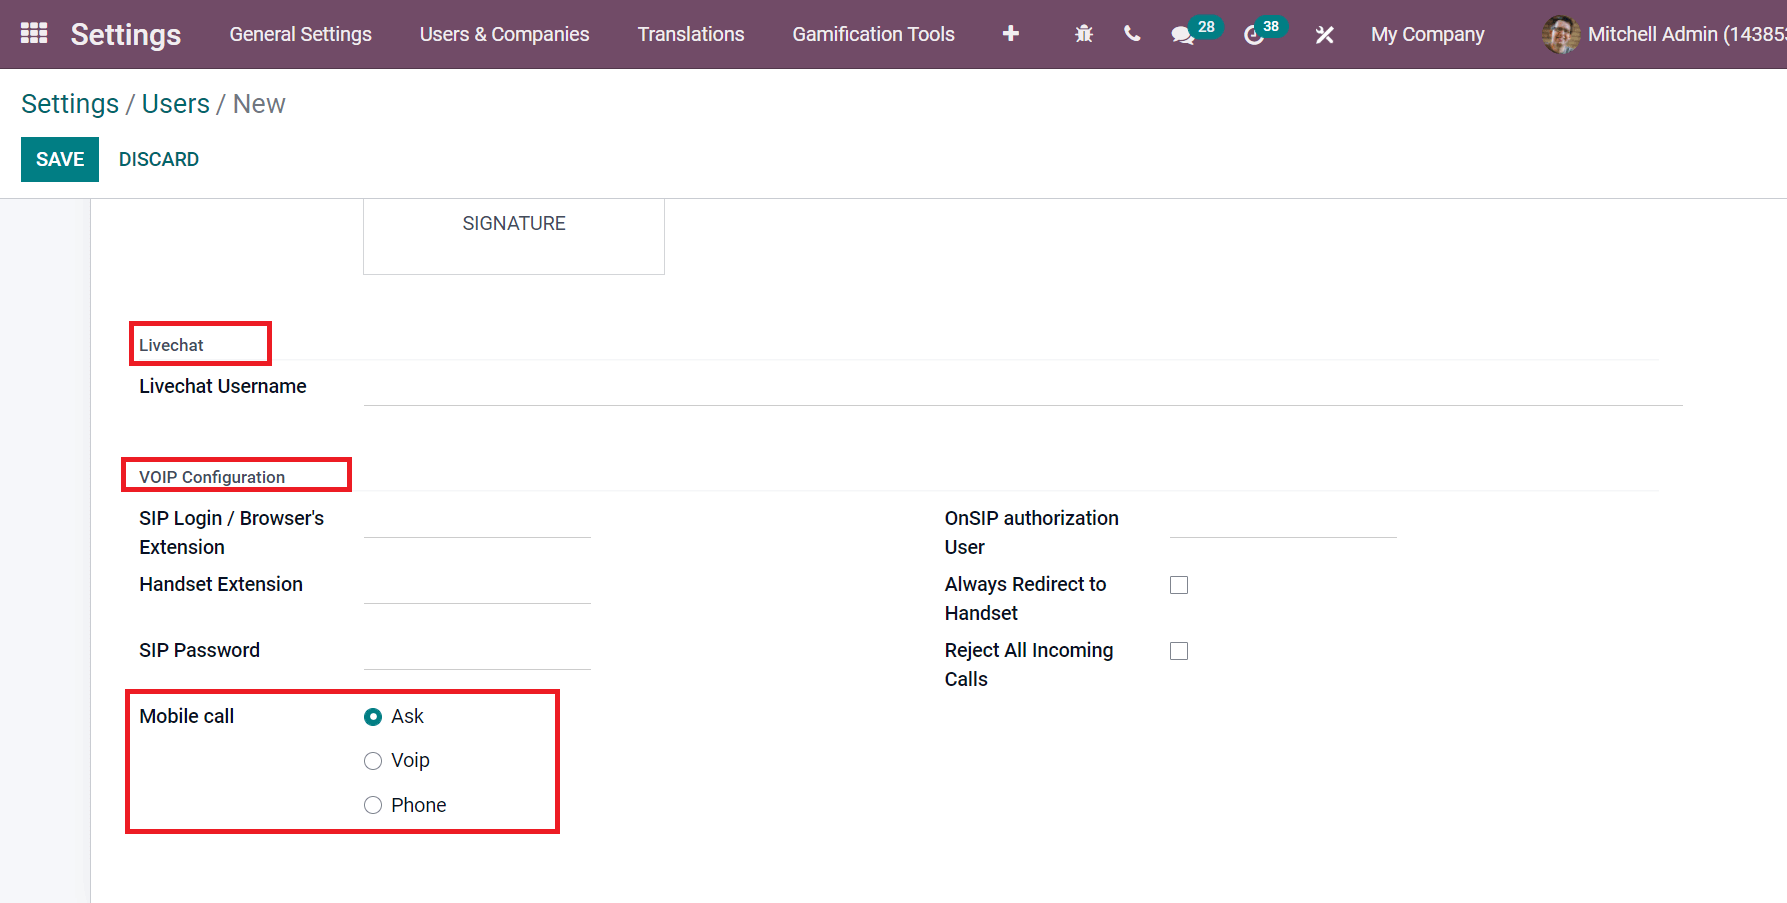
You can add the Digital Signatures and initials of the user within the Digital Signatures section. In addition, apply a Live Chat Username that displays in all live-chat channels. The VOIP Configuration section includes Browsers Extension, SIP Password, and Handset Extension. We can choose the method of the user to make a call on mobile within the Mobile Call field. It classifies into three methods: VoIP means always used as a softphone, device phone always used by enabling Phone option, and always prompt by activating the Ask option.
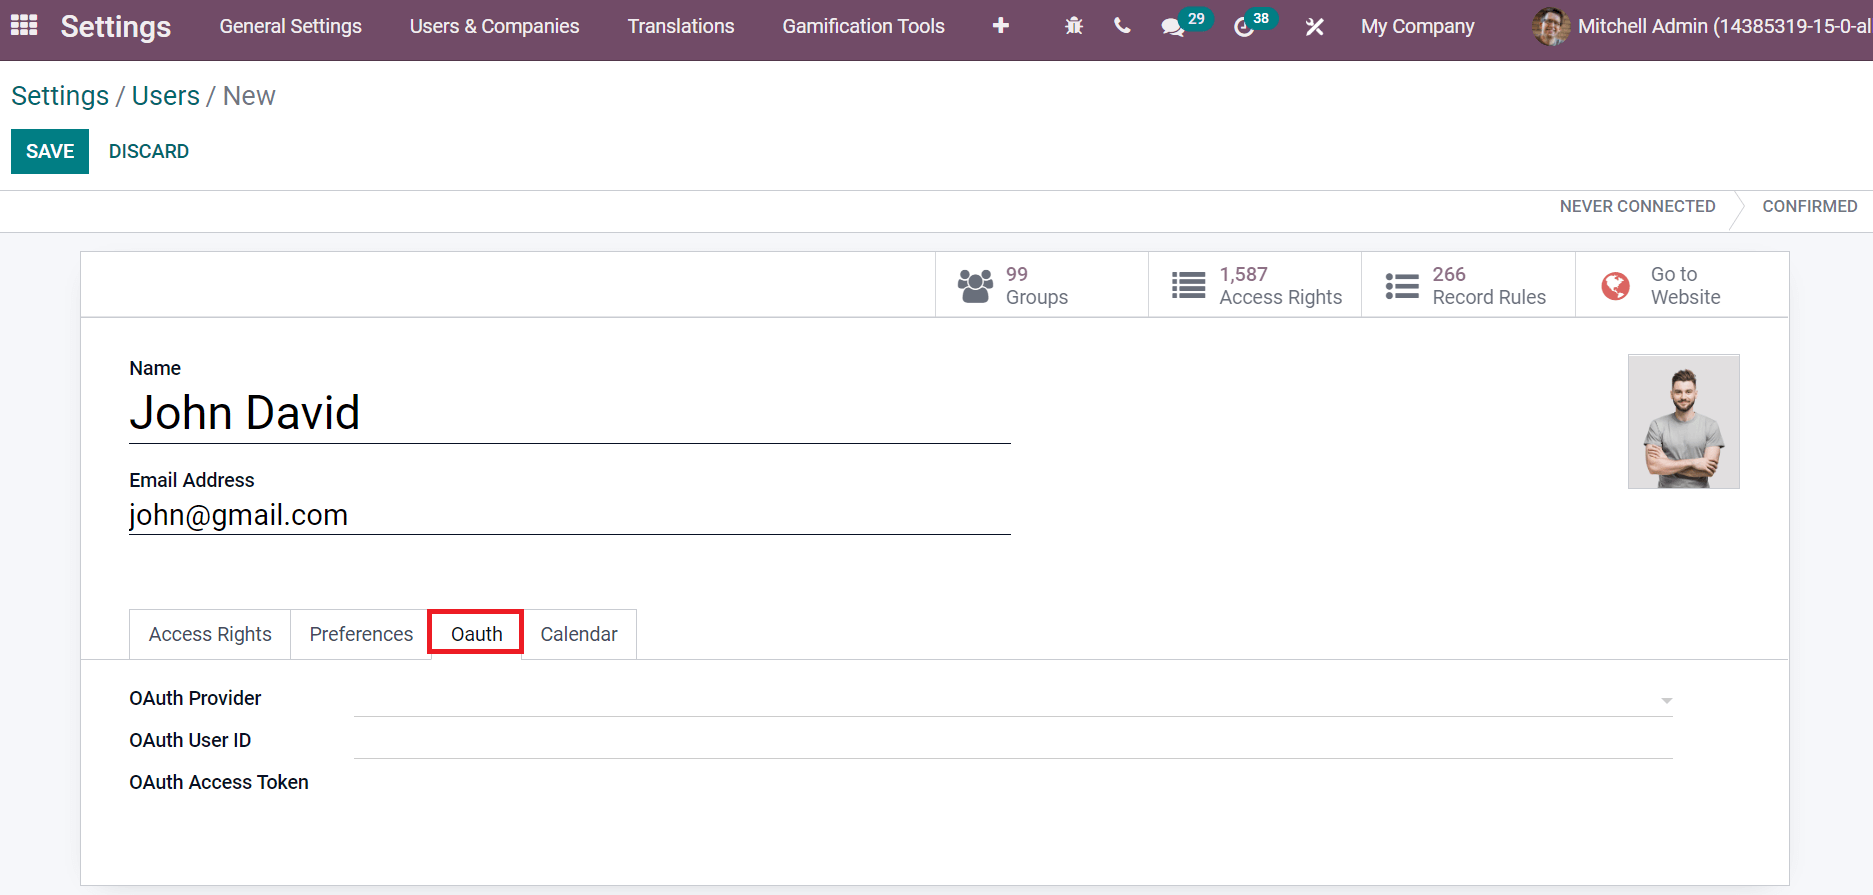
The information about your services and products in a business is quickly shared with a third party without giving a password allowing using the Oauth. You can add OAuth Provider and User ID inside the Oauth tab as per your requirement.
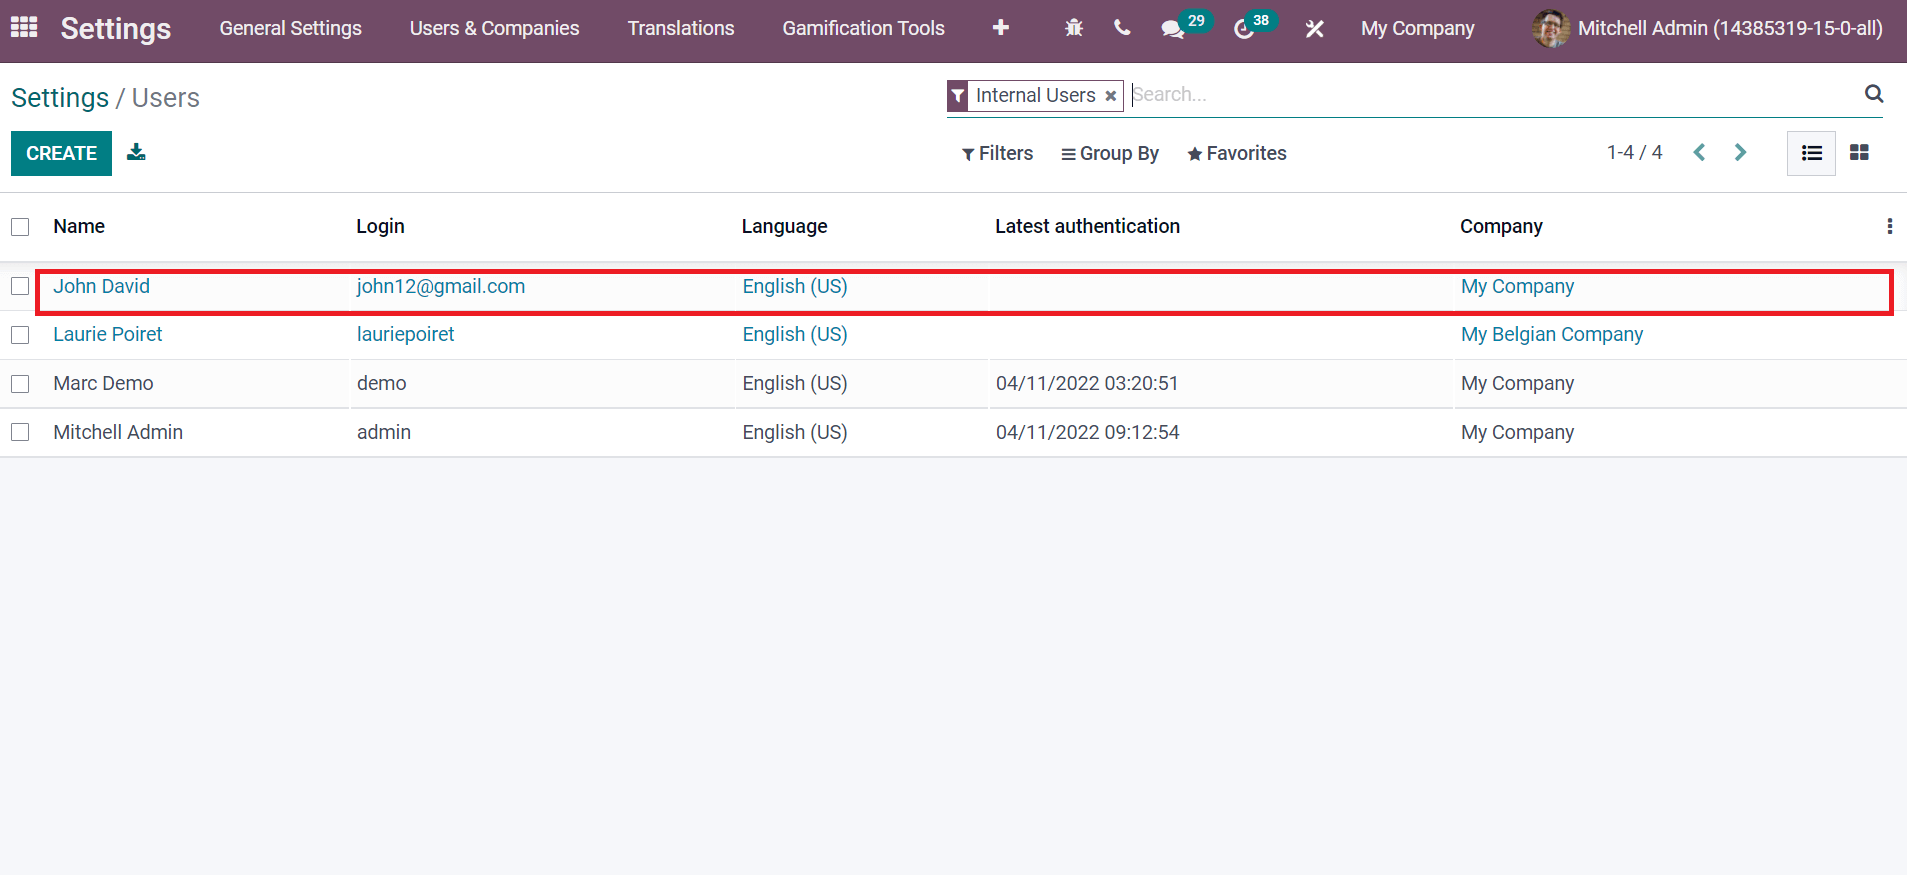
It is possible to reset the account of Google Calendar and Outlook Calendar of users inside the Calendar tab. After entering all details, click on the Save icon and a new user is created in the Odoo database. Hence, a user named John David is made in the Odoo 15 database, as portrayed in the screenshot below.
How to Deactivate a User in the Odoo 15?
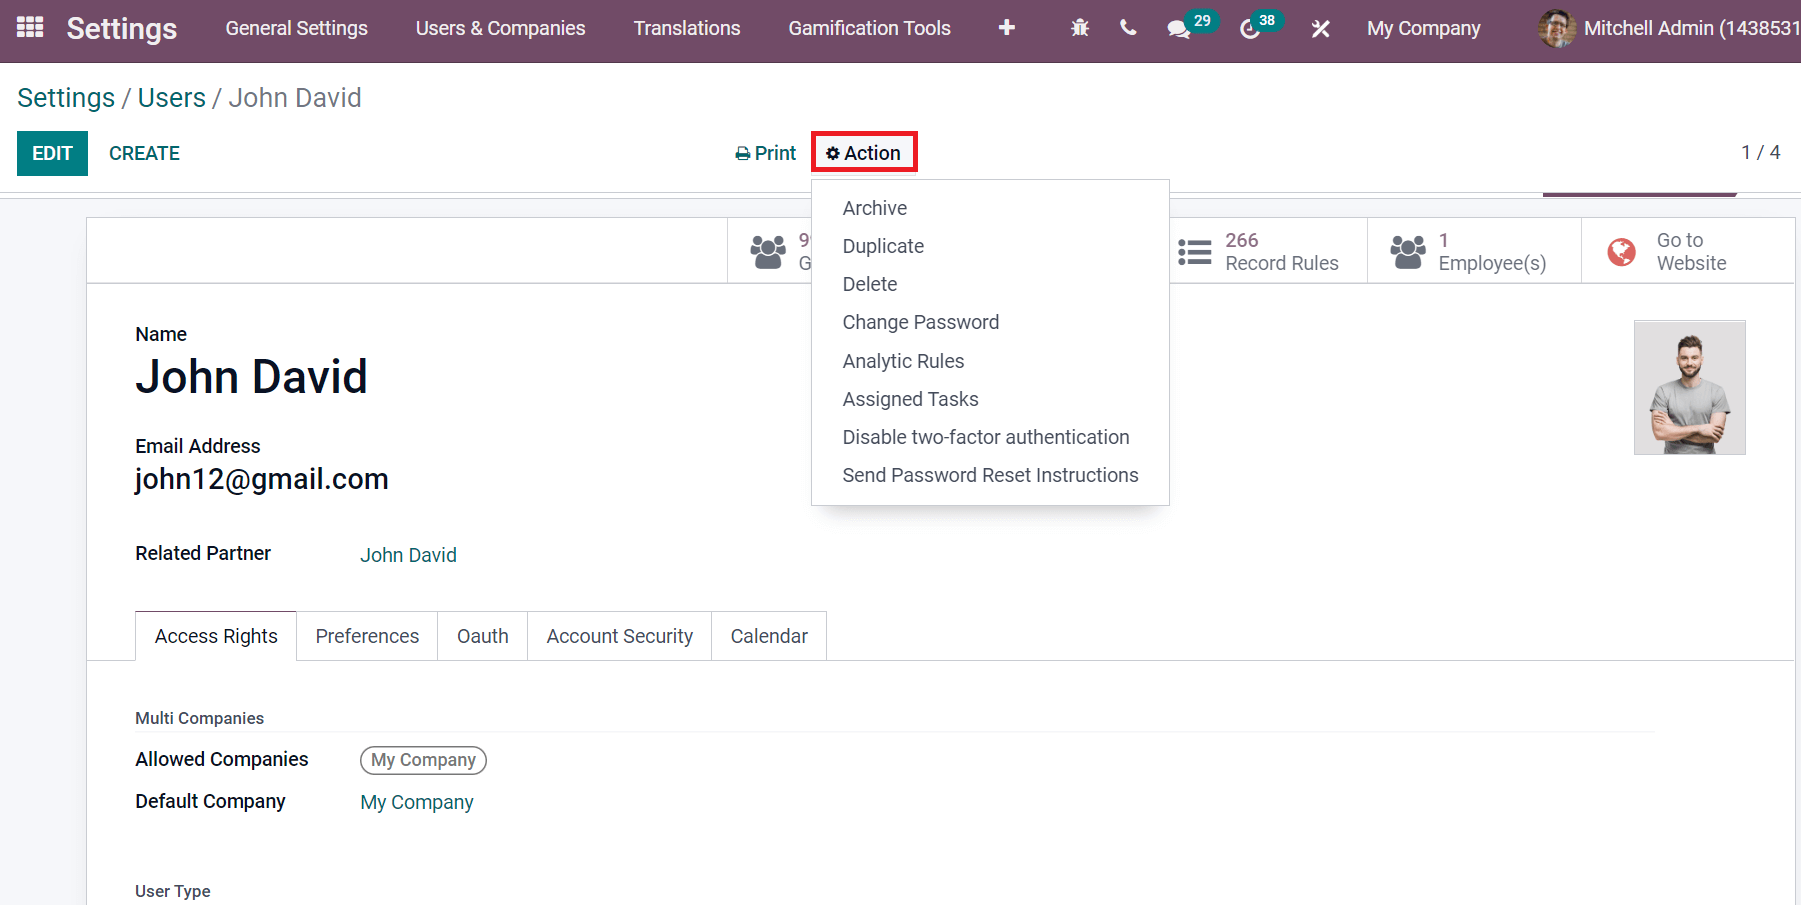
Select the user that deactivated from the Users window of Odoo 15 Settings. Here, we select John David from the Users window. Click on the Archive menu from the Action button in the John David screen, as depicted in the screenshot below.
After selecting the Archive button, a Confirmation page opens before you, and click on the Ok icon. Later, you can see an Archived line at the corner of the user window. Go back to the Users window; we did not see the information of John David here, as displayed in the screenshot below.
The data of John David is deleted permanently from the Odoo 15 database. You can see the Users window in both Kanban and List formats.
We discuss creating a new user and deactivating it with the Odoo 15. Odoo 15 Settings are beneficial to maintaining users' access rights, preferences, and more aspects. All information about users in a company is managed quickly with the help of an Odoo ERP system.