Odoo 16, an open-source ERP platform, offers powerful reporting capabilities that allow businesses to generate and customize various types of reports. This blog will guide you through the process of creating custom PDF reports from scratch and modifying existing reports in Odoo 16. By leveraging the built-in report templates and Odoo's flexibility, you can tailor your reports to meet your specific business needs.
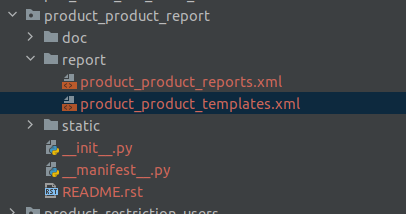
First, let us see how to create a custom PDF report in Odoo 16. The major part of a PDF report is its QWeb template. It also needs the corresponding action of type ir.actions.report to bind the report to the model. These two records should be placed inside the report directory of a module structure. Let’s create a custom PDF report for the model product.product. First of all, create the report action inside the report directory. We can keep separate XML files for the two parts of a PDF report. They are the QWeb template and Report action. The file structure will be like the image below.
The XML file product_product_reports_xml should contain the report action for the PDF Report. The report action is created inside the model ir.actions.report. The important fields to be specified when creating report actions are
* Name (name)
The name of the report action. It helps identify the report within the system.
* Model (model)
The model that the report is associated with. It specifies the data model from which the report retrieves the necessary data.
* Report Type (report_type)
The type of report to generate. It can be one of the following:
1. qweb-pdf: For generating PDF reports using QWeb templates.
2. qweb-html: For generating HTML reports using QWeb templates.
3. qweb-text: For generating plain text reports using QWeb templates.
* Report Name (report_name)
The name of the report as displayed in the user interface.
* Report File (report_file)
The file name of the report template. It defines the QWeb template file used to generate the report.
* Binding Model ID (binding_model_id)
A reference to the model of the binding associated with the report action. It defines the model used to bind the report action with other objects.
* Binding Type (binding_type)
Specifies the type of binding used for the report action. It can be one of the following:
1. action
2. report
* Binding View Types (binding_view_types)
A comma-separated list of view types for which the report is available. It specifies the types of views (form, tree, kanban, etc.) from which the report can be accessed.
<record id="action_report_product_product" model="ir.actions.report">
   <field name="name">Product Report</field>
   <field name="model">product.product</field>
   <field name="report_type">qweb-pdf</field>
   <field name="report_name">product_product_report.report_product</field>
   <field name="report_file">product_product_report.report_product</field>
   <field name="binding_model_id" ref="product.model_product_product"/>
   <field name="binding_type">report</field>
</record>
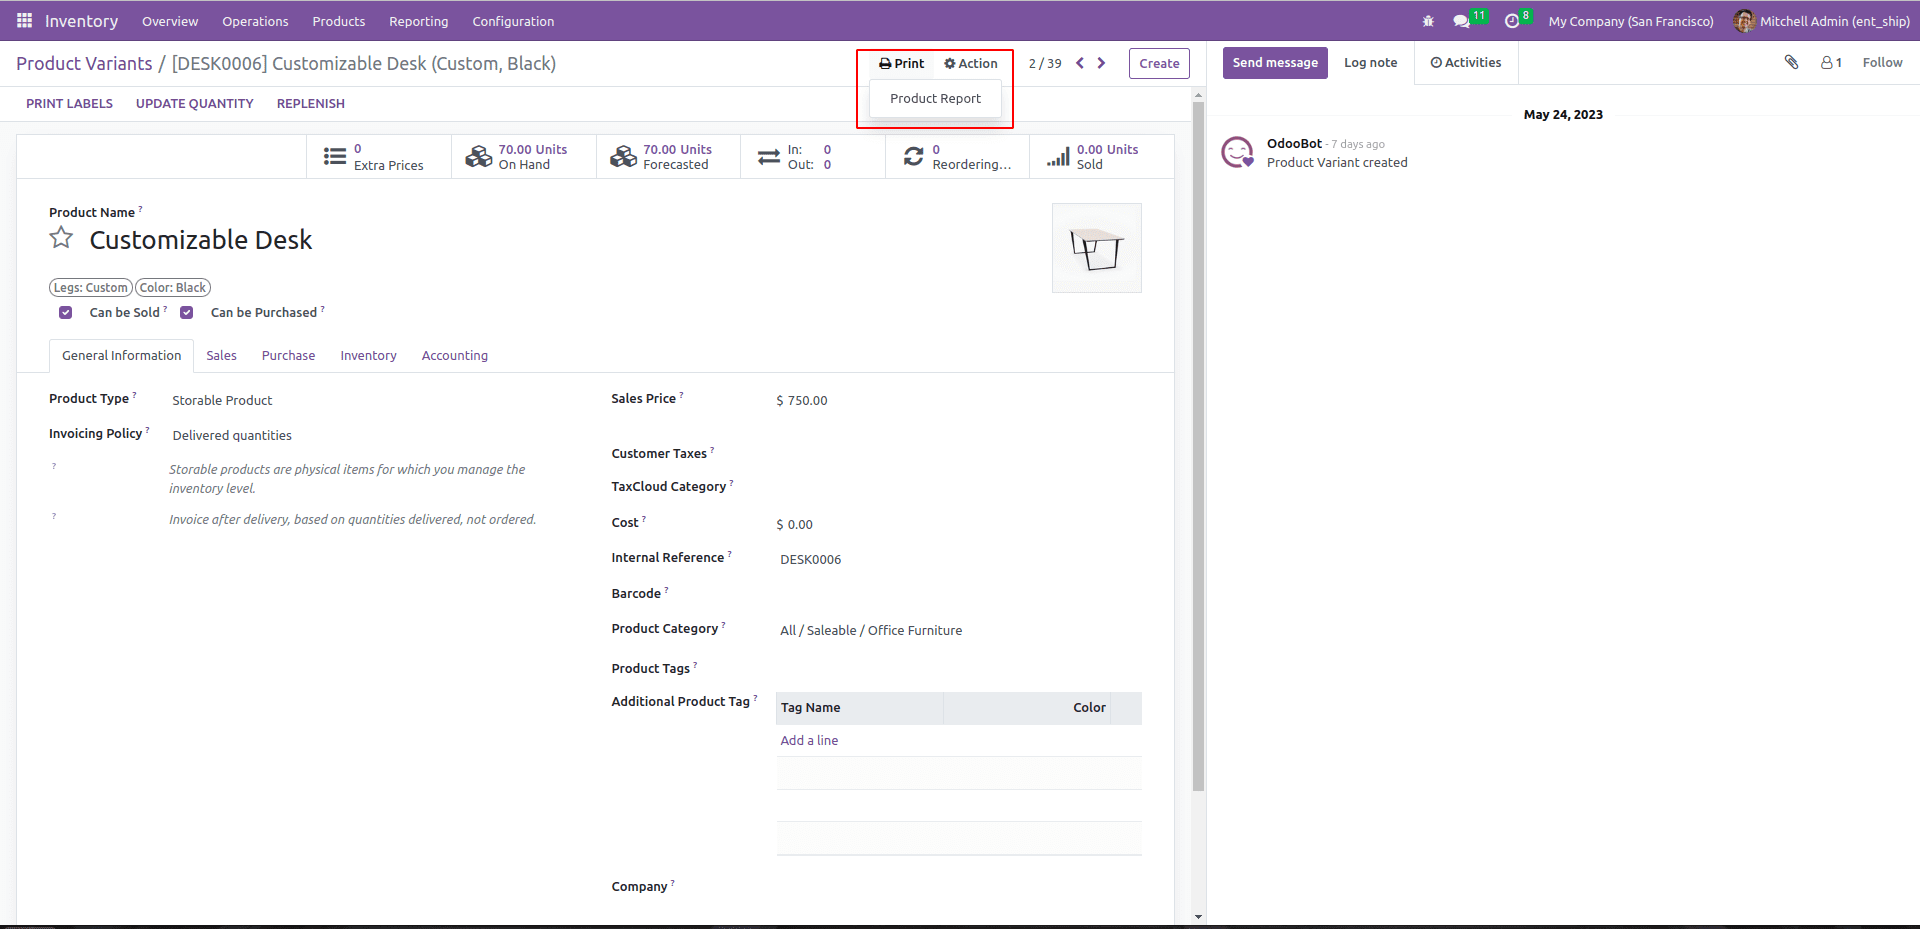
The report action will add a new report under the Print menu of the related model. For the above report action, a new report will be added inside the model product.product like the screenshot given below.
The next step is to define the template for the PDF print. This can be created inside the XML file product_product_templates.xml. Like website views in Odoo reports, templates are also written in HTML/QWeb. PDF rendering in reporting is performed by wkhtmltopdf. Some variables are provided by the report templates, which are for common use.
* time: Refers to the time from standard Python library
* user: res. user record for the user who is printing the report.
* res_company: record for the current user’s company.
* website: The current website object if any.
* web_base_url: The webserver base url.
* context_timestamp: A function taking datetime.datetime in UTC and converting it to the timezone of the user printing the report.
Now let’s see an example of a minimal report template.
<template id="report_product">
   <t t-call="web.html_container">
       <t t-foreach="docs" t-as="o">
           <t t-call="web.external_layout">
               <div class="page">
                   <div class="oe_structure"/>
                   <h2>Product Report</h2>
                   <p><span t-field="o.name"/></p>
               </div>
           </t>
       </t>
   </t>
</template>
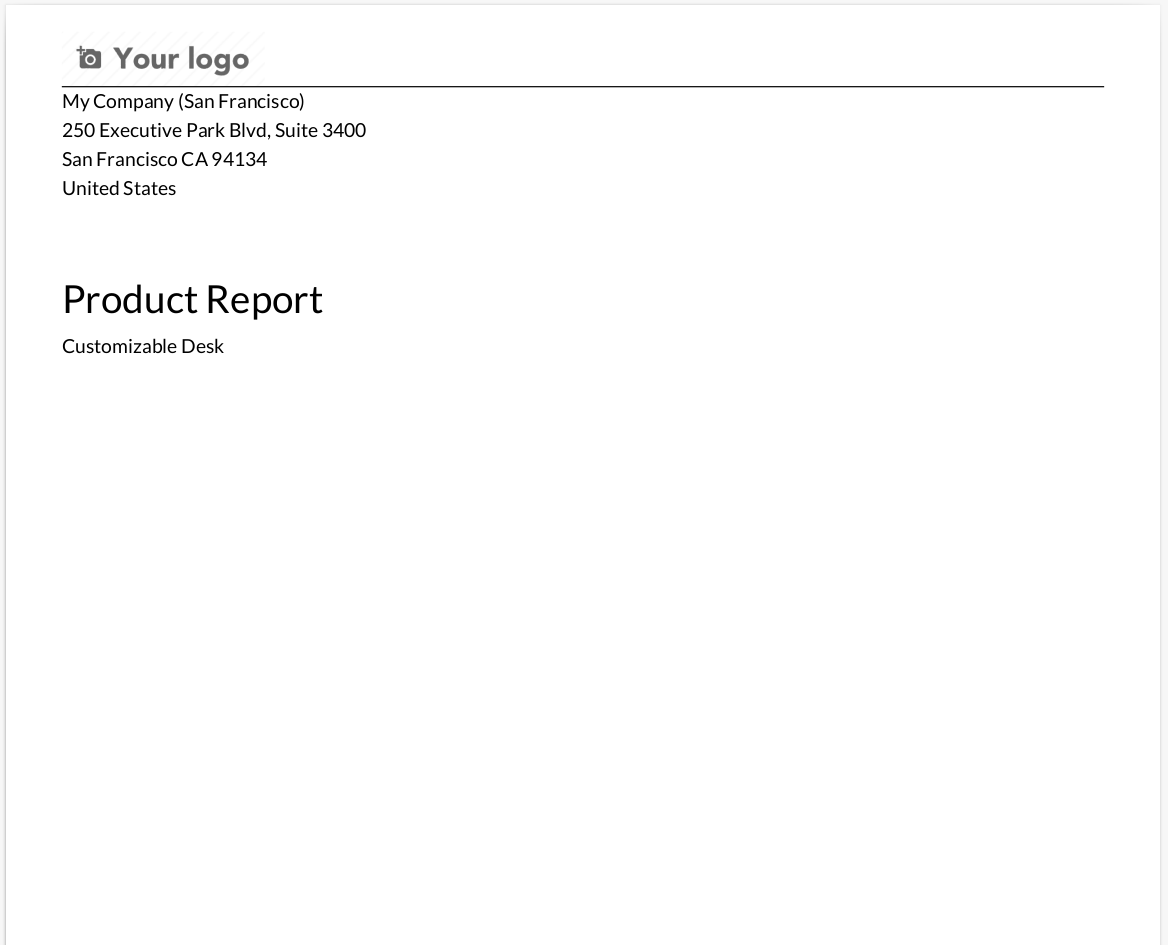
Calling the template external_layout will add the default header and footer. The body printed inside the PDF will be based on the content inside <div class=”page”>. The given template will print a PDF report with the product name, as shown below.
There are some default items provided by the rendering context. These items can be accessed from the report template.
* docs : records of the current model
* doc_ids: list of ids for the current model
* doc_model: current model record
Since the docs item provides the records for the current model, it is easy to access each field value inside the template. There by the Odoo report engine makes it easier to customize reports.
To read more about the custom report in Odoo 16 portal view, refer to our blog How to Create a Custom Report in the Odoo 16 Portal View