The Odoo website module includes a default theme automatically chosen when no other theme options are present. Nevertheless, developers have the flexibility to design and incorporate new themes, which can then be applied to the Odoo 17 website.
This blog post will guide you through the process of creating and implementing a theme module on the website.
As a first step, let's install the website module.
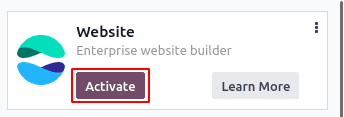
Upon clicking the "Activate" button, users will be directed to a new page where they can apply or update the theme.
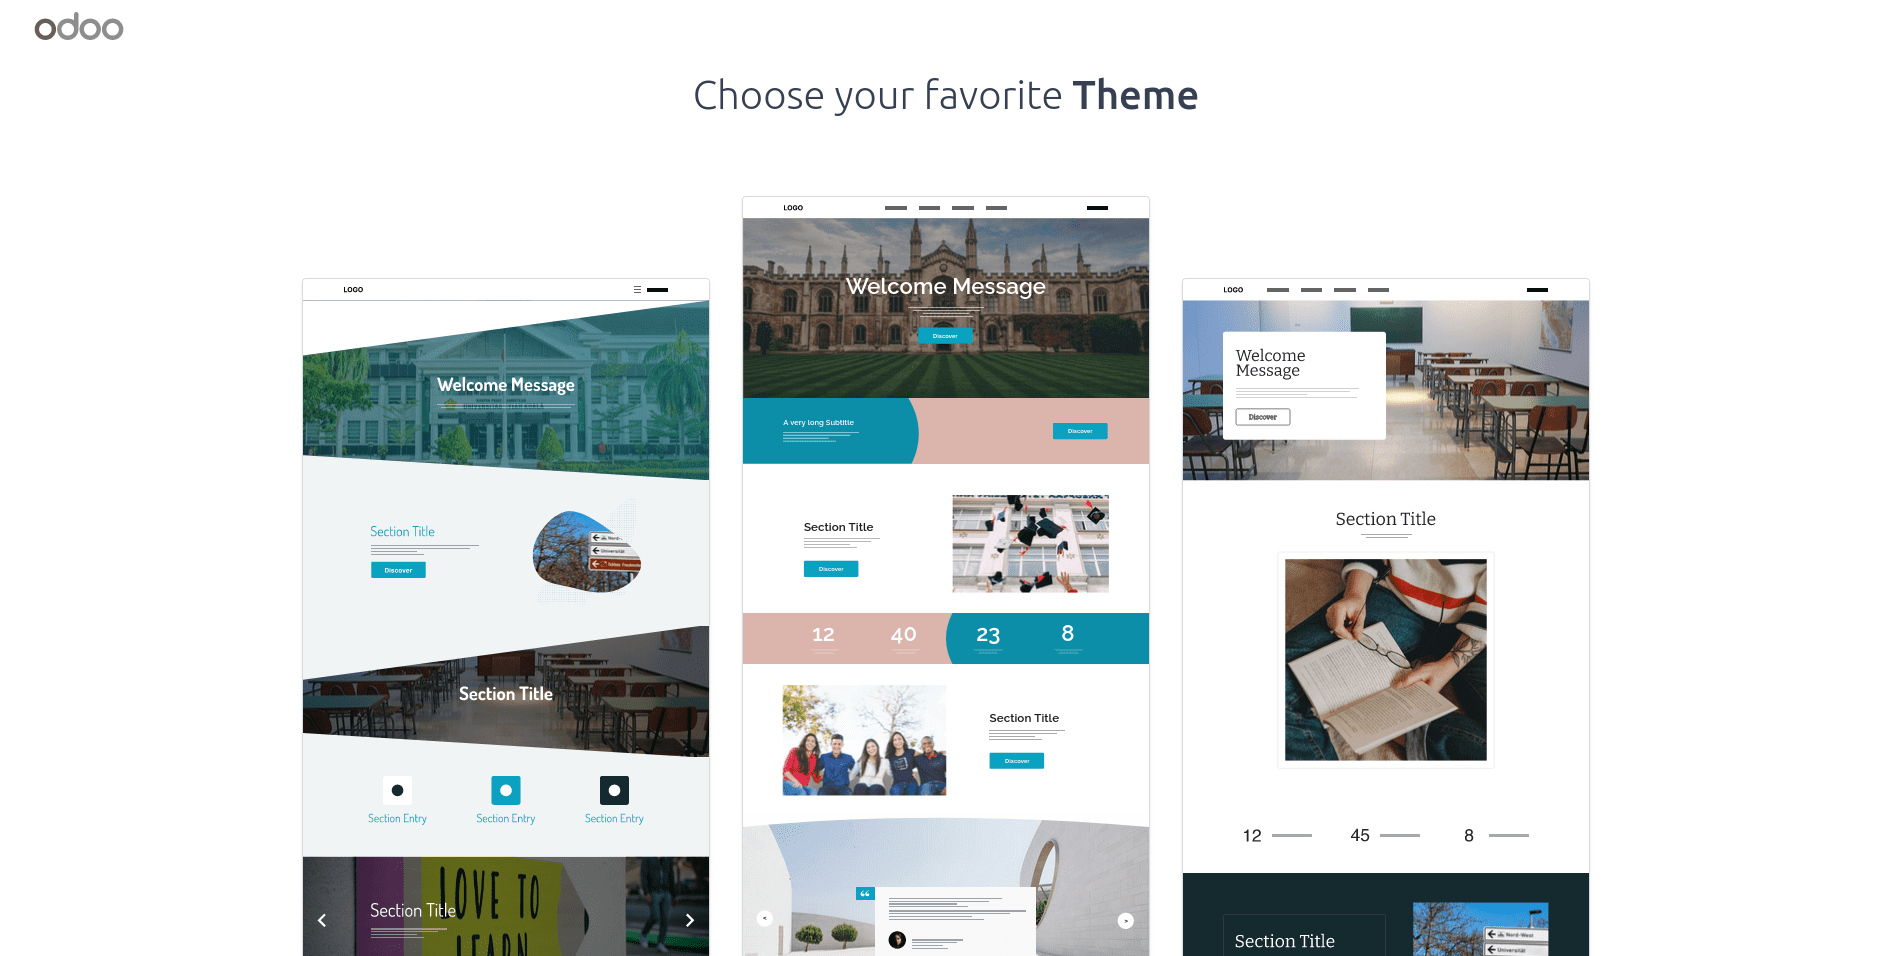
To apply the theme, simply click on the "Choose your favorite Theme" option. This action will redirect users to the website editor view, where they can choose from various snippet blocks, styles, and themes.
Now that we've covered installing and applying a theme on the Odoo 17 Website, let's delve into creating a custom theme module in Odoo.
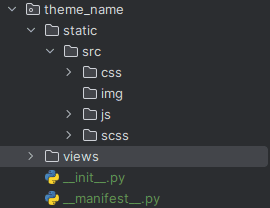
The image above displays the necessary files needed to construct a custom theme. The theme's technical name must begin with 'theme_' followed by a unique name for the theme.
The provided codes reveal the content included in the manifest file.
{
  'name': 'My Theme',
  'version': '17.0.1.0.0',
  'category': 'Theme/sub_category',
  'summary': 'Theme summary',
  'description': 'Detailed theme description',
  'depends': ['website'],
  'data': [
      'views/theme_views.xml'
  ],
  'assets': {
      'web.assets_frontend': [],
    },
}
'version': Specifies the theme version,
'category': The category should be 'Theme' with a slash, followed by a sub-category like 'e-commerce',
'summary': Summary of the theme,
'description': Detailed description of the theme,
'depends': Lists other modules that the theme relies on,
‘data’: Identifies the data file(s) linked to the theme.
'assets': Specifies the assets associated with the theme.
Folders:
Static: Within the static folder, you'll find the src folder housing CSS, image (img), JavaScript (js), and SCSS files.
Views: This folder encompasses the views for the website, including templates for snippets and various options.
Web page structure:
The web page structure in Odoo consists of a header, body, and footer. If customized header and footer components are not utilized by inheriting 'website.layout', Odoo defaults to its own. However, the header and footer can be customized or styled based on specific requirements by inheriting 'website.layout'.
Creating page layout:
To establish a page layout, it is necessary to generate an XML file within the views folder.
<?xml version="1.0" encoding="utf-8"?>
<odoo>
      <record id="test_page" model="website.page">
          <field name="name">Test page</field>
          <field name="website_published">True</field>
          <field name="url">/test</field>
          <field name="type">qweb</field>
          <field name="key">theme_name.theme_views</field>
          <field name="arch" type="xml">
              <t t-name="theme_name.test_page_template">
                  <t t-call="website.layout">
                      <div id="wrap">
                          <div class="container oe_structure">
                              <h1 class="test-heading"> TestPage </h1>
                              <ul class="test">
                                  <li>Feature 1</li>
                                  <li>Feature 2</li>
                                  <li>Feature 3</li>
                              </ul>
                          </div>
                      </div>
                  </t>
              </t>
          </field>
      </record>
</odoo>
Here, it is evident that a call to 'website.layout' has been initiated using the 't-call' method.
"Website.layout" serves as the default layout in Odoo, providing us with the foundation to design our webpage content.
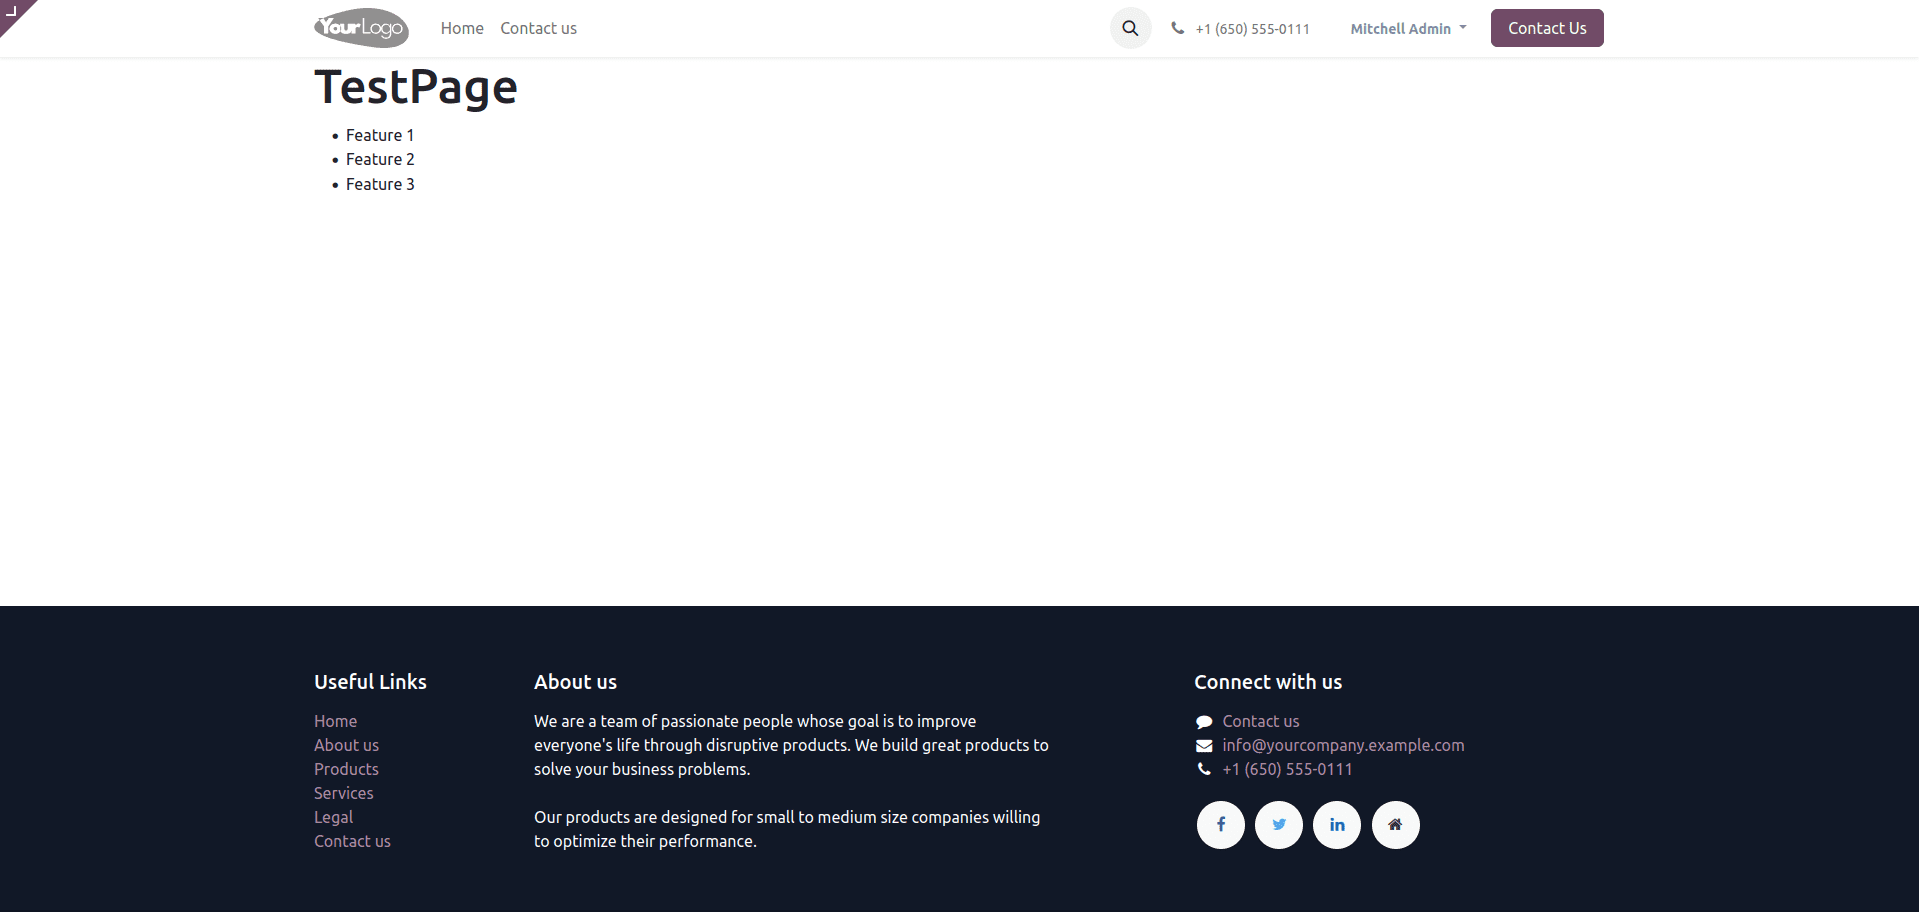
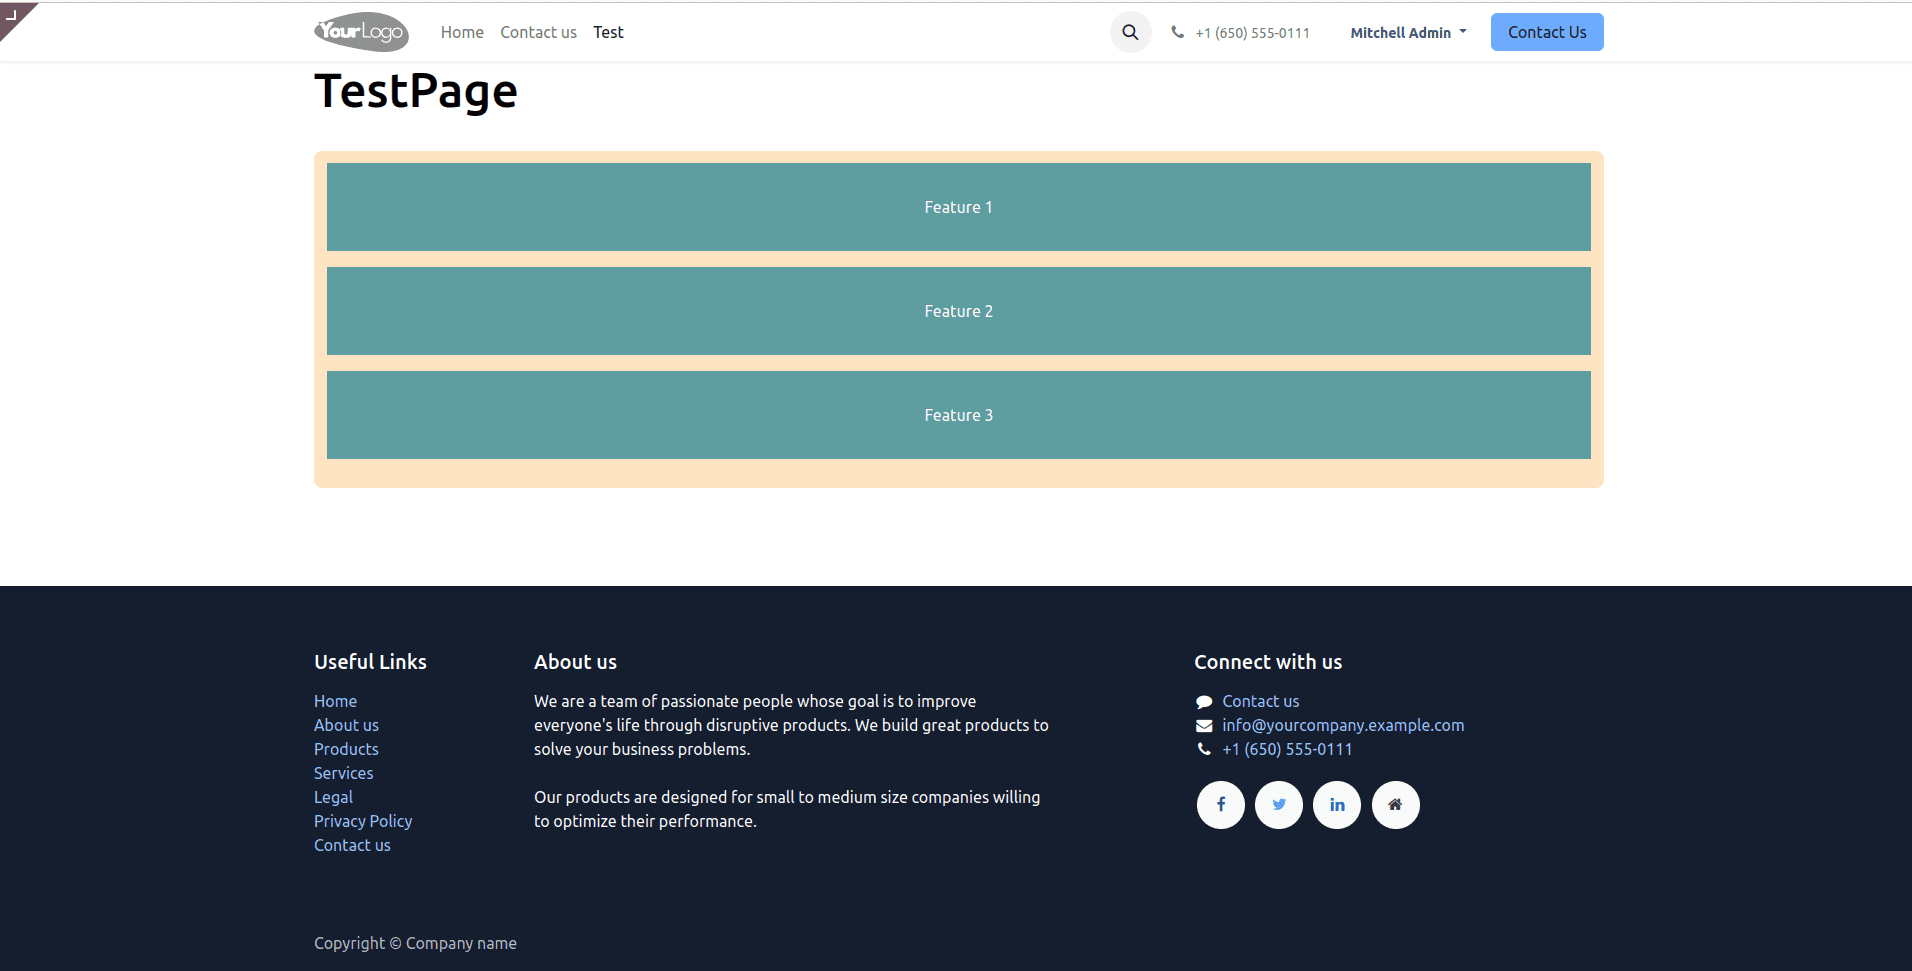
The image below illustrates the test page following the aforementioned modifications:
A menu is necessary for accessing the link to the test page. By incorporating the provided code within the test page record, we can include the essential menu.
Having integrated both the view and its corresponding menu for access, it is now possible to augment the styling of the test page by incorporating CSS or SCSS files.
Below is the content of the style.scss file:
.test-heading {
   color: black;
}
.test {
   background: bisque;
   border-radius: 8px;
   padding: 0.8em;
   margin: 2em 0 3em;
   li {
       display: block;
       position: relative;
       padding: 2em;
       color: #FFF;
       text-align: center;
       margin-bottom: 1em;
       background-color: cadetblue;
       font-size: 1.0em;
   }
}
To apply the style.scss file to the new page, it is necessary to include it in the manifest, as illustrated below:
'assets': {
     'web.assets_frontend': [
         '/theme_name/static/src/scss/style.scss'
   ],
},
Once the necessary modifications have been made, it's essential to upgrade the theme to ensure the changes are reflected on the website. To do this, navigate to the website's 'Edit' options, select the 'Theme' option, scroll down, locate the 'Switch Theme' option, and click 'ok'. On the subsequent page displaying all available themes, identify your theme and click the 'Update Theme' option.
Following a successful update, the theme will exhibit the appearance depicted below:
An essential feature of Odoo's website is the ability to incorporate snippets. These snippets enable us to easily drag and drop desired views or functionalities into a web page, aligning with our preferences.
Now, let's explore the steps and procedures involved in creating a basic snippet in Odoo.
1. Create an XML template:
<template id="test_snippet" name="Test Snippet">
 <section class="container oe_structure">
   <h1 class="test-heading">Test Snippet</h1>
   <ul class="test">
     <li>Snippet Feature 1</li>
     <li>Snippet Feature 2</li>
     <li>Snippet Feature 3</li>
   </ul>
 </section>
</template>
2. Add the created snippet to the building blocks.
<template id="test_snippet_register" inherit_id="website.snippets"
         name="Test Snippet Register">
   <xpath expr="//div[@id='snippet_structure']/div[hasclass('o_panel_body')]"
          position="inside">
       <t t-snippet="theme_name.test_snippet"
          t-thumbnail="/theme_name/static/src/img/test_thumbnail.png"/>
   </xpath>
In this context, the t-snippet attribute is employed to specify the theme_name.snippet_id, establishing a connection between the snippet template and the block. Likewise, the t-template attribute is utilized to include a template within the snippet inside the block.
3. Incorporate the style files (CSS or SCSS) as previously indicated.
4. Include the test_snippet in the manifest file.
'data': [
     'views/test_page.xml',
     'views/snippets/test_snippet.xml'
],
5. Perform the theme upgrade as explained previously.
6. Navigate to the 'Edit' option on the website and proceed to the 'Blocks' section. Inside the 'Structure' section, locate the recently added test_snippet.
Creating a custom theme module in Odoo 17 offers developers the opportunity to tailor the website's appearance to specific requirements. By following the outlined steps, users can install, apply, and customize themes seamlessly within the Odoo framework. The process involves organizing files, defining page layouts, styling with CSS or SCSS, and incorporating custom snippets for enhanced website functionality. Through careful implementation and thorough testing, businesses can create a visually appealing and user-friendly website that aligns with their branding and objectives.
To read more about creating a theme module in Odoo 16 ERP, refer to our blog How to Create a Theme Module in Odoo 16 ERP