Odoo's backend interface includes various widgets (like one2many, many2many, many2many_tags) that simplify tasks in selection fields. These widgets are created using the Select2 JavaScript package. When you create forms with one2many or many2many fields, replicating these advanced selection features without external libraries can be challenging. The Select2 package is crucial for enhancing user interaction and making selection fields more dynamic and efficient in Odoo. In simpler terms, it's challenging to recreate the same functionality without relying on external libraries like Select2.
This blog will explore various selection field types provided by the Select2 library, making form building more accessible.
It will delve into the functions, and implementation syntax, and provide examples to illustrate their usage.
Basic Select2 Field
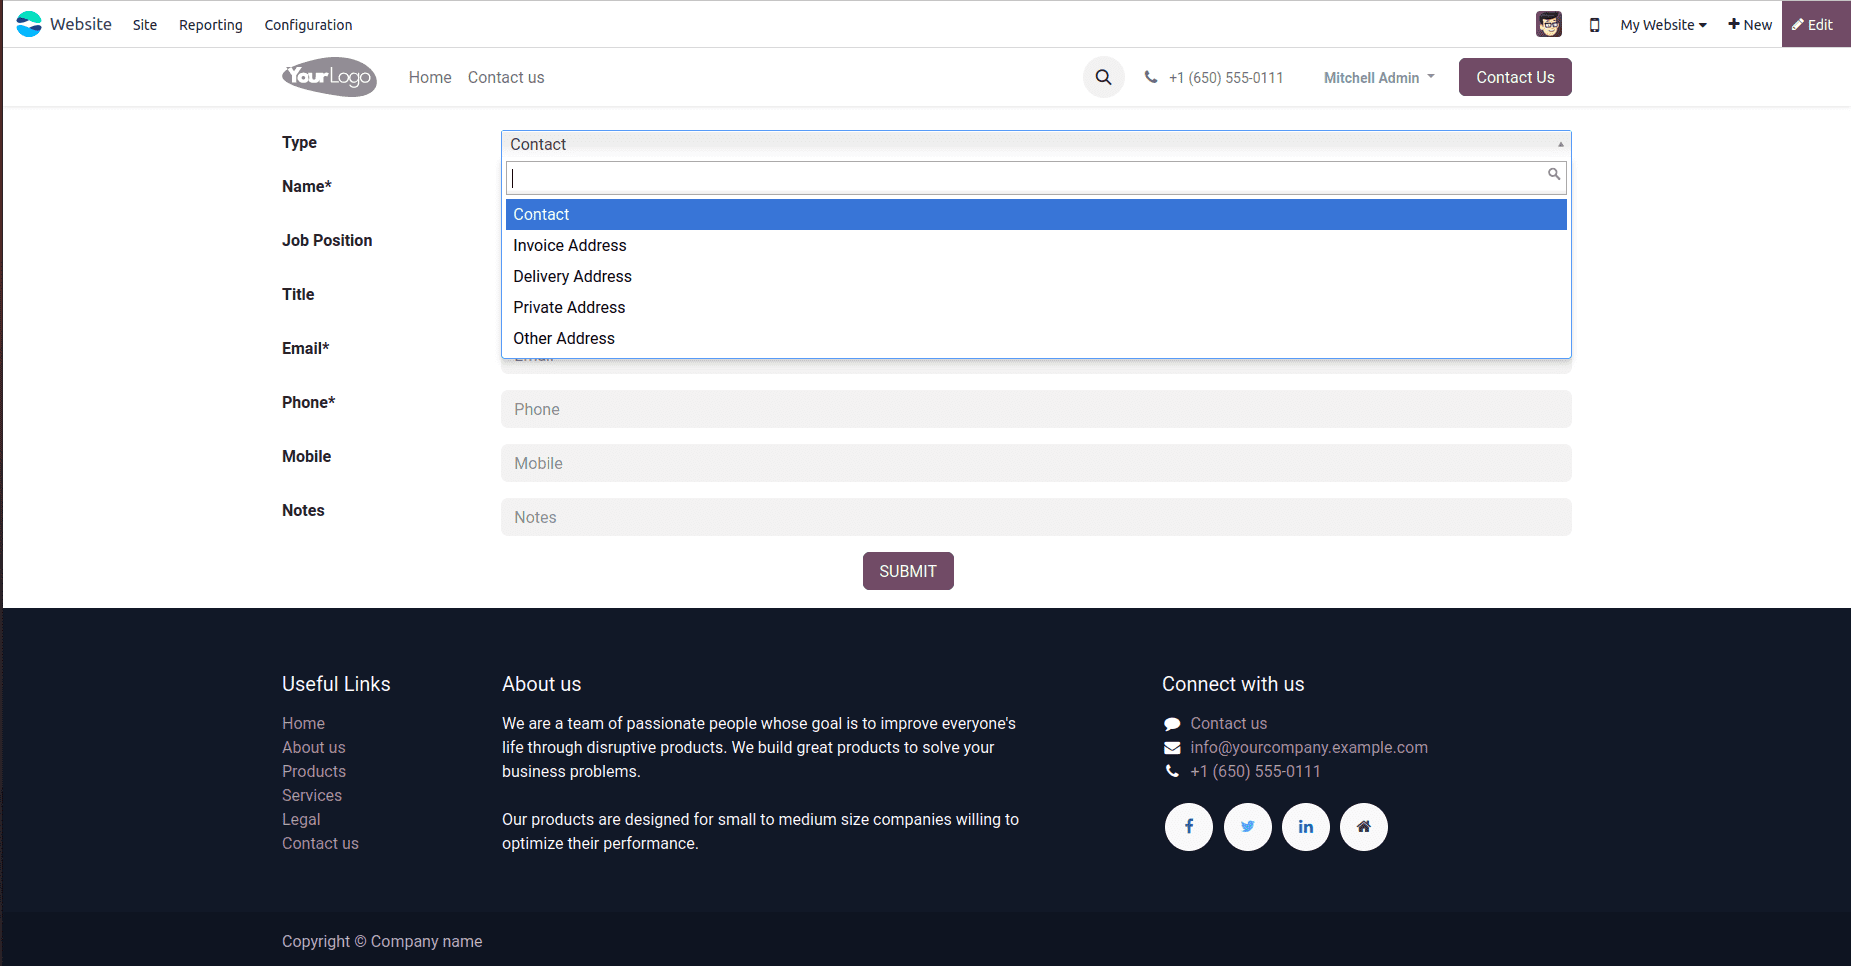
Navigating through a lengthy list of options in a standard Select tag can be challenging for users trying to find a specific choice. Select2 addresses this issue by offering a user-friendly built-in filter mechanism. This feature enables users to filter and search for options conveniently within the select element.
To implement this, it is essential to provide a Selector (Class or ID) for the select tag. In the example below, we are using a Class as the selector.
<select name="type"
       t-attf-class="form-control select_box_test"
       required="" >
   <option value="contact">Contact
   </option>
   <option value="invoice">Invoice
       Address
   </option>
   <option value="delivery">Delivery
       Address
   </option>
   <option value="private">Private
       Address
   </option>
   <option value="other">Other Address
   </option>
</select>
Following that, we initiate the activation of select2 from the JS file utilizing the selector class "advanced-select."
publicWidget.registry.WebsiteCustomerContactRequestForm = publicWidget.Widget.extend({
   selector: ".customer_contact_form",
   events: {
     "click .select_box_test": "applySelect2",
   },
      applySelect2: function (ev) {
        self.$('select.select_box_test').select2();
     },
Upon integrating the select2 enhancement, we've successfully introduced a new Select field with real-time search filter capabilities, as depicted in the image below.
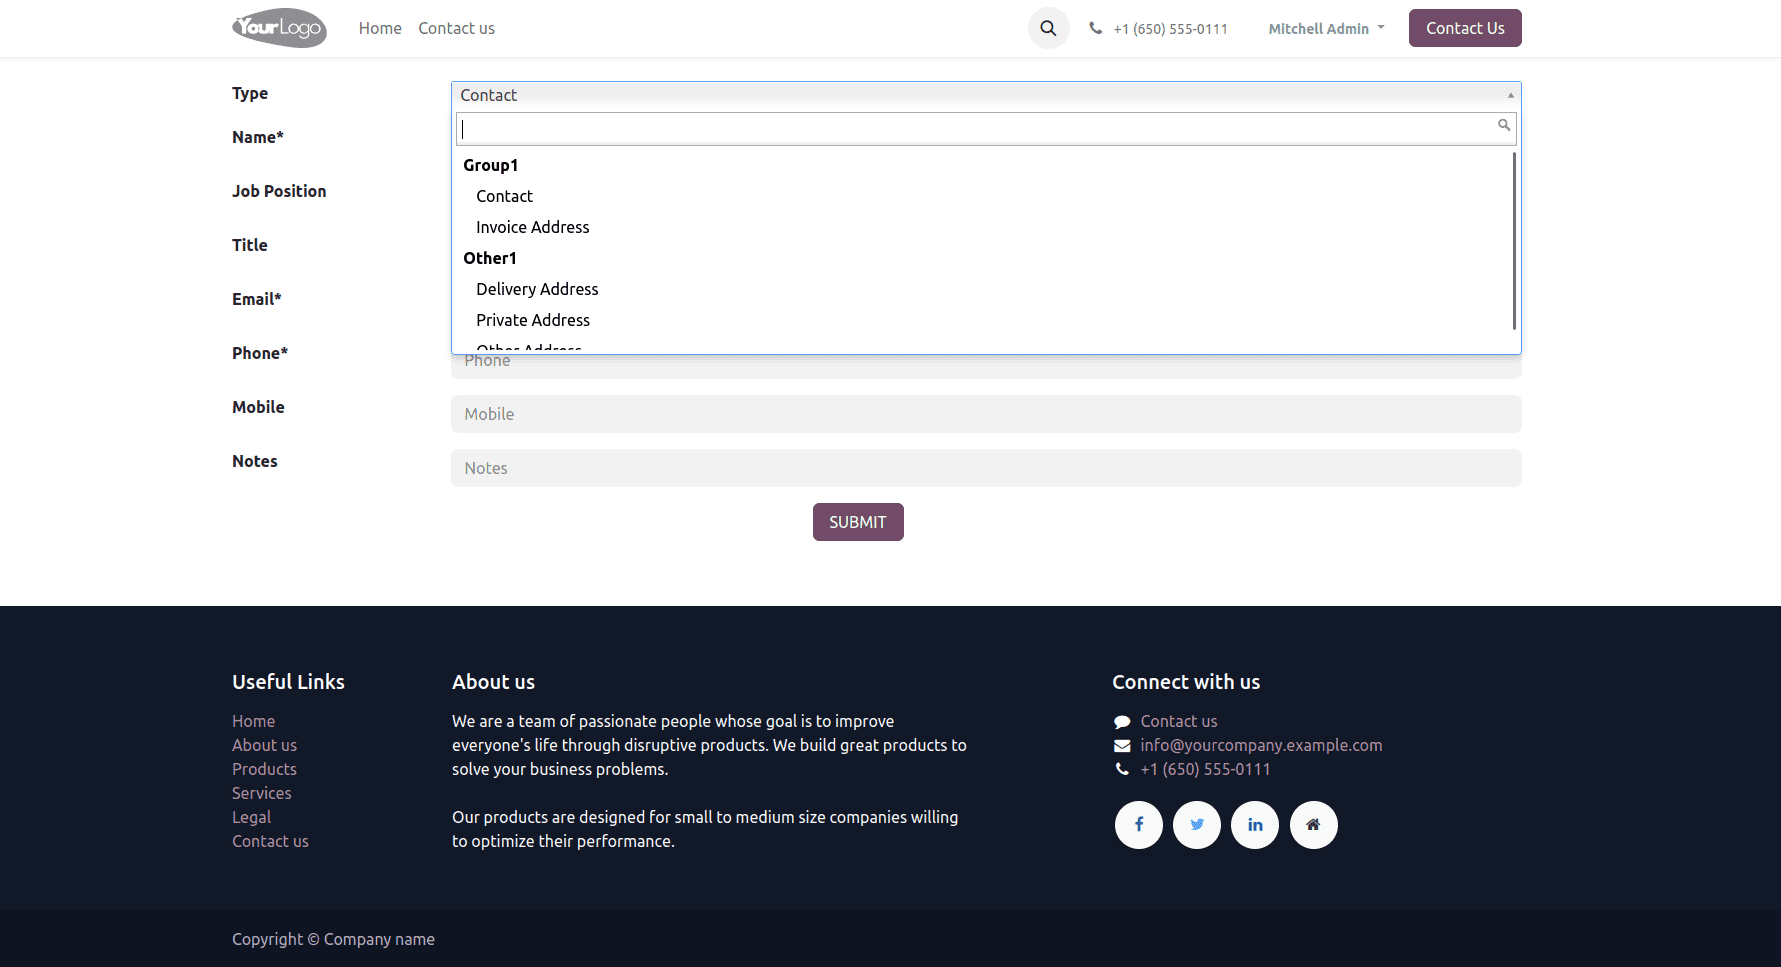
Select2 with Grouping
Our next step involves crafting a Select2 field that incorporates grouped options. This is achieved using the <optgroup> tag.
<select name="type"
       t-attf-class="form-control select_box_test"
       required="" >
      <optgroup label="Group1">
   <option value="contact">Contact
   </option>
   <option value="invoice">Invoice
       Address
   </option>
      </optgroup>
      <optgroup label="Other1">
   <option value="delivery">Delivery
       Address
   </option>
   <option value="private">Private
       Address
   </option>
   <option value="other">Other Address
   </option>
      </optgroup>
</select>
The enhancements to the select2 choose tag are facilitated by JS code, such as the example below. In this case, the selector utilized was the id of the select tag.
applySelect2: function (ev) {
  self.$('select.select_box_test').select2();
},
The figure below illustrates an example of a select2 field with grouped elements.
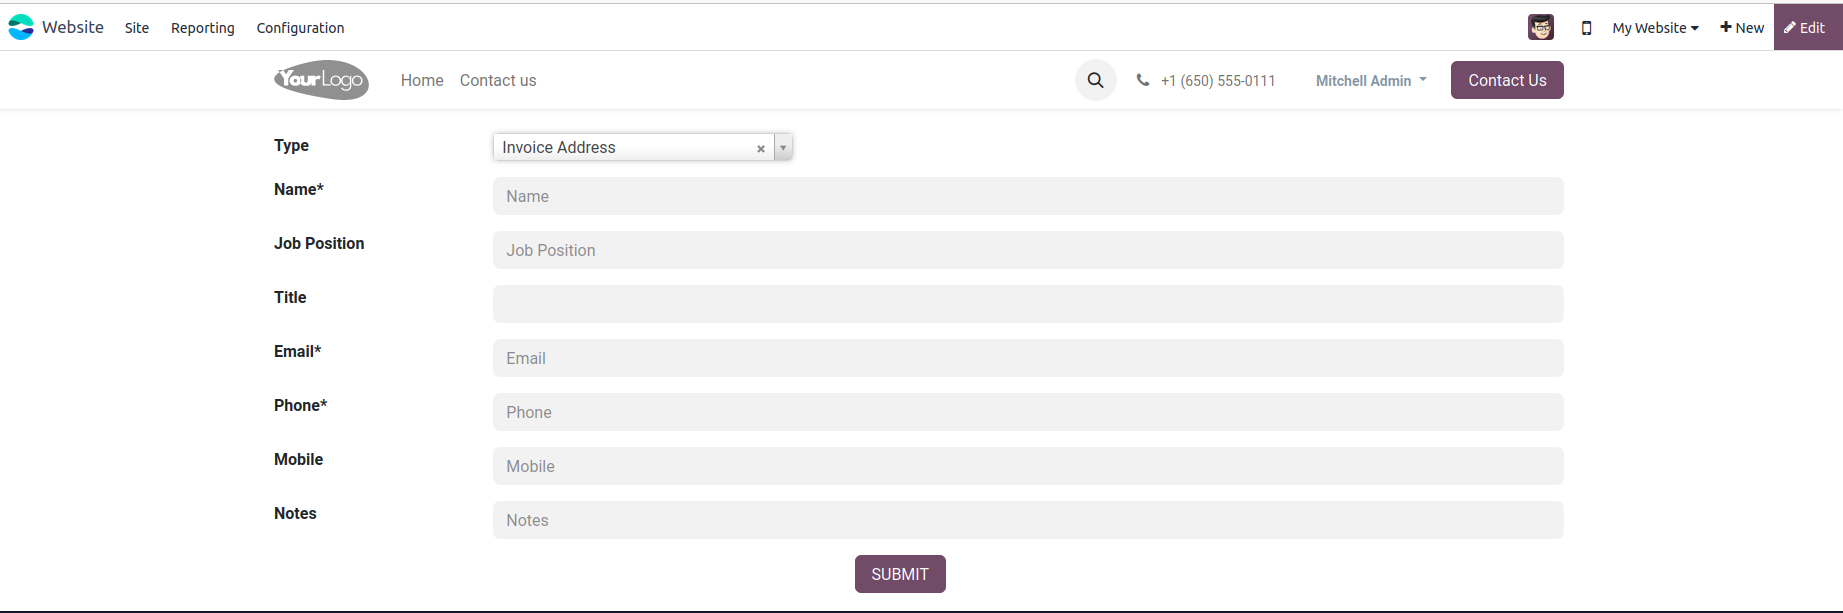
Select2 with Clear Option Enabled
Next, we'll create a sample select2 enhanced field with clear options. To enable the clear option, we utilize the 'allowClear: true' attribute in the JS file.
<select name="type"
       t-attf-class="form-control select_box_test"
       required="" multiple="" style="width:300px;height:200px">
      <optgroup label="Group1">
   <option value="contact">Contact
   </option>
   <option value="invoice">Invoice
       Address
   </option>
      </optgroup>
      <optgroup label="Other1">
   <option value="delivery">Delivery
       Address
   </option>
   <option value="private">Private
       Address
   </option>
   <option value="other">Other Address
   </option>
      </optgroup>
</select>
Enabling the Clear option provides users with the choice to clear the selected option in the select tag, leaving it empty if desired.
applySelect2: function (ev) {
    self.$('select.select_box_test').select2({
       allowClear: true,

    });
},
The accompanying example image is presented here. To deselect an option, click on the 'x' symbol next to the chosen selection.
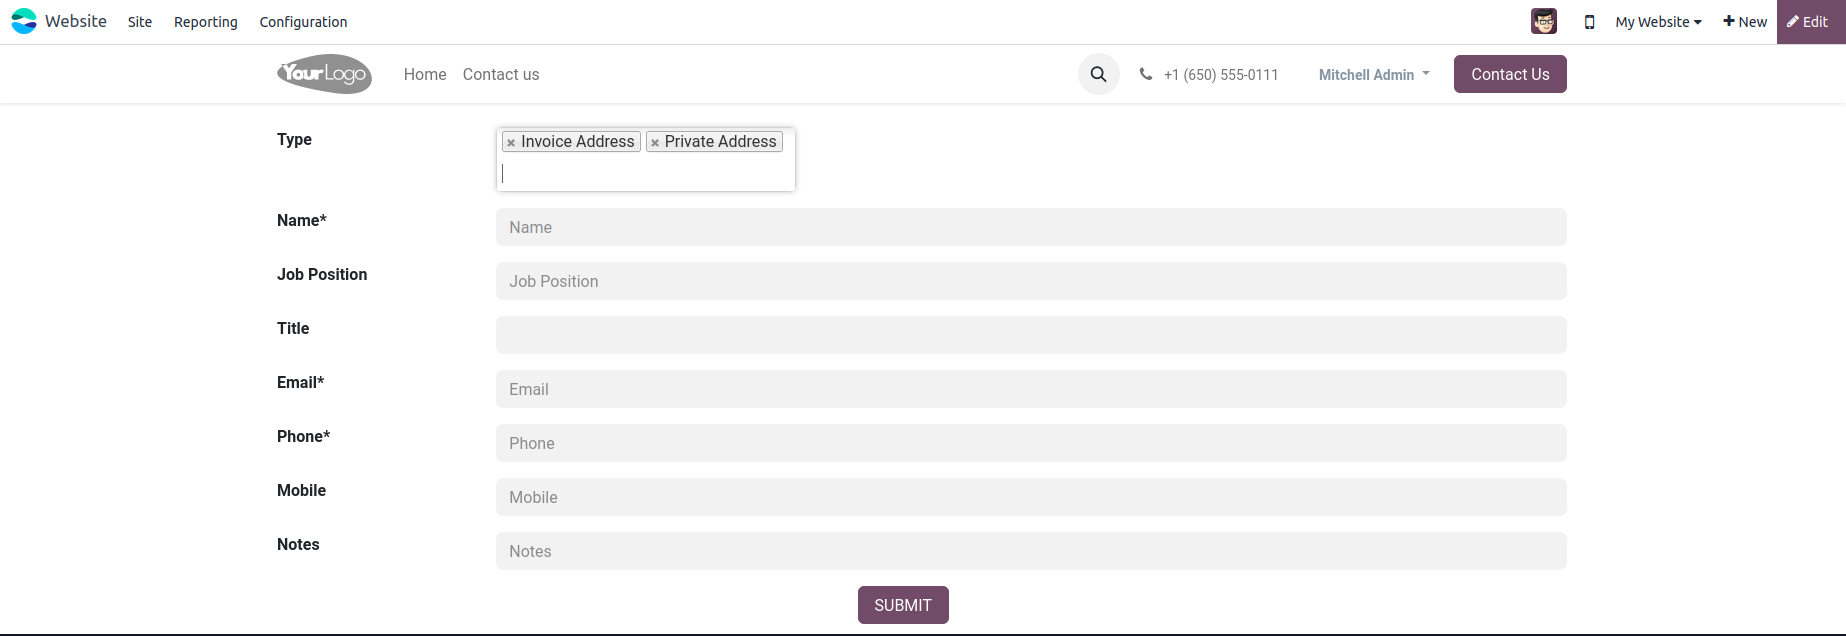
Select2 with Multiple Selection
Moving forward, we're developing a select2 field with multi-selection capabilities. By populating the select tag with more than one option, visitors can now choose multiple alternatives from the list.
Here is a sample code snippet:
<select name="type"
       t-attf-class="form-control select_box_test"
       required=""  multiple="" style="width:300px;">
      <option/>
   <option value="contact">Contact
   </option>
   <option value="invoice">Invoice
       Address
   </option>
   <option value="delivery">Delivery
       Address
   </option>
   <option value="private">Private
       Address
   </option>
   <option value="other">Other Address
   </option>
</select>
Subsequently, mirroring the approach used in the basic select2 example, we employ JS to establish a connection between the select2 functionality and the select tag.
applySelect2: function (ev) {
    self.$('select.select_box_test').select2({
       allowClear: true,
    });
},
Here is an example featuring select2 with multiple selections enabled.
Select2 Placeholder
Next, we'll activate a placeholder for the select2 field. This feature is enabled in the JS file using the select2 attribute "Placeholder."
applySelect2: function (ev) {
    self.$('select.select_box_test').select2({
  placeholder: 'Select an Option',
    });
},
Note: To incorporate a placeholder in this fashion, it's imperative to guarantee that the first choice in the select field remains empty, as illustrated in the code example below.
<select name="type"
       t-attf-class="form-control select_box_test"
       required=""  multiple="" style="width:300px;">
      <option/>
   <option value="contact">Contact
   </option>
   <option value="invoice">Invoice
       Address
   </option>
   <option value="delivery">Delivery
       Address
   </option>
   <option value="private">Private
       Address
   </option>
   <option value="other">Other Address
   </option>
</select>
The placeholder will appear in the select2 area when no options are selected, as illustrated in the accompanying image.

Select2 with Minimum/Maximum Search Input
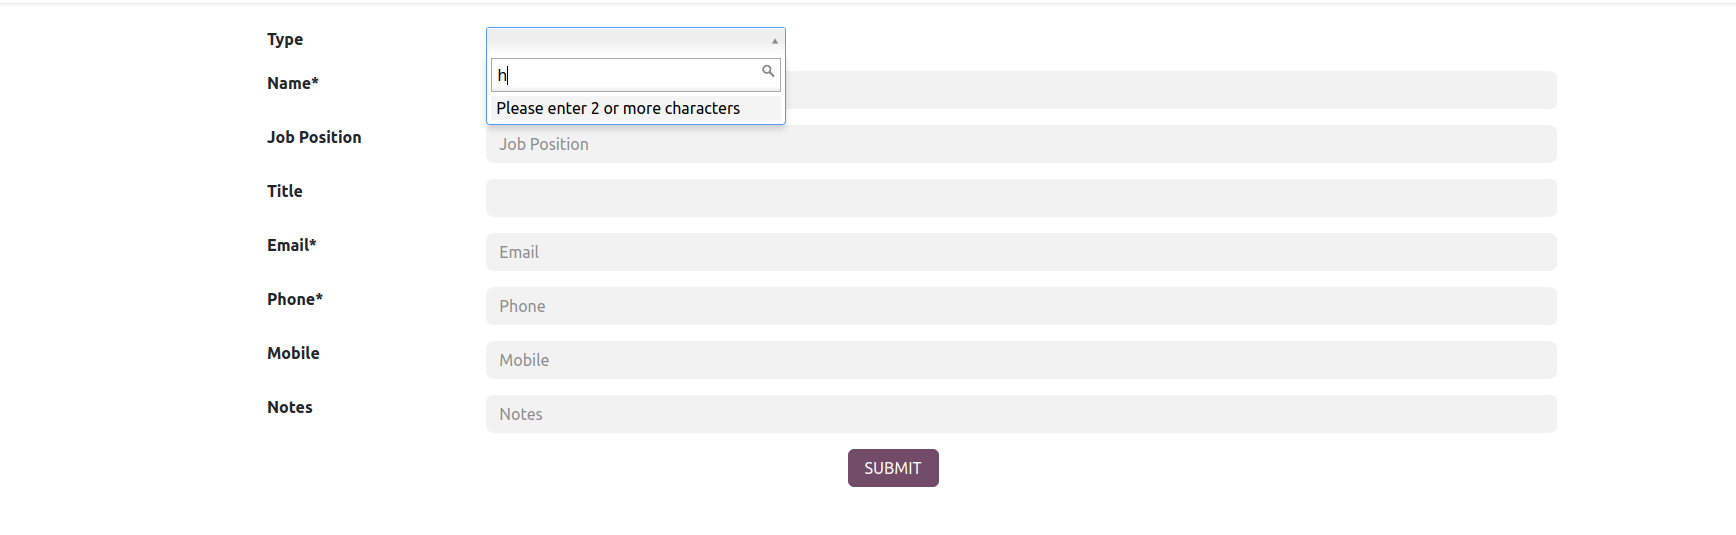
Select2 offers the functionality to establish minimum and maximum lengths for search input, allowing control over the initiation of filtering based on these specified parameters. When dealing with extensive datasets, small search strings may not be effective for filtering, making the minimum attribute valuable.
The code below serves as an example of how to implement both minimum and maximum search length restrictions.
applySelect2: function (ev) {
    self.$('select.select_box_test').select2({
      minimumInputLength: 3,
     maximumInputLength: 10
    });
},
In this demonstration, it's evident that filtering becomes active only when the minimum input length property is met. An illustrative outcome image is also presented for reference.
Select2 with Maximum Selection Limit
Within this section, we will define an upper limit for the number of options permitted in the select2 field while enabling multi-select functionality. To achieve this, we employ the JS attribute MaximumSelectionSize, as demonstrated in the example below.
applySelect2: function (ev) {
    self.$('select.select_box_test').select2({
      maximumSelectionSize: 2
    });
},
The select field allows users to choose up to two alternatives, as demonstrated in the sample above. As users make their selections, select2 dynamically adapts, as depicted in the example images below.

The Select2 JS package encompasses an array of additional properties and features. Some of these include
Width: Governs the select2's width through the style attribute.
Id: Employed to retrieve the ID from the selected option.
Locked: Prevents visitors from altering the status of the chosen option.
Disabled: Render's optional options are unavailable, preventing users from inadvertently selecting them.
Tokenizer: This functionality transforms user input in the search area into selectable choices.
Query: Employed to retrieve results when data is loaded in real time dynamically.
Essentially, the collaboration between Odoo's inherited widgets and external libraries such as Select2 offers developers a spectrum of opportunities. It empowers them to create bespoke and sophisticated selection fields that precisely match the application's needs. This fusion of native features and external tools underscores Odoo's dedication to flexibility and extensibility, delivering a sturdy foundation for crafting customized solutions not only in the domain of selection fields but across various application aspects.
To read more about creating an advanced selection field on the Odoo 16 website, refer to our blog How to Create Advanced Selection Field in Odoo 16 Website