A business attains growth by maintaining relationships with customers and clients. An individual can generate an opportunity at the beginning of a sale discussion with a consumer. Based on the progress discussion with the customer, the stage changes as per the deal. Odoo ERP is a vital way to manage and create business opportunities. Using Odoo 15 CRM, we can quickly formulate leads, opportunities, pipelines, activities, and more. It is easy to maintain the Sales Team, Activity Types, Team Members, etc., with the support of Odoo 15 CRM.
This blog prioritizes creating and managing opportunities in the Odoo 15 CRM.
We can schedule various activities according to the opportunity in the Odoo CRM module. It is easy to log each activity quickly in the opportunity chatter with predefined actions. You can efficiently plan actions and schedule meetings based on daily work on opportunities. Now, let’s see a detailed view of opportunities management in Odoo 15 CRM.
To Formulate a New Opportunity in Odoo 15 CRM
We get a clear overview of the opportunity pipeline in Odoo. To better organize procedures, you can set specific stages and sub-stages for various tasks. It is simple to create an opportunity with a pipeline using Odoo ERP. Choose the My Pipeline menu in the Sales tab to process your opportunity. In the Pipeline window, the user can see that various opportunities are arranged under different stages. Click on the CREATE icon to develop a new opportunity, as displayed in the screenshot below.

A new box appears below the New stage after selecting the CREATE icon. You can choose Organization/Contact from the box as indicated in the screenshot below.

Here, we choose an existing contact, ‘Deco Addict,’ and other details are updated automatically. Next, you can add an Expected Revenue and prioritize it by clicking on the star icon, as depicted in the screenshot below.
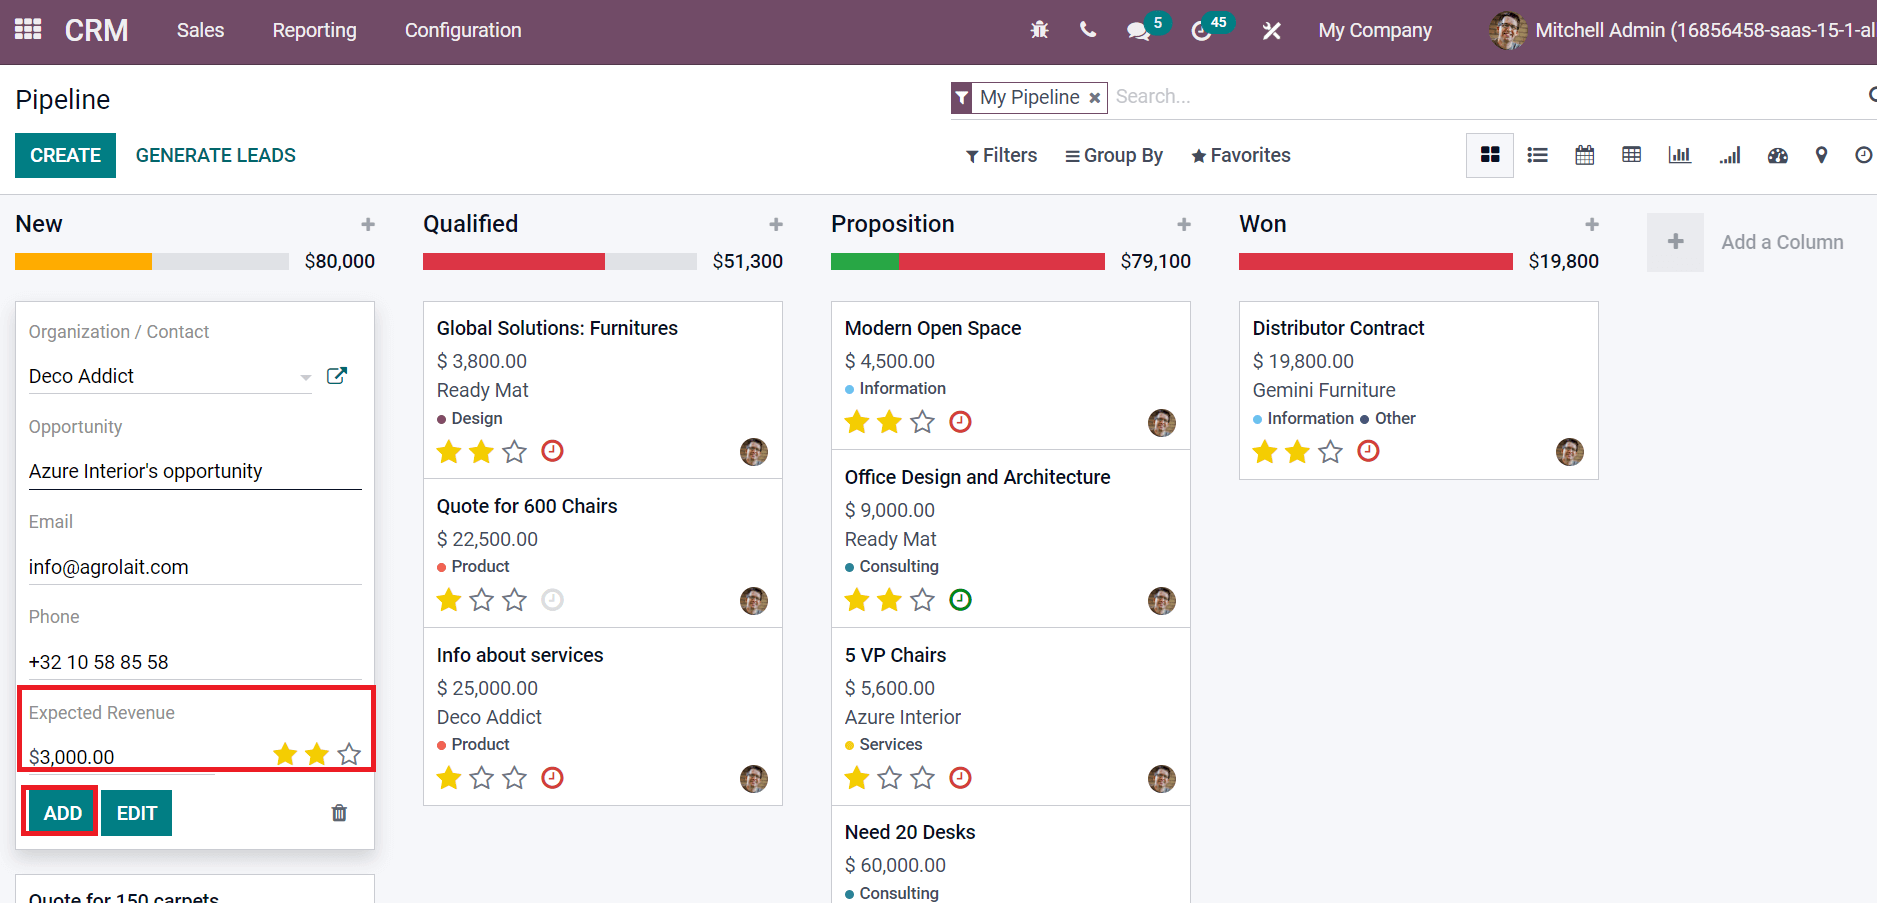
We can process the opportunity by choosing the ADD icon, as demonstrated in the above screenshot. Several stages of opportunity management include New, Proposition, Qualified, and Won. An opportunity gets qualified if we have discussions with customers. We can place the created Azure Interiors Opportunity from New to Qualified based on customer interaction, as specified in the screenshot below.
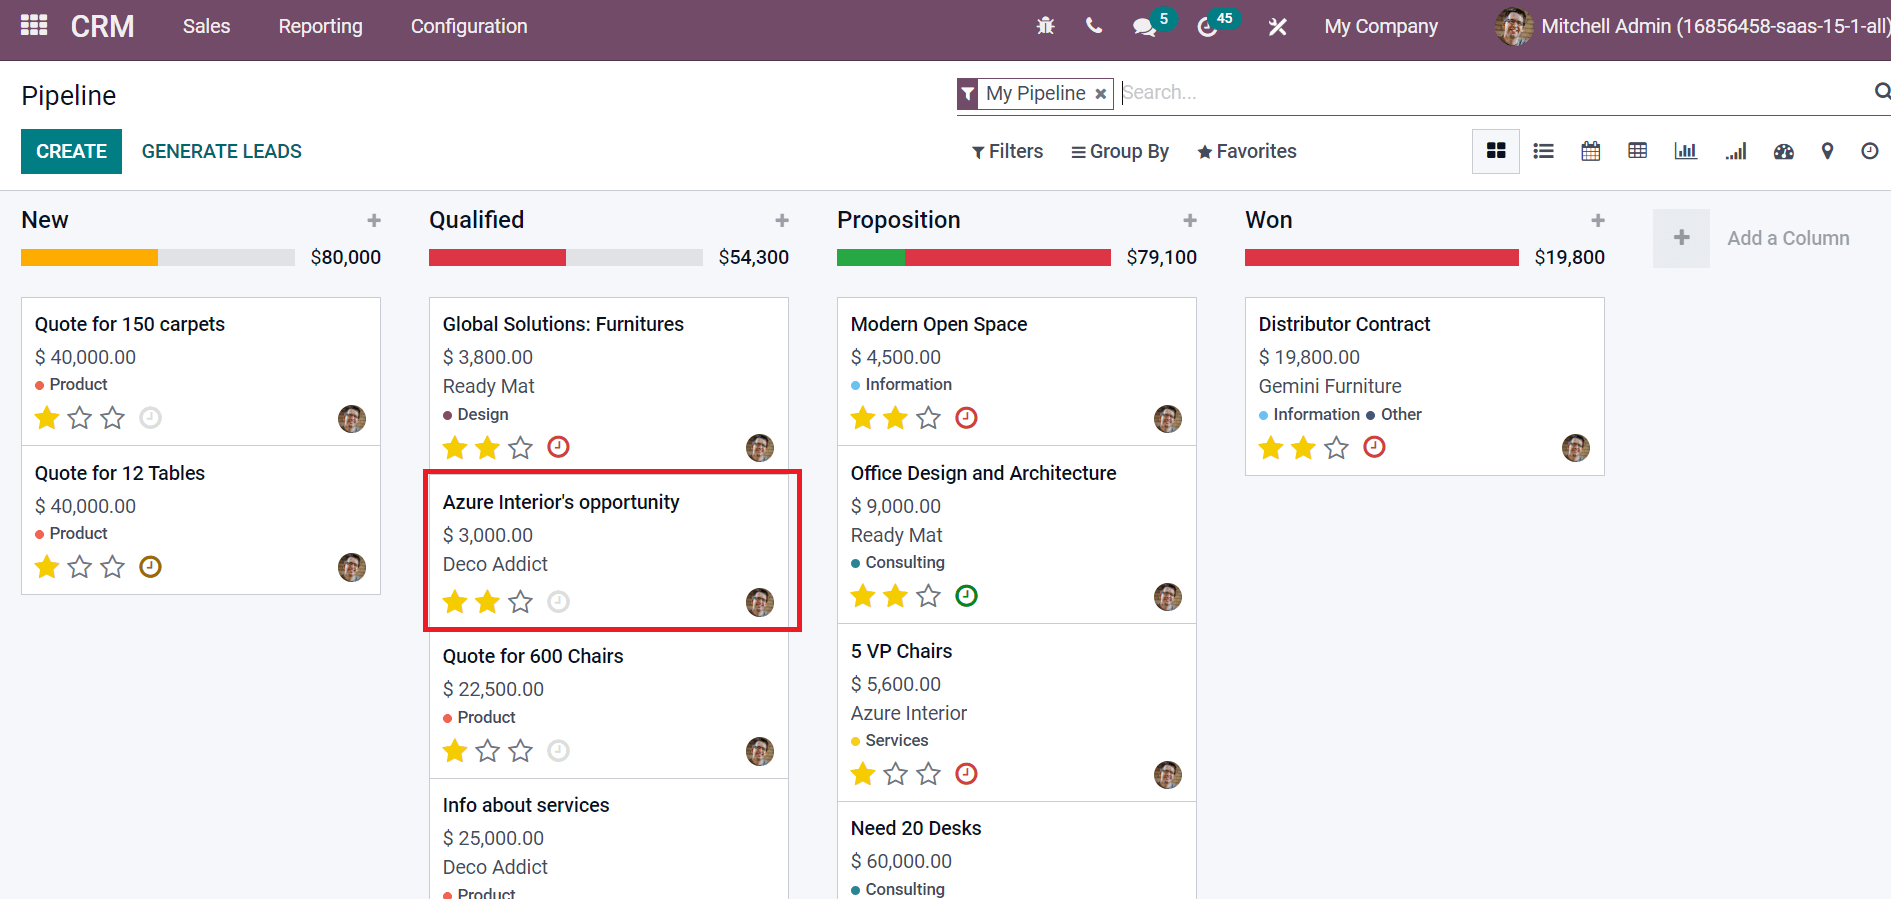
The expected revenue of the Qualified stage is $51300 previously. After changing Azure Interior’s Opportunity stage to Qualified, we can see a rise in revenue to $54300. In such a manner, the user can switch the stages of a created opportunity.
To Manage a Created Opportunity in Odoo 15 CRM
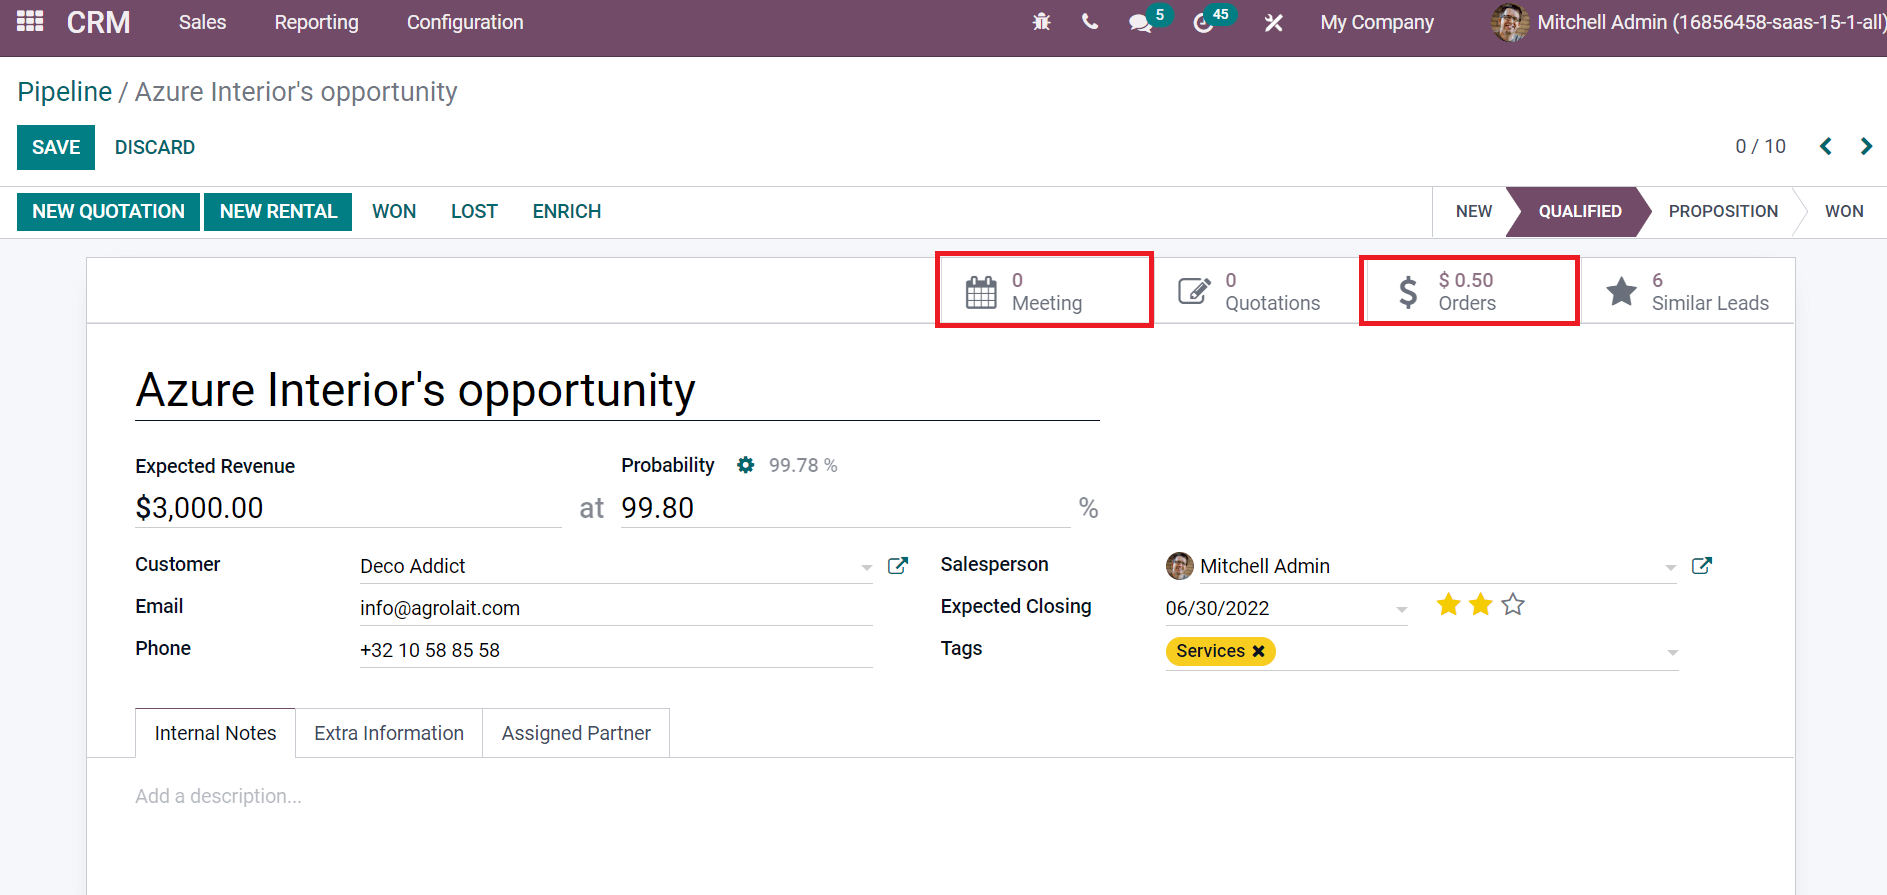
Users can manage various information inside a created opportunity. Choose your created opportunity Azure Interiors Opportunity in the Pipeline window. Users can change the Probability for Expected Revenue of your opportunity. As mentioned in the screenshot below, we changed the probability from 99.78% to 99.80.
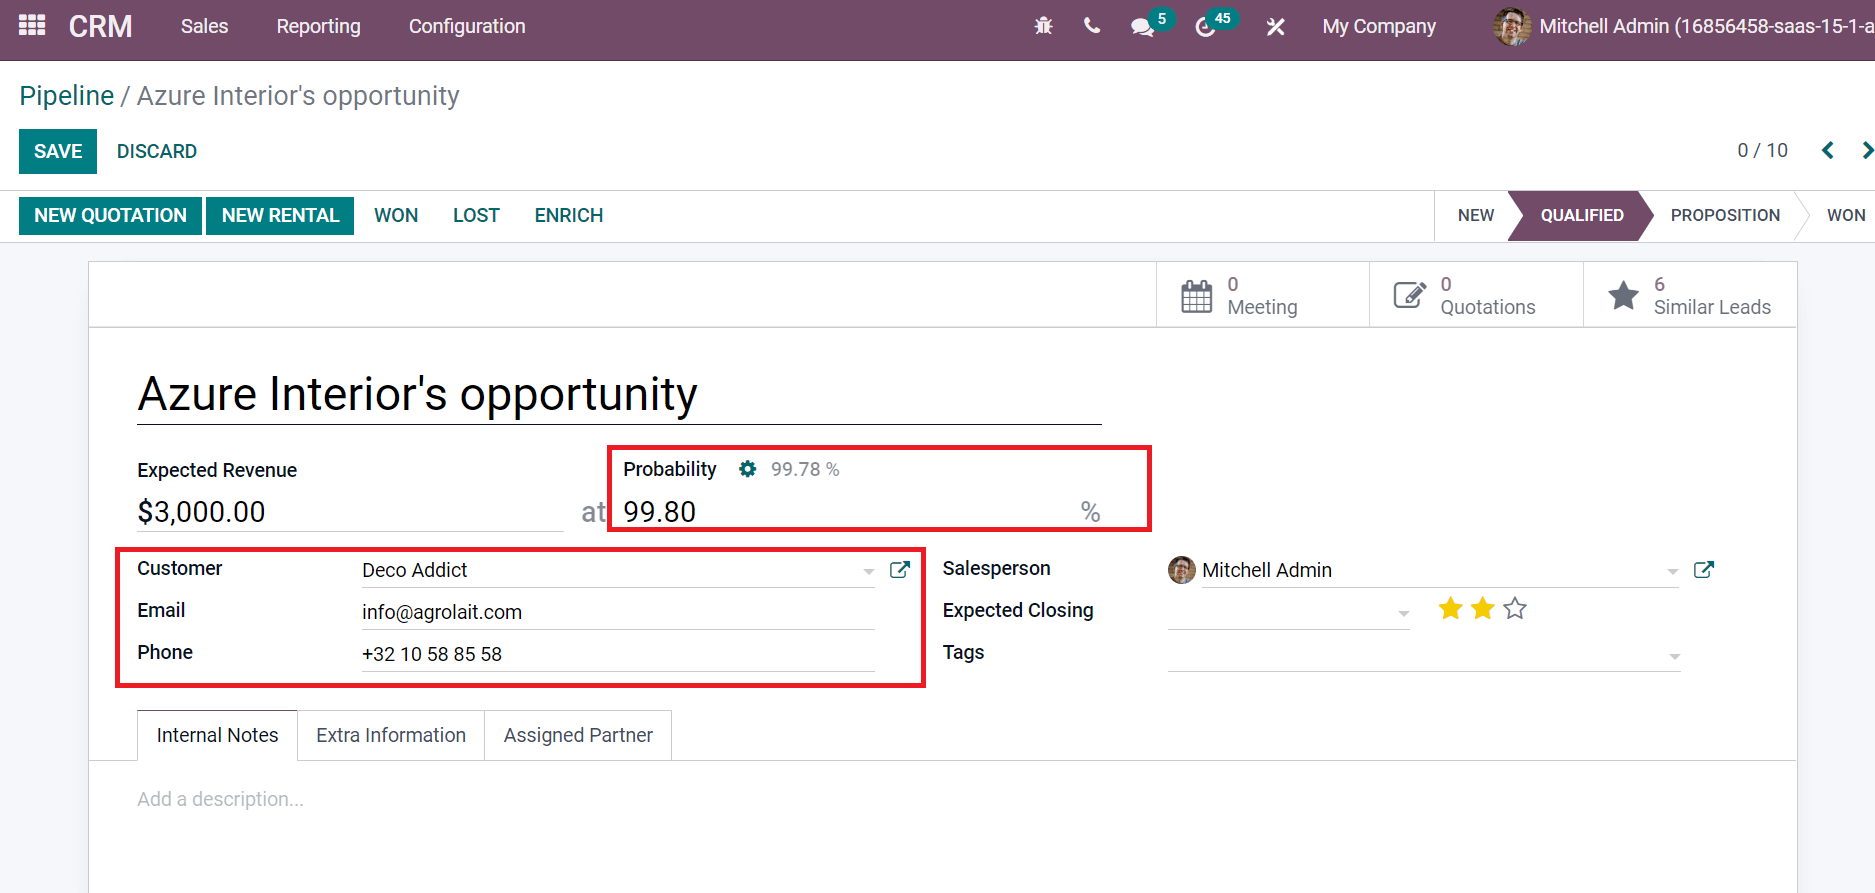
Later, you can update your Phone, Email, and linked partner in the Customer field as in the above screenshot. Users can also enter the name of the salesperson handling the opportunity in any situation inside the Salesperson field and the estimated date of closing opportunity in the Expected Closing field, as noted in the screenshot below.
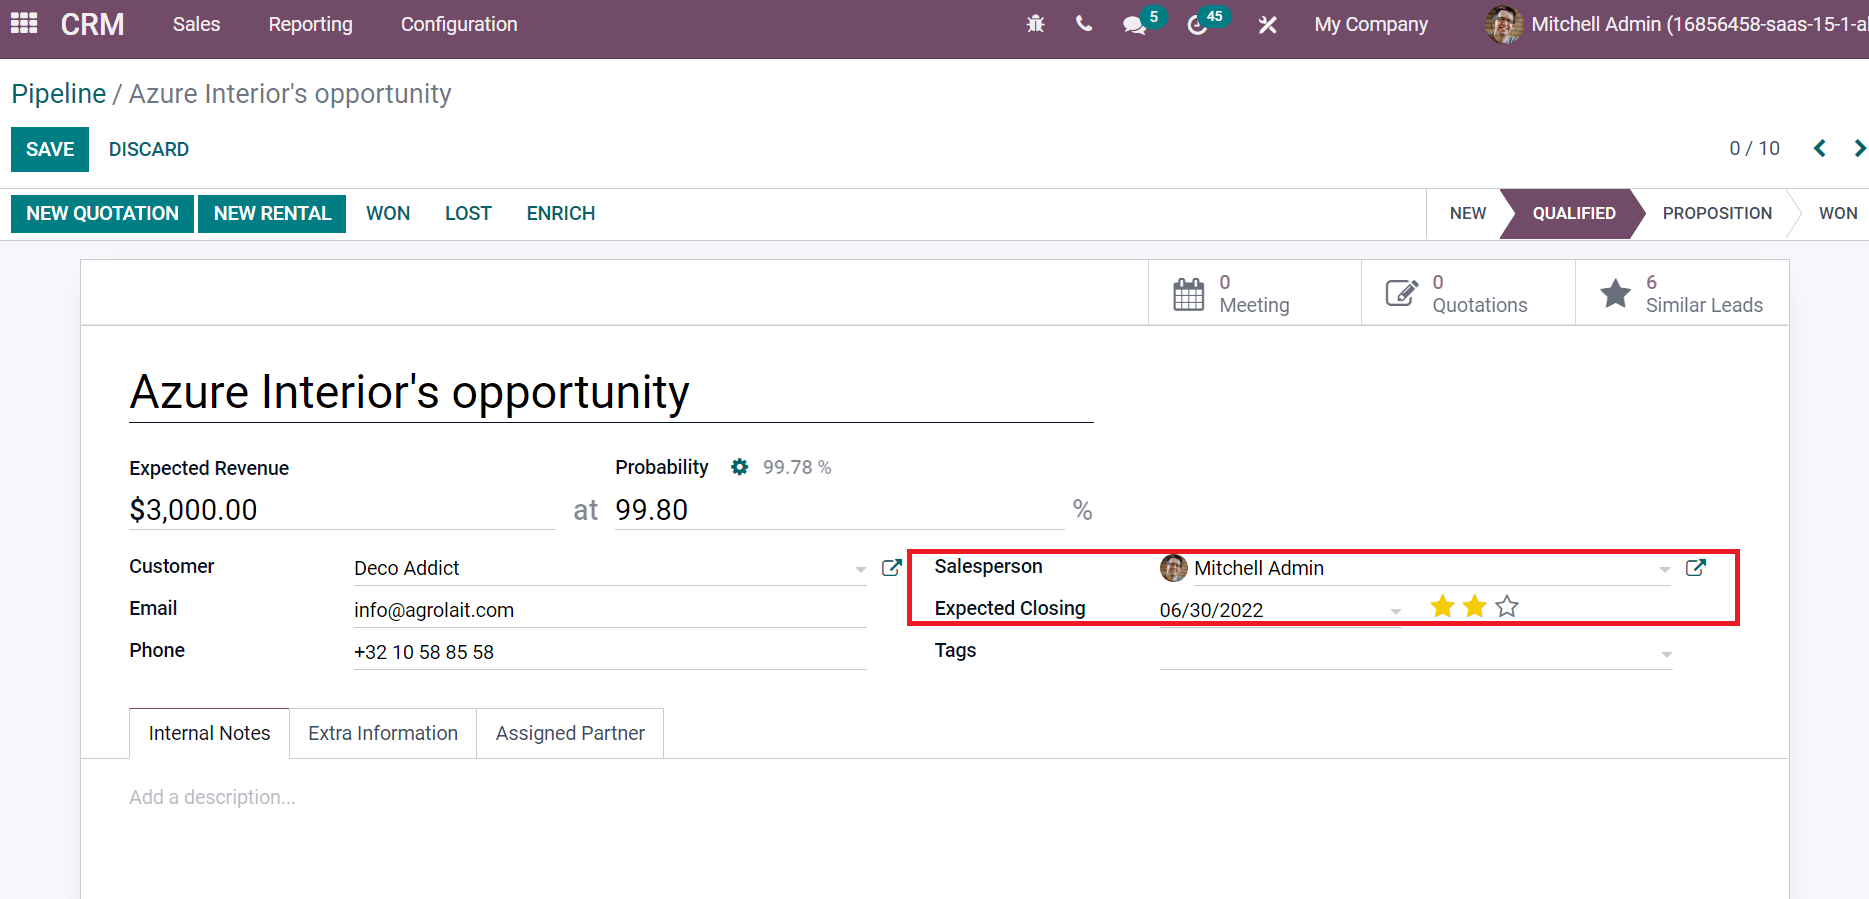
Tags assists in classifying your opportunity/lead categories such as training, service, and more. It highlights an opportunity specification between a sales team and the customer. You can enter the tag for a created opportunity in the Tags field, as represented in the screenshot below.
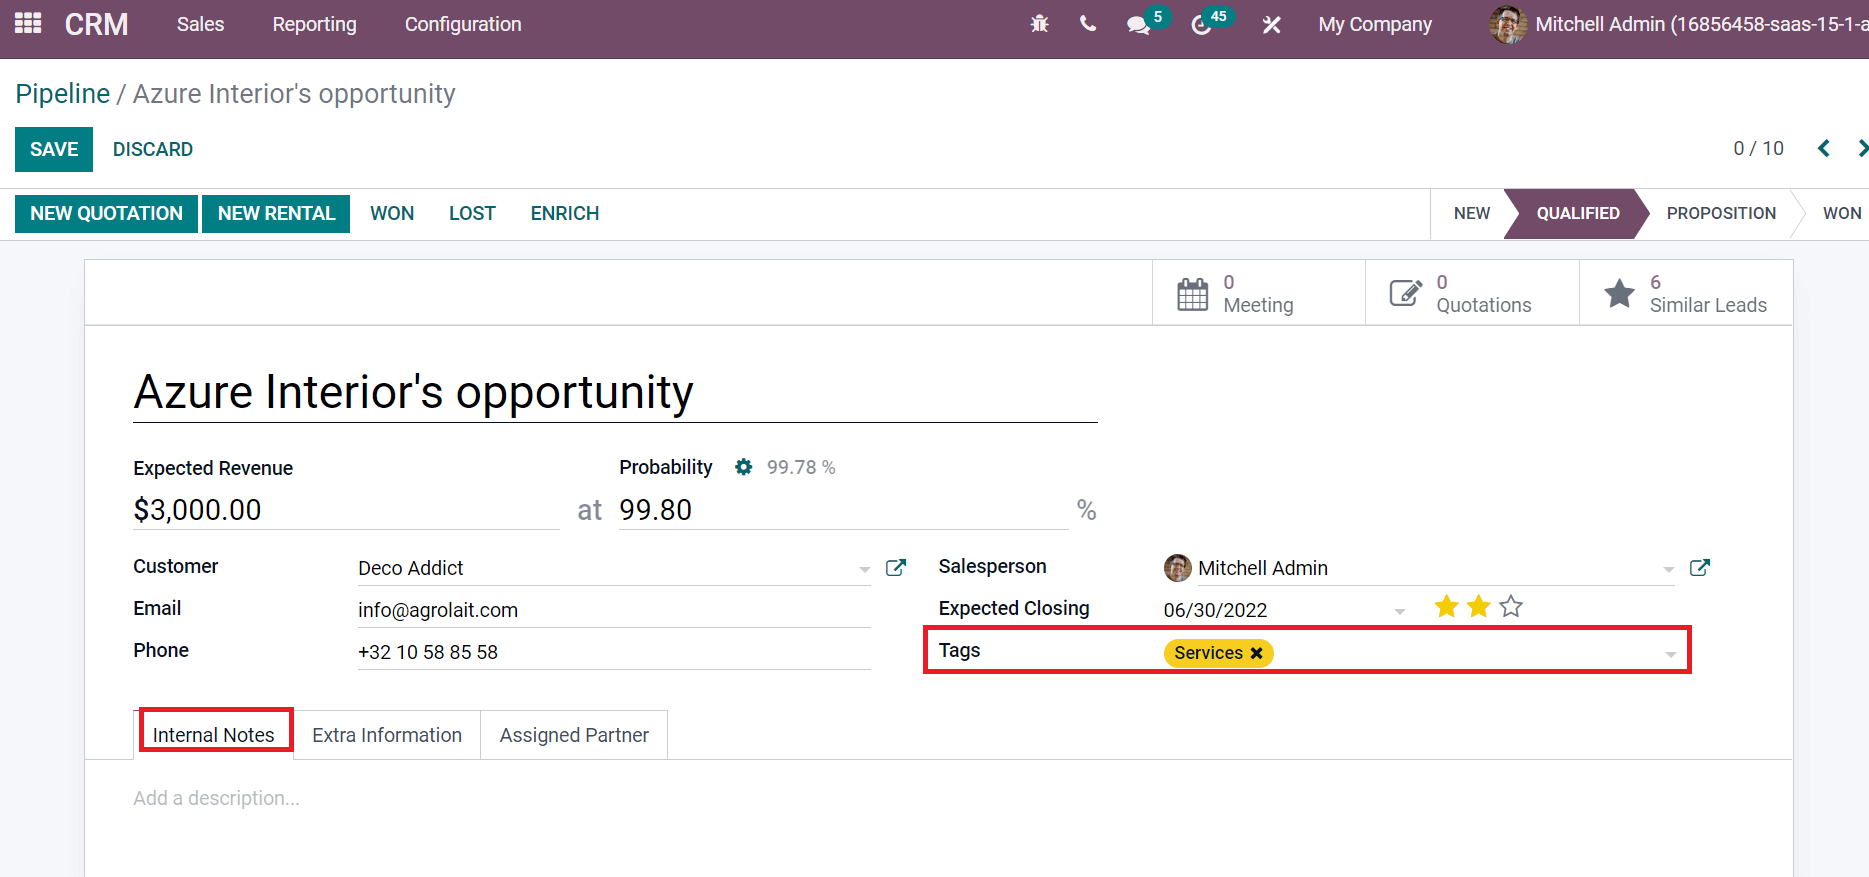
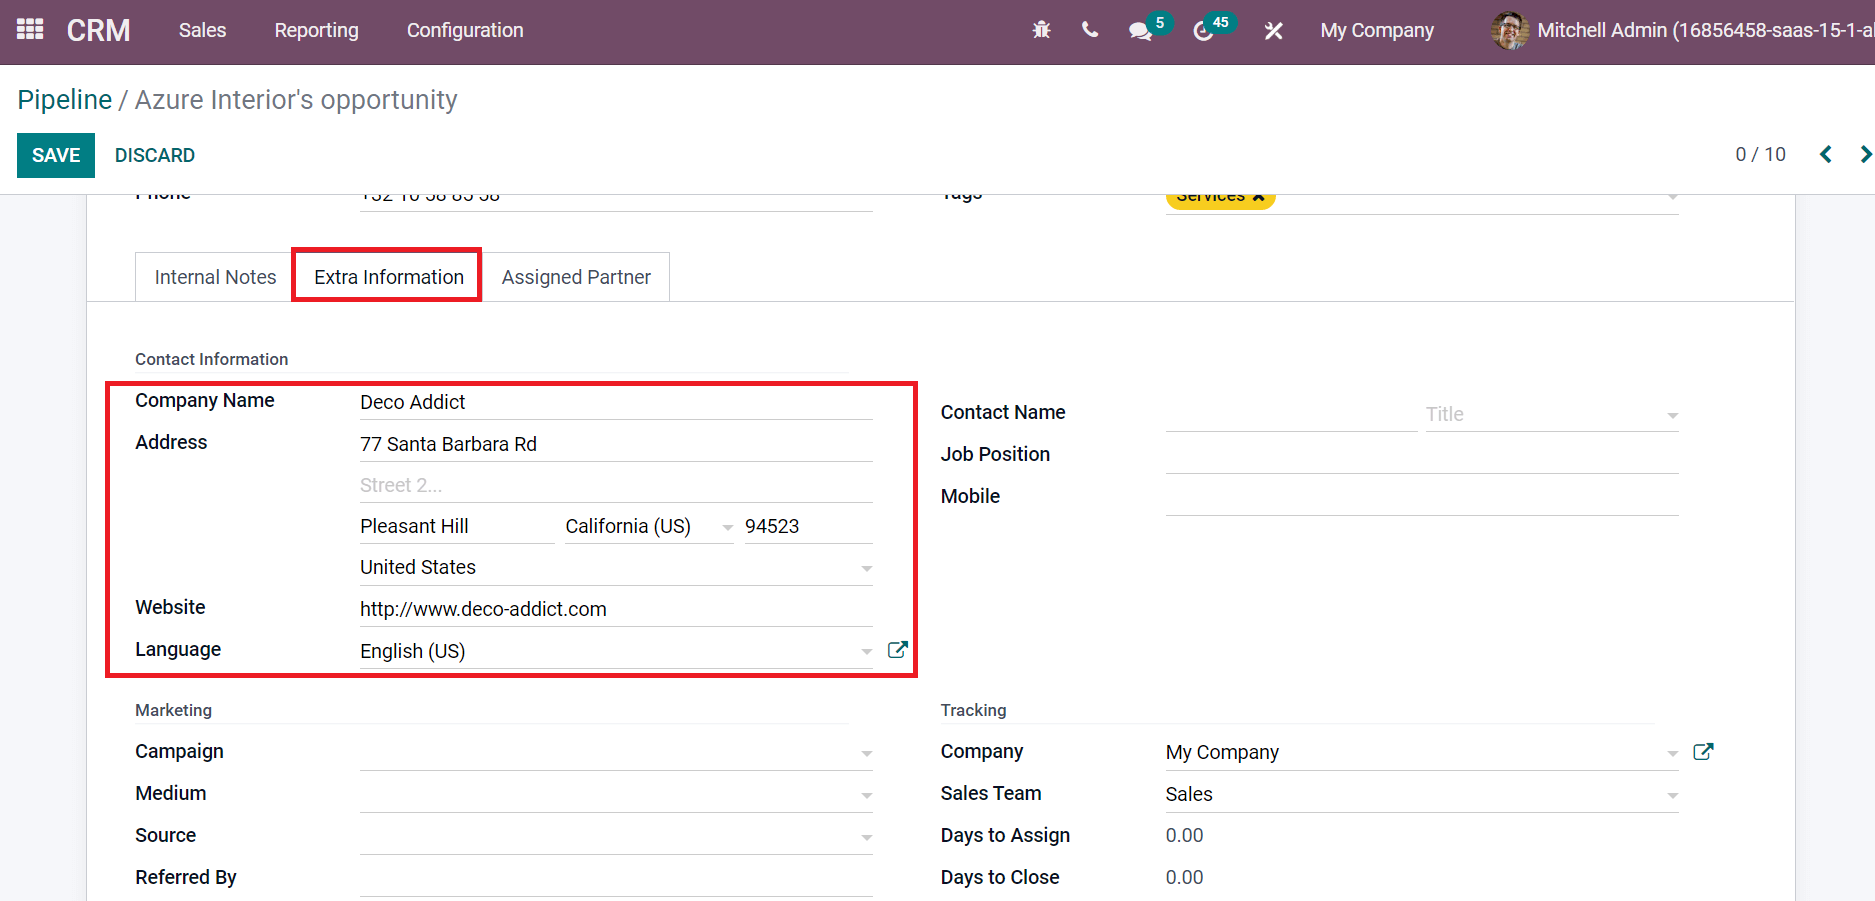
Users can add Azure Interior’s opportunity descriptions below the Internal Notes tab. It is easy to enter additional information related to contact information, tracking, and marketing below the Extra Information tab. Enter the Address, Language, Website, and future partner company in the Company Name field, as demonstrated in the screenshot below.
Users can keep track of different campaign efforts by choosing your Campaign below the Marketing section and selecting the delivery method inside the Medium field.
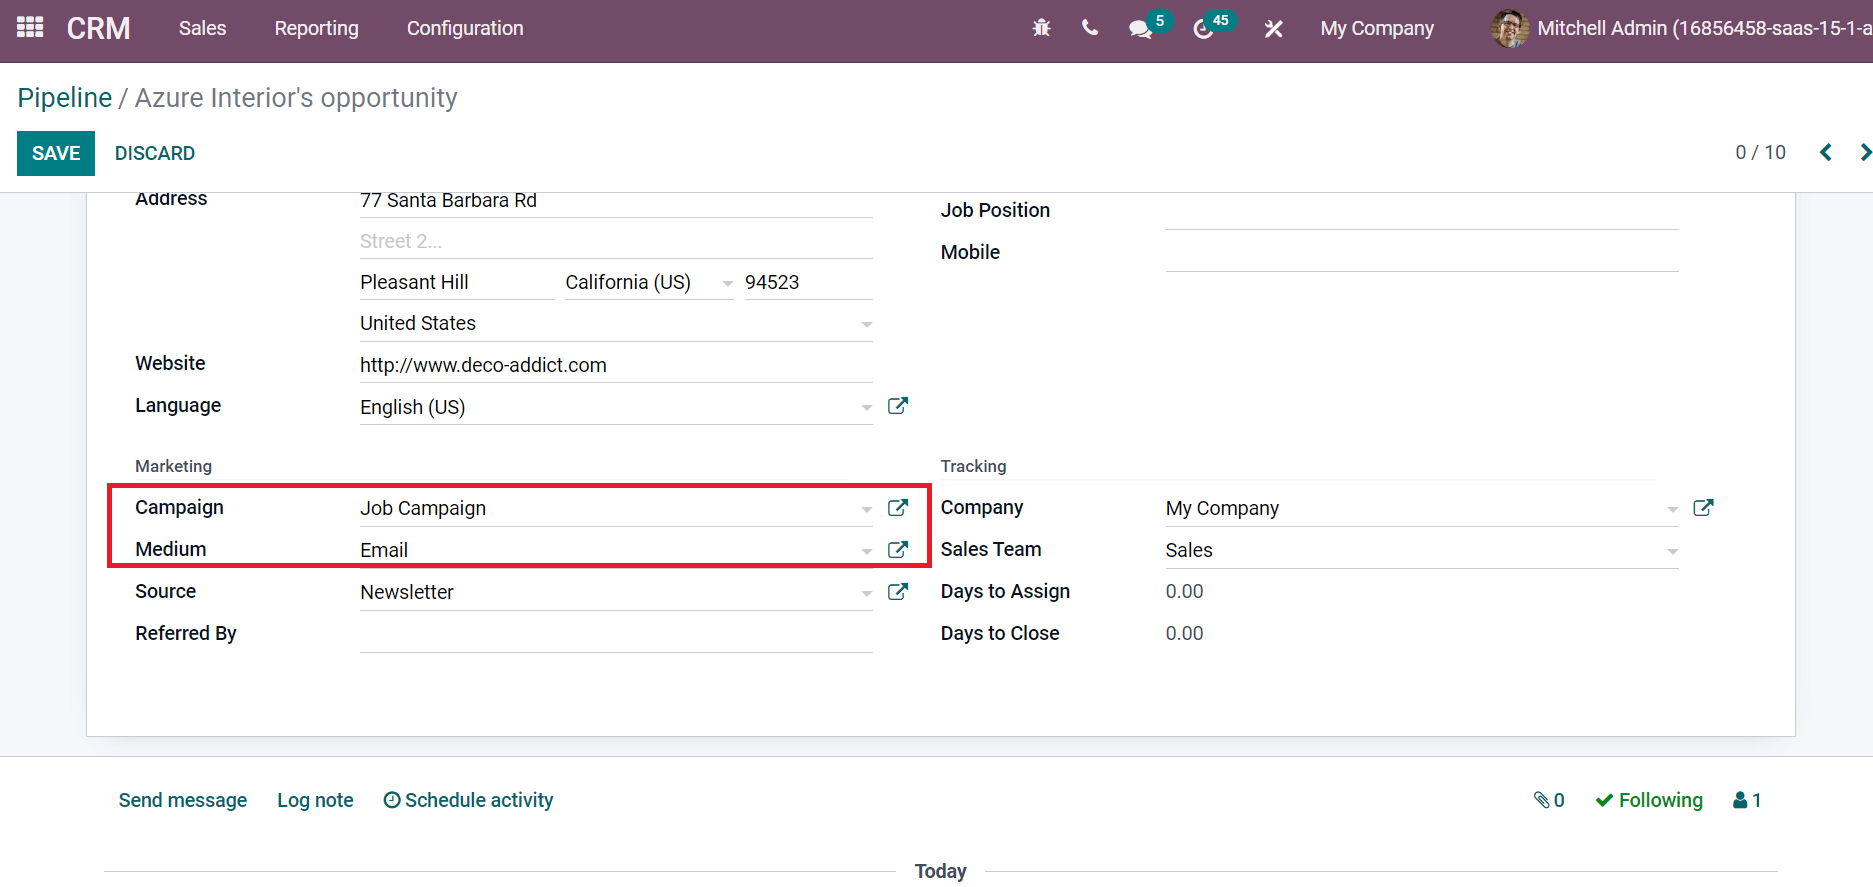
Next, you can add a source link in the Source field and a referrer inside Referred By field, as shown in the screenshot below.
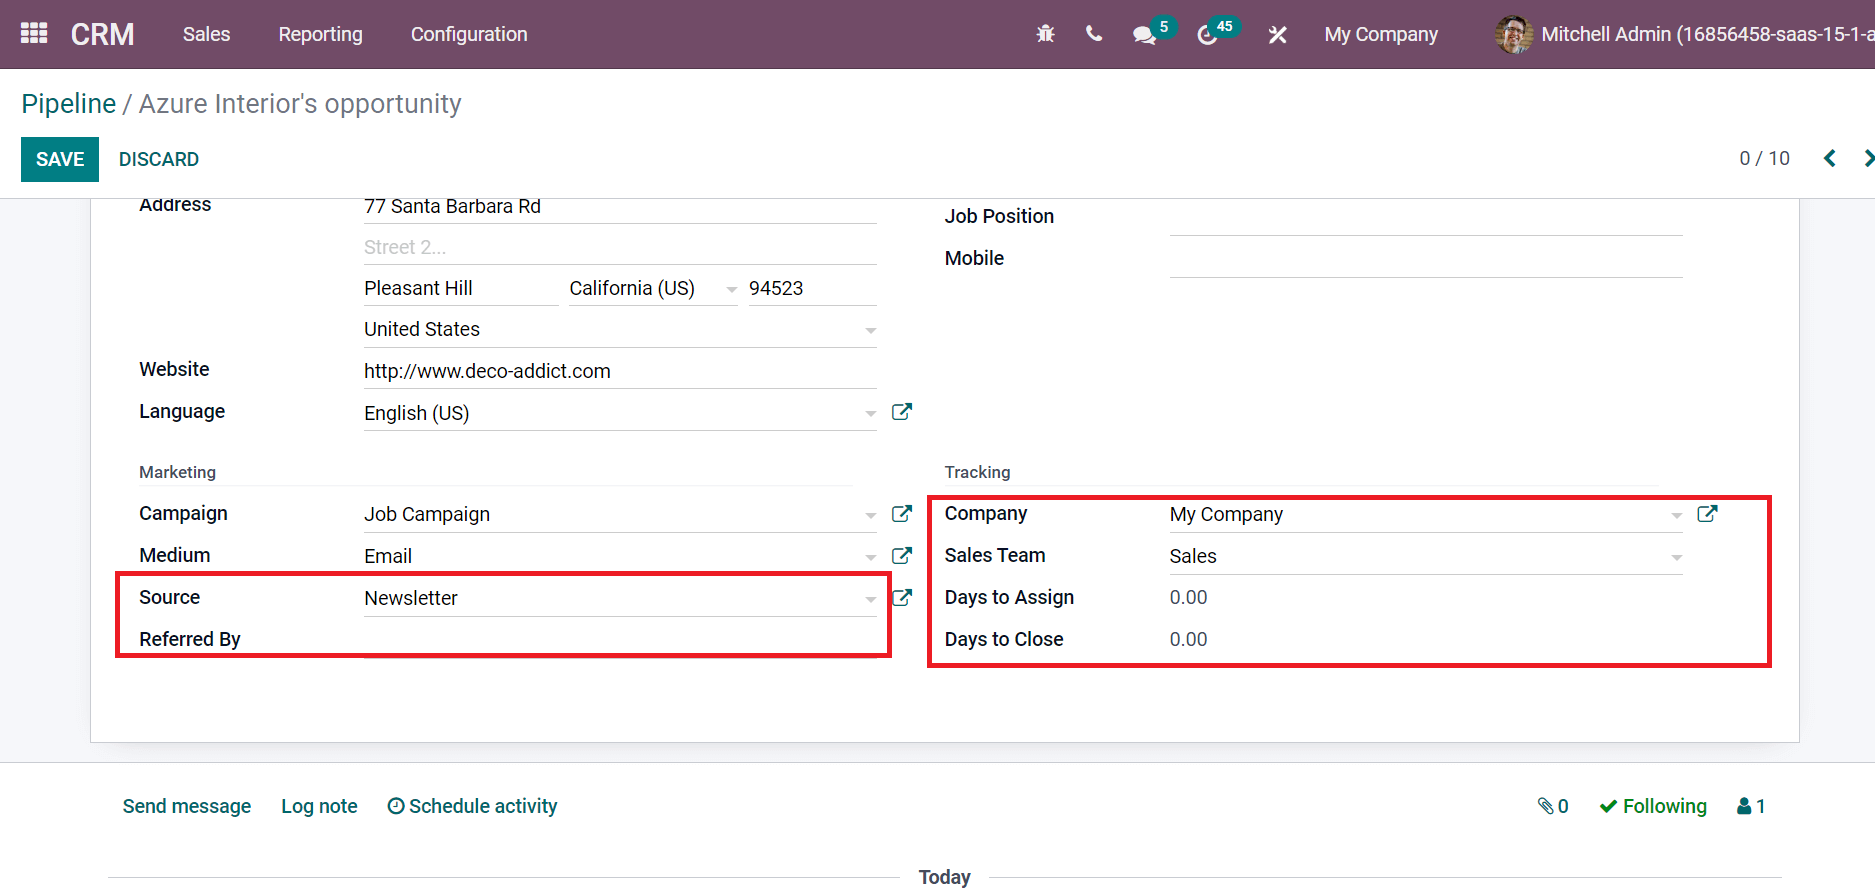
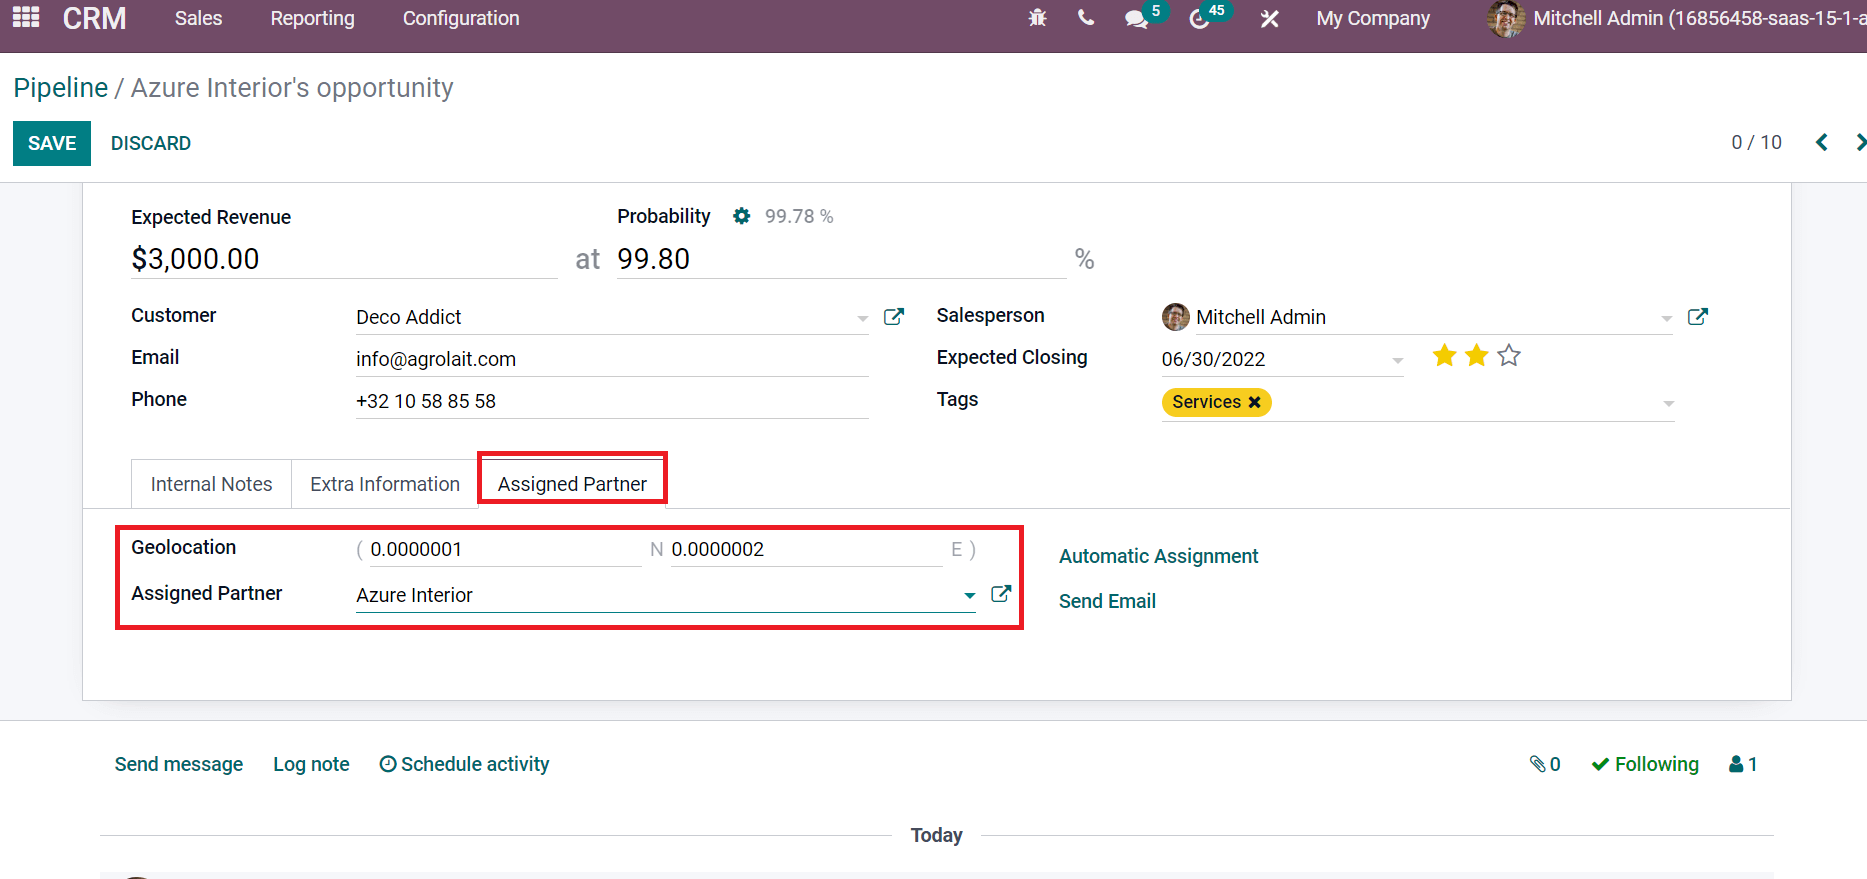
Below the Tracking section, you can see the data such as Company, Days to Close, Sales Team, and Days to Assign, as in the above screenshot. Users can also specify Geo latitude in the Geolocation field and partner of specific cases in the Assigned Partner option, as marked in the screenshot below.
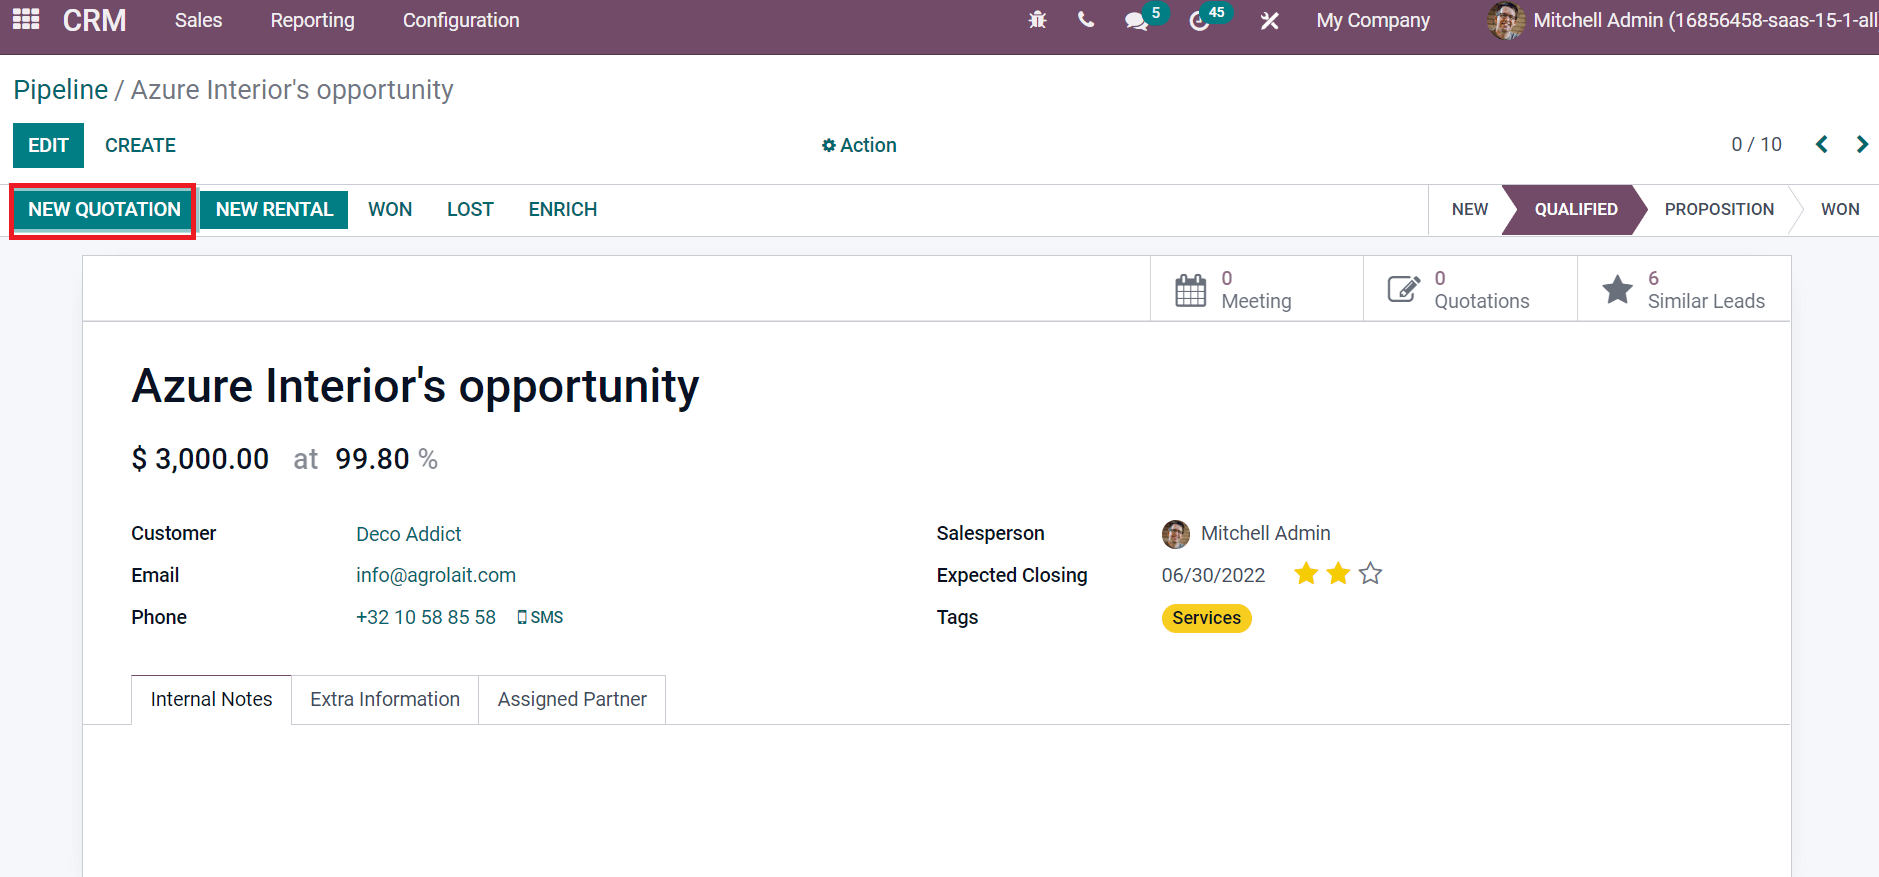
After saving the details, we can generate a new quotation by clicking on the NEW QUOTATION icon in the Pipeline window, as portrayed in the screenshot below.
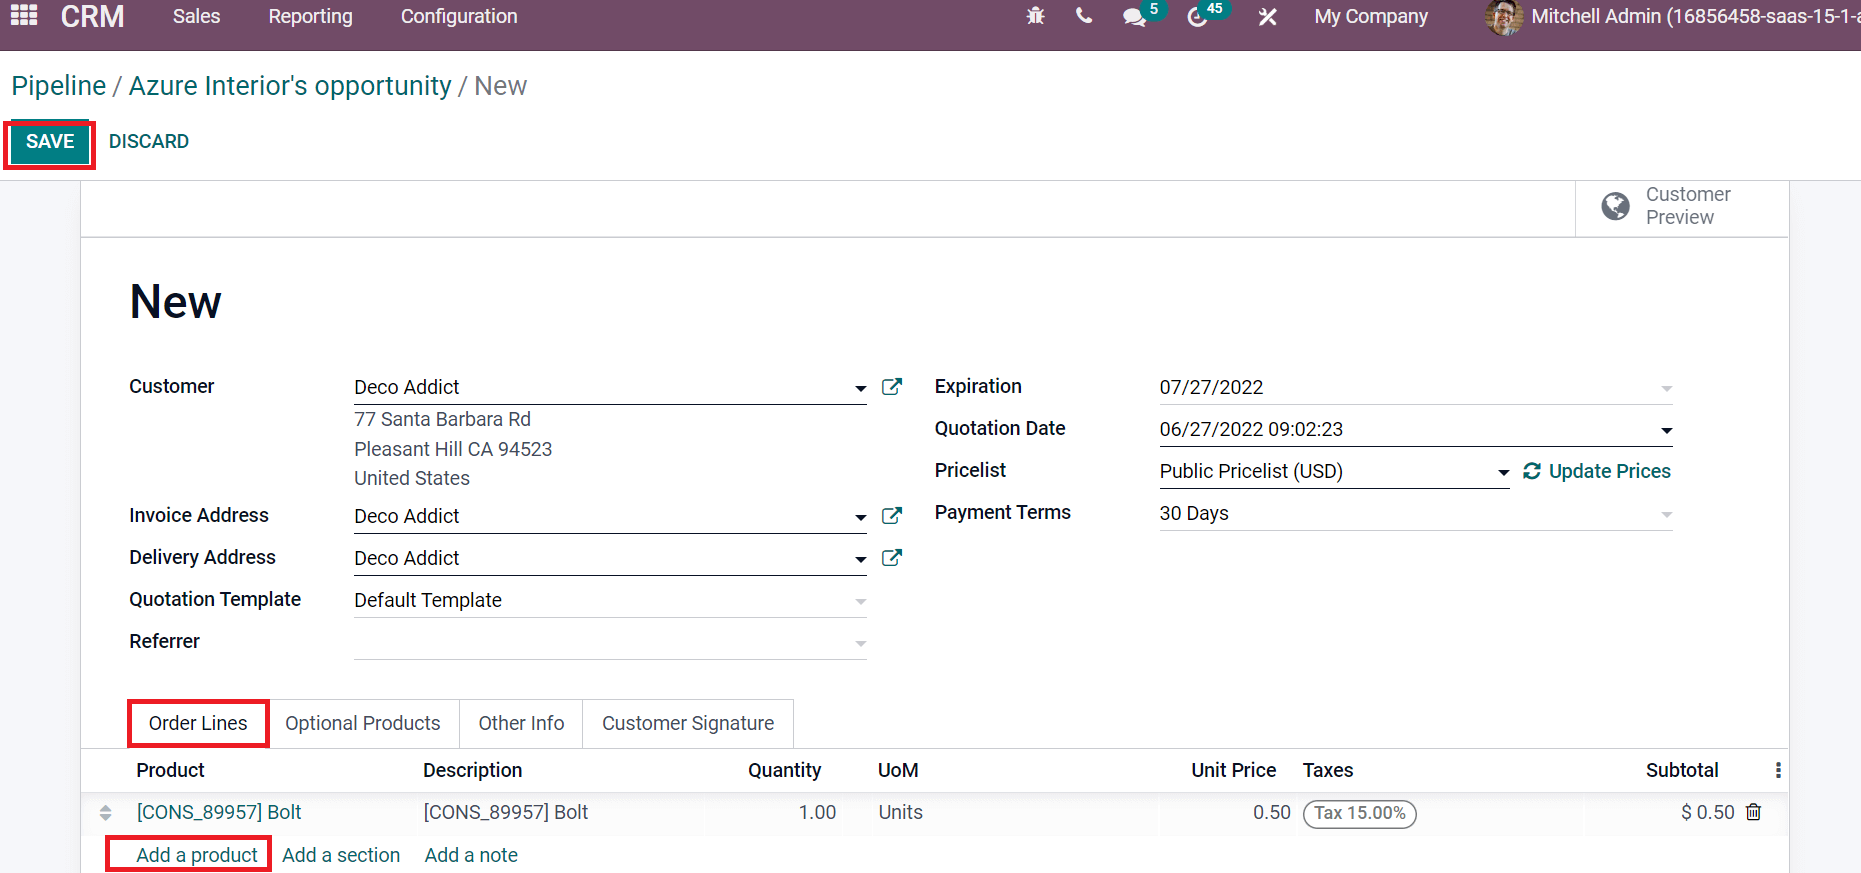
A new quotation window appears before you from the opportunity. You can access details such as Customer, invoice Address, Expiration, Pricelist, Delivery Address, etc. We can enter products for the quotation by selecting the Add a Product option below the Order Lines tab, as in the screenshot below.
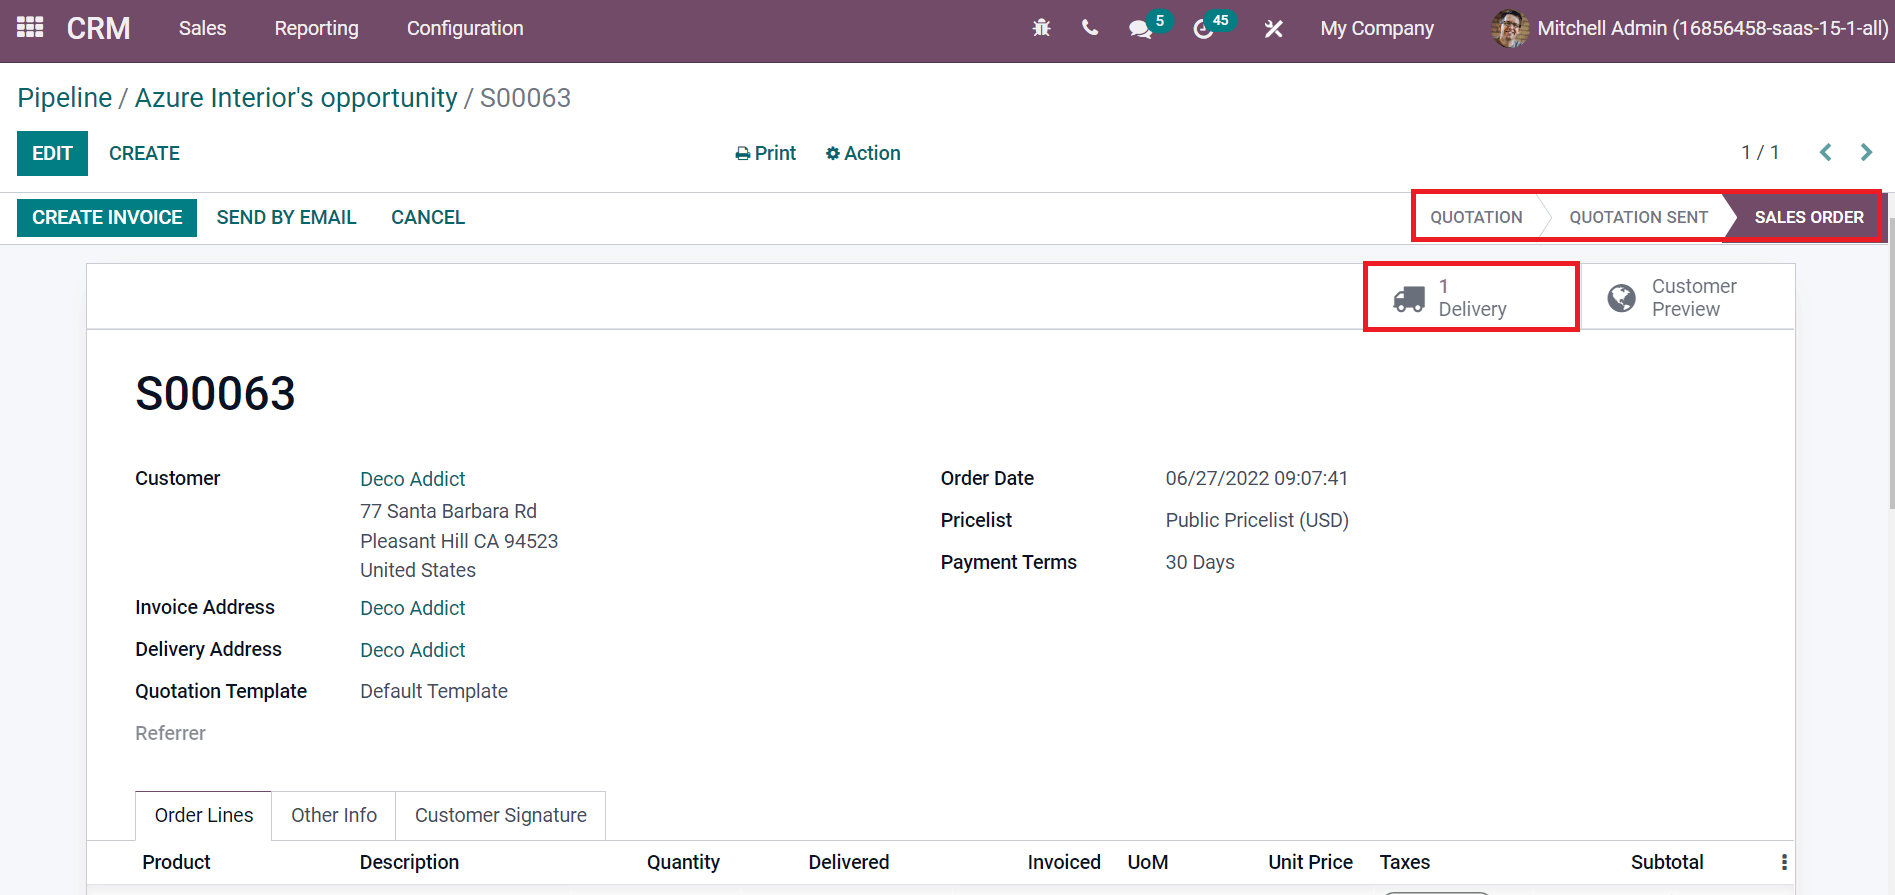
Select the SAVE icon after adding all details and confirm it. The sale order is created after confirmation, and one Delivery is visible before you, as illustrated in the screenshot below.
You can view the created sales order inside the Orders smart button in the Pipeline window.
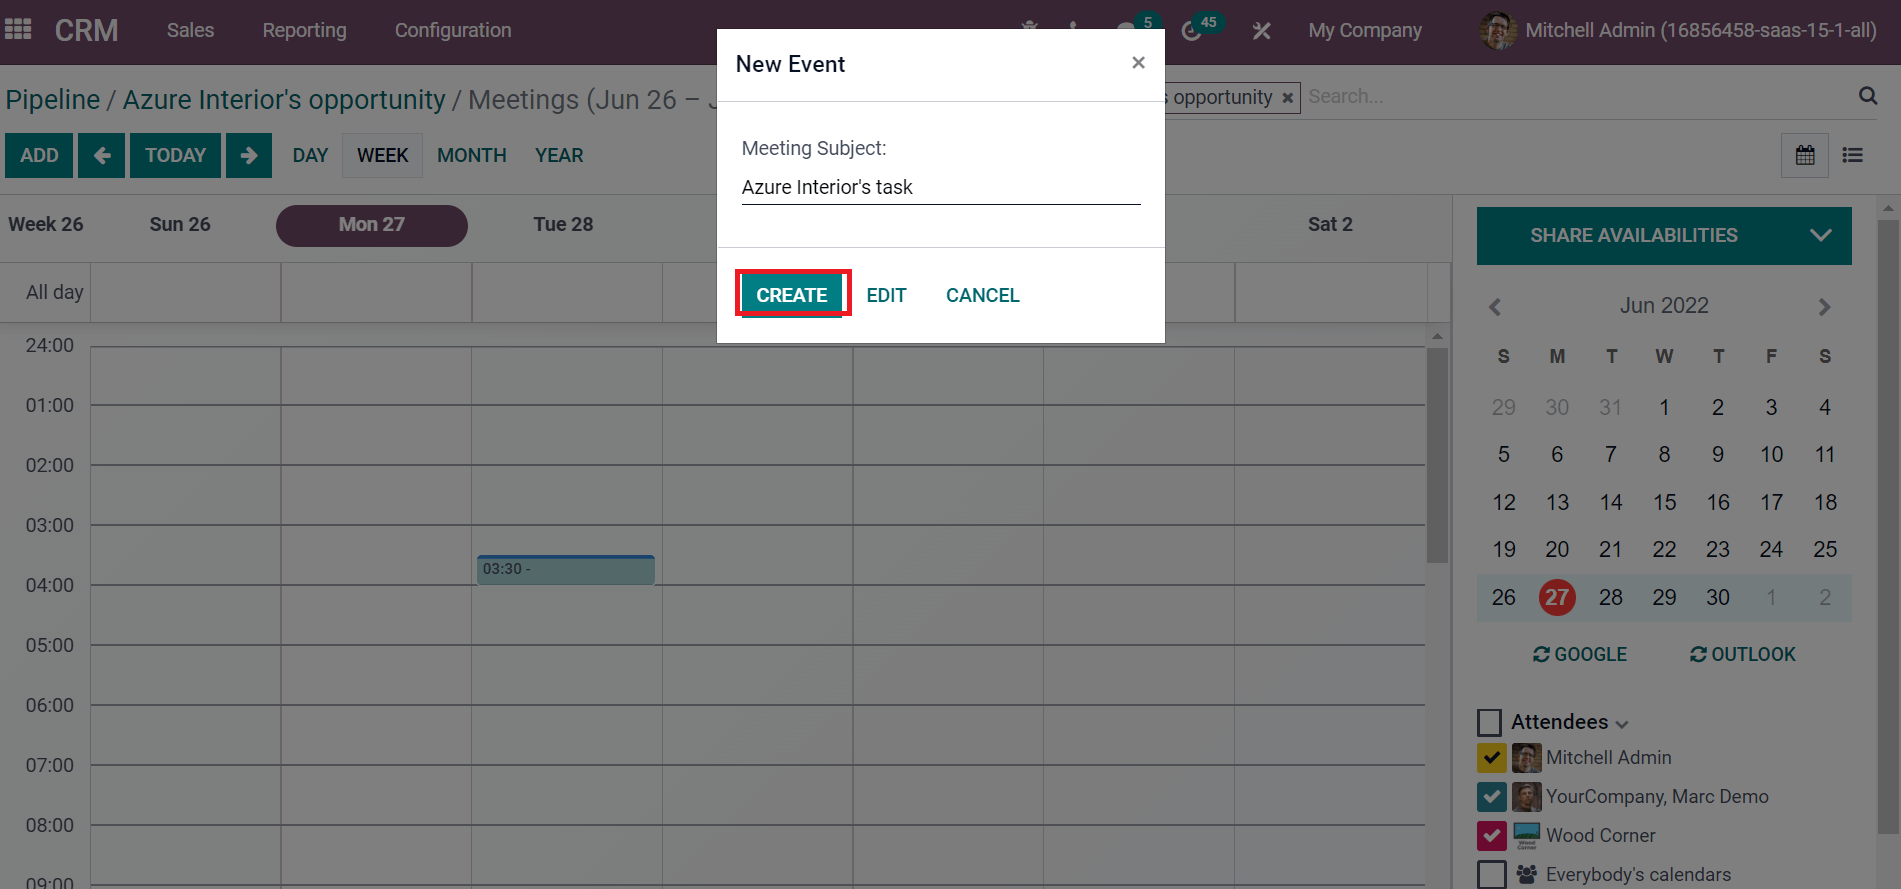
The created meeting is viewable in the calendar. You can access details of meetings, including Date, Organizer, Time, and Privacy.
The right side of the Meetings widow denoted the details of all attendees. Now, we can change the stage from QUALIFIED to PRO
POSITION.
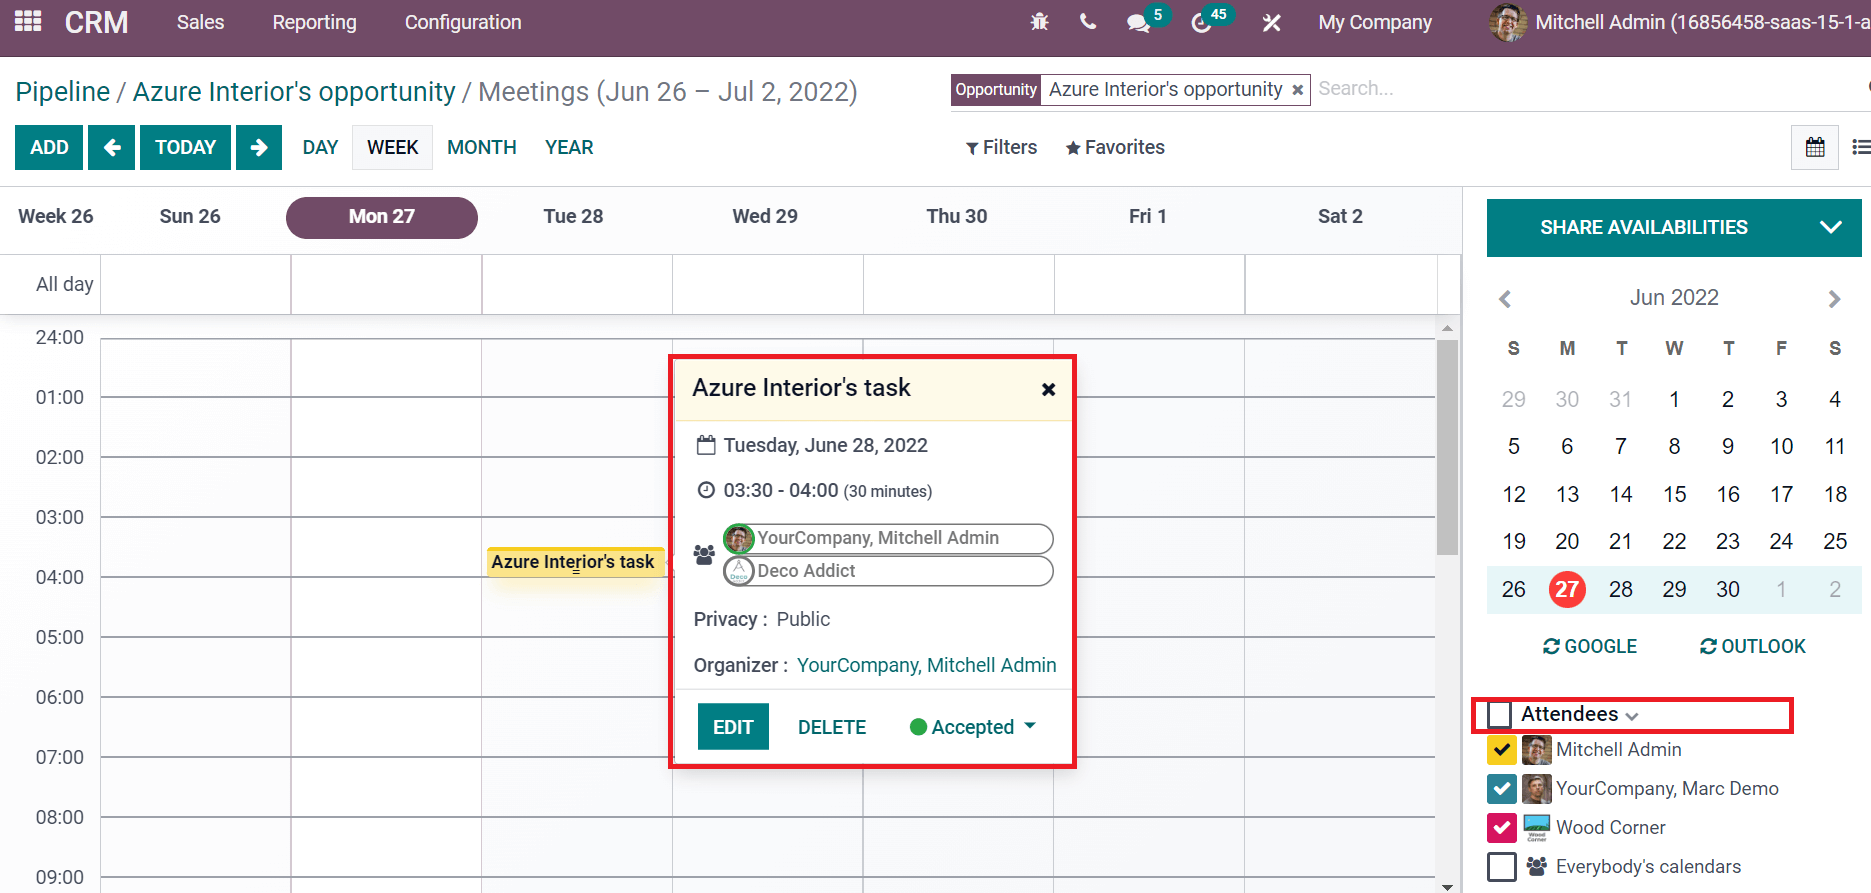
The right side of the Meetings widow denoted the details of all attendees. Now, we can change the stage from QUALIFIED to PROPOSITION.
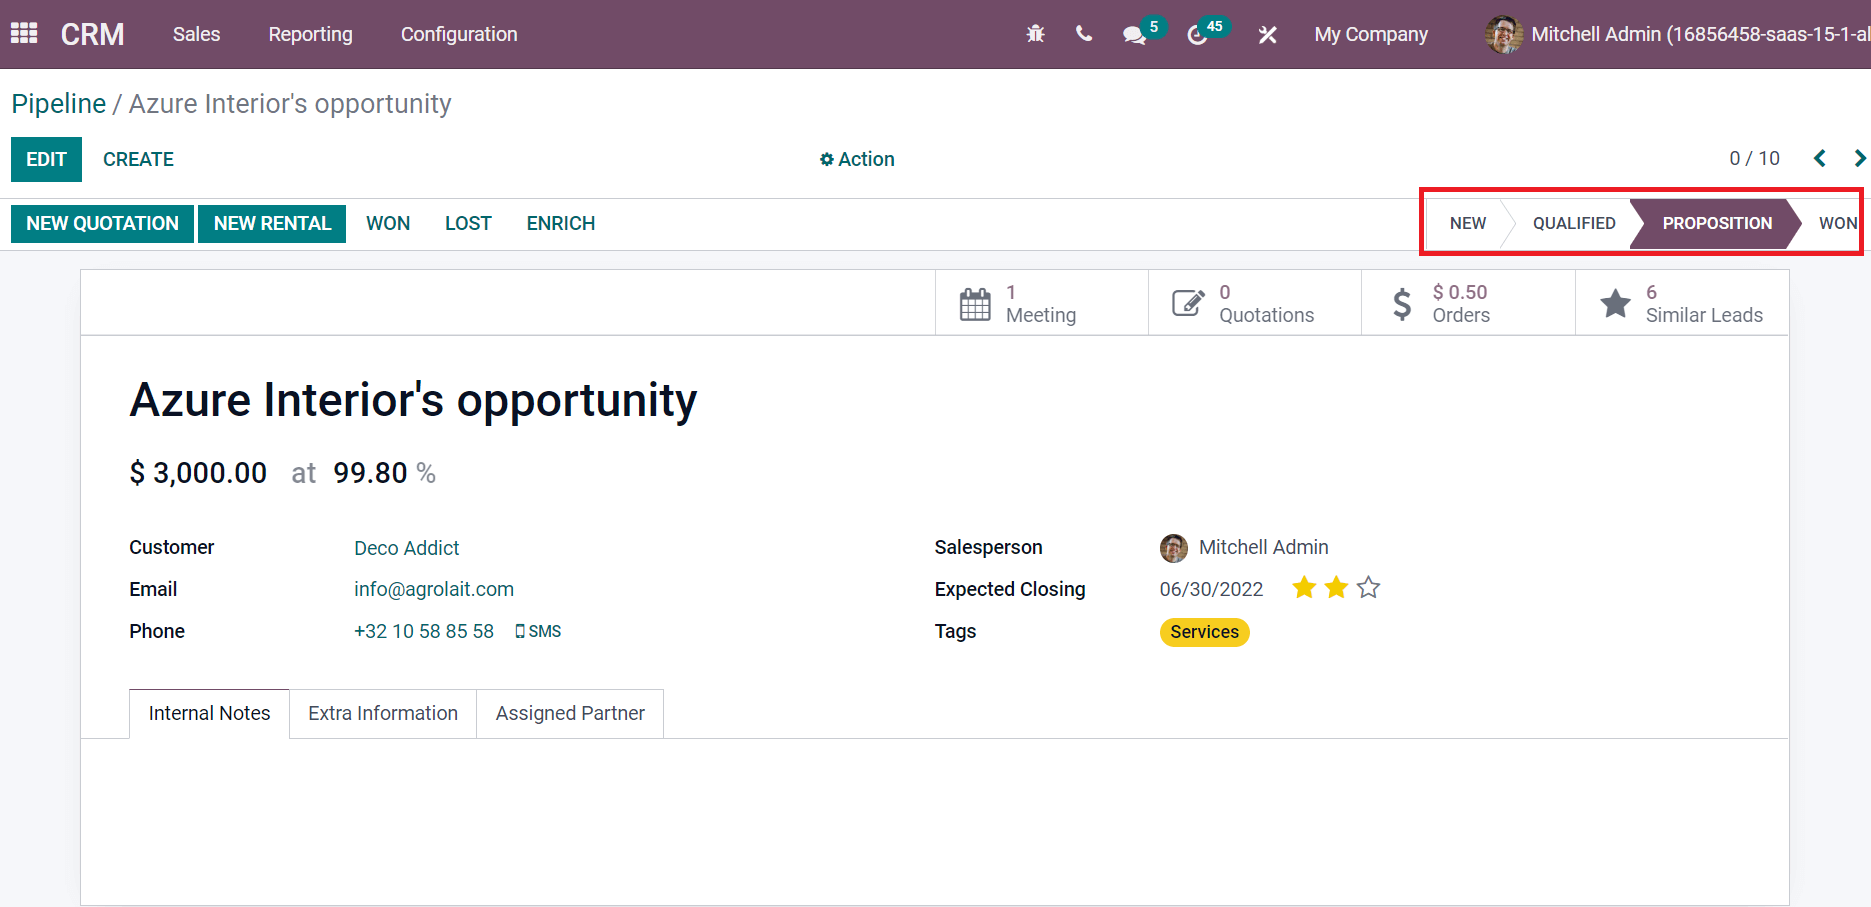
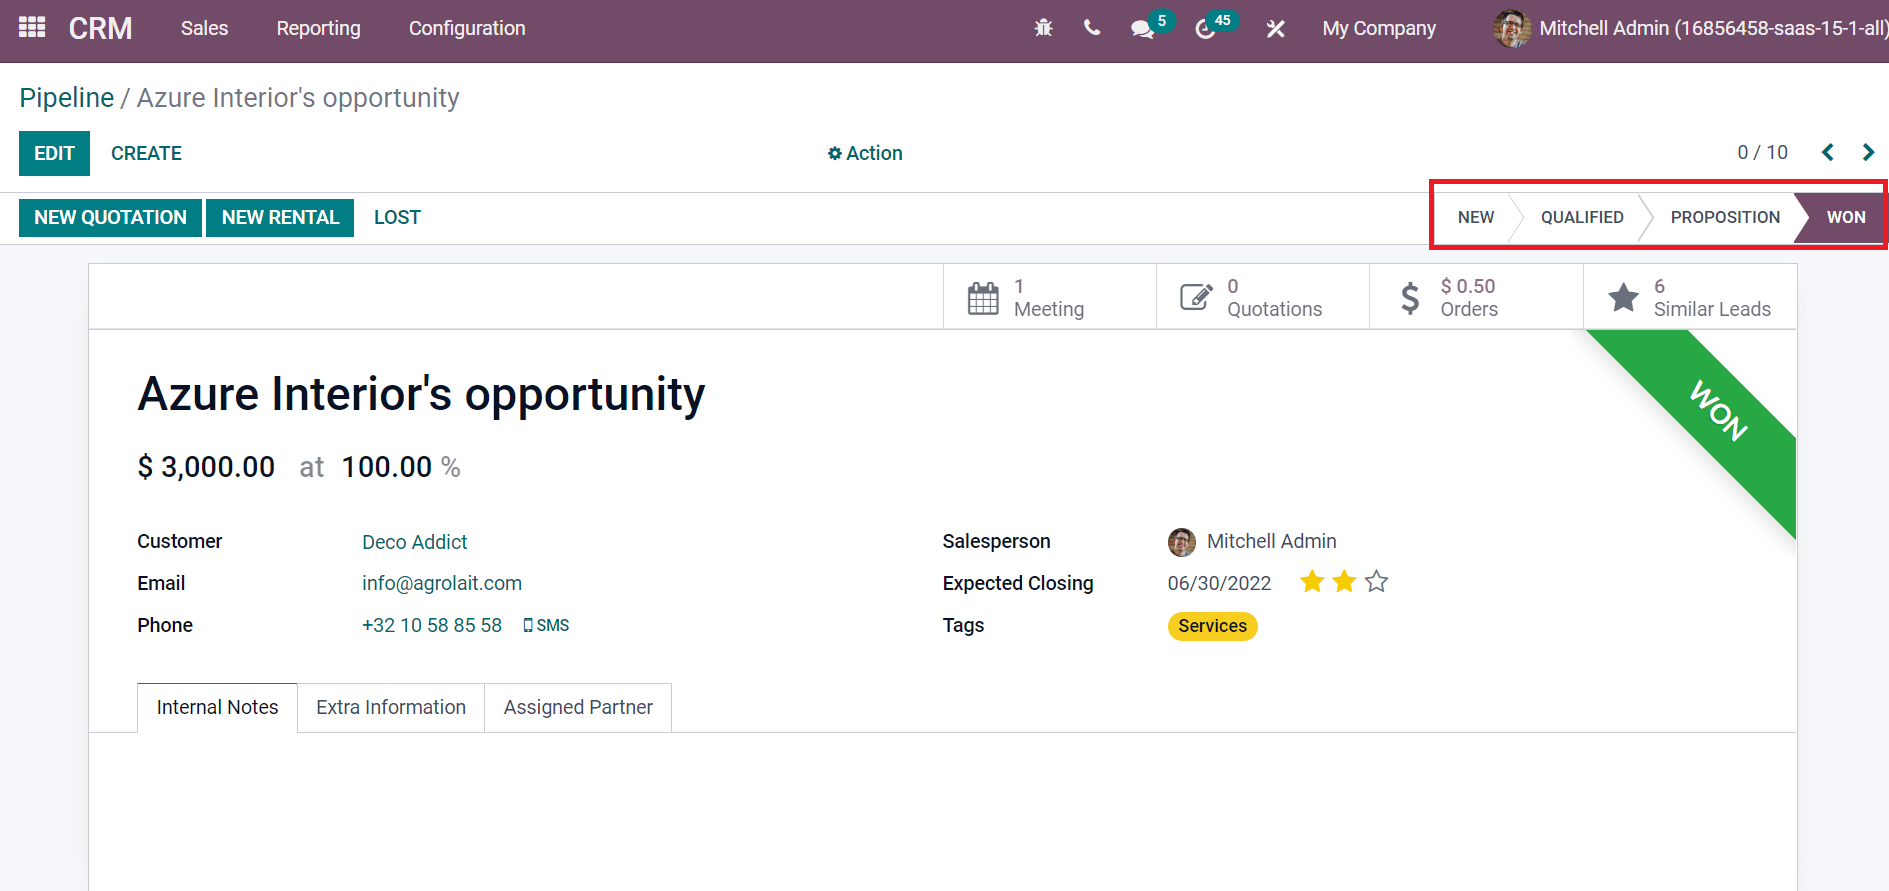
After approving the quotation by a client, you can change the stage from PROPOSITION TO WON.
Within the Odoo CRM module, we can easily develop opportunities and manage them. In addition, users can formulate quotations and schedule meetings from a created opportunity. Odoo 15 CRM Module is necessary to get information about your opportunities/leads. Refer to the given link to learn about the New Features of Odoo 15 CRM