In this blog, we are going to discuss how to create a custom module in Odooo 13 and how to add a search panel for the newly created module.
While creating a custom module we have to cover the following areas
1. Creating a custom model.
2. Defining different view types including form and tree view.
3. Defining required menu items.
4. Defining access rights to user groups for newly created modules.
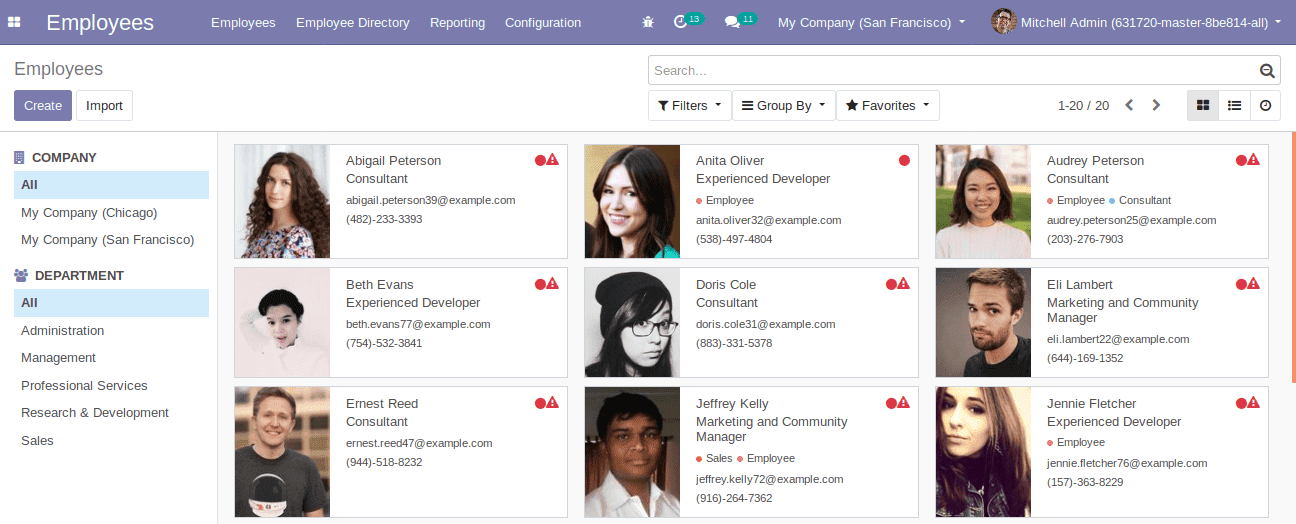
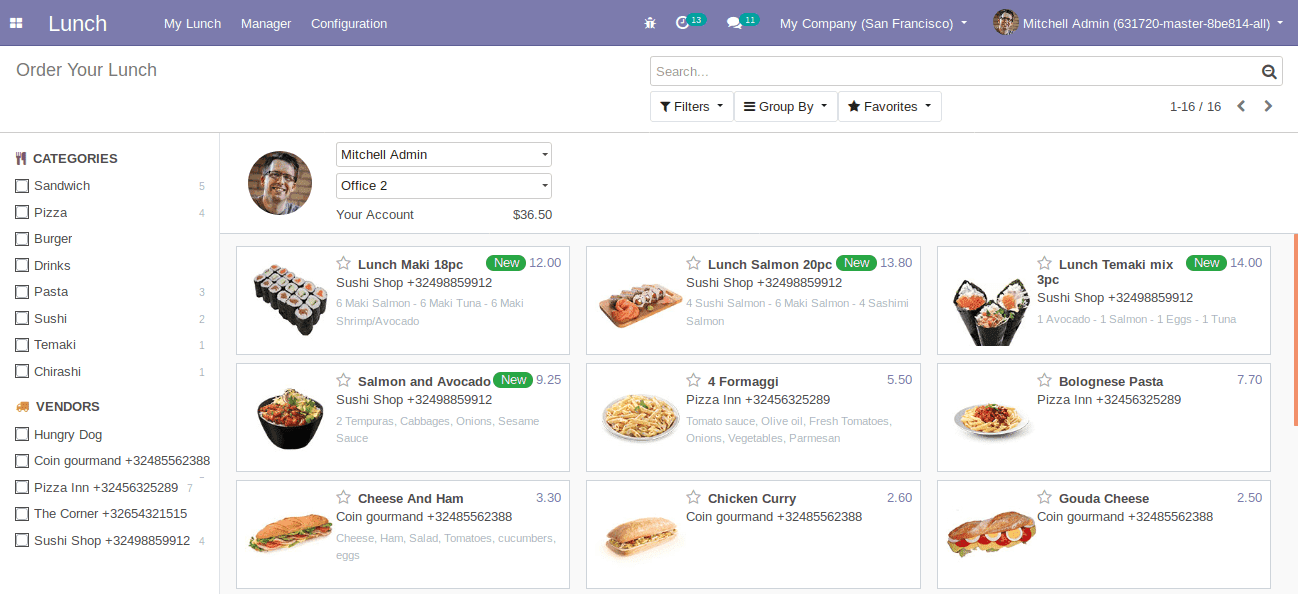
The search panel is a new feature added in the Odoo version 13. It provides advanced and easiest way for filtering a view according to their data. The search panel redefines the traditional filtration methods of Odoo. Some of the modules like Employee (hr), Lunch(lunch) owns the search panel view by default.
Features of Odoo 13 search panel
> Provides simple and advanced types of filtration.
> Available in view types like kanban and tree.
Search panel in Employees
Search panel in Lunch
Now we can check a sample module build in odoo 13.
Module Structure
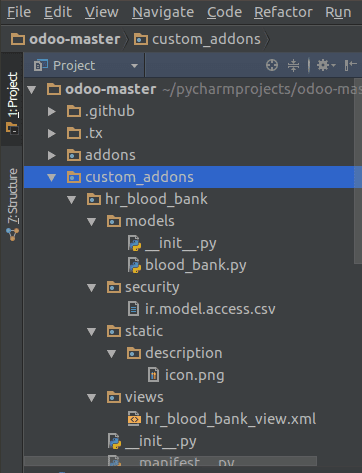
In the __init__.py file, we have to import all the python files that we are going to use.
# -*- coding: utf-8 -*-
from . import models
We have got a python file inside the model's folder, so we have to import that file by defining __init__.py inside the models folder.
# -*- coding: utf-8 -*-
from . import blood_bank
Now we are moving to the blood_bank.py which we have imported.
# -*- coding: utf-8 -*-
from odoo import fields, models
class BloodBank(models.Model):
   _name = 'blood.bank'
   _rec_name = 'blood_employee_id'
   blood_employee_id = fields.Many2one('hr.employee', string='Employee')
   blood_employee_age = fields.Integer(string='Age')
   blood_employee_gender = fields.Selection([('male', 'Male'), ('female', 'Female'), ('others', 'Others')],
                                            string='Gender')
   blood_employee_phone = fields.Char(string='Phone')
   blood_employee_city = fields.Char(string='city')
   employee_blood_group = fields.Selection(
       [('A+', 'A+ve'), ('B+', 'B+ve'), ('O+', 'O+ve'), ('AB+', 'AB+ve'),
        ('A-', 'A-ve'), ('B-', 'B-ve'), ('O-', 'O-ve'), ('AB-', 'AB-ve')],
       string='Blood Group')
In this python file we have to define
1. Class name(BloodBank).
2. Model name(‘blood.bank’).
3. The fields that are required for our module.
We have created the model and fields now, we can now move for creating the views.
First, we have to define the menu item for our module.
<menuitem id="menu_blood_bank"
         name="Blood Bank"
         action="action_view_blood_bank"/>
Next, we need to define the action for this menu item.
<?xml version="1.0" encoding="utf-8"?>
<odoo>
   <data>
<record model="ir.actions.act_window" id="action_view_blood_bank">
           <field name="name">Blood Bank</field>
           <field name="res_model">blood.bank</field>
           <field name="view_type">form</field>
           <field name="view_mode">tree,kanban,form</field>
           <field name="domain">[]</field>
           <field name="help" type="html">
               <p class="oe_view_no_content_create">Create new record
               </p>
           </field>
       </record>
       <menuitem id="menu_blood_bank"
                 name="Blood Bank"
                 action="action_view_blood_bank"/>
   </data>
</odoo>
After defining the action we have to create the tree and form views of our module.
Tree view
<record id="view_blood_bank_tree" model="ir.ui.view">
   <field name="name">blood.bank.tree</field>
   <field name="model">blood.bank</field>
   <field name="priority" eval="8"/>
   <field name="arch" type="xml">
       <tree string="Blood Bank">
           <field name="blood_employee_id"/>
           <field name="blood_employee_age"/>
           <field name="blood_employee_gender"/>
           <field name="employee_blood_group"/>
       </tree>
   </field>
</record>
Form view
<record id="view_blood_bank_form" model="ir.ui.view">
   <field name="name">blood.bank.form</field>
   <field name="model">blood.bank</field>
   <field name="arch" type="xml">
       <form string="Blood Bank">
           <group col="2" colspan="4">
               <field name="blood_employee_id"/>
               <field name="blood_employee_age"/>
               <field name="blood_employee_gender"/>
               <field name="employee_blood_group"/>
               <field name="blood_employee_phone"/>
               <field name="blood_employee_city"/>
           </group>
       </form>
   </field>
</record>
So our final view file will be like:
<?xml version="1.0" encoding="utf-8"?>
<odoo>
   <data>
       <record id="view_blood_bank_tree" model="ir.ui.view">
           <field name="name">blood.bank.tree</field>
           <field name="model">blood.bank</field>
           <field name="priority" eval="8"/>
           <field name="arch" type="xml">
               <tree string="Blood Bank">
                   <field name="blood_employee_id"/>
                   <field name="blood_employee_age"/>
                   <field name="blood_employee_gender"/>
                   <field name="employee_blood_group"/>
               </tree>
           </field>
       </record>
       <record id="view_blood_bank_form" model="ir.ui.view">
           <field name="name">blood.bank.form</field>
           <field name="model">blood.bank</field>
           <field name="arch" type="xml">
               <form string="Blood Bank">
                   <group col="2" colspan="4">
                       <field name="blood_employee_id"/>
                       <field name="blood_employee_age"/>
                       <field name="blood_employee_gender"/>
                       <field name="employee_blood_group"/>
                       <field name="blood_employee_phone"/>
                       <field name="blood_employee_city"/>
                   </group>
               </form>
           </field>
       </record>
<record model="ir.actions.act_window" id="action_view_blood_bank">
           <field name="name">Blood Bank</field>
           <field name="res_model">blood.bank</field>
           <field name="view_type">form</field>
           <field name="view_mode">tree,kanban,form</field>
           <field name="domain">[]</field>
           <field name="help" type="html">
               <p class="oe_view_no_content_create">Create new record
               </p>
           </field>
       </record>
       <menuitem id="menu_blood_bank"
                 name="Blood Bank"
                 action="action_view_blood_bank"/>
   </data>
</odoo>
Now we have to add this view file into __manifest__.py
# -*- coding: utf-8 -*-
{
   'name': "Employee Blood Bank",
   'version': '13.0.1.0.0',
   'summary': """Keep the records of employee blood details",
   'description': """Keep the records of employee blood details",
   'category': 'Human Resources',
   'author': 'Cybrosys Techno Solutions',
   'company': 'Cybrosys Techno Solutions',
   'maintainer': 'Cybrosys Techno Solutions',
   'website': "https://www.cybrosys.com",
   'depends': ['base', 'hr'],
   'data': [
       'views/hr_blood_bank_view.xml',
       'security/ir.model.access.csv',
   ],
   'license': "AGPL-3",
   'installable': True,
   'application': True,
}
After defining the view, we have to assign access rights to the users for the newly created models.
We have to write this inside security -> ir.model.access.csv file.
id,name,model_id:id,group_id:id,perm_read,perm_write,perm_create,perm_unlink
access_blood_bank_user_id,access_blood_bank_user,model_blood_bank,base.group_user,1,1,1,0
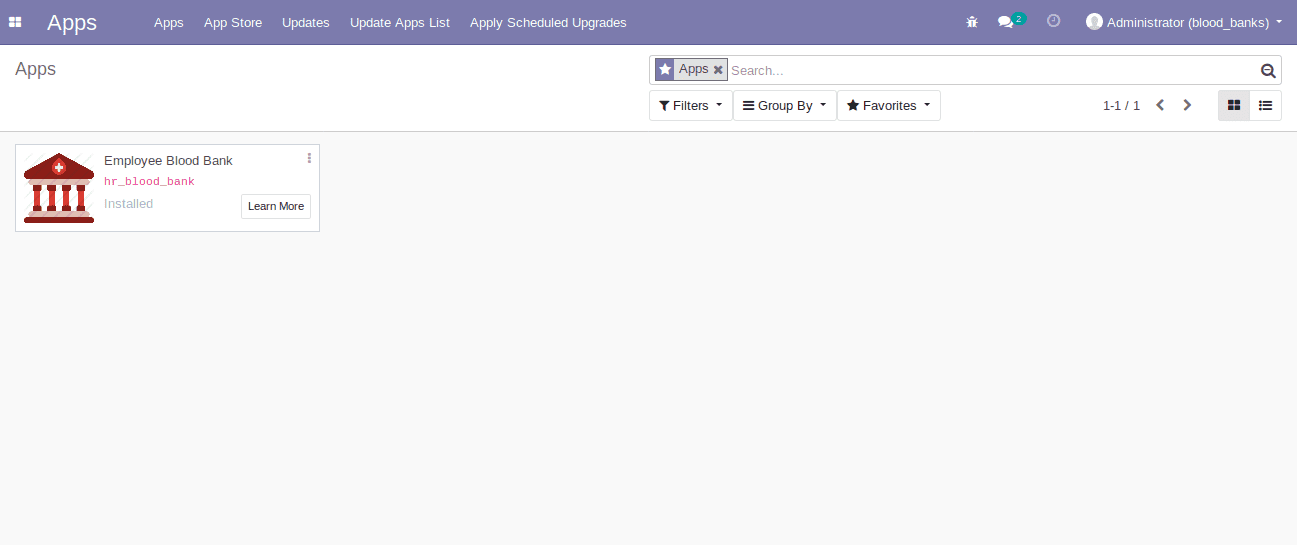
Now we can install our app from Odoo Apps.
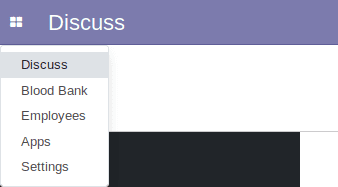
Click on menu item Blood Bank.
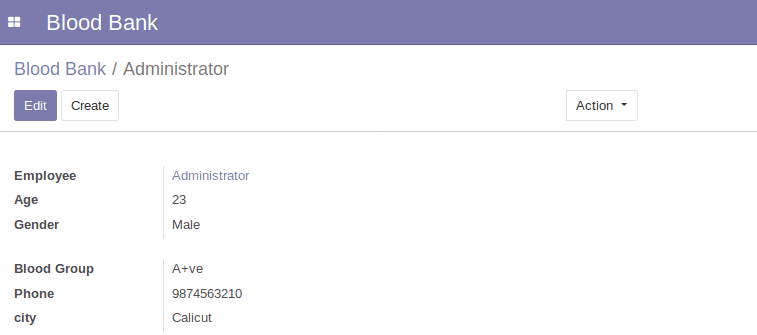
Create a new record.
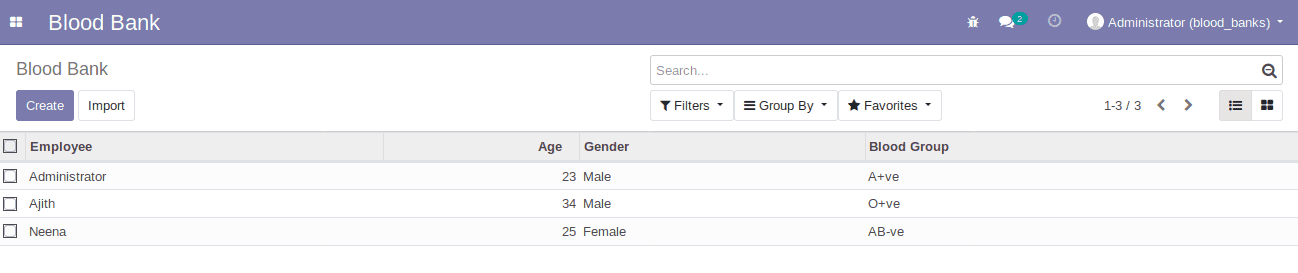
List view of created records.
Now we can create search panel for this module like in employees and lunch.
In our view file add a new record like below:
<record id="view_blood_bank_search" model="ir.ui.view">
   <field name="name">blood.bank.search</field>
   <field name="model">blood.bank</field>
   <field name="arch" type="xml">
       <search string="Blood Bank Analysis">
           <field name="blood_employee_id"/>
           <field name="blood_employee_age"/>
           <field name="blood_employee_gender"/>
           <field name="employee_blood_group"/>
           <field name="blood_employee_phone"/>
           <field name="blood_employee_city"/>
           <group expand="0" string="Group By">
               <filter name="group_by_employee" string="Employee" context="{'group_by': 'blood_employee_id'}"/>
               <filter name="group_by_gender" string="Gender" context="{'group_by': 'blood_employee_gender'}"/>
               <filter name="group_by_blood_group" string="Blood Group"
                       context="{'group_by': 'employee_blood_group'}"/>
           </group>
           <searchpanel>
               <field name="blood_employee_id" string="Employee" icon="fa-users"/>
               <field name="blood_employee_gender" string="Gender" icon="fa-mars"/>
               <field name="employee_blood_group" string="Blood Group" icon="fa-heart"/>
           </searchpanel>
       </search>
   </field>
</record>
And search panel corresponding to this will occur in our module.
In kanban view
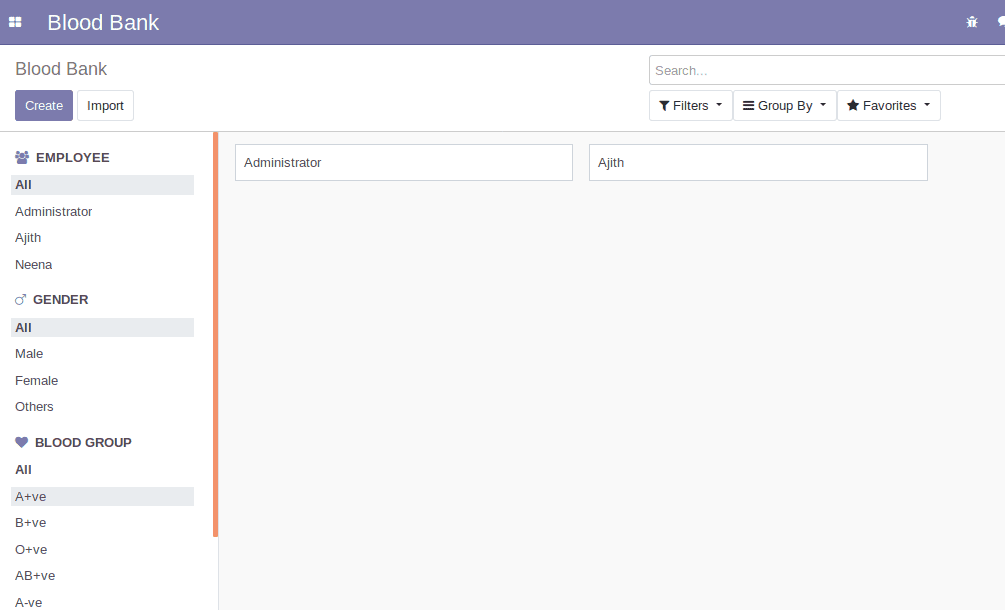
In tree view
