Odoo provides different view types and each view type has its own format. And these views can be customized with our additional view types. Any of the views such as the kanban, form, tree, etc can be customized like this to add additional features.
Learn how to customize an existing view type in Odoo15. For example, you can use this method if you want to customize or extend the Form view type with some additional features.
You can use the example of the sale module itself to elaborate on the method. The image below shows a basic form view. It can be expanded by adding a form to the form view. View type JS can be divided into four categories: view, controller, renderer, and model.

For customizing this form view, we want to override the form renderer and also create a template for a particular view type and add this view type to the sale order form.
1. Defining js class and overriding the form renderer
By customizing the view type we need to register properties to the widget, override the form renderer and the component can be mounted with it.
odoo.define("blog_topic2.PartnerOrderSummary", function (require) {
const FormRenderer = require("web.FormRenderer");
const { Component } = owl;
const { ComponentWrapper } = require("web.OwlCompatibility");
const { useState } = owl;

class CustomerOrderSummary extends Component {
partner = useState({});
constructor(self, partner) {
super();
this.partner = partner;
}
//
};
/**
* Register properties to our widget.
*/
Object.assign(CustomerOrderSummary, {
template: "blog_topic2.CustomerOrderSummary"
});
/**
* Override the form renderer so that we can mount the component on render
* to any div with the class o_partner_order_summary.
*/
FormRenderer.include({
async _renderView() {
await this._super(...arguments);
for(const element of this.el.querySelectorAll(".o_partner_order_summary")) {
this._rpc({
model: "res.partner",
method: "read",
args: [[this.state.data.partner_id.res_id]]
}).then(data => {
(new ComponentWrapper(
this,
CustomerOrderSummary,
useState(data[0])
)).mount(element);
});
}
}
});
});
2. Creating the widget and template
The template is to create what we need to customize in the sale view, that is defined in the template, here I am taking each partner with their name and address and the image of that particular partner. Also, the information that the total order and total invoiced amount.
<?xml version="1.0" encoding="UTF-8"?>
<templates xml:space="preserve">
    <t t-name="blog_topic2.CustomerOrderSummary
" owl="1">
        <div class="center"
            style="width: 100%; text-align: center; border: 1px solid #cecece; padding: 2rem 20%; margin: 12px 0;">
            <img t-attf-src="data:image/jpg;base64,{{partner.image_256}}" width="75px" height="75px"
                style="background-color: #ccc; border-radius: 50%; margin-bottom: 10px;" />
            <!-- Customer name -->
            <p style="font-size: 16px; color: #4d4b4b;"><strong t-esc="partner.name" /></p>
            <!-- Address -->
            <p style="font-size: 12px; color: #8c8787;">
                <i class="fa fa-map-marker" style="padding-right: 4px;" />
                <span t-esc="partner.city" />
                <span t-esc="partner.zip" style="margin-left: 5px;" />
            </p>
            <!-- Grid of previous order stats -->
            <div class="row" style="padding-top: 20px;">
                <div class="col-6" style="border-right: 1px solid #ccc;">
                    <p style="font-size: 20px;">
                        <strong t-esc="partner.sale_order_count" />
                    </p>
                    <p style="font-size: 12px; color: #8c8787;">Orders</p>
                </div>
                <div class="col-6">
                    <p style="font-size: 20px;">
                        <strong t-esc="partner.total_invoiced" t-options='{"widget": "monetary"}' />
                    </p>
                    <p style="font-size: 12px; color: #8c8787;">Total Invoiced</p>
                </div>
            </div>
        </div>
    </t>
</templates>
3. Adding the template in the sale order view
And this is the step in adding our customization to the sale. We can add the view in the sale view type.
<?xml version="1.0" encoding="utf-8"?>
<odoo>
    <record id="sale_order_form_inherit" model="ir.ui.view">
        <field name="name">sale.order.form.inherit</field>
        <field name="model">sale.order</field>
        <field name="inherit_id" ref="sale.view_order_form" />
        <field name="arch" type="xml">
            <field name="payment_term_id" position="after">
                <div class="o_partner_order_summary" colspan="2" />
            </field>
        </field>
    </record>
</odoo>
And the sale form view looks like this:
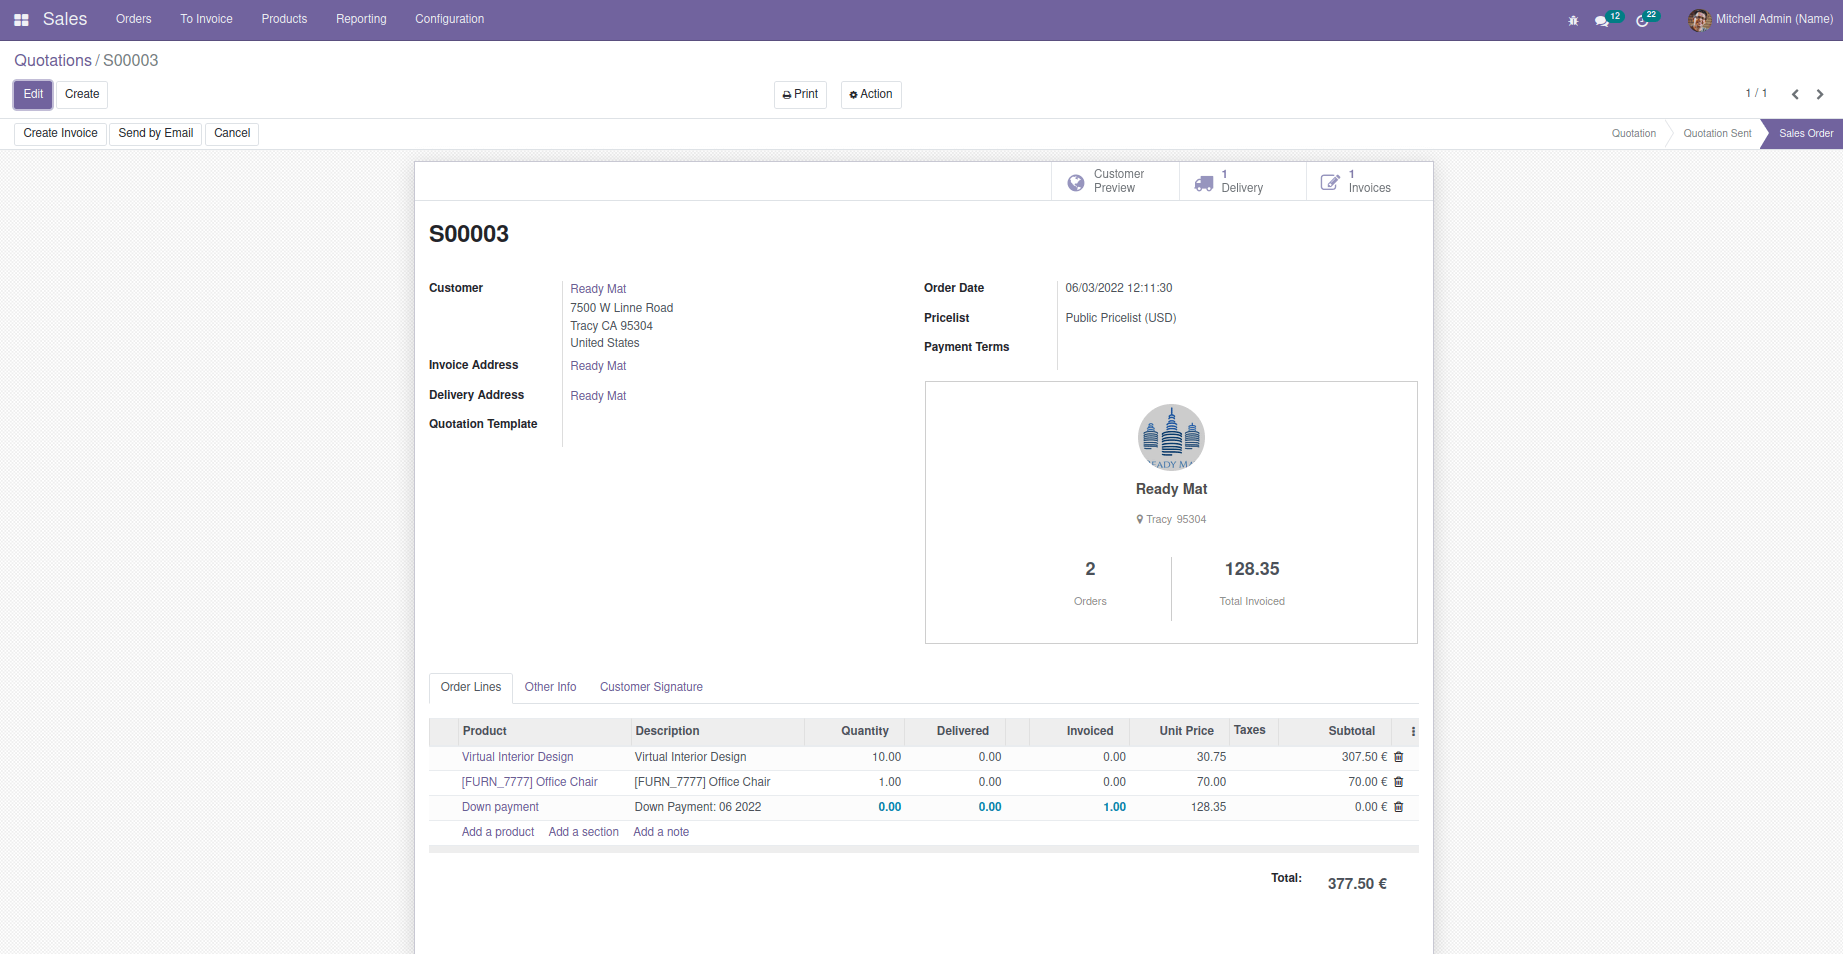
In this example, we extended the form view and added another form view-like structure inside the form view, and added the corresponding details we want. In a similar way, we can extend the tree, kanban view, etc. In the same way, we can customize the chatter in the kanban view for the customers. To know more, Refer to the blog link: Customizing An Existing View Types in Odoo 14