Odoo 19 Live Chat enables companies to interact with visitors on their website instantly. It can be used to answer customer questions, provide support, qualify leads, and direct visitors to the appropriate team.
Live Chat channels can be configured with specific agents so that only selected users handle conversations for a particular team or purpose. Odoo offers pre-written replies – canned responses – enabling agents to efficiently send commonly used messages. Once a conversation concludes, customers have the opportunity to assess the support they received and share further insights.
In this blog, we will look at how to create a Live Chat channel, add and restrict agents to channels, use canned responses, and collect customer ratings for Live Chat agents.
Creating a Live Chat Channel in Odoo 19
Before using Live Chat, make sure the Live Chat application is installed. Odoo can also enable Live Chat through the Website or Helpdesk applications.

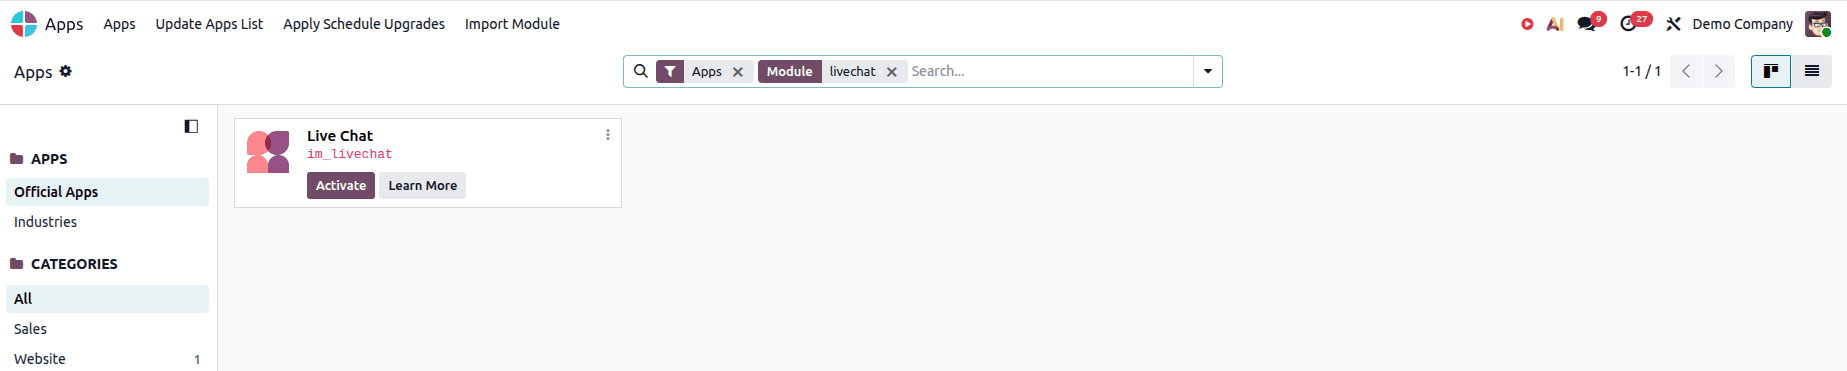
Once Live Chat is installed, Odoo creates a Live Chat channel by default.
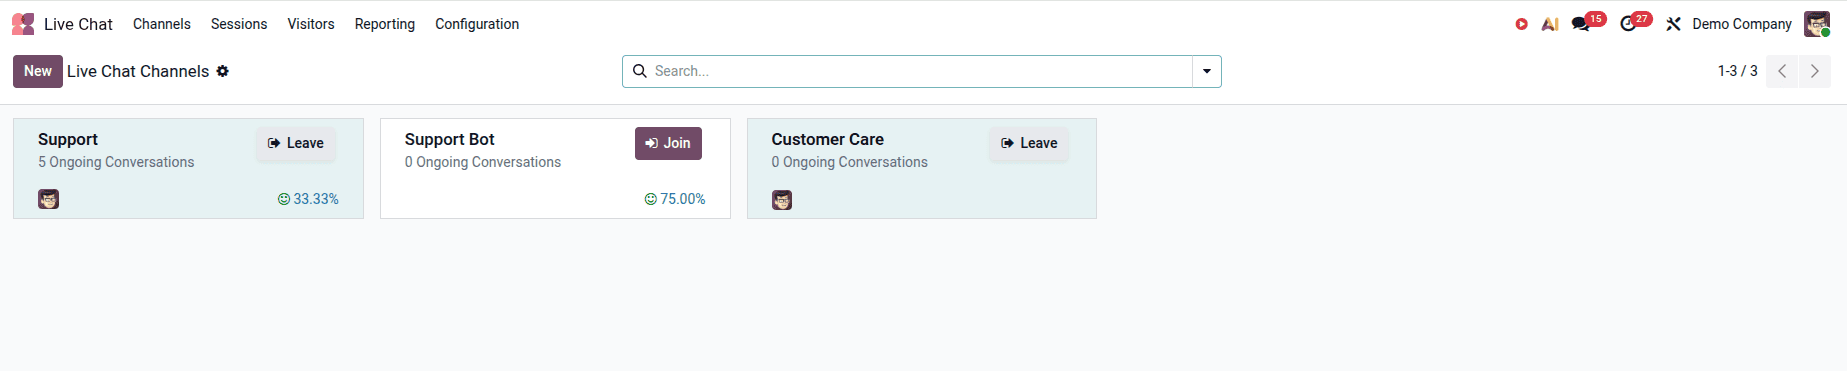
Additional channels can be created when different teams or types of customer support need to be handled separately.
To set up a new live chat channel, follow these steps.
Step 1: Open the Live chat Channels
Go to Live Chat > Channels
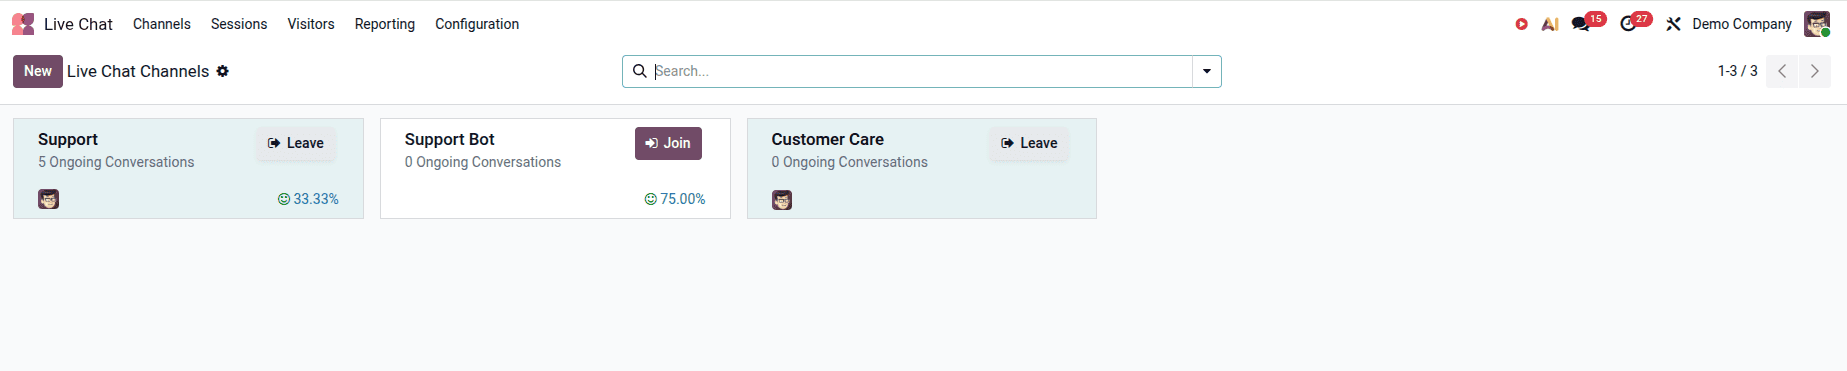
To set up a new Live Chat channel, click New.
Step 2: Enter the name for the channel.
Type an appropriate name for the channel into the Channel Name field.
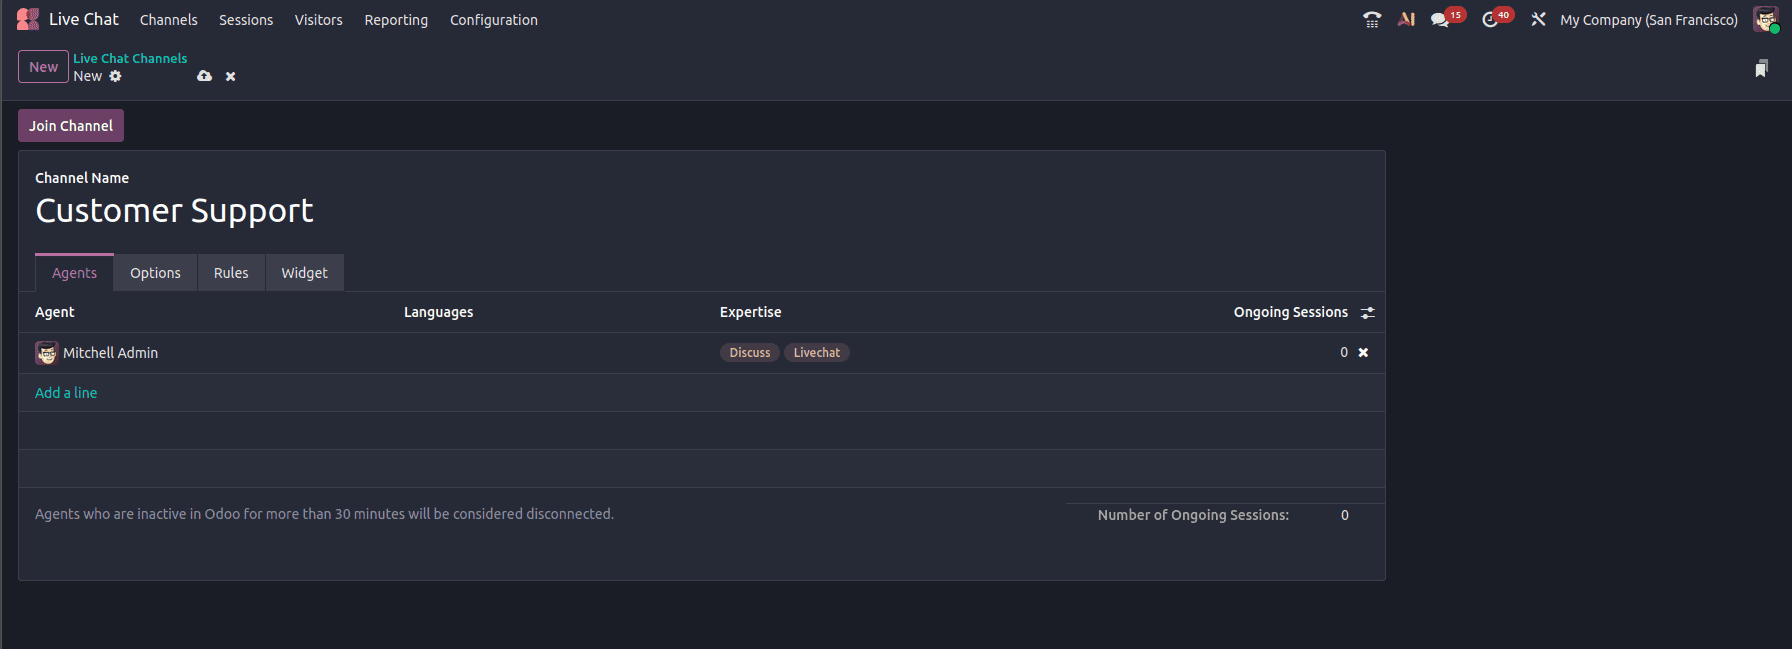
The channel name helps identify the purpose of the channel and the team responsible for handling conversations.
Step 3: Configure the Channel
After entering the channel name, the channel form provides different tabs for configuration, including:
- Agents
- Options
- Rules
- Widget
The Agents tab is used to control which users can handle conversations for the channel.
The Options tab enables you to adjust the look and functionality of the Live Chat button and the chat window.
Channel Rules can be used to determine when and where the Live Chat window is displayed on the website.
The Widget tab provides the code required to add the Live Chat widget to an external website.
Adding Agents to a Live Chat Channel
Agents are individuals who handle live chat enquiries from customers and website visitors. Once a user is designated as an agent for a channel, they are able to engage in conversations with visitors utilizing that channel.
Step 1: Open the Agents Tab
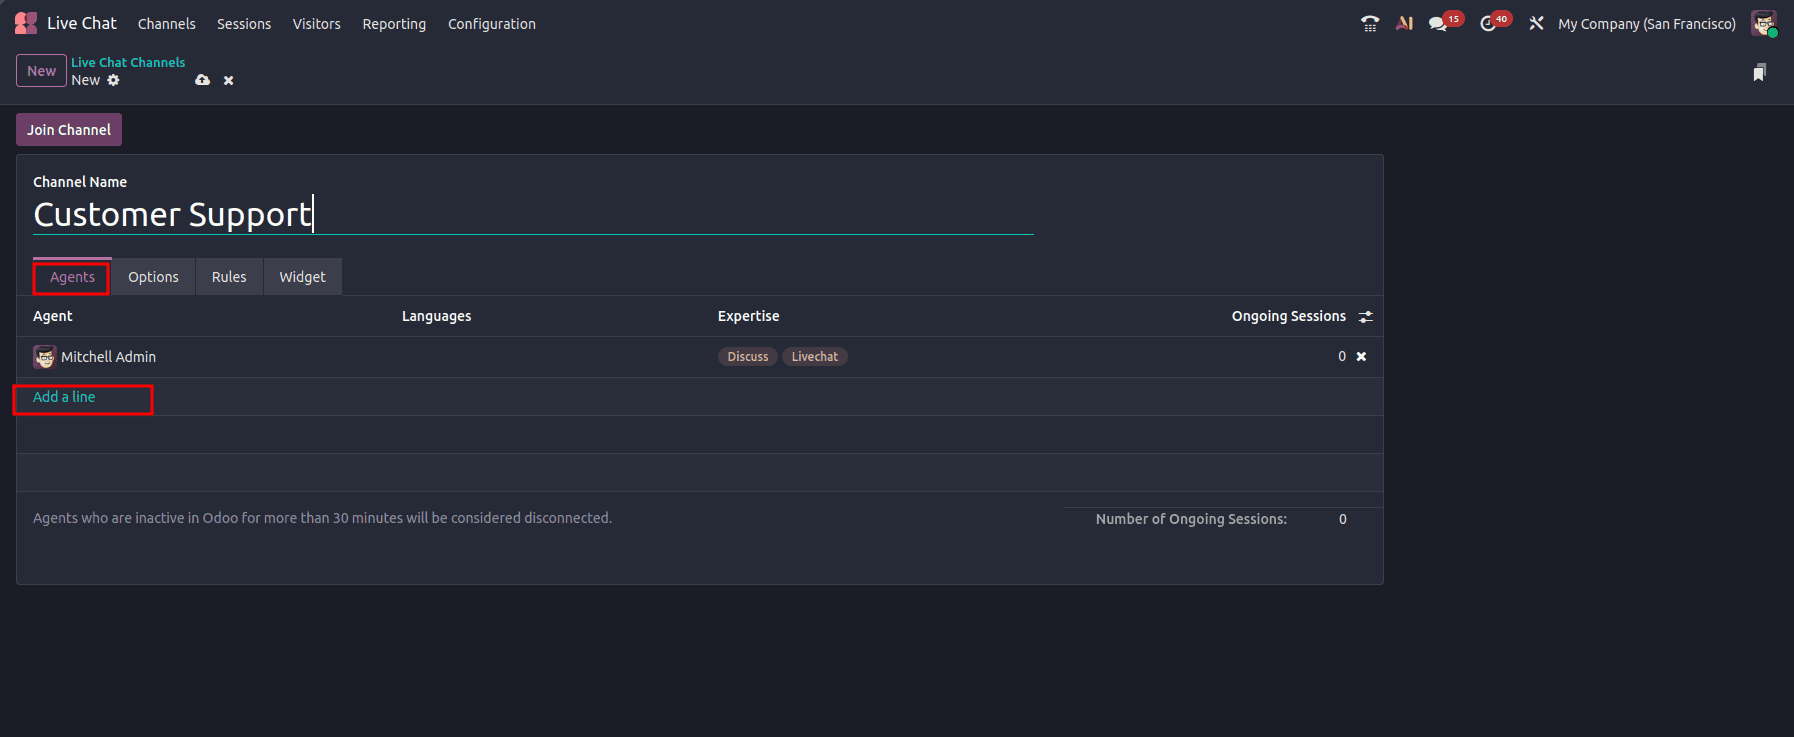
Open the Live Chat channel and go to the Agents tab.
By default, the user who initially established the Live Chat channel is included as an agent.
Step 2: Add agents
Click Add in the agents section.
A list of available users is displayed.
Search for the required user or select users from the list.
Choose the users you wish to include and then click on Select.
The selected users are then added as agents for that Live Chat channel.
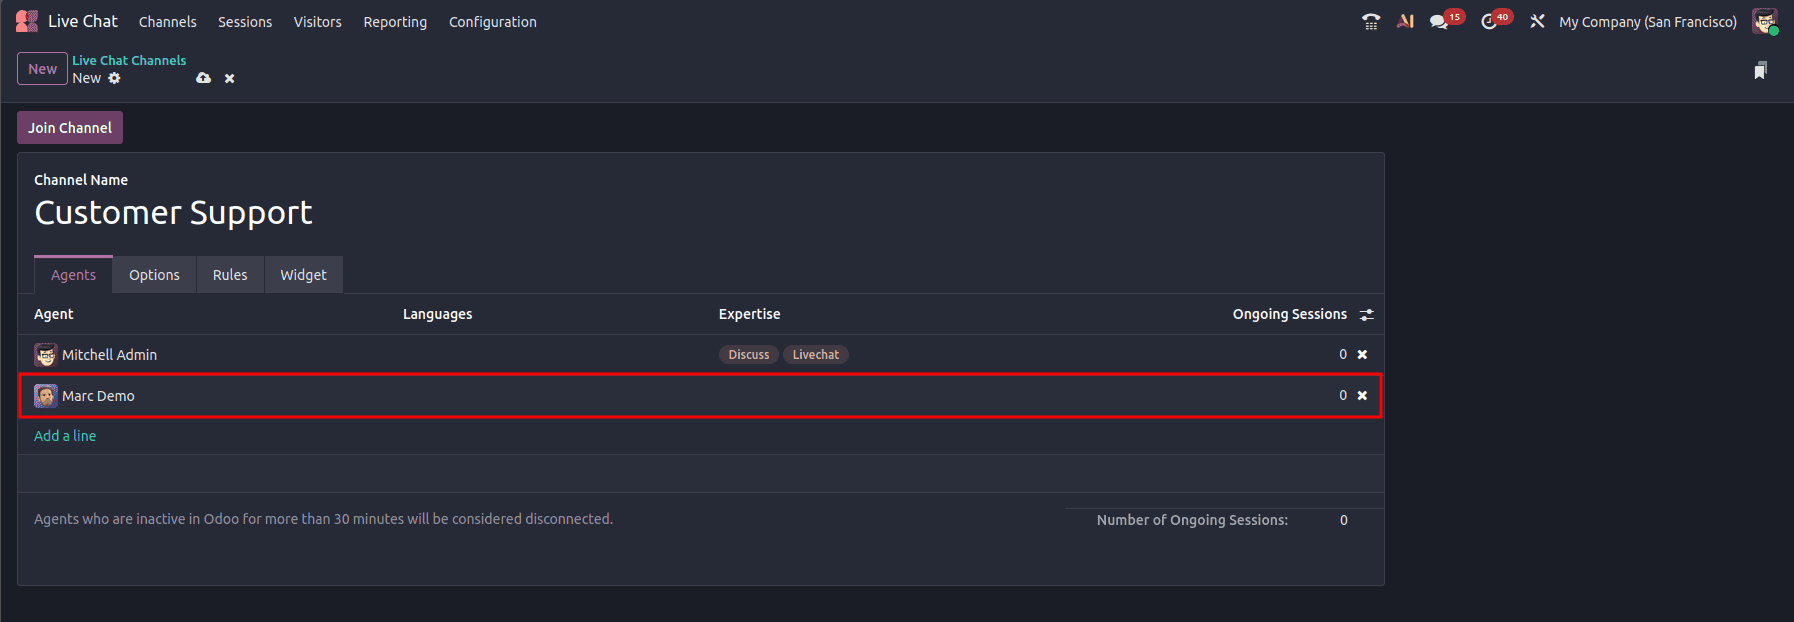
- Agent: Shows the agent name
- Languages: Shows the languages configured/associated with the channel or its members.
- Expertise: Indicates the types of support/expertise of the agent.
- Ongoing Sessions: Shows the number of currently active/ongoing live-chat sessions for that agent.
Other Tabs:
Options Tab: It controls the appearance and behaviour of the chat button and chat window, plus session limits.
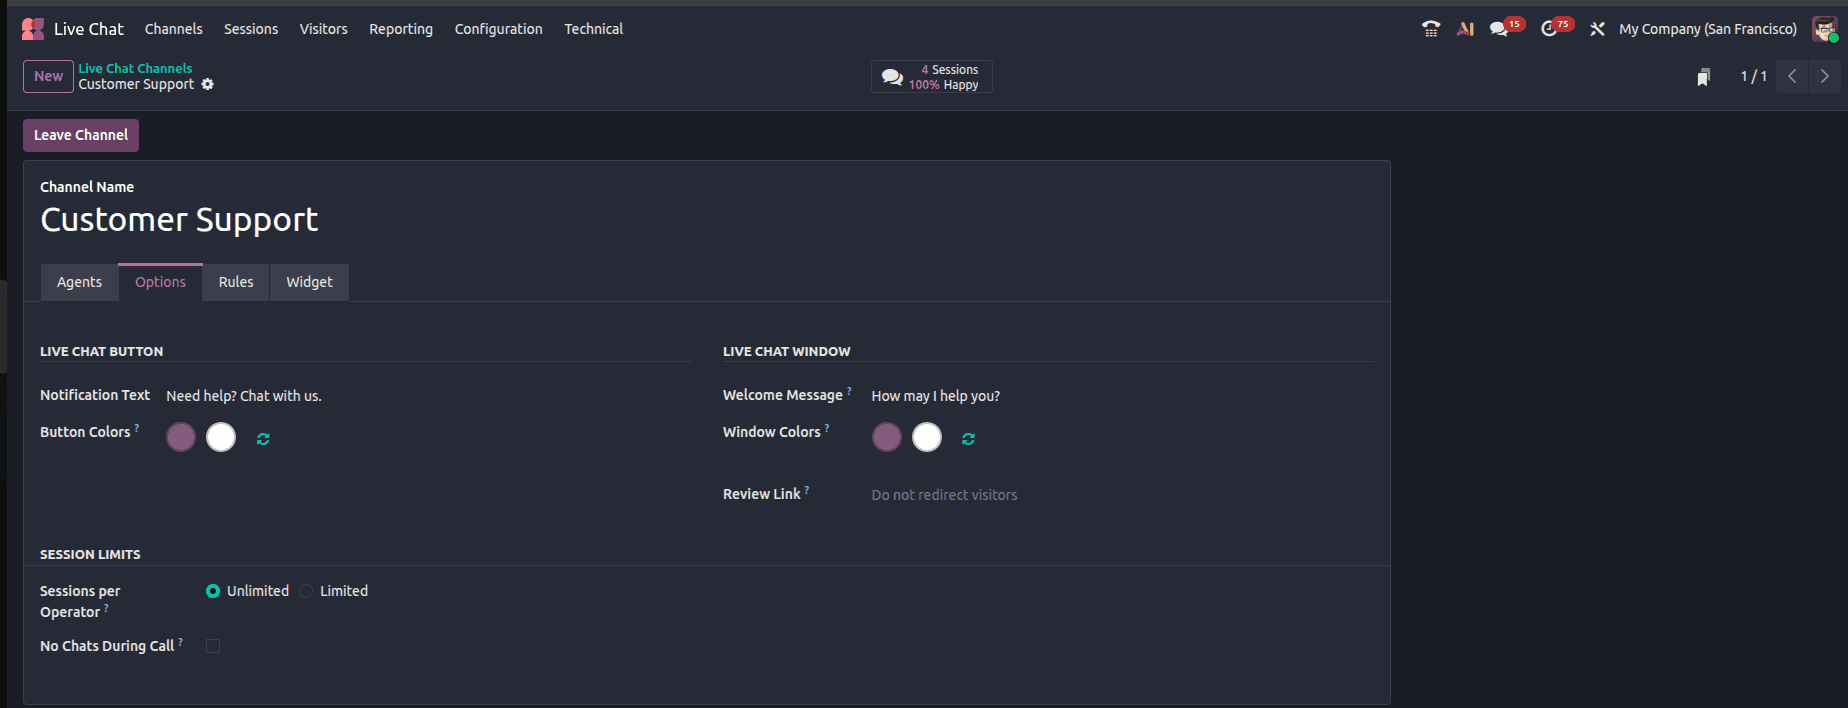
- Notification Text – Text displayed around the Live Chat button. The text can be enabled via the Rules Tab – 'Live chat button’ configuration.

- Button Colors – Defines the colors of the website Live Chat button.
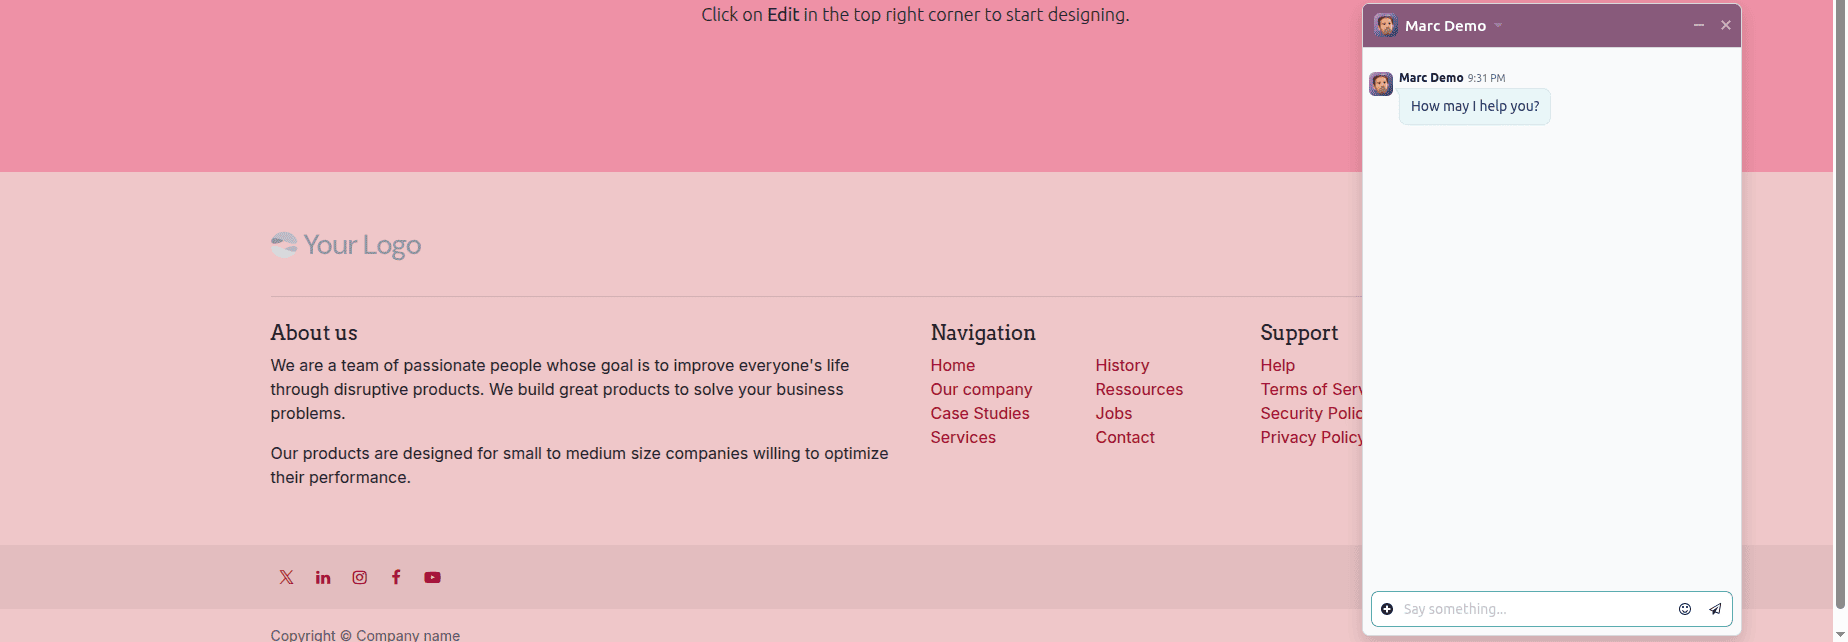
- Welcome Message – First message displayed when the Live Chat window opens.
- Window Colors – Defines the colors of the Live Chat window.
- Review Link – Defines where visitors are directed for the review/rating process.
- Sessions per Operator > Unlimited – Allows an operator to handle an unlimited number of concurrent chats.
- Sessions per Operator > Limited – Sets a maximum number of concurrent chats that an operator can handle.
- No Chats During Call – Prevents new Live Chat sessions from being assigned to an operator while they are on a phone call.
Rules Tab:
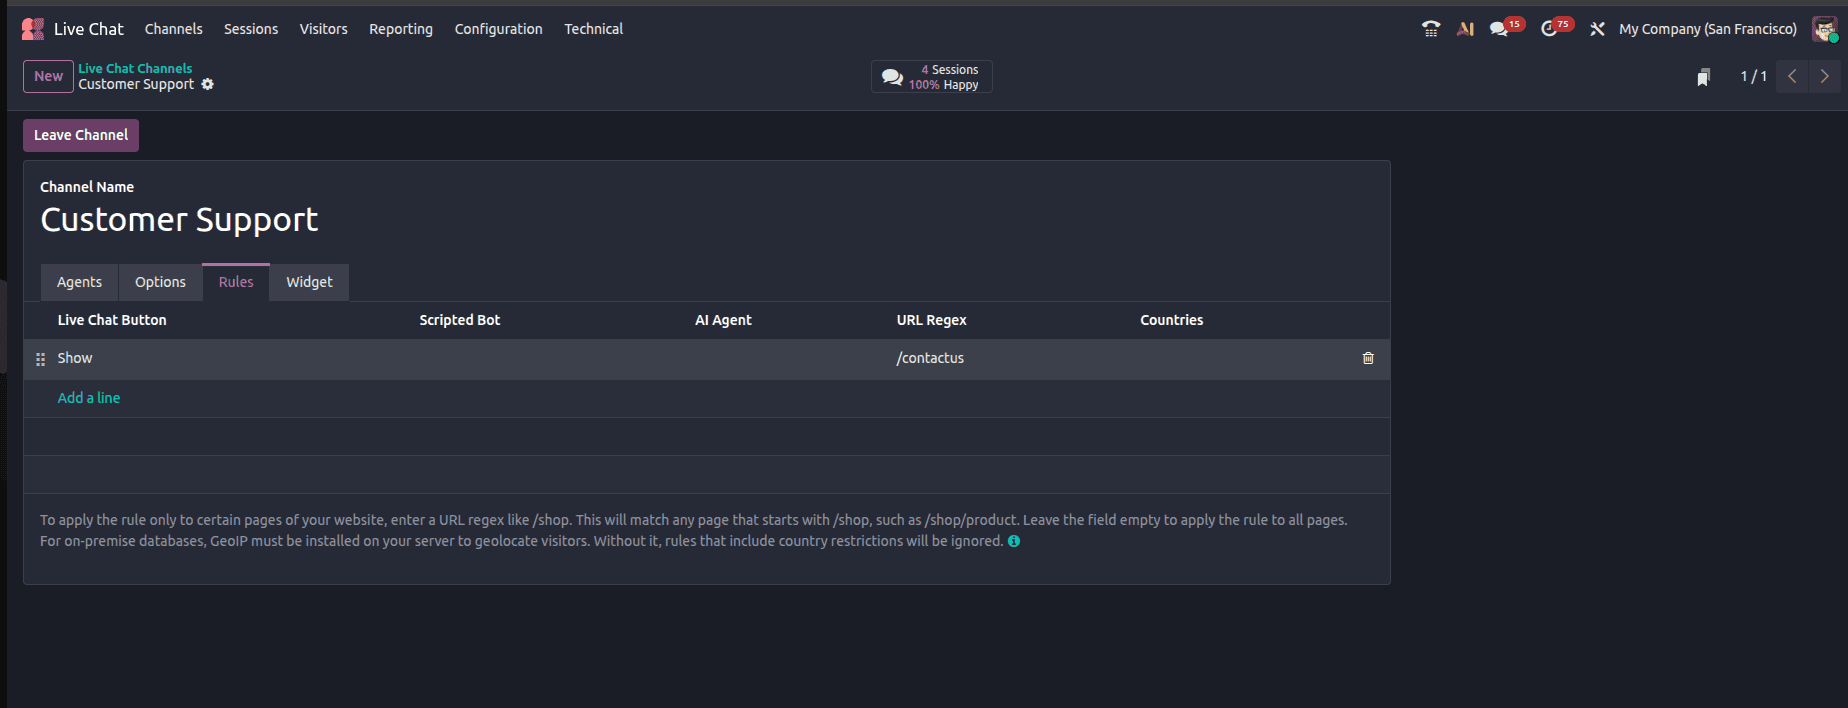
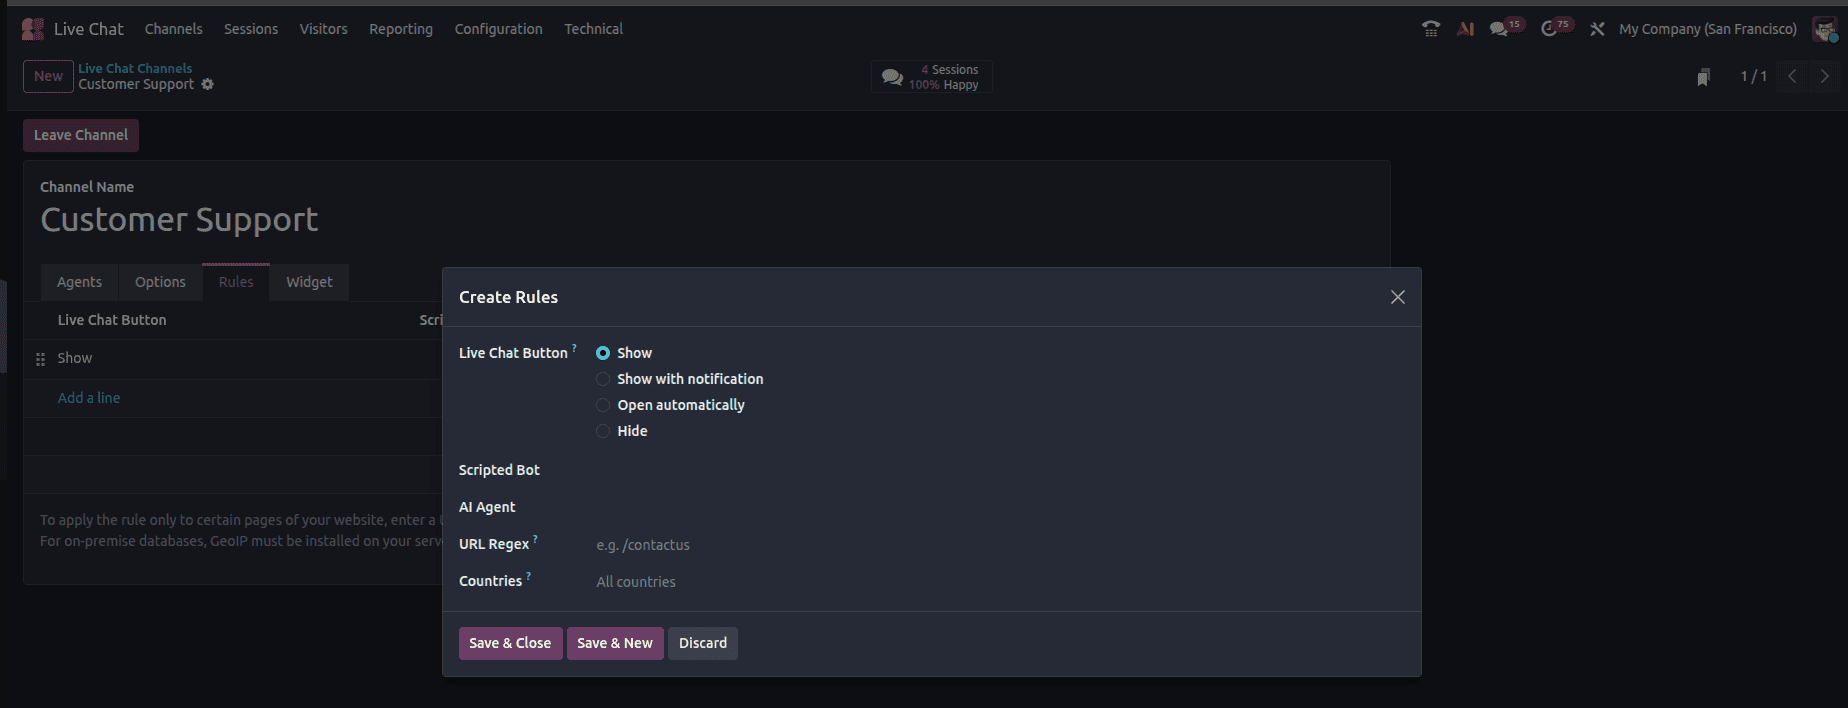
Live Chat Button
- Show – Displays the Live Chat button on the selected website pages.
- Show with notification – Shows the Live Chat button along with a notification message.
- Open automatically – Automatically opens the Live Chat window for the visitor.
- Hide – Hides the Live Chat button on the selected website pages.
Scripted Bot - Selects a predefined chatbot to interact with visitors automatically.
AI Agent - Selects an AI Agent to handle conversations with visitors automatically.
URL Regex
- URL Regex – Specifies the website pages where the rule applies.
- Example: /contactus – Applies the rule to the Contact Us page.
- Empty – Applies the rule to all website pages.
Countries
- Countries – Restricts the rule to visitors from selected countries.
- All countries – Applies the rule to visitors from all countries.
Step 3: Save the Channel
After adding the required agents, save the channel.
The selected agents can now receive Live Chat requests from visitors using that channel.
Restricting Agents to Specific Channels
A business may have different teams handling different types of customer requests. For example, the Sales team may handle sales-related questions while the Support team handles technical issues.
Odoo allows agents to be assigned to specific Live Chat channels. This makes it possible to control which agents receive conversations from each channel.
Step 1: Open the Required Channel
Go to:
Live Chat > Channels
Open the channel that needs to be configured.
Step 2: Manage the Agents
Open the Agents tab.
Add only the users who should handle conversations for this channel.
Existing agents can also be removed by opening their agent record and clicking Remove.
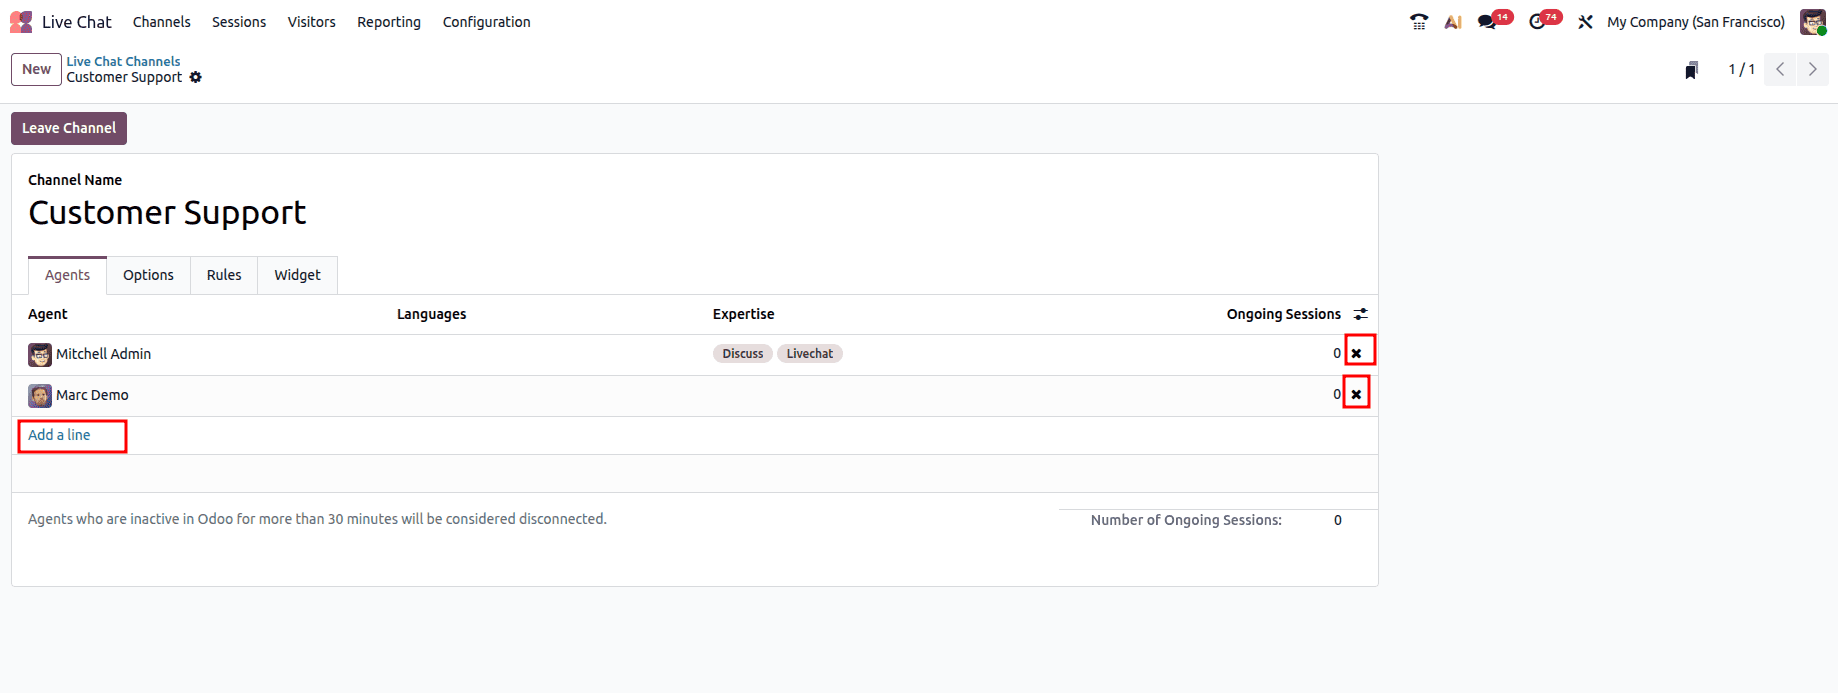
This enables various teams of agents to manage distinct categories of customer interactions.
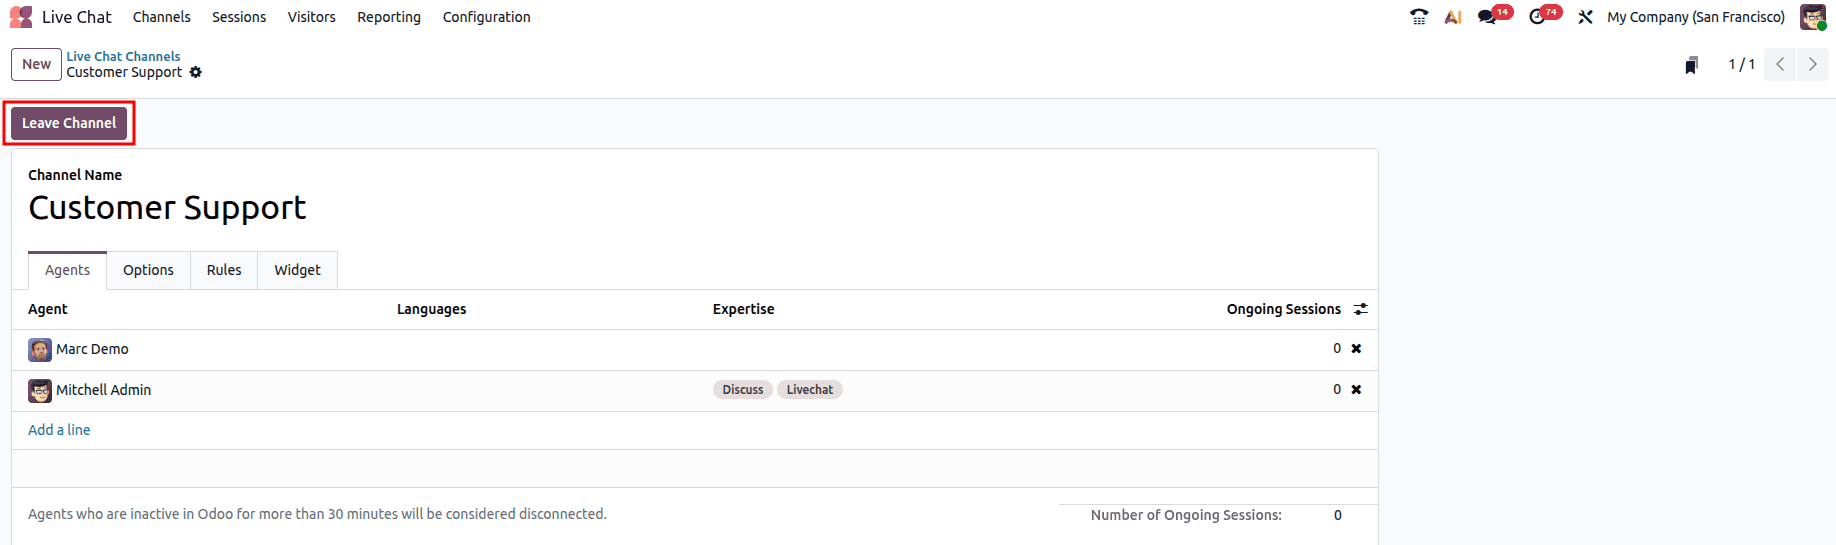
Agents can enter or exit a channel via the Live Chat Channels dashboard. When an agent joins a channel, they become active for that channel and can receive conversations. Any agent who stays inactive in Odoo for over thirty minutes is regarded as disconnected and gets removed from the channel.
Using Canned Responses in Odoo 19
Canned responses are predefined messages that agents can insert into Live Chat conversations using shortcuts. They are useful for frequently asked questions and common customer responses.
For instance, rather than typing the same thing over and over:
"Thank you for contacting our support team. We will check this issue and get back to you shortly".
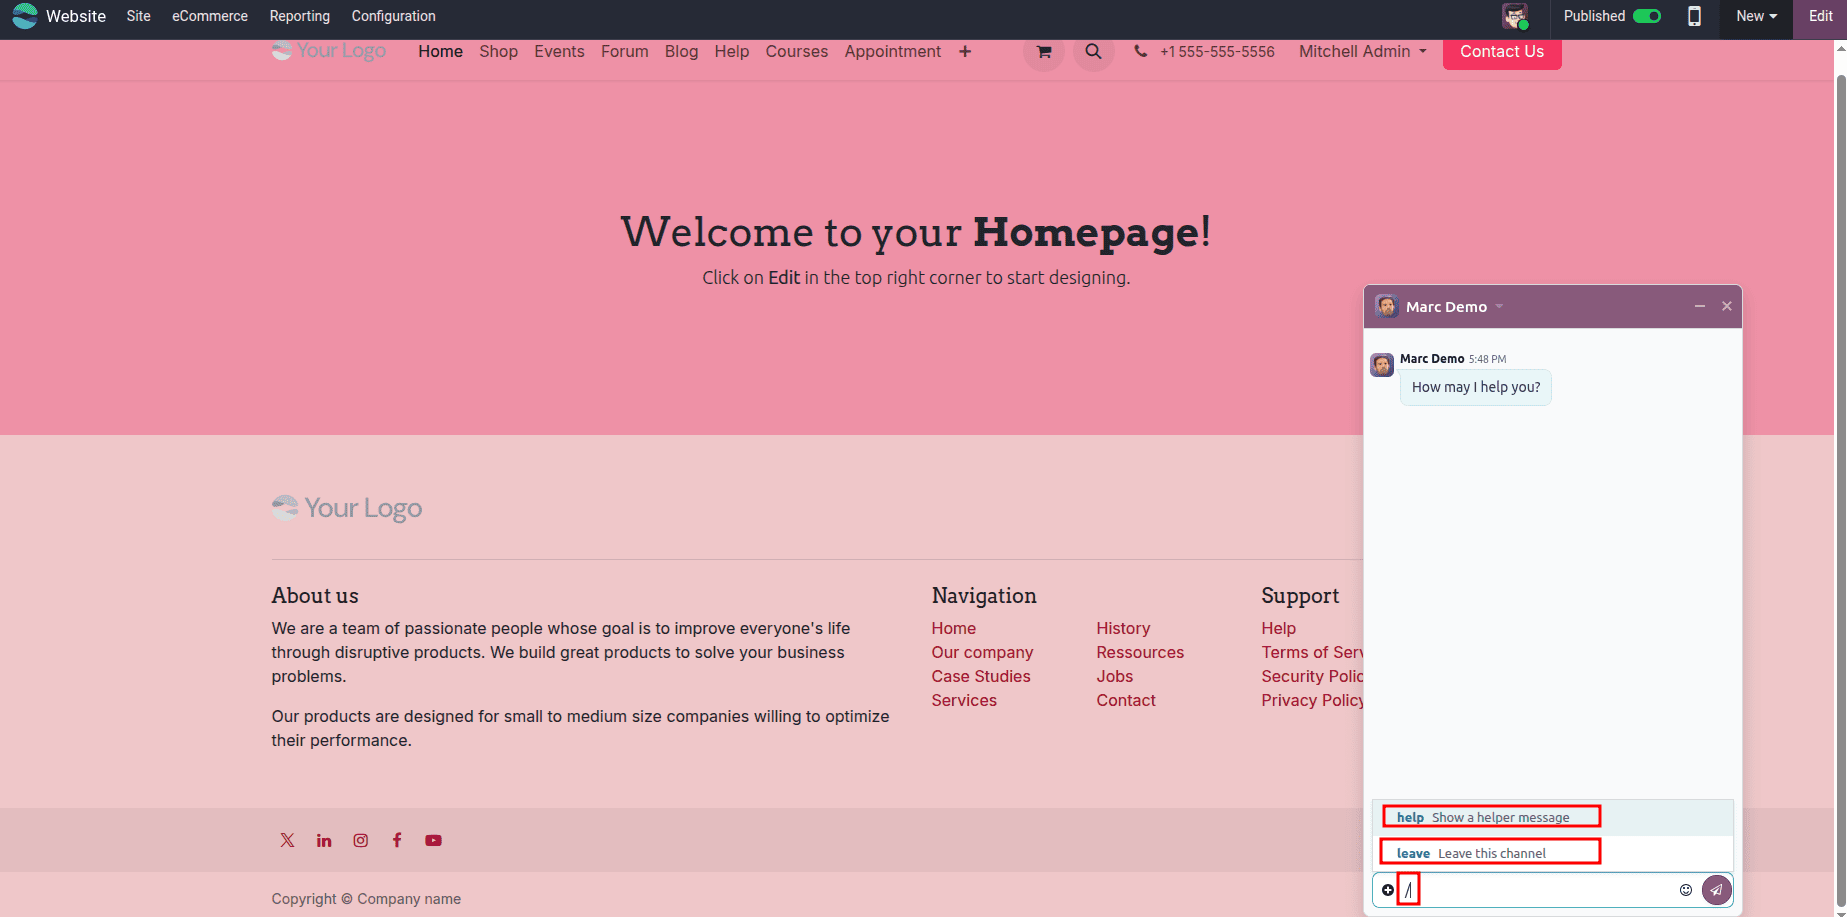
An agent can create a shortcut and insert the complete message when required.
Canned responses help agents save time and maintain consistency in customer communication.
Step 1: Open Canned Responses
Go to:
Live Chat > Configuration > Canned Responses

Step 2: Create a Canned Response
Enter a shortcut in the Shortcut field.
Then, enter the complete response in the Substitution field.
For example:
Shortcut:
Substitution:
Thank you for contacting our support team. How can we help you today?
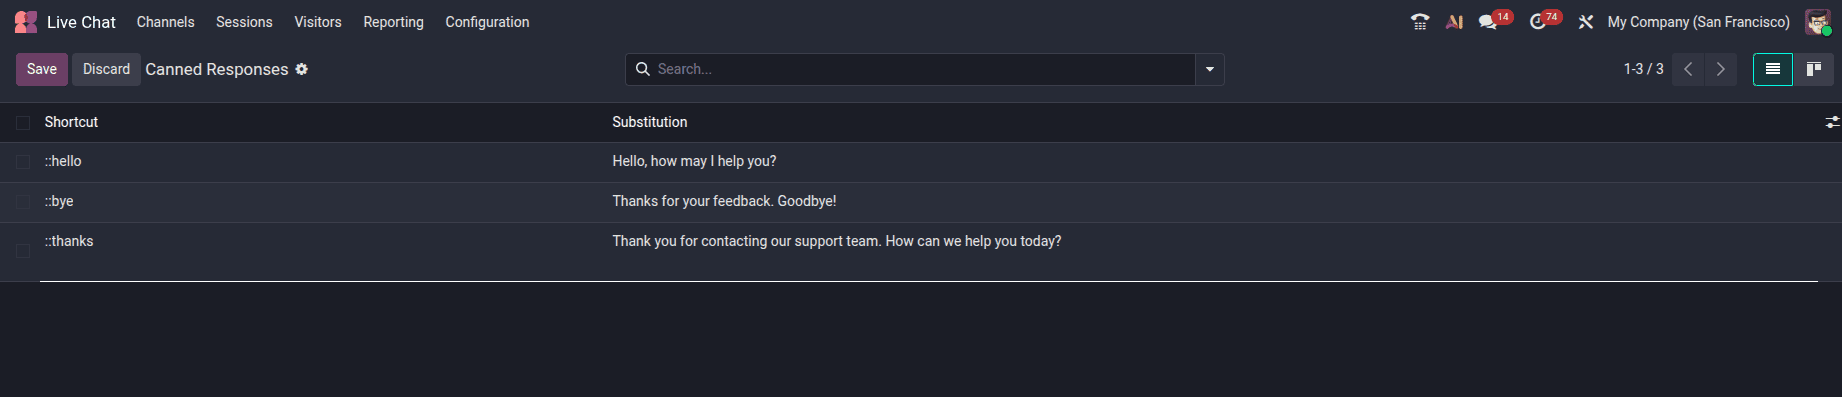
The shortcut should be easy for agents to remember and related to the response it represents.
Step 3: Set Authorized Groups
A newly created canned response can initially be used by the agent who created it.
To allow other agents to use the response, select the required groups in the Authorized Groups field.
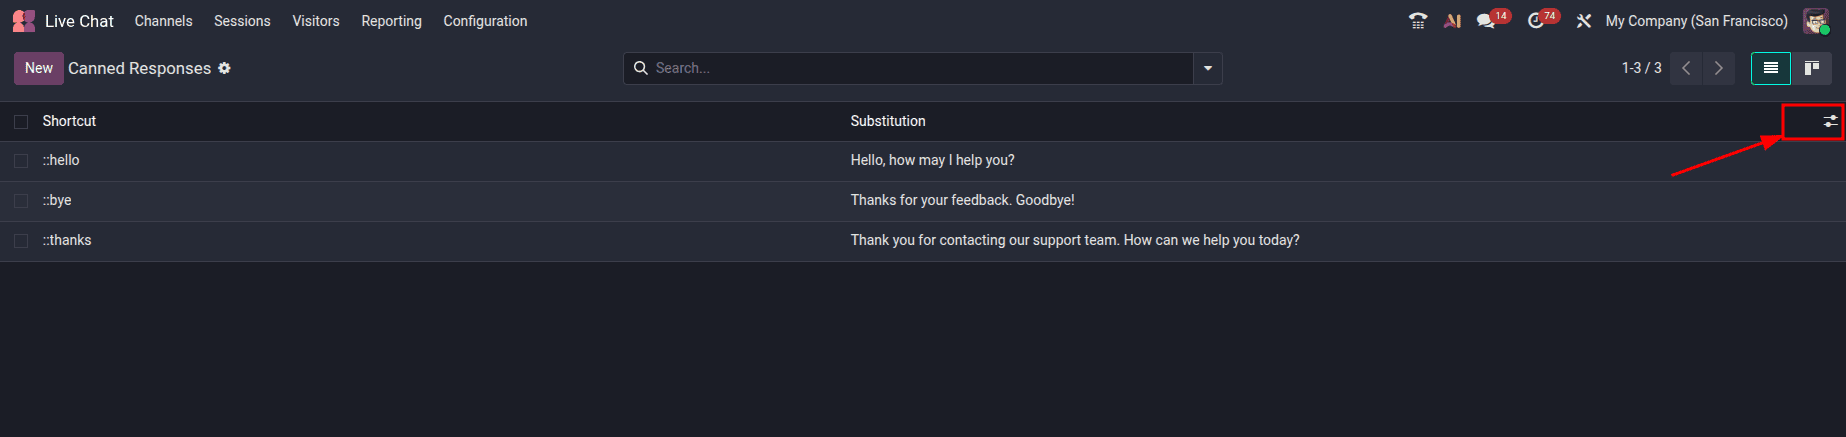
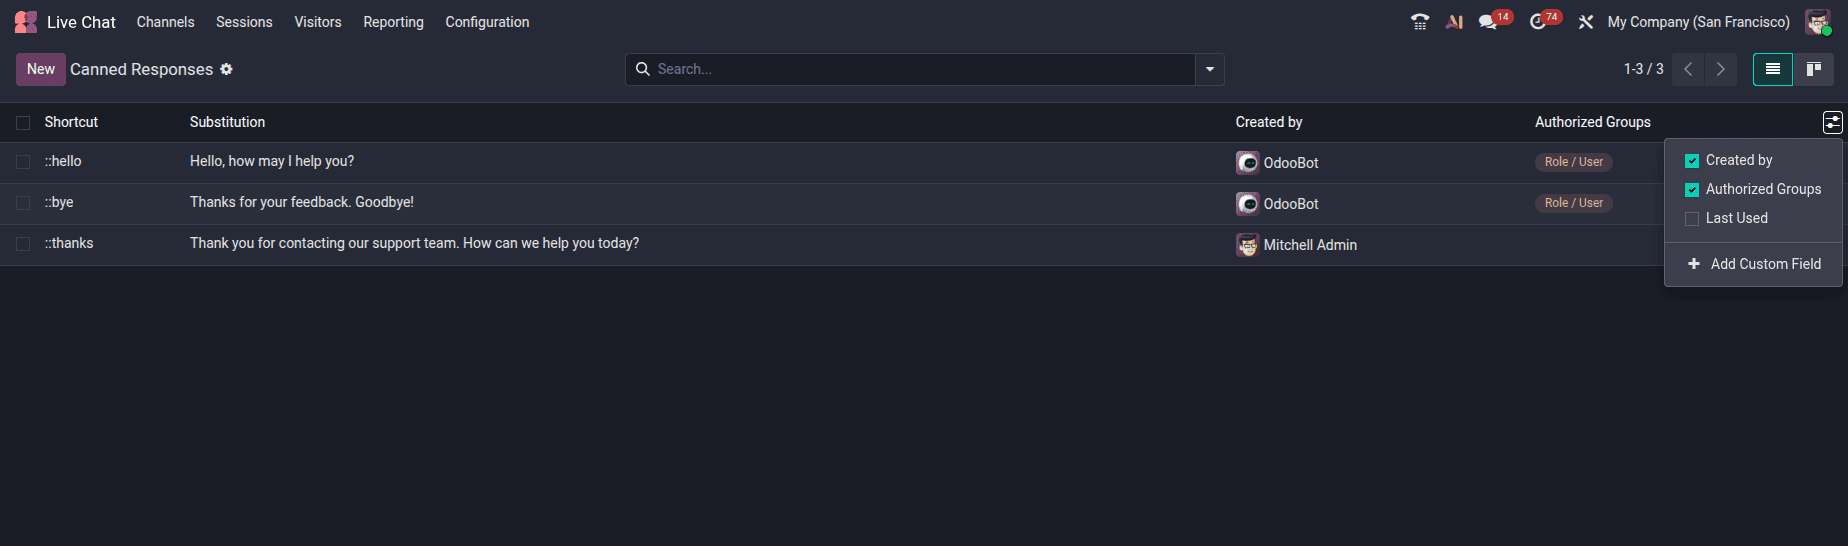
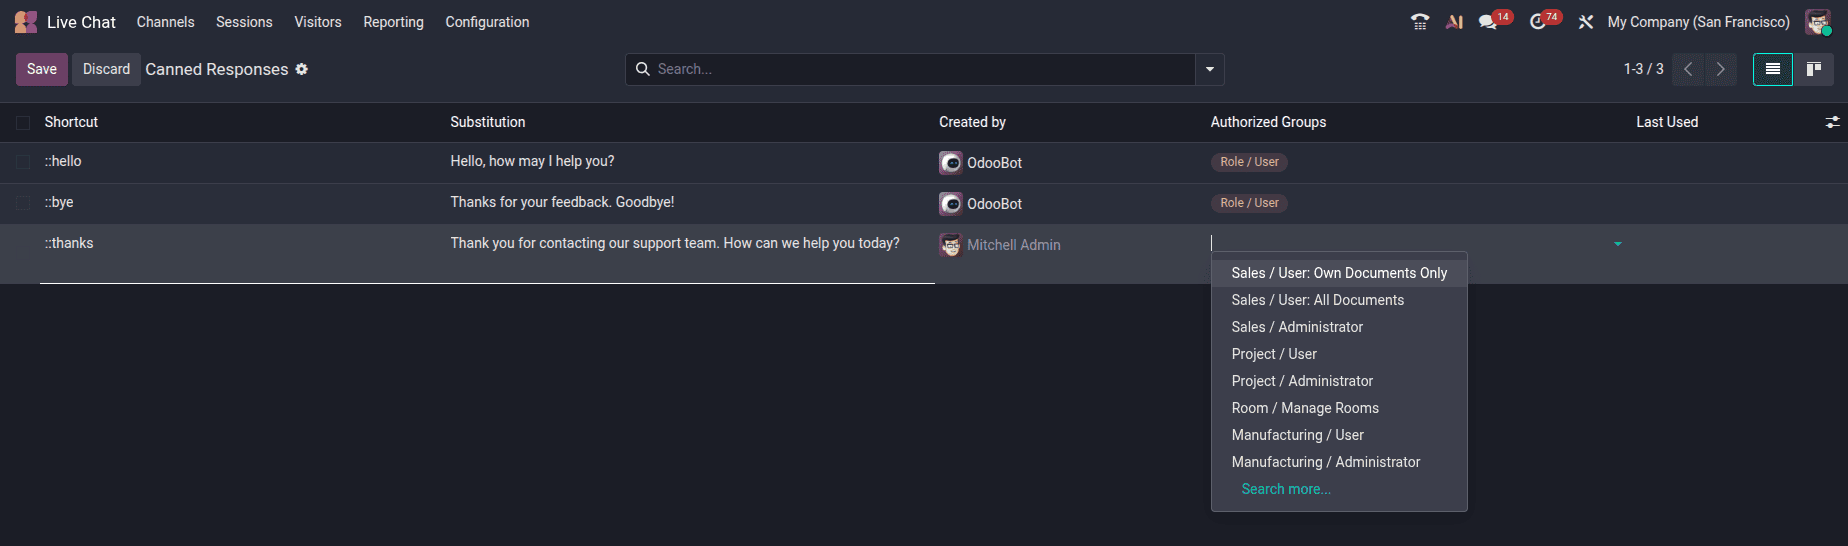
This allows businesses to control which groups of users can use specific canned responses.
Step 4: Use a Canned Response in a Chat
During a Live Chat conversation, click the plus icon in the message window and select Insert a Canned Response.
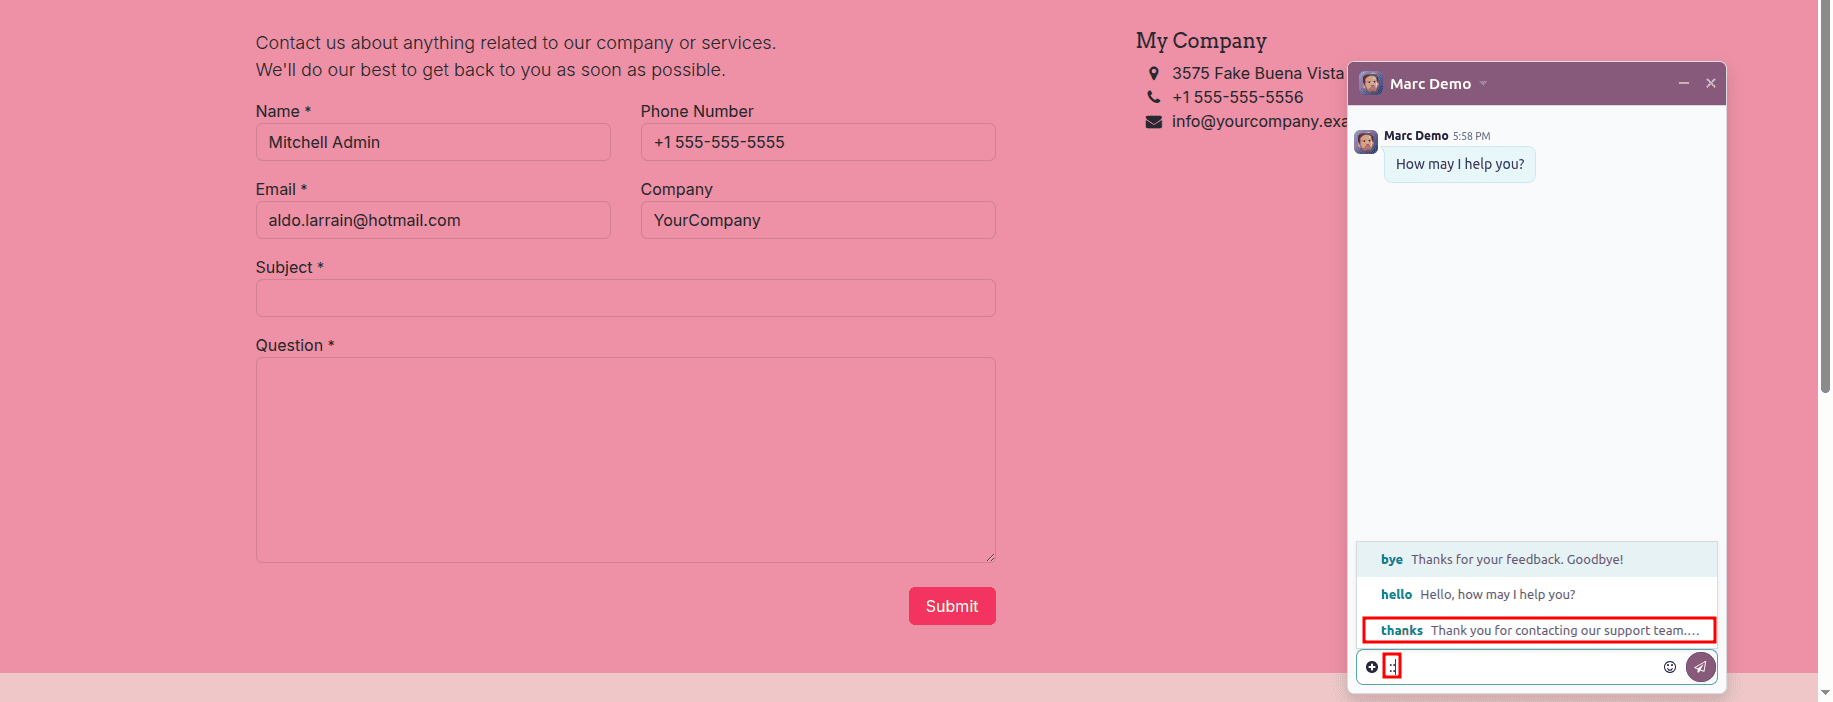
Select the required response from the list.
Agents can also enter the shortcut directly.
Typing: in the chat window displays the available canned responses, allowing the agent to select one quickly.
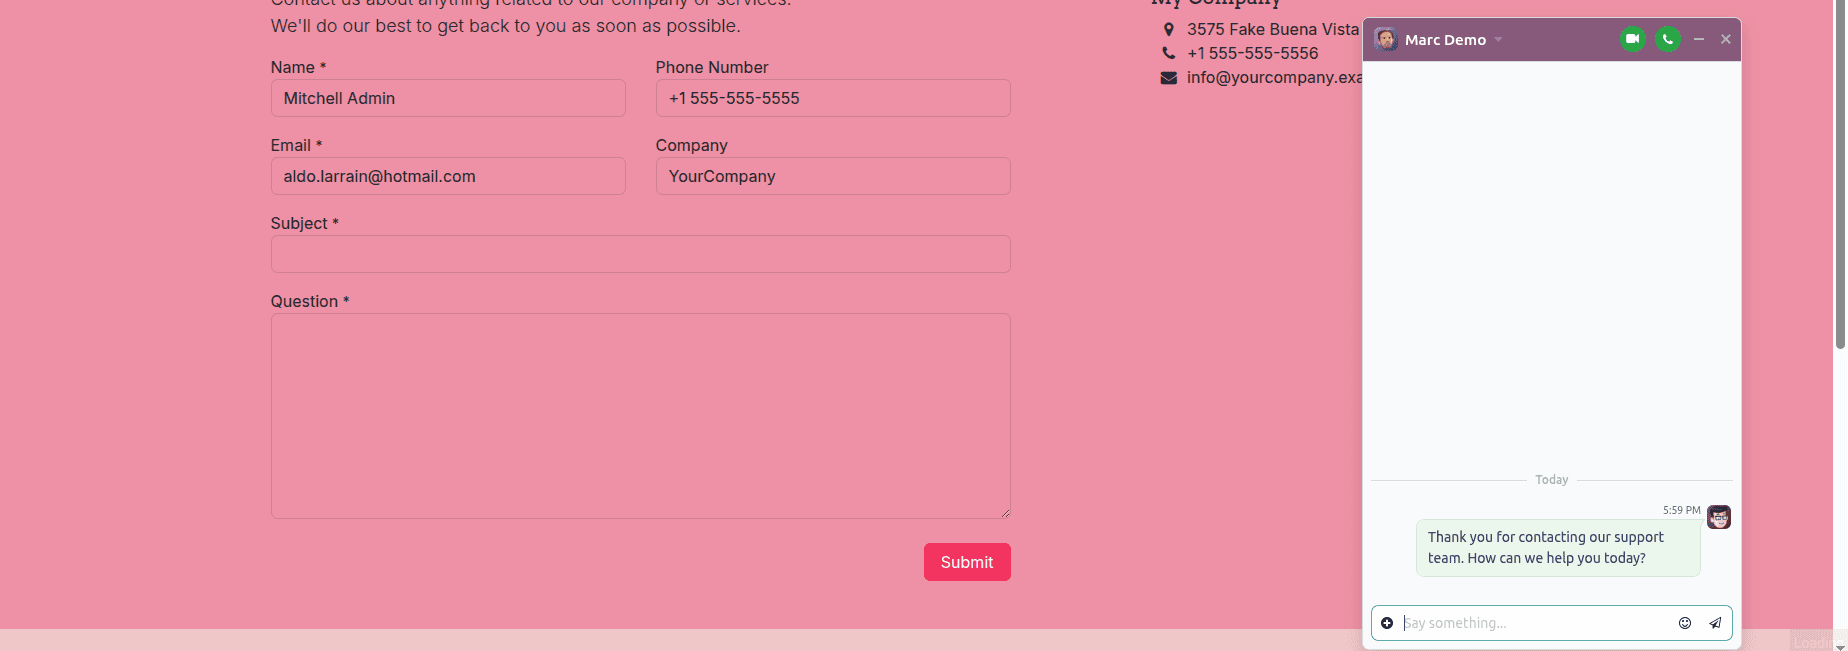
The selected canned response is inserted into the message window and can then be sent to the customer.
Rating the Reply from a Live Chat Agent
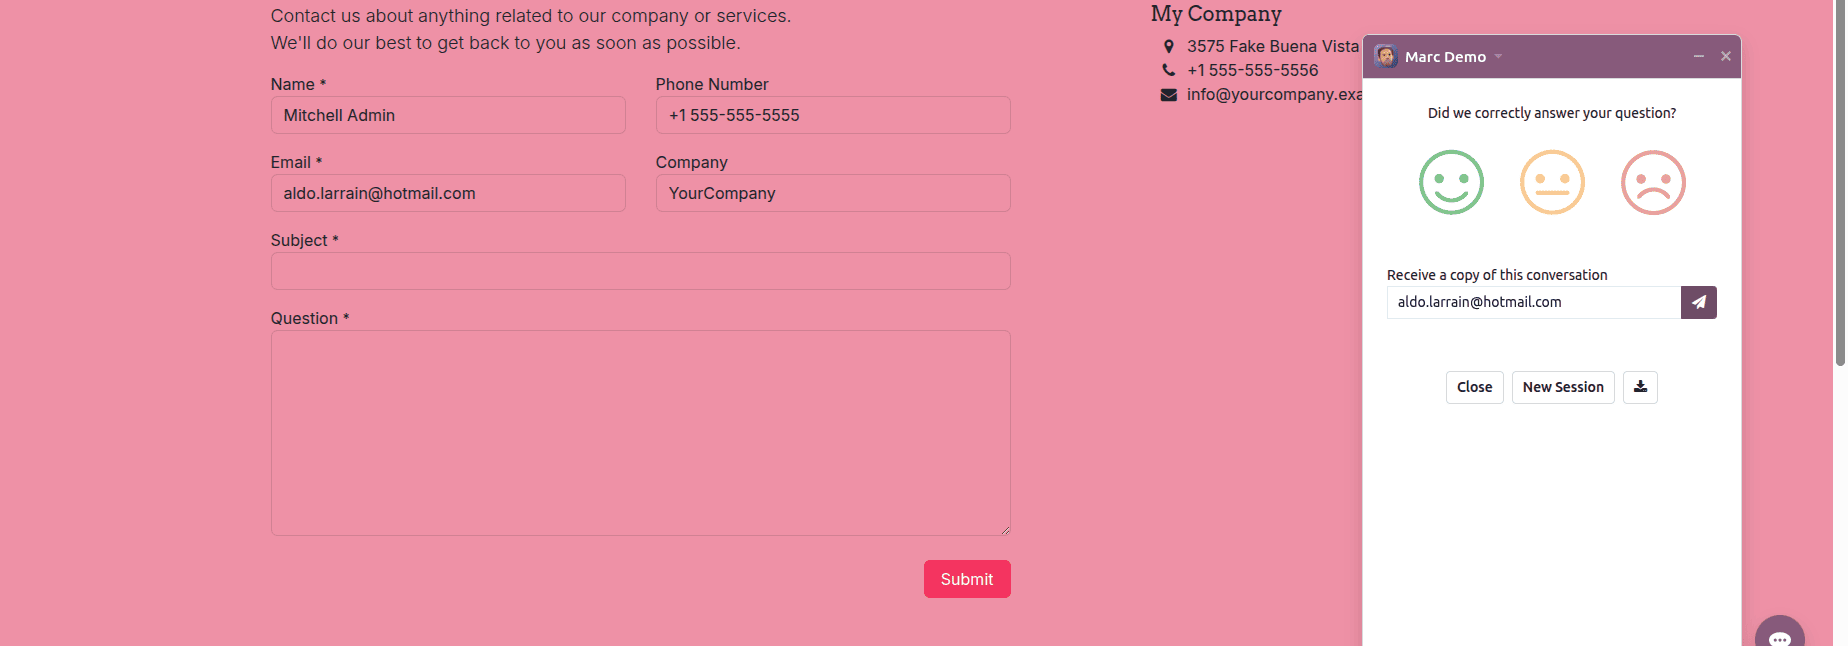
Odoo 19 allows customers to rate the support they receive after a Live Chat conversation ends. This gives agents immediate feedback about their performance and allows businesses to measure customer satisfaction.
Step 1: End the Live Chat Conversation
When the customer finishes the conversation, they can close the Live Chat window.
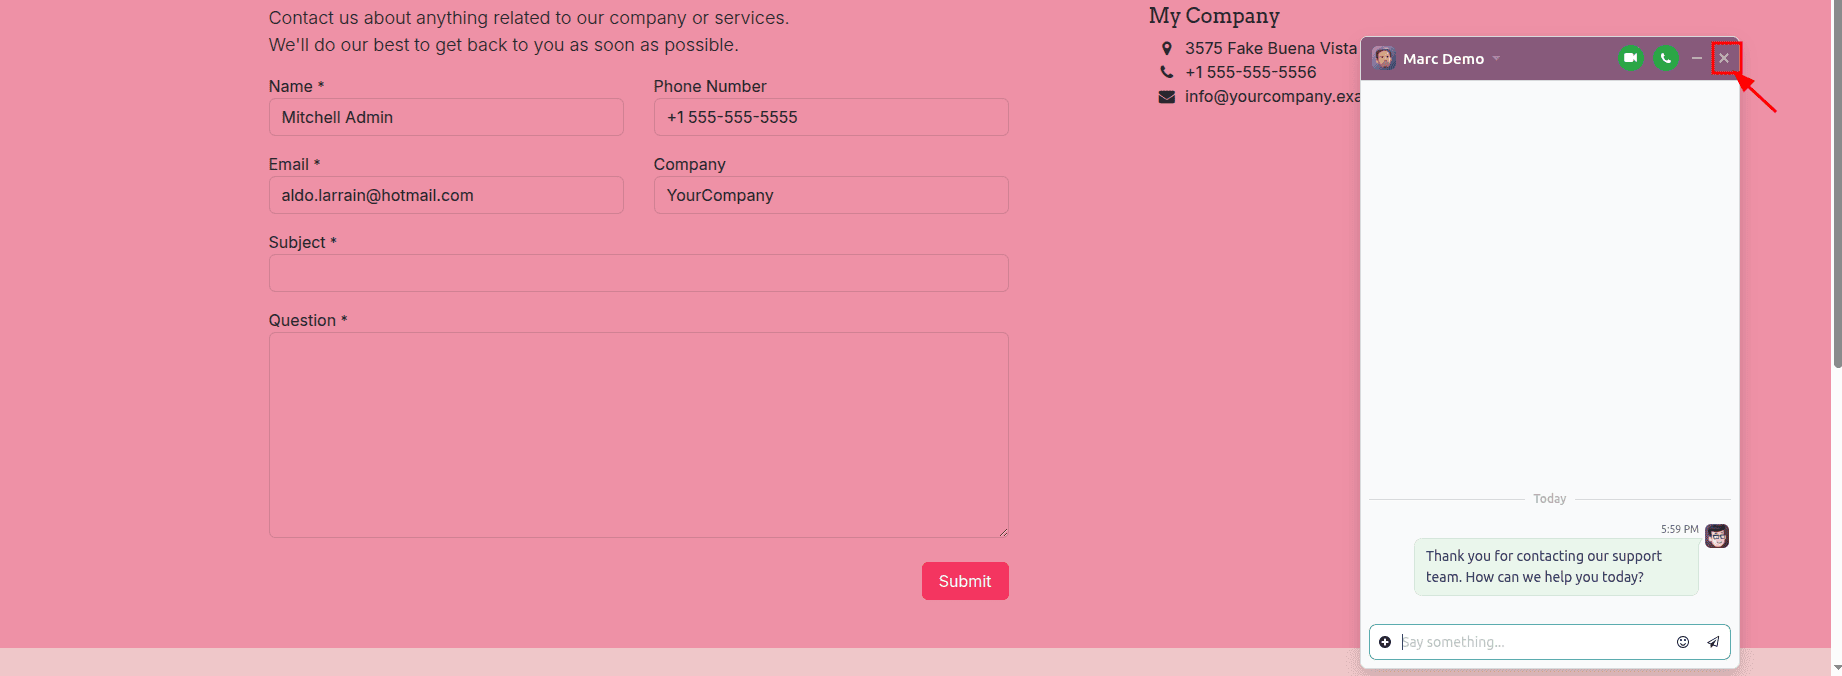
Odoo then displays the available rating options.
The customer can select one of three ratings:
- Satisfied – Displayed as a green smile icon
- Okay – Displayed as a yellow neutral icon
- Dissatisfied - Displayed as a red frown icon
Step 2: Add Feedback
If the customer selects the 'Okay' or 'Dissatisfied' rating, Odoo displays a text box where the customer can provide additional comments explaining the rating.
The rating and comments are sent to the Live Chat agent. If customers would like a copy of the conversation, they can also provide their email address.
Step 3: Evaluate the Performance of Agents.
Live Chat ratings serve as a way to assess both agent performance and customer satisfaction.
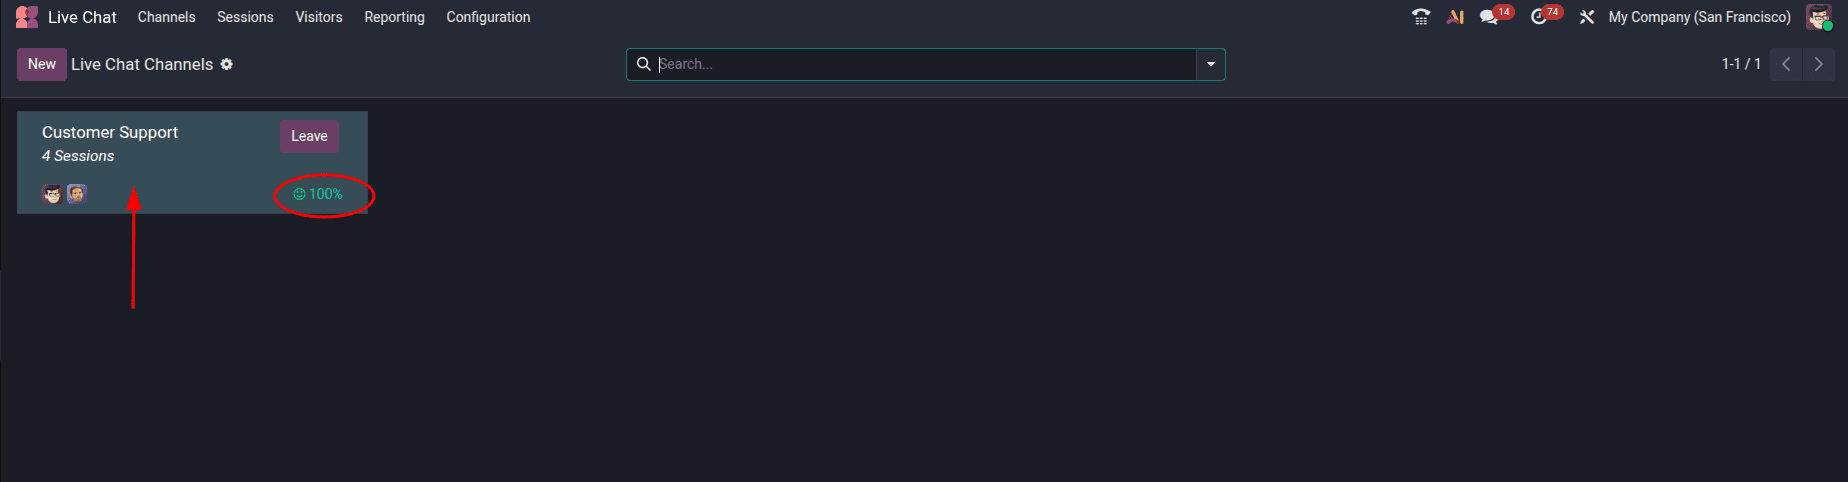
The 100% shows the average of the ratings from the customers.
If we click the channel card, we can see each session and its ratings and details
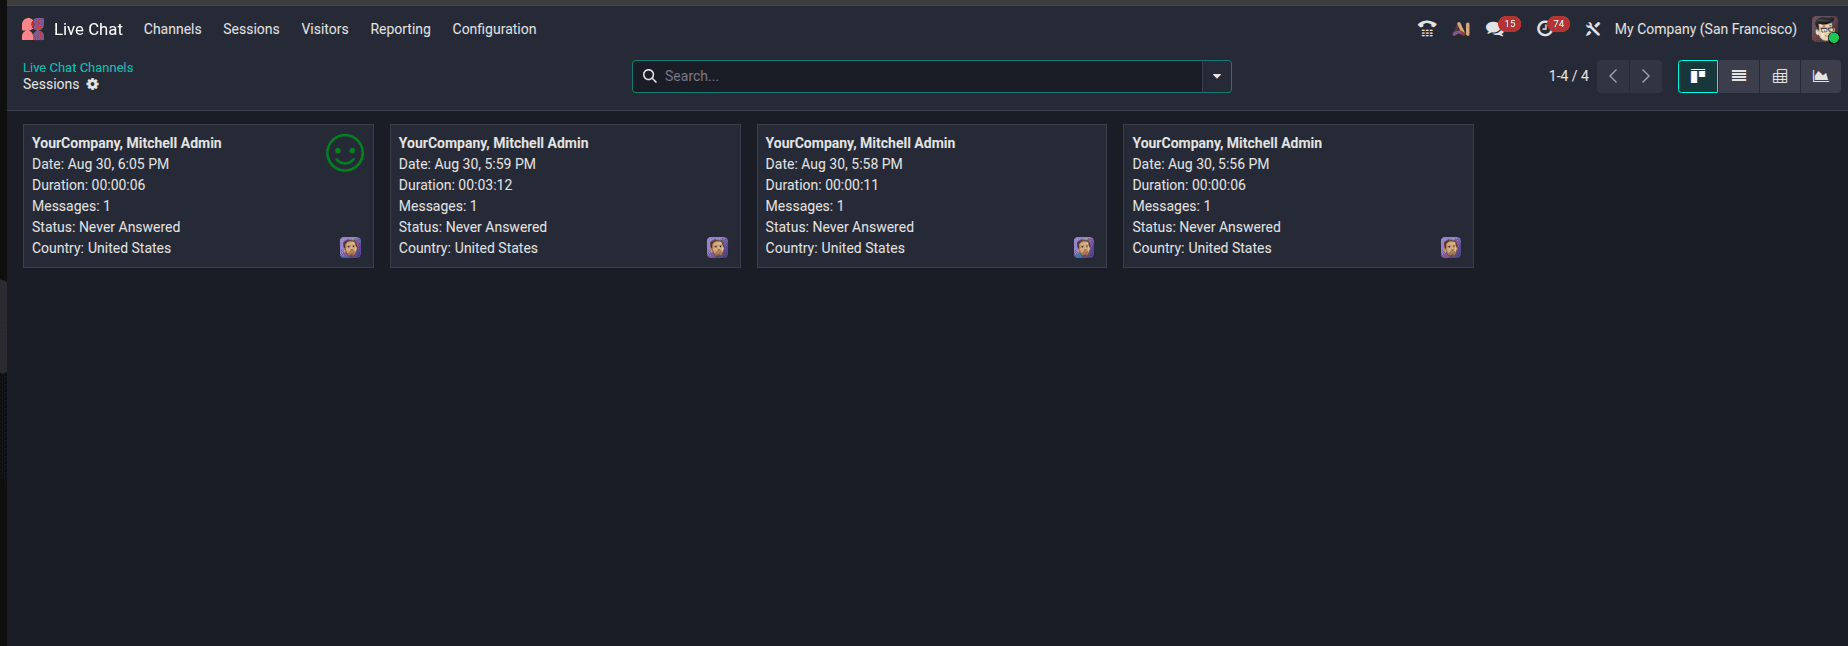
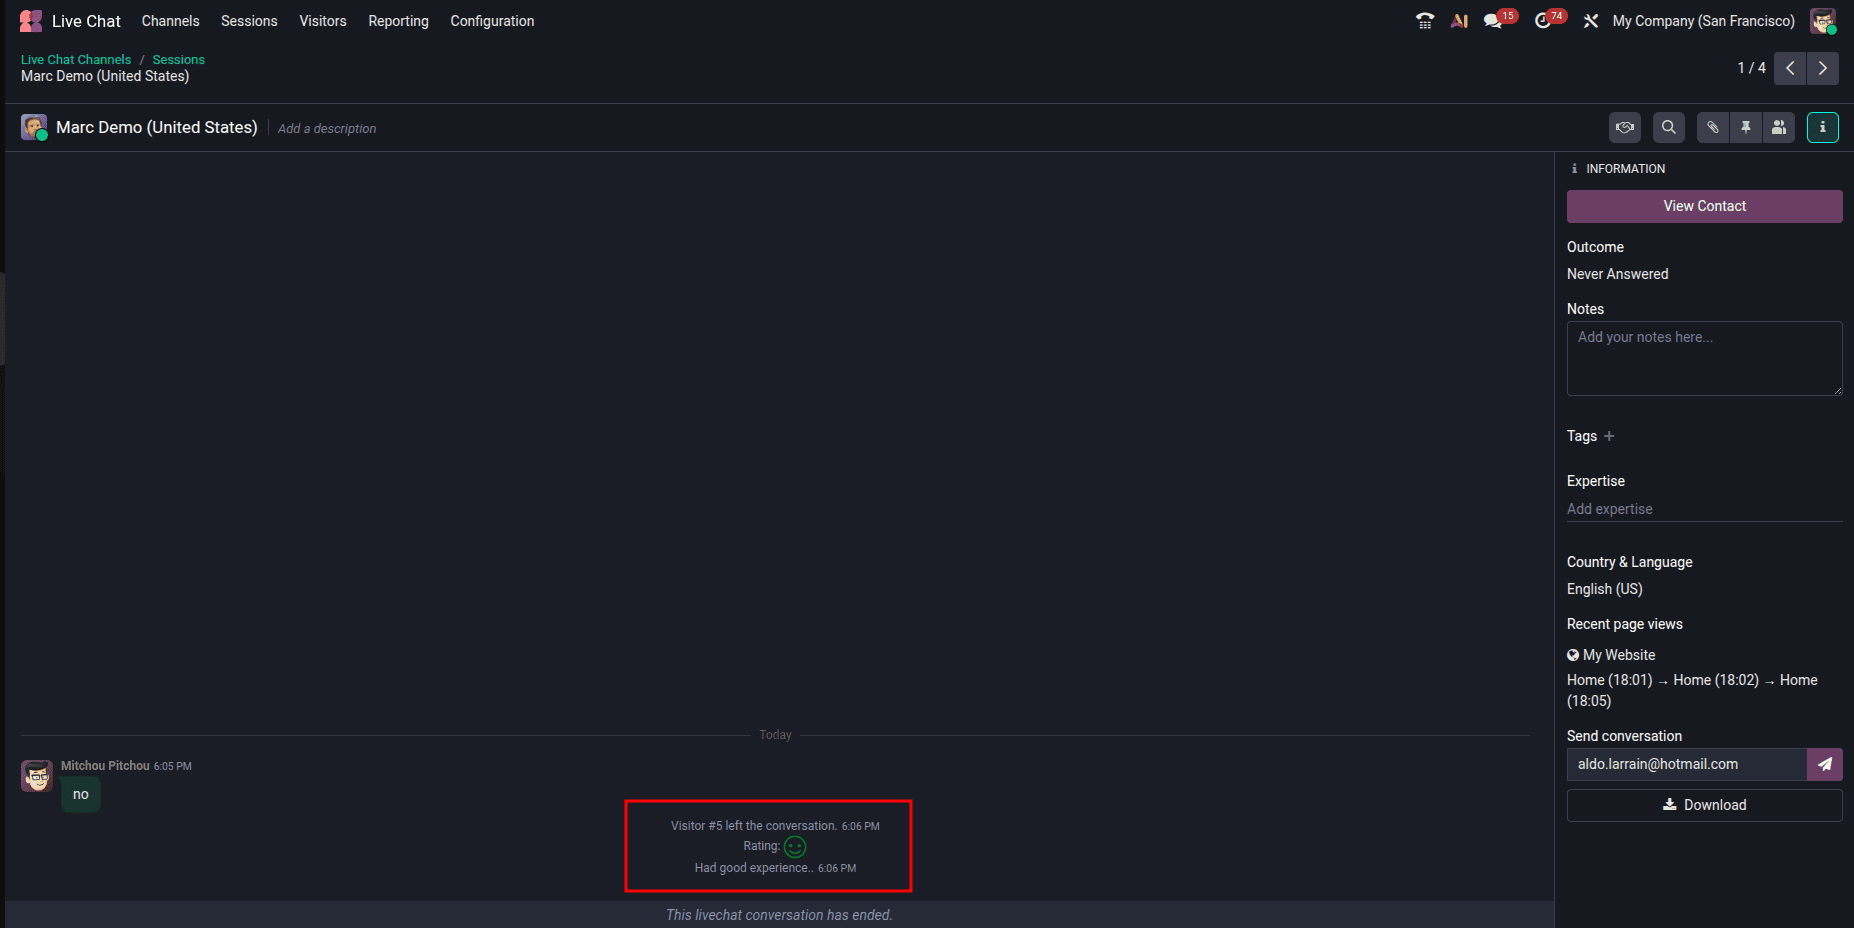
And upon clicking the session card, it shows the session details along with the user review and rating as well.
Go to:
Live Chat > Reporting > Agent
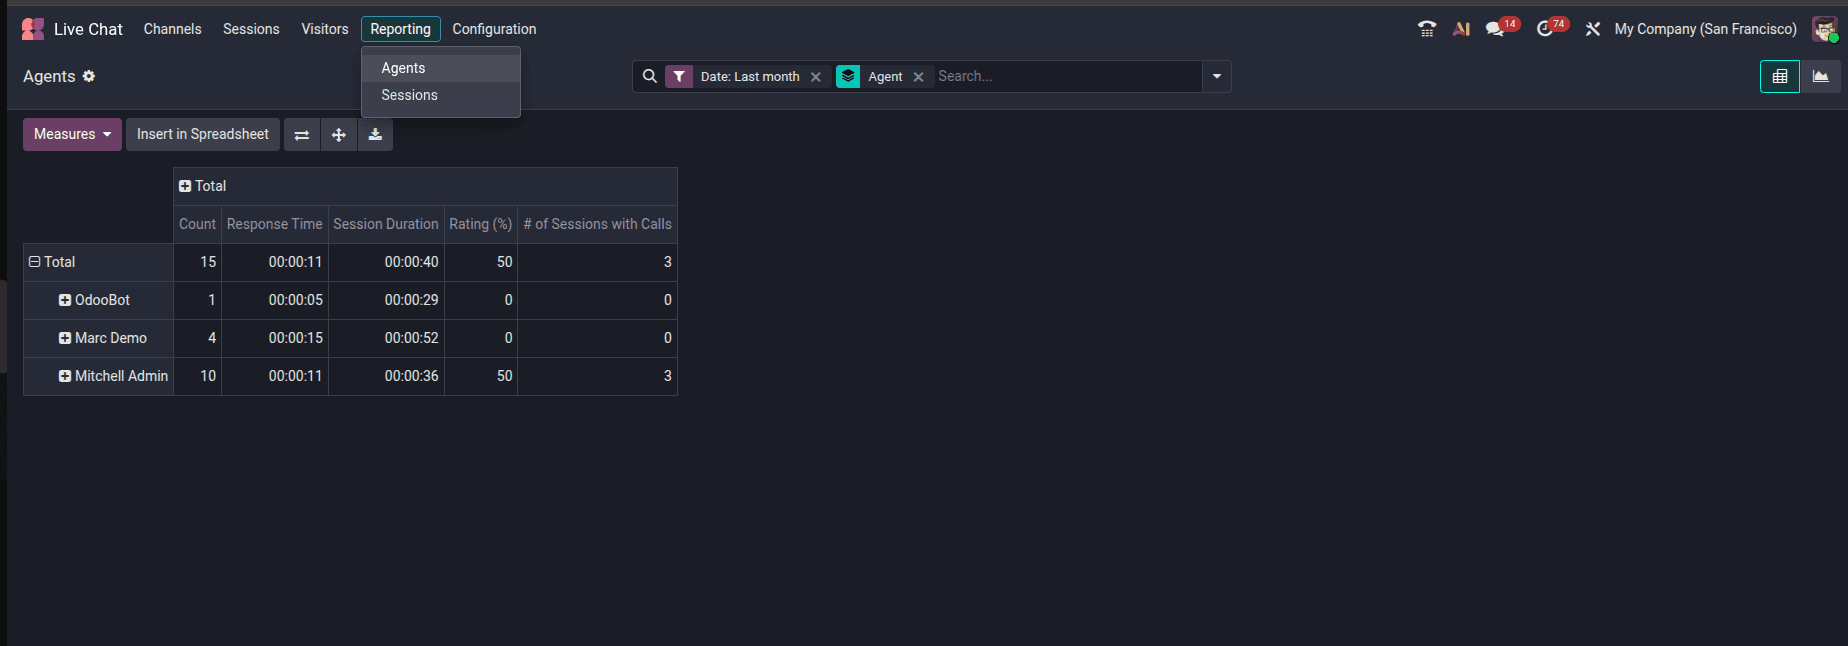
This allows businesses to identify trends and understand how individual agents are performing.
Odoo 19 Live Chat offers companies a convenient method to connect with website visitors in real time. By creating separate Live Chat channels, businesses can organize conversations according to different teams, departments, or support requirements.
Agents can be added to specific channels so that the right users handle customer conversations. Agents can also join or leave channels depending on their availability.
Canned responses make it easier to handle common questions by allowing agents to insert predefined messages using shortcuts. This saves time and helps keep communication consistent.
Customer ratings provide another useful part of the Live Chat workflow. Customers can rate the support they received and provide additional comments, while businesses can use the resulting data to evaluate agent performance and customer satisfaction.
By combining channels, controlled agent access, canned responses, and customer ratings, Odoo 19 Live Chat can help businesses provide faster and more consistent customer support.
To read more about How to Set Up Live Chat for Instant Support on Your Odoo 18 Website, refer to our blog, How to Set Up Live Chat for Instant Support on Your Odoo 18 Website.