Odoo IoT Box is a Raspberry Pi device that acts as a bridge between physical hardware and the Odoo database. It allows businesses to easily connect and manage devices such as receipt printers, barcode scanners, payment terminals, measurement tools, etc, directly from Odoo. In this blog, we will walk through the basics of setting up the Odoo IoT Box and getting your devices up and running.
Network Connections
The IoT Box can be connected either through an Ethernet Cable or Wifi. It is recommended to connect the IoT Box to the same network as the device connecting to it.
Ethernet
To connect using an Ethernet Cable, plug the Ethernet cable into the IoT Box’s Ethernet port and then into an available port on your router. After that, plug the IoT Box into a power source.
Wi-Fi
Ensure that no Ethernet cable is connected to the IoT Box, then follow the steps below:
- Connect the IoT Box to a power source and wait for a few minutes for it to start up.
- On your computer, open the Wi-Fi settings and select the IoT Box network. The network name will appear as IoTBox-xxxxxxxxxxxx, where the characters represent a unique identifier.
- Connect to the IoT Box’s Wi-Fi network and sign in. Your browser should automatically open and redirect you to the IoT Box homepage.
- On the IoT Box homepage, click Configure next to the Internet Status section.
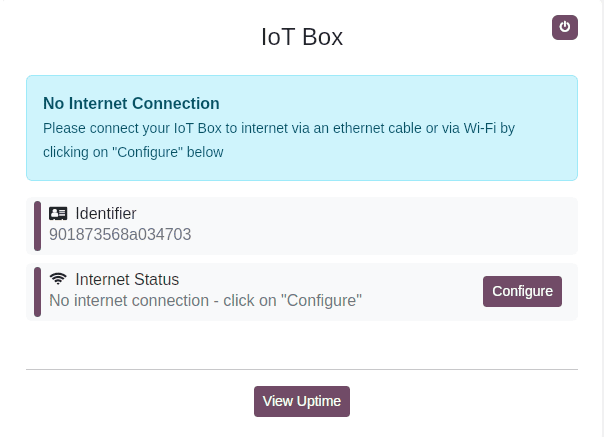
- Wait a few moments for the available Wi-Fi networks to appear; choose your network, enter the Wi-Fi password, and click Connect.
LED Status
When no display is connected, the IoT Box's two LEDs to the right of the SD card slot help with troubleshooting by indicating the card's current status. They have the following meanings:
- The IoT Box's red LED indicates that it is not online. Connect the IoT Box to a Wi-Fi network or make sure the Ethernet cable is firmly in place.
- Blinking green LED: The IoT Box is turned on and awaiting connection to an Odoo database.
- Solid Green LED: There is no need for additional action, as the IoT Box has been successfully connected to a database and is functioning normally.
IoT Box Homepage
Open a web browser on a device that is connected to the same network as the IoT Box, then type the IP address of the IoT Box into the address bar to view the IoT Box homepage.
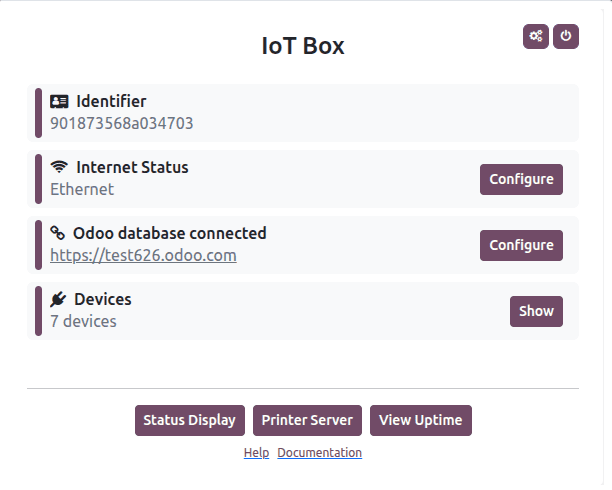
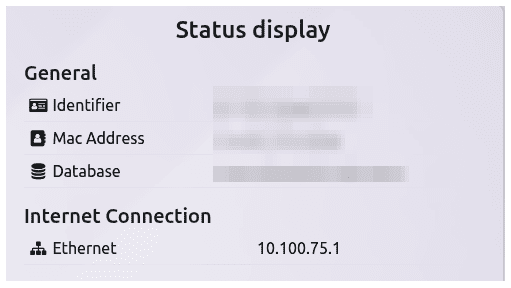
The IoT Box’s IP address can be found using any of the following methods:
- Connect the IoT Box to an external monitor: The IP address will be displayed directly on the screen.
- Connect the IoT Box to a supported receipt or label printer via USB: The IP address will be printed automatically.
- Check your router’s admin interface: Locate the IoT Box in the list of connected devices, or use third-party network scanning tools to identify its IP address.
The Odoo IoT Box is easy to set up and allows your physical devices and the Odoo database to communicate with each other. The IoT Box streamlines device integration and guarantees seamless operation for POS, inventory, and other hardware-dependent workflows, regardless of whether you connect via Ethernet or Wi-Fi. You can quickly get your IoT Box up and running with little troubleshooting if you follow the above instructions and comprehend the LED indicators.
To read more about How to Connecting external devices with IoT Box in Odoo 18 IoT, refer to our blog How to Connecting external devices with IoT Box in Odoo 18 IoT.