Odoo has created the most powerful pricelist tool to help business pricing strategies. It only means creating a tariff or price list, especially for a certain customer. The pricing list or rate may include a single product or a group of products. A long-term, profitable business depends on how you set your prices. This one requires us to modify the product pricing. Some companies do modify their product prices in response to partners, special occasions, changing seasons, and other factors. Odoo's pricelist makes it easy to manage product pricing in line with business needs.
You can provide particular consumer groups with exclusive discounts, coupons, or promotions in Odoo's Website and Sales modules. Pricelists are one method for achieving this. Pricelists enable you to specify different pricing for various clients, including VIP members, wholesale purchasers, and retail consumers. You may ensure that only the clients you select receive the exclusive deal by connecting promotions to a pricing list.
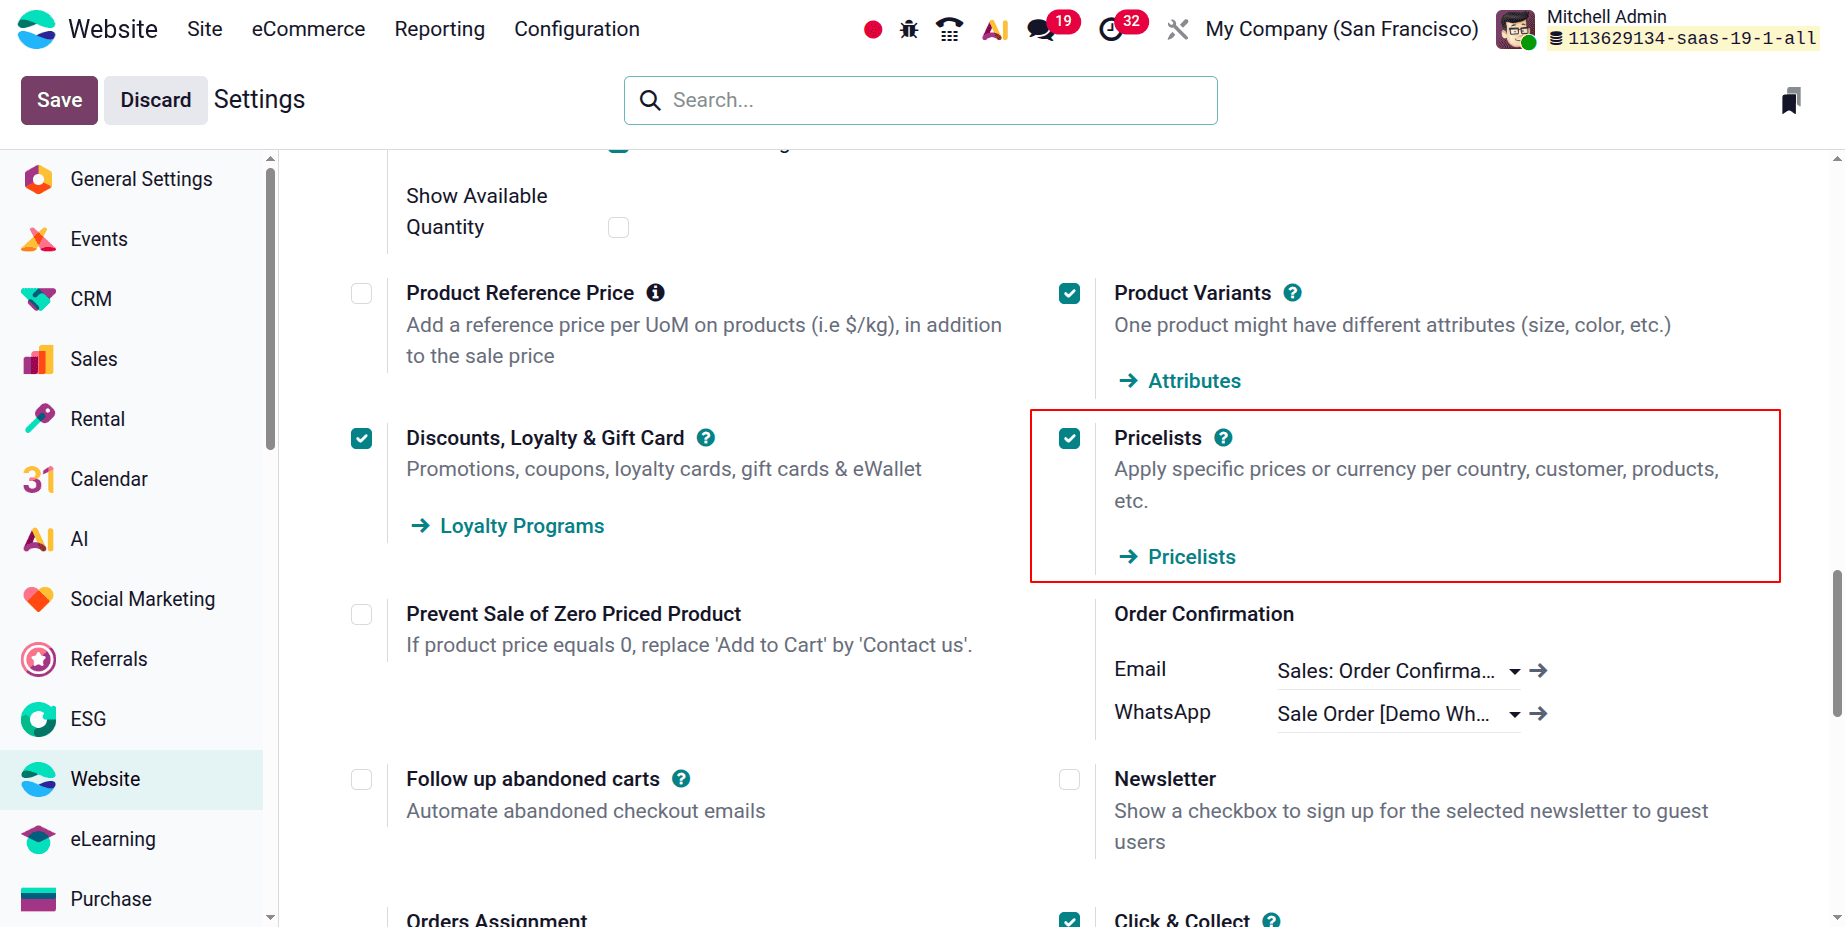
To do this, confirm that the Settings option's pricelist option is turned on.
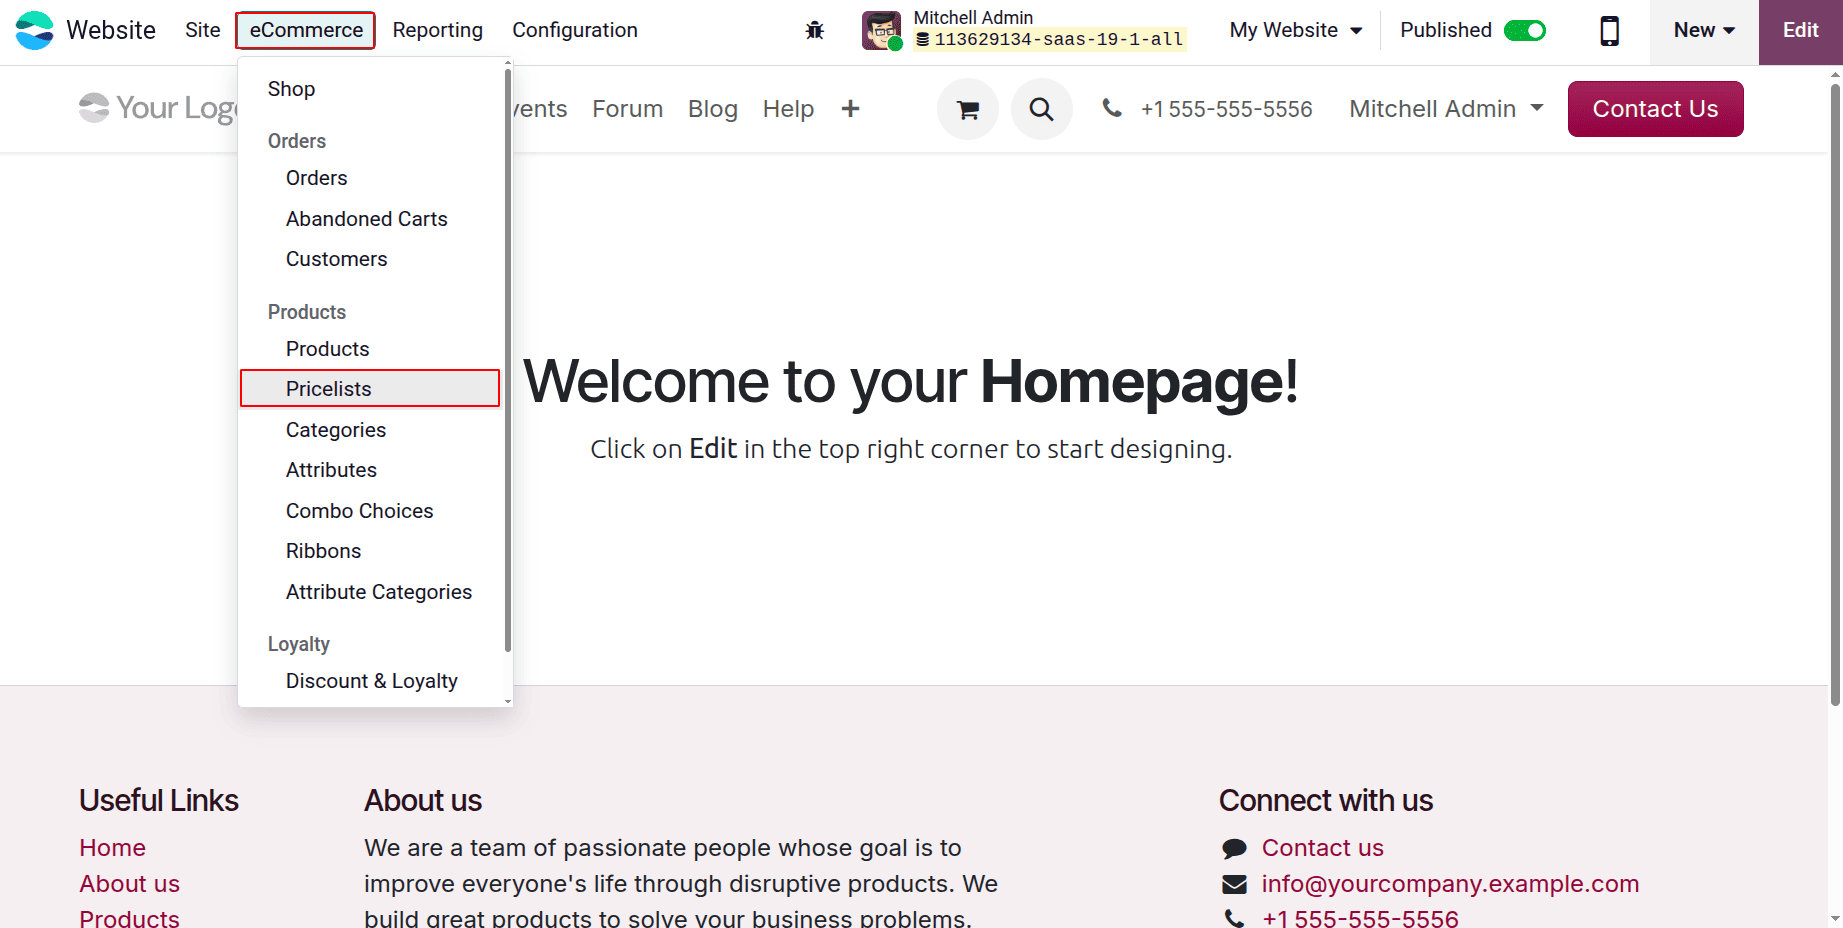
Next, select the E-commerce menu's pricelist option to create a new pricelist, as shown in the figure below.
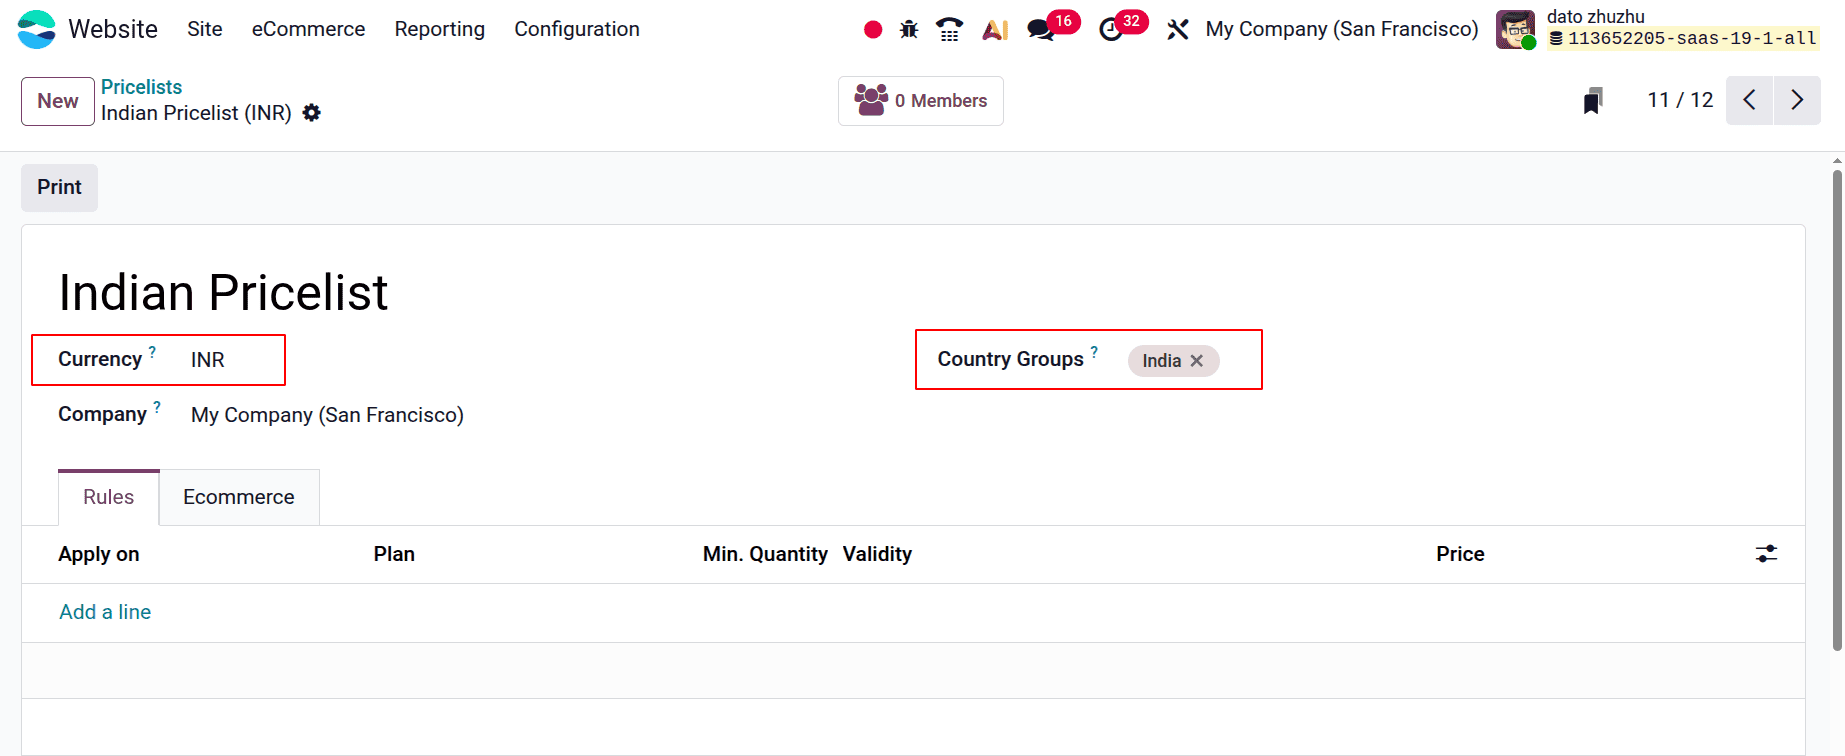
When making a new pricelist, begin by filling in the blank space at the top of the form with the pricelist's name. Next, decide which currency to use.
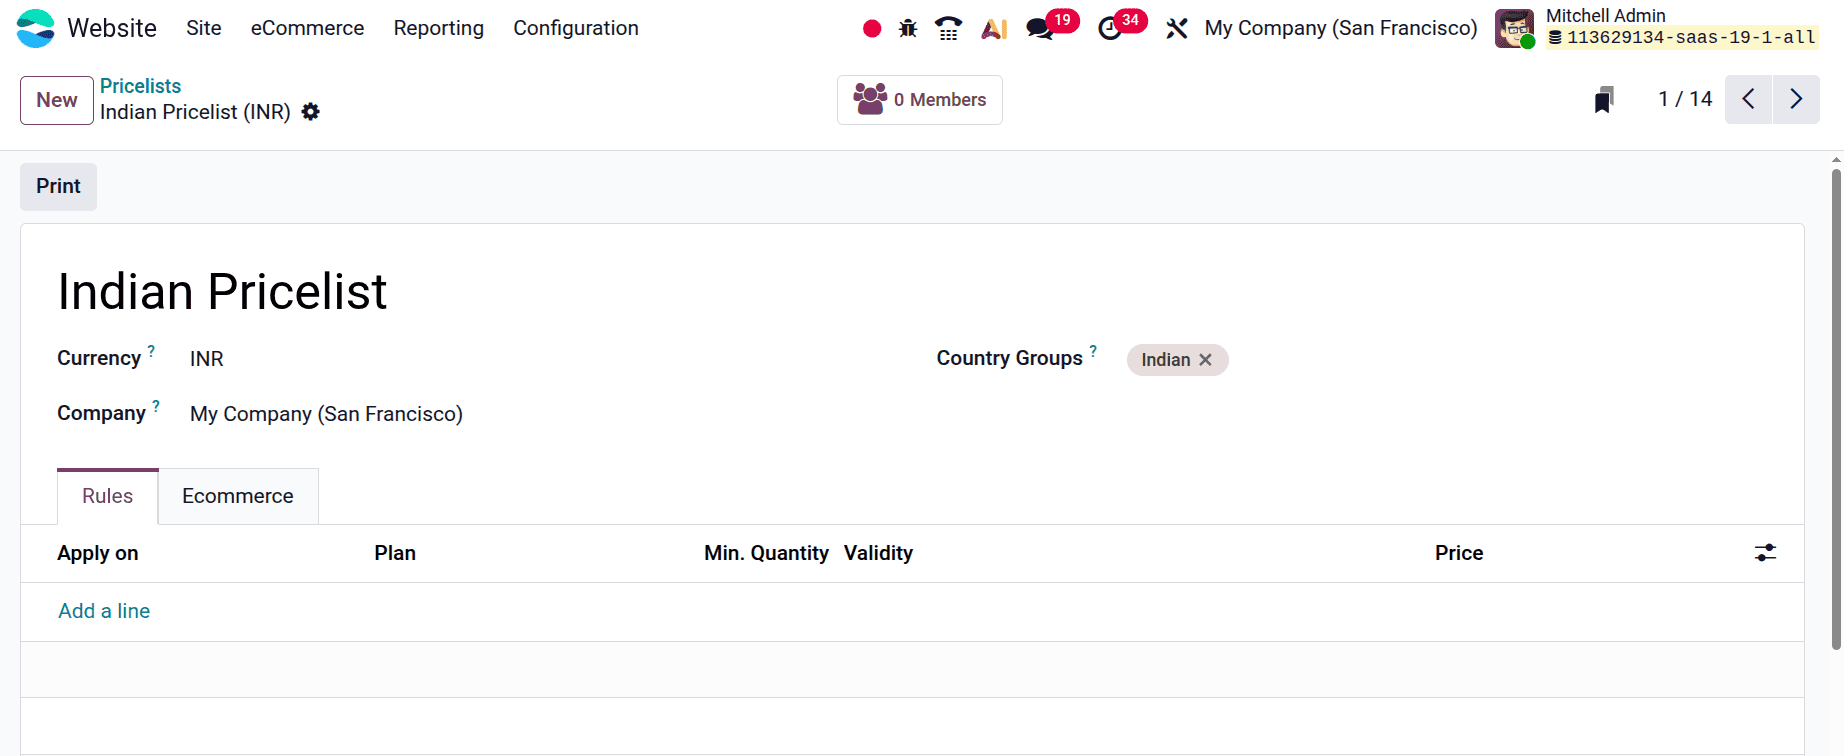
Next, choose which firm this pricelist should apply to in the firm area if you work in a multi-company setting. If this column is left empty, the pricing list is automatically applied to every firm in the database, as shown in the image below.
In the Country Groups section, you can add particular country groups to the price list. It is possible to enter an infinite number of nation groupings in this area. The price list will only be given to those who fall under the nation group option.
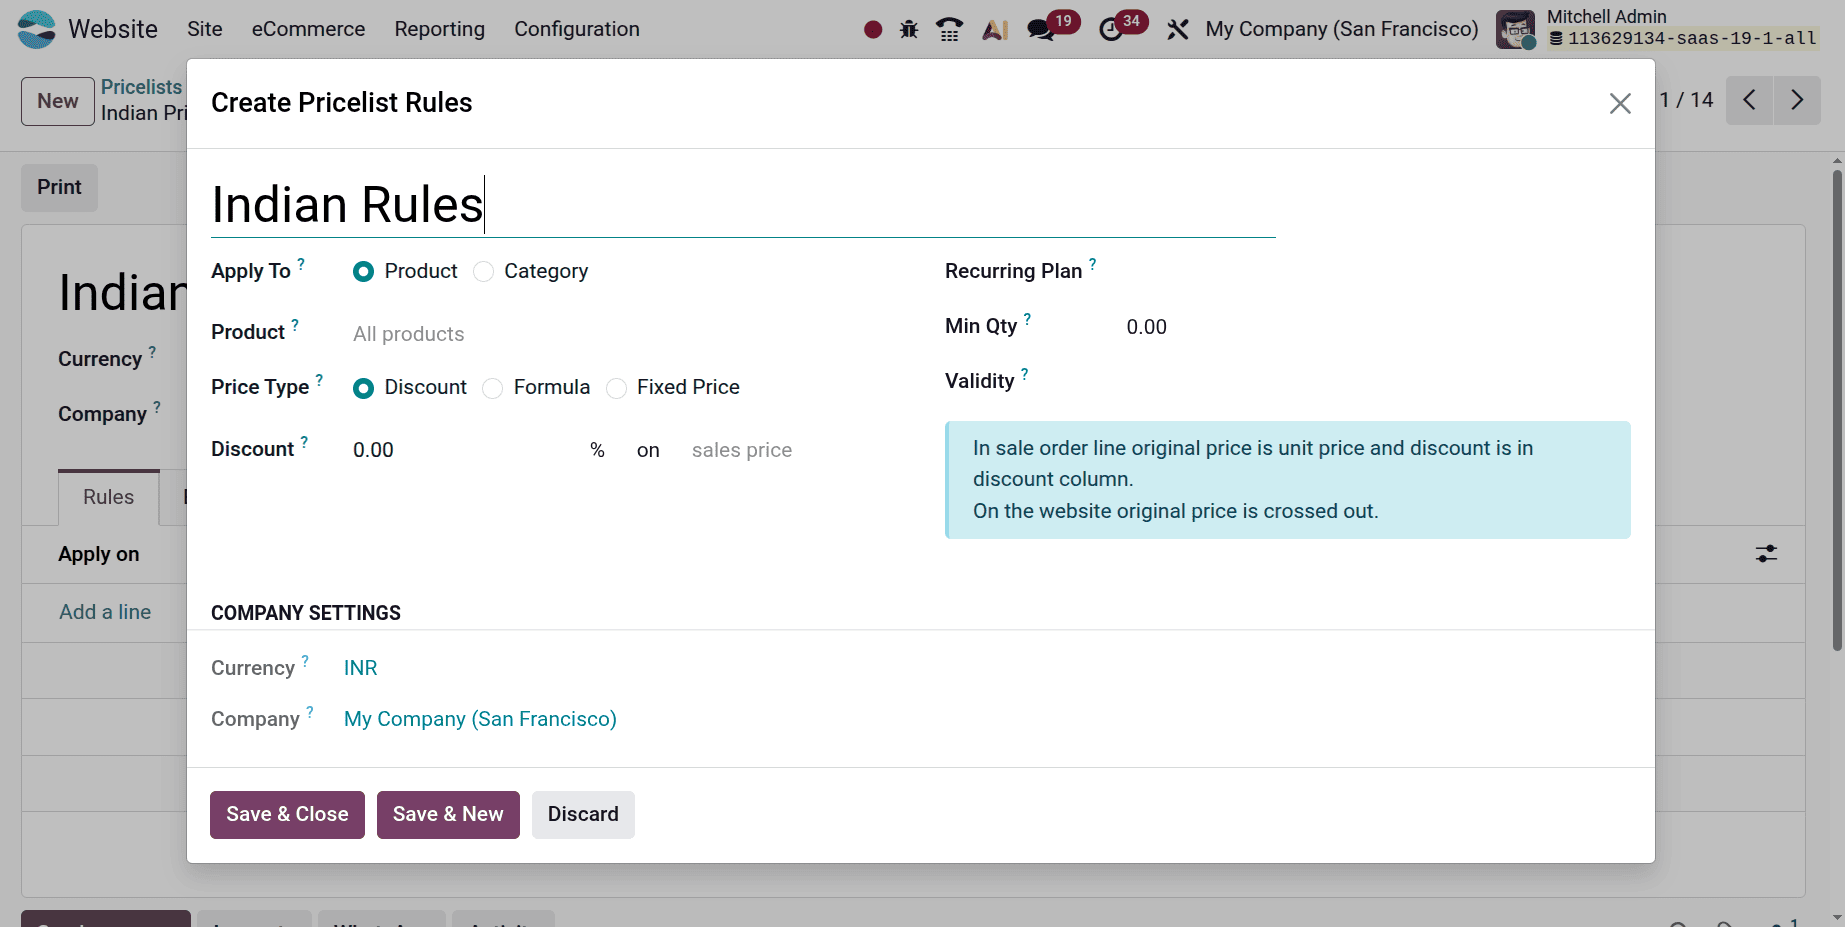
Now, as shown in the figure below, add the product from the list under the price rule tab, set the price type to fixed price, and select a minimum quantity. The following main price types can be established in a pricelist:
- Fixed Price: The predetermined, fixed price of a product, separate from its original list price.
For example, determining that a product will always sell for €500, regardless of the going pricing.
- Discount: Applies a percentage-based reduction to the product's starting price.
For example, 10% off the standard sales price for a specific clientele.
- Formula: Uses a formula that dynamically calculates the price based on factors including the percentage of the discount, the margin or markup over cost, the rounding rules, and the margin minimum or maximum.
So here, no rule is added, but the currency is chosen as INR. Which means the price list is only applicable for customers from India, and while using this pricelist the price will be shown in INR.
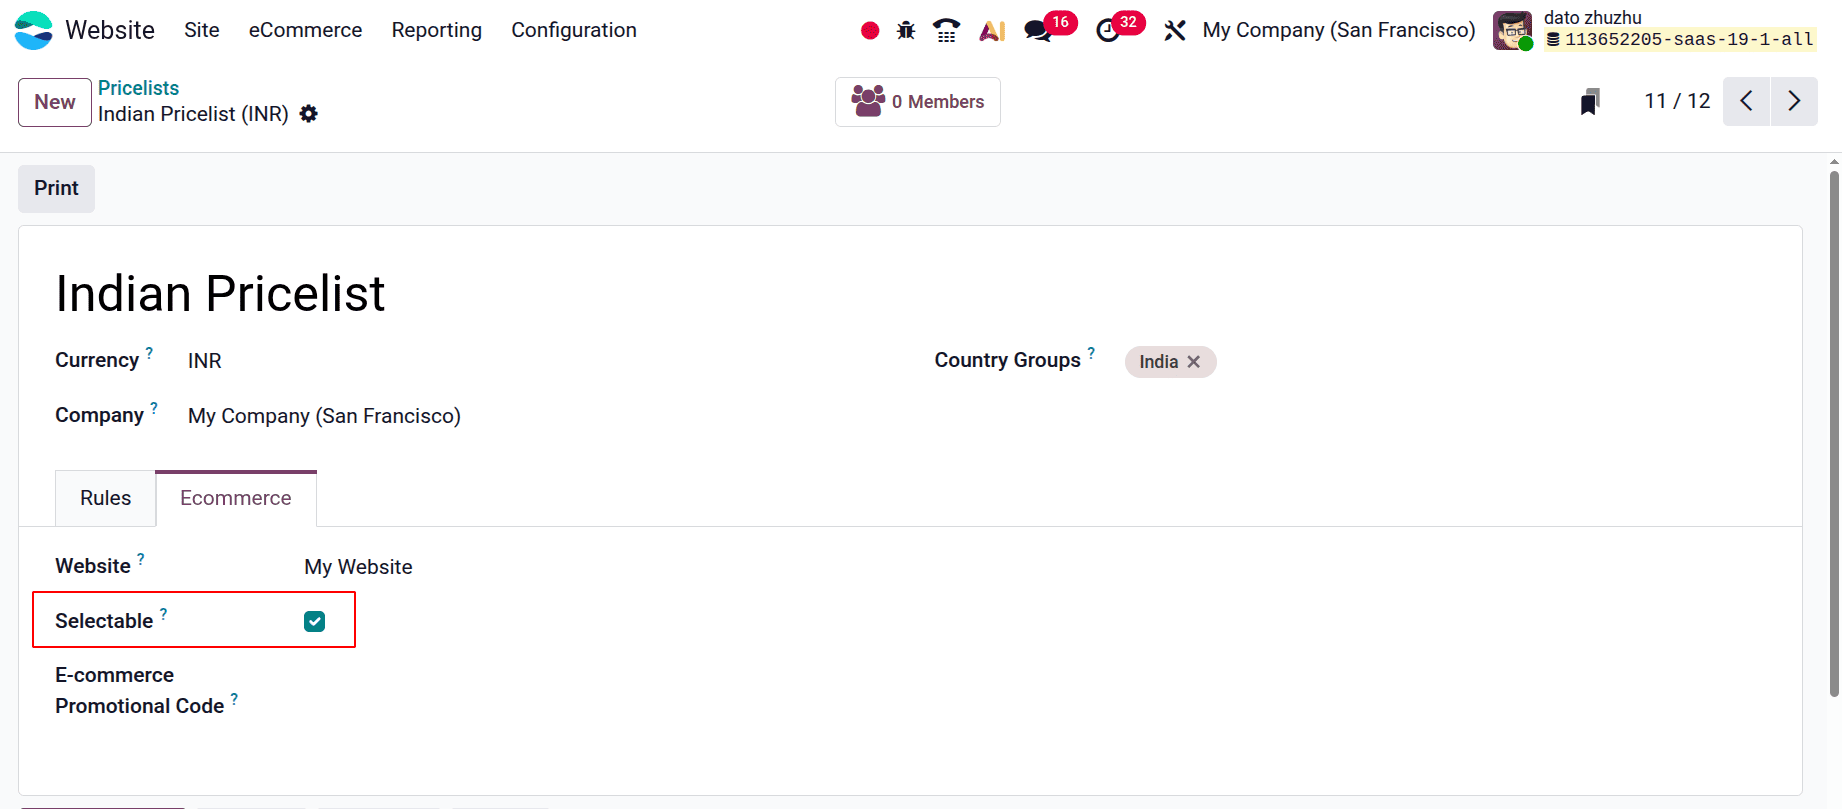
As seen in the screenshot below, the Website option under the Ecommerce menu now has adjustable options. This price list can be applied to a particular website in the Website field if you're working with multiple websites. If the pricing list is left blank, it will be applied to all websites in the database.
Check the Selectable checkbox to enable consumers to choose from this pricing list while they buy. If the Selectable option is not checked, users will not be able to select this price list for themselves while they are shopping. Lastly, you can add an e-commerce promotional code. To add a code, enter the necessary promo code that will apply the price list to the customer when they check out, even if they don't fit the previously mentioned qualifications.
Configure Promotion / Discount Program
You must now enable the discount and loyalty option under the settings option in order for it to be accessible under the E-commerce menu.
You can now add a new program by selecting the New option under the E-commerce menu, which offers the discount and loyalty option. The creation form will appear as seen in the picture below when you click the New button.
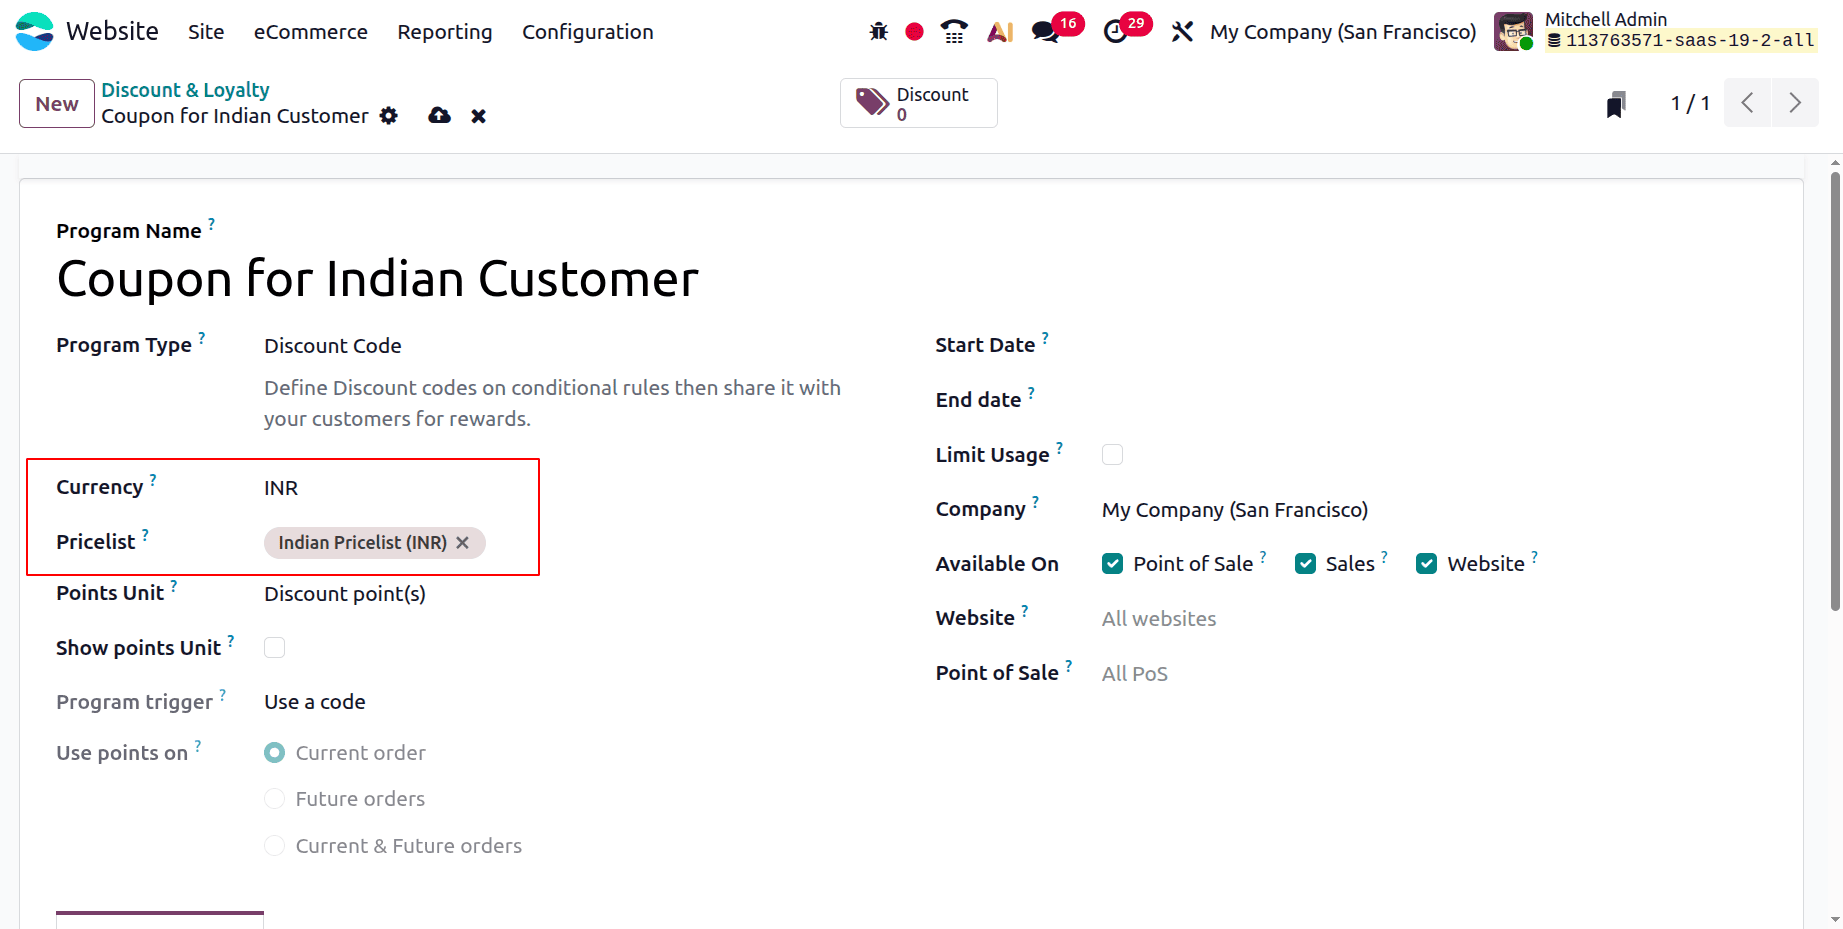
The following fields are included in the program form:
- Program Name: Type the program's name in this field. The customer cannot see the program name.
- Program Type: As seen in the above image, choose the preferred program type from the drop-down menu. Coupons, loyalty cards, promotions, discount codes, buy X get Y, and next order coupons are among the varieties.
- Currency: Choose the program's currency.
- Pricelist: Select a pricelist from the drop-down menu if you'd want to apply this loyalty program to a certain pricelist (and customers associated with the pricelist). Multiple price lists can be chosen thanks to this capability. When a single loyalty program is linked to multiple pricelists, it is possible for different consumer segments to have different pricelists but the same loyalty programs. If this field is left empty, the program is applicable to everyone, regardless of pricing list.
- Points Unit: Type the name of the points (such as Loyalty Points) that are used for the Loyalty Cards program. The name of the points unit is visible to the client. This field is only available when Loyalty Cards are chosen as the Program Type.
- Start Date: Decide when the program will go into effect. If the program should never expire, leave this field empty.
- End Date: Decide when the program's validity ends. If the program should never expire, leave this field empty.
- Limit Usage: Check this box and enter a number of usages to limit how often the software can be used during its validity term.
- Company: Select the only firm for which the program is available if you are working in a multi-company database. If the program is left empty, all companies in the database can use it
- Available On: Choose the applications that the program is compatible with.
- Website: Select a website where you can view the software. Please leave this form blank so that it can be accessed on all websites.
- Point of Sale: Choose the point or points of sale where the program is offered. To make this field accessible at all PoS, leave it empty.
Please take note that this promotion is only available to clients who utilize the Indian Pricelist (INR).
The Rules and Rewards menu is located beneath that, and you may add items using the ADD icon.
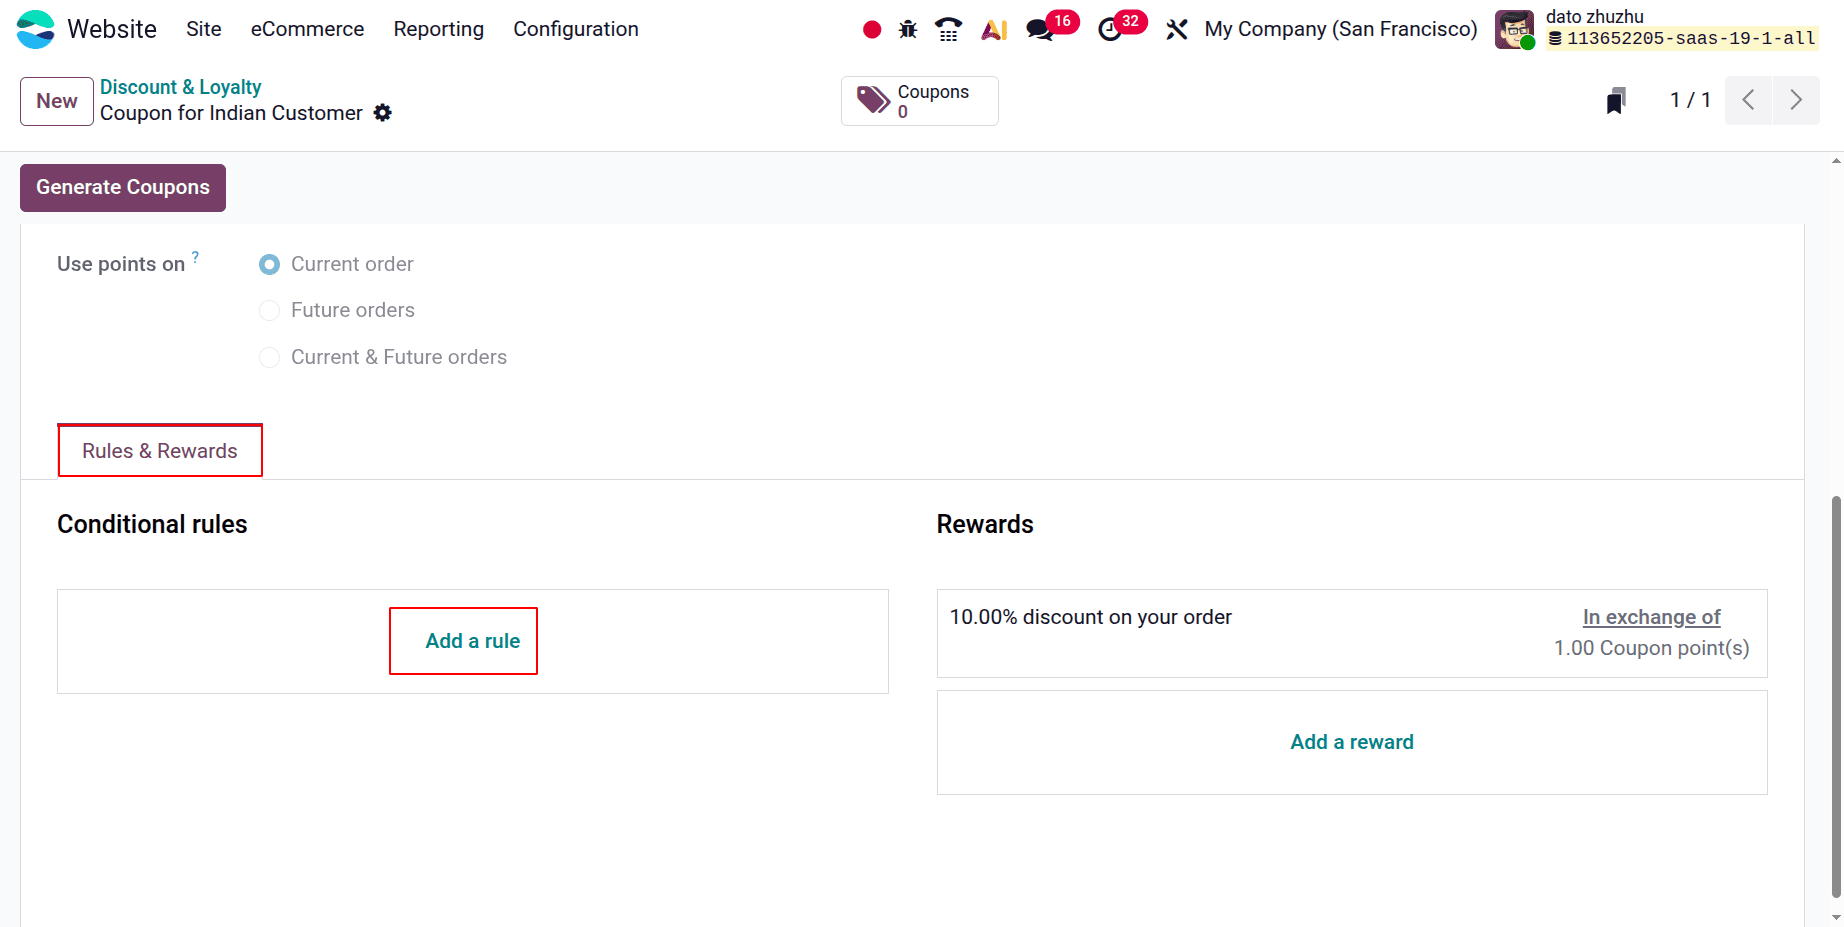
A pop-up box will appear when you pick the ADD icon in the conditional rules, as shown in the screenshot below. The minimum quantity and minimum purchase are displayed below.
Here, the users can see the Discount Code.
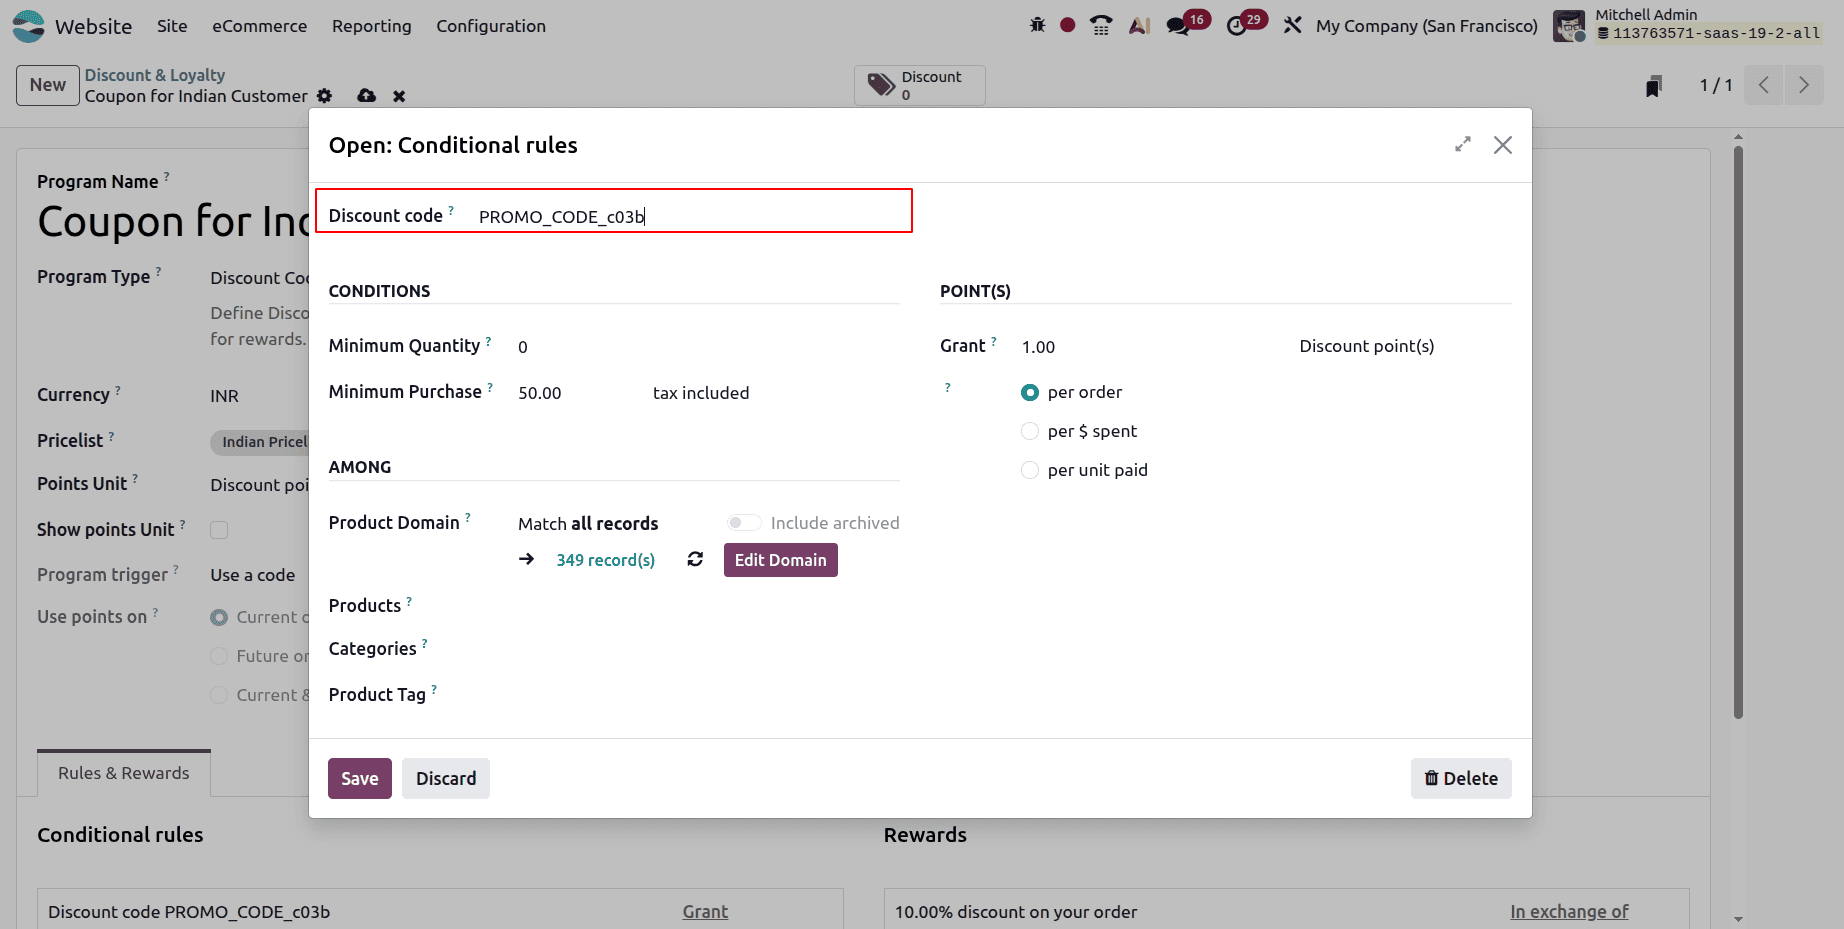
- Minimum quantity: The number of minimum quantities that must be purchased in order to be eligible for the promotion program's prize can be specified.
- Minimum purchase: We have the option to set a minimum purchase amount, either including or excluding taxes, in order to qualify for the reward.
- Products: A variety of products that we select will be subject to the condition.
- Categories: The program is relevant to specific product categories that we can select.
- Product Tags: Items with a specific product tag may be designated as being eligible for the offer.
Once you have entered all of these details, use the Save & Close icon; if you want to add more, select the Save & New option.
Use the ADD icon, which displays a pop-up, to add a reward, as shown in the screenshot below.
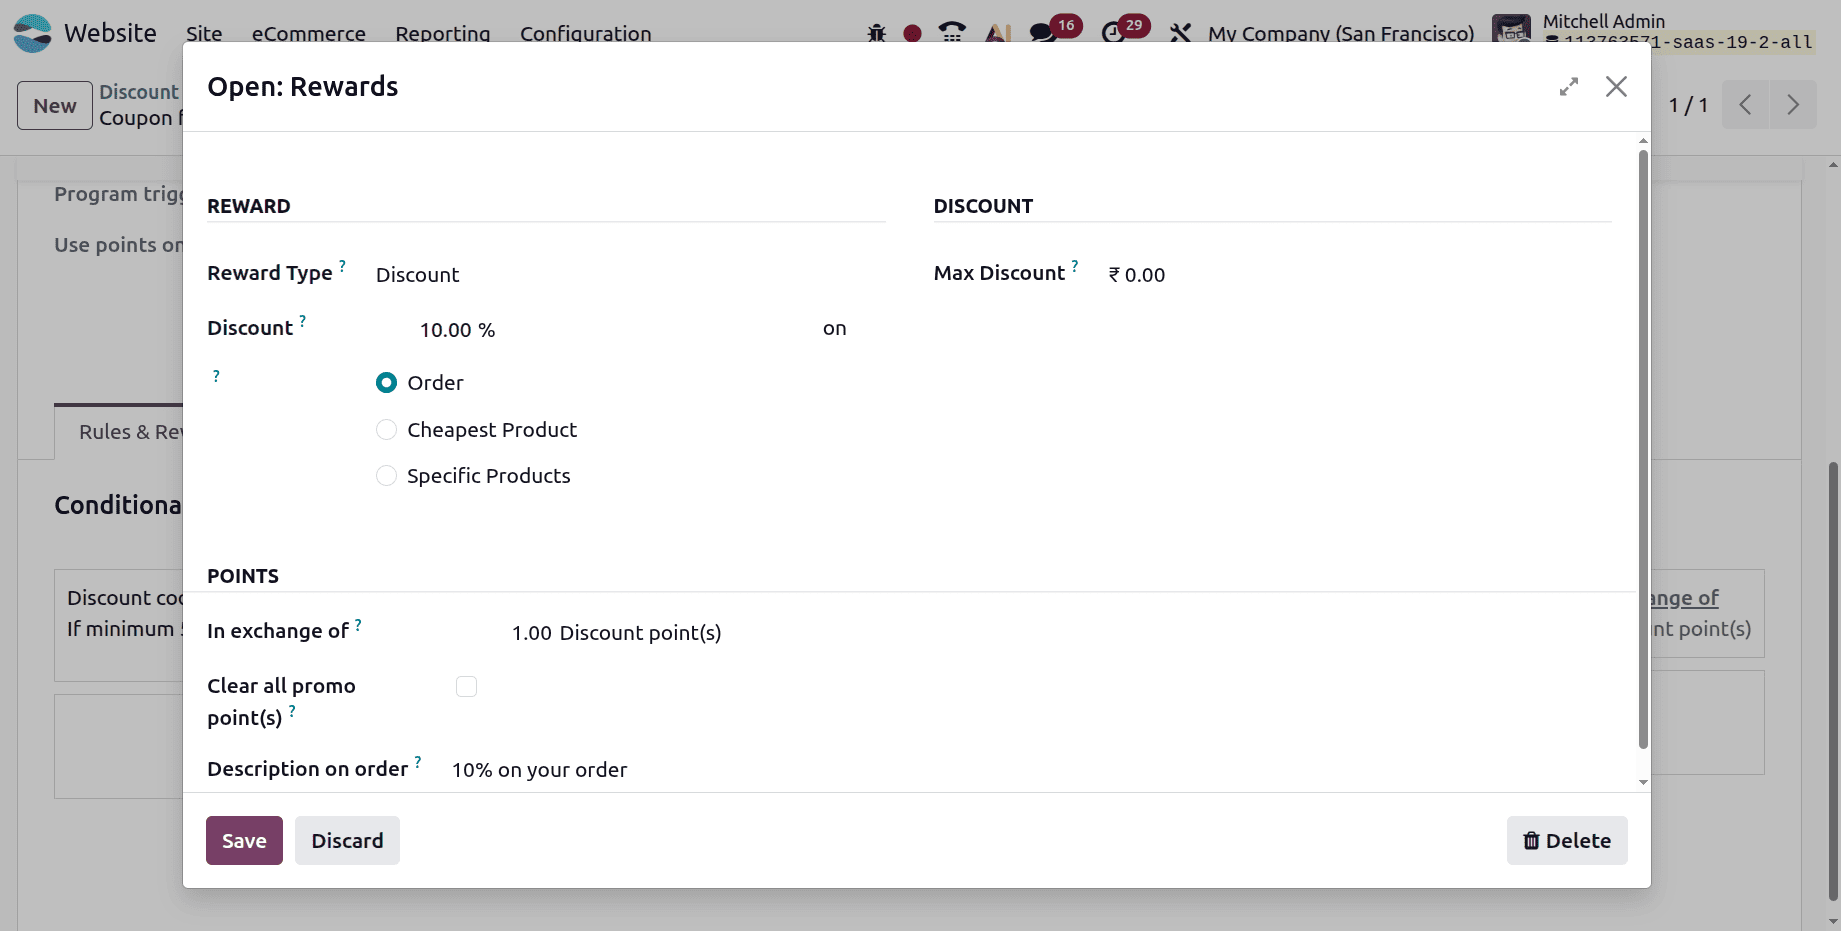
- Reward Type: You can select a free product, a discount, or free shipping as your reward.
- Discount: Add a percentage to be discounted if the product is on sale, the cheapest product, or a specific product.
- Max Discount: The maximum discount that can be given as a reward is represented by an amount.
- Order Description: We are able to supply the description of the award that will show up on the payment page.
A 10% reduction in the sales price is the prize in this case. Once all the information has been entered, select Save & Close.

Here, a Discount Code program was created so that when the customer selects a minimum 1 quantity, they will get a reward of a 10% discount using the discount code.
Go to the Homepage and select Shop after logging in with a specific customer. There, choose a specific item from the list and add it to the cart using a random pricelist, as shown in the picture below.
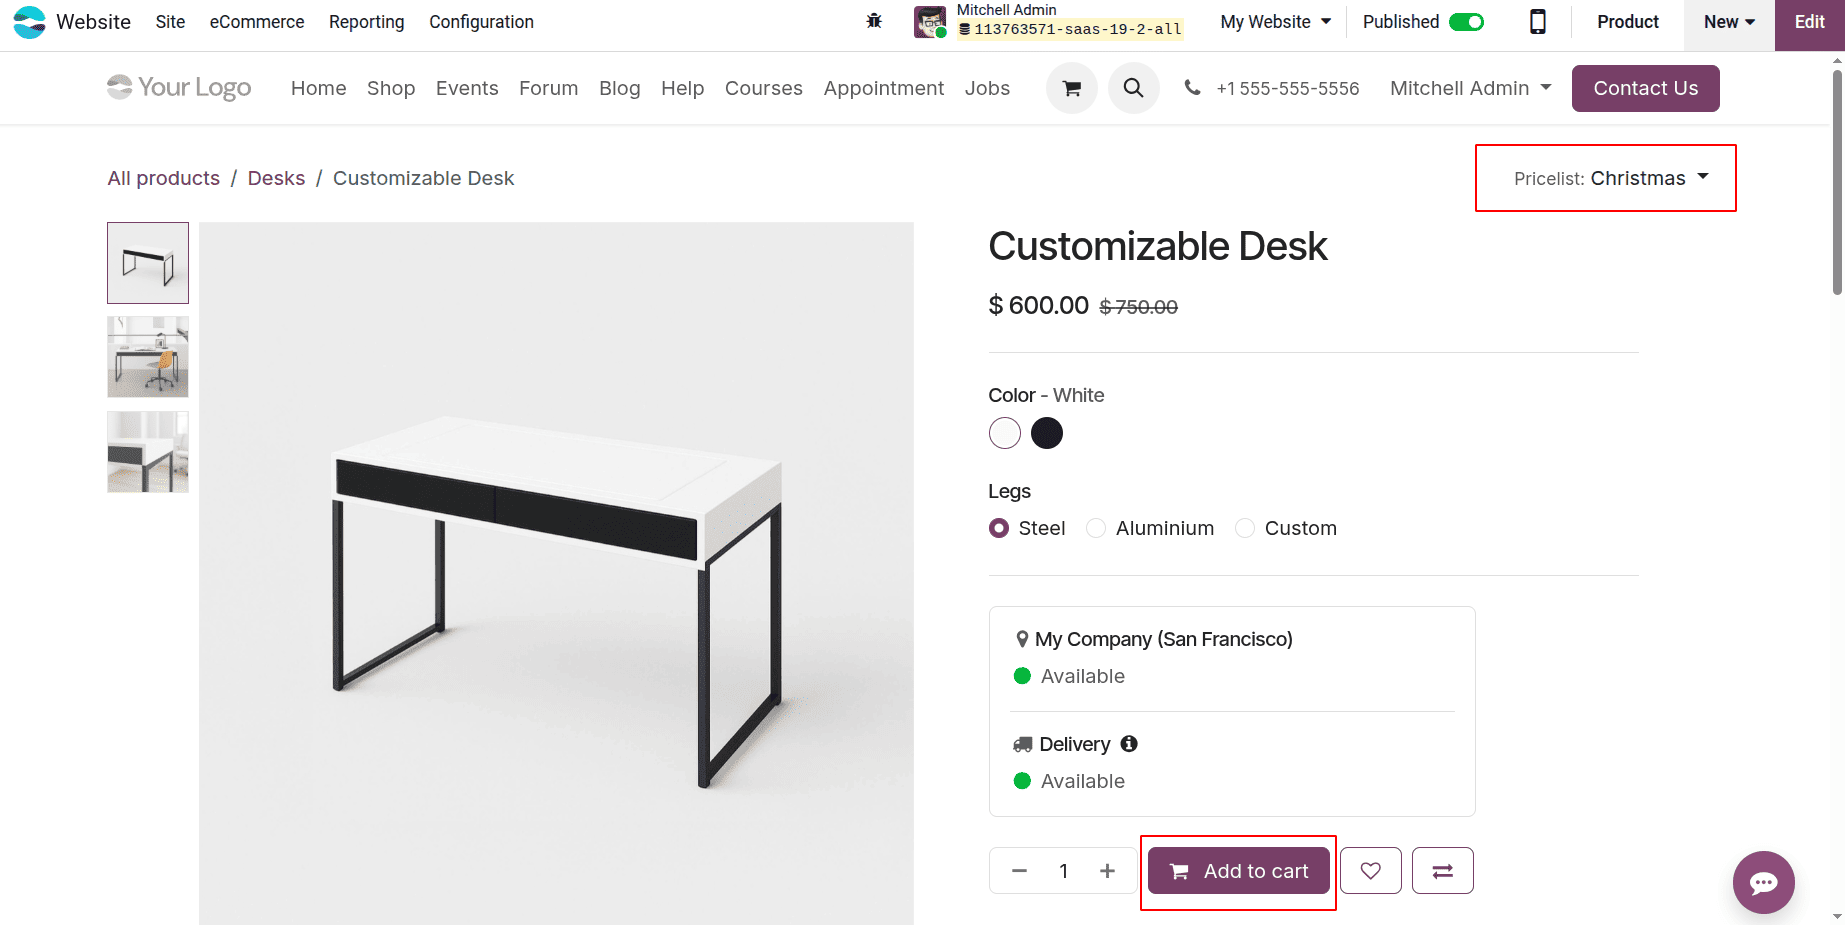
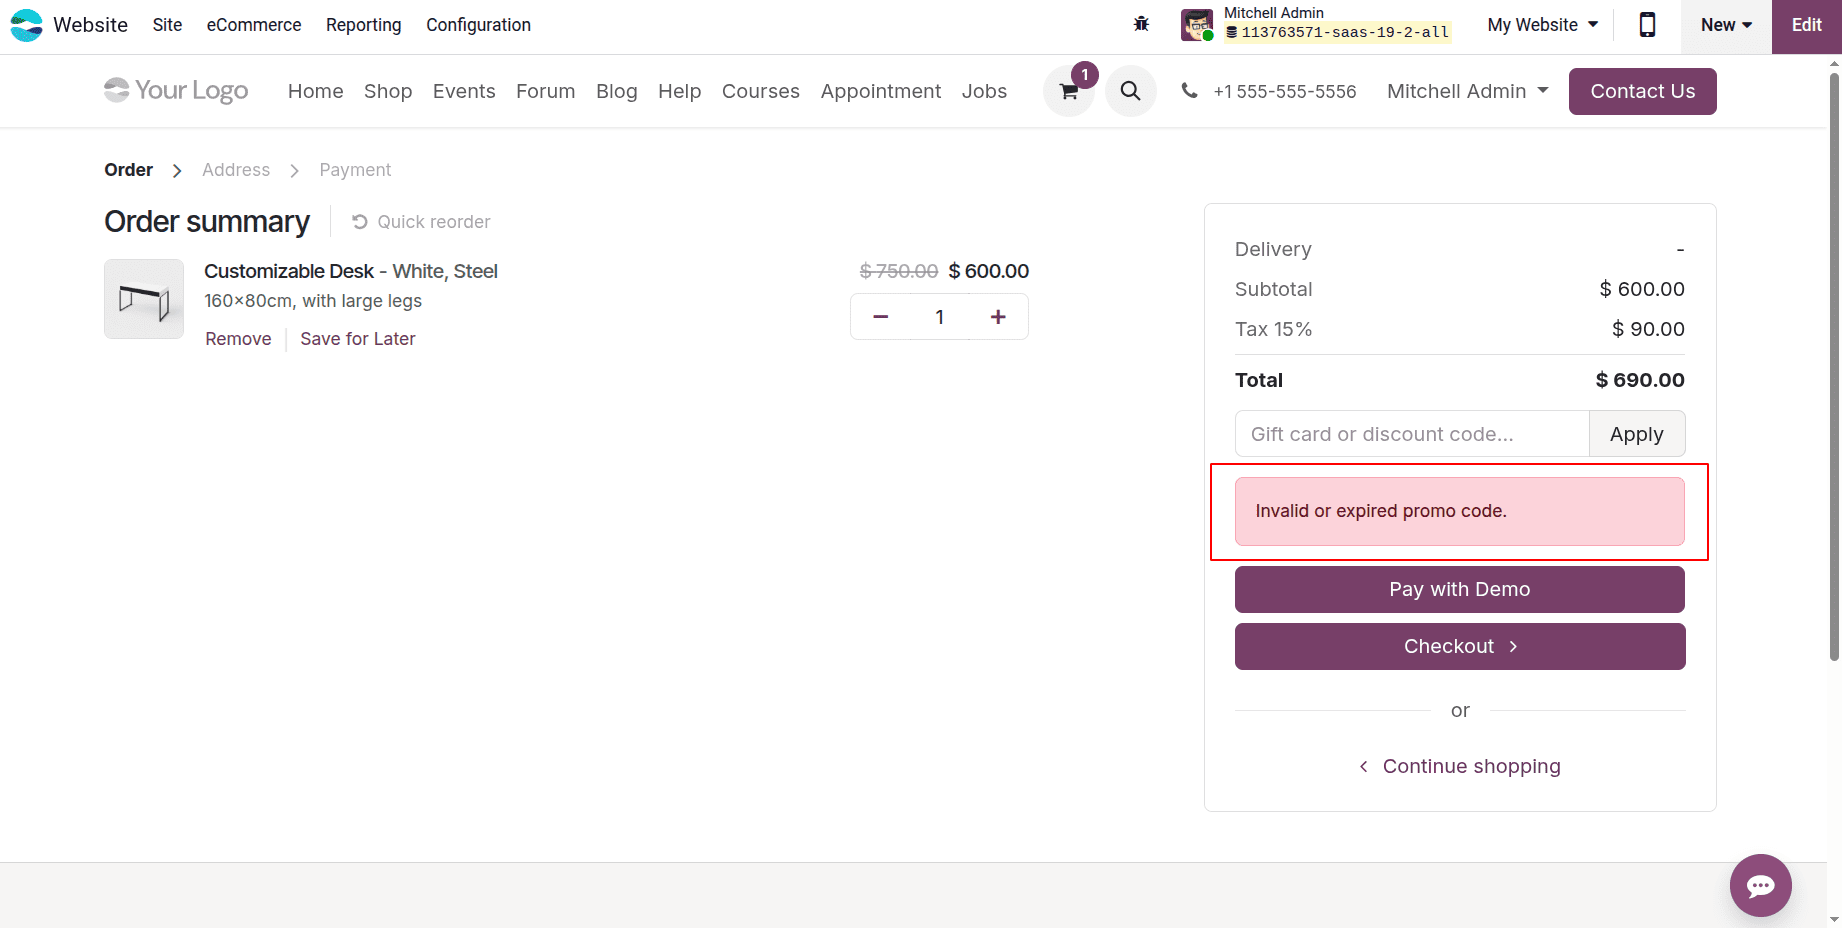
When you click the "Add to cart" button, the product will be added to your cart, and you will be taken to the next page. When you apply for the promotion program, you may now see that. To receive the prize, enter the discount code there.

However, as seen in the picture below, the consumer won't receive it because the price list is incorrect.
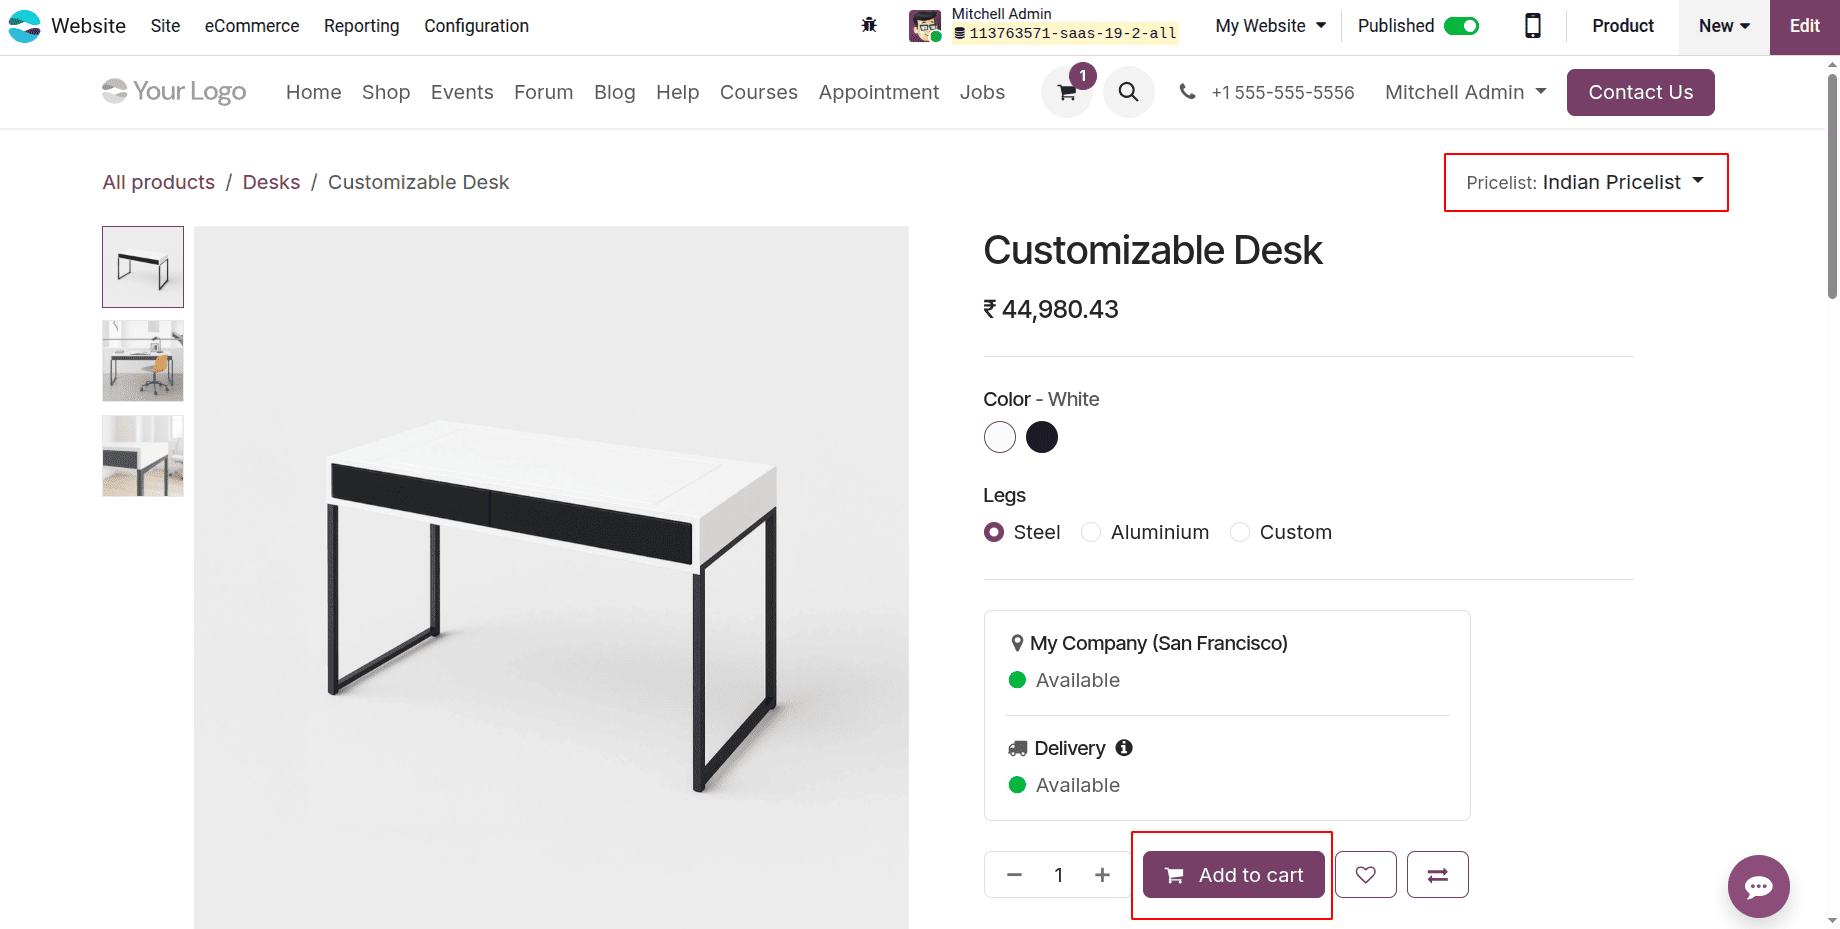
Then return to the shop era and select the same item once more. Change the pricing list now to Indian Pricelist (INR), the freshly produced one. Next, alter the price list on the home page of the website, as seen in the picture below. The product's sales price has been converted to INR value, as stated in the pricing list. Once more, click the "Add to cart" button.
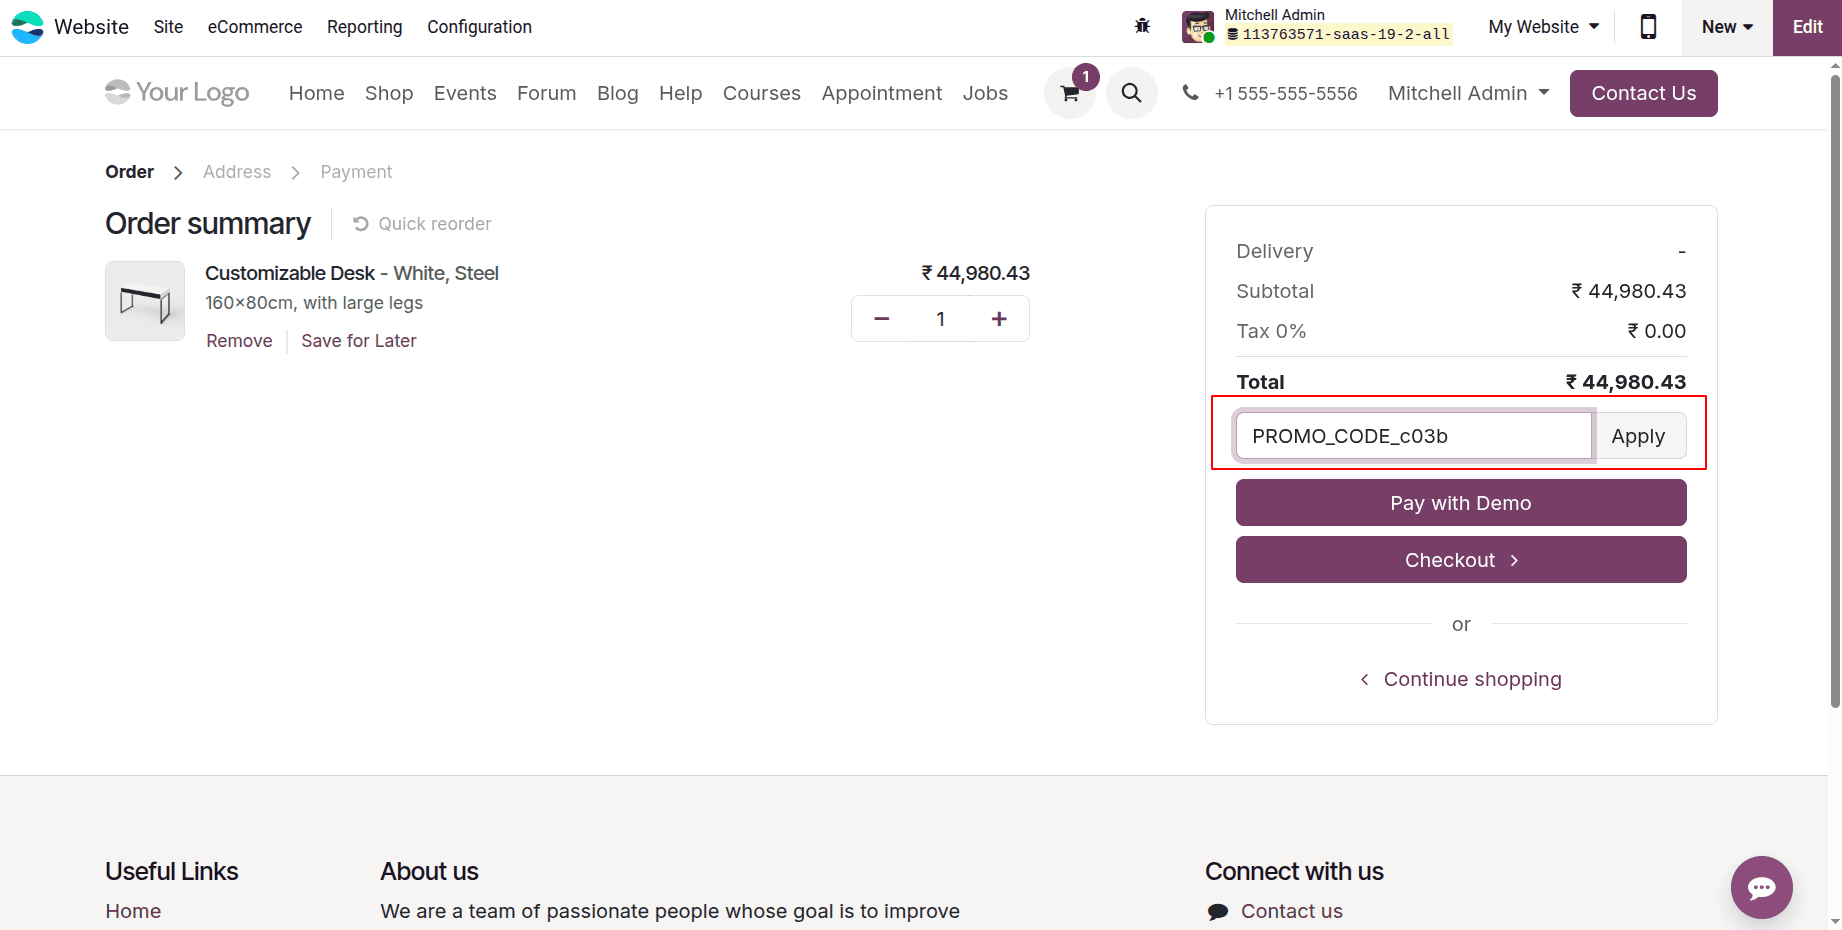
Add the item to the cart now, then enter the discount code in the designated field.
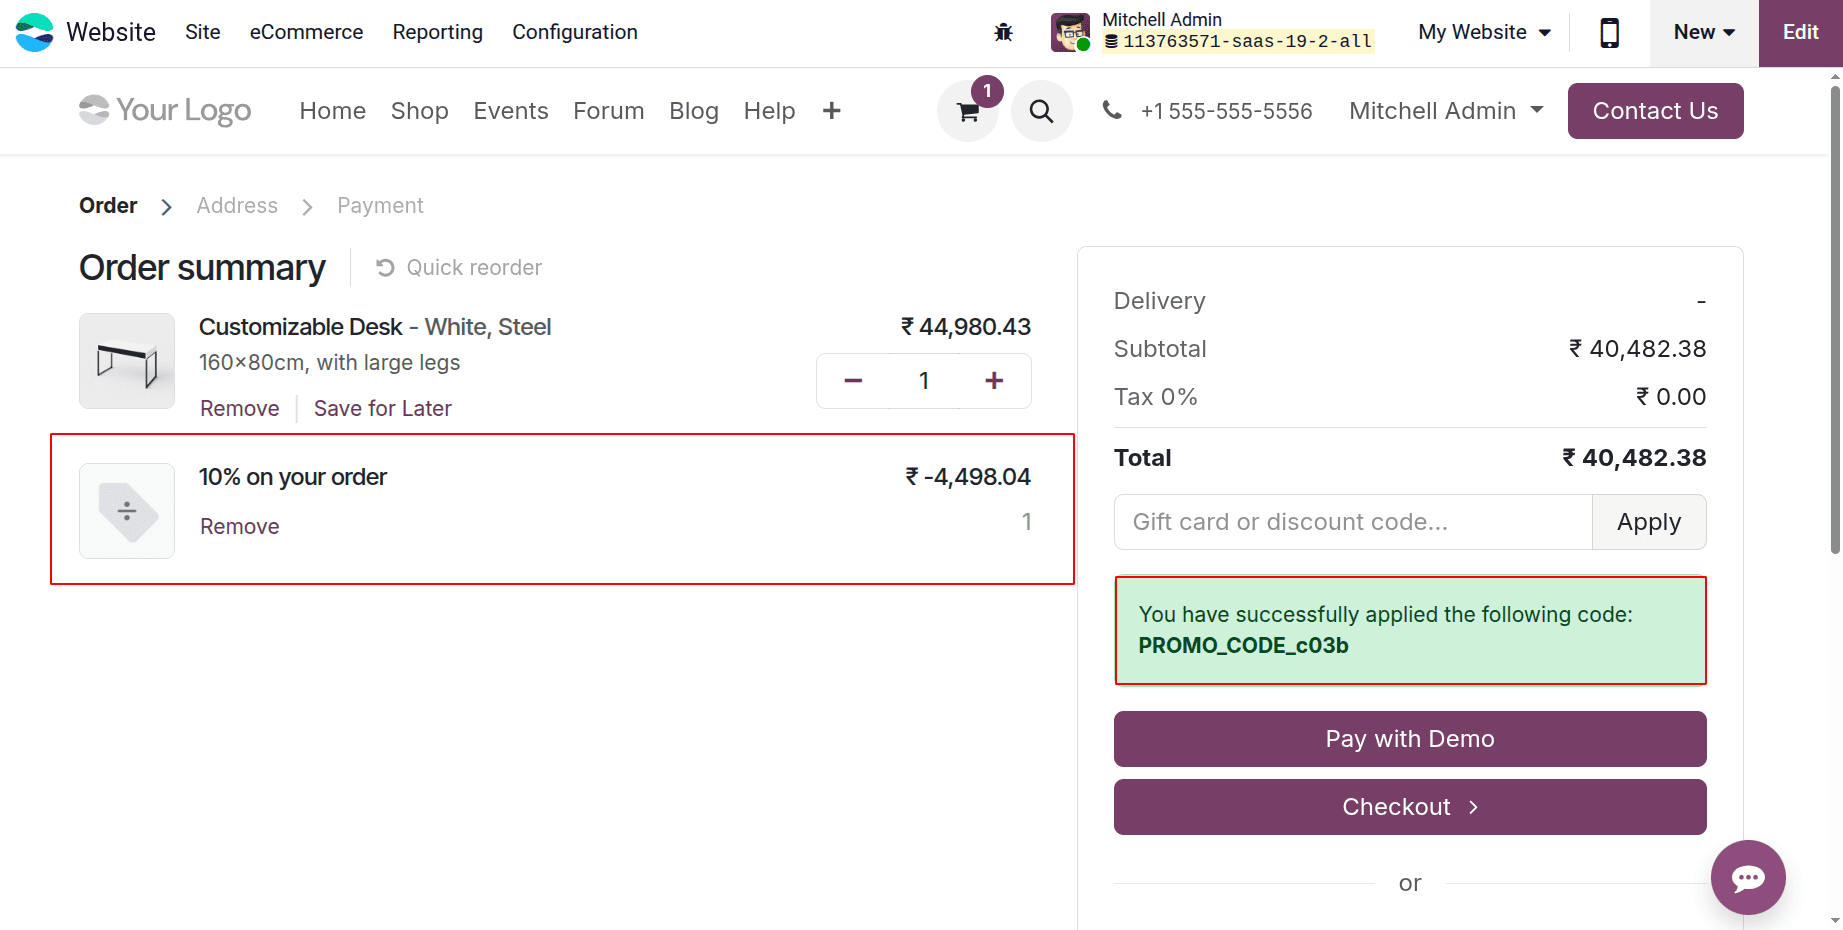
Here, you can observe that the goods have been successfully discounted. The sales price is discounted by 10%. Thus, the consumer receives the reward, and the sum is lowered.
By offering special offers and incentives to particular customers on the Odoo 19 website, businesses can create customized marketing strategies that boost customer engagement and sales. By implementing targeted rules, eligibility criteria, and customizable discount settings, Odoo ensures that promotions reach the right audience at the right time, improving customer satisfaction and business performance.
To read more about How to Configure & Optimize Pricelists in Odoo 19, refer to our blog How to Configure & Optimize Pricelists in Odoo 19.