In many cases, we may have to test and demonstrate the flow, which is not much better to use with master data. Here comes the use of Demo data which is used for only demonstration purposes.
Demo data for each Odoo model is loaded only if we have enabled the option to load demo data while at the creation time of the database. So, if we want to load the Demo data, we can specify it at the database creation time.
In this blog, we are going to discuss how to add demo data using CSV and XML files. Let’s get started.
Create Demo data using an XML file
To add demo data to our module, always create a separate demo folder, and don’t forget to add the path for our demo file inside the demo field on the manifest, mentioning the data as a demo. Here we are going to create Product Categories and Products.
<?xml version="1.0" encoding="UTF-8" ?>
<odoo>
    <data noupdate="1">

        <!--PRODUCT CATEGORY DEMO DATA -->
        <record id="product_category_test" model="product.category">
            <field name="parent_id" ref="product.product_category_all"/>
            <field name="name">Test Category</field>
        </record>
        <!--PRODUCT DEMO DATA -->
        <record id="product_test" model="product.product">
            <field name="name">Test Product</field>
            <field name="categ_id" ref="product_category_test"/>
            <field name="standard_price">14</field>
            <field name="list_price">20</field>
            <field name="type">product</field>
            <field name="uom_po_id" ref="uom.product_uom_unit"/>
            <field name="uom_id" ref="uom.product_uom_unit"/>
            <field name="description">This is a test product</field>
        </record>
    </data>
</odoo>
In the above example, we have created a simple Product category named Test Category and a product named Test Product. As we have to use the product category inside the product to be created, first we need to set up the product category lines, and then we can specify the id given for the product category on the Product. We can give several field values for creating the demo data records. Here I have given the common mandatory fields.
The next step is to add the path of this demo data file inside the manifest. We can add it like
‘demo’: [‘demo/file_name.xml’]
After creating a database with Load demo data enabled, install the module. Automatically the data will be loaded. If Load demo data is not enabled, it will not get loaded, and the records will not be created.
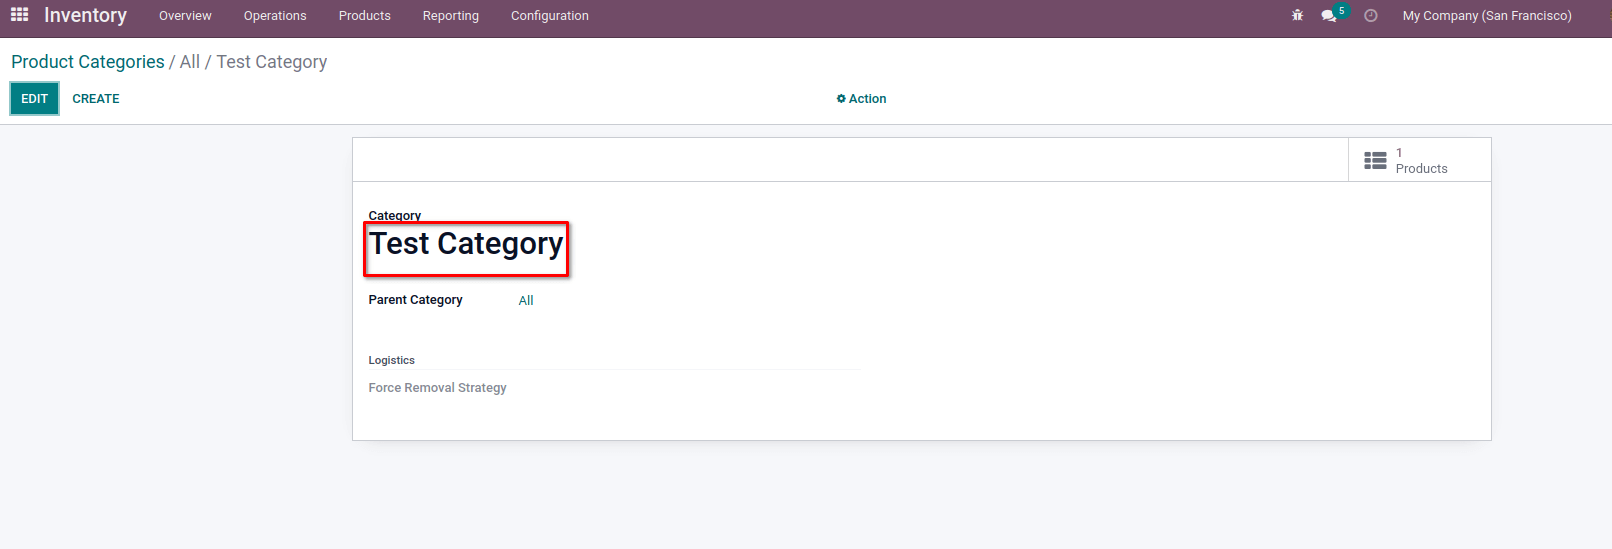
As we can see on the above image, our Test Category is loaded since we enabled the option to load demo data.
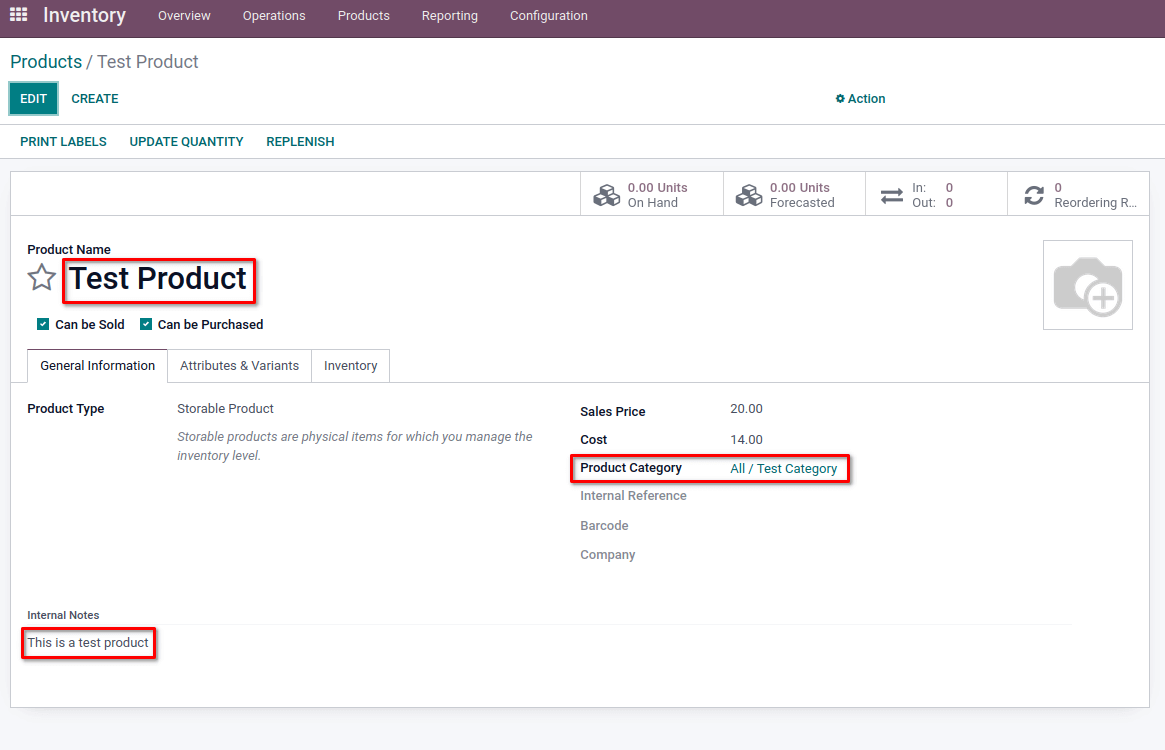
From the above image, it depicts that the Test Product is also loaded.
Create Demo data using a CSV file
Data files in XML format are very verbose when creating large numbers of simple records for the same model, even if it is self-descriptive and flexible. For this case, we can use CSV formatted data files. But in the case of creating demo data using CSV, we need to create separate CSV files for each model. In our case, we are creating Product categories and Products, so we should create two files, one for the Product category and the other for the Product itself, and the name of the file should be in the format
model_name.csv
Let us move on to how to import demo data using CSV.
product.category.csv
id,name,parent_id:id
product_category_test1,Test Category1,product.product_category_all
product_category_test2,Test Category2,product.product_category_all
In the above example, the fields on the first row are the field names used at the time of creation or update to externally identify for writing purposes along with the special field id. And each row thereafter creates a new record of the Product category. When we specify an external identifier for a field like parent_id for the product category in our example, we must provide it by
field_name:id
product.product.csv
id,name,categ_id:id,standard_price,list_price,type,uom_po_id:id,uom_id:id,description
product_test1,TestProduct1,product_category_test1,14,20,product,uom.product_uom_unit,uom.product_uom_unit,This is a test product
product_test2,TestProduct2,product_category_test2,20,14,product,uom.product_uom_unit,uom.product_uom_unit,This is a test product
As we have done for our XML demo data file, we need to add the paths for the CSV files on manifest like below.
	‘demo’: [
		‘demo/product.category.csv’,
		‘demo/product.product.csv’,
		]
Now we can install our module, and all the records on CSV files will be automatically loaded if the Load Demo data option is enabled while creating the Database.
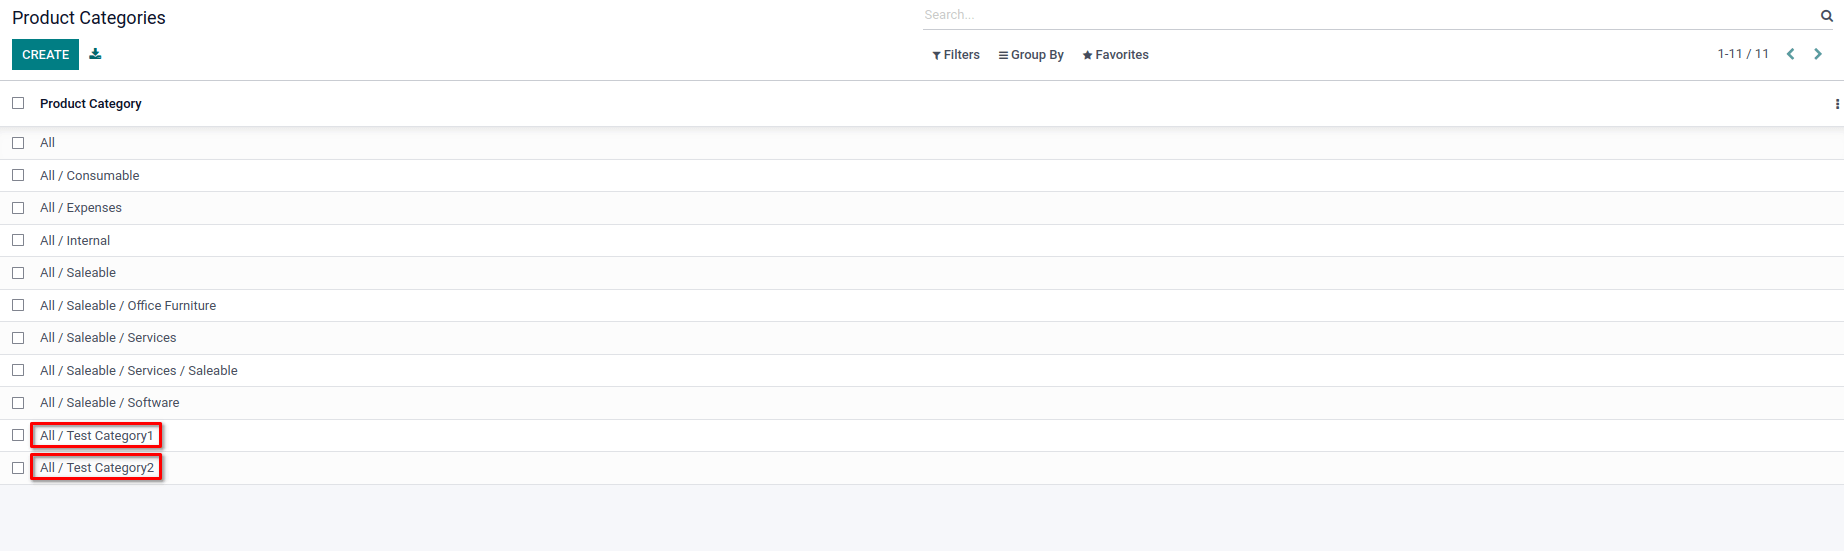
As in the above image, we can see that the two product categories Test Category1 and Test Category2 are loaded successfully.
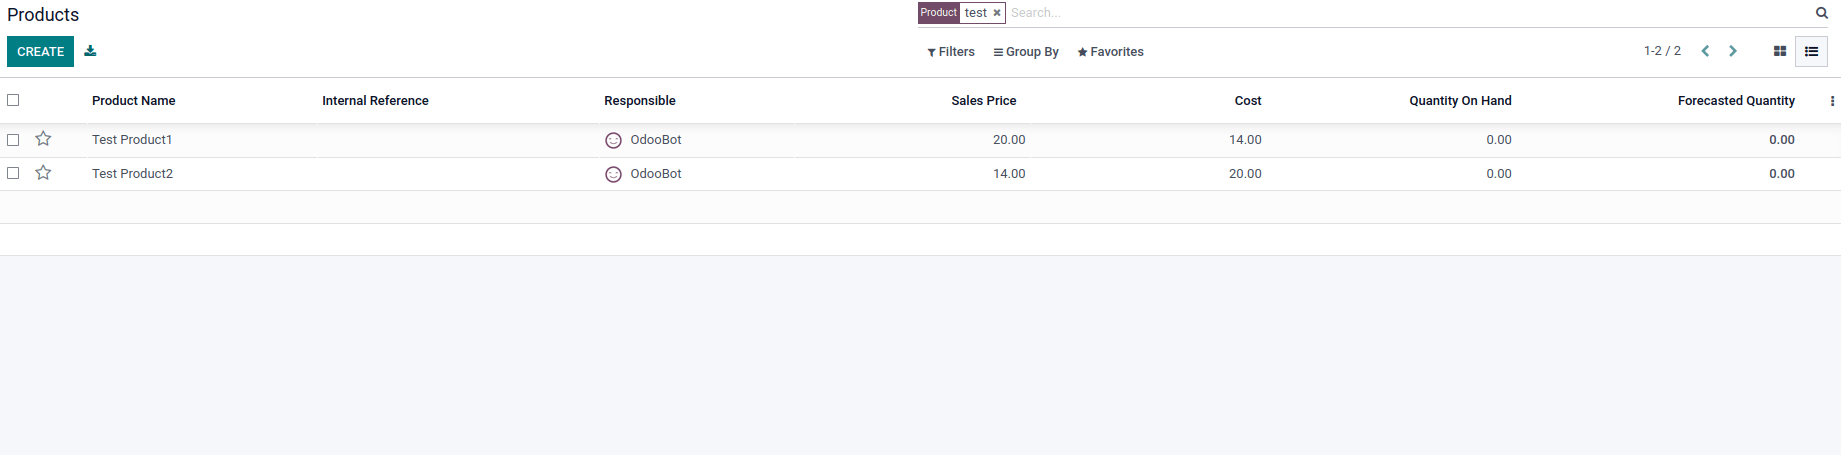
Like the Categories, Test Product1 and Test Product2 are also successfully loaded as we have enabled the option to load demo data.
And that’s how we can load demo data using XML and CSV files in Odoo 15.