If you have been developing custom modules using Odoo Studio, you definitely know what comes next: Who has access to read, create, edit, and delete the records within the module?
In Odoo 19, access rights (ir.model.access) and record rules (ir.rule) were used to restrict access to models and records. With Odoo 20, the new ir.access model has been introduced to provide a unified access control system where access permissions can be managed along with record-level restrictions.
In this article, we are going to take a tour of the Security tab in Odoo 20 Studio, go through all fields of an access record, take a look at the access created automatically for new models, and then check everything out using a restricted user.
Understanding ir.access in Odoo 20
Before Odoo 20, the question "can this group use this model?" was answered by ir.model.access, while "which records can they touch?" was answered by ir.rule. In Odoo 20, both answers are unified in one record: a model, a group (optional), a combination of operations, and a domain (optional).
- A record with a group is a Permission. It allows listed operations to the users of a group, limited to the records that match a domain (if provided).
- A record without a group is a Restriction. This means that all users can operate ONLY if the record matches the domain.
Permissions can be defined per group of users. Restrictions are not specific to a group and will apply to all users. These will restrict the number of records that can be accessed by users within the domain specified. Where a restriction is applicable, it will have priority over permissions.
Opening the Security Tab in Studio
Odoo Studio is only available on the Enterprise edition. You can find the security rules of your custom model by following these steps:
- Go to your custom app and click on the Studio icon located at the top bar.
- Select the model you want to manage.
- Click on the Security tab.
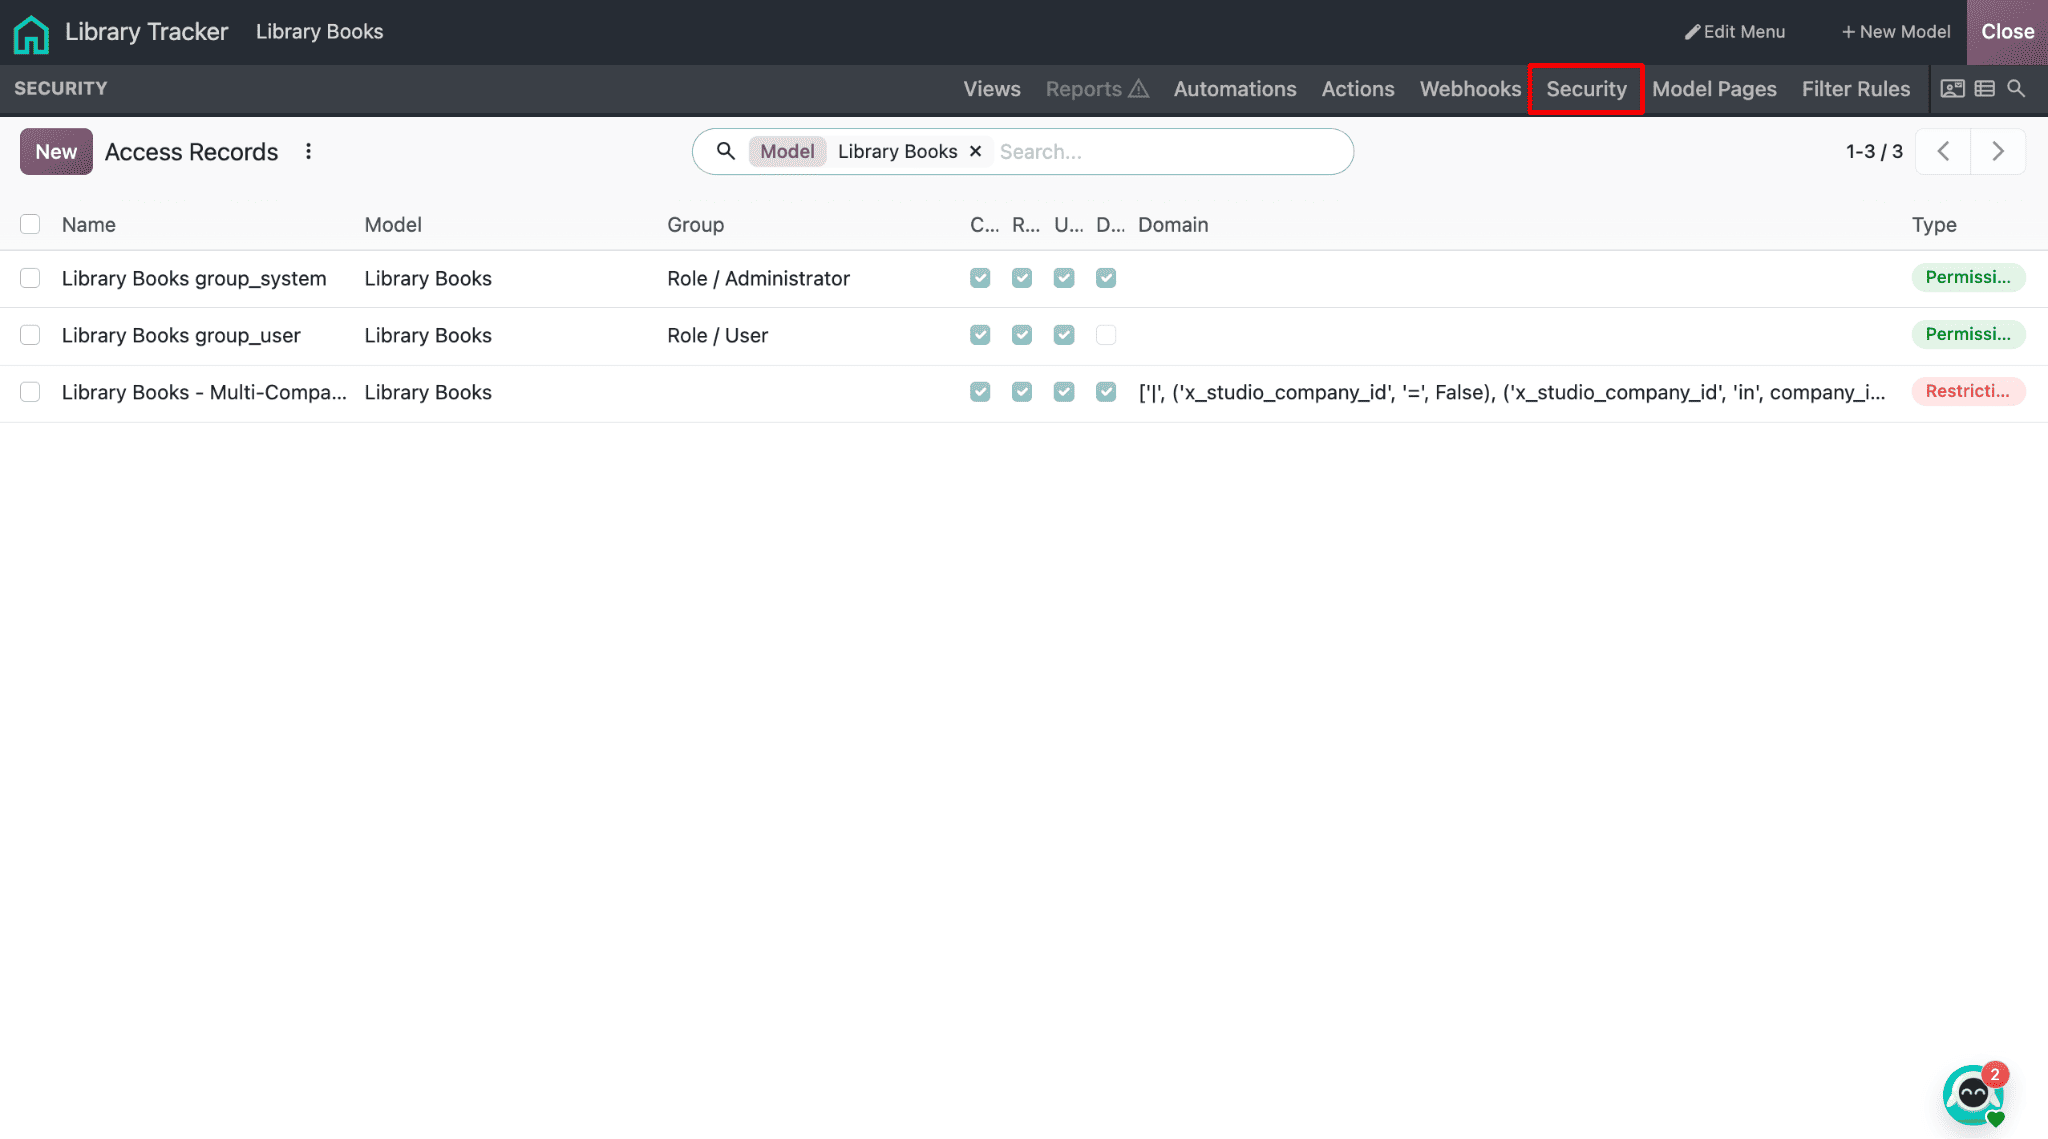
This will show you all the Access Records (ir.access) that are currently applied to your model. These records will represent either a permission or restriction. You can easily add/edit/archive/delete Access Records from here, without needing to go into another menu.
Fields of an Access Record
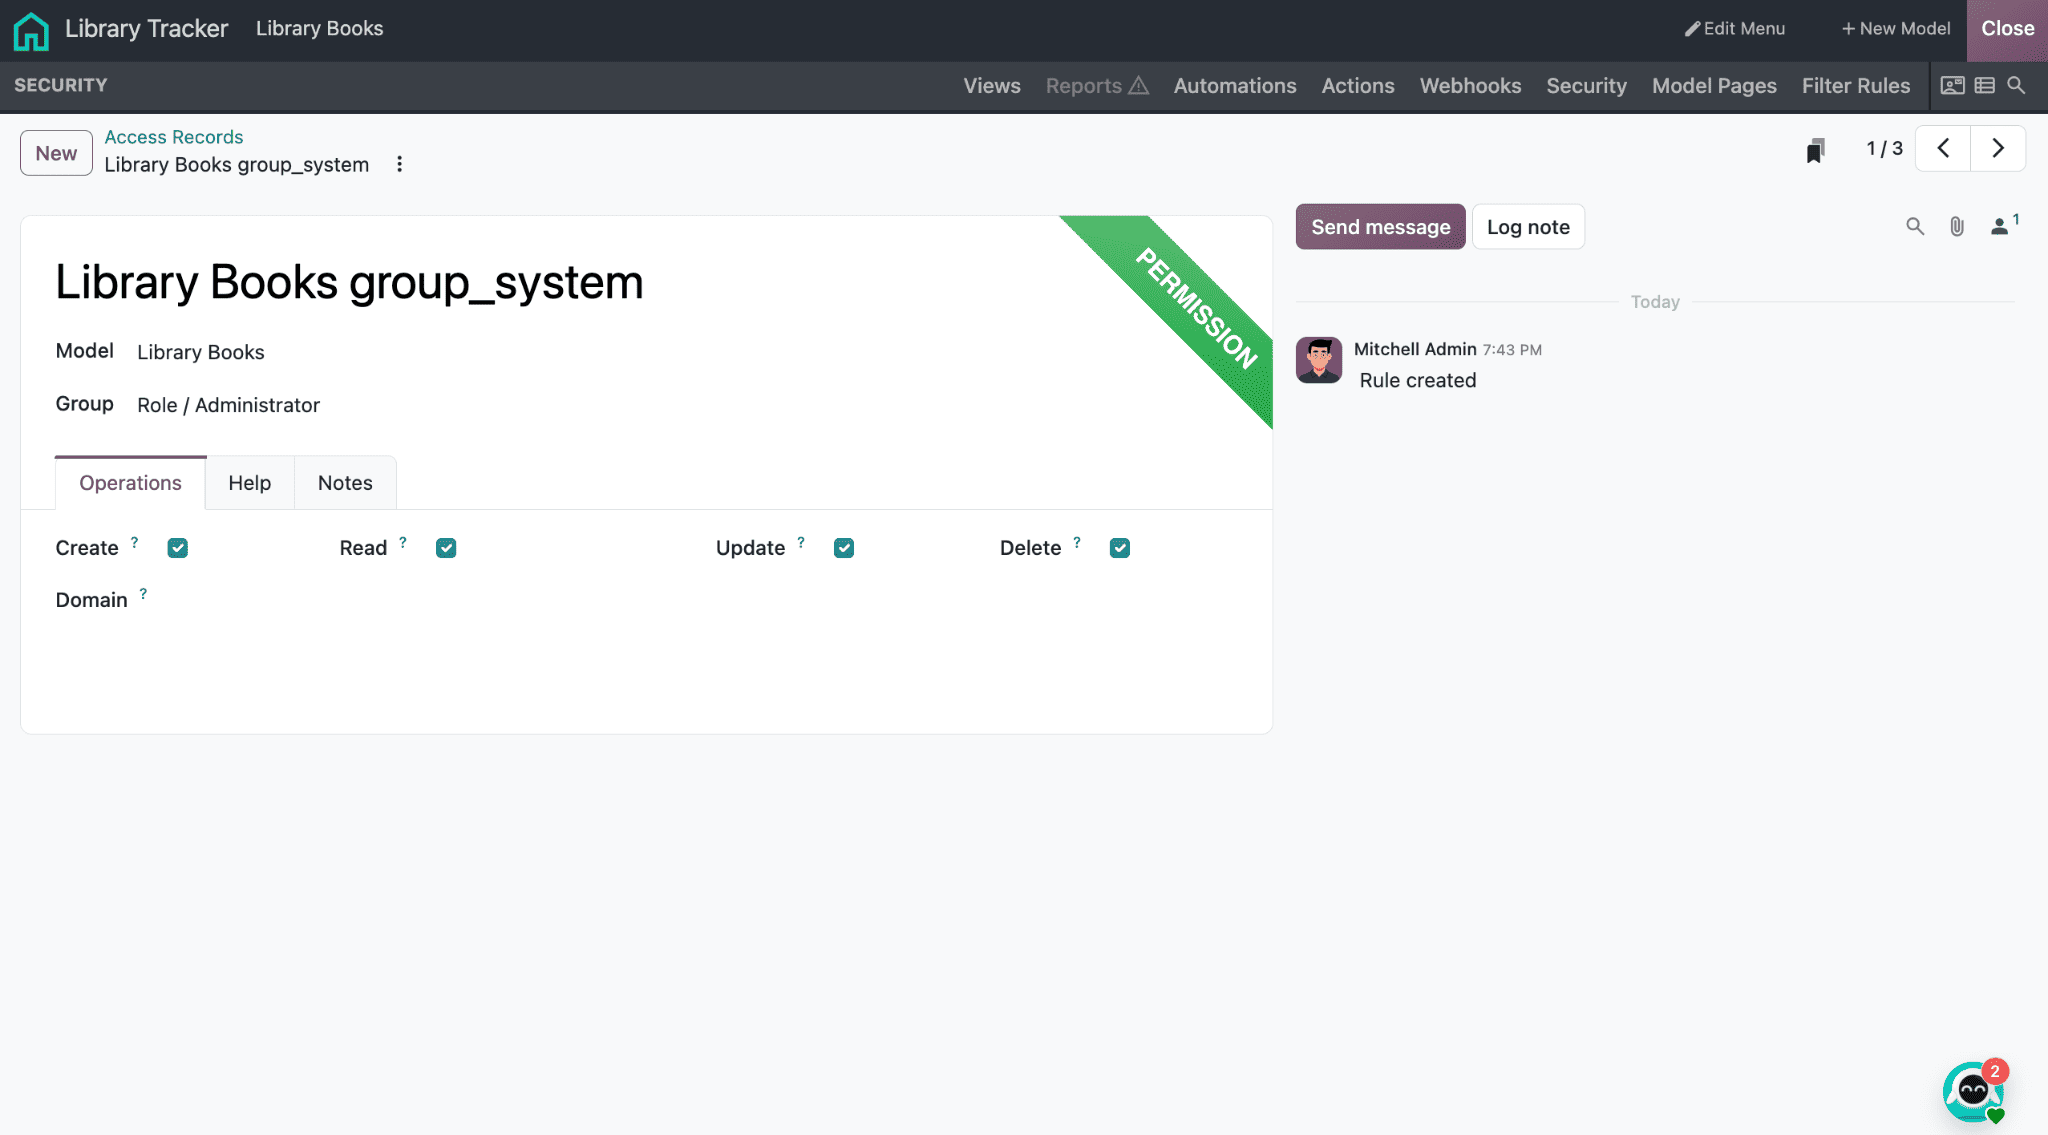
- Name: A name for this access rule
- Model: The model this rule relates to. This should be automatically set in Studio to the model you're currently editing.
- Group: The group to apply this rule to. If left blank, it will act as a restriction to all users.
- Operation: The operations allowed on this model. You can use crud, cru or r etc. (c = create, r = read, u = update, d = delete)
- Domain: You can narrow down what records this rule will affect.
- Kind: If the access rule is a permission or restriction. It is automatically computed by Odoo based on the Group field. If the group is filled, then it will be a permission; otherwise, it will be a restriction.
- Read / Update / Create / Delete: Turn these on and off to set what operation this rule will perform.
- Note: A note field to let you know why this rule exists.
The active field allows you to put the rule into archive mode rather than deleting it. This may be useful if you wish to disable a restriction.
Operation Codes: crud, cru, r and More
Within the 4 toggles, the operation is stored as a string with the letters c, r, u, or d.
- crud: create, read, update, and delete (full access)
- cru: create, read, and update, but no delete
- crd: create, read, and delete
- cud: create, update, and delete
- rud: read, update, and delete
- cr: create and read
- cu: create and update
- cd: create and delete
- ru: read and update
- rd: read and delete
- ud: update and delete
- c: create only
- r: read only
- u: update only
- d: delete only
Permission vs. Restriction
There are two types of records in Odoo 20. Odoo detects whether it is a permission or restriction by seeing if there is a group assigned to it.
- If there is a group, the record will be considered a permission. This allows users in the selected group to perform the selected operation.
- If there is no group, the record will be considered a restriction. This will restrict which records all users can access, based on its domain.
1. Permission - Users can perform these actions.
To allow users within the internal group of users to create, read, and update only records that they created, the following access record should be set up:
To do this, create an Access Record with the following setup:
- model_id: your custom model
- group_id: Internal User
- operation: cru
- domain: [('create_uid', '=', user.id)]
This lets your internal users interact with their records but will not let them interact with any records created by other users.
2. Restriction - What users cannot access
If your system has multiple companies, and you want users to only be able to see the records from companies they are allowed to. To do this, you would create another access record.
- model_id: your custom model
- group_id: (empty)
- operation: crud
- domain: [('company_id', 'in', company_ids)]
As there is no group specified, this will apply to everyone. Users can only view records that belong to companies they are allowed to. This example assumes there is a company_id field on your model.
Default Access on New Models(_setup_access_rights)
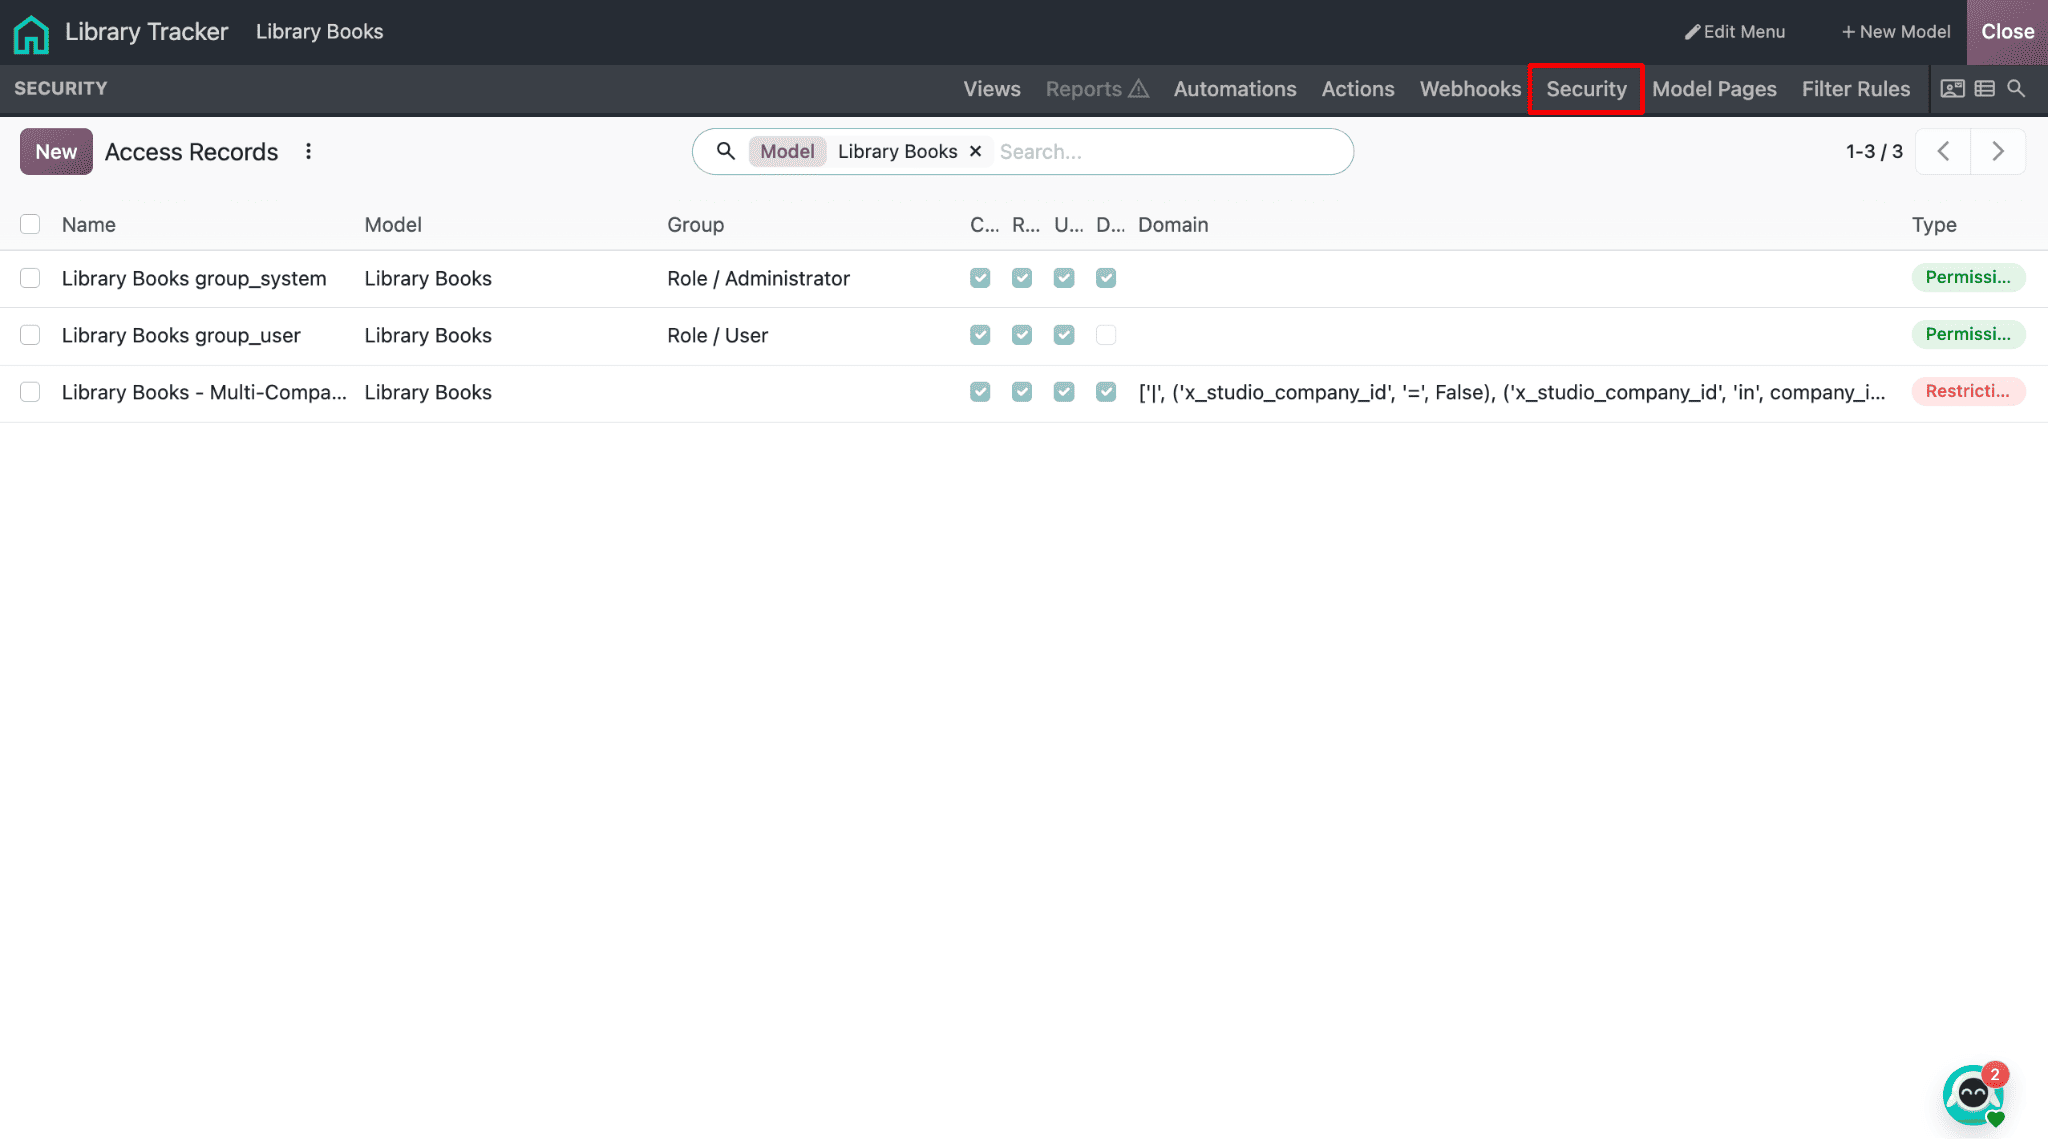
If there aren’t any access rights set up for a model, then no users will have access to it. This means if we create a new Studio model, it will be completely unusable. To overcome this issue, Odoo will run the _setup_access_rights method when we create the model. This will create some default access rights. These default entries can be seen in the Security tab.
Testing Access Records
Once the access records have been set up on the Security tab, they should be tested with a basic user.
As an example, we can create a test user with limited access to the Library Tracker module.
Steps:
- Create a Test User: Go to Settings > Users & Companies > Users and create a new user without being an administrator.
- Assign the User Group: Add the group referenced in your access record for the Library Tracker module. For example, if you added the Internal User group, then add this.
- Log in as the Test User: Create a password and log in to Odoo in another browser or incognito window. Ensure you keep your administrator logged in.
- Test Read Access: Open the Library Tracker module and ensure that the test user can only view library records that are permitted due to the access settings.
- Test Create Access: Attempt to create a new library record. If Create has been set, then the user should be able to.
- Test Update Access: Open any library record and try to update any details. The test user should only be able to update library records that are permitted.
- Test Delete Access: Attempt to delete a library record. If delete has not been set, then Odoo should not allow this.
- Test Domain Restrictions: If you added a domain to your access record, then ensure that the test user can only see records that match. For example, if you have restricted the access to only show library records created by the current user, then the test user should not be able to see records created by other users.
- Test Restrictions: If you have added a restriction without specifying a group, then ensure that this is also applied to your test user. Attempt to open a record that does not meet the domain of the restriction.
Once testing has been completed, go back to your administrator account and change the access records to ensure that everything works as expected.
Within the Security tab of Studio in Odoo 20, it is very easy to give certain permissions to your custom models. You can create group, operation, and domain rules, meaning that you can set rules easily and test them using a restricted user.
To read more about What's New in Odoo 20 Studio: Key Features and Updates, refer to our blog What's New in Odoo 20 Studio: Key Features and Updates.