Odoo Studios is a toolkit that allows you to customize Odoo without needing any coding skills. You can customize your applications by creating new fields, changing views and automating processes. In Odoo 20 there have been some changes made to the studio that make it easier for you to manage your security, automations and website content.
In any app, you can add or modify:
- Fields
- Views
- Models
- Automation rules
- Webhooks
- PDF reports
- Approval rules
We will go through the main changes to Odoo 20 Studio and explain how they work. This will help you understand how they can benefit your business when customising your Odoo applications.
Security rules
In this blog, we will go through the main changes to Odoo 20 Studio and explain how they work. This will help you understand how they can benefit your business when customising your Odoo applications.
How to Open Studio
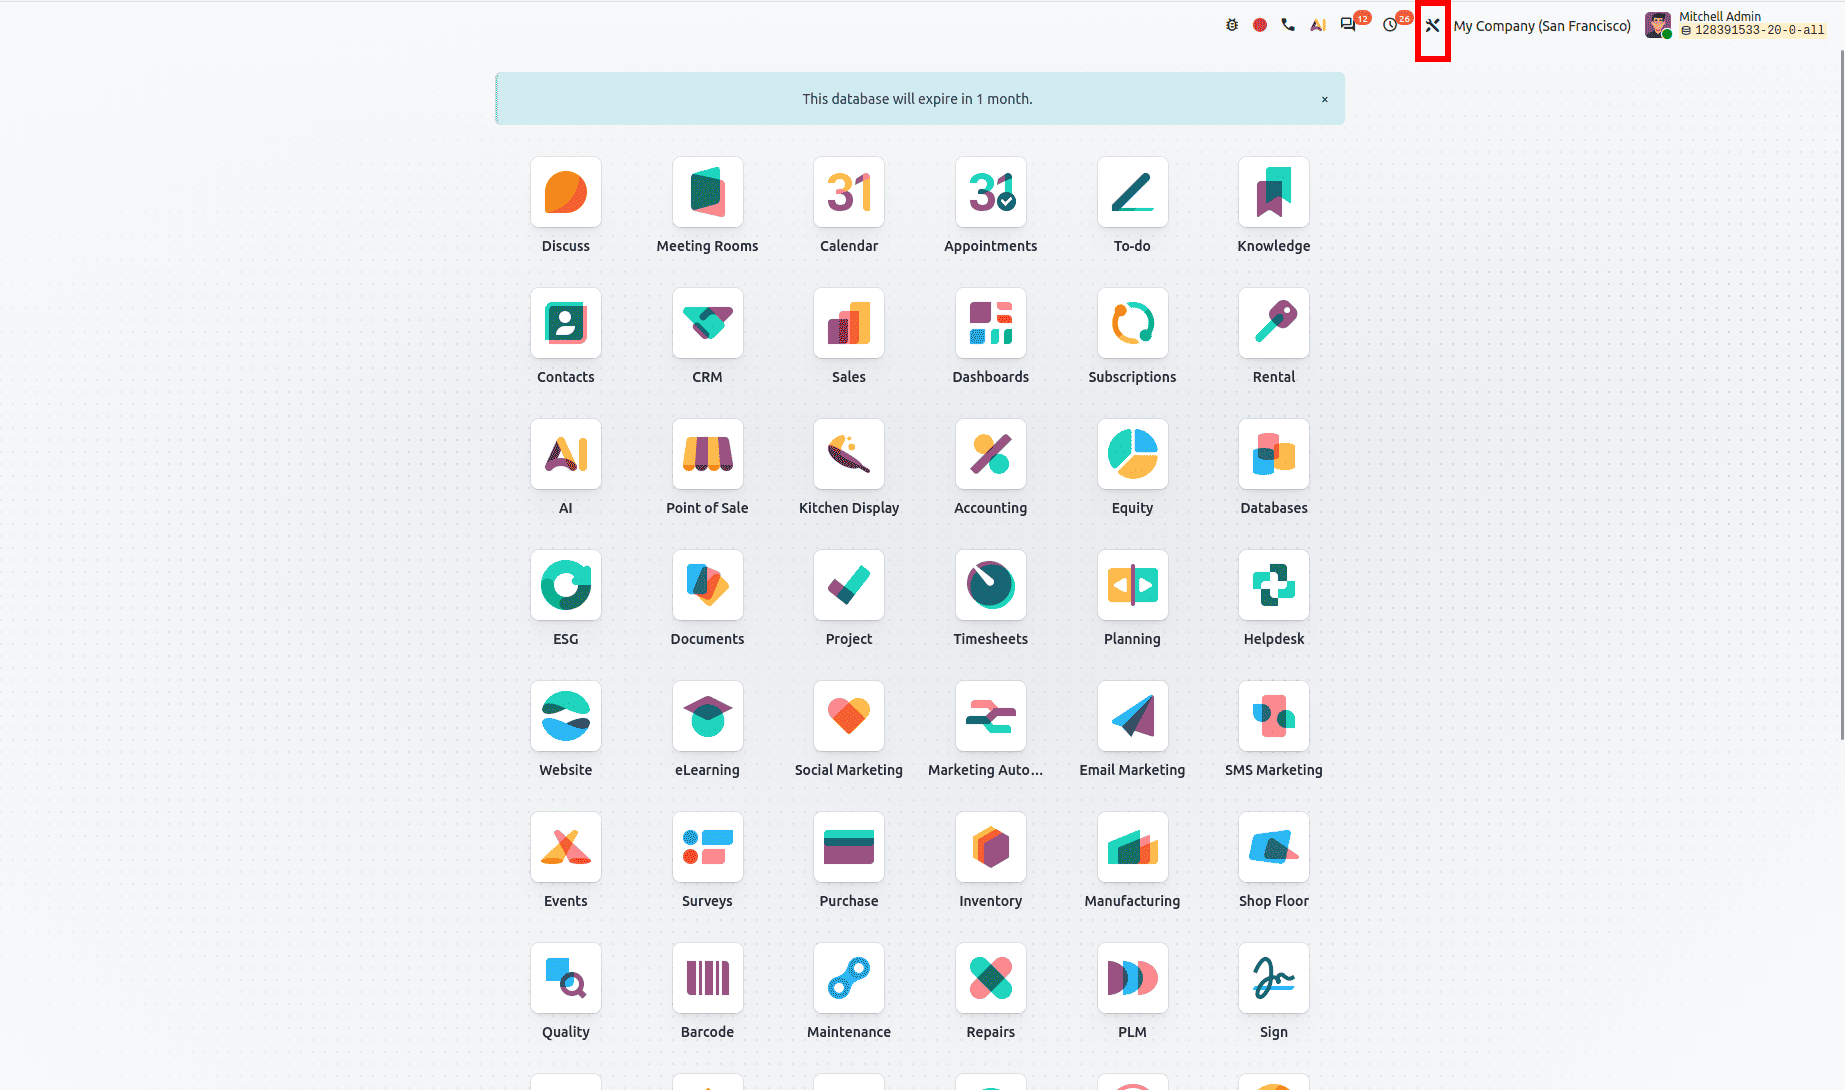
When you have opened Odoo, you will see the Studio icon in your system tray. Clicking this icon from the home menu will open Studio and show you a list of your apps. This means you can modify an existing app or create a new app. The studio will open in your current view when you click the icon, such as a list, form, or report, so you can start customizing it right away.
1. Security Tab – Unified Access Rights Management
This is one of the main changes to Odoo 20 Studio. The Security tab has been updated. Previously, access control lists (ACLs) and record rules were separate, but now Odoo 20 uses a unified method using ir.access records. The updated security tab enables users to control their app using Permissions and Restrictions.
- Permission: Controls what actions users can do. For example, Read, Create, Edit, and Delete.
- Restriction: It restricts the user to certain records using a domain.
This approach brings permission management and record-level restrictions into one place, making it easier to configure and maintain application security.
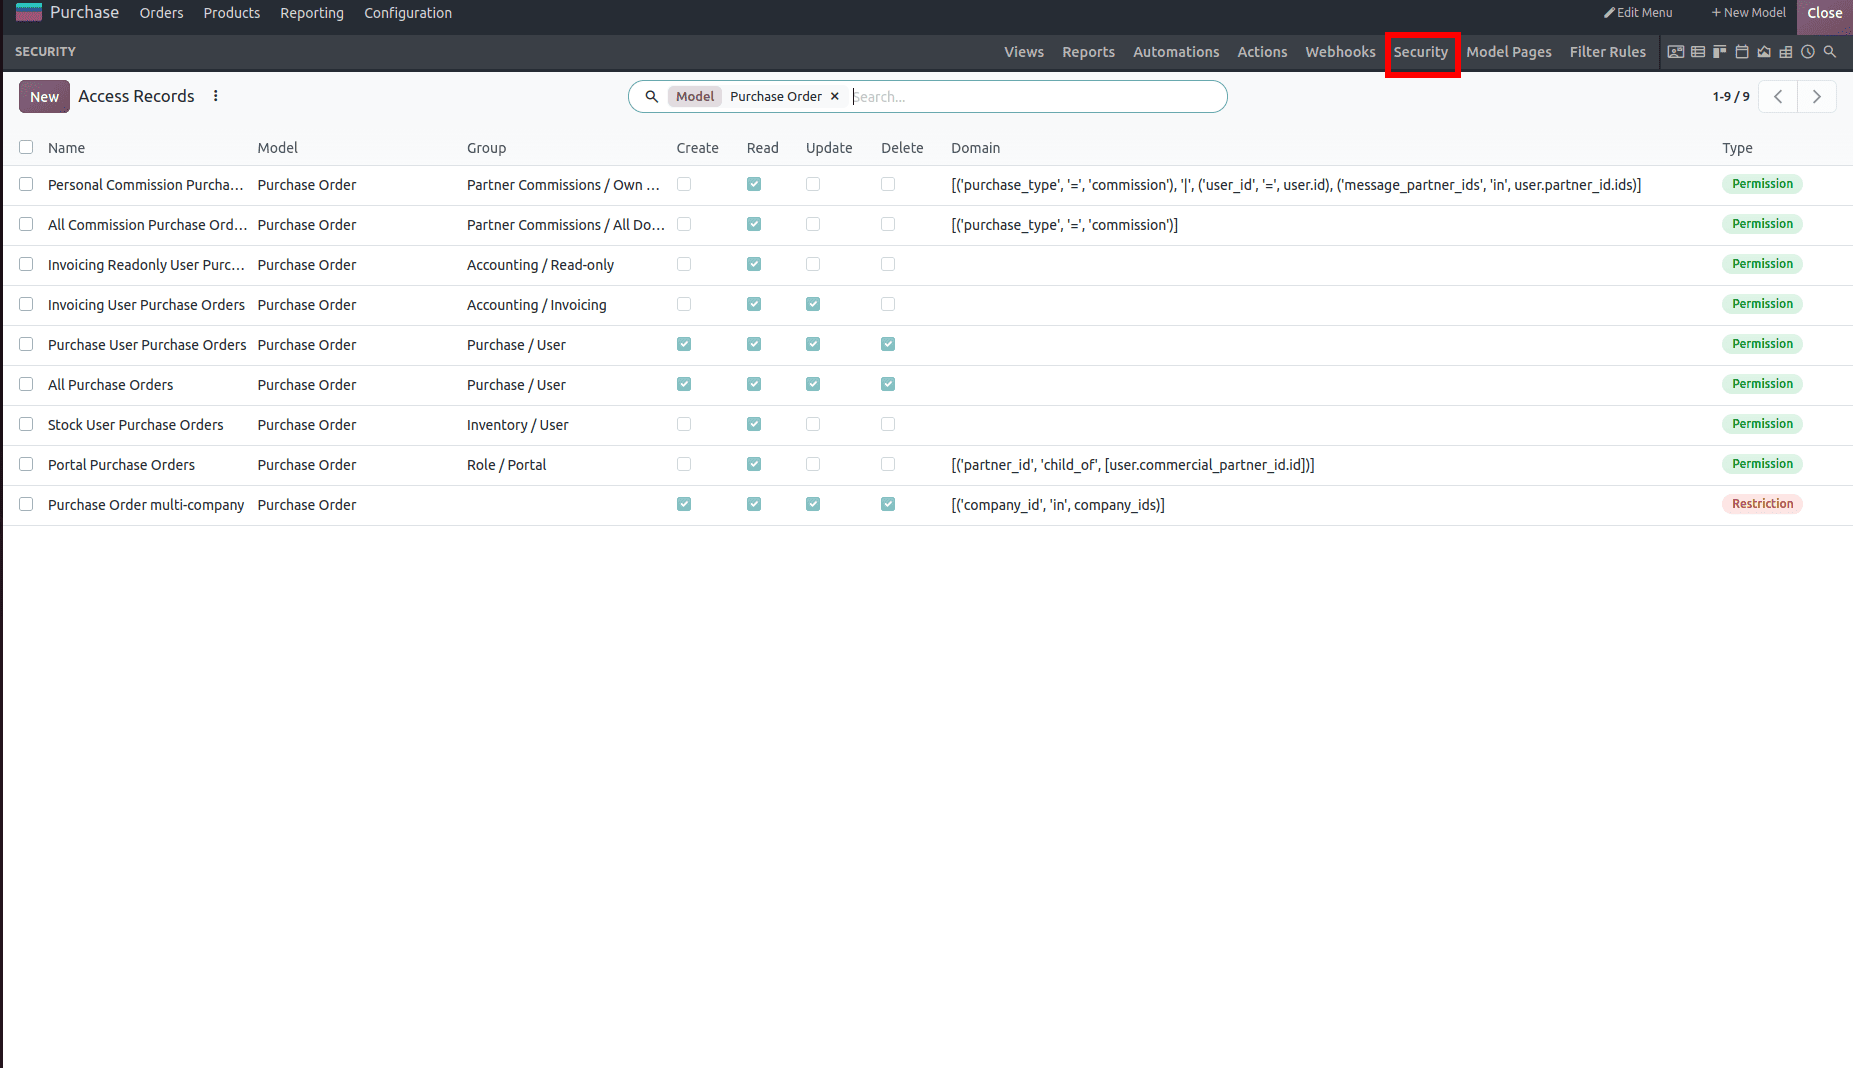
From the screenshot, we can see that some rules are restrictions and others are permissions, as shown in the Type column. By clicking the New button, you can create a new rule or update an existing one.
Let’s take a look at creating a new rule.
Example: Creating a Rule
For example, we want our accounting team to have permission to view and edit Purchase Orders but not create or delete them.
- Open Studio from the Purchase app and go to the Security tab. The list is already filtered by the Purchase Order model.
- Click New.
- Fill in the rule:
- Name: Accounting Purchase Orders
- Group: Accounting / Invoicing
- Permissions: tick Read and Update, and leave Create and Delete unticked
- Click Save so the new rule is added to the list with a green Permission badge.
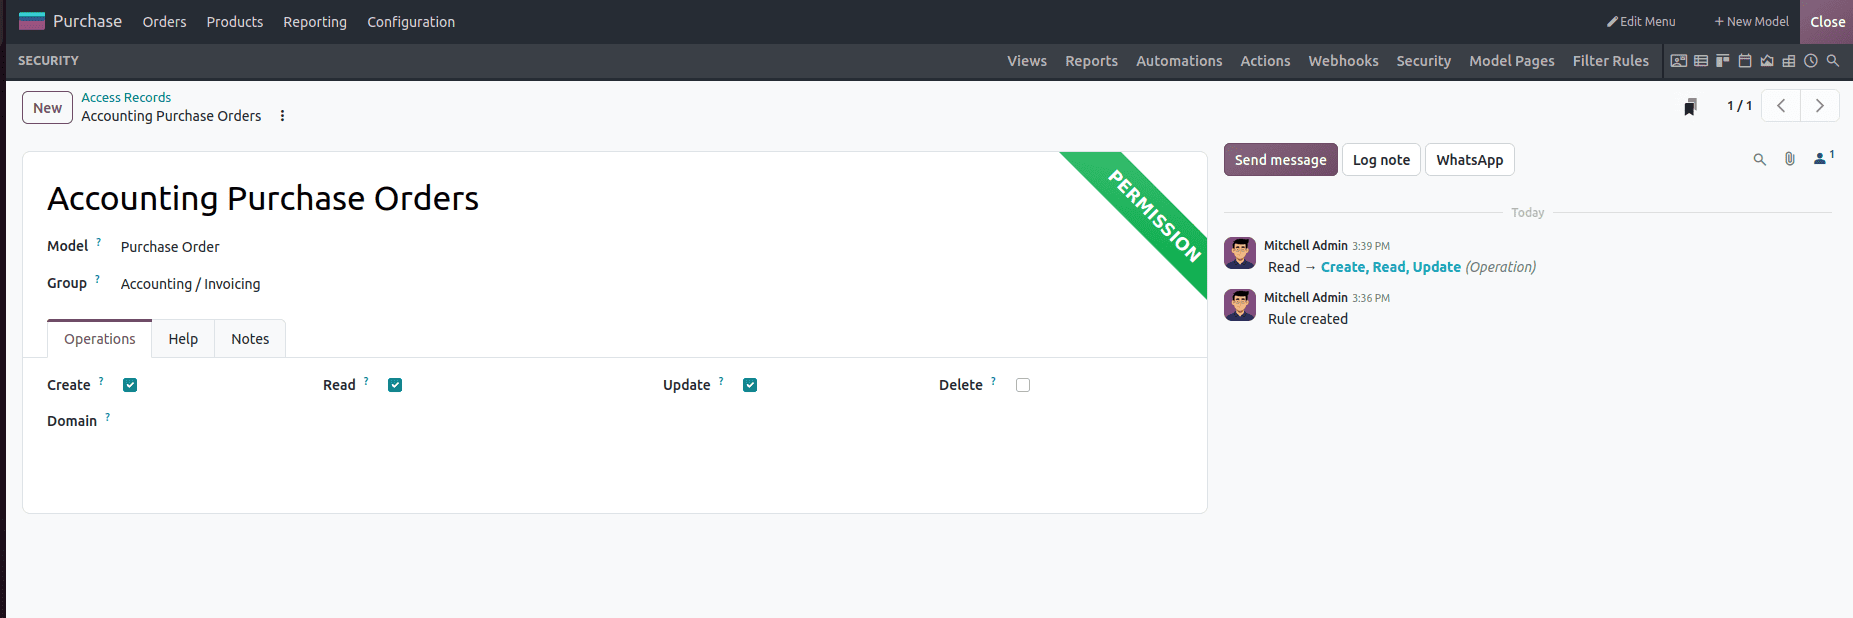
If we wanted to make it more specific, we could add a domain such as [('company_id', 'in', company_ids)]. The rule then applies only to the records that match it.
Let’s now take a look at how to update an existing rule.
Example: Updating a Rule
You can also edit an existing rule. In the screenshot, Stock User Purchase Orders only has Read enabled (group: Inventory / User) . Let’s say our warehouse team needs to edit Purchase Orders as well, for example, to correct a received quantity.
- Click the Stock User Purchase Orders row.
- Tick Update.
- Save.
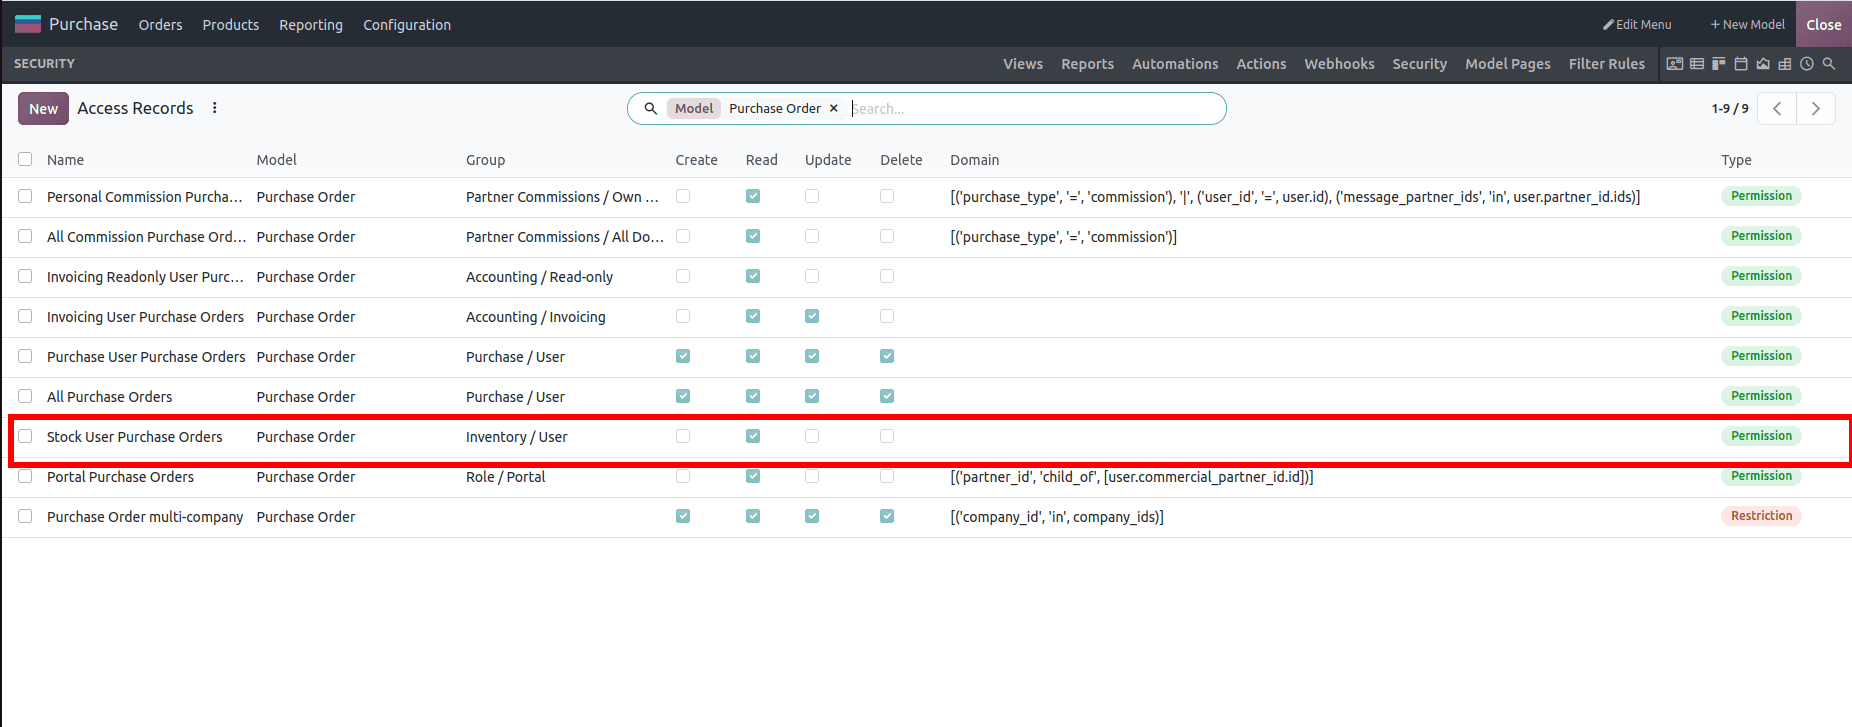
When we click on the Update button, the form view opens, as shown below.
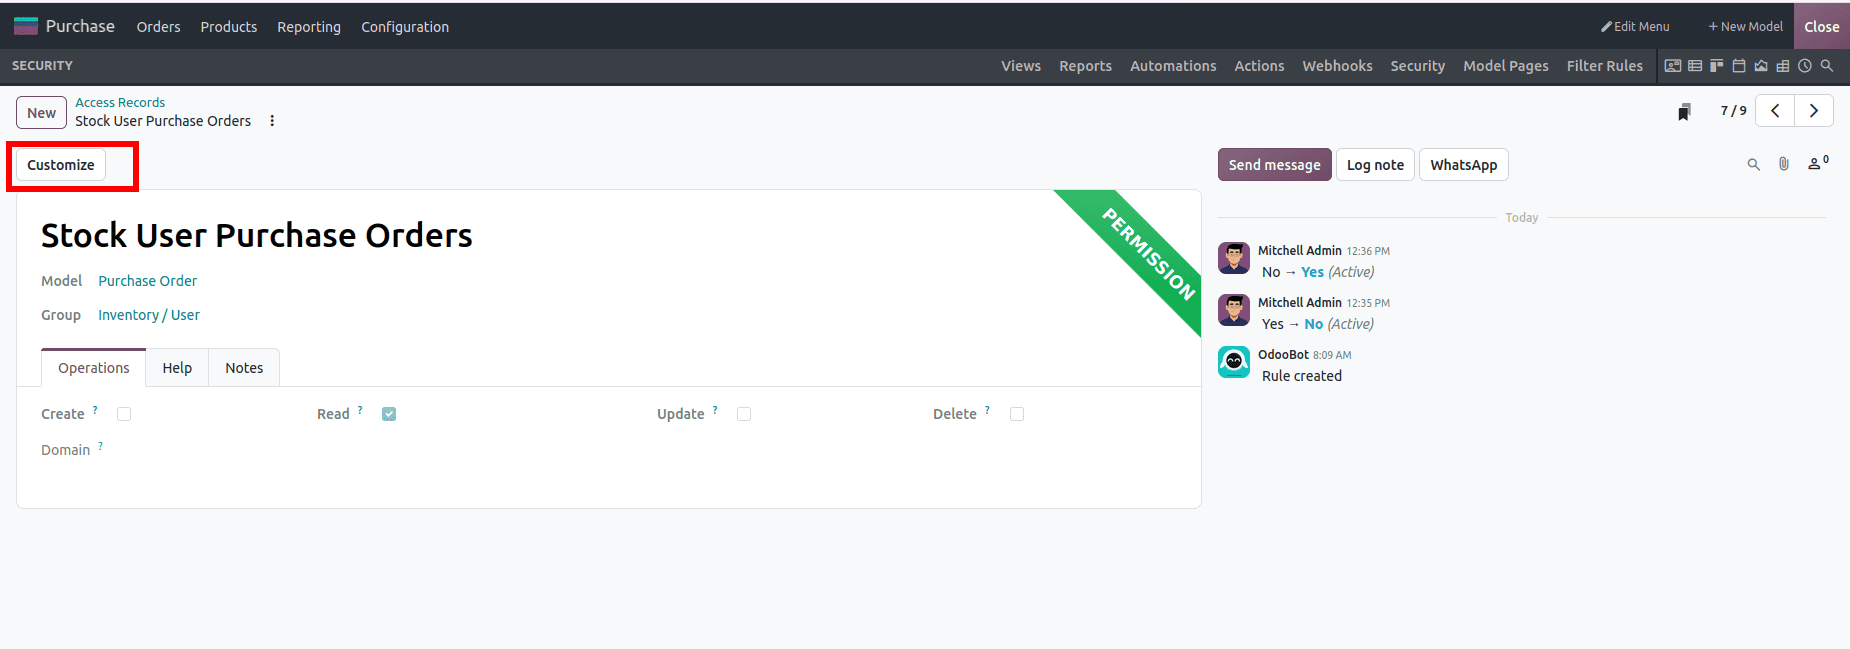
To edit this rule, click on ‘Customize’ in the top left corner.
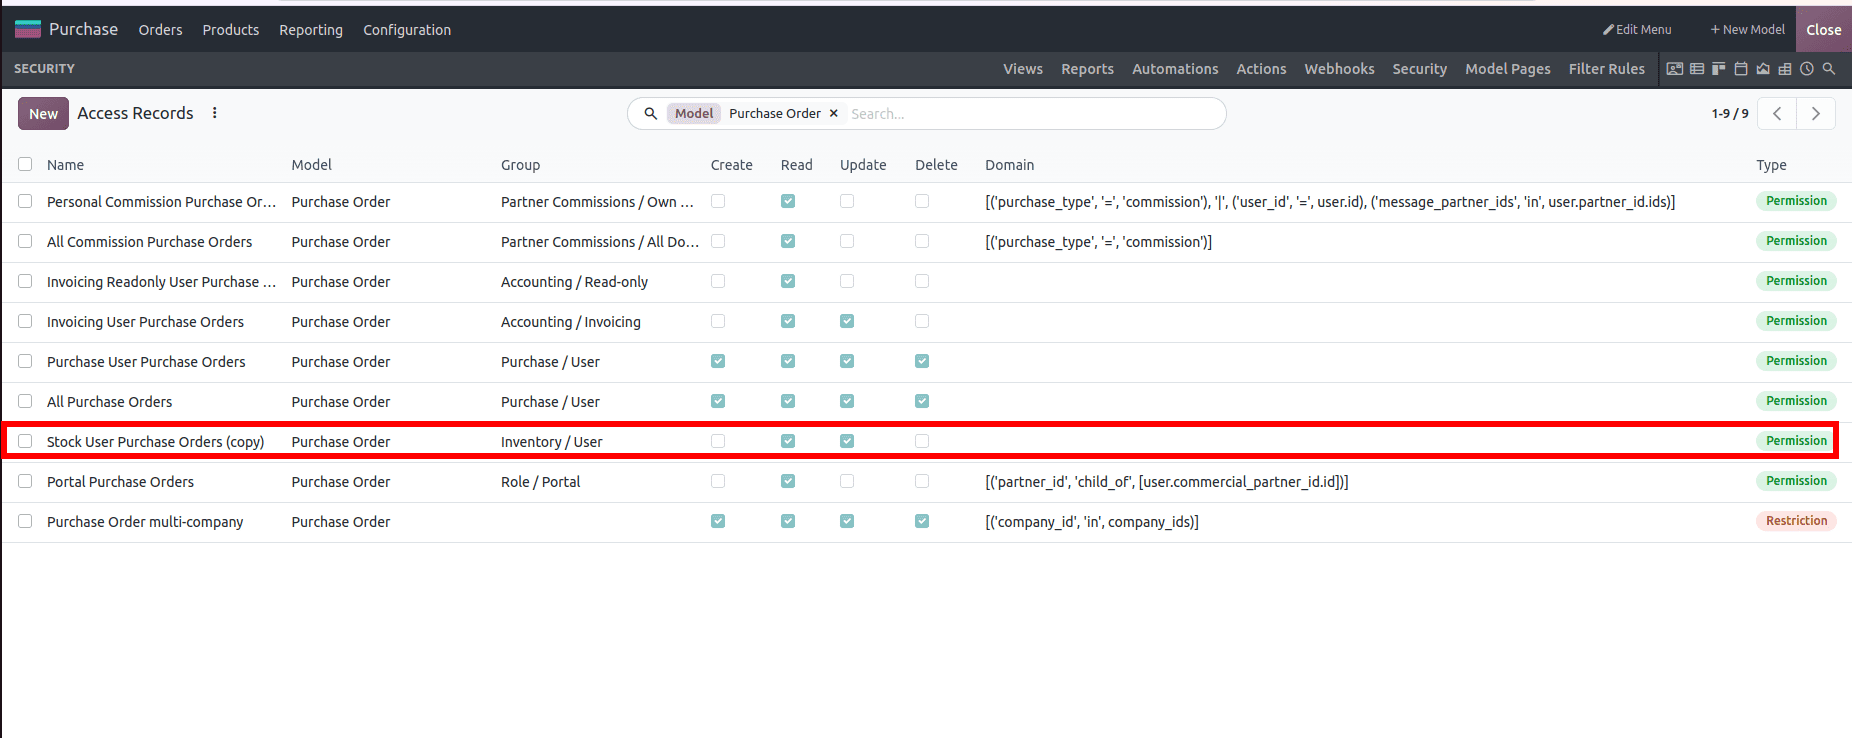
When you customize a standard rule, this won’t change the actual rule. Instead, it will archive the standard rule and create a new rule with our changes. This means that the original rule will remain untouched and can be unarchived to get back the original rule. We will only see the new rule by default. To see the archived original, filter the list to include archived records.
Inventory users can now view and update purchase orders, and the rest of the rules have remained unchanged.
Another example is the Portal Purchase Orders rule, whose domain [('partner_id', 'child_of', [user.commercial_partner_id.id])] shows portal users only the orders for their own company. Editing that domain changes which records they can see.
Permission vs Restriction
The Type column shows how each rule behaves. Permissions grant access to a group, while Restrictions limit access to specific records. In the given screenshot, the Purchase Order multi-company rule is a Restriction. It limits access to records matching its domain (company_id in company_ids), ensuring that users can only view purchase orders belonging to their allowed companies.
2. Webhooks Tab – Manage External Integrations
The Odoo 20 Studio includes a tab called Webhooks that allows you to manage webhook-based automation. This means that you can have external applications that will send HTTP requests to your Odoo instance for certain events. The Webhooks tab provides access to automated actions using the on_webhook trigger.
For example, when an external application sends customer data via a webhook, Odoo will be able to use this information to automatically start a process. This helps businesses link their Odoo instance to external systems and saves time on data entry.
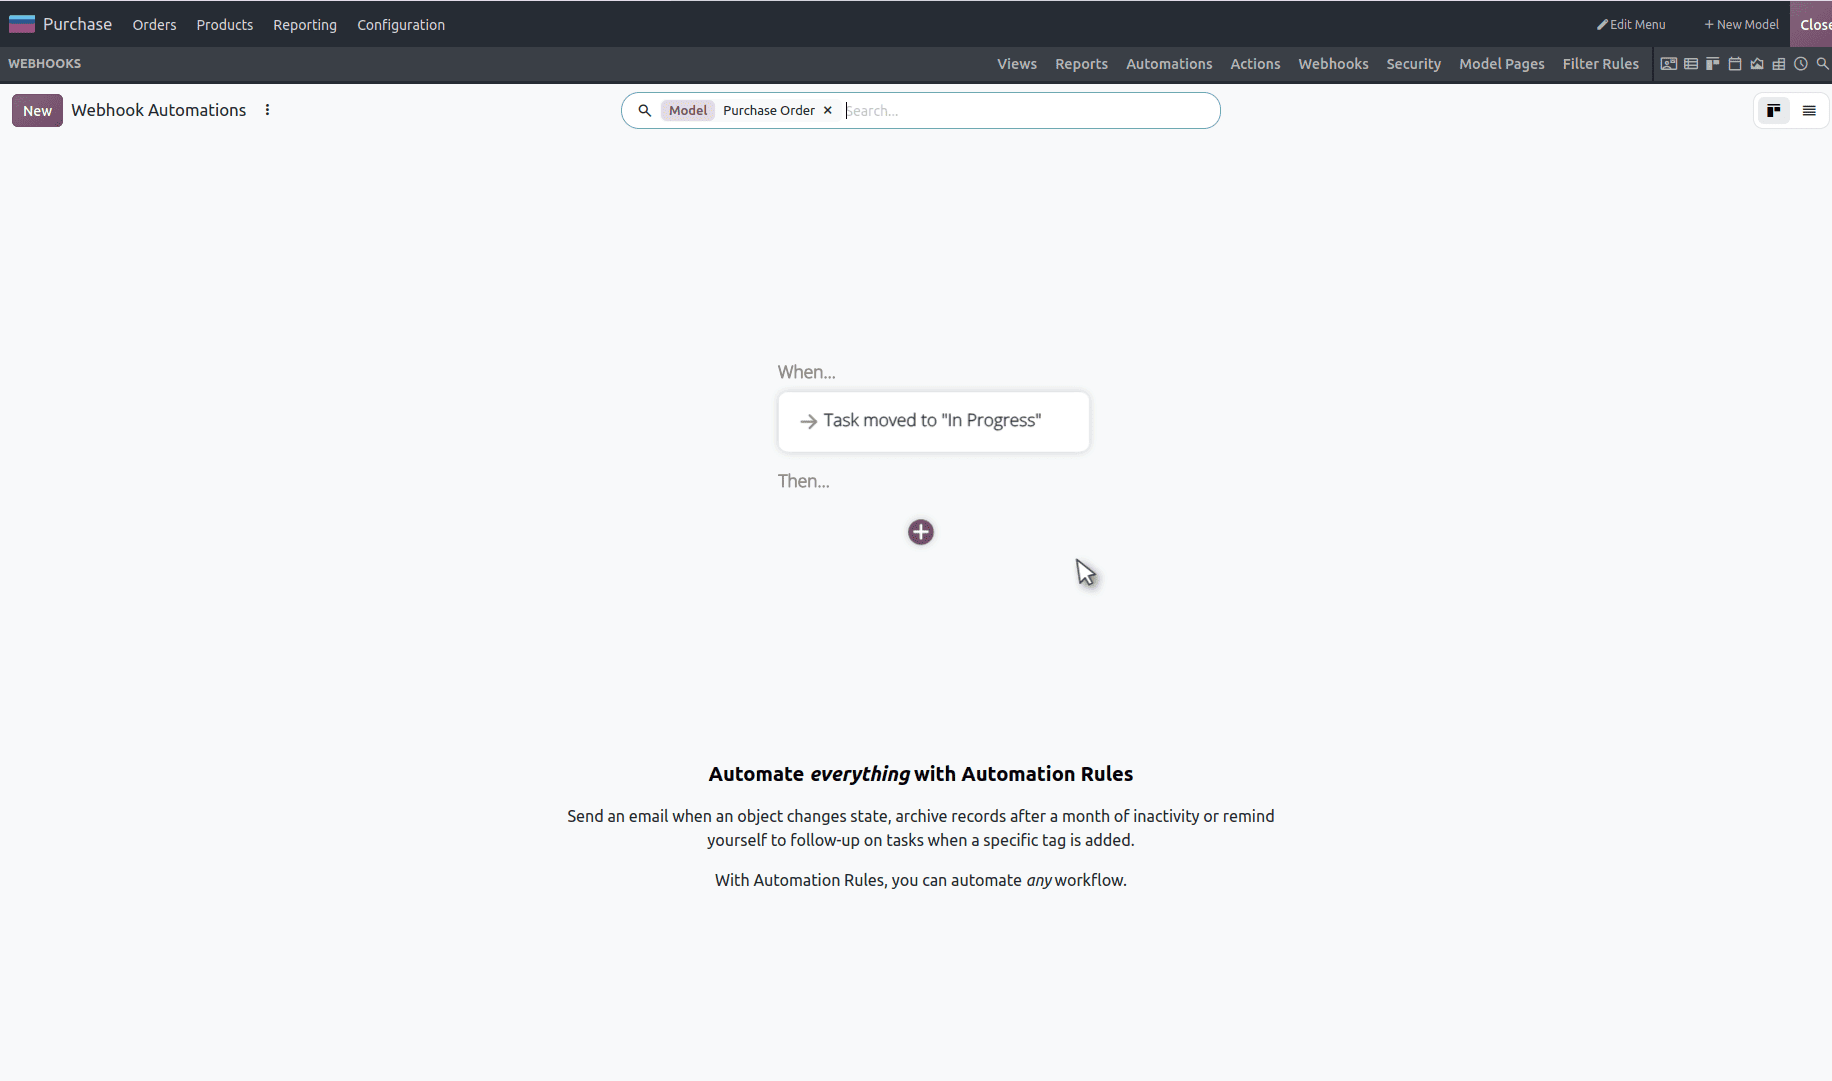
Now, let us see how to create a new automation rule.
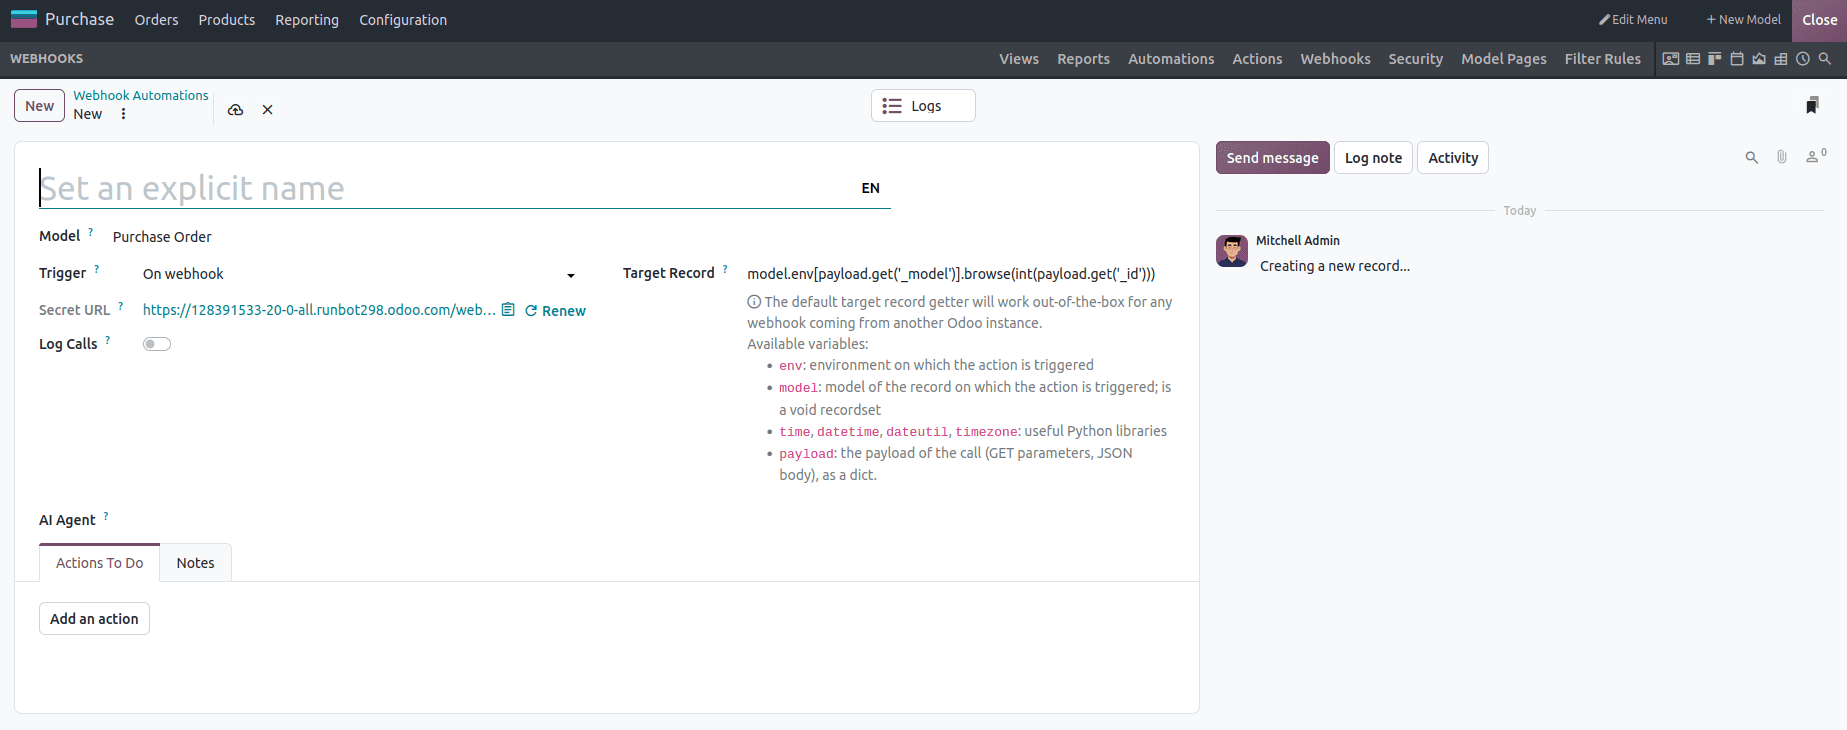
To create a new automation rule, give your webhook a meaningful name. Then, choose the relevant Model from the dropdown. If the developer mode is not active, then the automation rule targets the current model by default.
The webhook’s URL is automatically generated but can be changed if needed by clicking Rotate Secret. This is the URL that should be used when implementing the webhook in the external system that will send updates to the database.
If desired, enable Log Calls to track the history of API requests made to the webhook’s URL, e.g., for troubleshooting purposes.
If the system sending the webhook is not Odoo, adjust the Target Record code to look for the JSON record included in the payload when the API request is made to the webhook’s URL. If the system sending the webhook is an Odoo database, ensure that the id and model appear in the payload.
If the webhook is used to create records in the Odoo database, use model.browse(i) or model.search(i) instead of the default Target Record format.
Click Add an action in the Actions To Do tab to define the action to be executed.
3. Actions Tab – Manage Server Actions
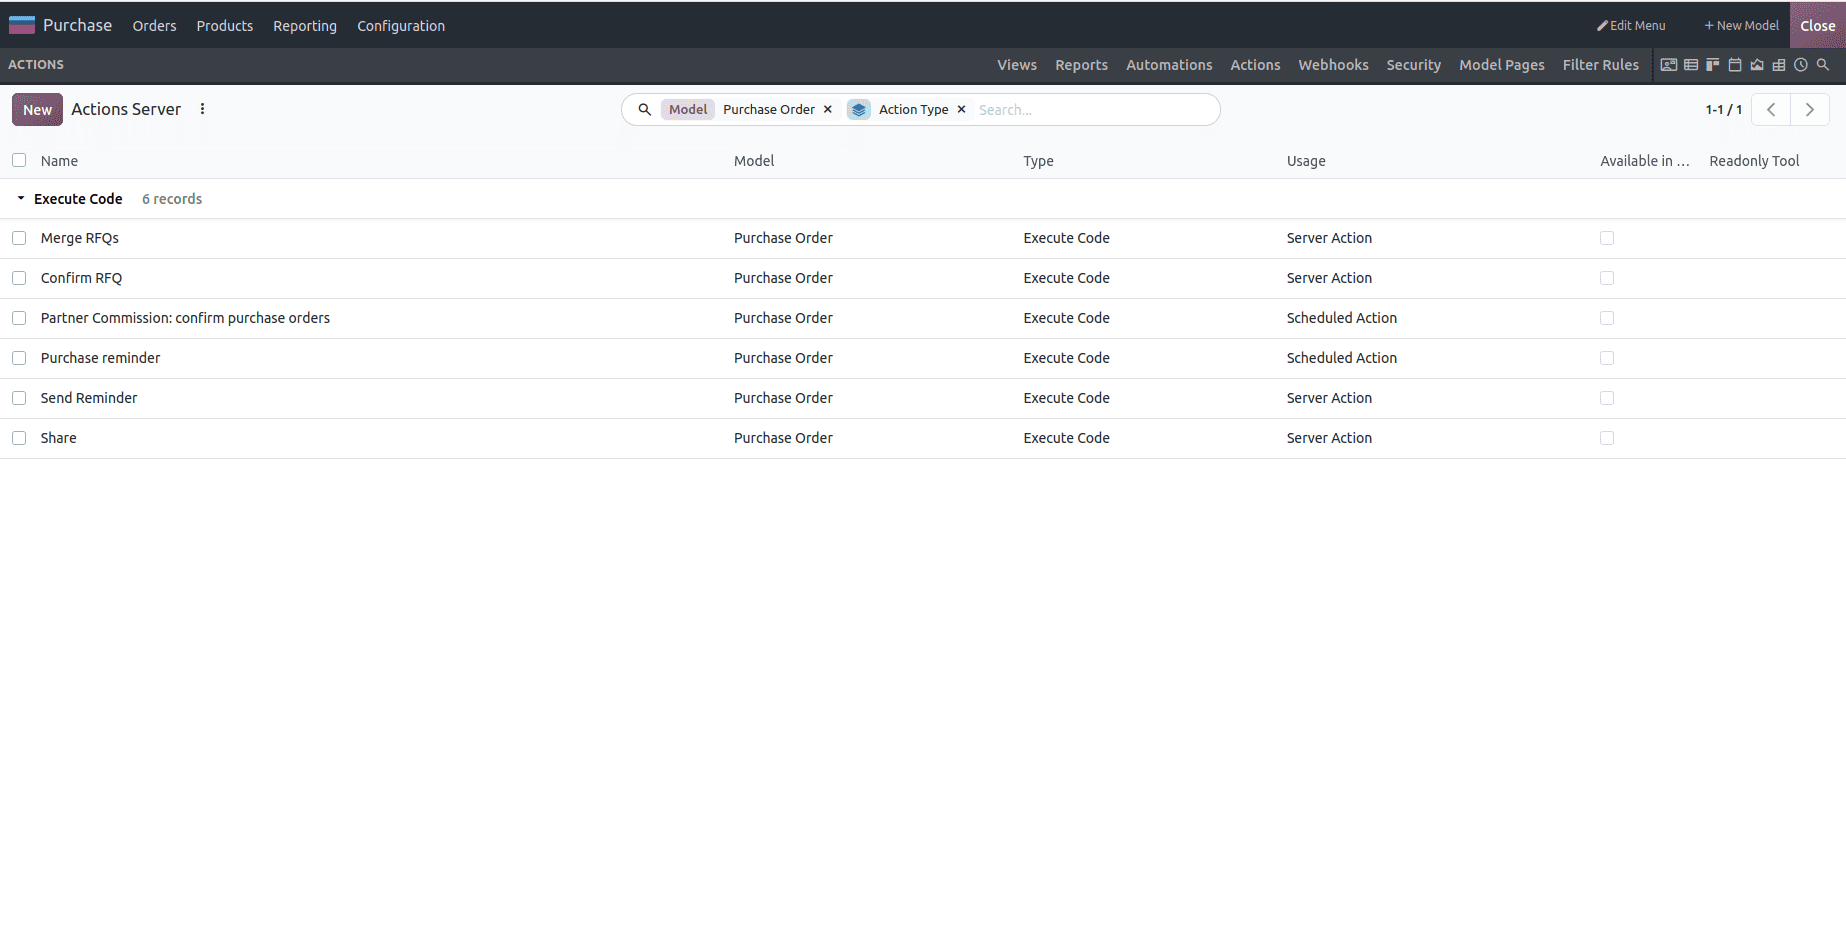
Odoo 20 Studio has an actions tab. This allows you to set up server actions. These can be used to update records, create new related records and perform specific business actions. Having a dedicated Actions tab makes it easier to find and manage these operations within Studio.
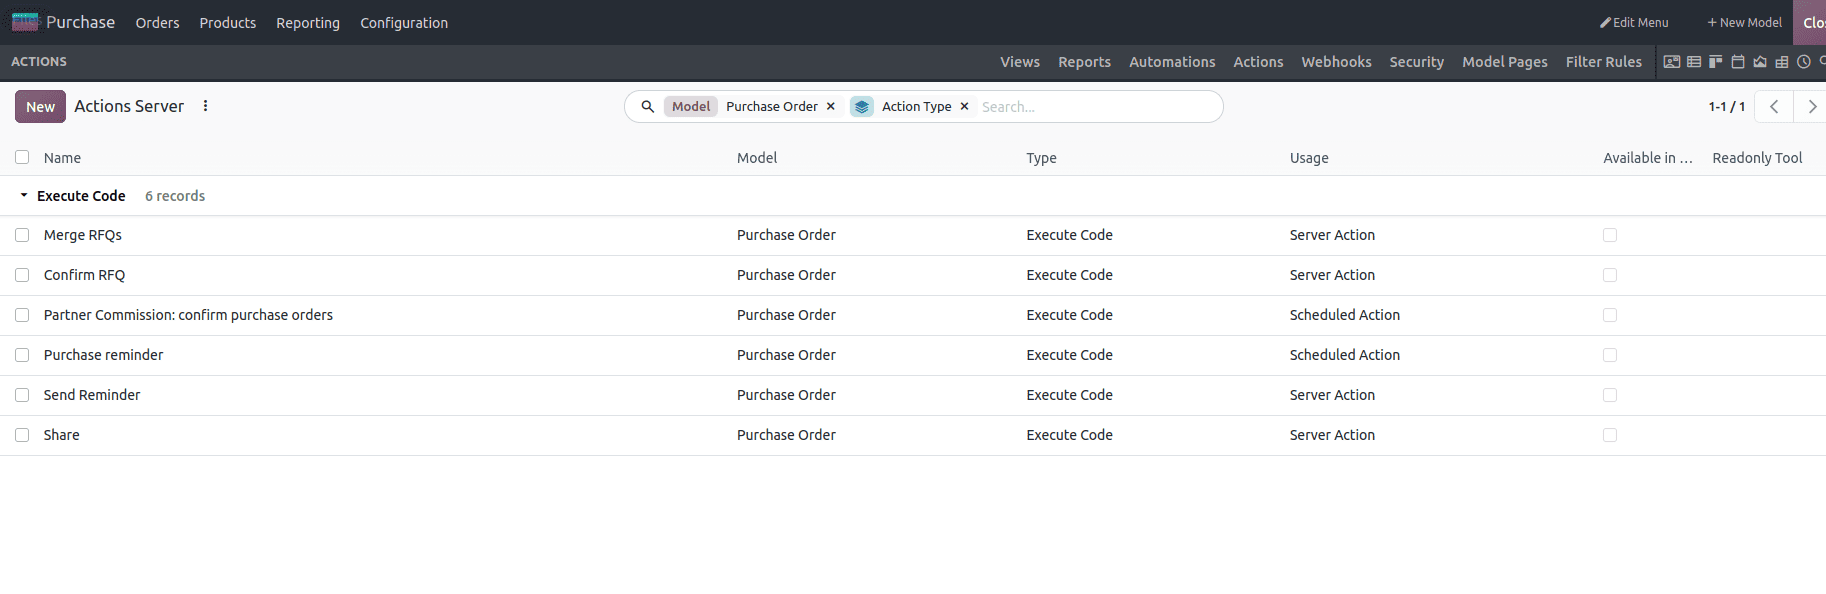
By clicking a new button, we can create a new action.
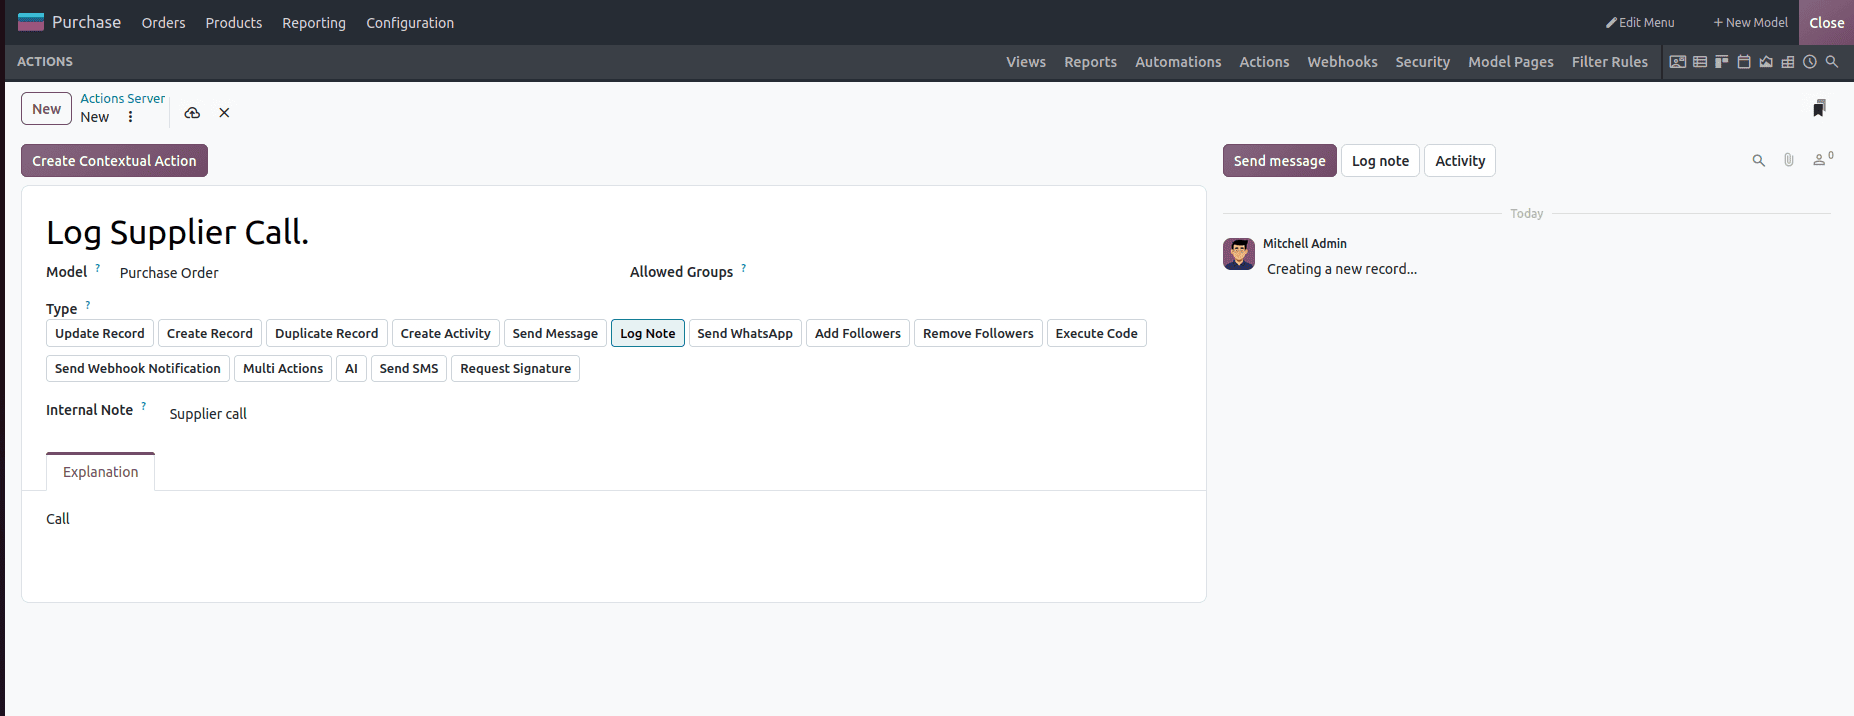
- Name: Name for the action.
- Type: The kind of action Odoo runs. You pick one of the options shown as buttons (listed below).
- Explanation: Used for documenting what the action does.
- Create Contextual Action: It adds the action to the model’s Action menu, so users can run it directly from the list or form view.
Action types
- Update Record: Change the values of a record.
- Create Record: To create a new record.
- Duplicate Record: Make a copy of a record.
- Create Activity: Schedule an activity, such as a to-do or a call.
- Send Message: Post a message on the record or send an email.
- Log Note: Add an internal note on the record.
- Send WhatsApp: Send a WhatsApp message.
- Add Followers / Remove Followers: Manage who follows the record.
- Execute Code: Run a Python code snippet.
- Send Webhook Notification: Send data to an external system.
- Multi-Actions: Run several actions in a sequence.
- AI: Let AI perform the action.
- Send SMS: Send a text message.
- Request Signature: Send a document for signature.
Example: Creating an action
Your purchasing team often needs to add an internal note to an order after calling the supplier.
- Click New.
- Enter the Name, for example, Log Supplier Call.
- Under Type, choose Log Note.
- Fill in the note details that appear once the type is selected.
- Save the action.
- Click Create Contextual Action if you want users to run it from the Action menu of the Purchase Order.
Once the contextual action is created, your team can select one or more orders and run it in a single step.
4. Filter Rules Tab – Manage Saved Filters
Odoo 20 Studio includes a Filter Rules tab for managing filters stored in the ir.filters model.
Filters help users quickly access records that match specific conditions.
For example, a sales team may create a filter to display quotations assigned to a particular salesperson or orders that are still pending confirmation.
The Filter Rules tab provides a centralized location for managing these saved filters.
This makes it easier to organize frequently used search conditions and improve record navigation.
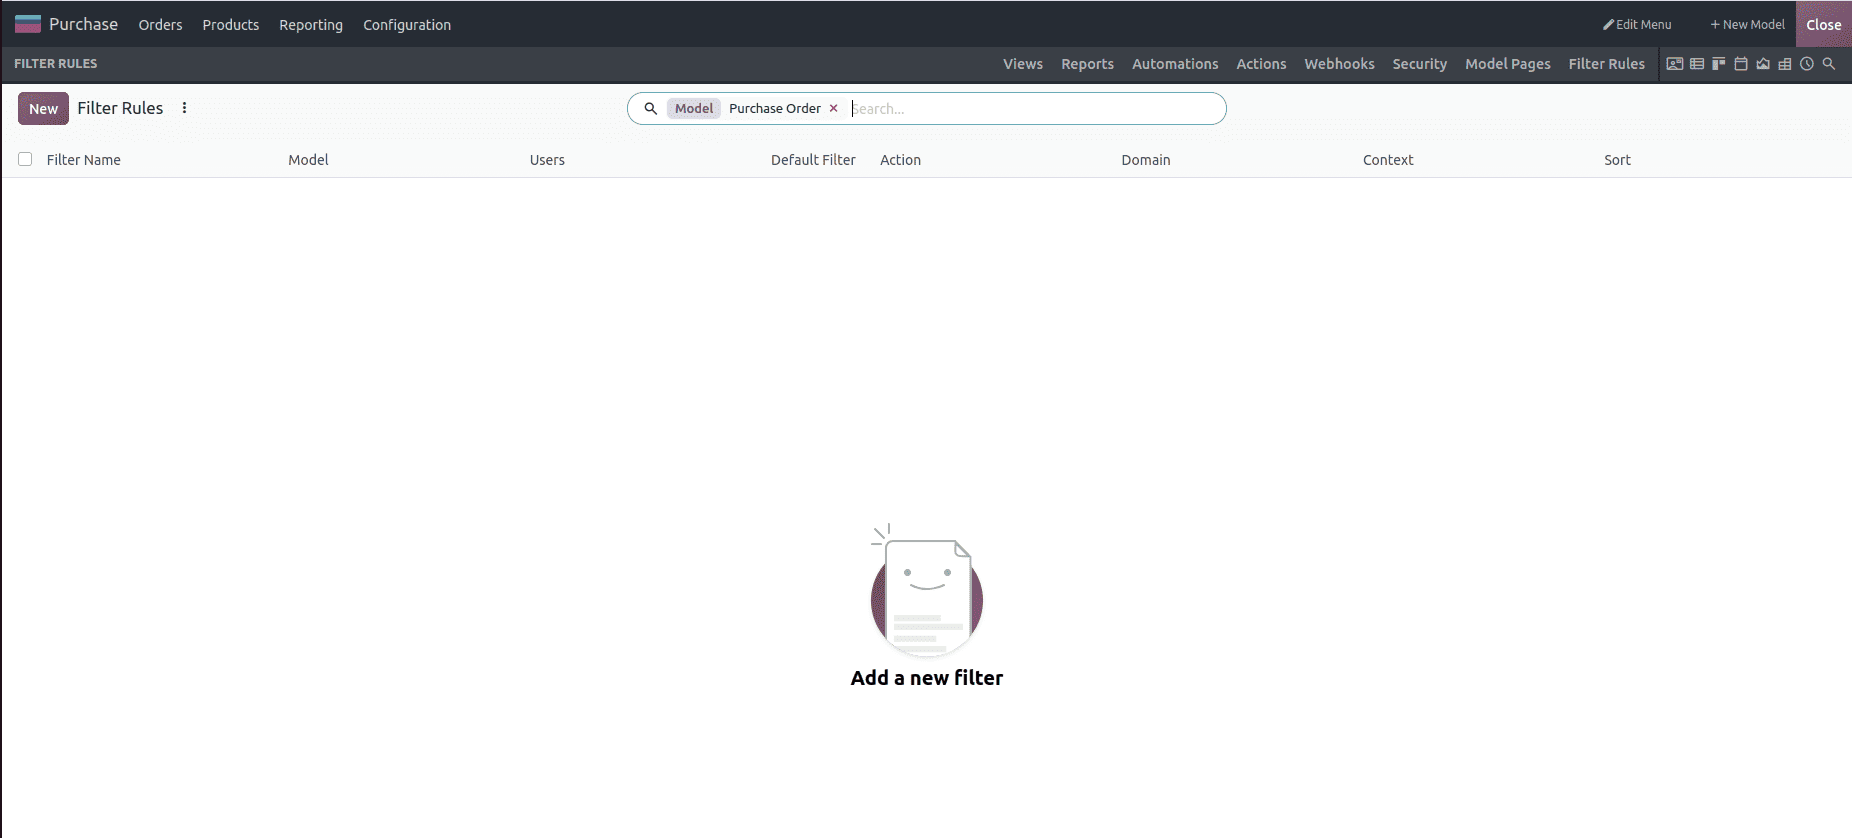
By clicking the New button, we can create new filter rules.
Example: Creating a Filter Rule
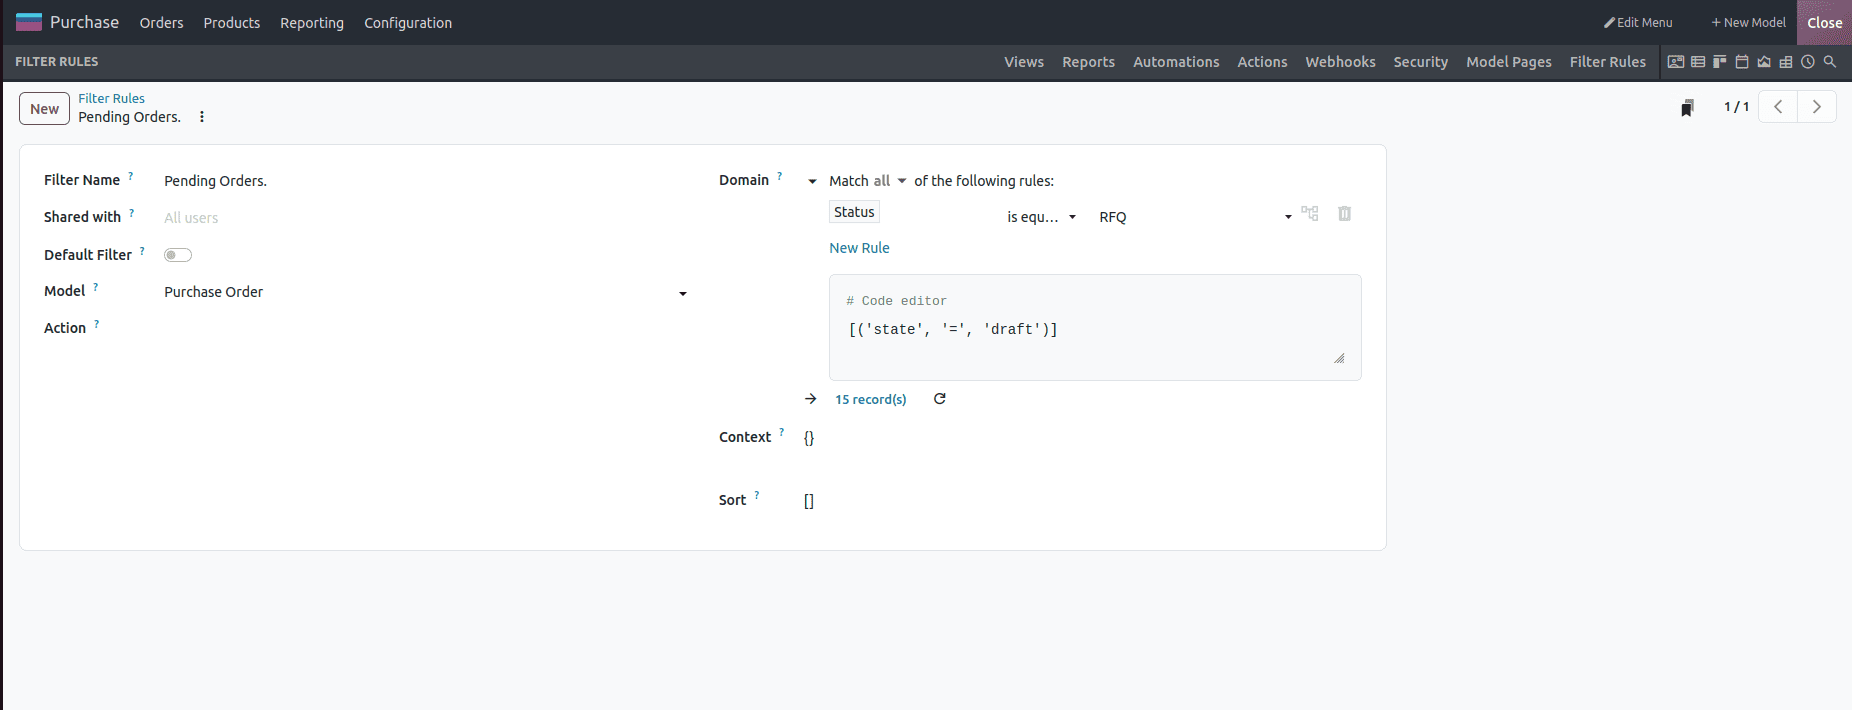
The purchasing team often needs to check which orders are still waiting for confirmation. Instead of rebuilding the search every time, you can save it as a filter.
What the form shows
- Filter Name: Pending Orders.
- Shared with: All users, so everyone can use the filter.
- Default Filter: off, so the filter isn’t applied automatically when the list opens.
- Model: Purchase Order.
- Action: empty, so the filter isn’t tied to one specific menu.
- Domain: Match all records with the counter showing 28 record(s).
- Context: empty ({}).
- Sort: empty ([]).
Add the condition before using it.
The domain still says Match all records, which means this filter would currently show every purchase order and not only the pending ones. To make it work:
- Click Add condition next to the domain.
- Set the condition so that Status is RFQ.
- Check the counter. It should drop from 28 to the number of pending orders.
- Save the form.
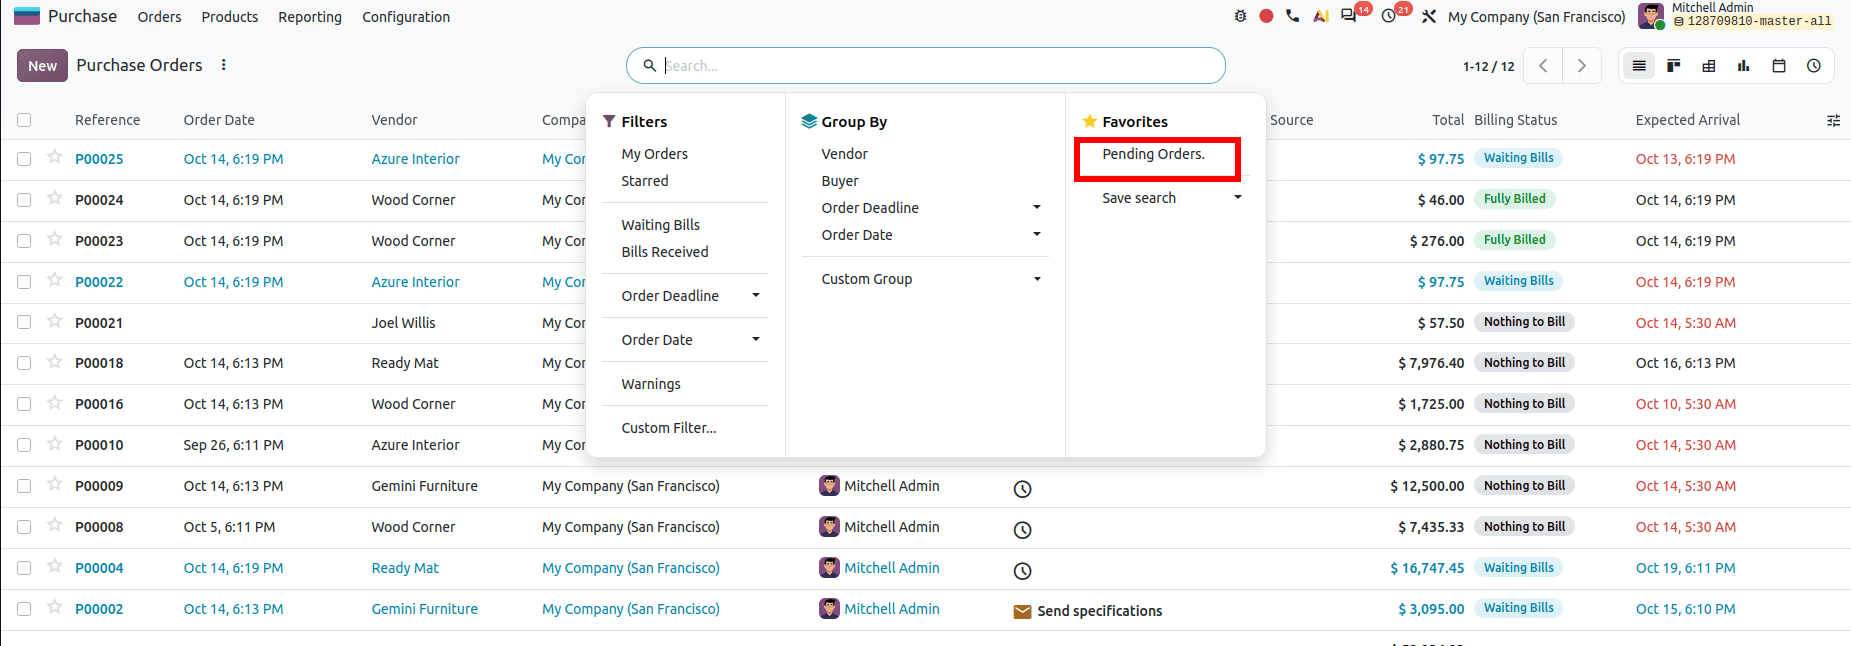
After that, open the Purchase Order list, click the Filters dropdown, and you’ll see Pending Orders ready to use.
Here, we can see that the new filter has been added.
5. AI Autofill – Automatically Populate Field Values
AI Autofill is another feature in Odoo 20.
When configuring supported fields, users can enable the Autofill (AI) checkbox and provide a prompt describing how the field value should be generated.
The AI uses the provided instructions and available record context to suggest or populate information.
For example, a business can configure an AI-enabled field to generate a short product description based on the product's existing information.
This reduces repetitive data entry and helps users maintain consistent descriptions across records.
The quality of the generated content depends on the prompt and the information available to the AI.
6. Model Pages – Create Website Pages from Models
Odoo 20 introduces Model Pages through the website_studio functionality.
This feature connects website pages with Odoo models, allowing businesses to display model-based information on their websites.
For example, a company can use model-based pages to present information about services, projects, or other business records.
This provides another way to extend website functionality using Studio.
7. Report Editor – Dynamic Table
The Odoo 20 Studio report editor includes a Dynamic Table feature.
Dynamic tables allow report content to be generated from related records rather than relying entirely on manually configured static content.
For example, an invoice report can display invoice lines dynamically, including product descriptions, quantities, and prices.
When the number of invoice lines changes, the table can adapt to the available records.
This helps businesses create more flexible reports and reduces the need for manual report adjustments.
Odoo 20 Studio brings several improvements to application customization and management. The updated Security tab introduces unified access management, while the Webhooks, Actions, and Filter Rules tabs make it easier to organize automation and configuration settings.
Features such as AI Autofill, Model Pages, and Dynamic Tables further extend Studio's capabilities by simplifying data entry, website customization, and report design.
Together, these updates make Odoo Studio a more flexible tool for businesses looking to customize their applications with less manual configuration.
To read more about How to Choose Between Odoo 20 Studio and Custom Development, refer to our blog, How to Choose Between Odoo 20 Studio and Custom Development.