Efficient database management is crucial for maintaining smooth business operations in Odoo. It allows users to securely create, back up, restore, and manage multiple databases from a single interface. Odoo 19 continues to provide an intuitive and powerful database management system that simplifies administrative tasks for developers and administrators alike.
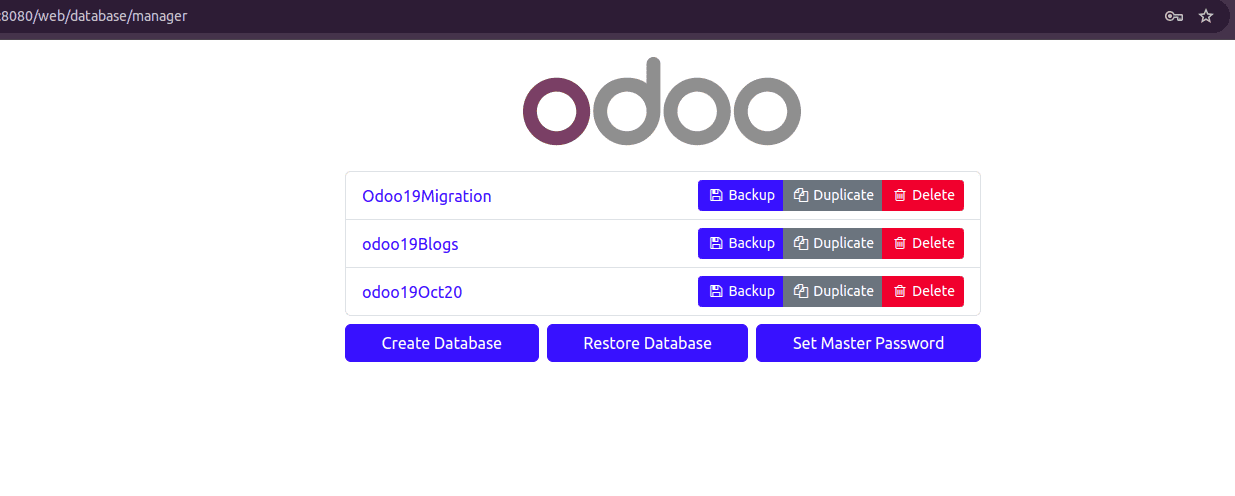
You can access the Database Management interface by selecting the “Manage Databases” option on the Odoo login screen or by visiting <your-odoo-url>/web/database/manager
Within this interface, the following key operations are available:
- Creating a New Database
- Duplicating Databases
- Database Backups
- Restoring Databases
- Dropping Databases
- Database Security
1. Creating a New Database
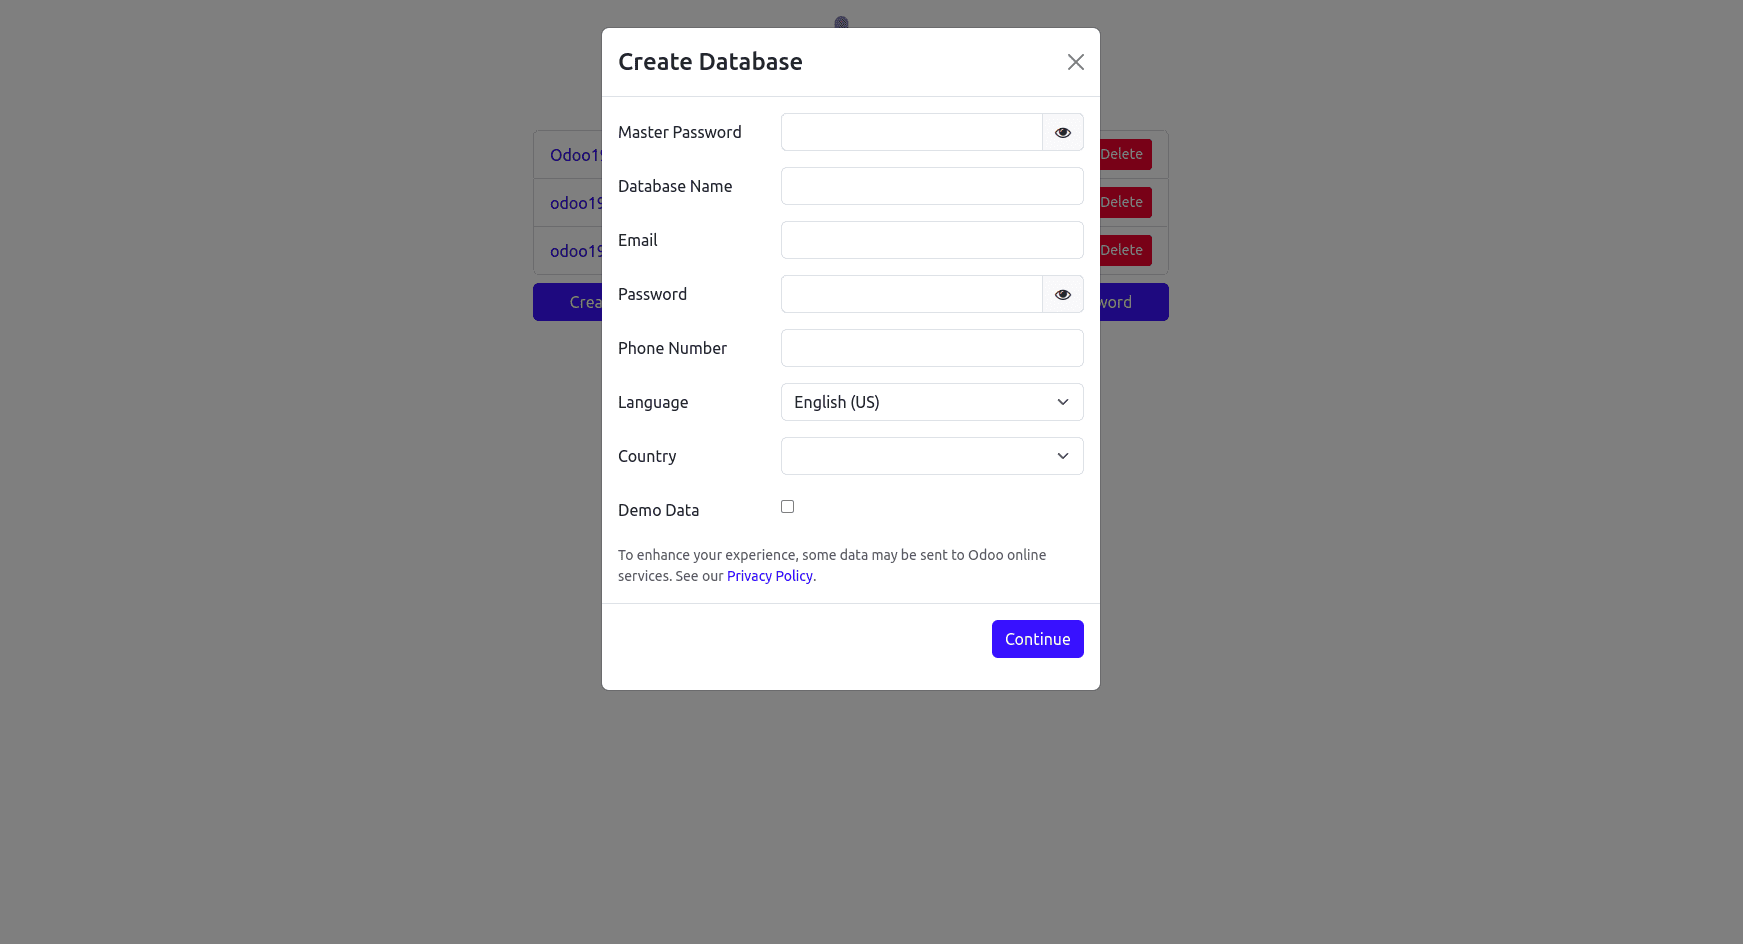
To create a new database, click on the “Create Database” button in the database management interface.
A popup window will appear where you need to fill in the following details:
- Master Password – Enter the master password that was set during the Odoo configuration.
- Database Name – Specify a unique name for the new database.
- Email – Provide the email address that will be used as the administrator login.
- Password – Set a password for the admin user.
- Phone Number – Enter the user’s contact number.
- Language – Choose the preferred language for the database.
- Country – Select the country; localization features and modules relevant to that country will be installed automatically.
- Demo Data – Enable this option if you want the database to include sample (demo) data, which is helpful for testing or training purposes.
Once all the required fields are filled in, click “Continue”. The new database will be created successfully. You can then select it from the login screen by clicking the “Select” button or by navigating to <your-odoo-url>/web/database/selector.
2. Duplicating Databases
Odoo allows you to create a duplicate of an existing database. This feature is especially useful for testing and development, as it lets you apply changes or updates in a copy of the database without affecting the original one.
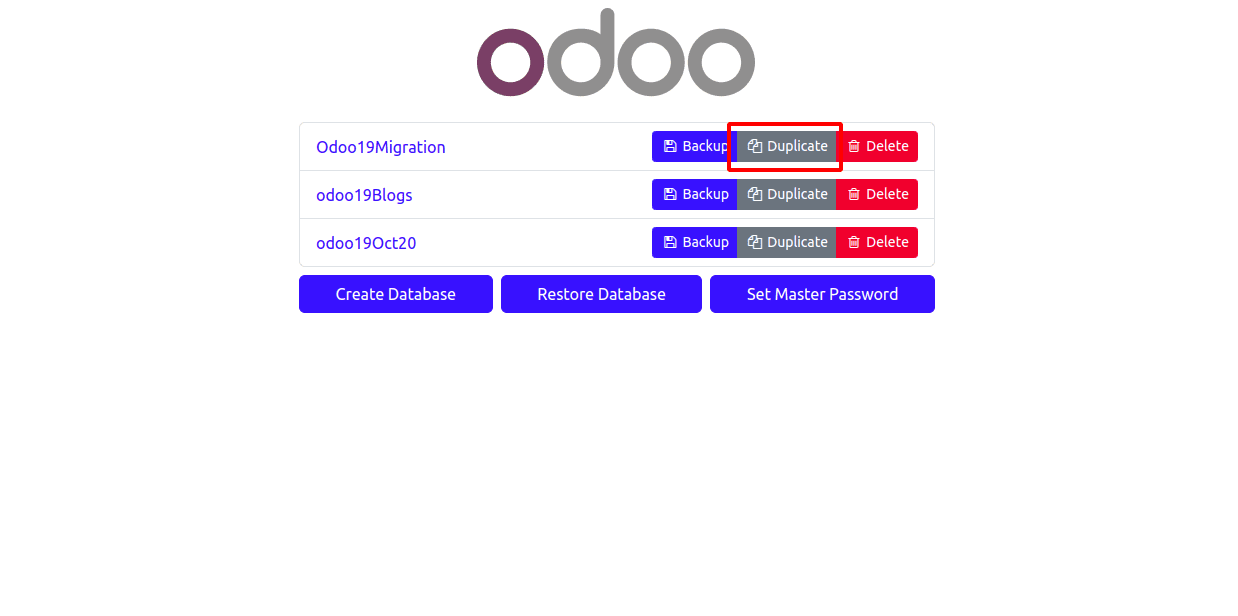
To duplicate a database, click the “Duplicate” option next to the desired database.
A pop-up will appear where you need to enter the Master Password and specify a New Name for the duplicated database. After clicking “Continue,” Odoo will generate a complete copy of the selected database, which you can use independently for testing or experimentation.
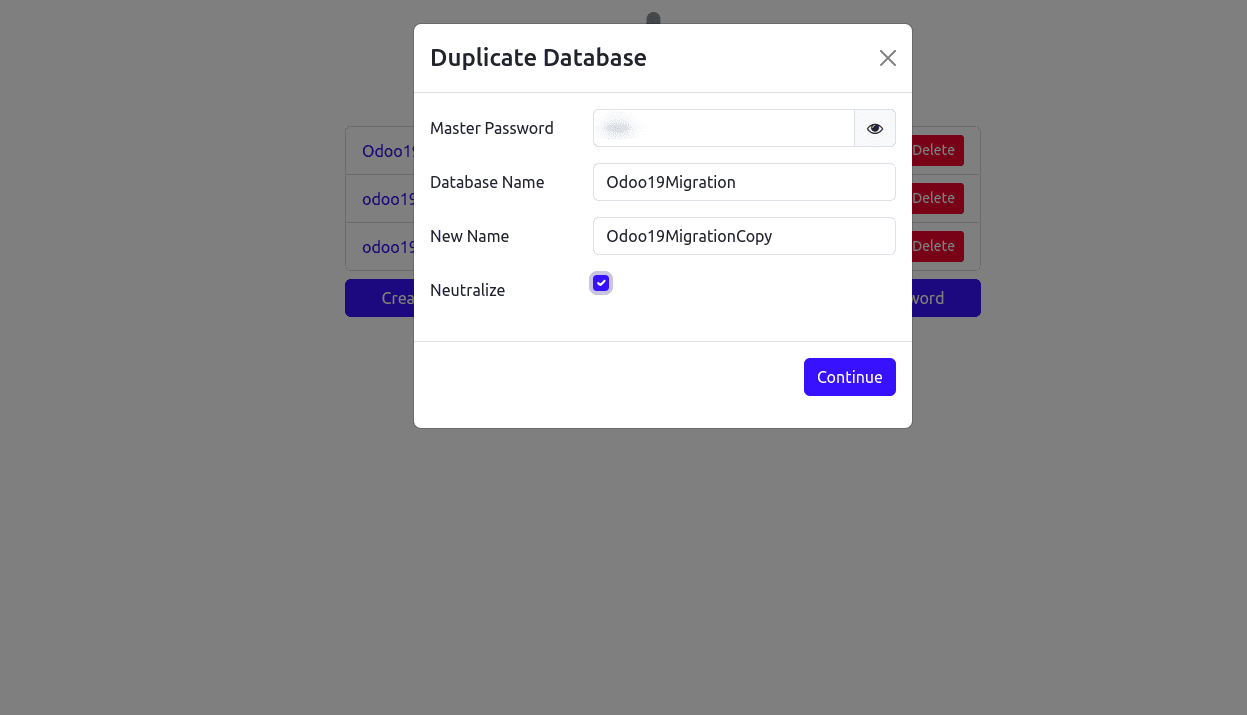
This “Neutralize” option is used to convert a live database into a safe testing environment by disabling automated actions, emails, and integrations — ensuring that no real operations affect production data.
3. Database Backups
To back up a database, click the “Backup” button next to the database you want to export.
A pop-up window will appear where you need to enter the Master Password. The selected database name will be displayed automatically. Next, choose the Backup Format — Odoo provides two options:
- ZIP (includes filestore)
- pg_dump custom format (without filestore)
If you select the ZIP option, Odoo will generate a backup file containing three key components:
- filestore – stores static files such as images and attachments.
- dump.sql – contains the actual database data in PostgreSQL format.
- manifest.json – includes metadata like module details, Odoo version, database name, and PostgreSQL version.
This ensures you have a complete and restorable backup of both your data and related files.
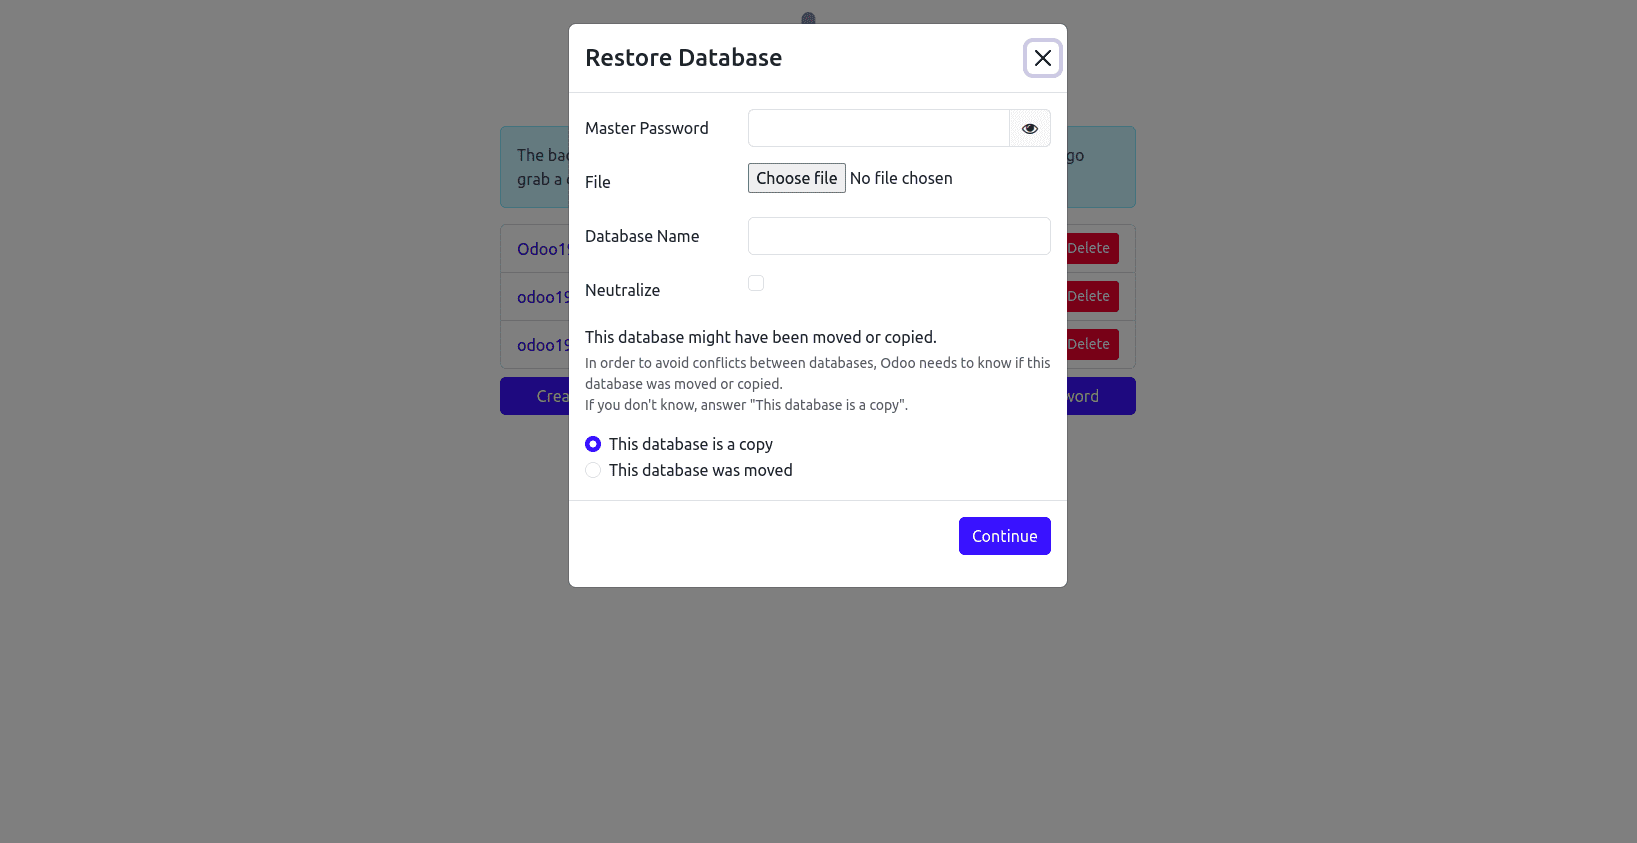
4. Restoring Databases
To restore a database, click the “Restore” button in the database management interface.
A popup window will appear where you need to enter the Master Password. Then, click “Choose File” to upload the backup file you want to restore. Next, provide a name for the restored database and select whether the database is a copy or was moved.
You can also enable the “Neutralize” option during restoration to turn the restored database into a safe testing environment, ensuring no live operations or automated processes are triggered.
Once all details are entered, click “Continue” — Odoo will then restore the database using the selected backup file.
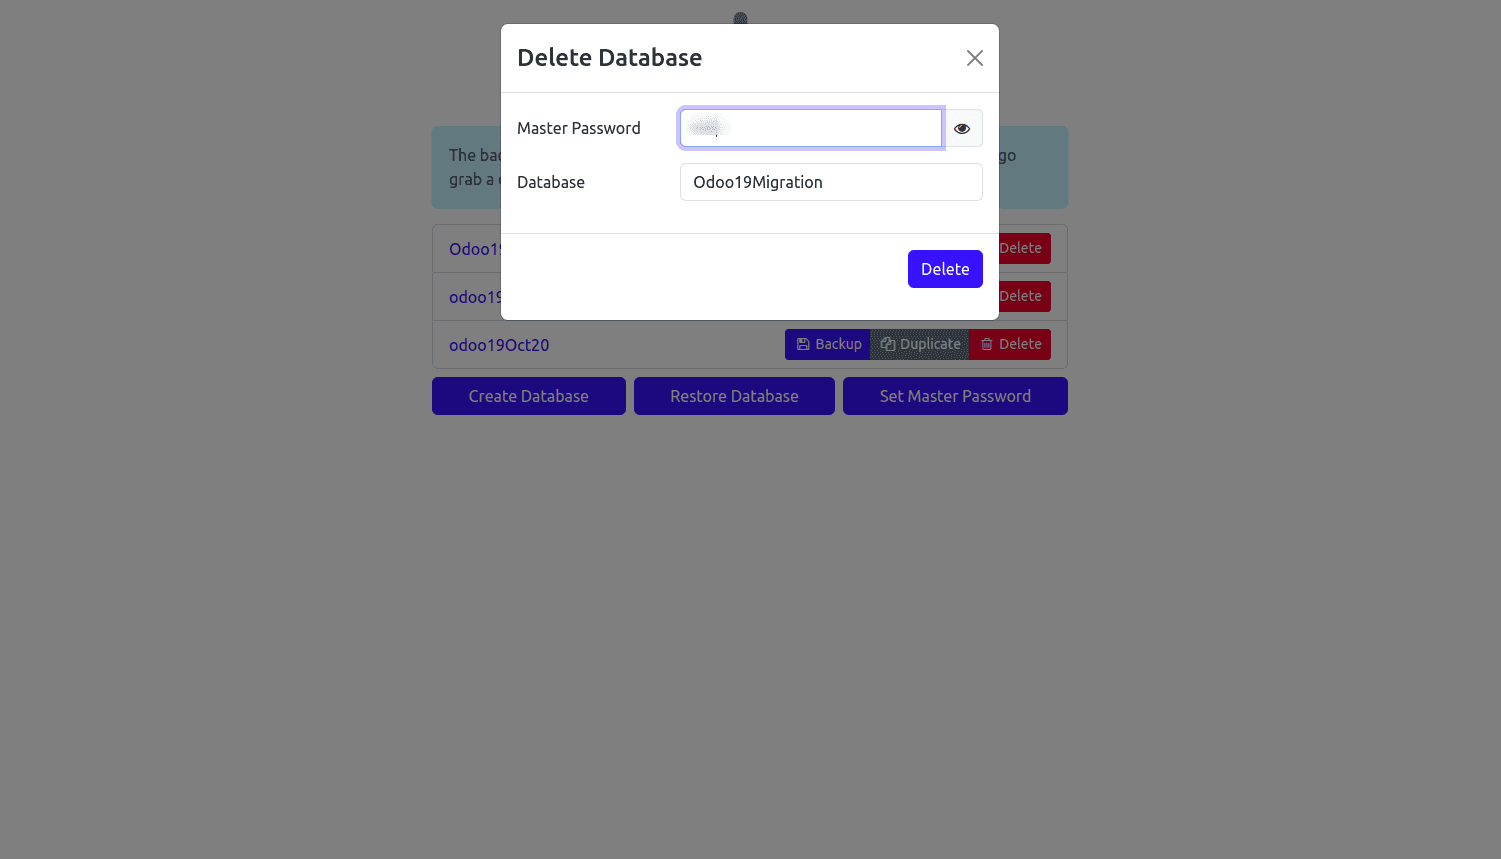
5. Dropping Databases
To remove a database, click the “Delete” button next to the database you wish to delete.
In the pop-up window, enter the Master Password and click “Continue.” The selected database will then be permanently deleted from Odoo.
6. Database Security
The master password secures and manages all database-related operations in Odoo. It is initially set when creating the first database and can be updated later using the “Set Master Password” option.
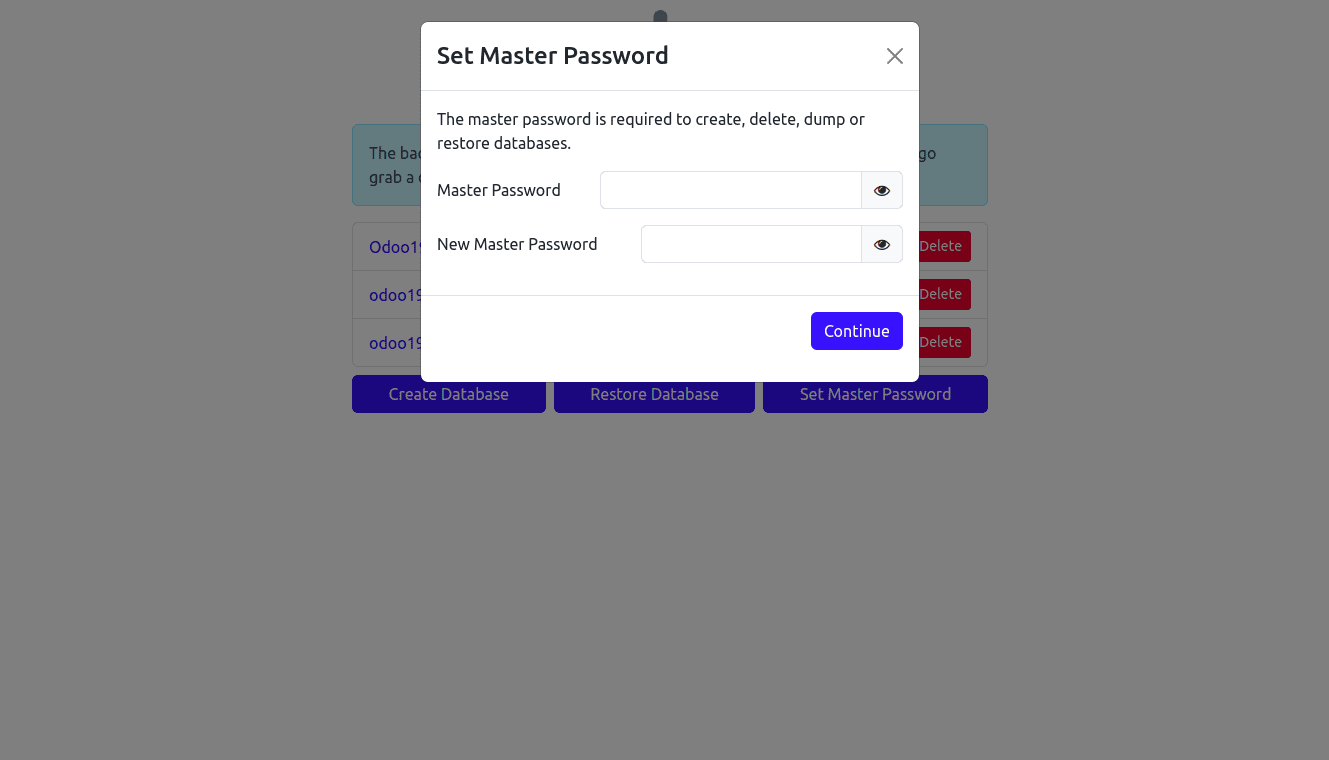
When you select this option, a pop-up appears asking for the current master password and the new password you want to set. Additionally, the master password can also be configured directly in the odoo.conf file using the admin_passwd parameter.
Conclusion
Odoo 19 makes database management straightforward and secure, giving administrators full control over their data. With features like creating, backing up, restoring, duplicating, and neutralizing databases, users can manage multiple environments safely and efficiently. The master password adds an extra layer of protection, while testing options such as neutralized or demo databases allow changes to be tried without affecting live operations. Overall, these tools help ensure reliable, organized, and smooth-running Odoo systems.
To read more about How Database Population Works in Odoo 18, refer to our blog How Database Population Works in Odoo 18.