Following up at the right time can make a difference when a lead is considering a proposal or an opportunity is close to a decision. Odoo 20 CRM activities help salespeople track these next steps directly on leads and opportunities. A salesperson can schedule a call, email, meeting, or task, assign it to a user, and set a due date. For repeated sales processes, an activity plan can schedule a sequence of follow-ups at once. Together, activities and plans give the team a practical way to organize work and keep the CRM pipeline current.
Activity Types for CRM Follow-ups
To view or configure CRM activity types, open CRM > Configuration > Activity Types.
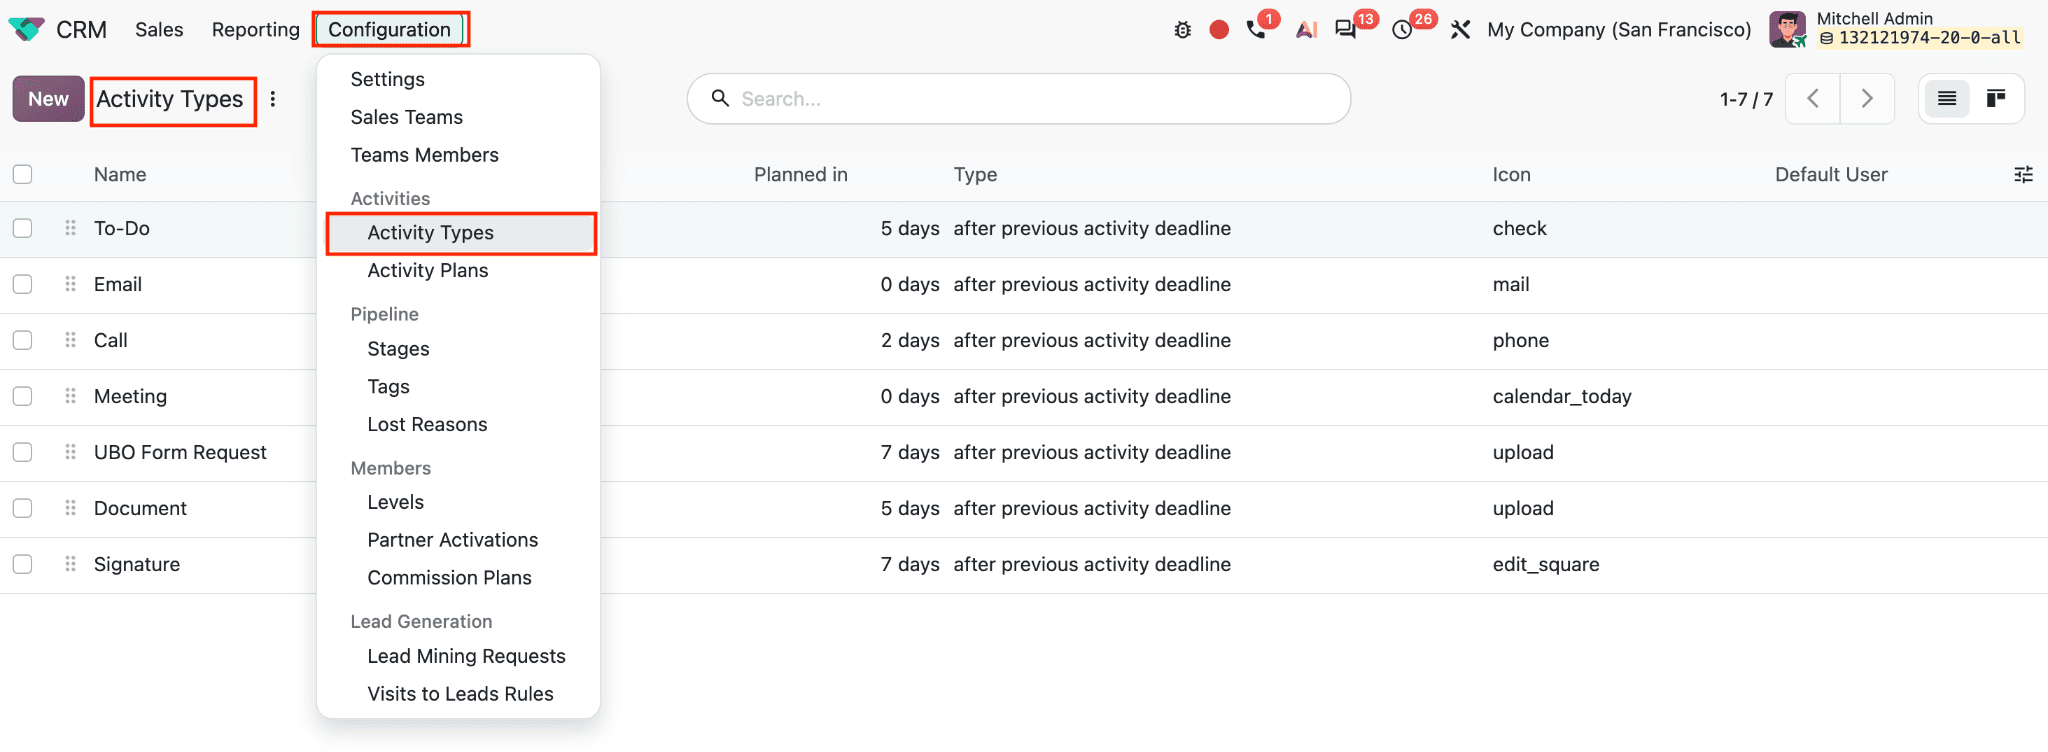
This page includes Odoo’s built-in activity types and any custom types created for the business. The standard CRM options include Email, which reminds the salesperson to send an email; Call, which can open a calendar link to schedule a phone call; Meeting, which opens a calendar link for a meeting; To Do, which creates a general reminder; and Upload Document, which adds a link for uploading a document to the activity. The Documents app is not required for the Upload Document activity. Other installed apps may add activity types to the list.
A business can create a custom type when its follow-up process needs a specific action. Click New on the Activity Types page and enter a Name for the activity type.
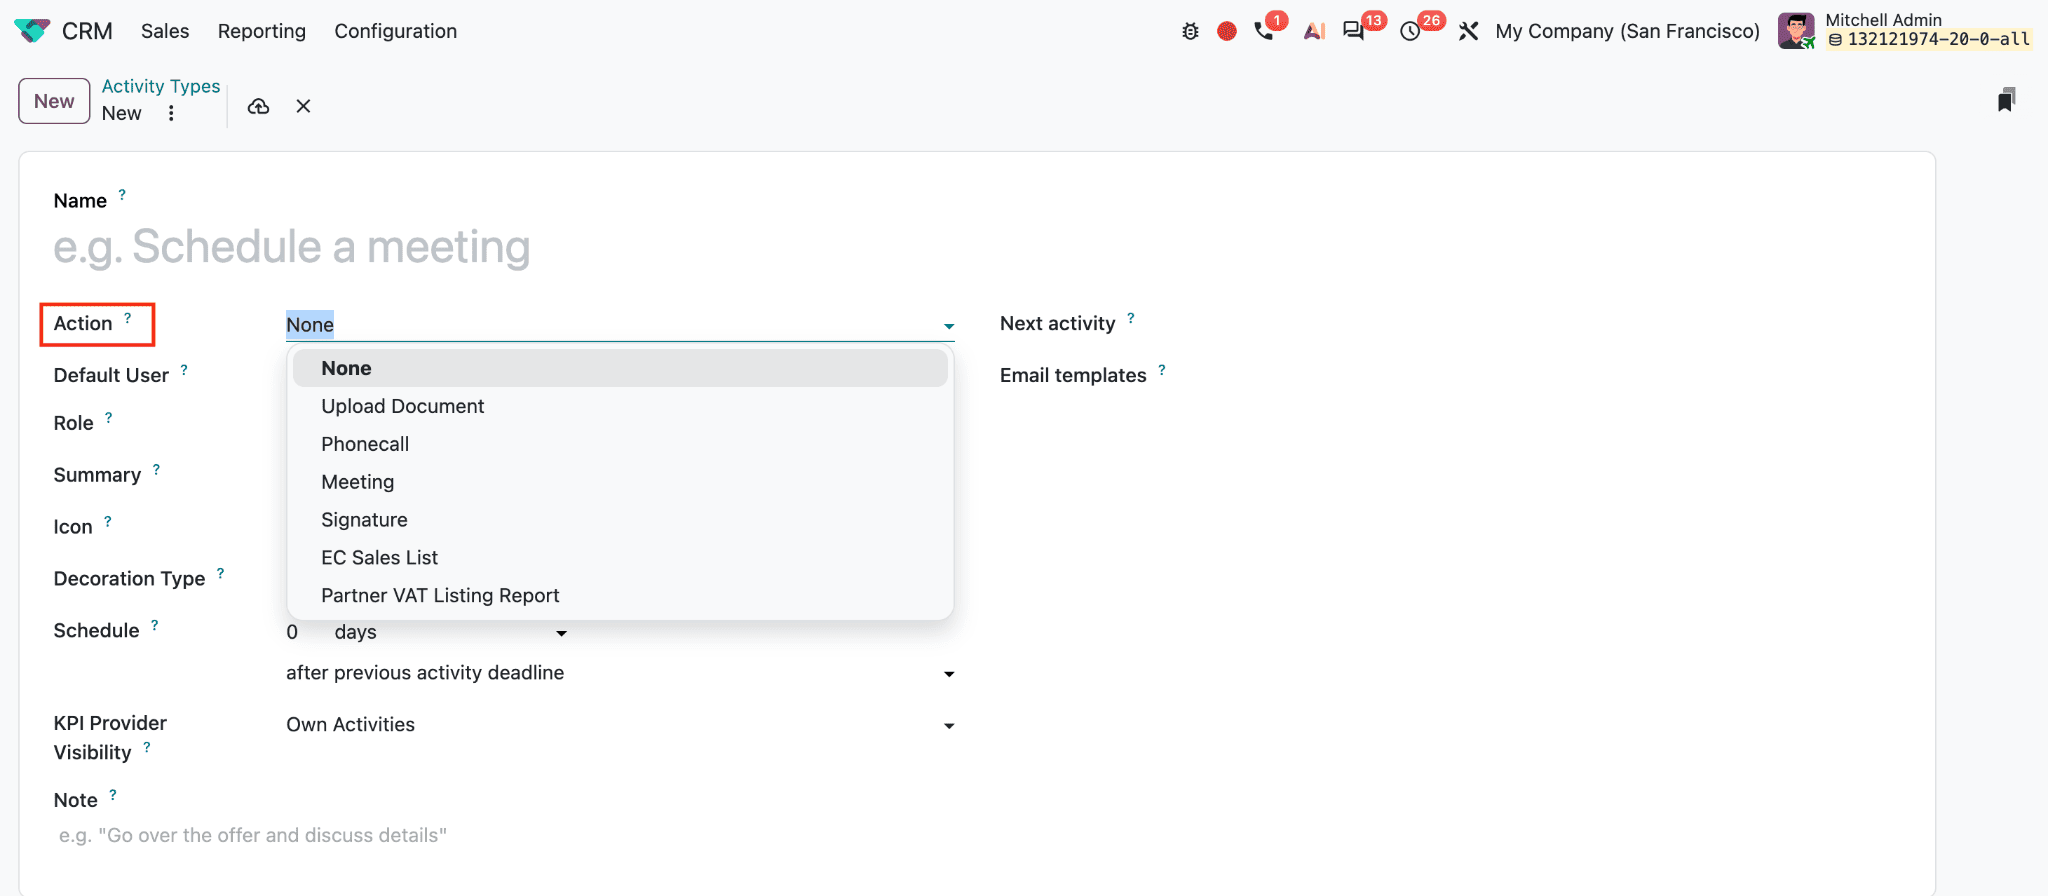
The Action field determines what happens when users schedule that activity. Depending on the installed apps, the available actions may include opening a calendar link for a call or meeting, adding a document upload link, or creating a signature request. The action helps the activity do more than display a reminder. Here, in the screenshot, the available actions are Upload Document, Phone call, Meeting, Signature, EC Sales List, and Partner VAT Listing Report.
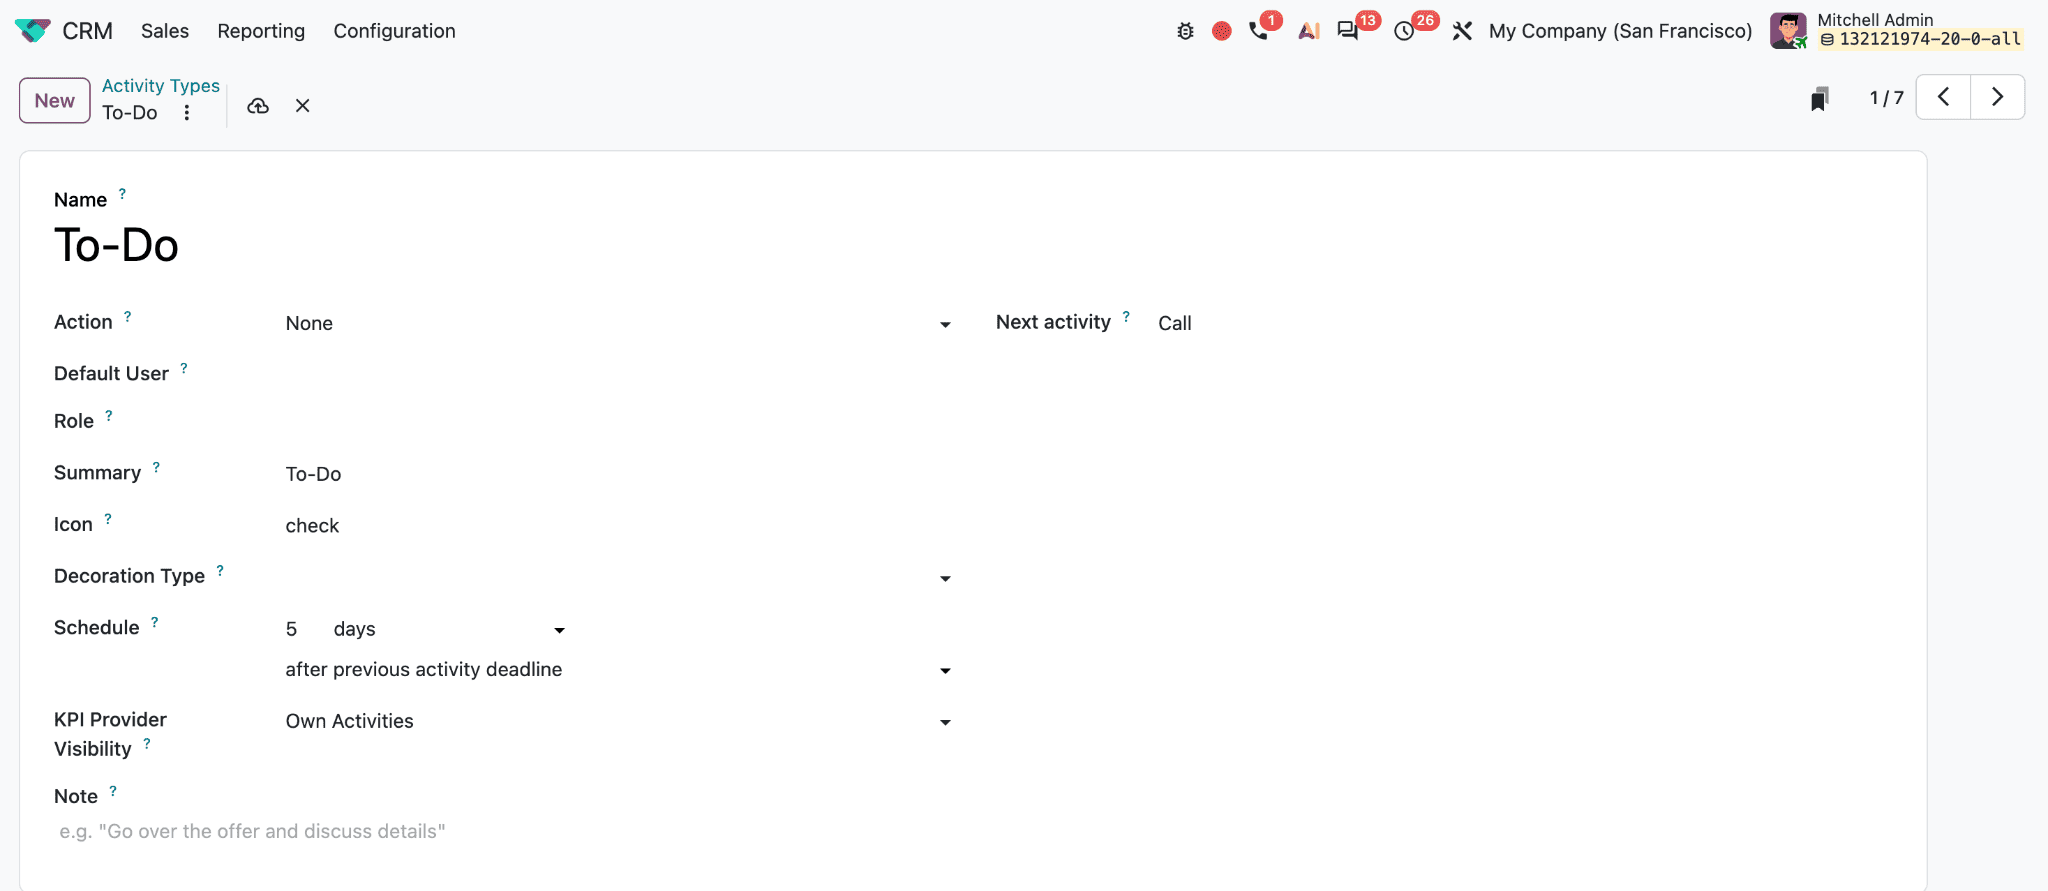
The Default User field assigns the activity to a particular user whenever that activity type is selected. If it is blank, Odoo assigns the activity to the person who schedules it. The Next Activity field specifies a follow-up activity that can come after the current one. Depending on the activity’s chaining setup, Odoo can suggest the next step to the user or trigger it when the current activity is marked complete. The Role field supports role-based assignment where roles are configured, helping direct work to the appropriate person or function. The Summary field provides the default title displayed on a scheduled activity. A specific summary makes the task easier to recognize in the opportunity’s chatter and activity views. The Icon field sets the symbol used to represent the activity in CRM. Decoration Type adds a visual style that can help distinguish this activity from others in the interface.
The Schedule field sets a default deadline relative to a previous activity. You can specify an interval in days, weeks, or months and choose whether the deadline is calculated from the previous activity’s deadline or its completion date. Using the previous deadline creates a fixed timeline. Using the completion date makes the next activity depend on when the earlier task is actually finished. The KPI Provider Visibility field determines which activities are included in KPI visibility. The Note field adds default instructions or context to the activity, such as points to cover during a call or information to review before contacting a customer.
When a salesperson schedules it on a lead or opportunity, Odoo can prefill the title, assignee, deadline, and instructions. The user can review and adjust those details for the specific follow-up before saving.
Schedule an Activity on an Opportunity
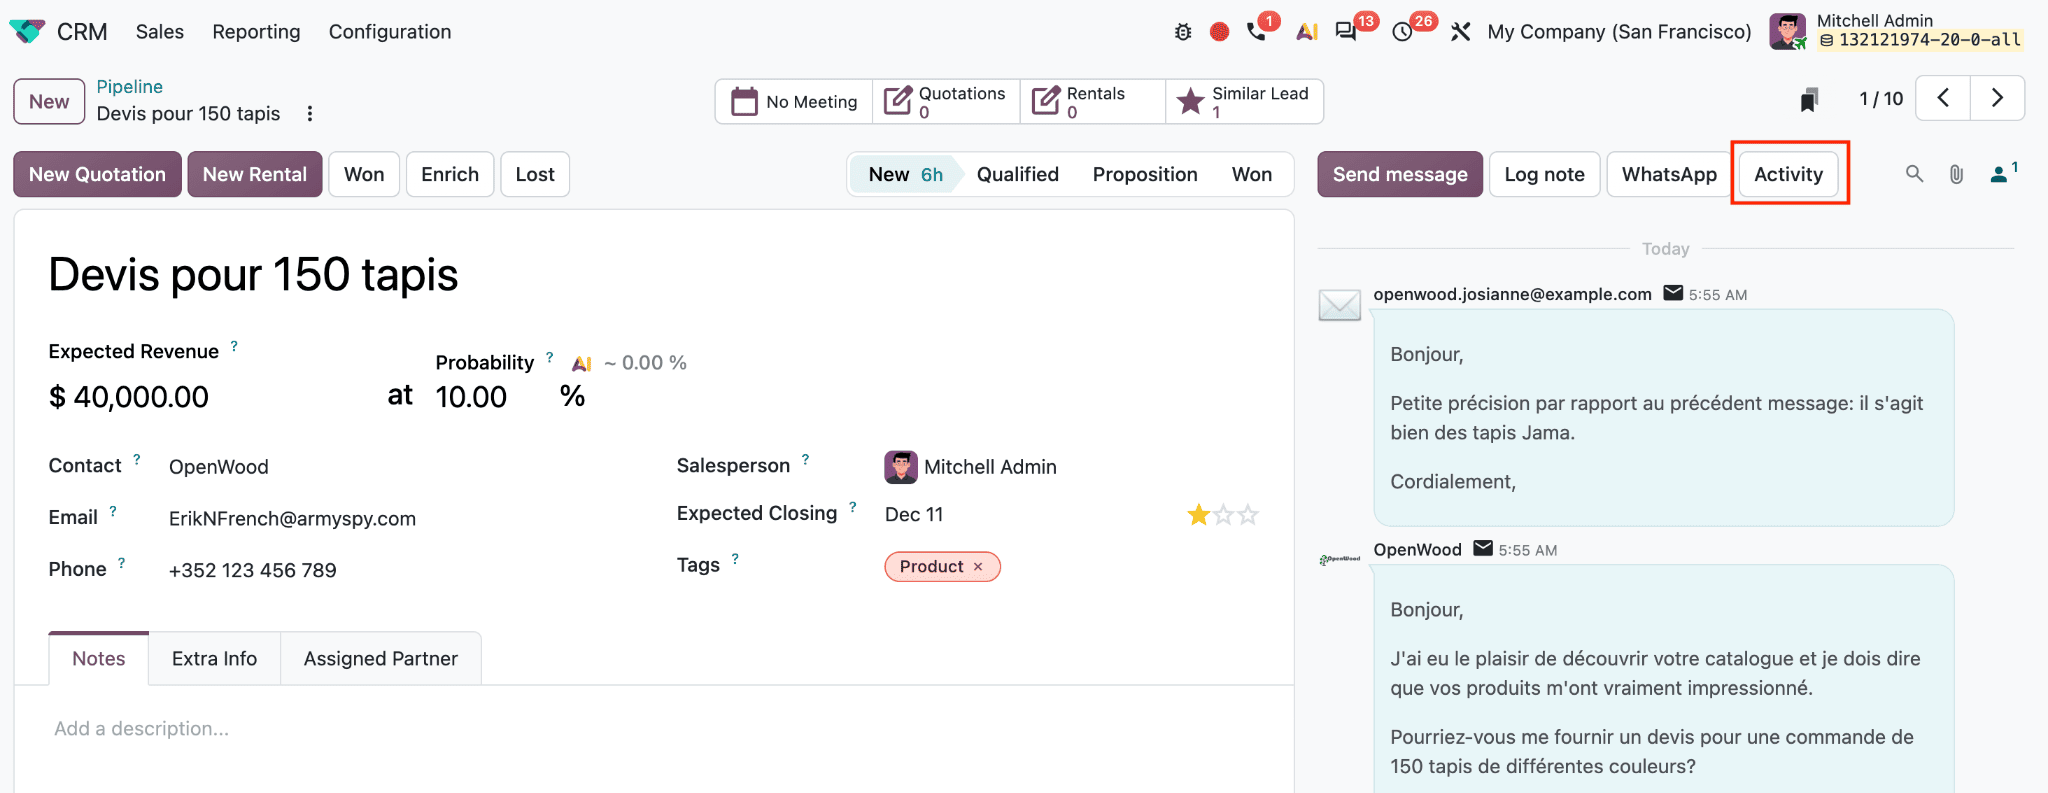
To schedule a single follow-up, open an opportunity from the CRM pipeline and click Activity above the chatter.
In the Schedule Activity form, select an activity type, enter a Summary, set the Due Date, choose the user in Assigned to, and add a note if needed.
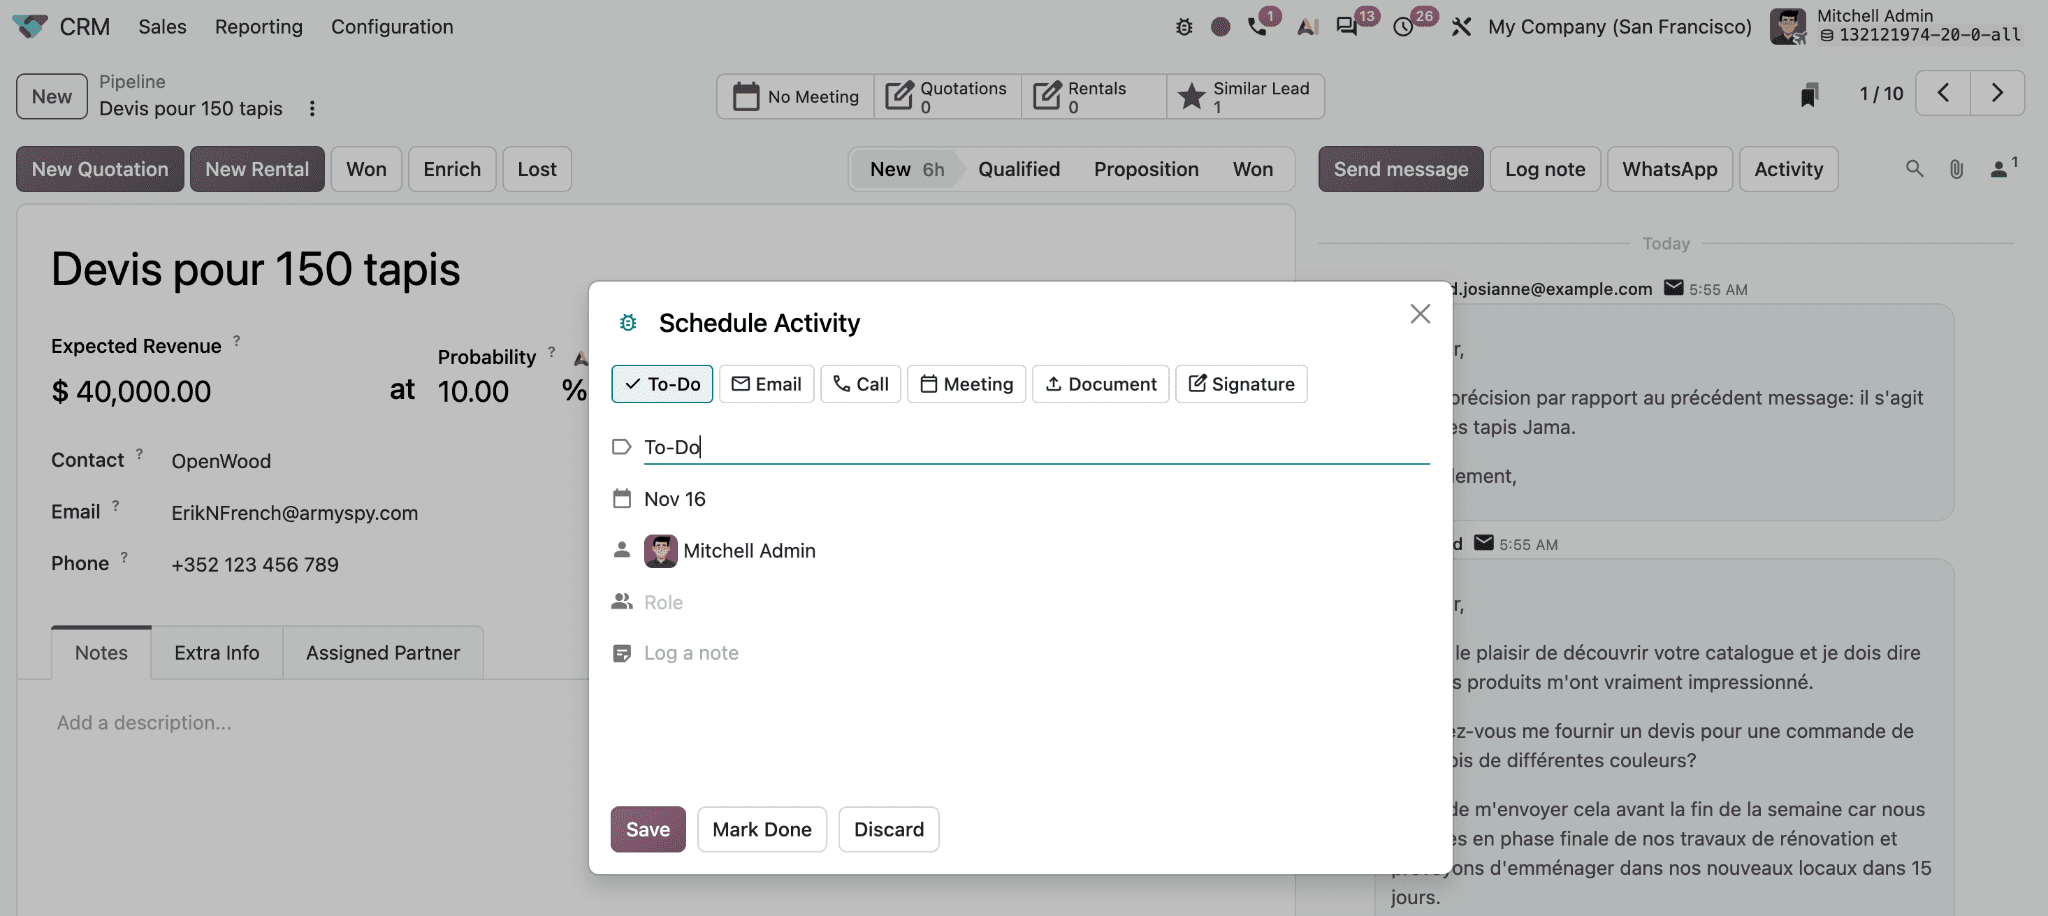
The current user is assigned by default, but the task can be delegated to another salesperson.
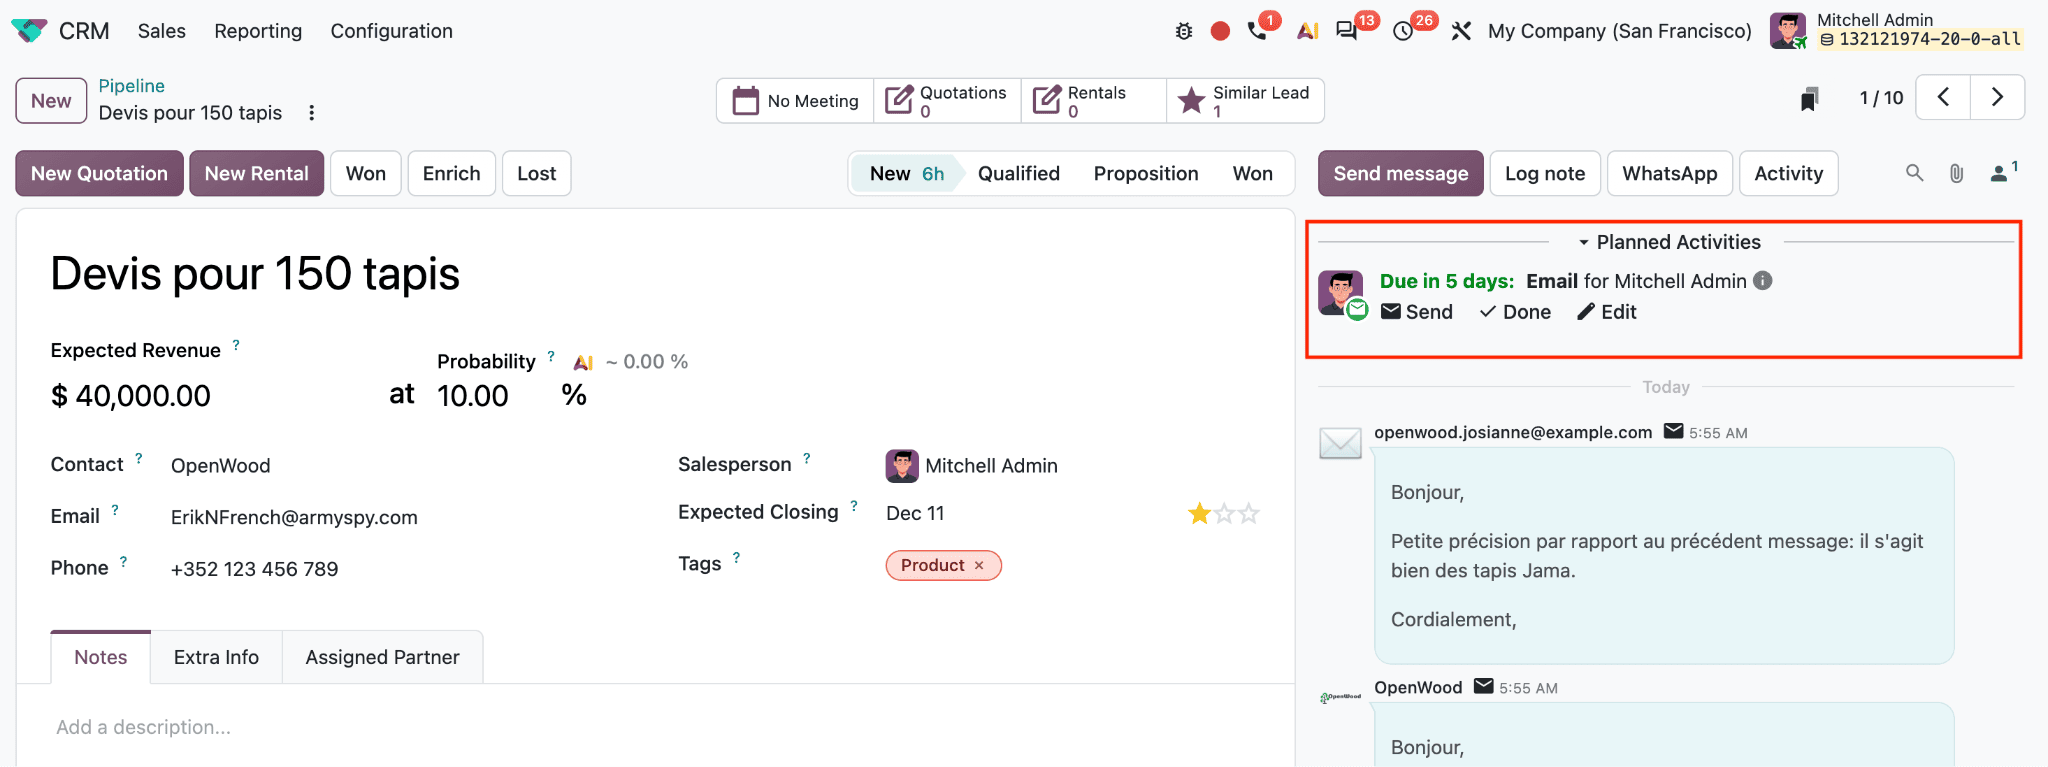
Click Save to add the task to the opportunity’s planned activities in the chatter.
Activities can also be scheduled from the CRM Kanban or list view.
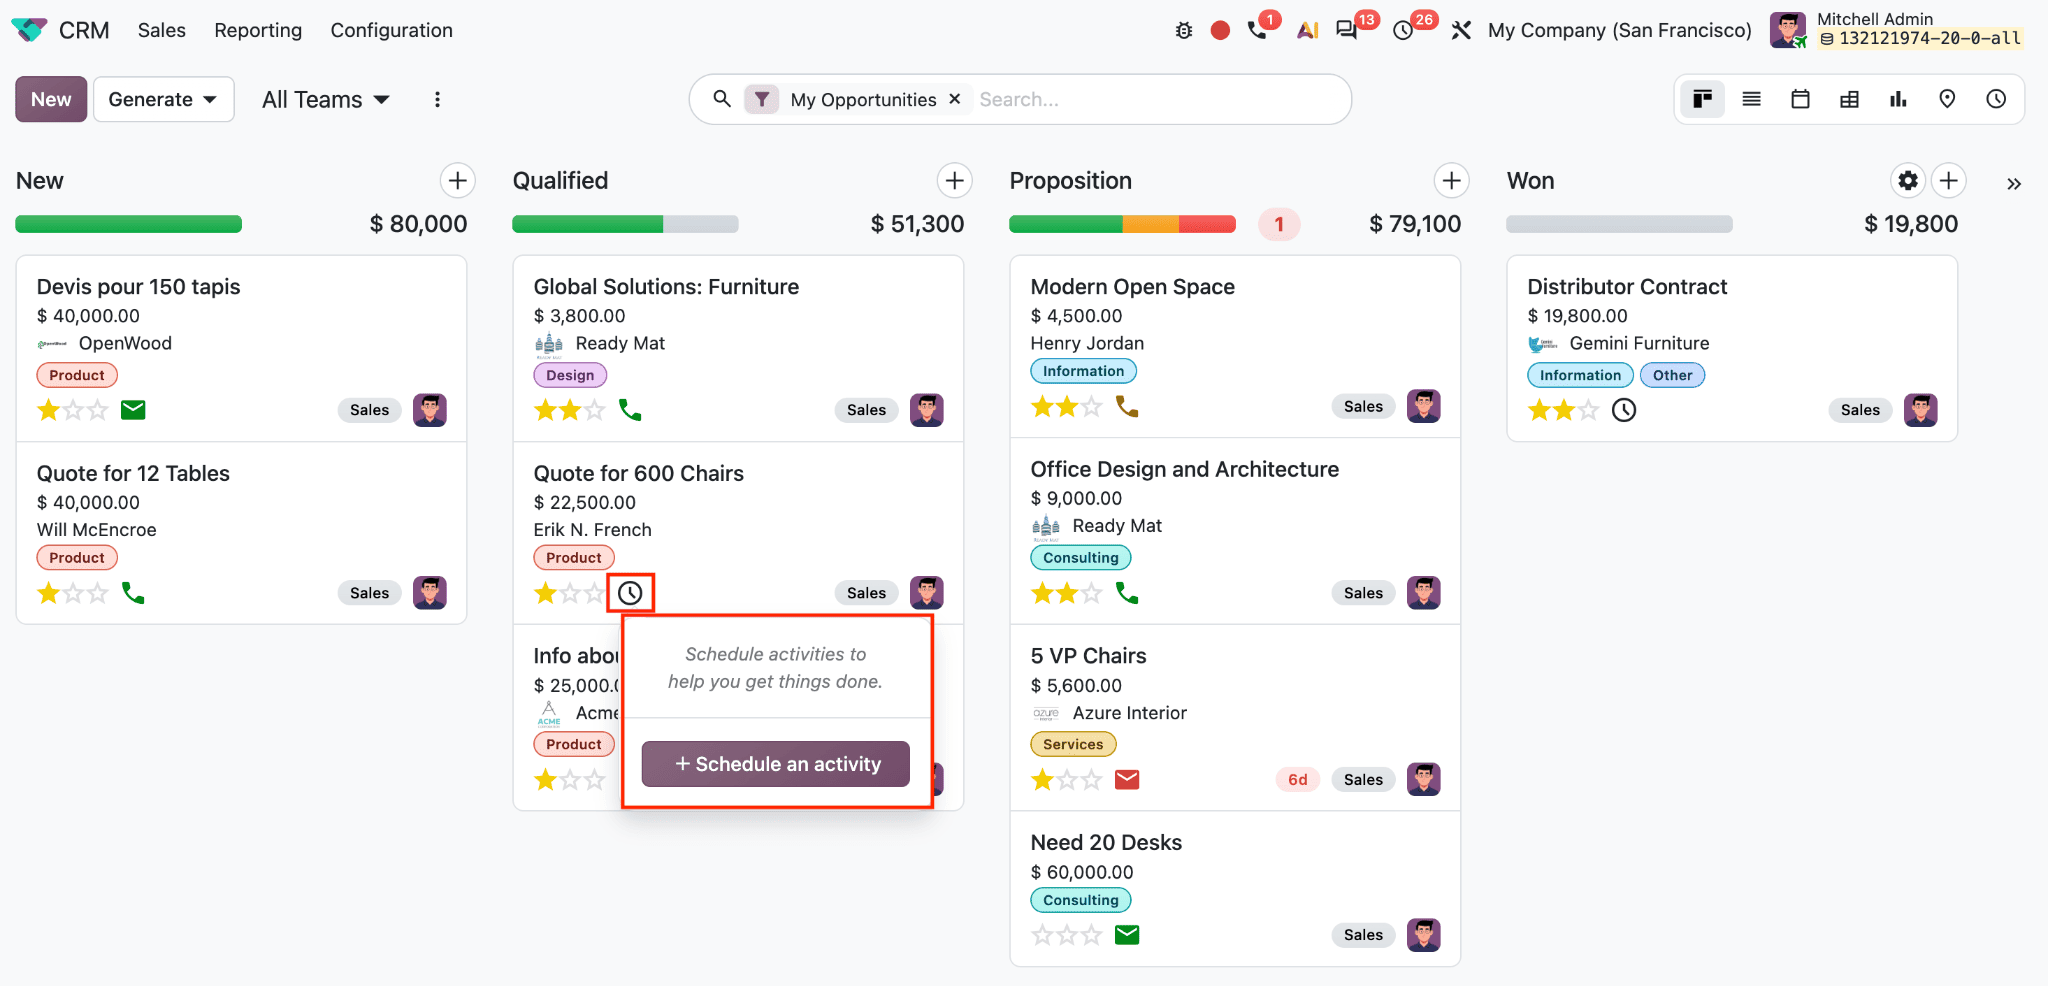
In Kanban, click the clock icon on the opportunity card and choose + Schedule An Activity. In the list view, make the Activities column visible from the view options if it is hidden, then use the clock icon on the relevant row.
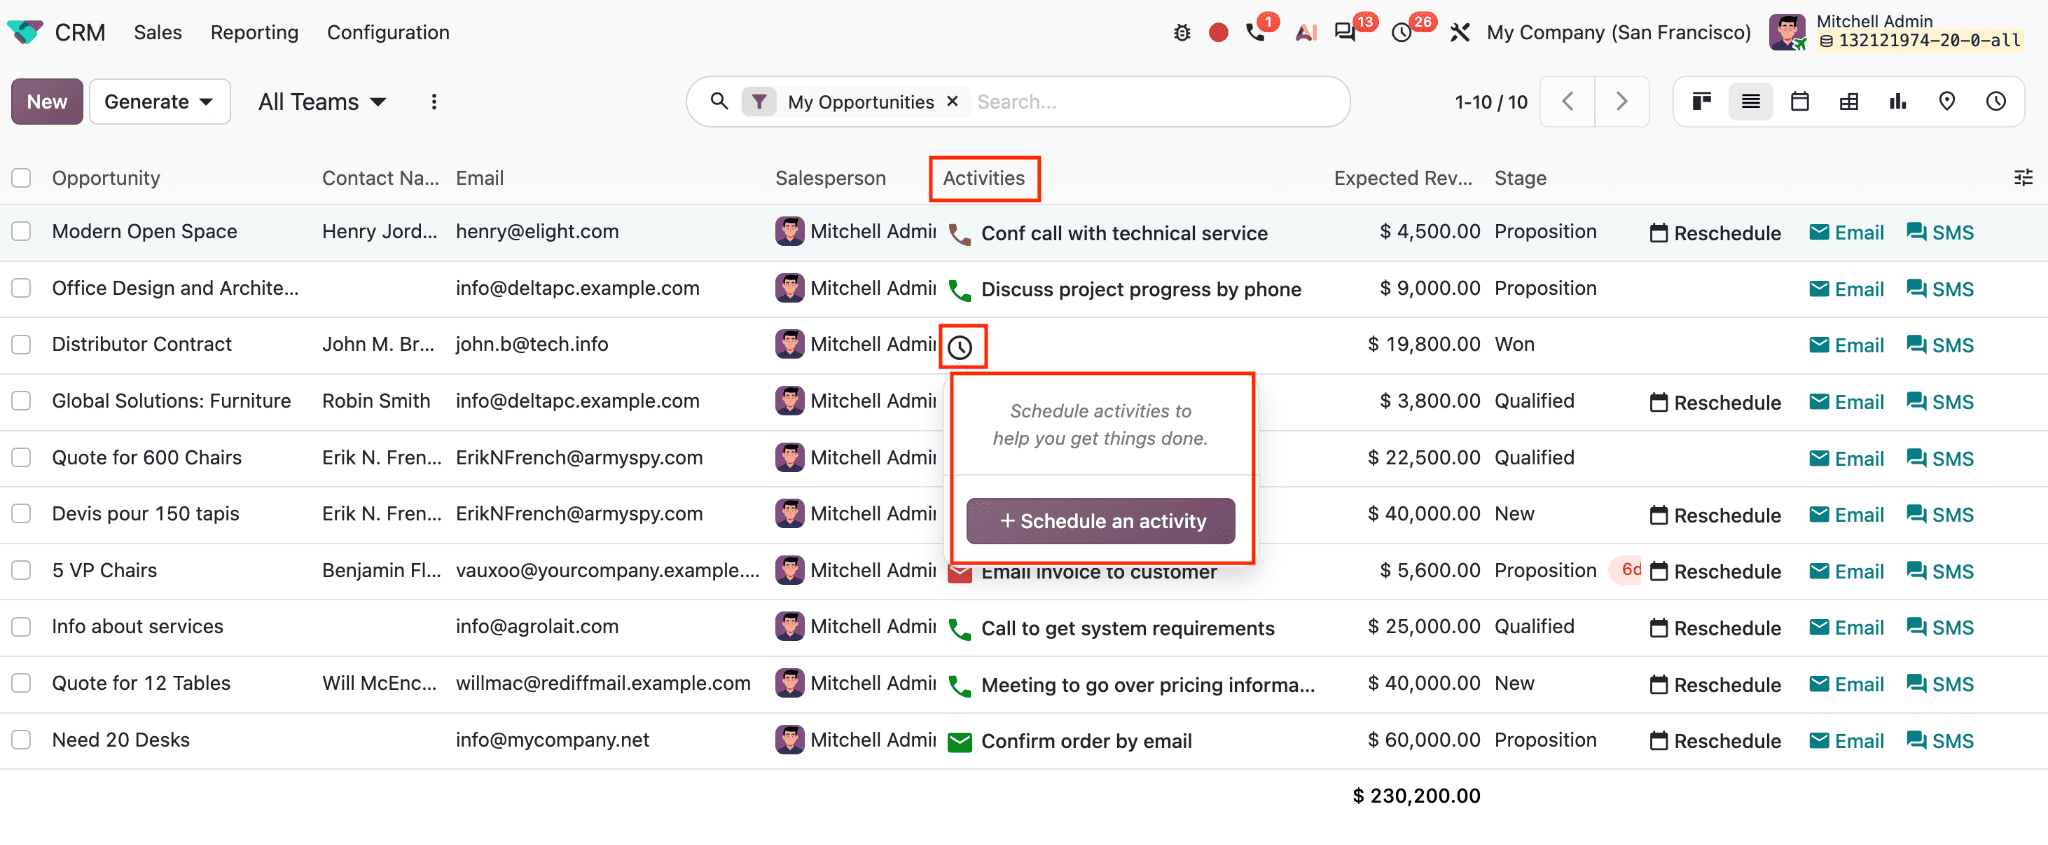
When an activity is already scheduled, its icon replaces the clock; click that icon to schedule another task. This lets a salesperson add follow-ups without opening each record.
Build a Reusable Activity Plan
An activity plan is a sequence of follow-up activities that can be launched on a lead or opportunity. Instead of scheduling each action separately, the plan creates the sequence with deadlines calculated from a selected plan date. To create one, go to CRM > Configuration > Activity Plans and click New.

Enter a Plan Name, then use the Activities To Create tab and click Add a line for each step. The Model field specifies which record type the plan applies to; here, it is Lead, so the plan can be launched from CRM leads. The Company field controls which company can use the plan. If left as Visible to all, it is available across companies.
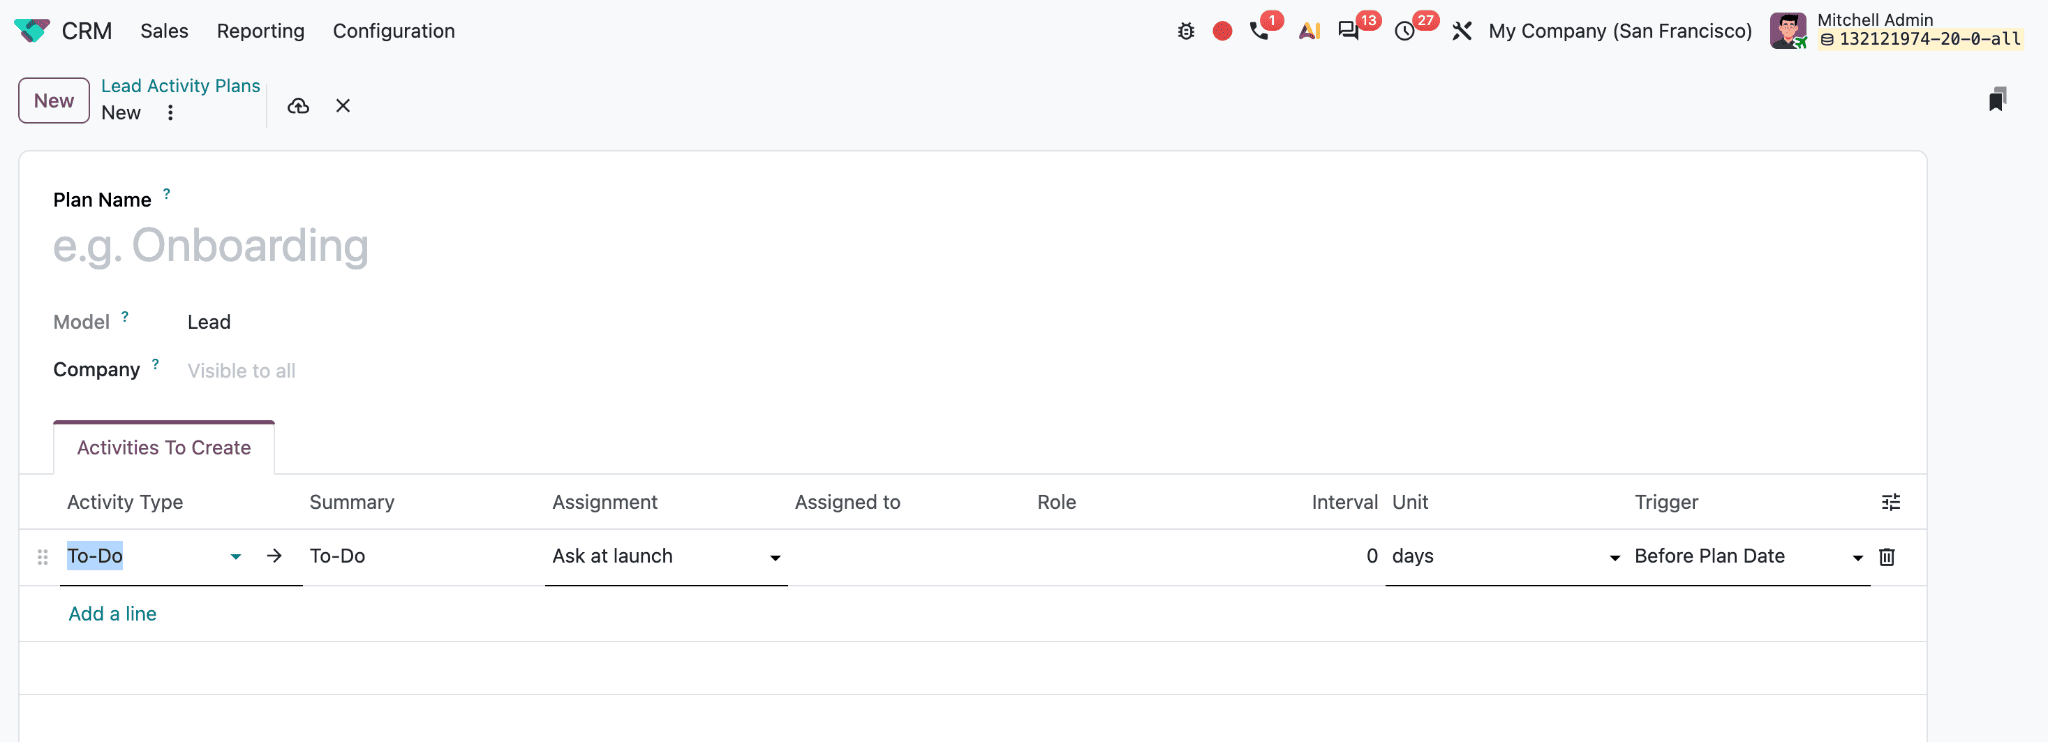
In the Activities To Create tab, add each follow-up step and select its activity type and summary. For every line, select an Activity Type. Use Search More to see all activity types or create a new one. The Summary field can be left blank to use the type’s Default Summary, or filled with a plan-specific instruction. A plan summary only changes the activity created by this plan; it does not overwrite the activity type’s default.
The Assignment menu offers three options: Ask at launch assigns the activity to a user chosen when the plan is launched; Specific User assigns it to the user selected in the Assigned to column; and Role routes it according to the role selected in the Role column.
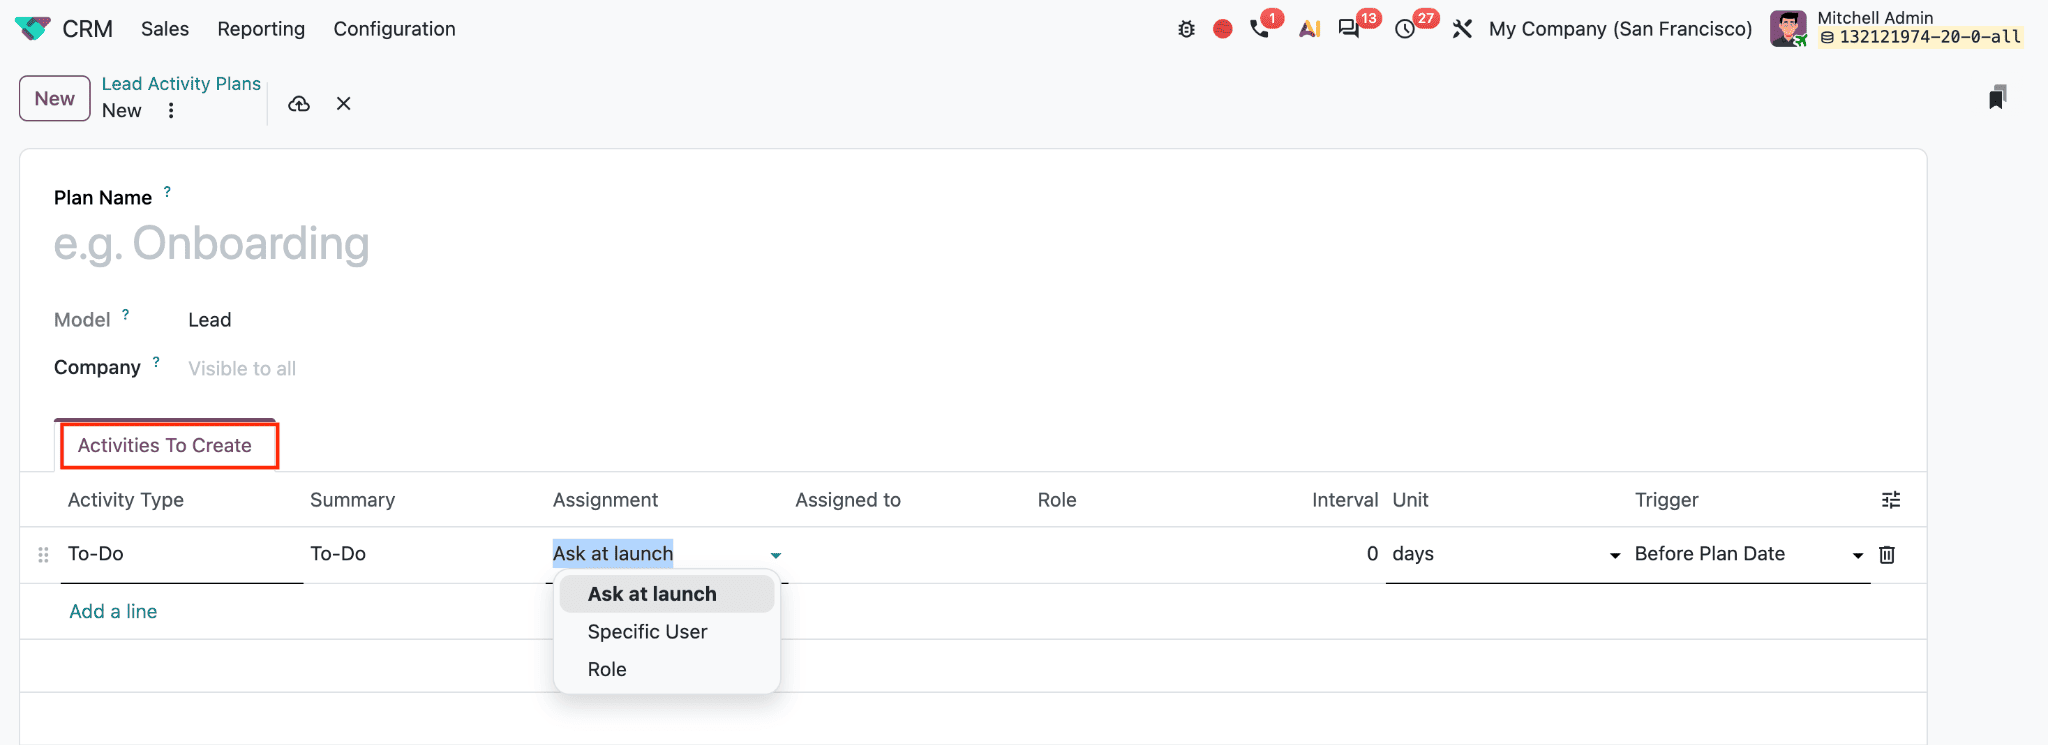
Default user assigns the activity to the user selected in Assigned to. A plan can mix these options, assigning some steps to a fixed specialist and others to the salesperson selected when the plan starts.
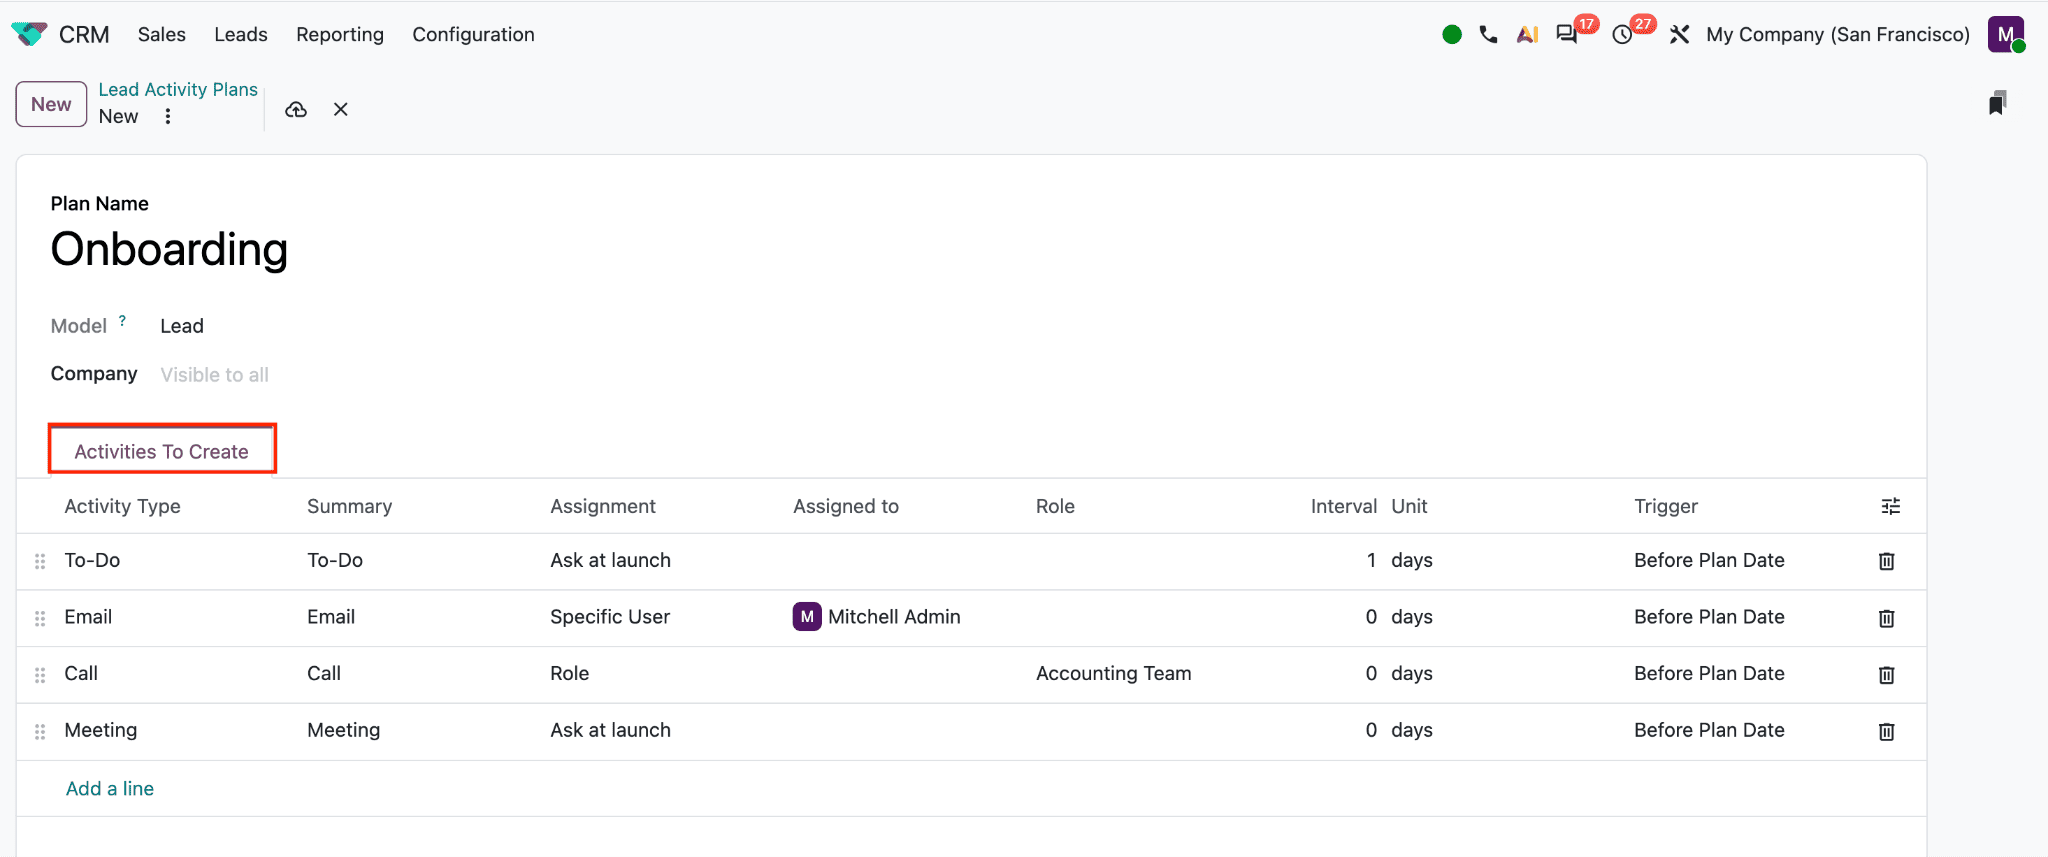
Here, in this example, the Onboarding activity plan demonstrates how one sequence can include several follow-up tasks with different assignment rules. The first To-Do is assigned using Ask at launch, so the user launching the plan can choose who is responsible. The Email activity uses Specific User and is assigned to Mitchell Admin. The Call is assigned by Role to the Accounting Team, while the Meeting uses Ask at launch.
Set each activity’s timing with Interval, Units, and Trigger. The interval defines how many days, weeks, or months from the plan date; the trigger determines whether the task is due before or after that date. A plan date can represent the key target, such as the meeting date, with preparation scheduled before and follow-up tasks after. For example, a plan might schedule an email two days before the meeting, the meeting on the plan date, a quote and document upload three days after, and a follow-up five days after. This creates a coordinated timeline around one milestone.
Launch the Plan and Track Progress
Open a lead or opportunity, then click Activity above the chatter, as shown in the screenshot.
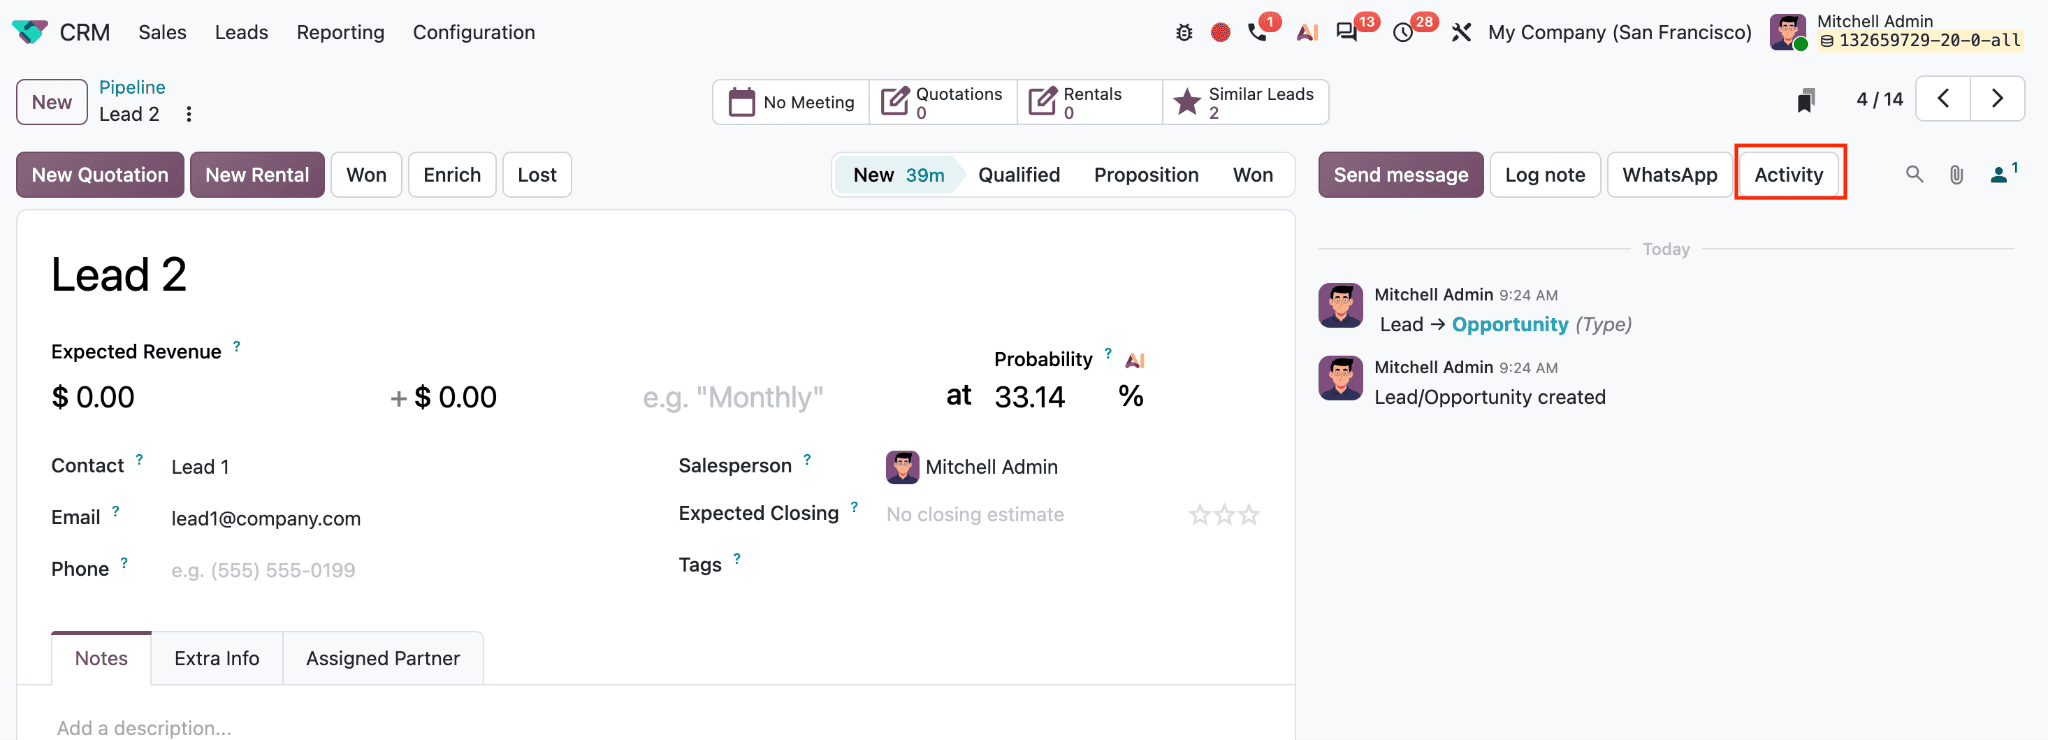
In the Schedule Activity window, select the appropriate plan.
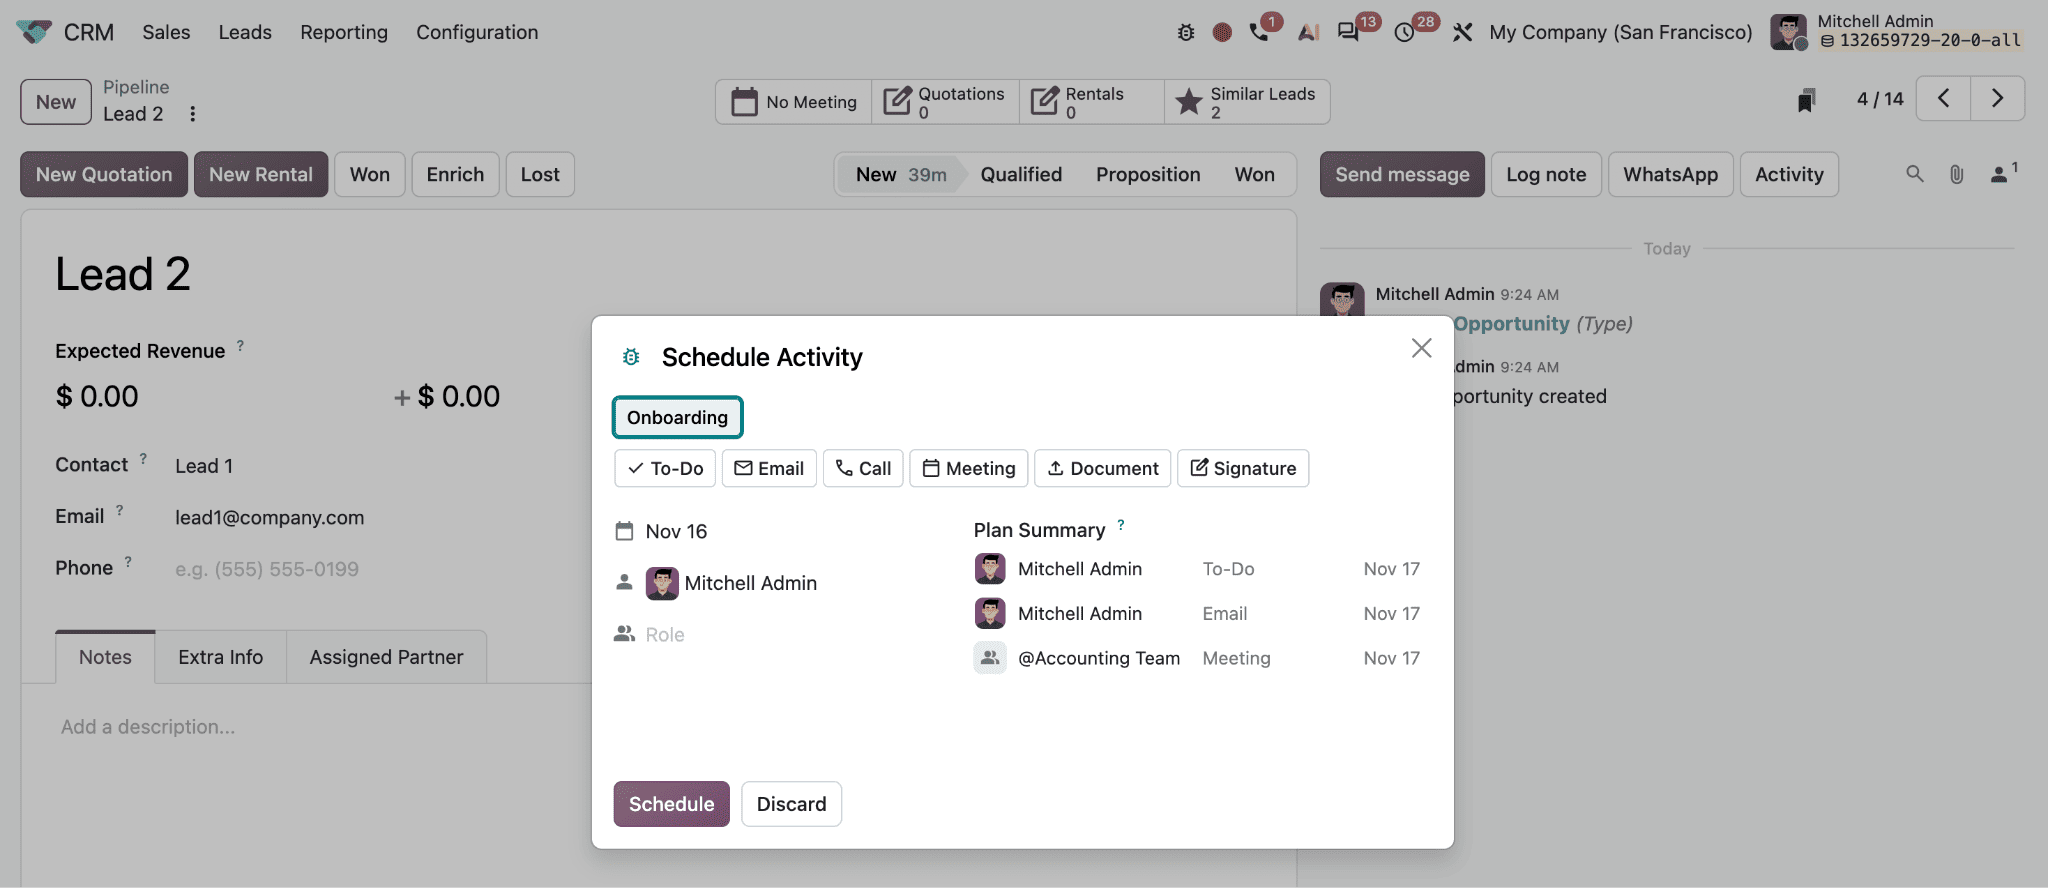
Odoo displays the plan’s activities in the Plan Summary, including who will handle each one and its due date. In this example, the To-Do and Email are assigned to Mitchell Admin, while the Meeting is assigned to the Accounting Team. Click Schedule to add the activities to the record.
The screenshot shows how each activity is configured in the plan.
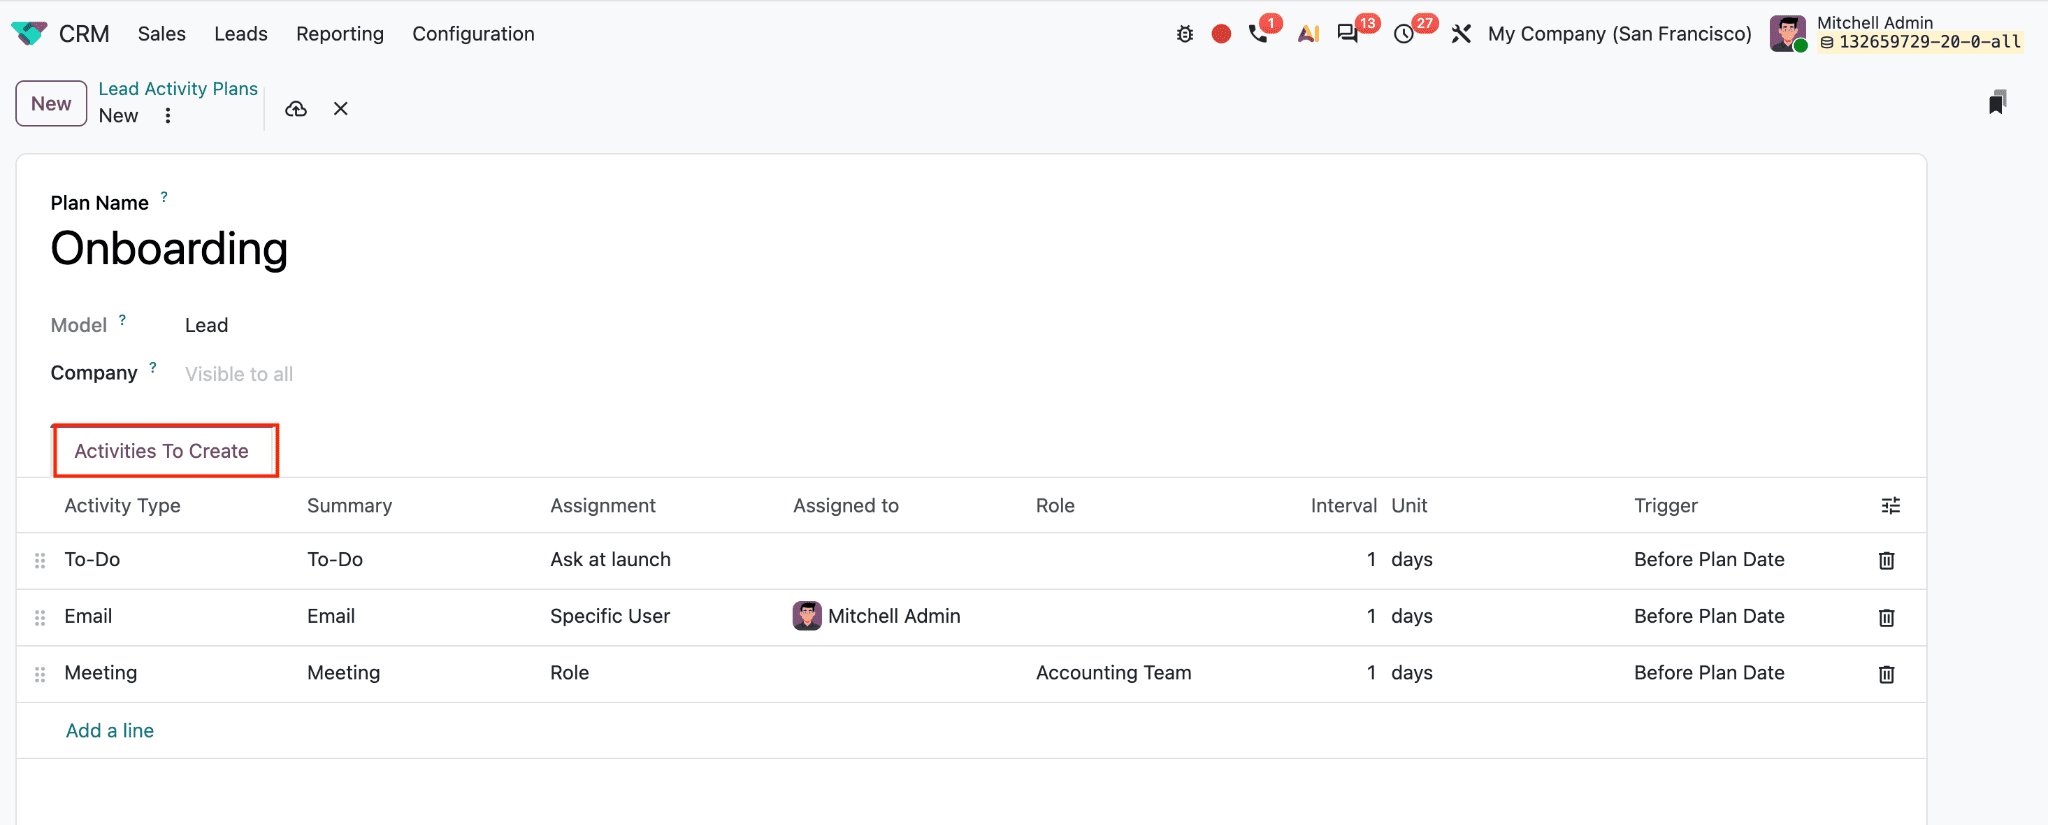
Ask at launch lets the person starting the plan choose a responsible user. Specific User assigns the activity to a named user selected in the plan. Role assigns it to a role or team, such as the Accounting Team. In the example, the To-Do uses Ask at launch, the Email uses Specific User, and the Meeting uses Role.
After scheduling, Odoo lists the activities under Planned Activities in the chatter, as shown in the screenshot.
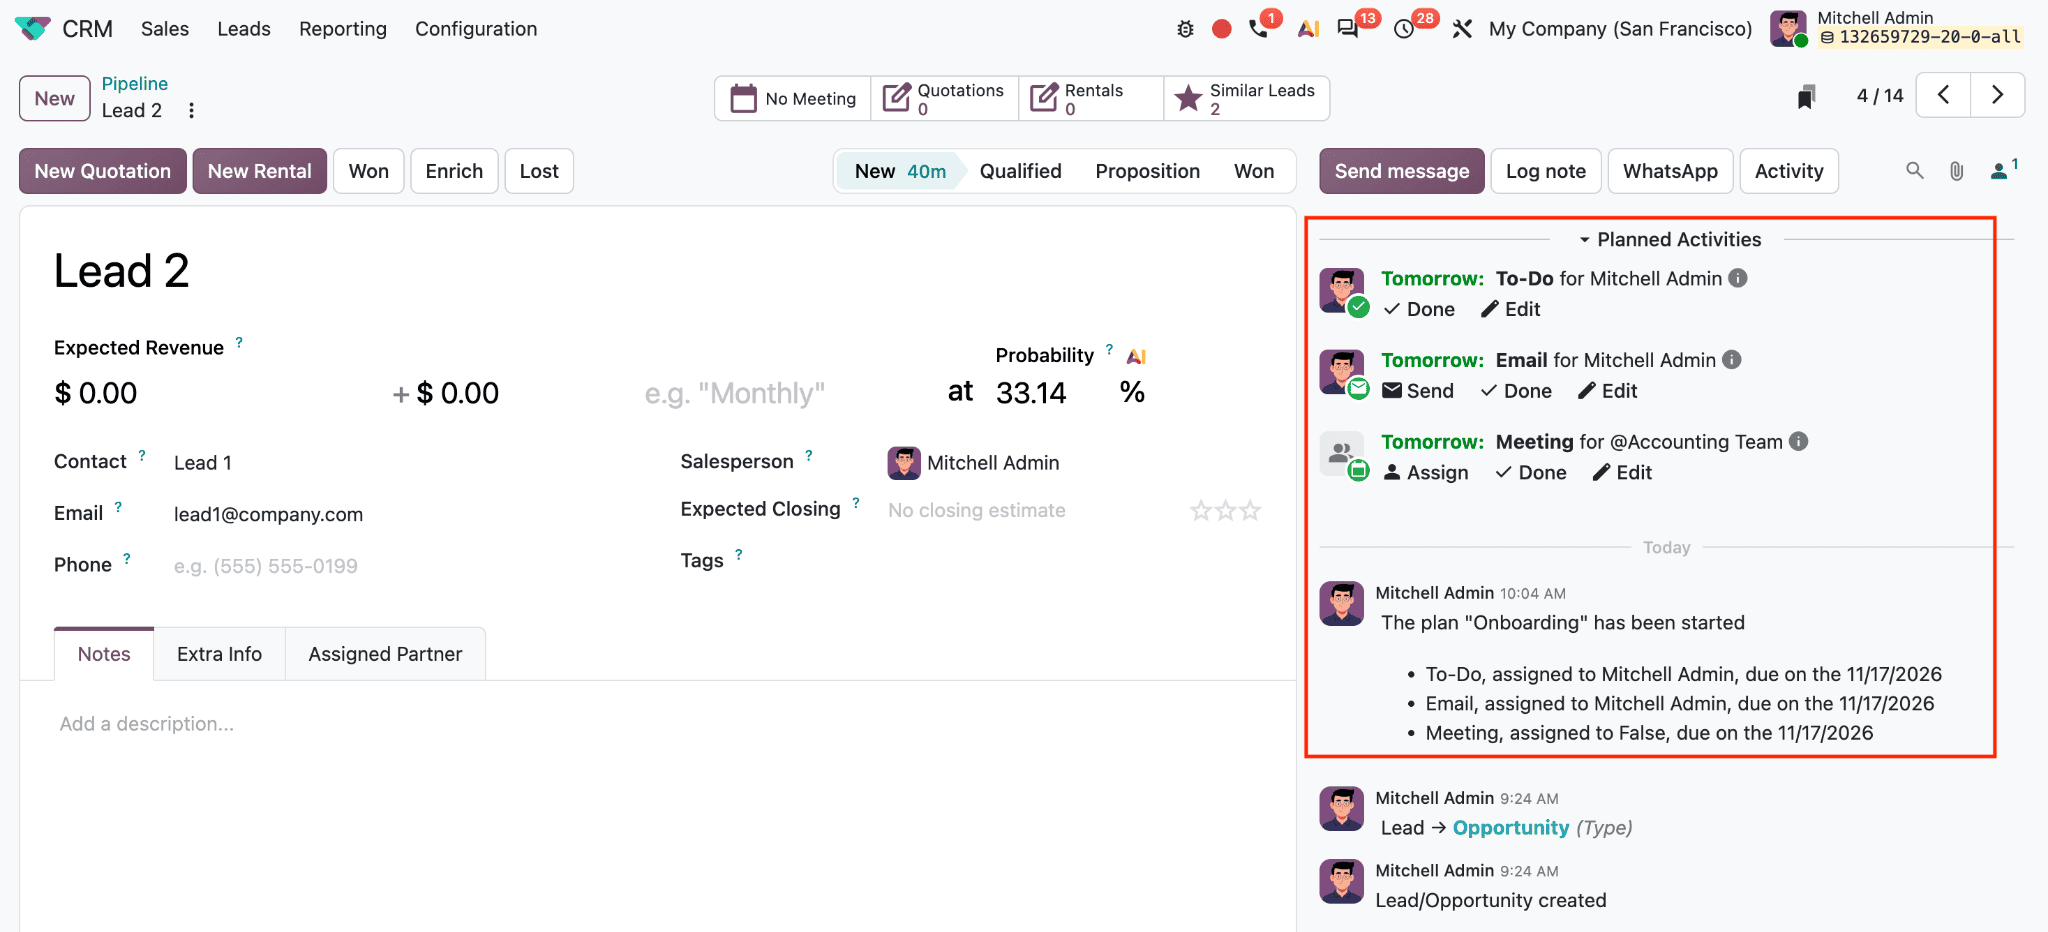
Each entry displays its due date, activity type, and assigned user or team. The To-Do and Email are assigned to Mitchell Admin. The Meeting is assigned to the Accounting Team, and its Assign option lets a user select the individual responsible for handling it.
Click Done when an activity is complete.
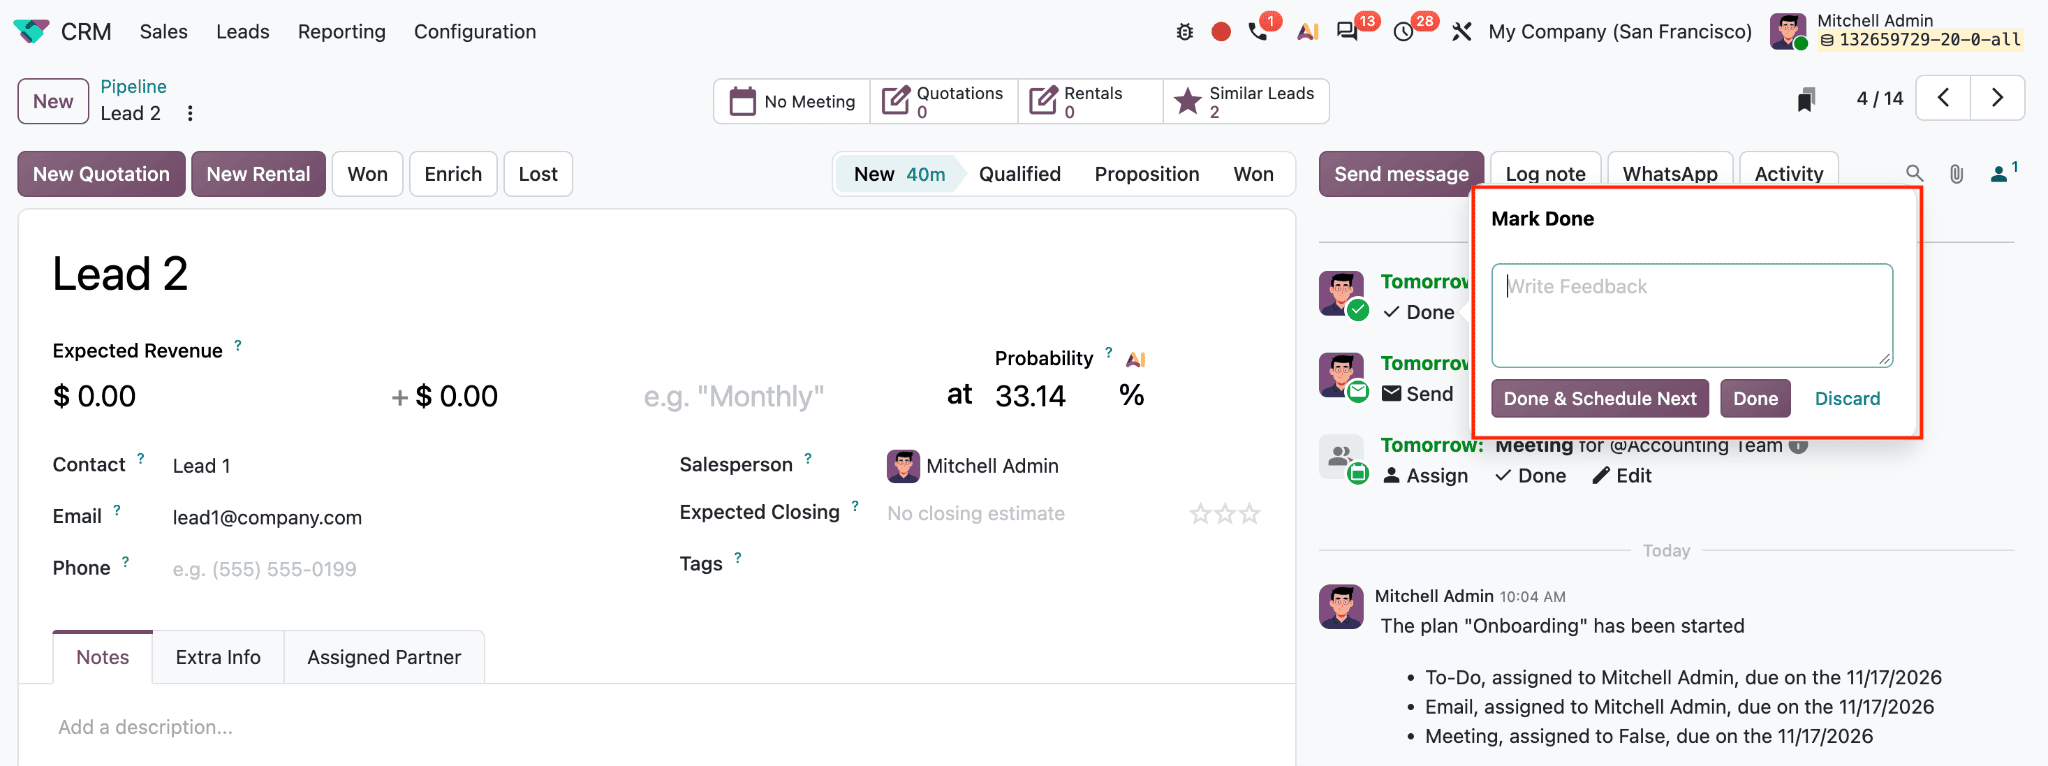
The screenshot shows the Mark Done window, where the user can enter feedback and choose Done & Schedule Next, Done, or Discard. Use Done & Schedule Next when the next activity has been configured and should follow the completed task.
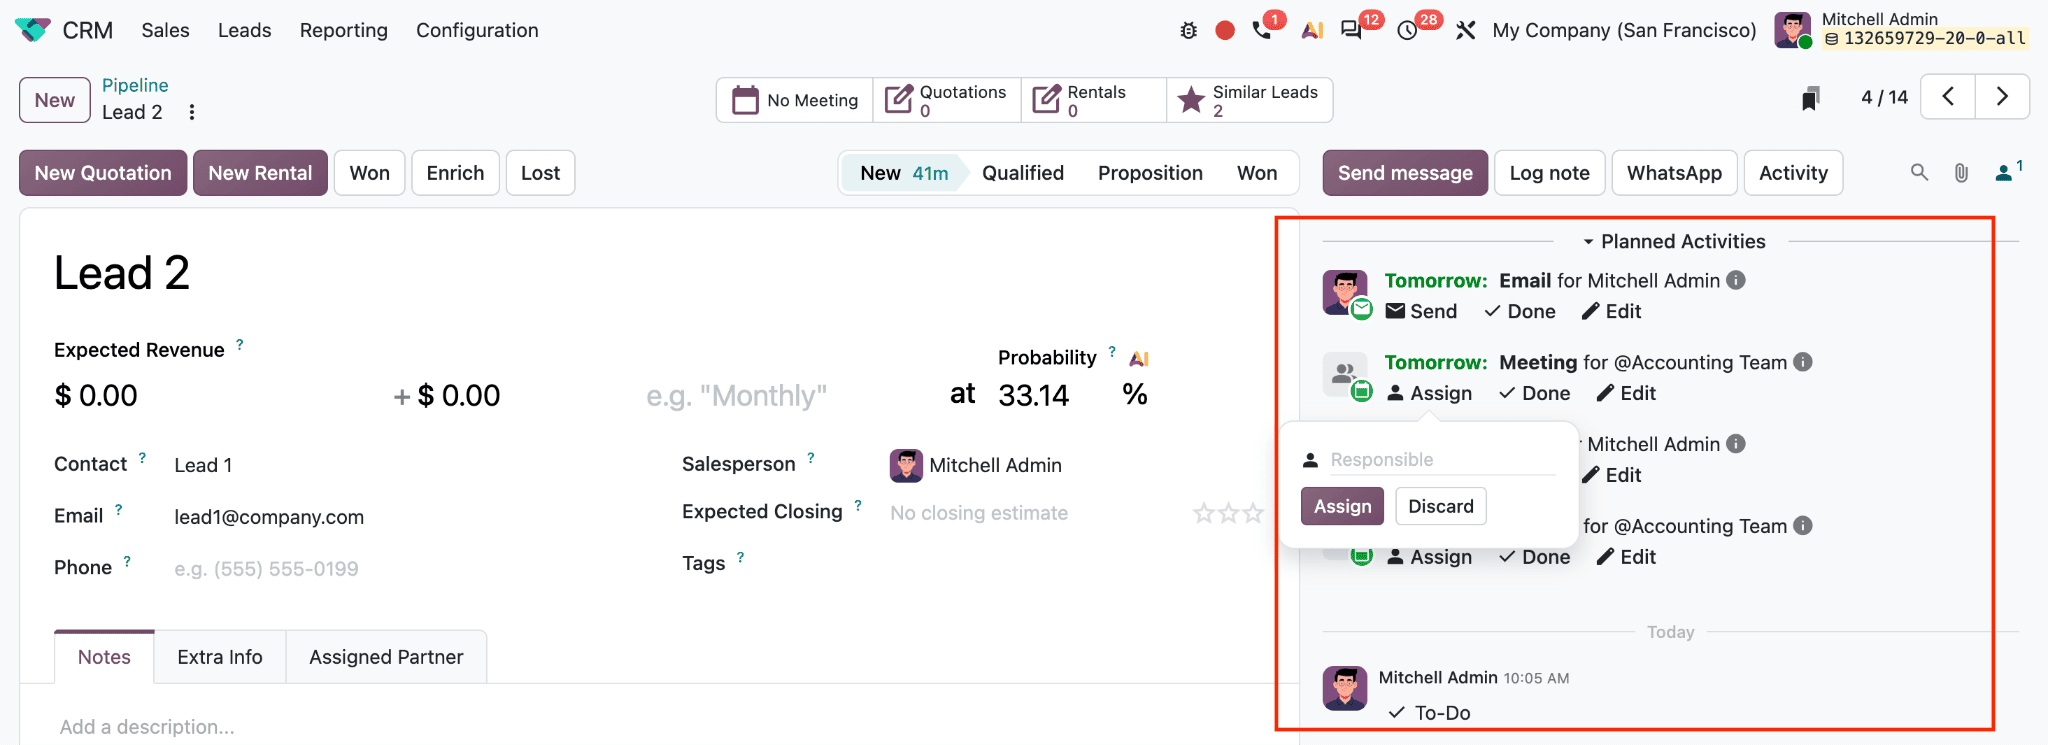
The screenshot shows the Meeting’s assignment pop-up, where the responsible person can be selected and confirmed with Assign. In this example, Odoo schedules the To-Do, Email, and Meeting together when the plan is launched. Completing one activity does not automatically assign the others; each follows the assignment method configured for it. The Done & Schedule Next option applies to a configured next activity, while the remaining activities from the plan stay visible under Planned Activities.
Leaving completed work open can make a pipeline look overdue even when the customer has already been contacted. If a task is no longer relevant, users can cancel or reschedule it rather than leaving it as an unresolved reminder.
Find Overdue Activities and Review Results
To see your assigned work, open CRM > Sales > My Activities.
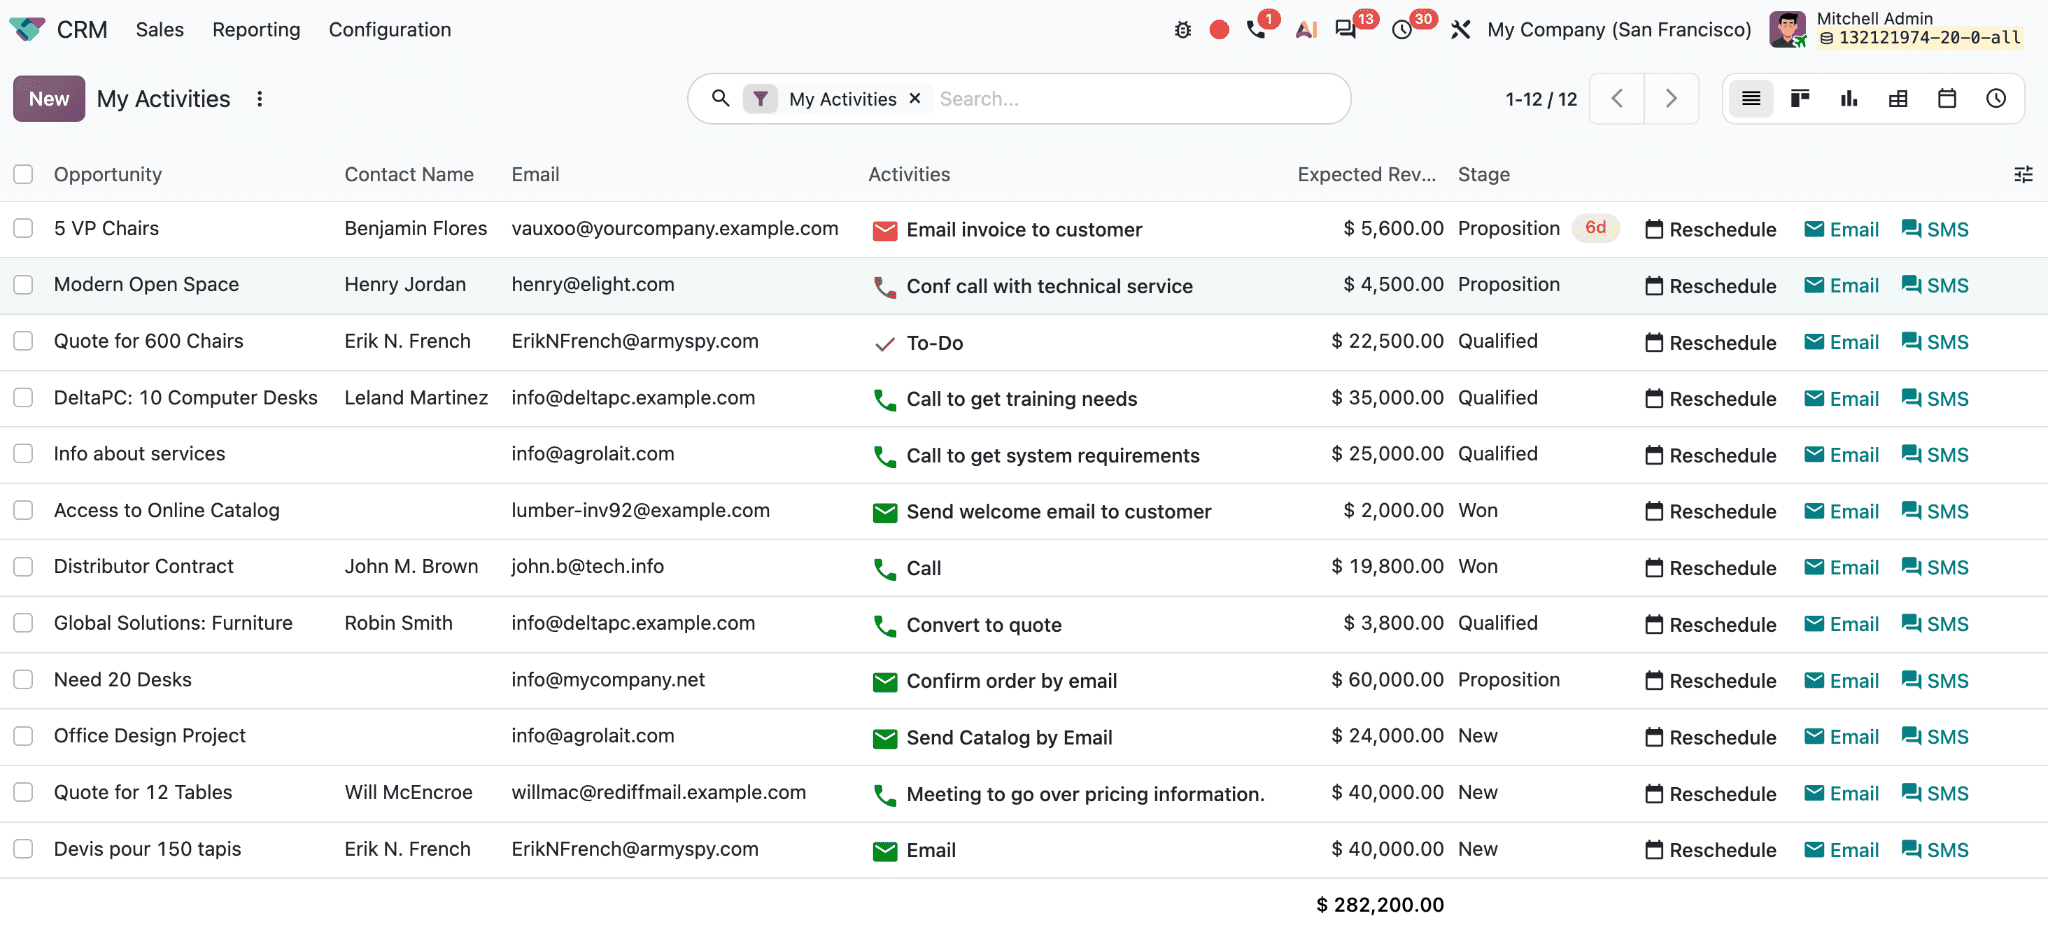
This view brings together activities that need attention.
The clock icon in the main menu can also show a consolidated activity overview across applications, with a red count bubble when activities are pending.
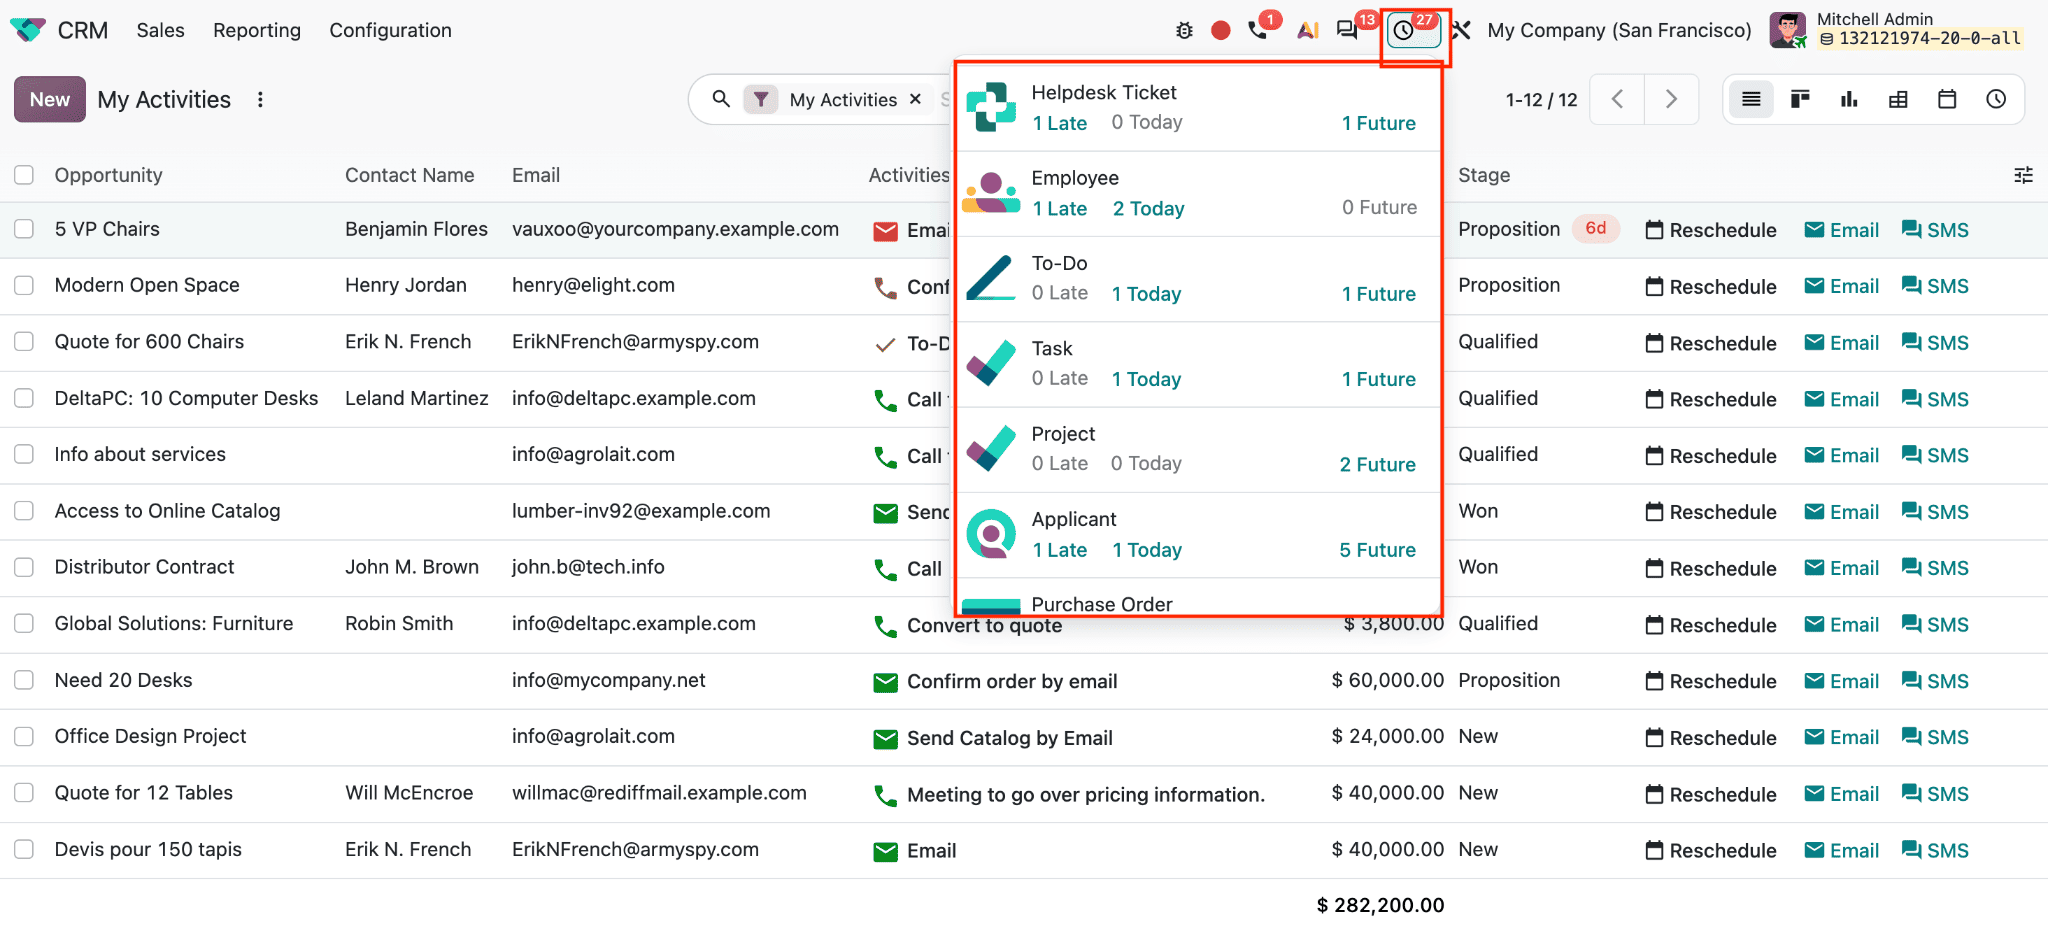
Odoo groups work into Late, Today, and Future, so users can prioritize overdue follow-ups and plan upcoming calls. In the CRM Activity view, records are arranged horizontally and activity types appear in columns.
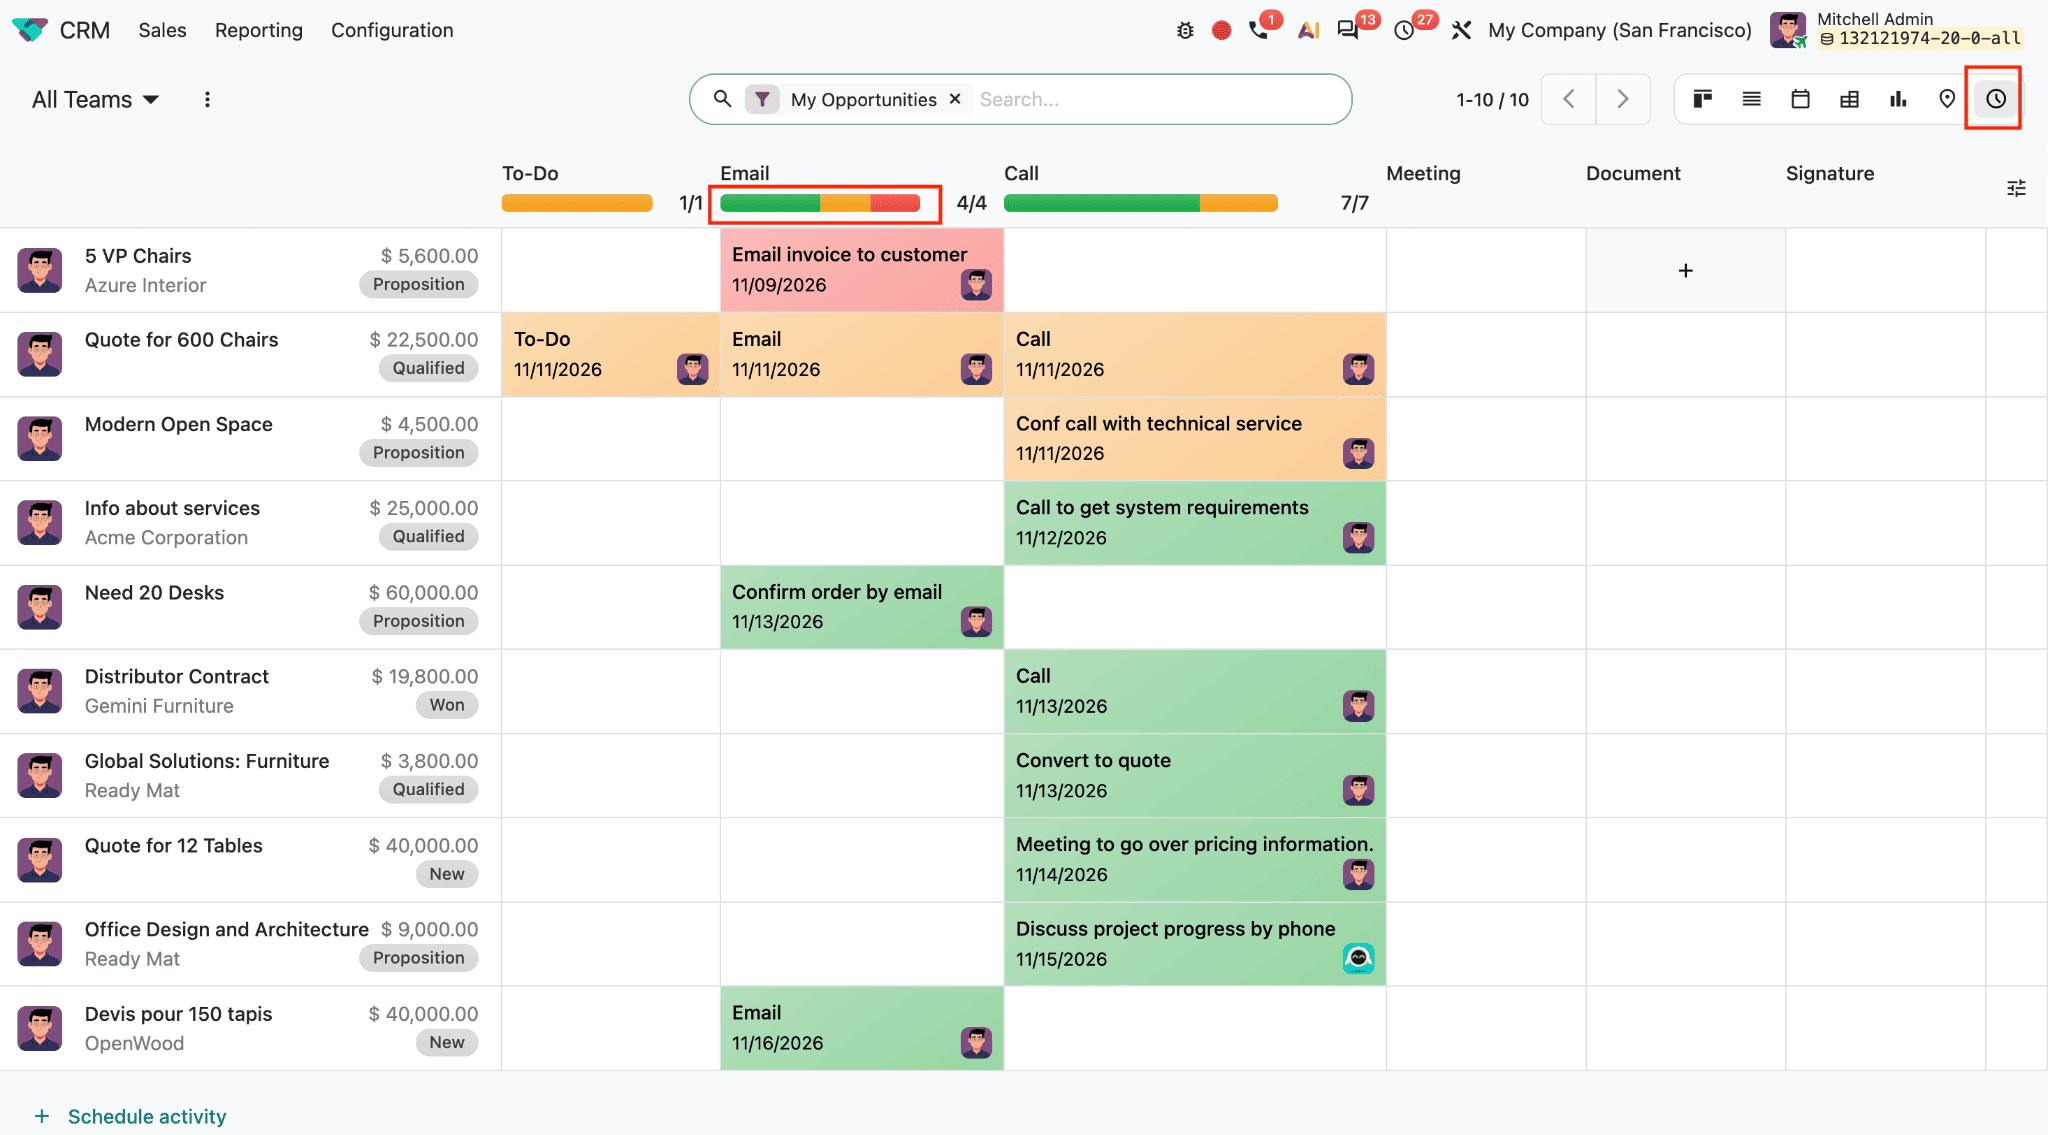
Green indicates a future due date, orange means due today, and red marks overdue work.
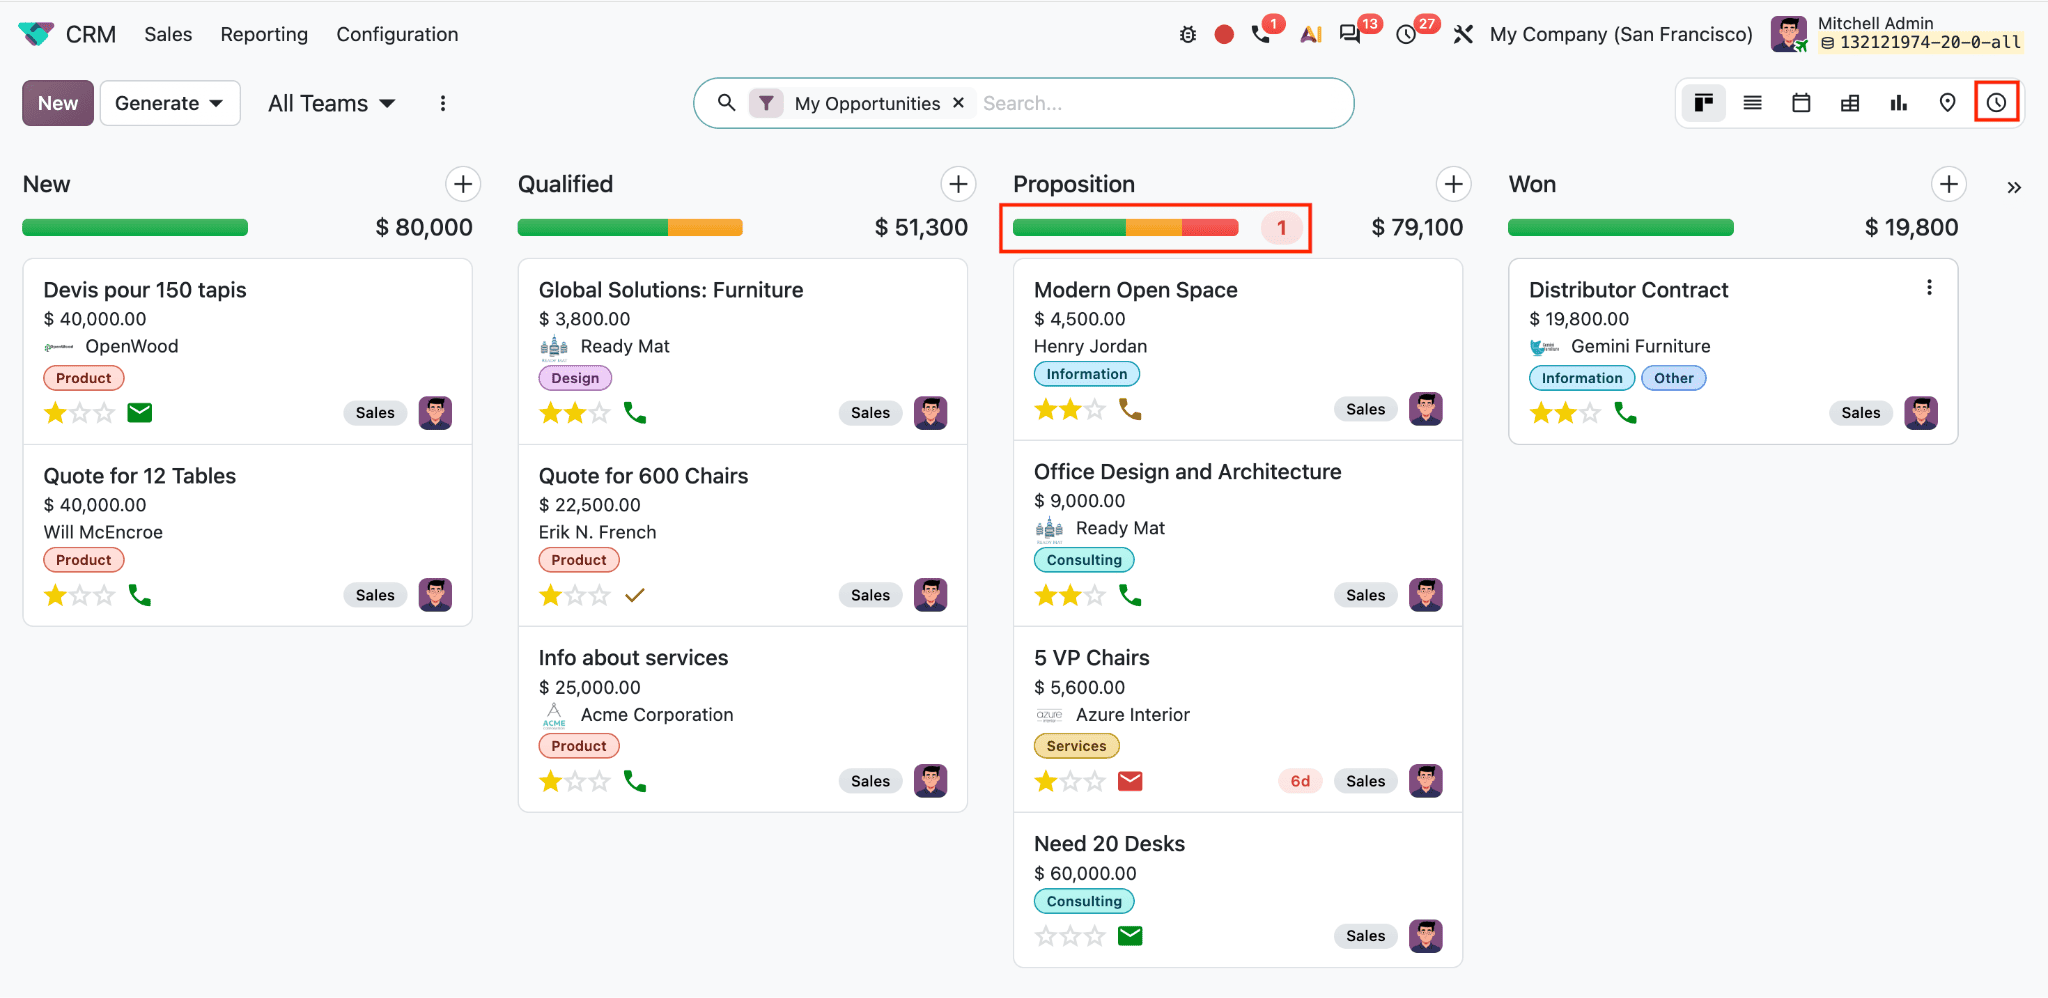
The progress bar on a Kanban opportunity card also gives a quick visual indication of its scheduled activity status.
For a broader review, use Reporting > Activities to analyze activity records across the team. The analysis view can help managers compare follow-up volume and status by salesperson, activity type, or date, depending on the available measures and grouping options. In CRM > Reporting > Activities, use the search bar to filter and group activity data.
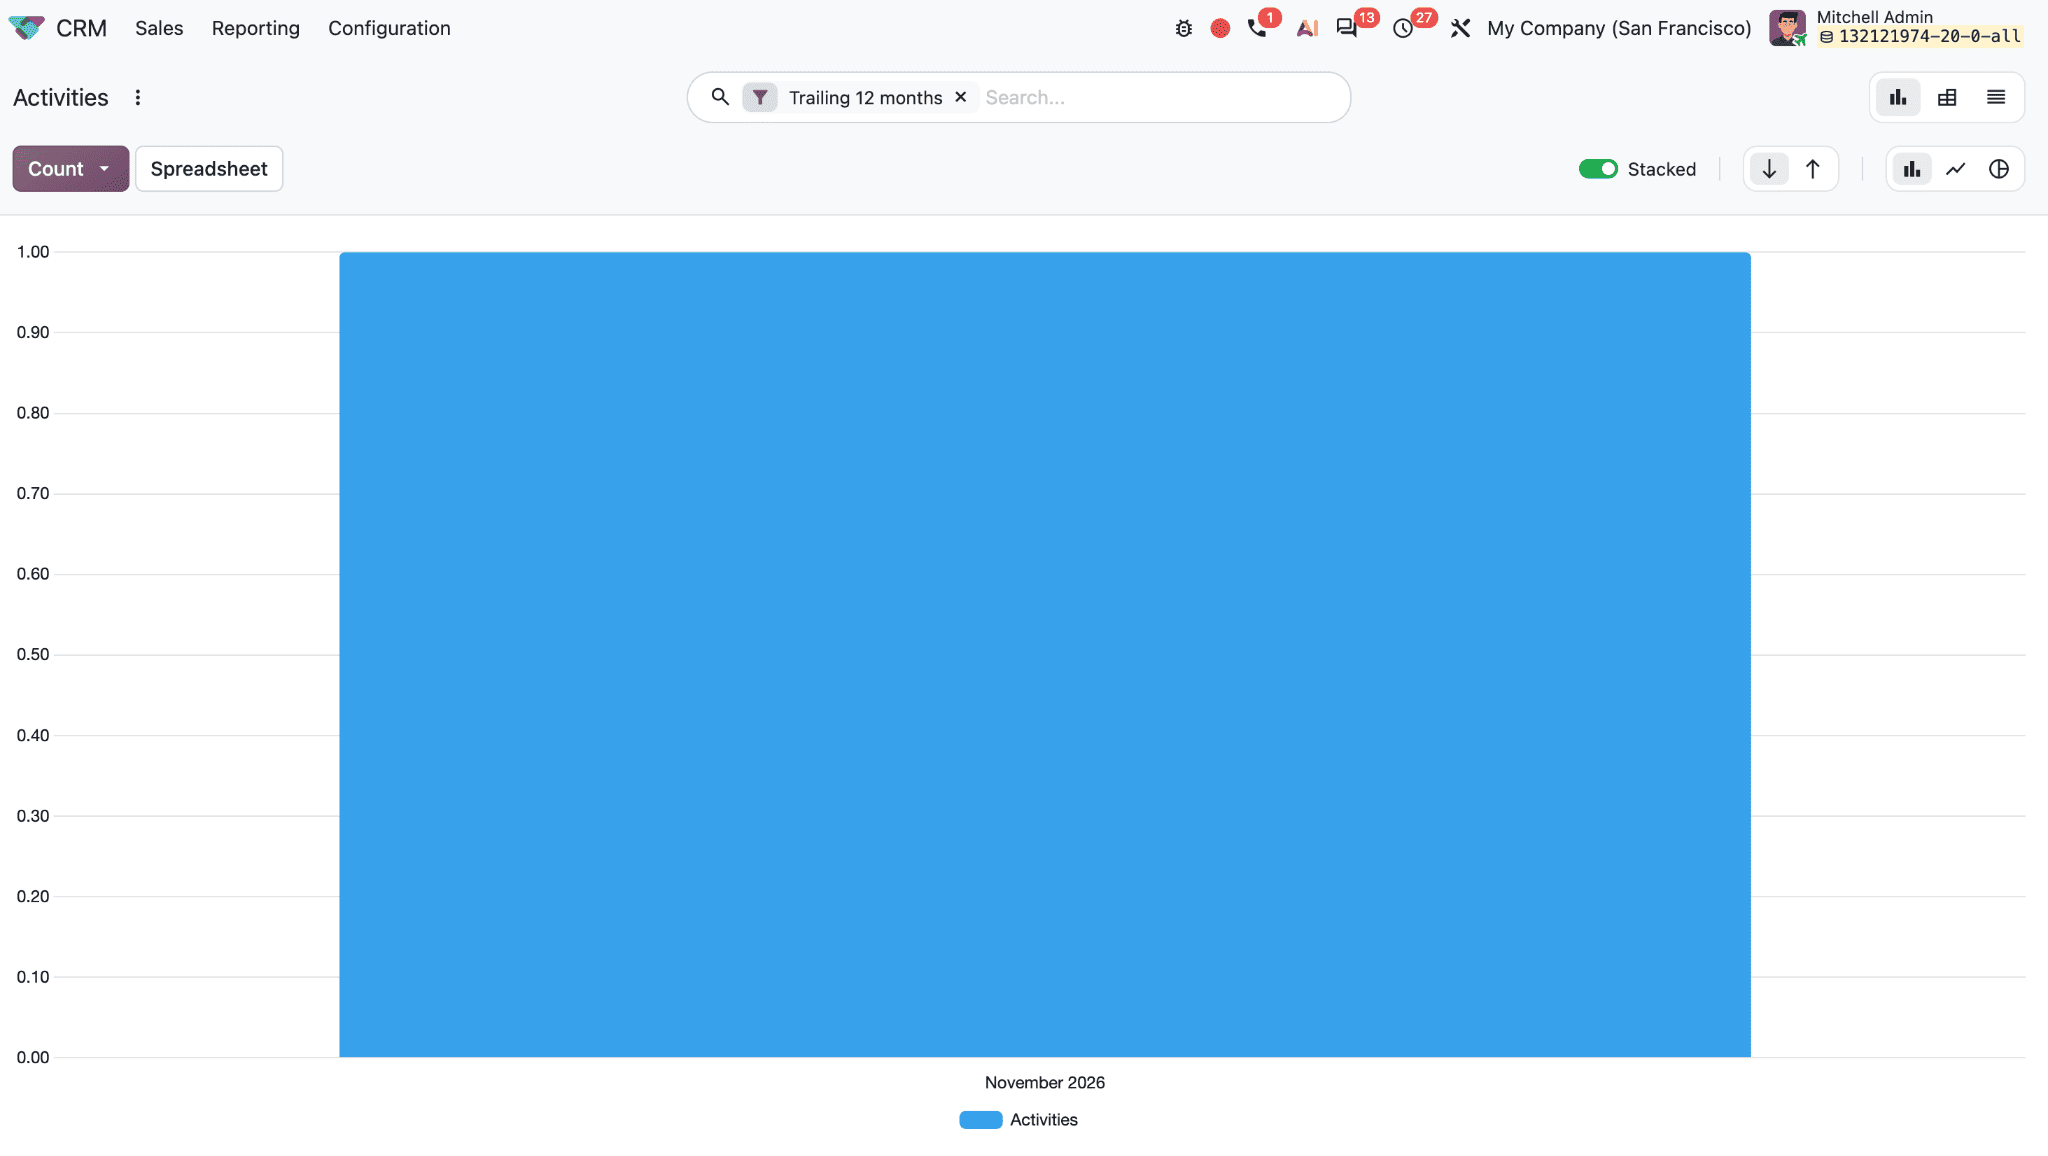
The screenshot shows the Trailing 12 months filter selected, which limits the report to activity records completed during the past year. Other filters include Won and Lost, while Completion Date, Archived, and Custom Filter let you adjust the records included.
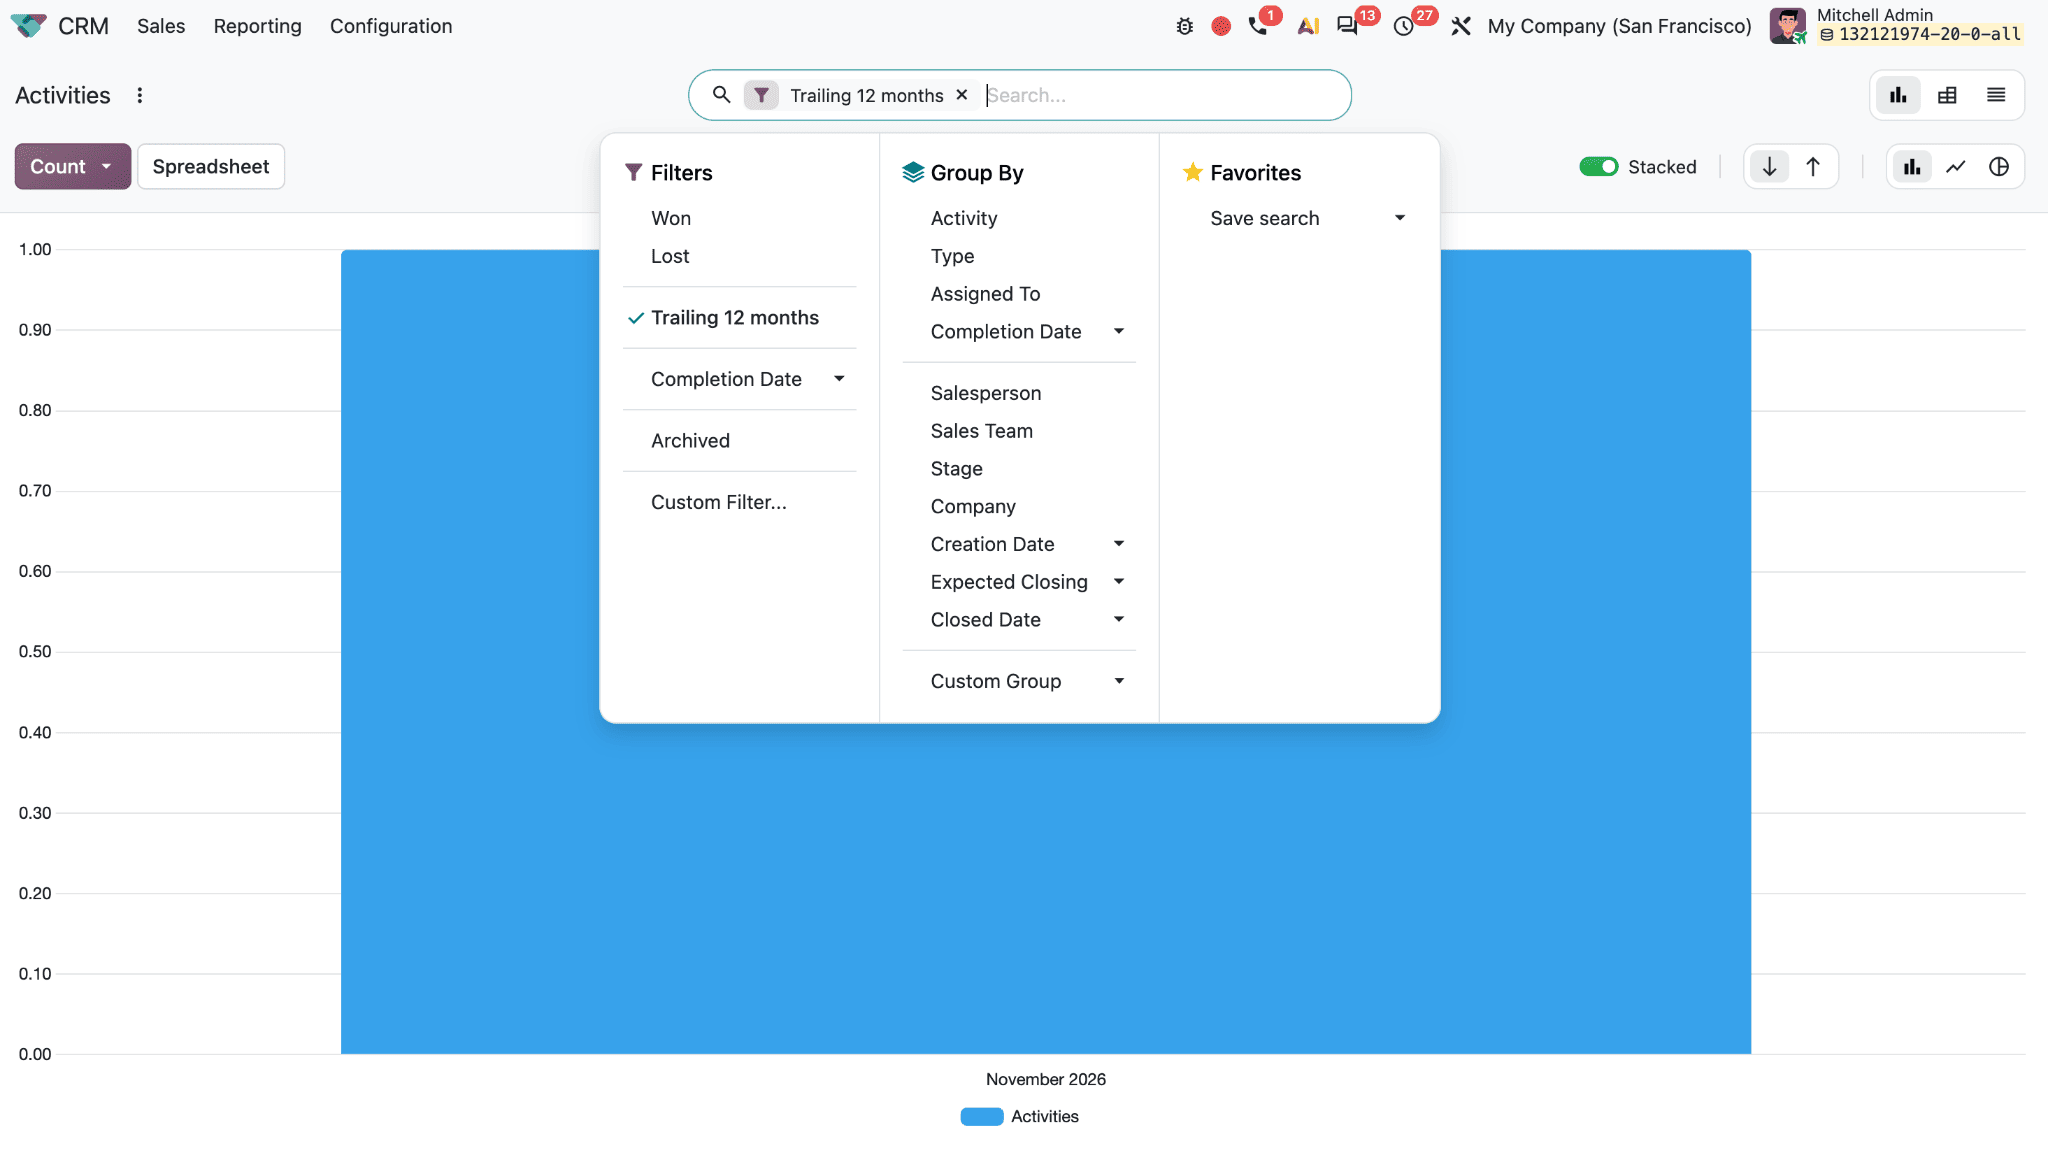
The Group By menu organizes results by Activity, Type, Assigned To, or Completion Date. You can also group by sales-related fields such as Salesperson, Sales Team, and Stage, or by Company, Creation Date, Expected Closing, and Closed Date. Custom Group lets you choose another field. This makes it possible to compare activity volume by type, see how work is distributed among salespeople, or review when activities were completed.
The report displays a chart, with Count selected as the measure in the screenshot. The view controls switch between graph, pivot table, and list views. In graph view, you can change the chart style, stack results, and adjust the orientation. Spreadsheet exports the analysis for further review, while Favorites > Save search saves the current filters and grouping for quick access later. Use the report to find patterns such as overdue calls or uneven workloads, then return to the relevant opportunity to update the activity. Activity plans automate the scheduling, while the activity view and reporting help the team keep the work visible and up to date.
To read more about How to Manage Activities in Odoo 19, refer to our blog How to Manage Activities in Odoo 19.