Odoo 18’s Point of Sale (POS) system offers a seamless and intuitive way to manage retail transactions, all from a single, integrated platform. Whether you're running a boutique, café, supermarket, or a multi-location retail chain, Odoo POS is designed to simplify the sales process while keeping everything in sync across your business.
With its user-friendly interface, staff can quickly add products to an order, apply discounts, process payments, and even print receipts, all in just a few clicks. Behind the scenes, Odoo automatically updates inventory levels, links the sale to customer records if needed, and prepares data for accounting and reporting, giving you real-time insights into your business performance. The best part? Odoo POS works both online and offline, ensuring uninterrupted service even during internet outages, a must-have for any fast-paced retail environment.
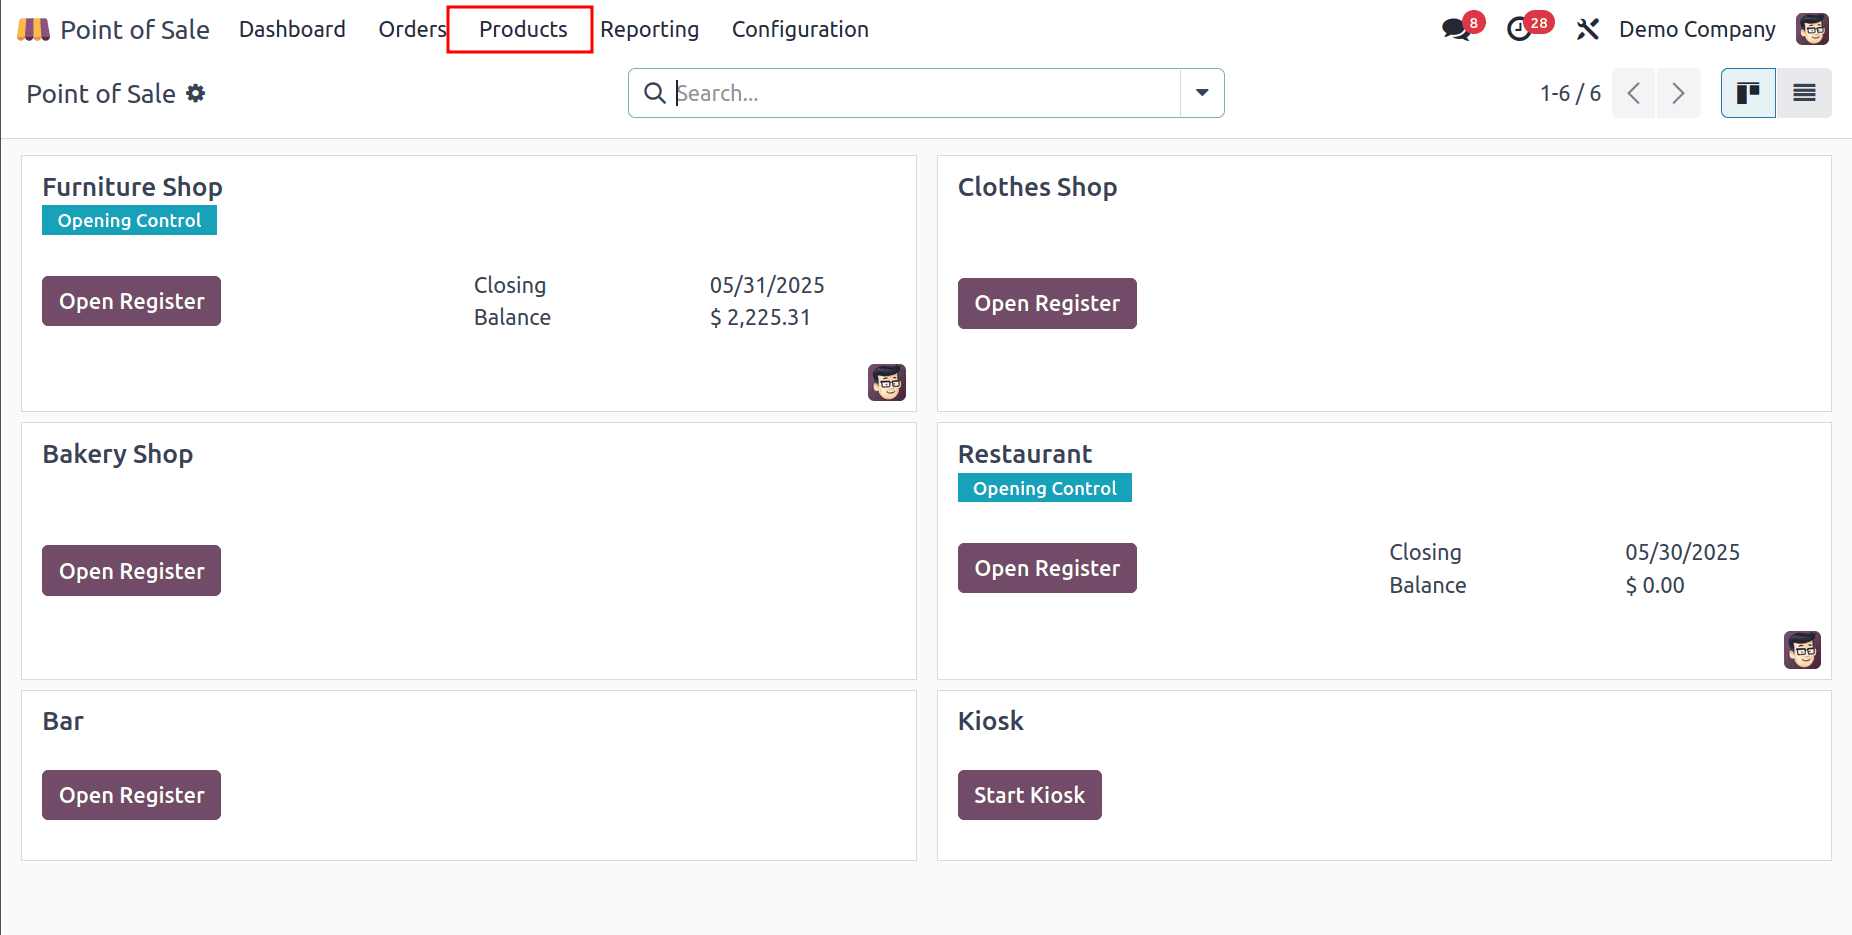
In this guide, we’ll walk you through the full sales process using Odoo 18 POS, from setting up your products to completing a transaction. In the POS module, products can be configured through the Products menu. Product creation and related functionalities are similar to those in the Sales module.
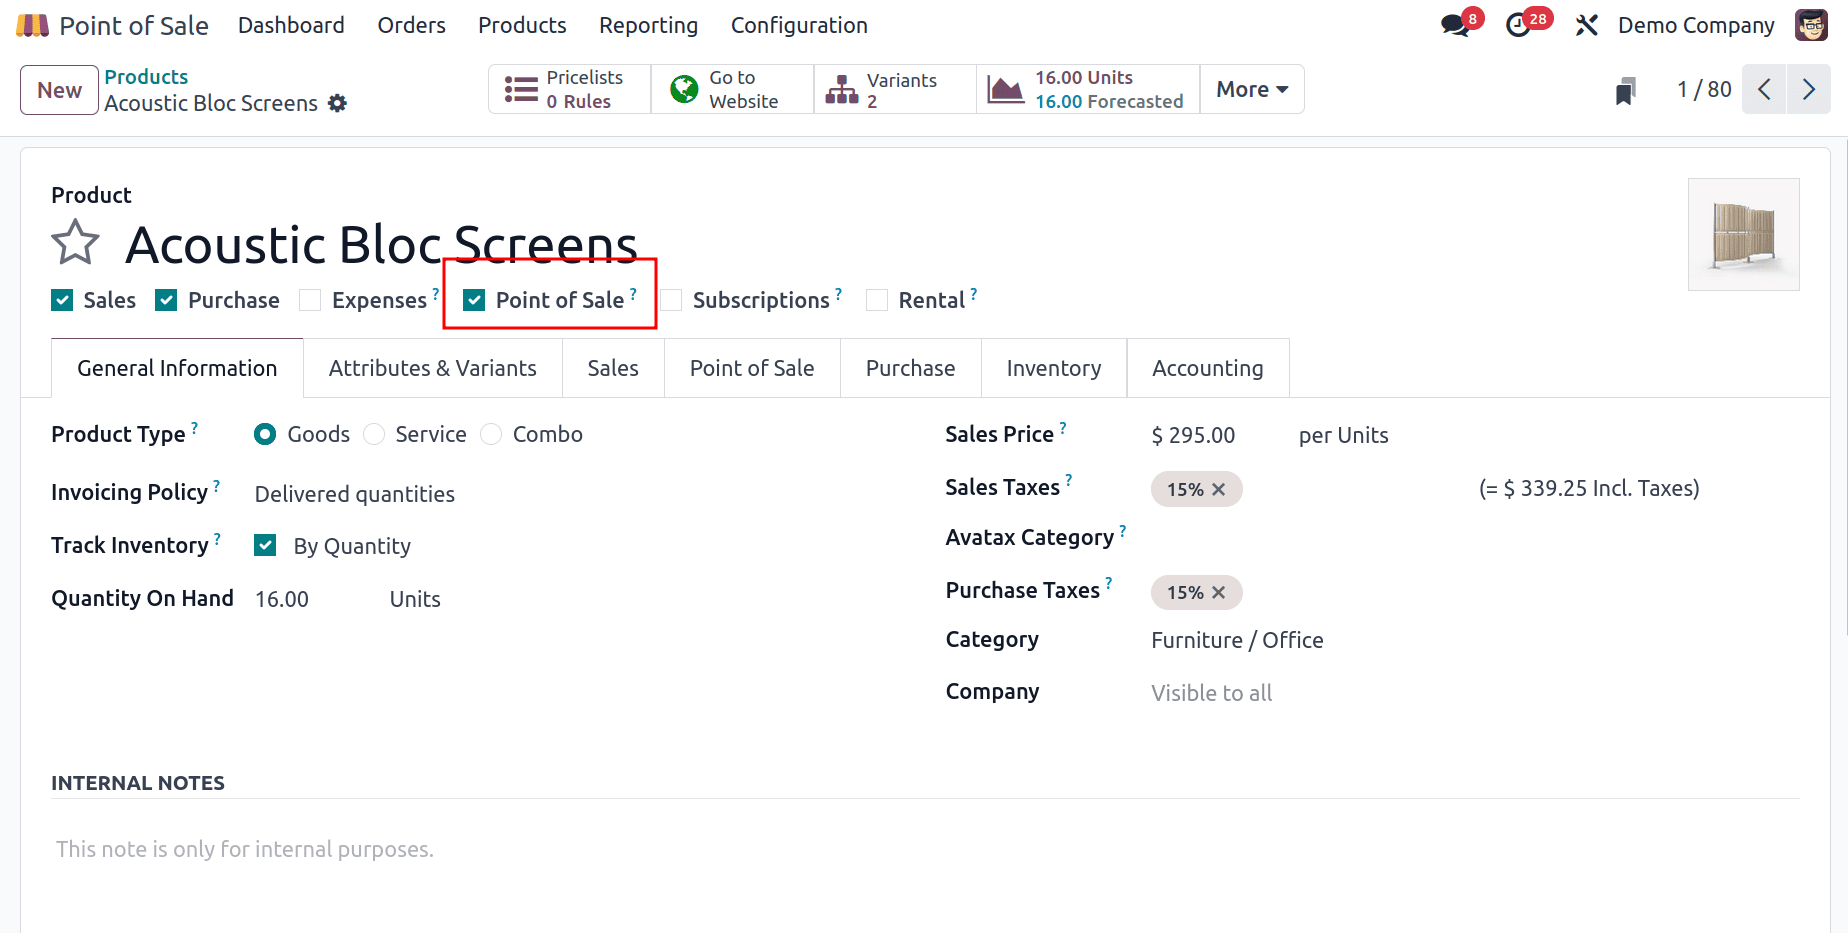
When a product is created, it does not automatically appear in the POS session for sale. We need to manually add the product to the POS. To do this, enable the Point of Sale boolean button on the product page. Then this product can be visible in the PoS screen.
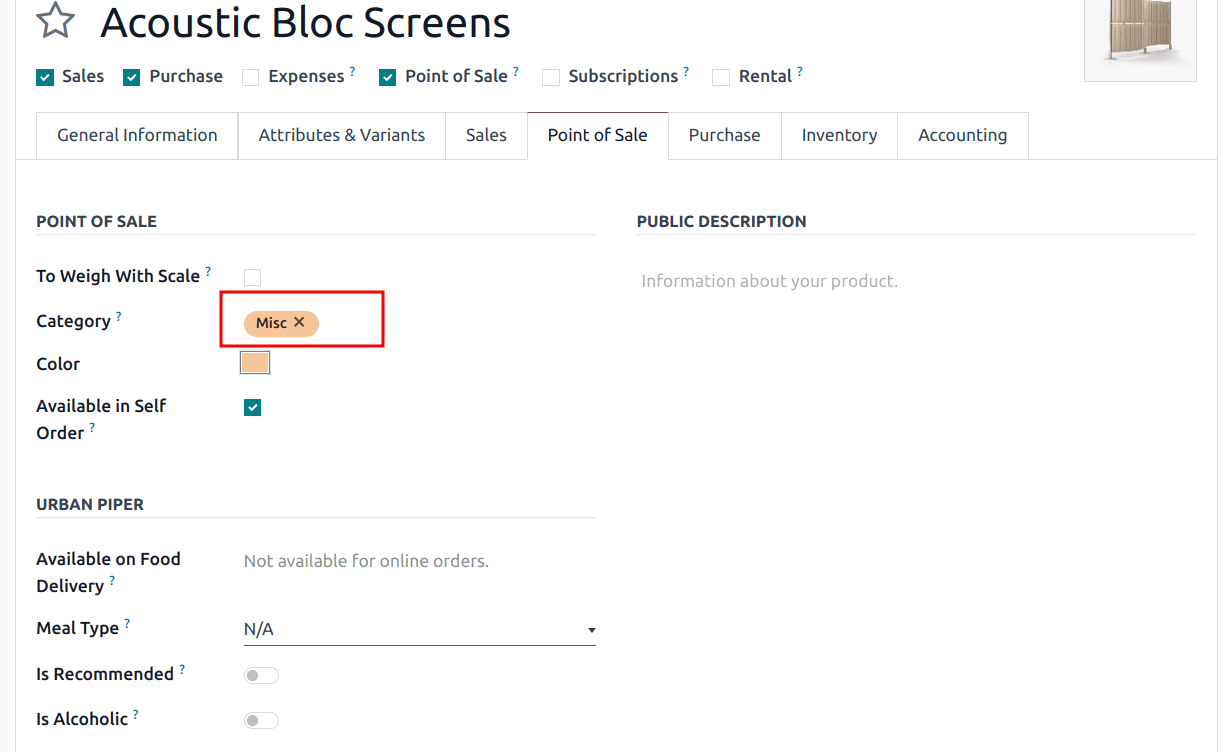
Inside the Point Of Sale tab, you can mention the category of this product. This ensures that the product appears under the appropriate category section on the POS screen.
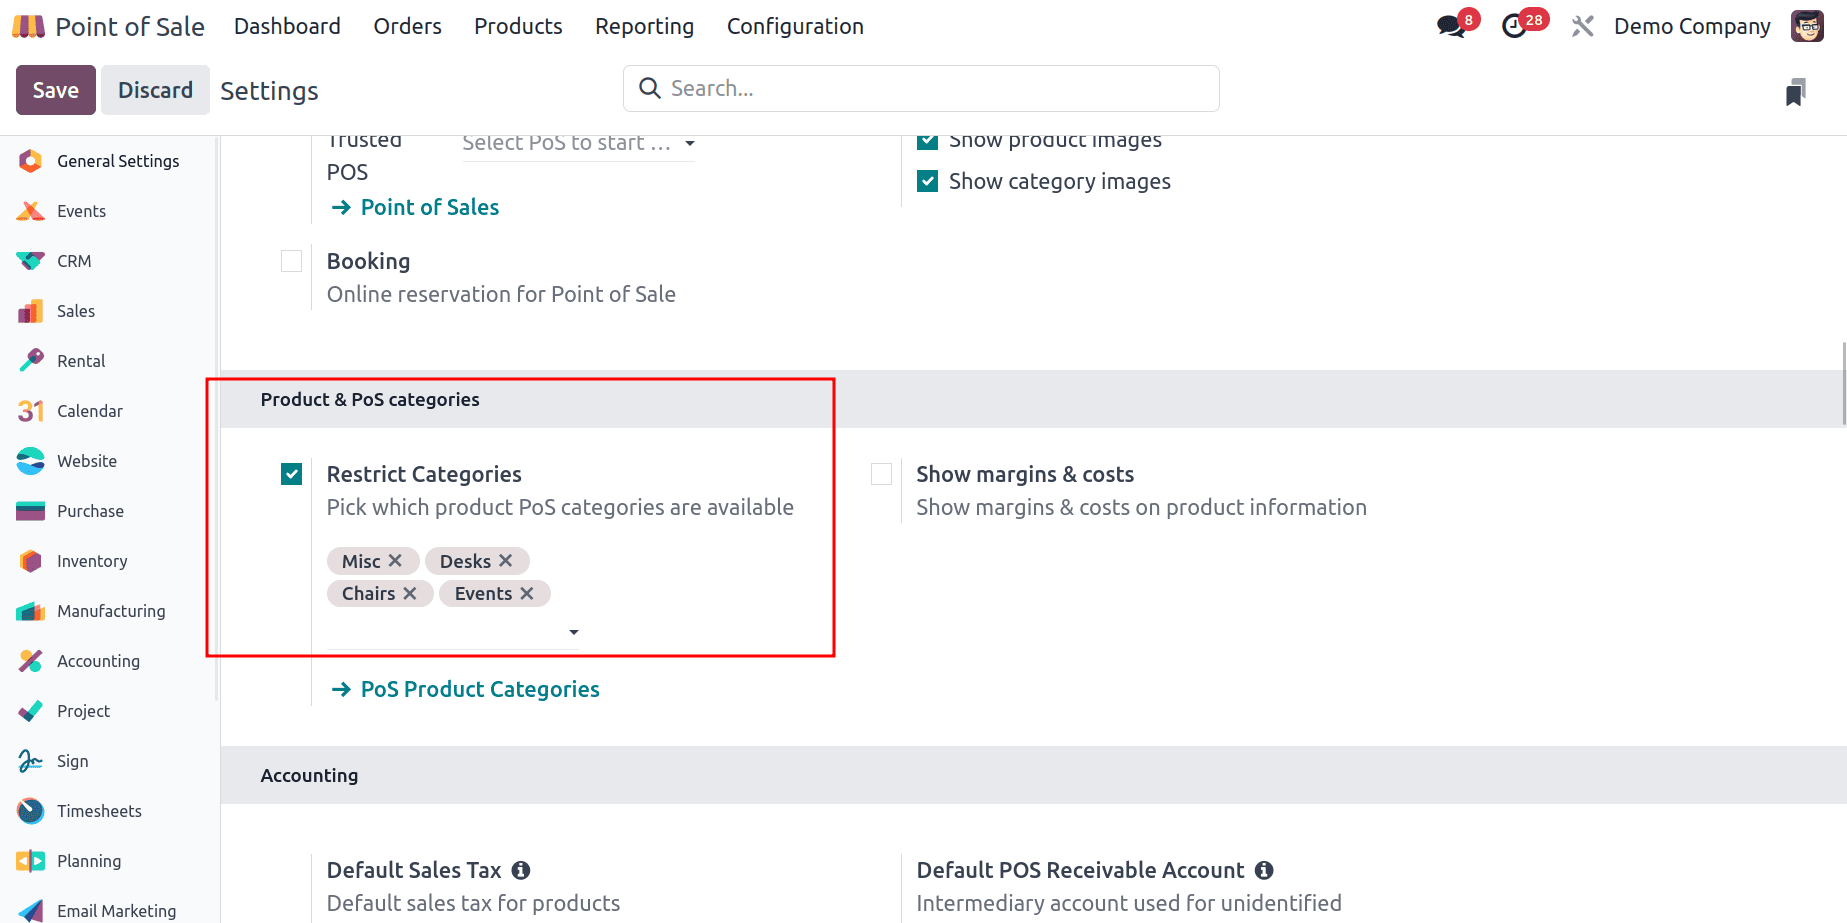
Additionally, products can be added to the shop based on their categories. To do this, open the configuration settings and select the shop you want to configure.
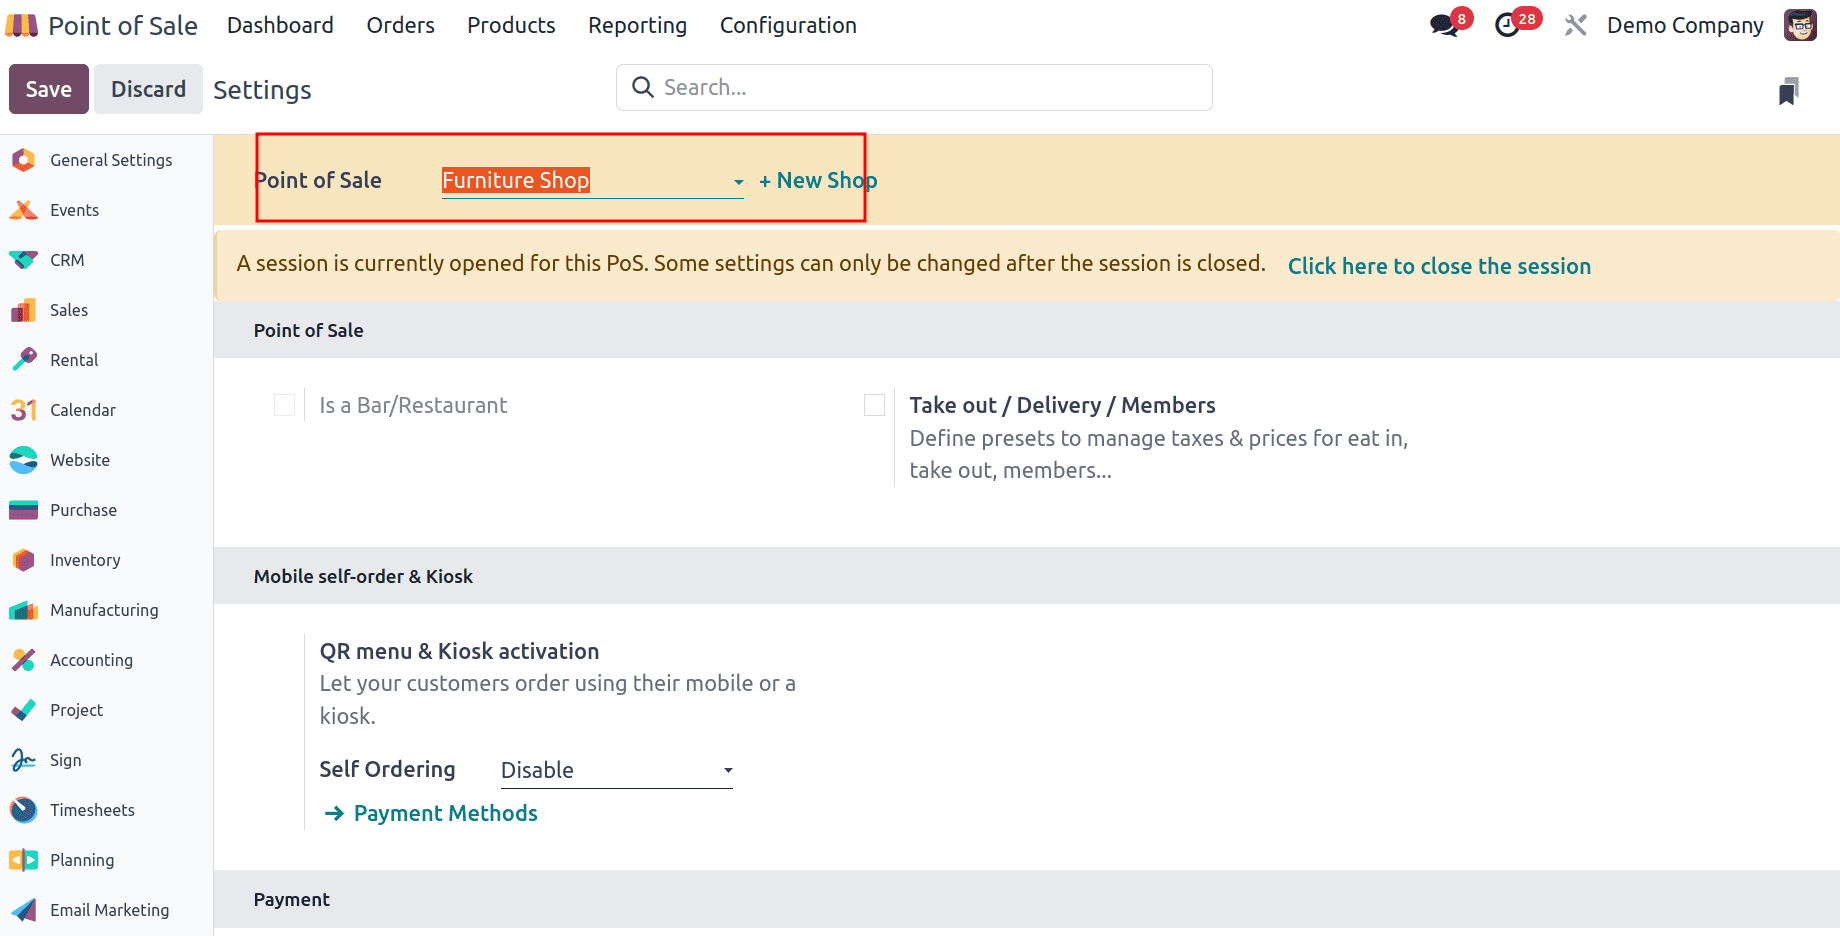
Next, navigate to the Product & POS Categories section, where you will find an option called Restrict Categories. Here, you can specify the categories that should be available in the POS shop.
Now that we have products on our side, we need to sell them. Open the shop from the dashboard.
In addition, you can also perform the POS process through the Mobo POS app, which is available for download on both the Play Store and App Store, allowing you to manage all operations smoothly and efficiently.
When opening the POS shop, an opening control pop-up dialog appears as shown above. In this dialog, you can set the opening balance for the session and optionally add relevant notes.
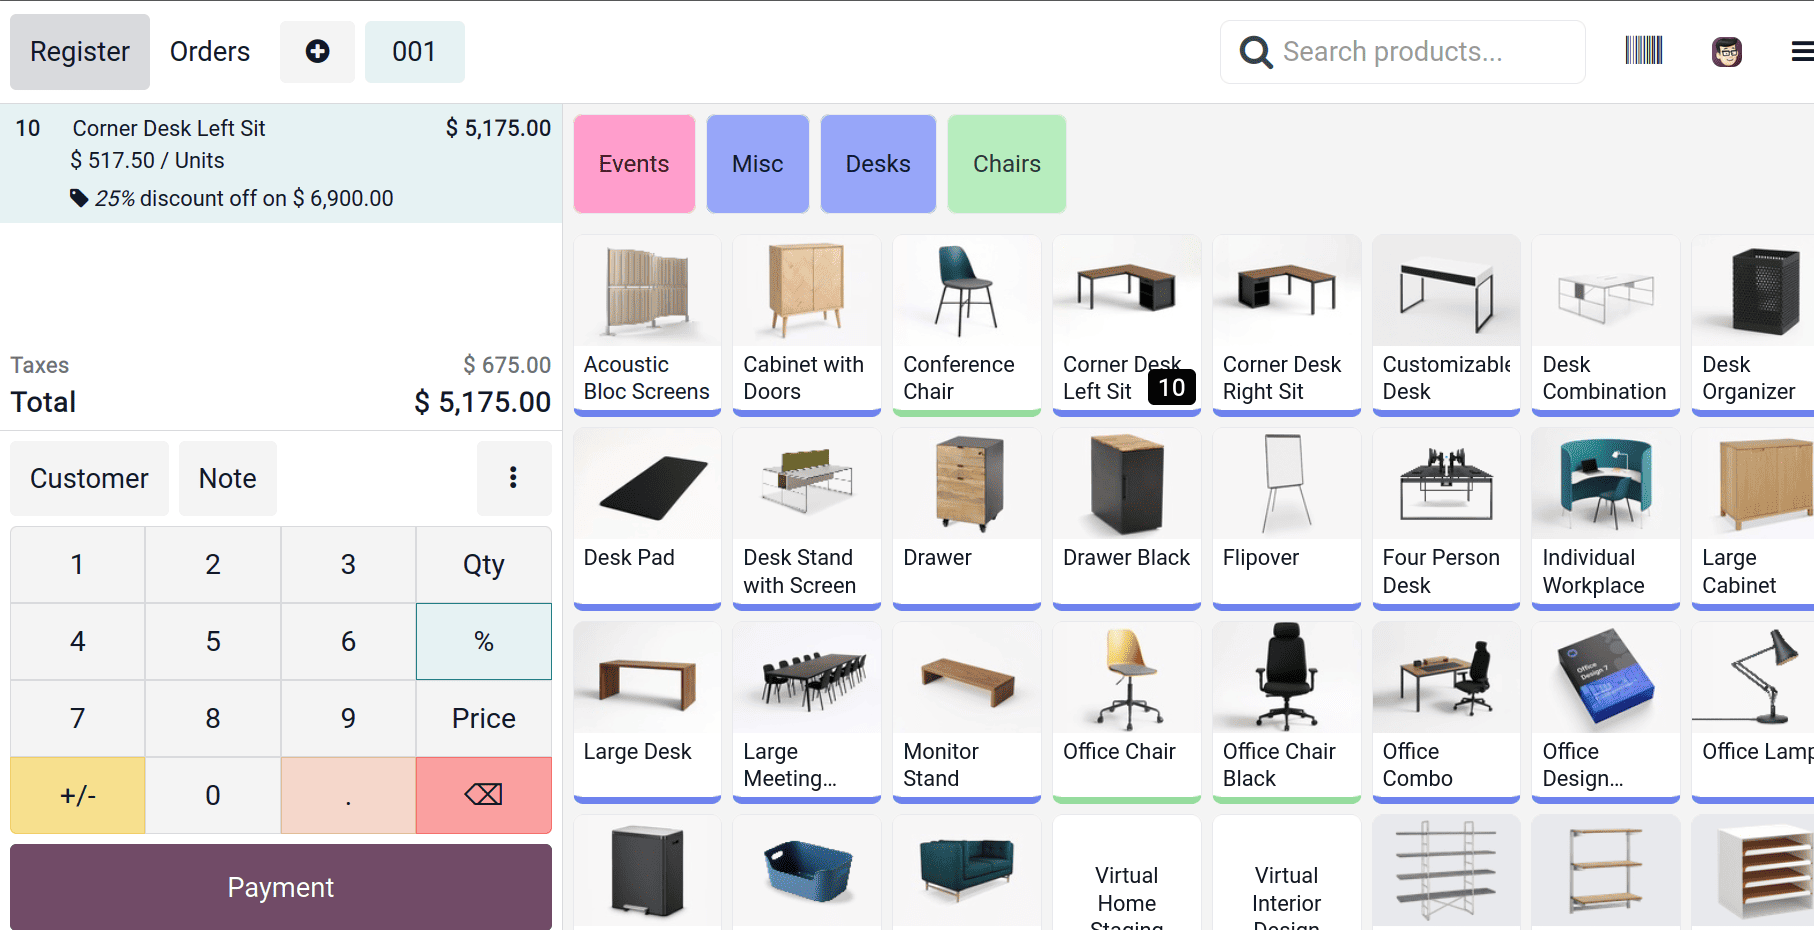
When you open the POS, the screen displays several listed products ready for sale.
Select a product from the screen to add it to the bill. You can adjust the quantity either by selecting the product again or by using the Qty button. After selecting the Qty button, enter the desired quantity, which will be recorded for the product. Similarly, by selecting the Price button, you can enter a custom price for the product. Discounts can be applied in the same manner.
So after selecting products in PoS, we can go to the payment section. A new interface will open for payments and generating invoices.

Select the appropriate payment method from this section. If the customer pays by cash or card, it can be accurately tracked in the system by choosing the corresponding method. Then we can validate it and print the bill. If the customer wants an invoice or needs to ship, they must add customer details in the Customer section. And enable the invoice from here to generate an invoice.
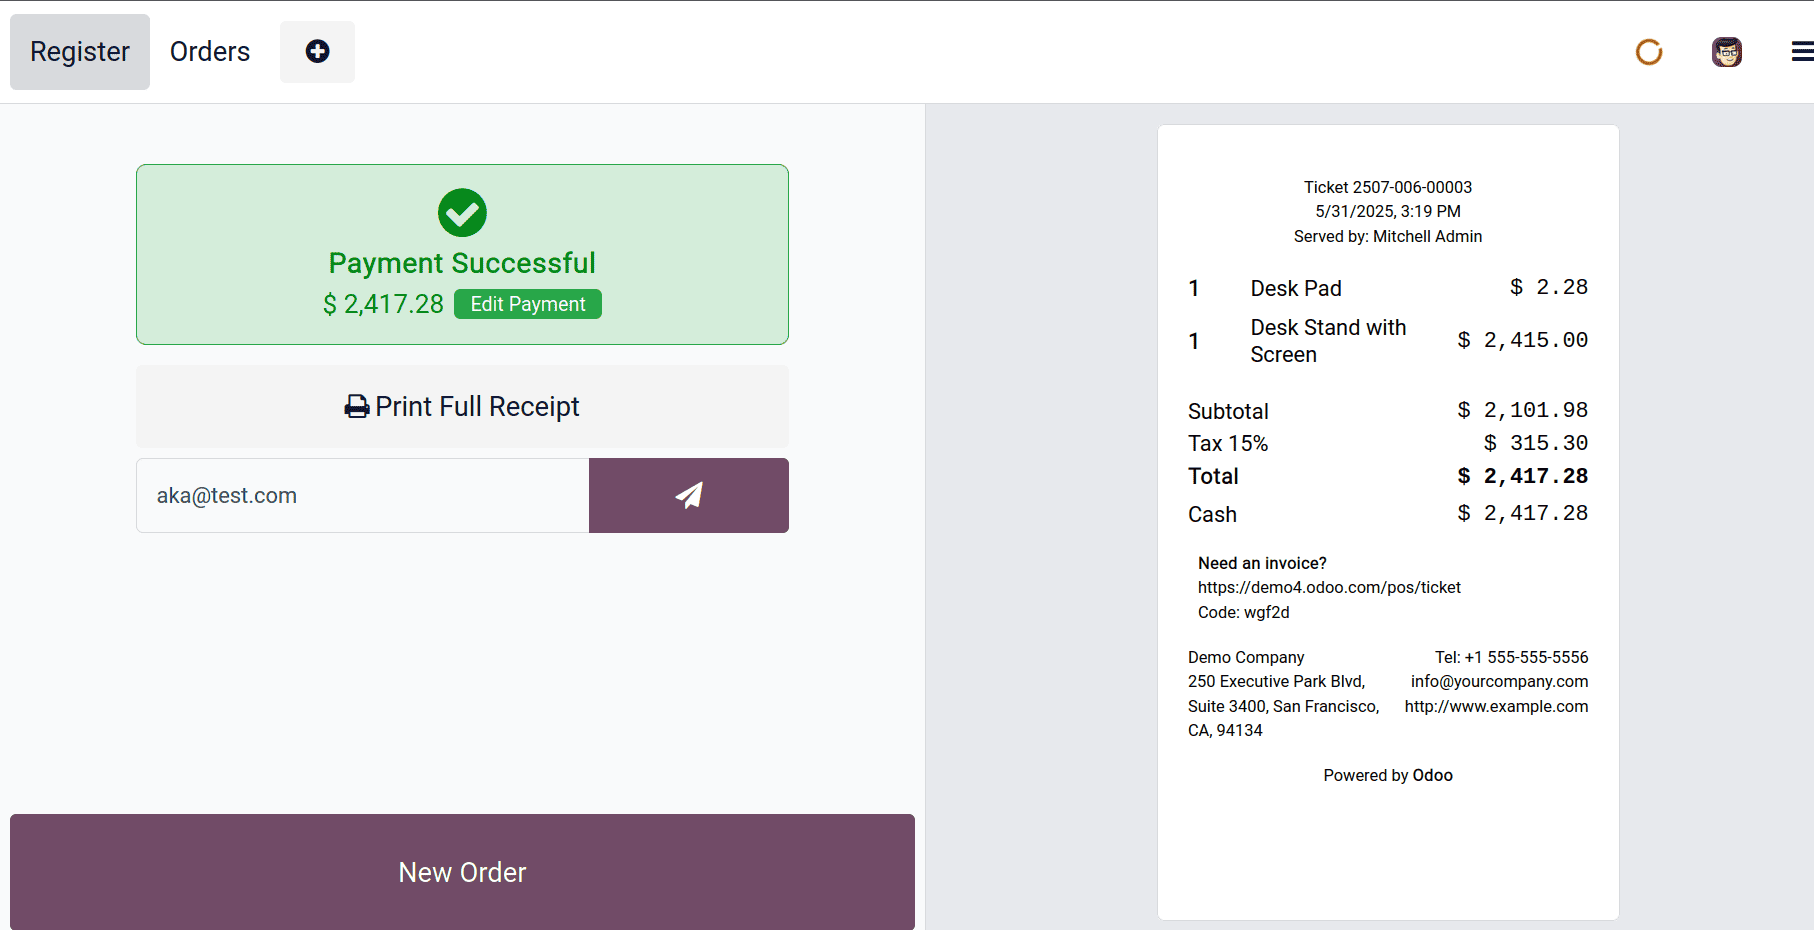
This is the interface displayed after validating the payment. The generated receipt can be viewed here. You also have the option to print the receipt or send it directly to the customer's email. This completes the process of selling products through the POS system.
Product with variants
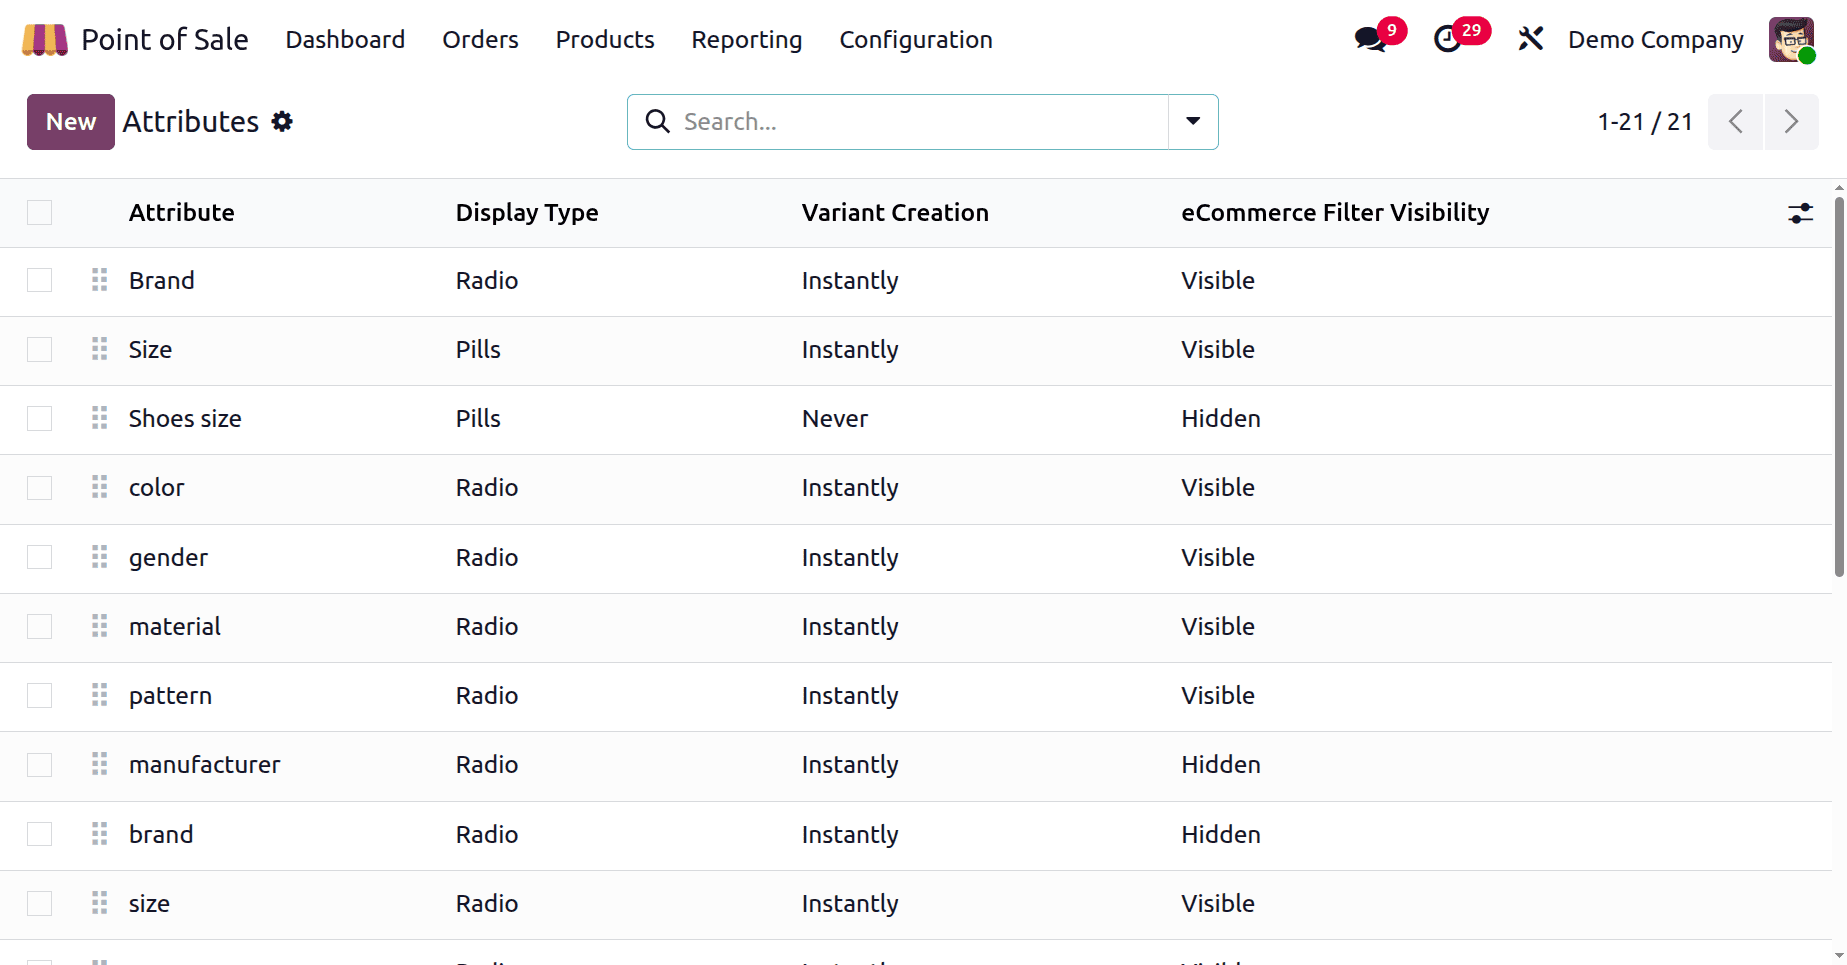
Odoo PoS fully supports the sale of product variants directly from the PoS interface. If a product has different versions, such as various sizes, colors, or materials, these can be managed and sold easily in the system. To create a new variant, you can configure it directly from the PoS app. Under the configuration settings( Configuration > Attributes ), you’ll find the Attributes section, where you can define specific attributes like "Size" or "Color."
Once created, these attributes can be assigned to products through the Products menu. You can either modify an existing product to include the new variants or create a completely new product with those attributes.

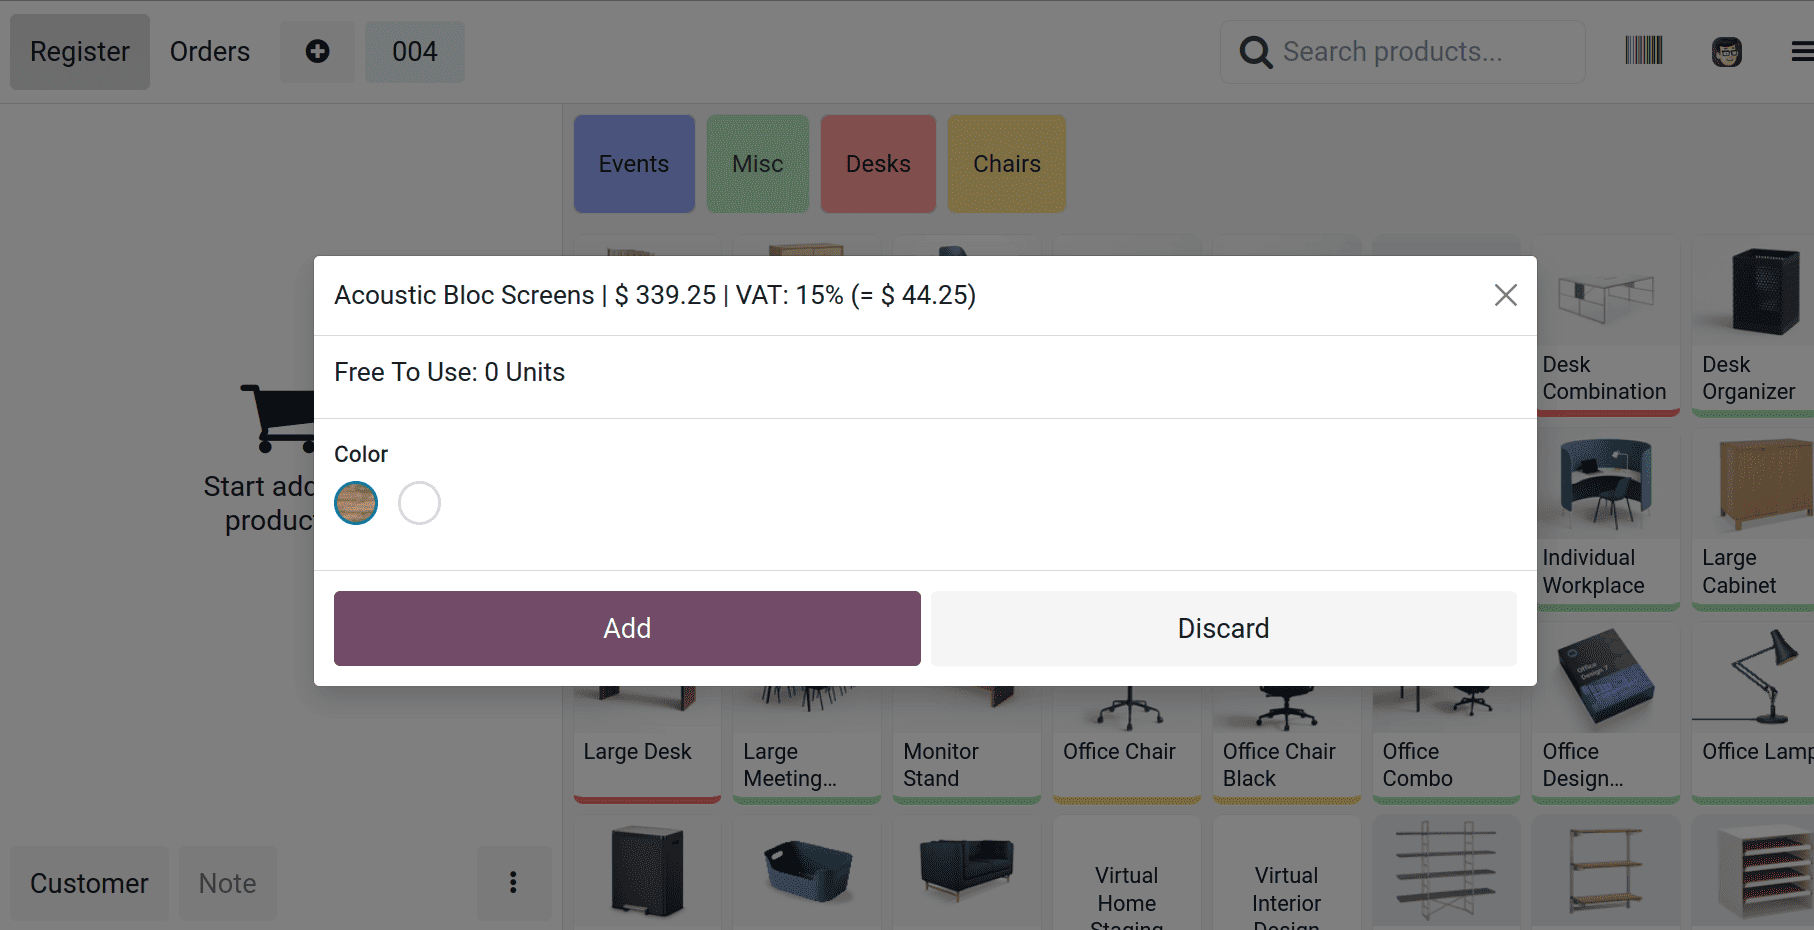
In the POS screen, selecting a product with variants is straightforward. When you choose a product that has variants, a pop-up will appear, as shown in the image below. Here we can choose the variant and add it to the cart.
Combo Product
The sale of combo products is also similar within the Sales module. For creating a combo product you can refer here - Combo products .
Combo products can also be configured directly from the Point of Sale (POS) module. To create combo products, start by creating combo choices under the Products menu. After creating two or more choices, you can create a combo product by navigating to Products>Products > New.
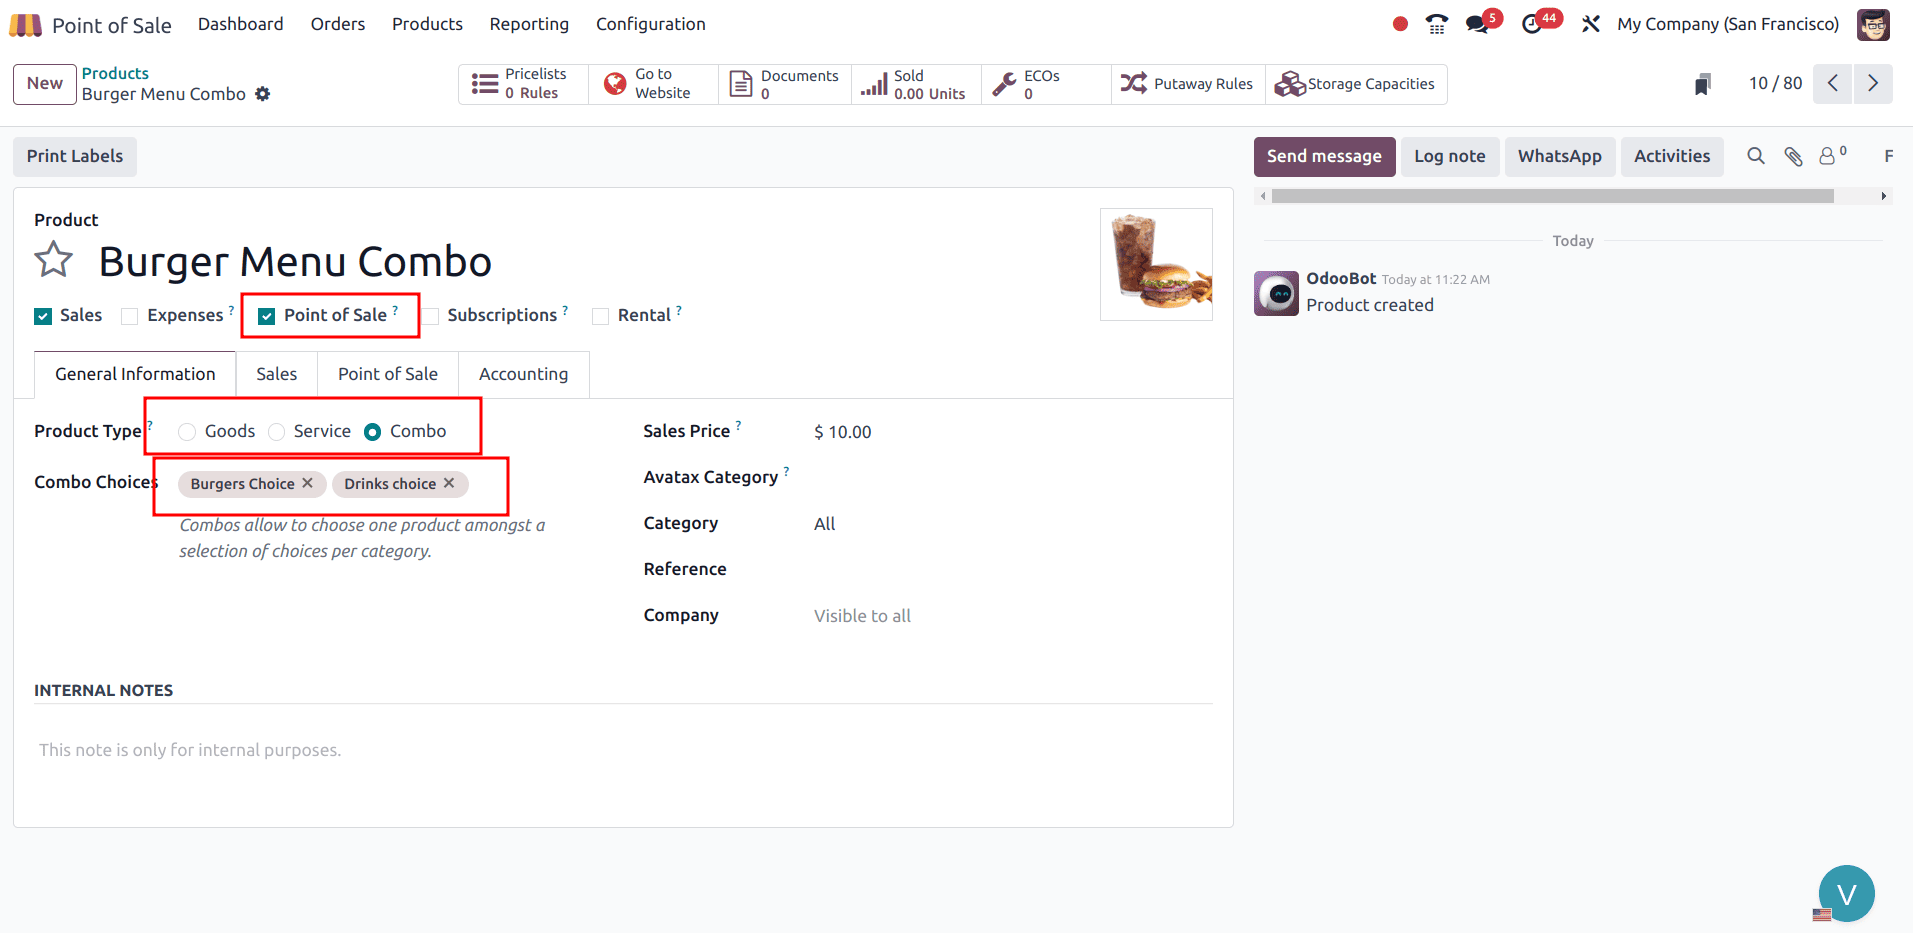
In the product form, when the product type is set to a combo, an additional field, ‘Combo choice’, will be added. Multiple combo choices can be added there. So add the newly created two combo choices, ‘Burgers’ and ‘Juices’. Then, provide the sales price for this combo product ‘Burger menu combo’ so that this price will be applied to both products in this combo. After setting a combo product, you can sell it through PoS.
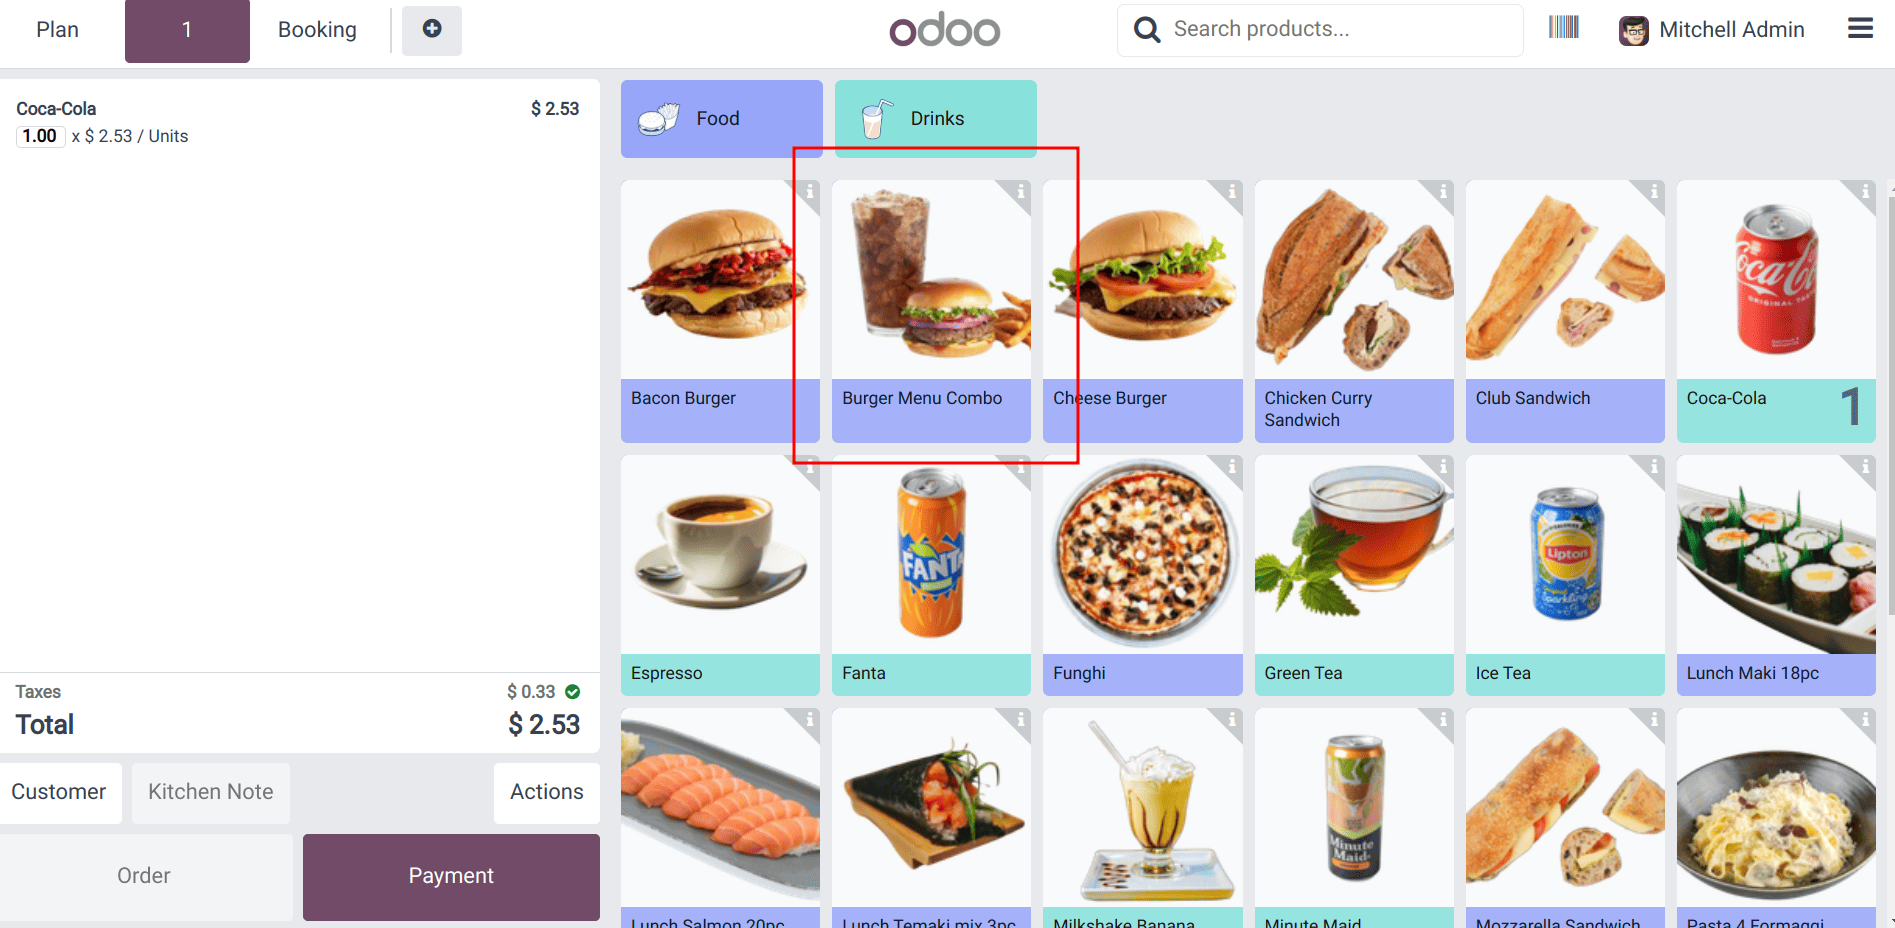
To sell a combo product in PoS, you can select the combo product from the display.
When a combo product is selected, a wizard appears displaying the corresponding choice products. You can select the desired options and then click the 'Add to Order' button to add them to the cart.

Only if one product has been selected from each combo choice, it is possible to click the confirm button.
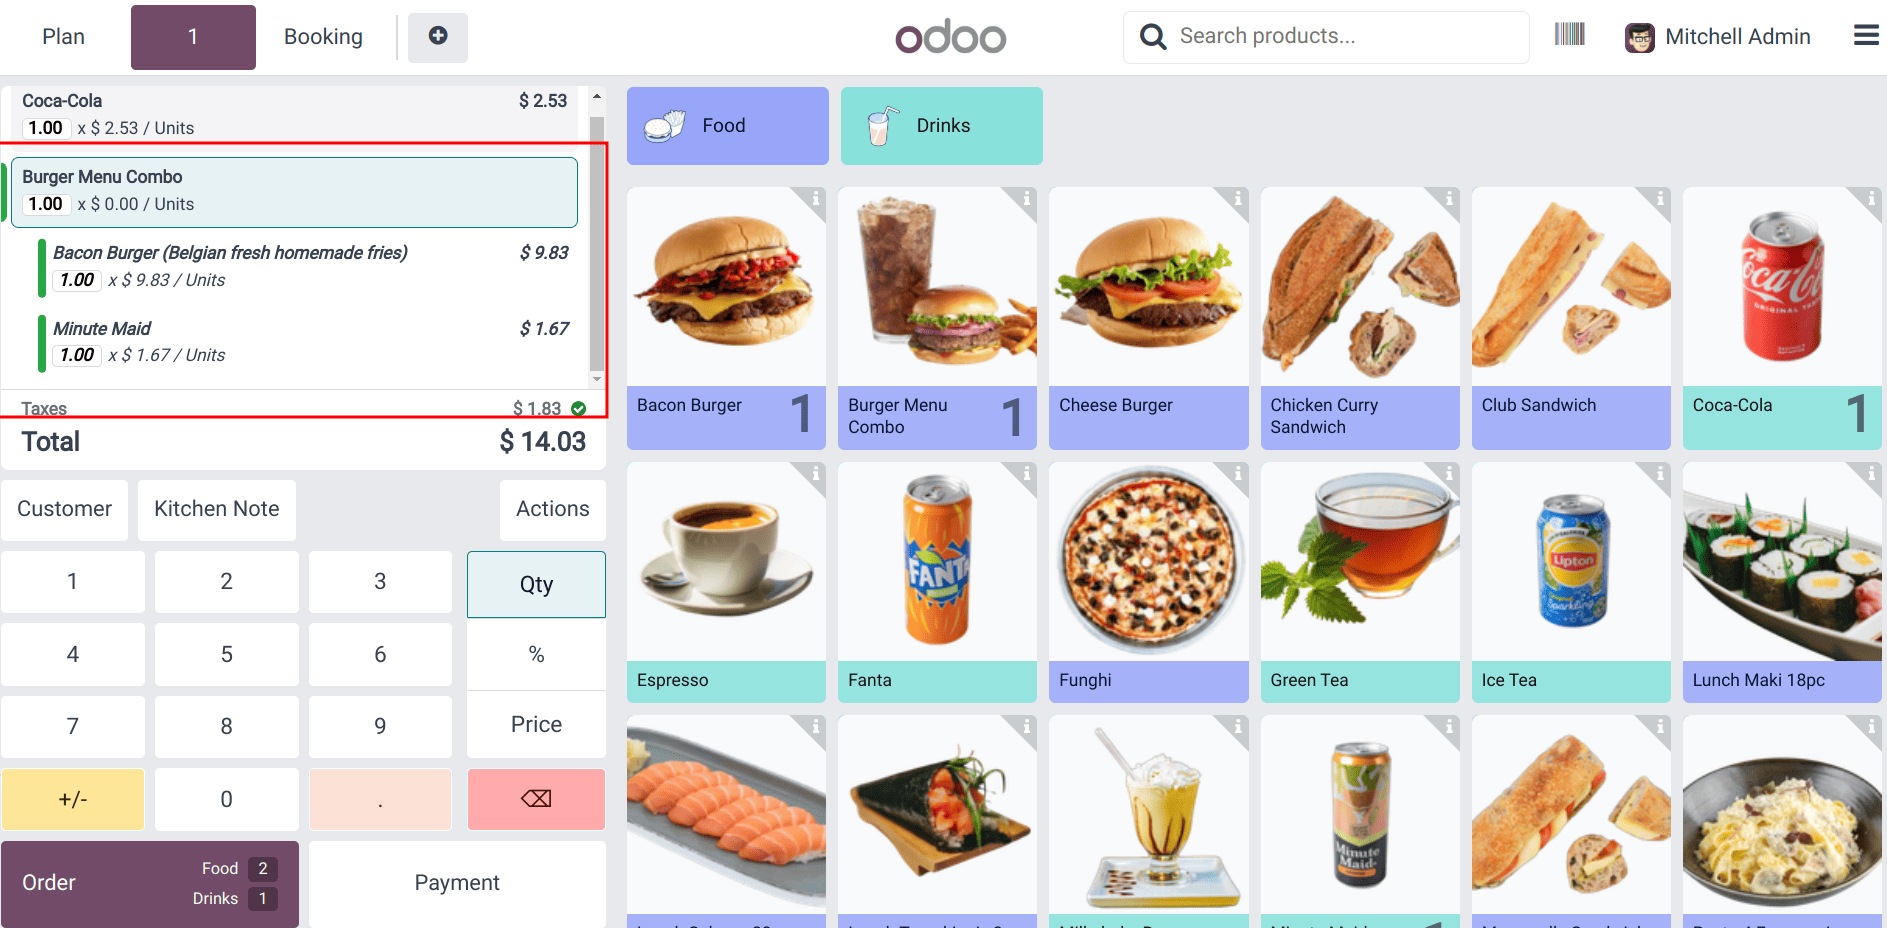
Once the product is added to the cart, the quantity can be adjusted directly from the cart section. Placing the order and making the payment follows the same process as previously demonstrated.
Products with Lot/Serial Number
Lots and serial numbers are used to trace items from the point of manufacturing to the point of sale. They are allocated during manufacturing and occasionally added while the product is being packed. Lots are collections of numbers or codes applied to a collection of products sharing a similar attribute, whereas serial numbers are distinct numbers allocated to a particular object.
Here, we’ll see how to sell a product with a lot or serial number in the Point of Sale (POS) module. Serial numbers can be configured for products either during the purchase process or added manually. To create a new product, you can enable the Track Inventory option under the product settings. This allows you to apply a lot or serial numbers to the product when adding it to inventory.
When selecting a product from PoS that already has a lot/serial numbers, you can choose the one you need. For example, the cheese sandwich is a product where the user added a lot of numbers.
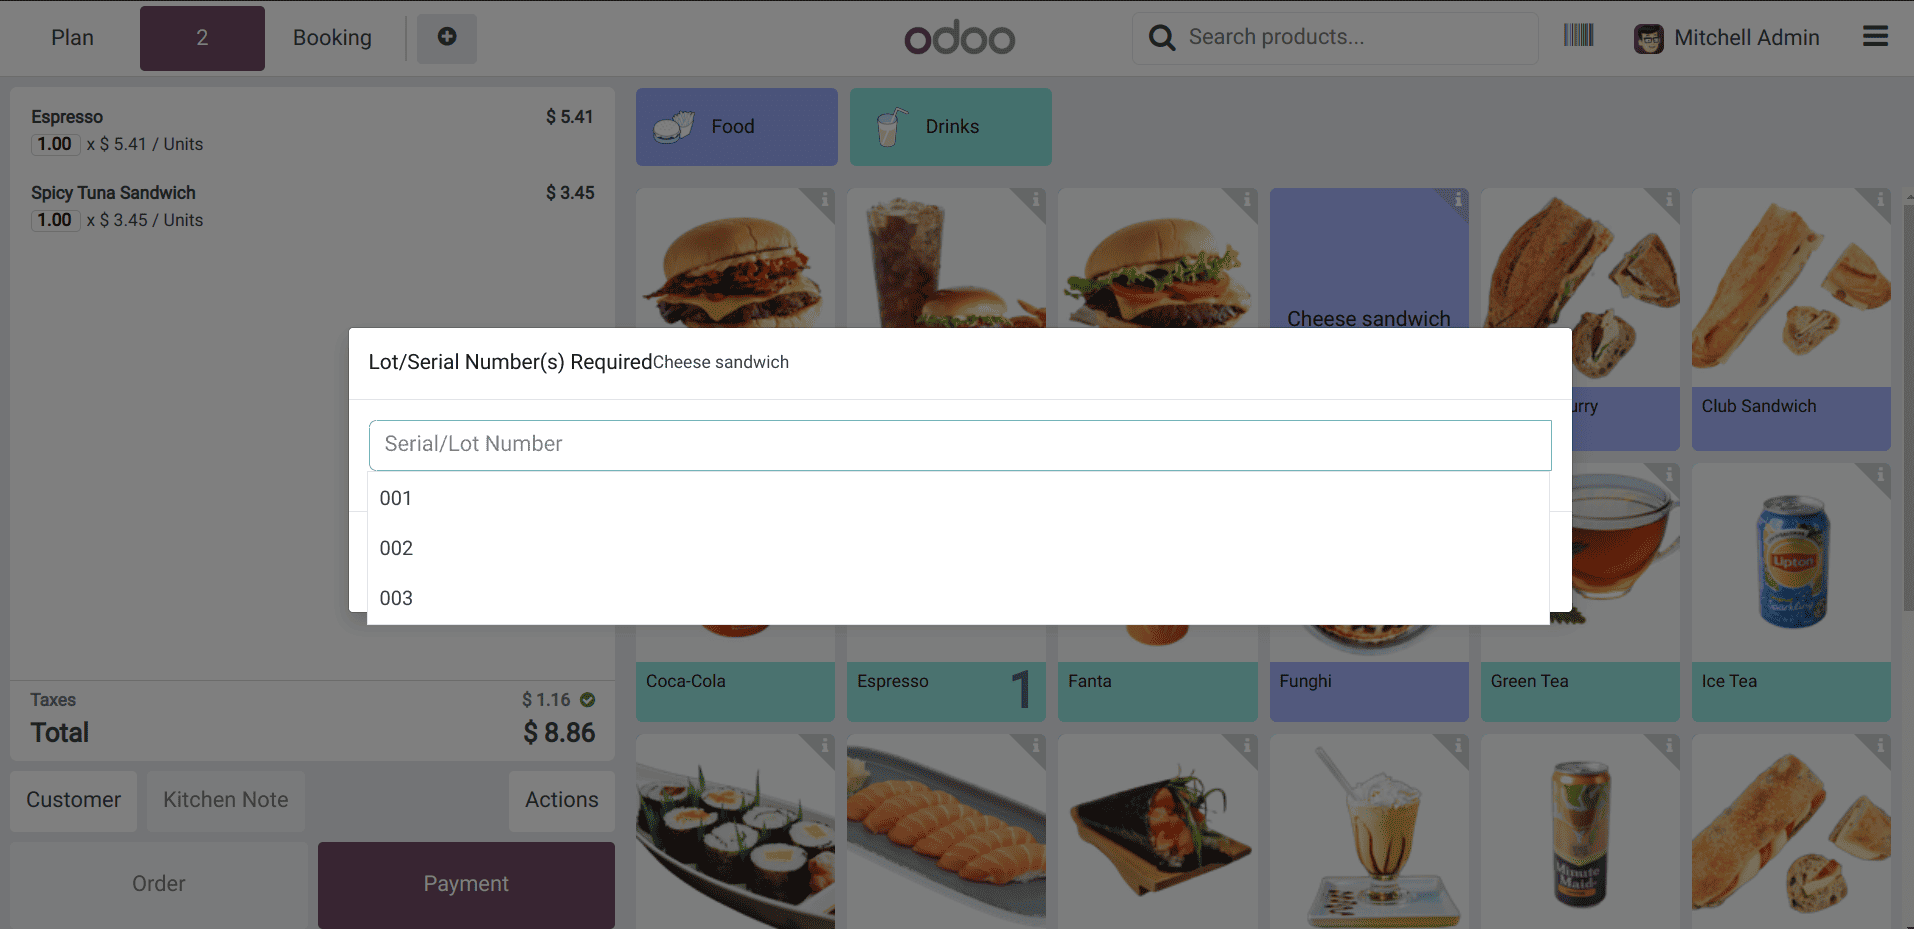
While selecting this product, a list will be shown to select a lot number. Placing the order and making the payment follows the same process as previously demonstrated.
Odoo 18 Point of Sale offers an efficient and adaptable platform for handling a variety of sales scenarios. From standard products to variants, combos, and items requiring lot or serial number tracking, the system ensures a smooth process from selection to payment. Its clear interface and practical features help staff work faster, reduce errors, and provide a better experience for customers. With these capabilities, Odoo POS is well-suited for both retail and hospitality businesses looking to manage sales with accuracy and ease.
To read more about How to Sell Products & Manage Ship Later in Odoo 18 Point of Sale (POS), refer to our blog How to Sell Products & Manage Ship Later in Odoo 18 Point of Sale (POS).