In Odoo 19, corrective maintenance allows organizations to respond quickly to unexpected breakdowns, track maintenance requests, and monitor equipment performance. By using Odoo’s integrated maintenance module, businesses can create maintenance requests, assign tasks to technicians, schedule interventions, and log repair activities efficiently. The system centralizes all maintenance-related information, providing clear visibility into ongoing and completed repairs, which helps optimize resource allocation and prevent recurring issues. Whether your goal is to improve machine uptime, extend equipment life, or enhance workflow efficiency, setting up corrective maintenance in Odoo 19 offers a great approach. This blog provides an overview of the steps required to configure and implement corrective maintenance, enabling organizations to maintain operational continuity and enhance overall productivity.
Firstly, select the Maintenance module from the Odoo 19 dashboard.
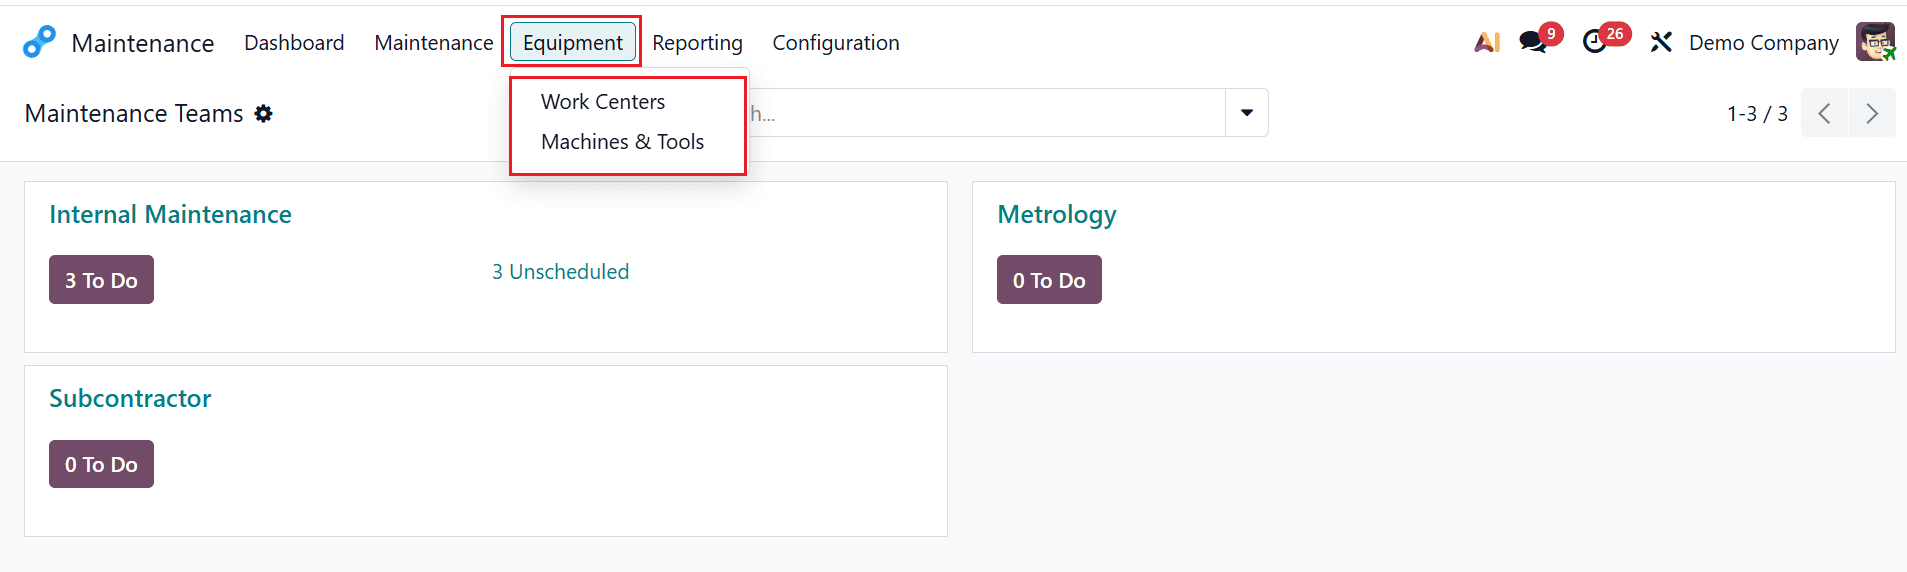
To set up corrective maintenance from the maintenance module, navigate to the Equipment menu, and you can select either Work Centers or Machine & Tools as shown below. Equipment is a company's assets, such as machines, tools, or devices that require regular monitoring and servicing. It is used to track maintenance requests, schedule preventive or corrective maintenance, record breakdown history, and ensure better performance and reduced downtime.
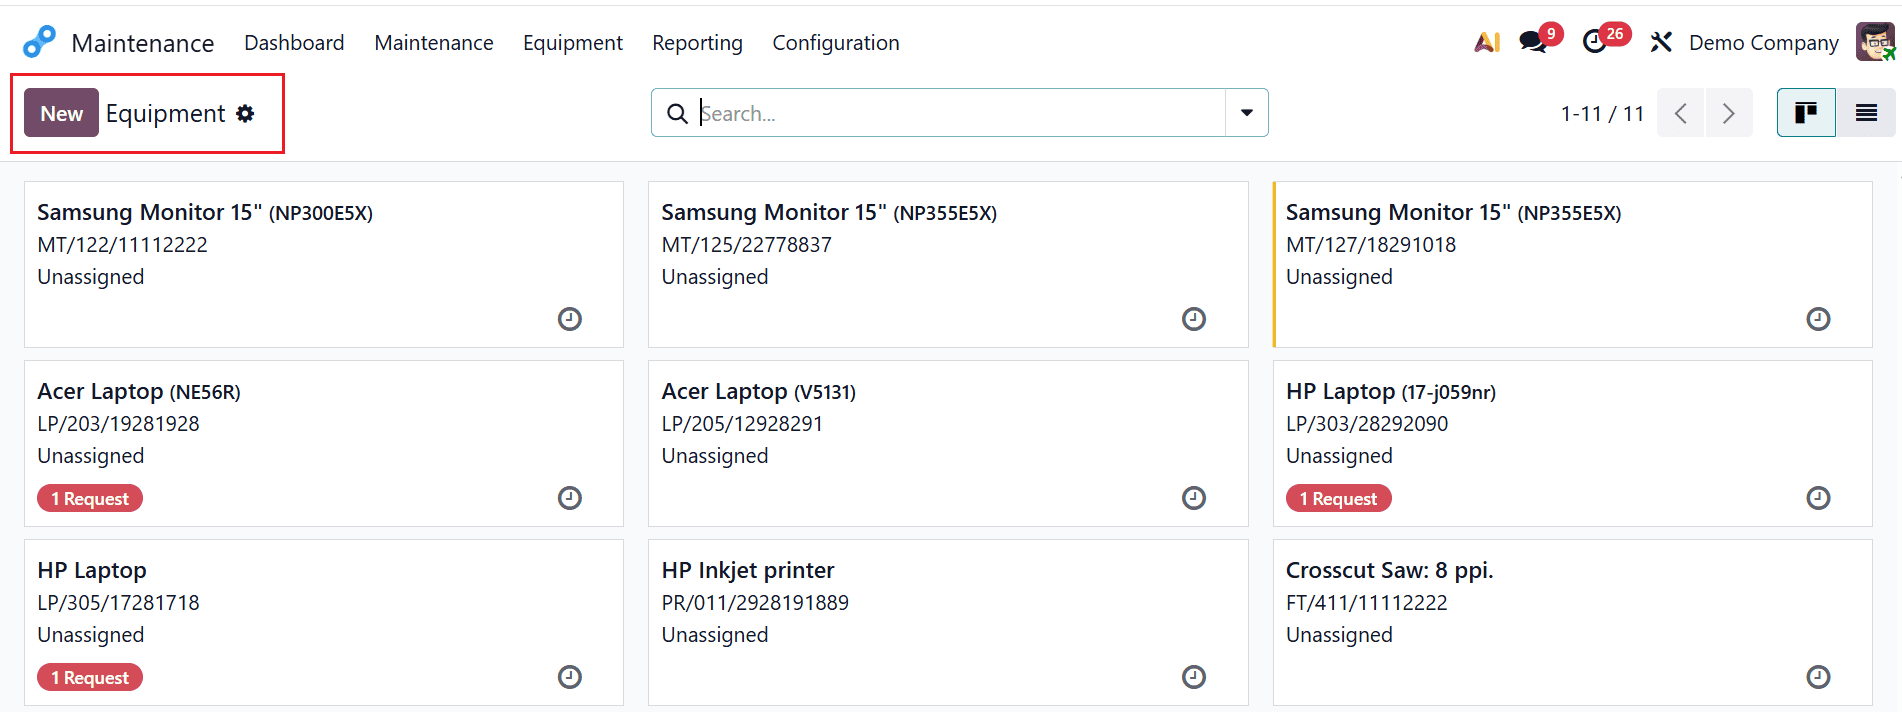
For example, let’s select the Equipment as Machine & Tools as shown below. Here, you can see all the equipment as arranged in kanban view. Each kanban card displays the details, such as the equipment name, serial number, and the employee’s name. To add new equipment, click on the New button as shown below:
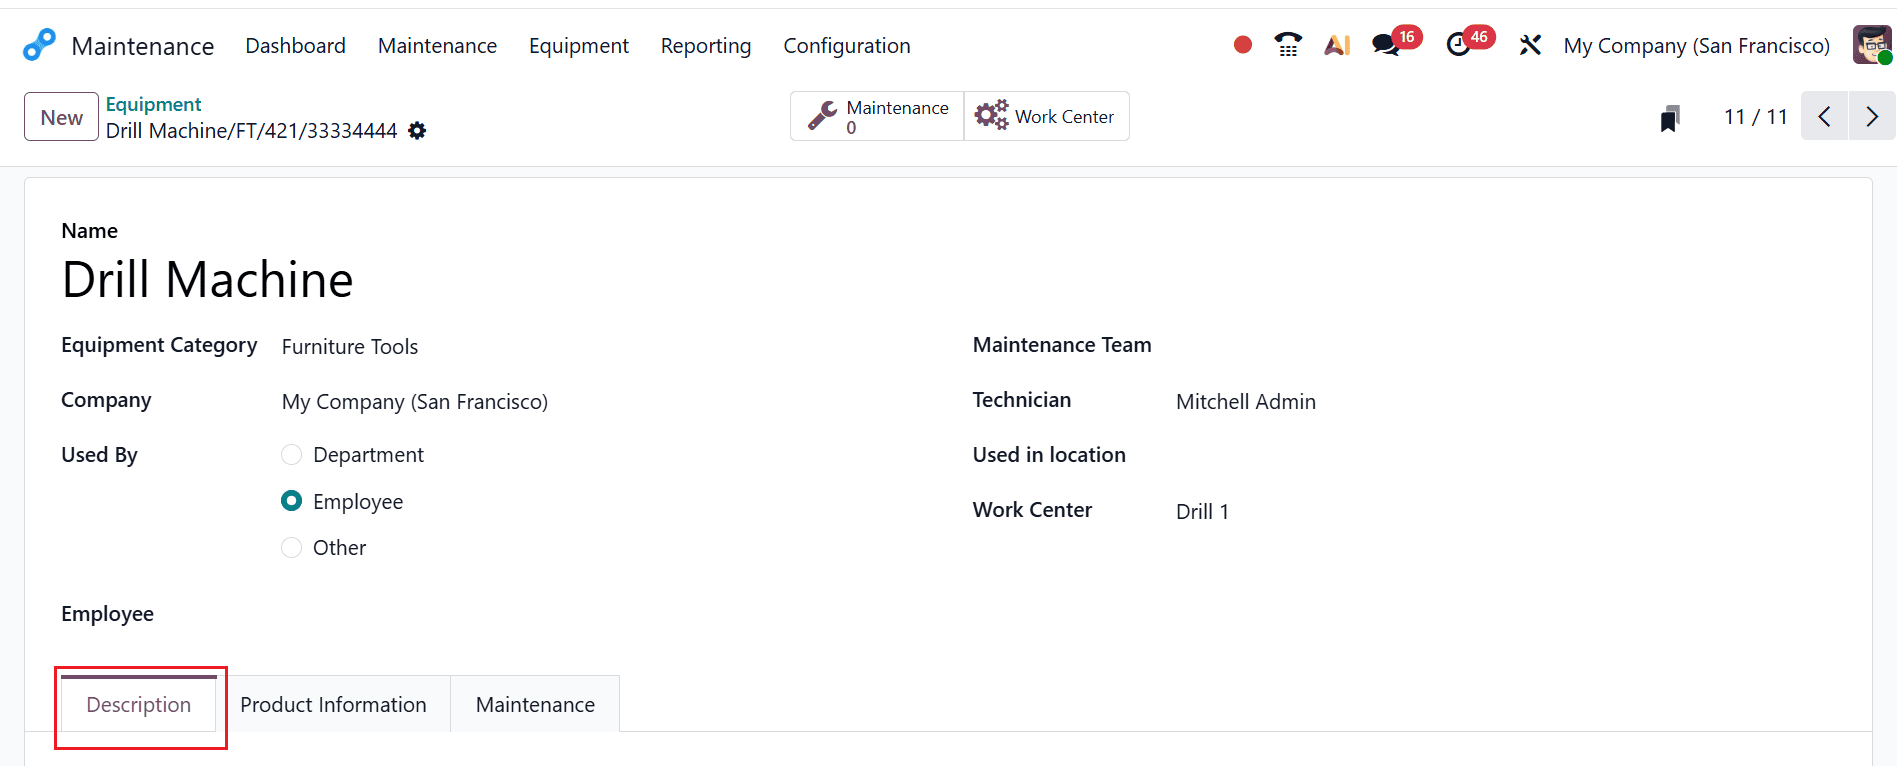
Here, add a name for the equipment as Drill Machine, which comes under the Furniture Tools Equipment Category. In the Used By field, choose Department, Employee, or Other. Then, enter the corresponding details, including Employee, Maintenance Team, Technician, Used In Location, and Work Center. Here, you can find three tabs: Description, Product Information, and Maintenance. Under the Description tab, you can add the details of the equipment.
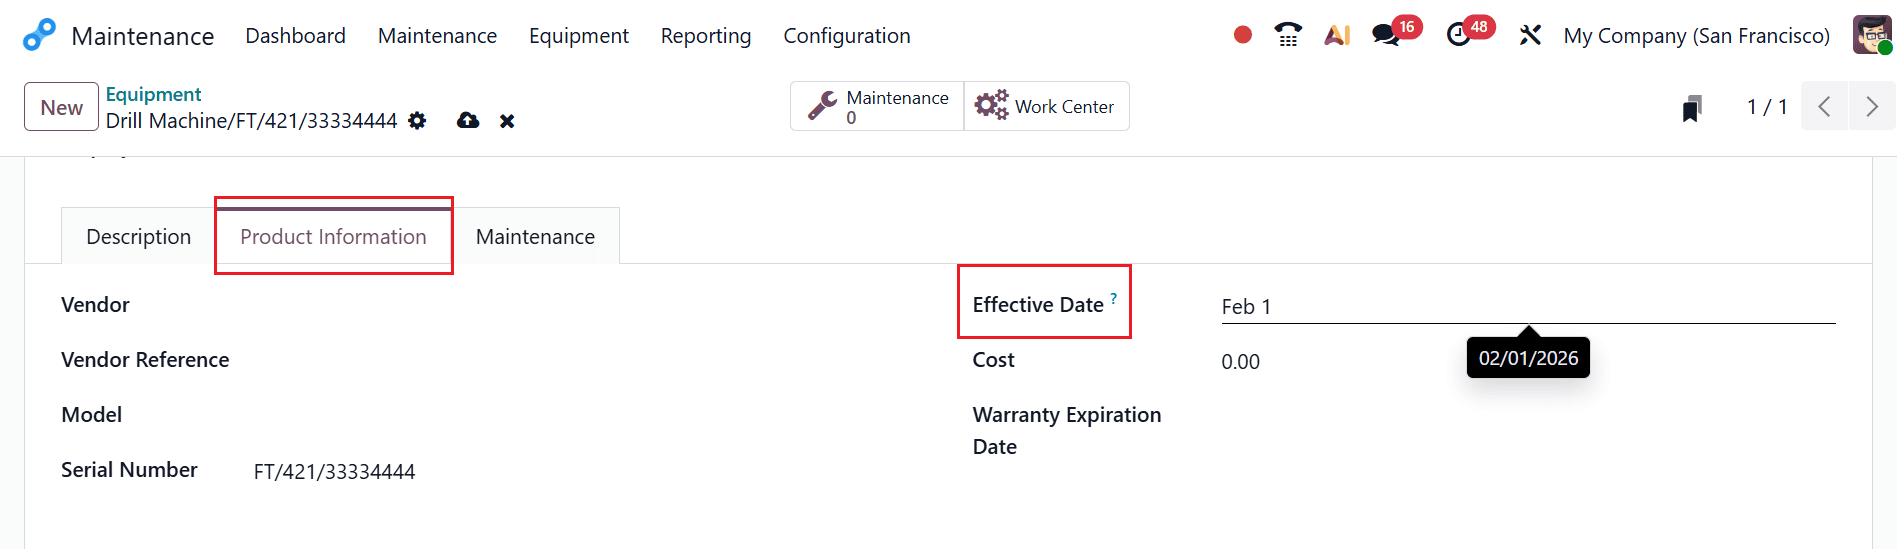
Under the Product Information tab, you can enter details such as Vendor, Vendor Reference, Model, Serial Number, Effective Date, Cost, and Warranty Expiration Date. In the Effective Date field, you can add a date that will be used to compute the Mean Time Between Failures. The effective date typically refers to the date when a equipment becomes active or operational. Here, add the Effective Date as 02/01/2026.
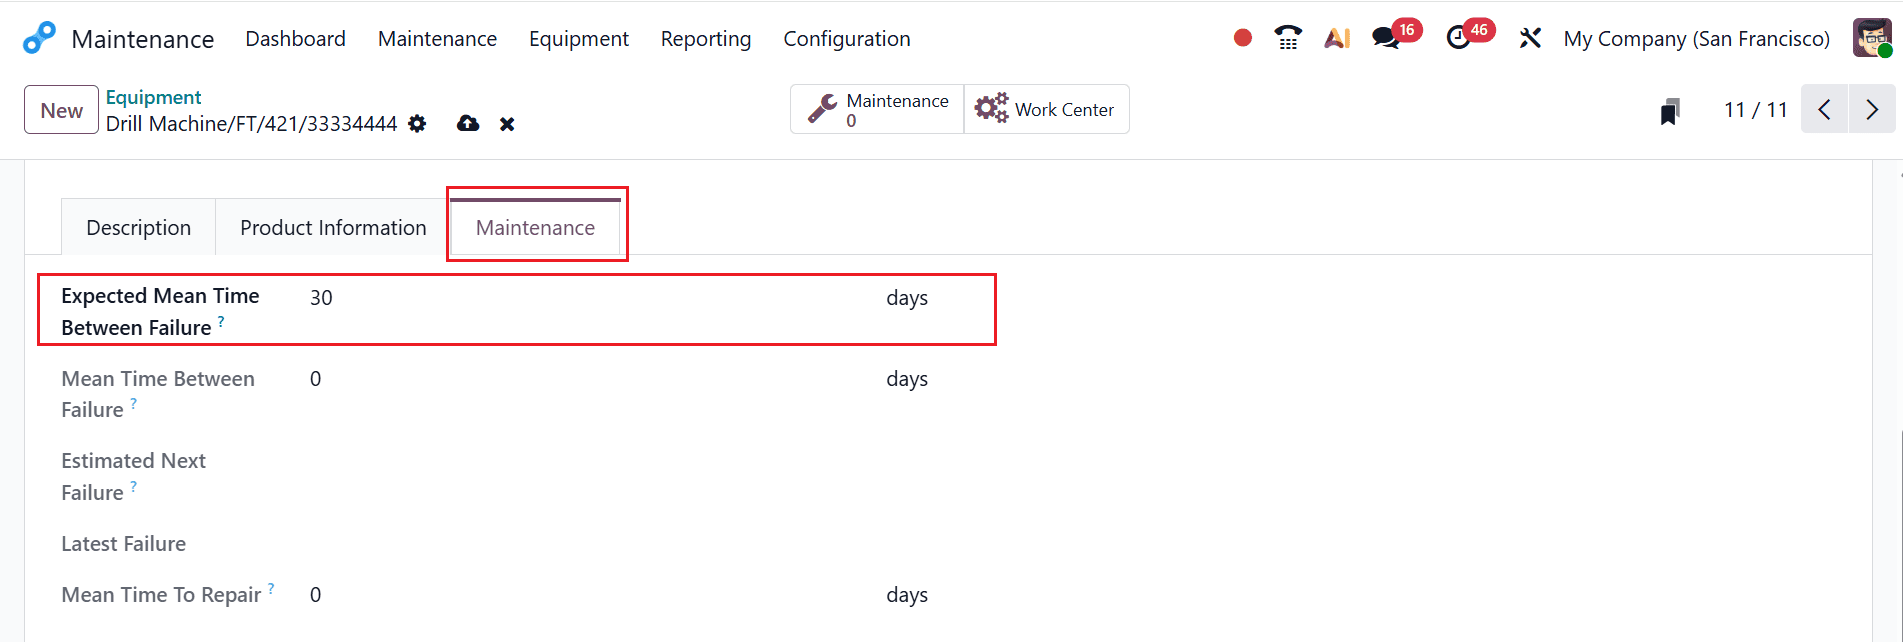
Under the Maintenance tab, you can view the details such as:
- Expected Mean Time Between Failure: The expected average time interval between two failures.
- Mean Time Between Failure: The actual average time between recorded failures
- Estimated Next Failure: The predicted date of the next equipment failure, computed using the MTBF and the date of the latest failure.
- Latest Failure: The most recent date on which the equipment experienced a failure.
- Mean Time To Repair: The average time required to repair the equipment and restore it.
Here, add the Expected Mean Time Between Failure as 30 days, as shown below. Then, click on the Maintenance smart tab to create a new maintenance request for the equipment.
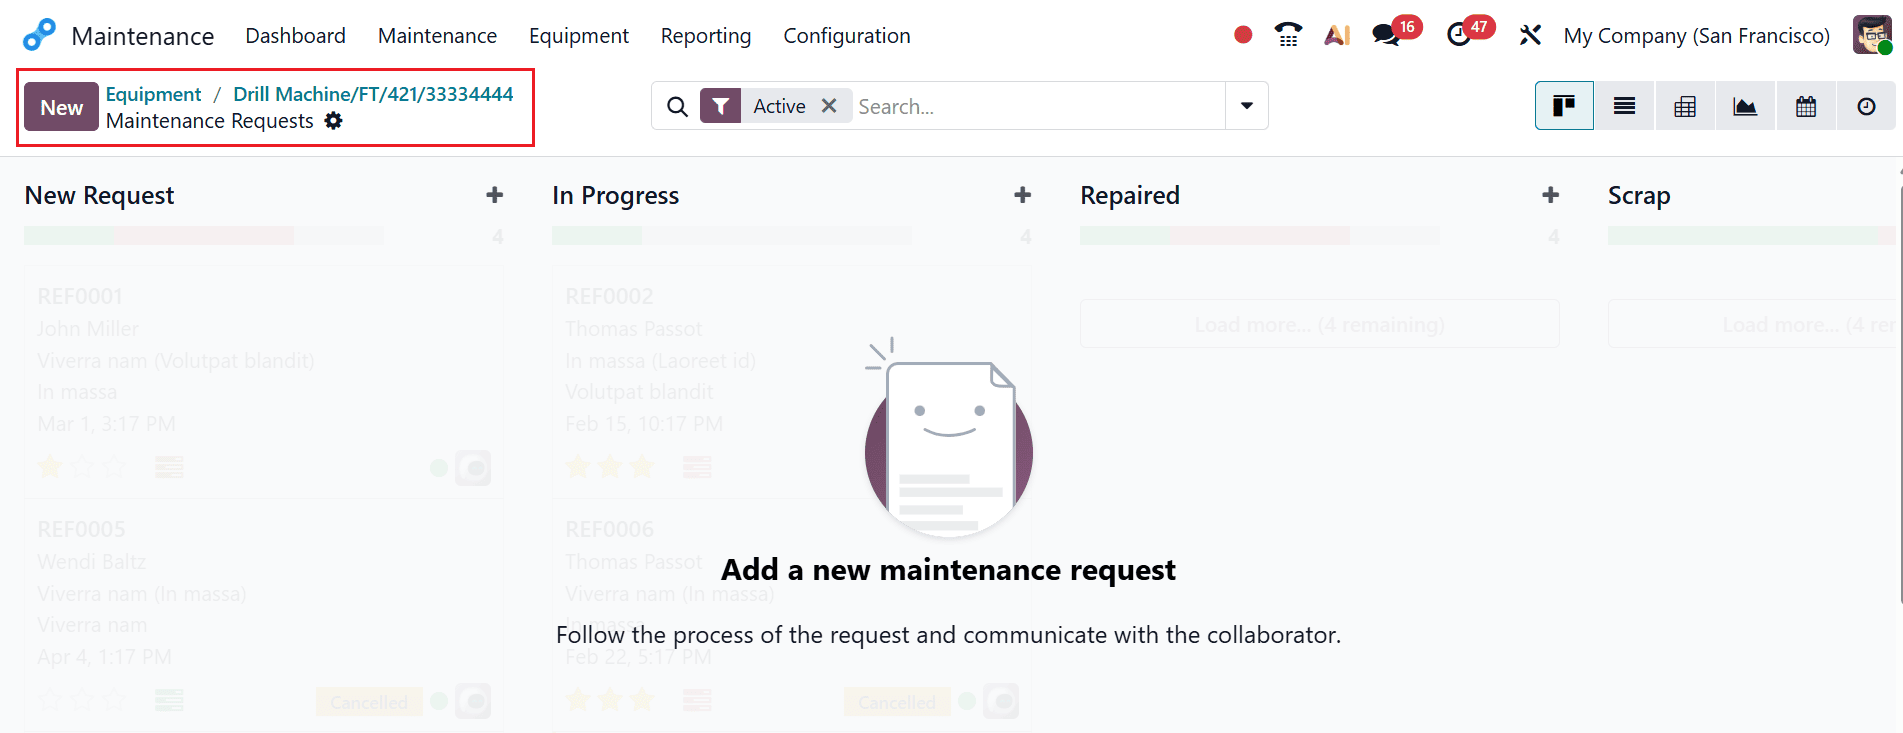
A new window will open, displaying the various stages of the maintenance request. Click the New button to create a new maintenance request.
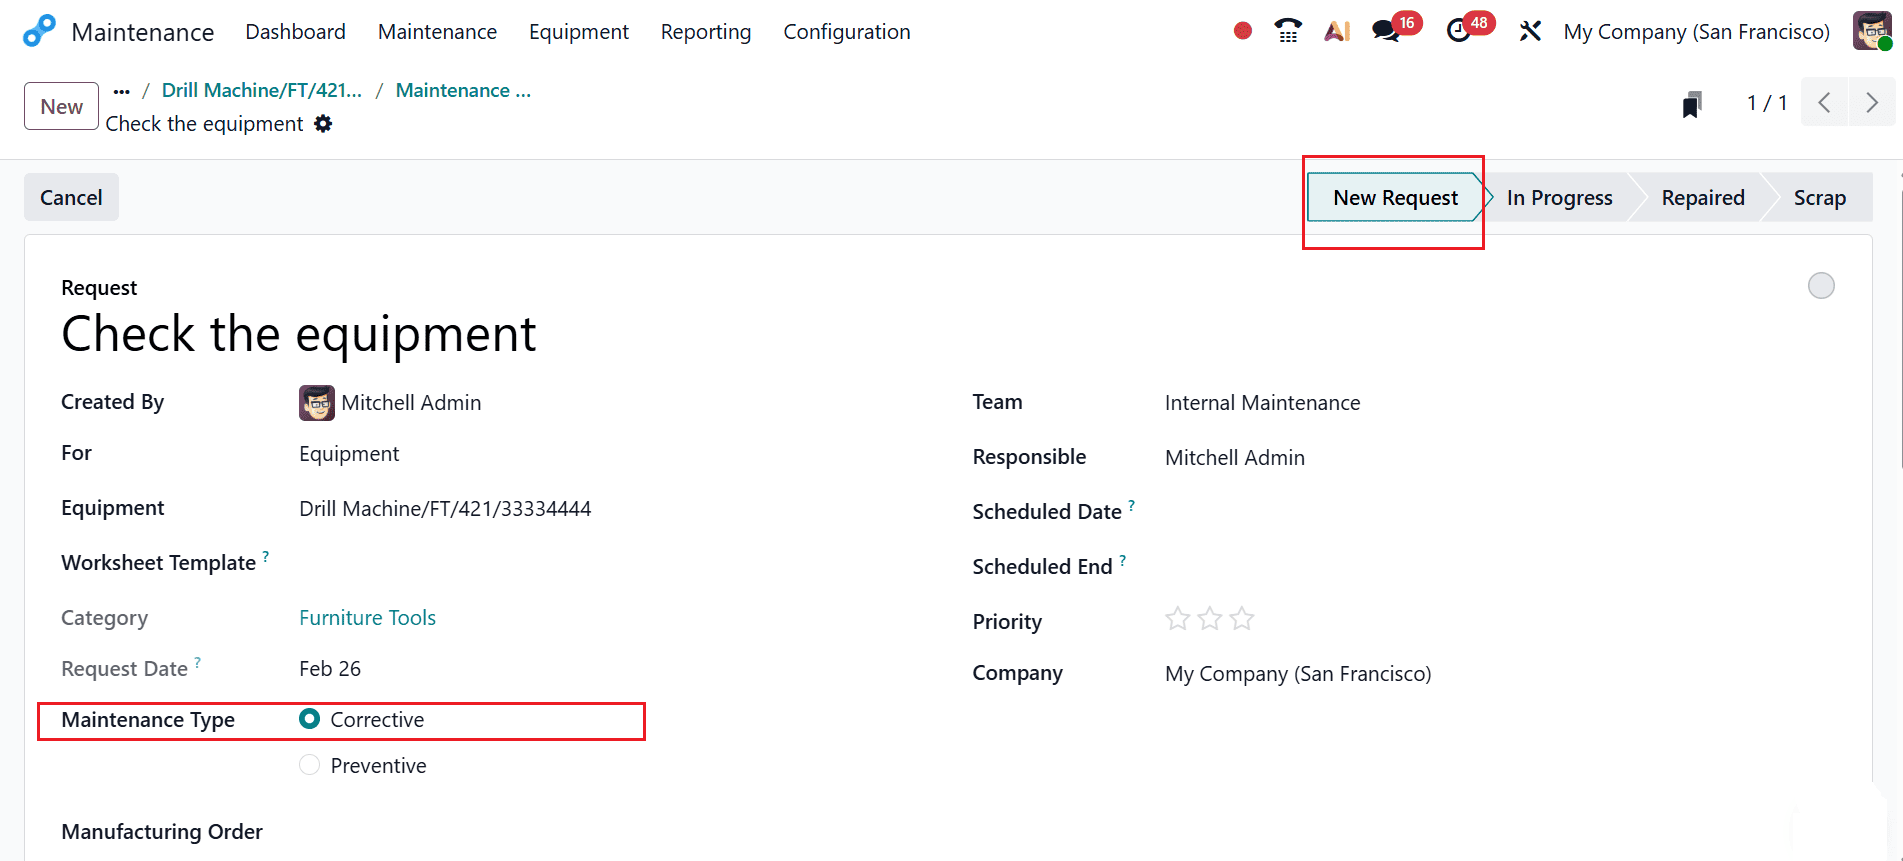
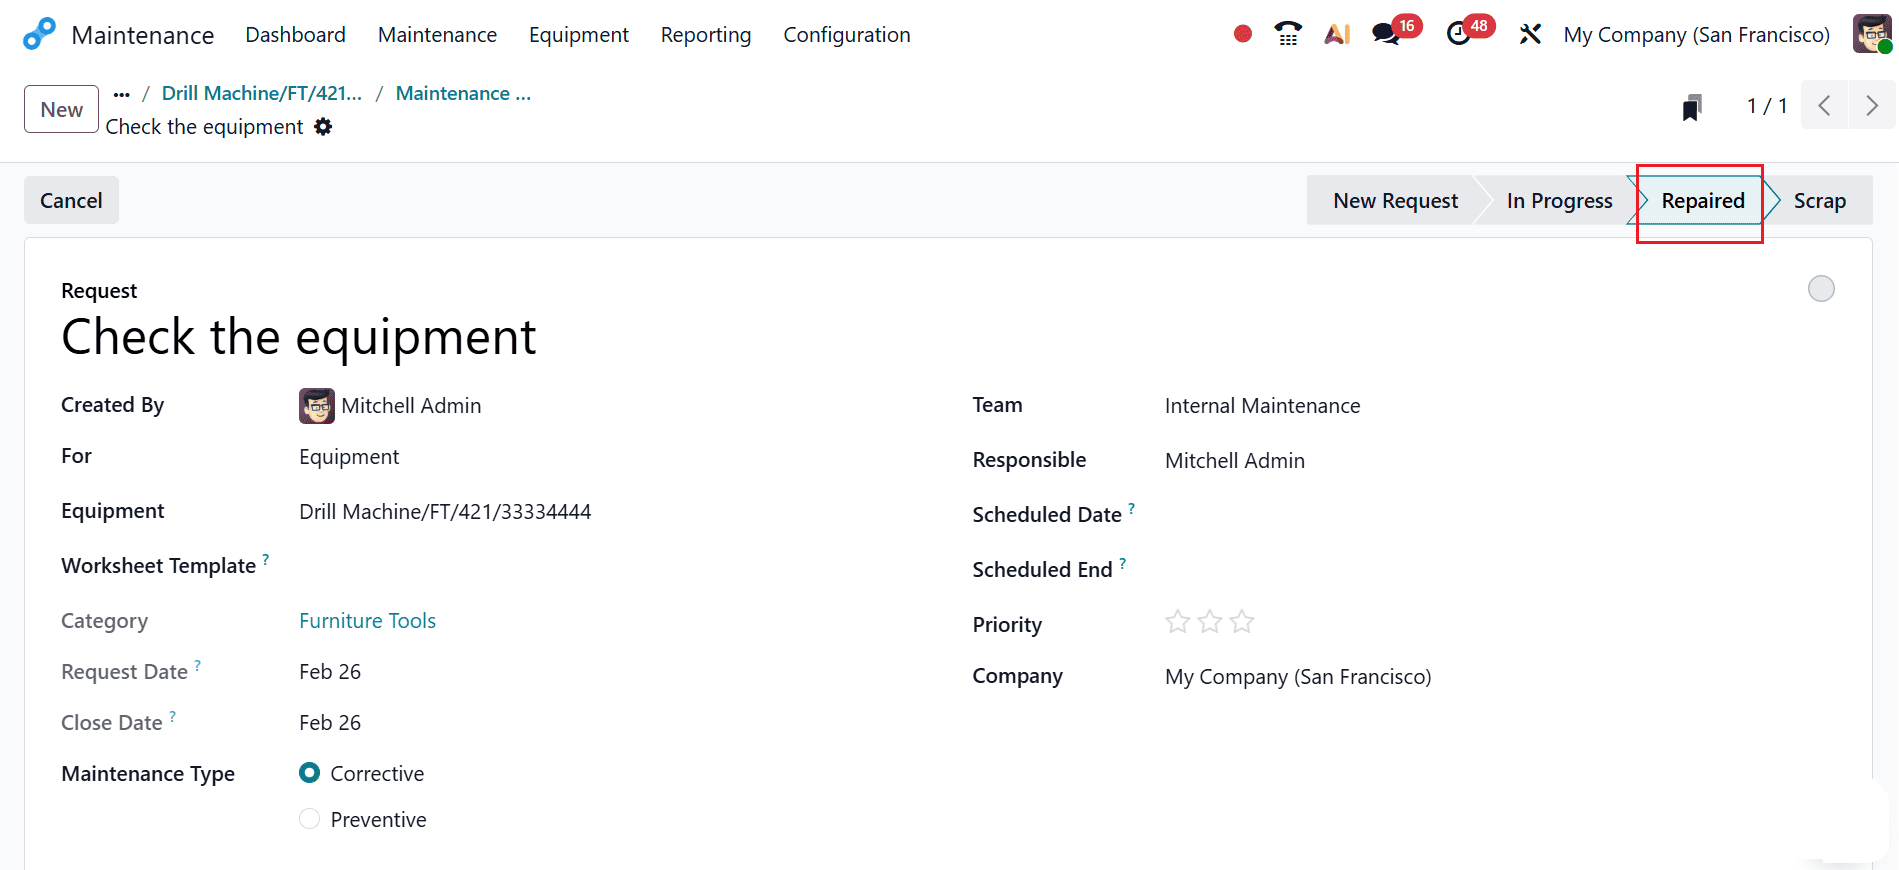
Under the Request field, add a title for the new maintenance request. Then, you can add the appropriate details of the request in the fields, such as Created By, For, Equipment, Worksheet Template, Category, Requested Date, Maintenance Type, Team, Responsible, Manufacturing Order, Scheduled Date, Scheduled End, Priority, and Company. In the Maintenance Type field, select Corrective as shown below. The request will initially appear in the New Request stage.
Once the maintenance work begins, update the stage to In Progress, and after the request is completed, change the stage to Repaired.
In the Odoo 19 Maintenance module, this is how you can set up and complete a corrective maintenance request.
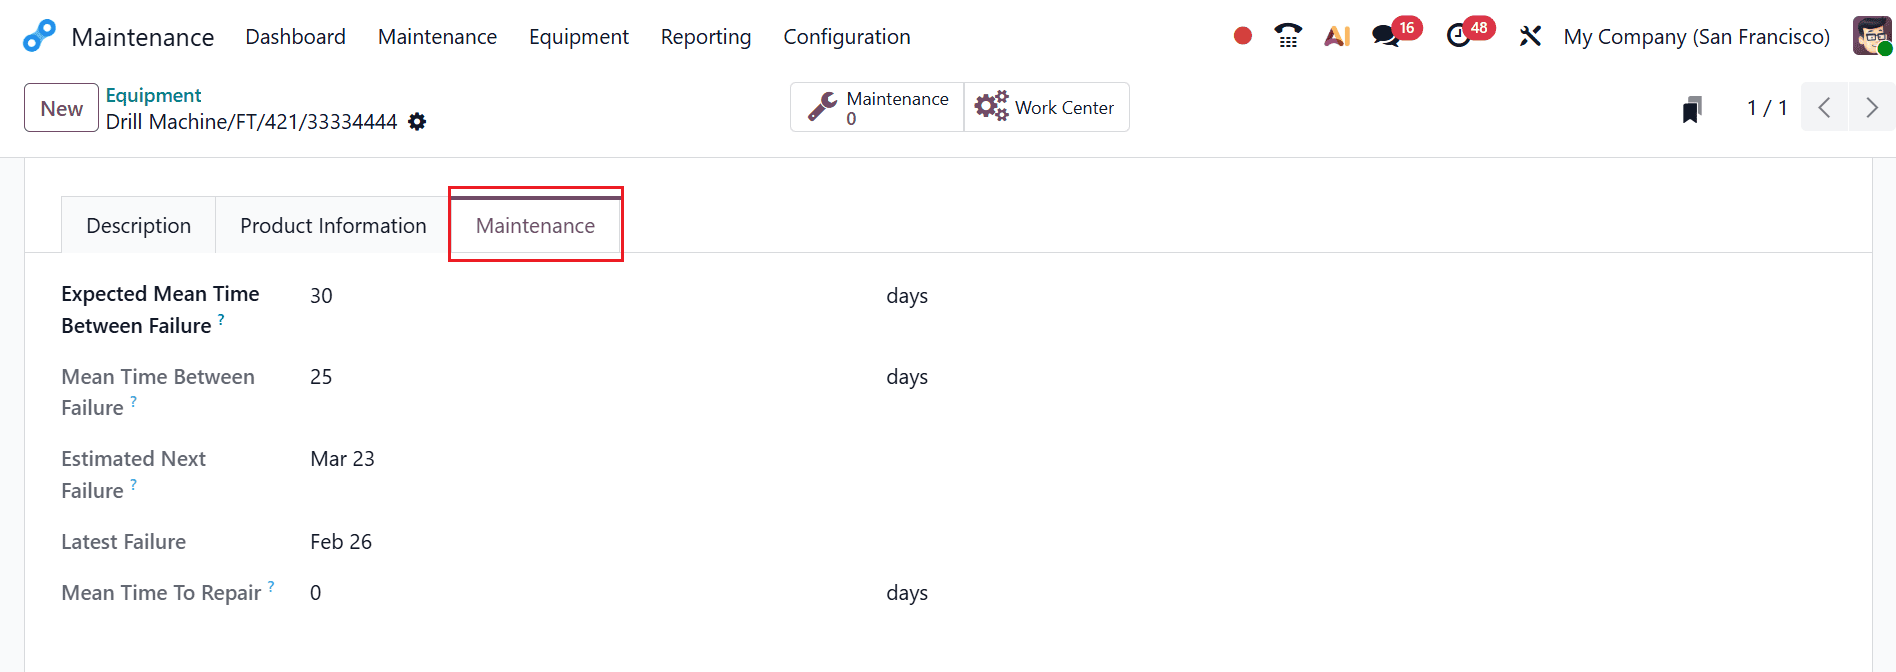
Then, you can move back to the equipment dashboard after completing the request. In the Maintenance tab, you can review the revised values for Expected Mean Time Between Failure, Mean Time Between Failure, Estimated Next Failure, Latest Failure, and Mean Time to Repair.
As you select the equipment as Drill Machine, the Effective Date as 02/01/2026, the Expected Mean Time Between Failure as 30 days, and the Latest Failure as 02/26/2026, which is updated as the date of the maintenance request.
Mean Time Between Failure = [Number of days between the Effective date and the Latest failure date.]/number of failures.
There are 25 days between 02/01/2026 and 02/26/2026, and one failure
Estimate Next failure = Latest Failure + Expected MTBF
= 02/26/2026 + 30 DAYS = 03/23/2026
Corrective maintenance in Odoo 19 ensures that organizations can quickly respond to unexpected equipment failures, thereby reducing downtime and improving operational efficiency. Once set up, the system allows for seamless creation and tracking of maintenance requests, assignment of tasks to relevant technicians, and systematic recording of repairs. The ability to monitor the status and history of equipment helps managers make informed decisions, plan preventive actions, and optimize resource allocation. Corrective maintenance improves teamwork across departments by serving as a central hub for communication and progress updates. In Odoo 19’s maintenance module, businesses can not only address failures effectively but also gain insights into recurring issues, helping to refine maintenance strategies. Ultimately, a well-configured corrective maintenance process contributes to prolonged equipment life, cost savings, and smoother operations, making it a tool for modern enterprises seeking efficiency and reliability in asset management.
To read more about How to Perform Corrective Maintenance in Odoo 18, refer to our blog How to Perform Corrective Maintenance in Odoo 18.