Automation rules in Odoo 19 CRM play a vital role in simplifying and optimising sales operations. They allow businesses to automate CRM tasks such as lead assignment, stage updates, activity scheduling, and email notifications. By setting clear triggers, conditions, and actions, organizations can ensure faster responses and consistent processes across sales teams. Odoo 19 offers improved flexibility and real-time execution of automation rules, making CRM workflows more reliable and efficient. Using these rules correctly enables sales teams to save time, minimize errors, and focus on building strong customer relationships and closing deals more effectively.
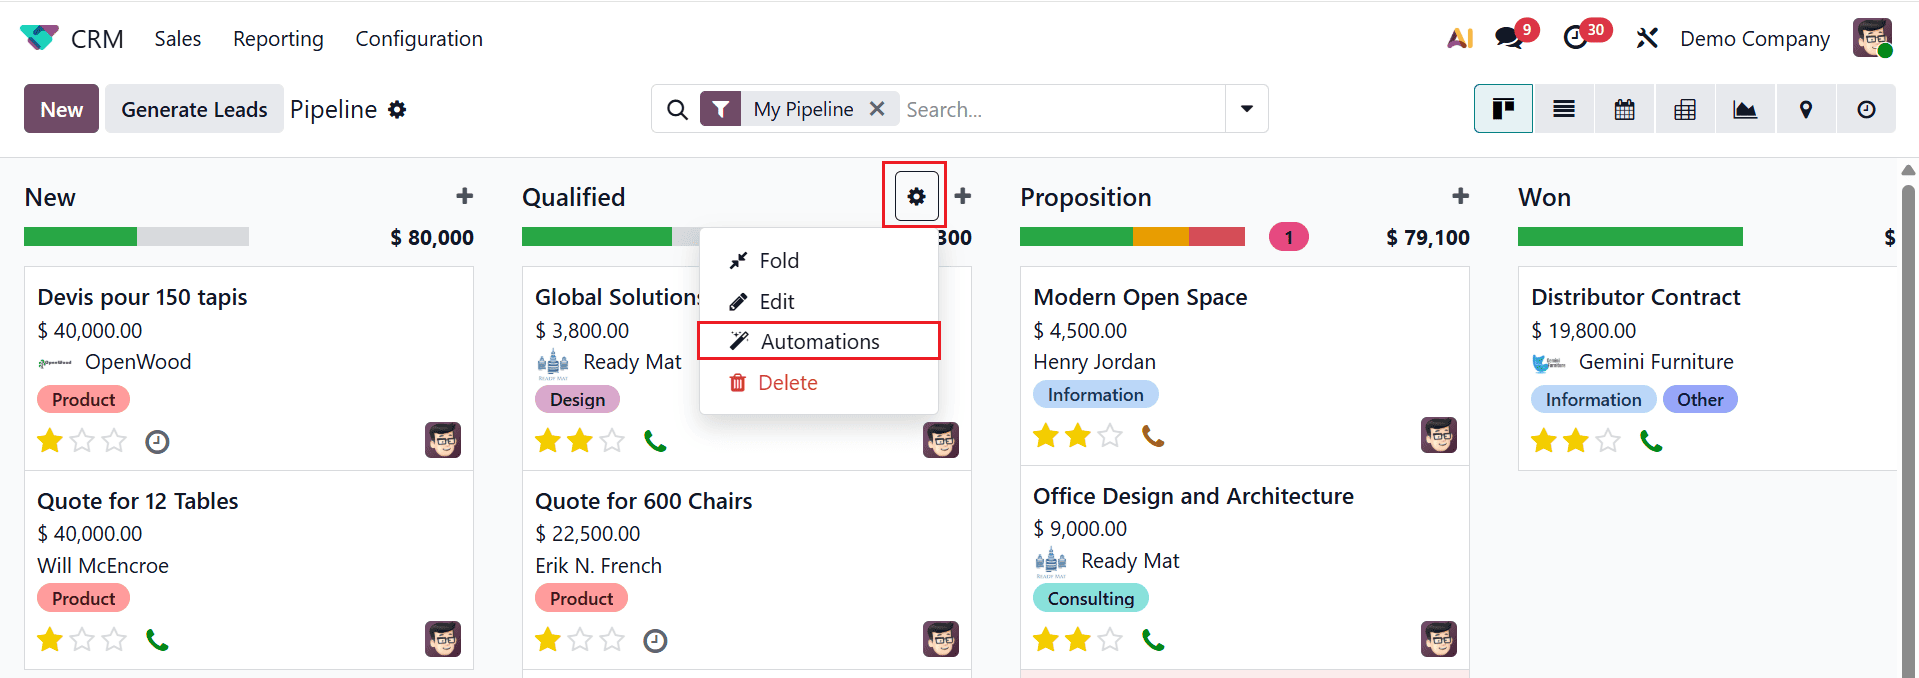
Firstly, navigate to the CRM module in Odoo 19. By default, you can view the sales menu as the main dashboard of the module. Here, you can configure the automation rules for each stage by clicking on the gear icon and then select Automations as shown below:
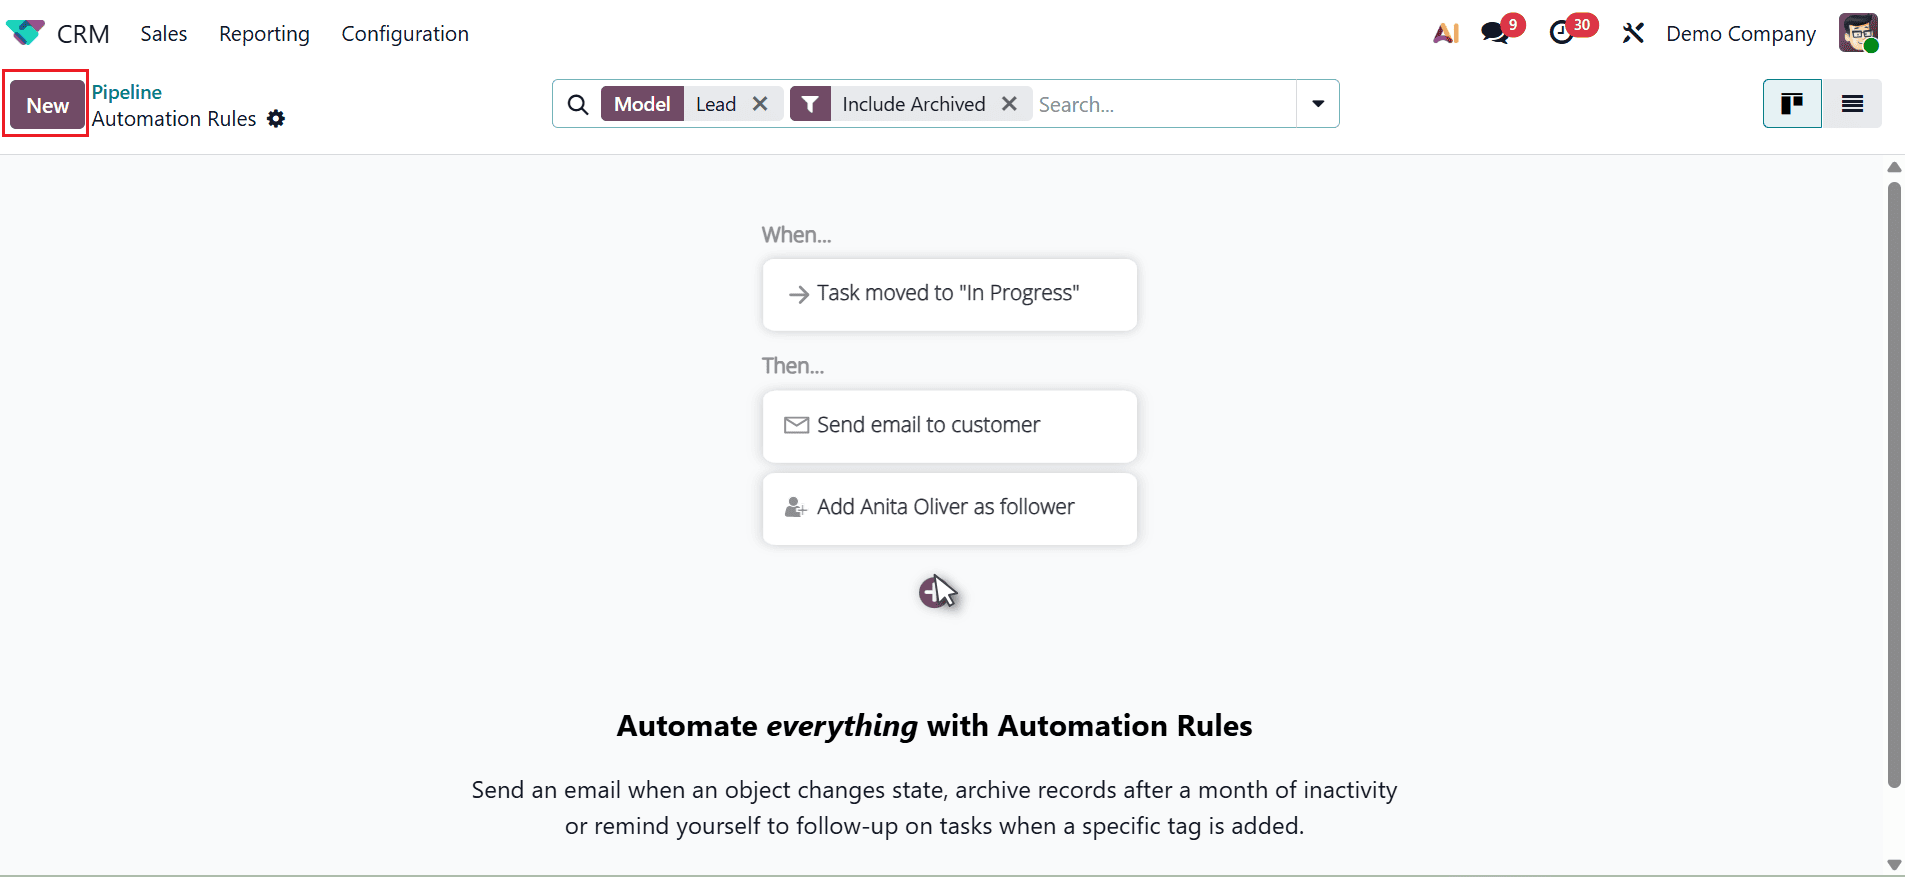
A new window will appear where you can add one or more predefined actions in response to a specific trigger. To create a new automation rule, click the New button, as shown below:
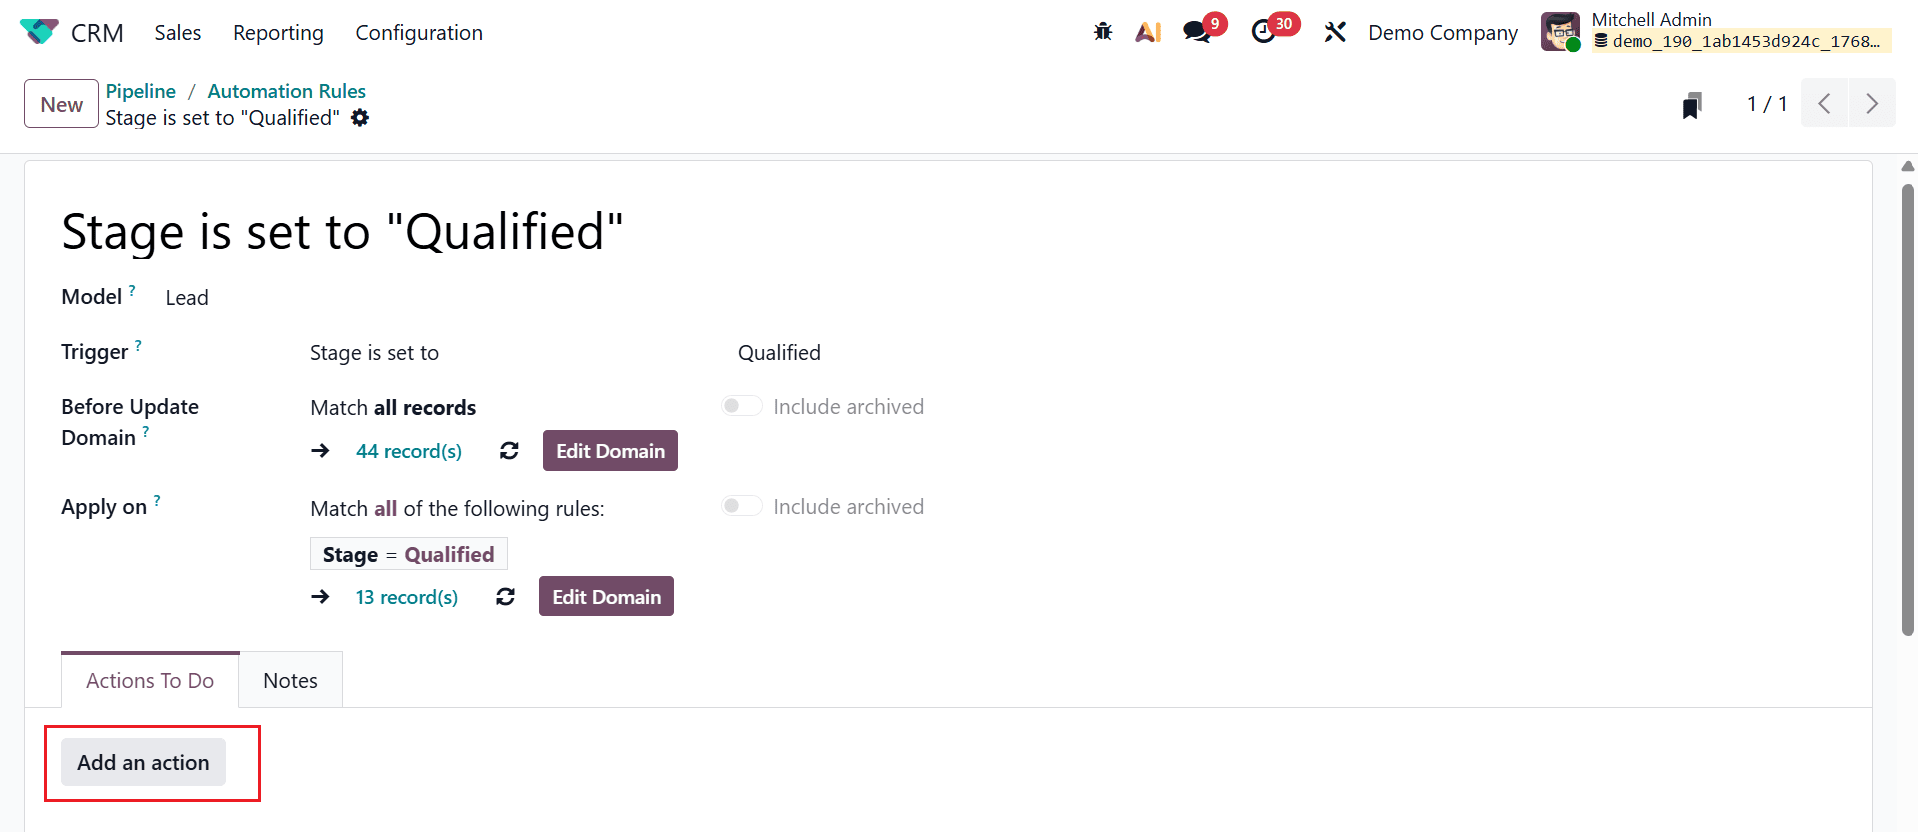
- Rule Name: Firstly, add an appropriate name for the rule that defines the purpose.
- Model: The Model defines which type of record the automation rule applies to. In this case, it is set to Lead, where any change made to lead records can trigger this rule.
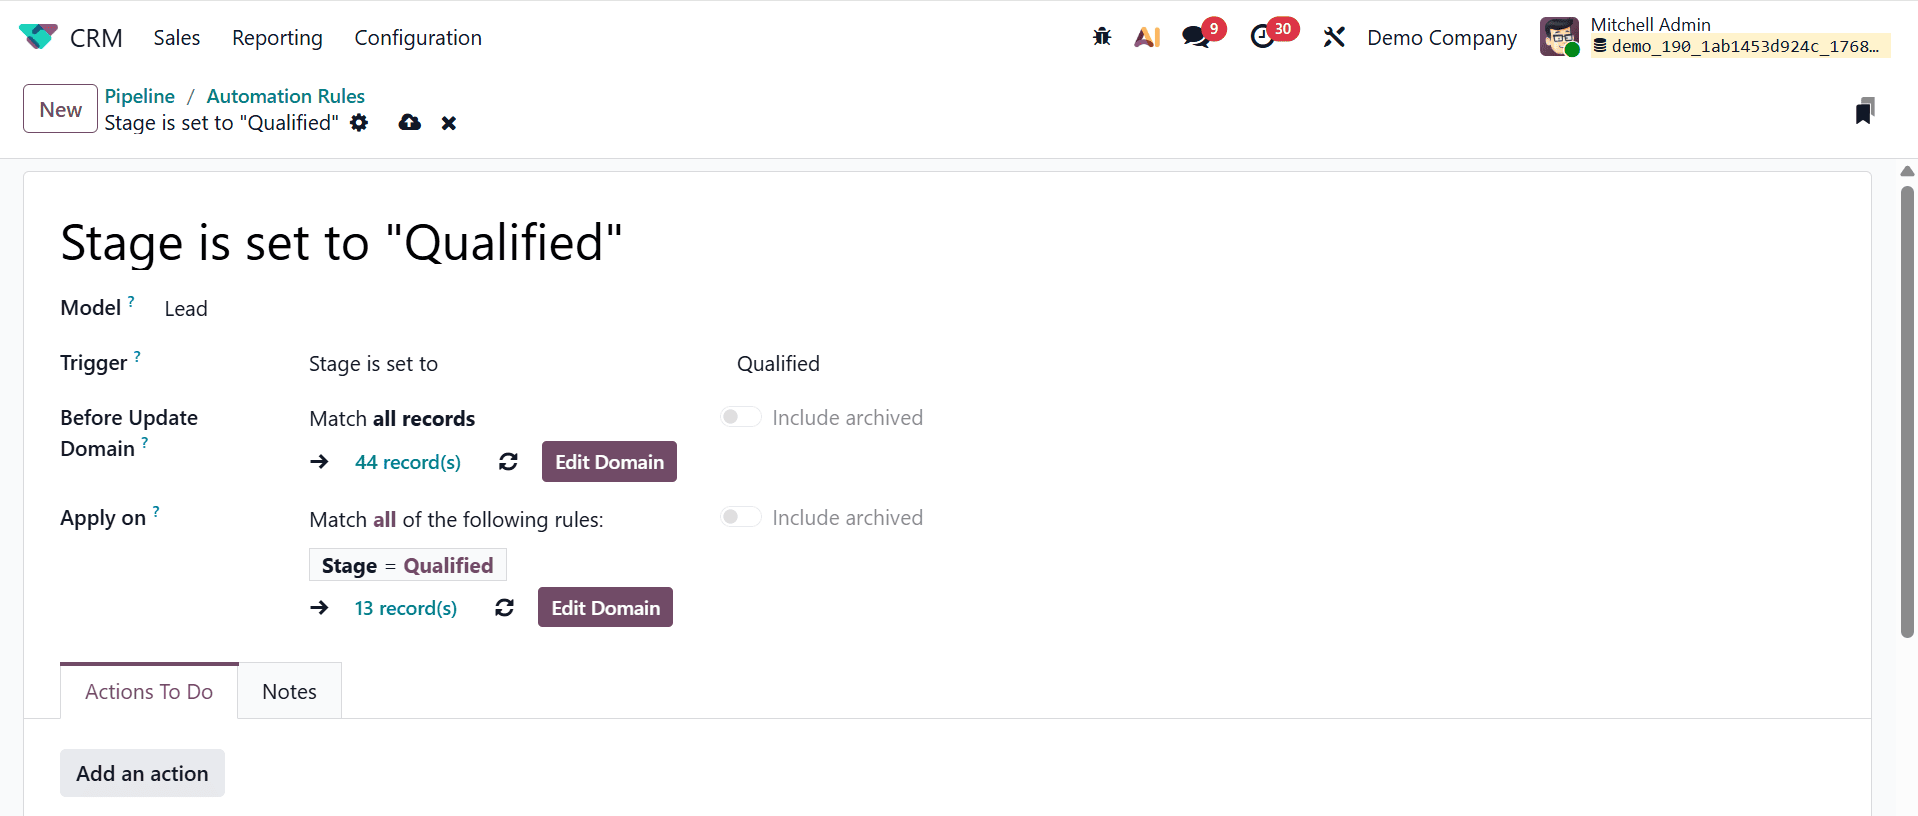
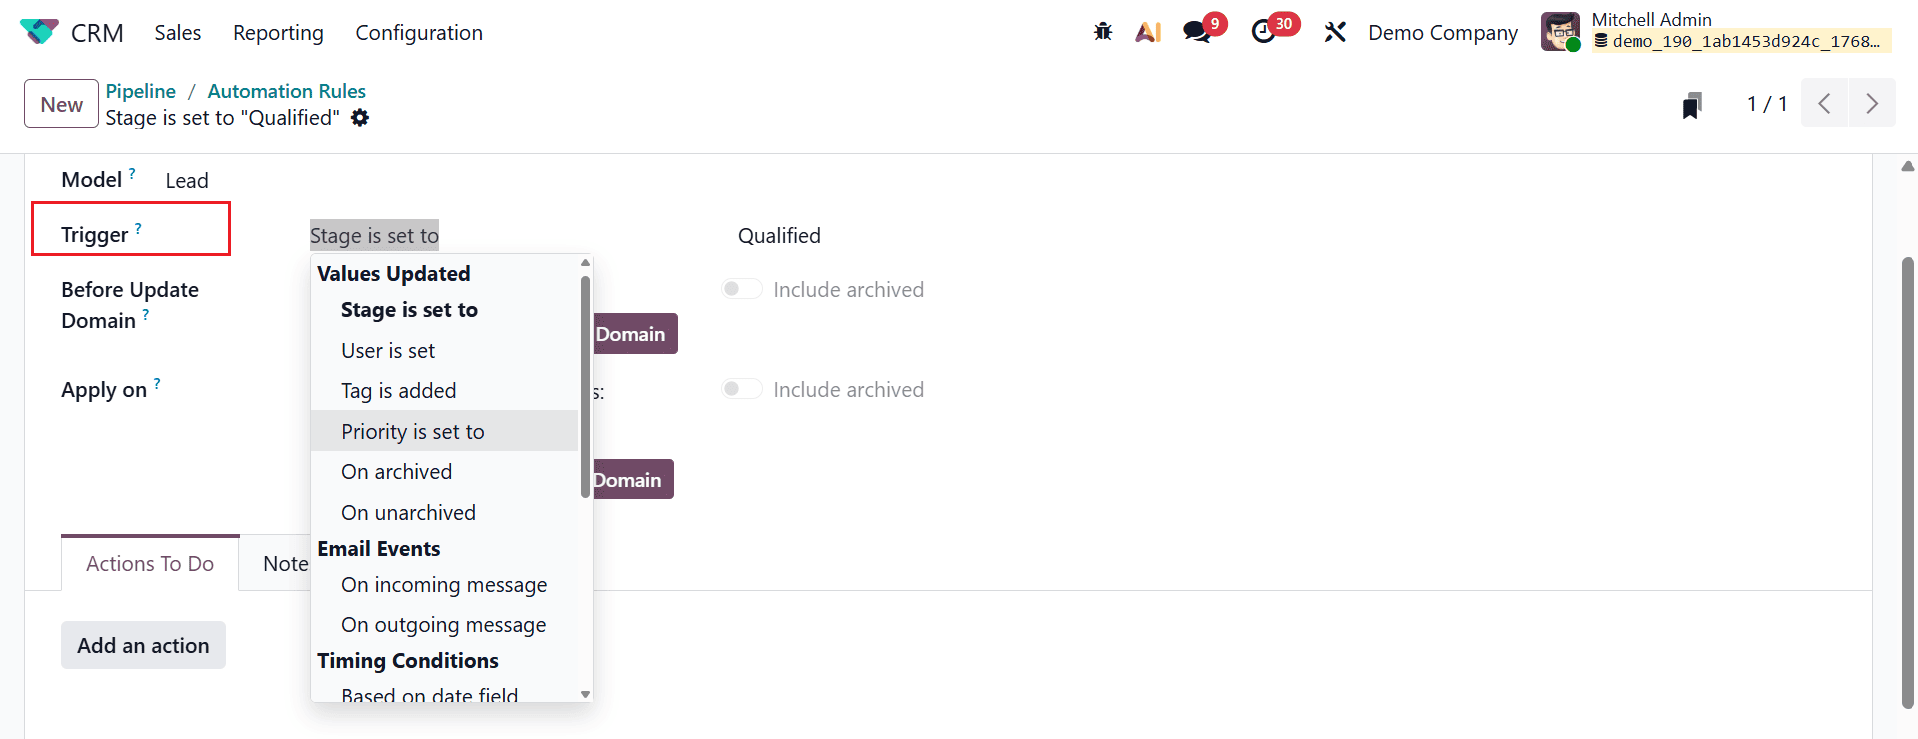
- Trigger: In the Trigger field, you can select the trigger values from the drop-down menu to define when the automation starts. Here, the rule is triggered once a lead’s stage is set to Qualified. This helps automate actions at the exact sales stage.
- Before Update Domain: Here, you can check the set of conditions of records before the record is updated. It filters which leads are allowed to trigger the automation and prevents unnecessary or incorrect automation.
- Apply on: Defines which records the action will run on after the trigger. It checks the updated values of the record. In this case, it applies only to leads whose stage is Qualified.
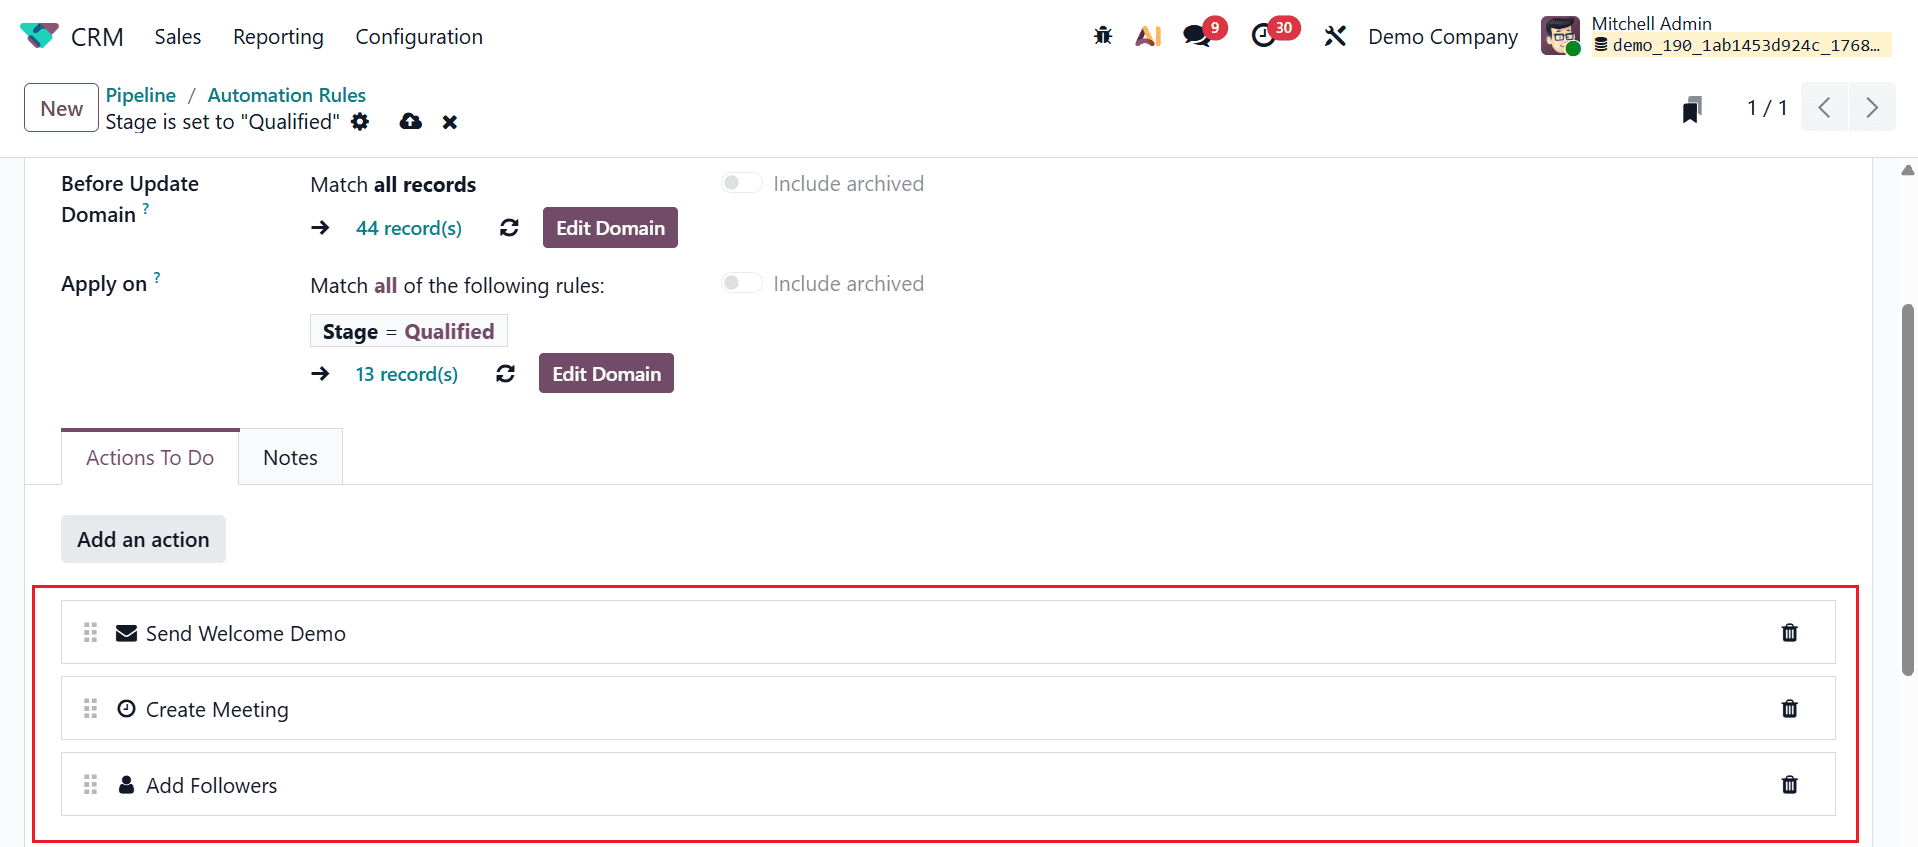
- Actions To Do: Here, you can define the automatic action when the rule is triggered. These actions run immediately after the conditions are met. Click on the Add an action button to add actions to the rule, as shown below:
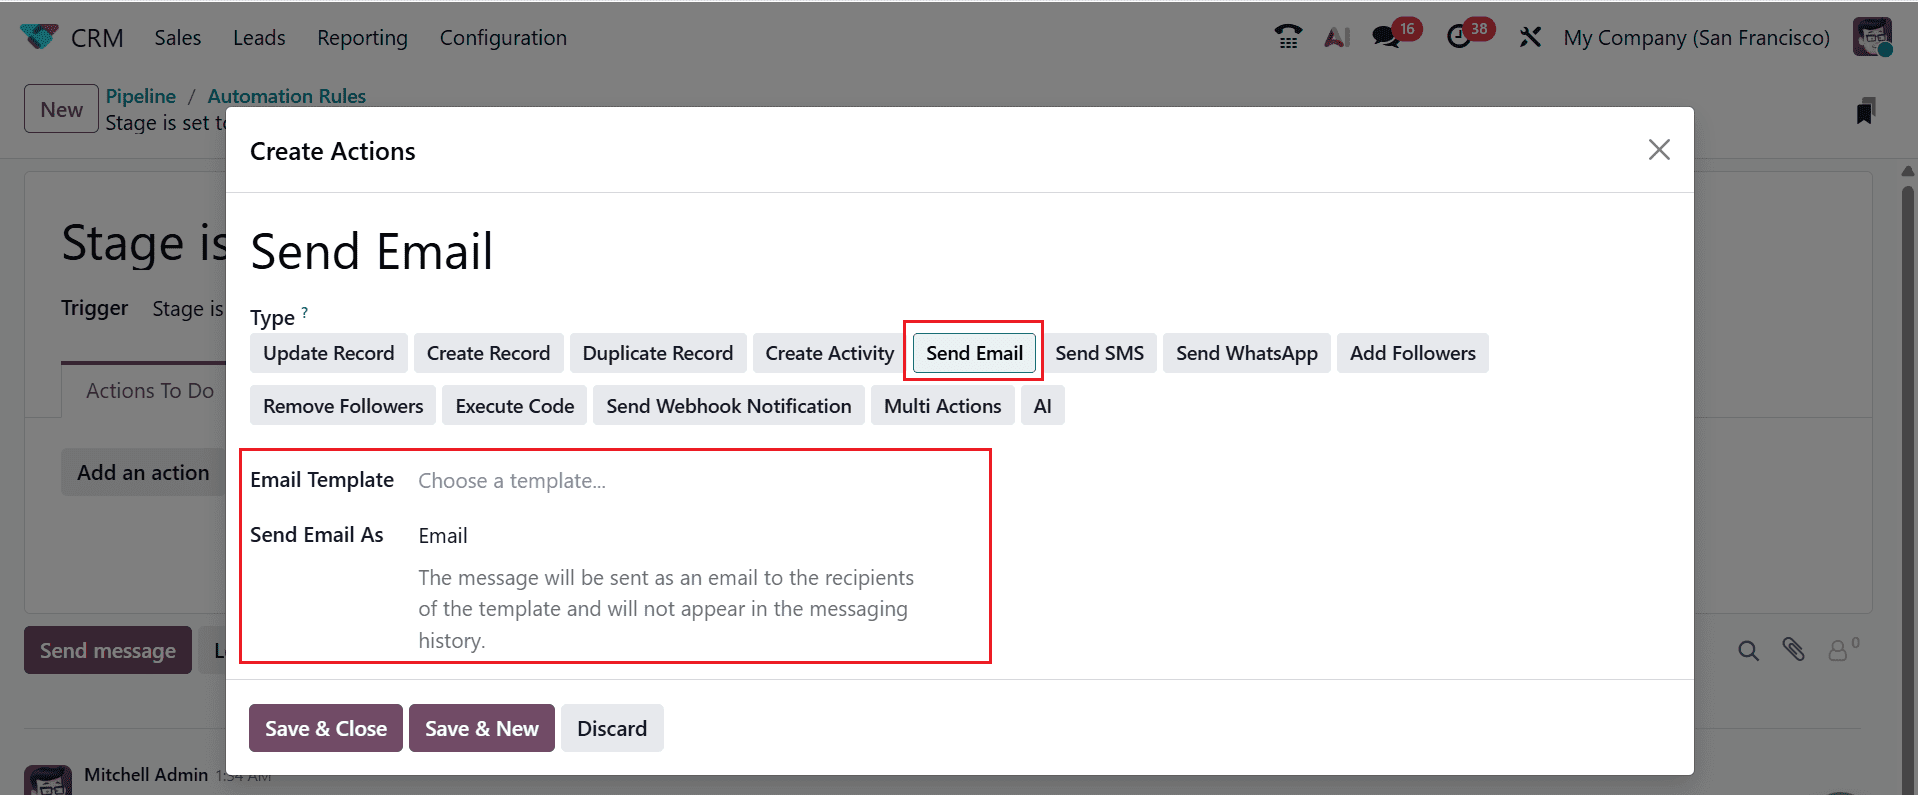
A new pop-up window will appear, allowing you to define the action to be performed when the trigger condition is met. Under the Type field, you can select from various actions such as Update Record, Create Record, Duplicate Record, Create Activity, Send Email, Send SMS, Add Followers, Remove Followers, Execute Code, Send Webhook Notification, Multi Actions, and AI. For example, select the Type field as Send Email action to automate email sending when the stage reaches the Qualified stage. Then, add an appropriate Email Template. In the Send Email As field, select either Message, Email, or Note. When Message is selected, the content is posted on the record as a message, notifying all followers and appearing in the messaging history. Choosing Email sends the message directly to the specified recipients and does not display it in the messaging history. Selecting Note considers the content as an internal note, visible only to internal users in the messaging history.
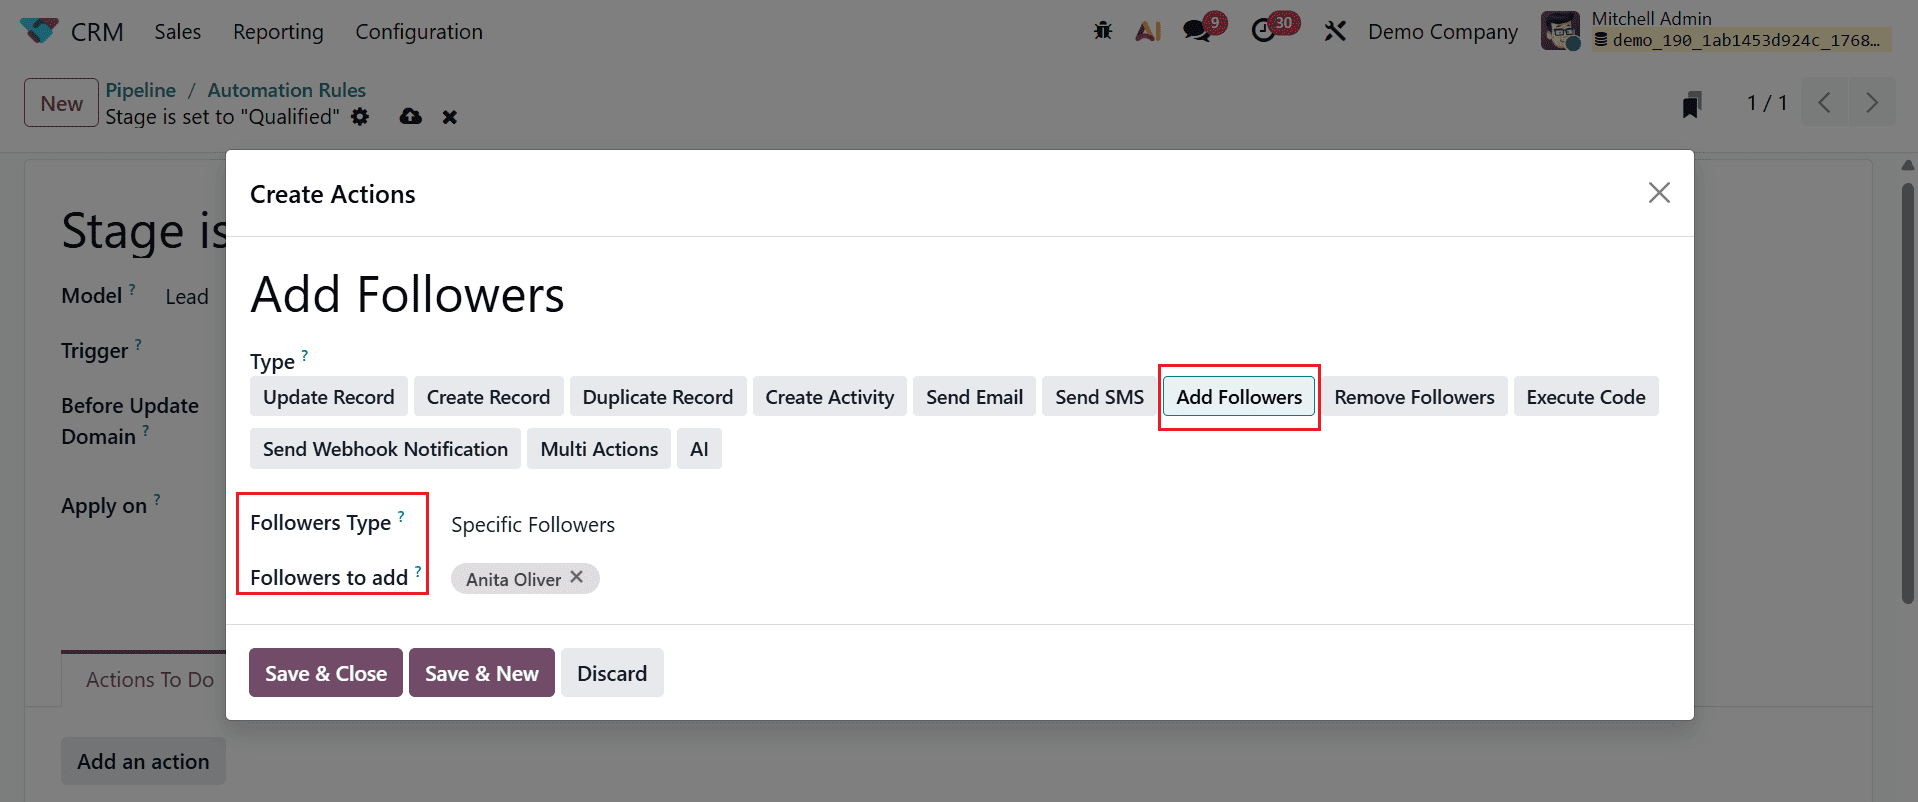
Then, click on the Save & New button to add another action. Here, select the Type as Add Followers. You can select either Specific Followers (select specific contacts to add/remove from the record’s followers) or Dynamic Followers (all contacts of the chosen record will be added/removed from followers) in the Followers Type field. In the Followers to add field, choose a contact as shown below:
Then, click on the Save & New button to add another action. Here, select the Type as Create Activity. Then, add the details such as Activity Type, Title, Due Date, User Type, Responsible, and Note.

Based on this automation rule, an email is sent to the customer, a specific customer is added, and a meeting will be scheduled when the stage is set to Qualified, as shown below:
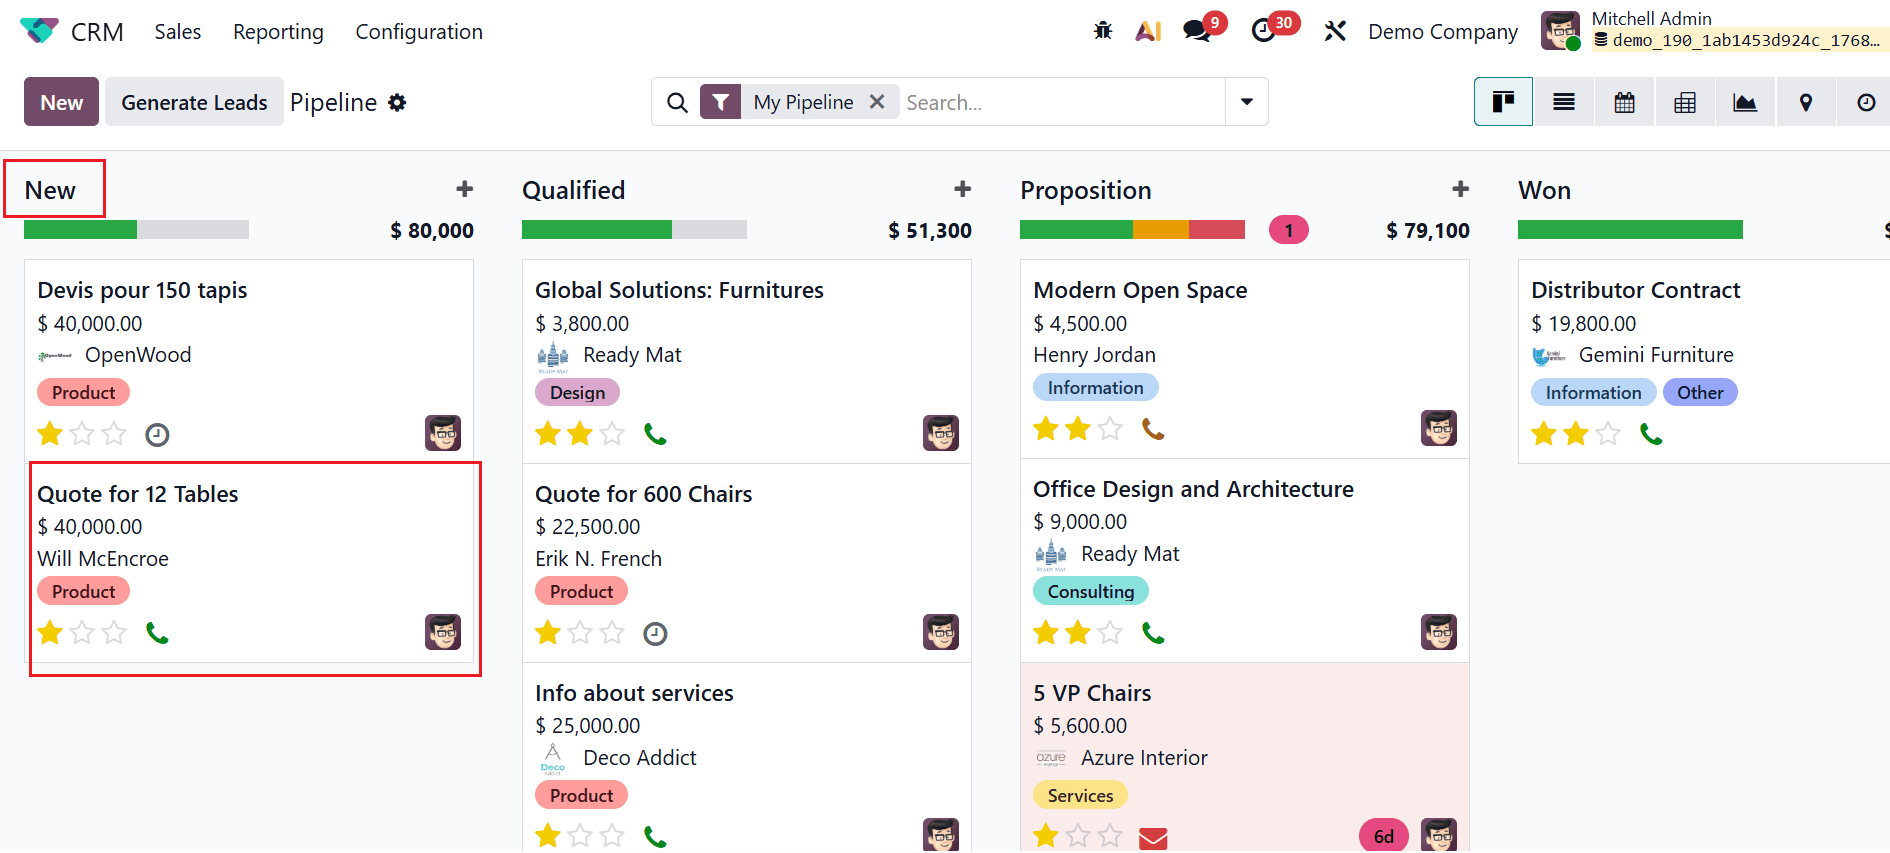
Then, move back to the CRM pipeline dashboard and select an opportunity named Quote for 12 Tables from the New stage as shown below:
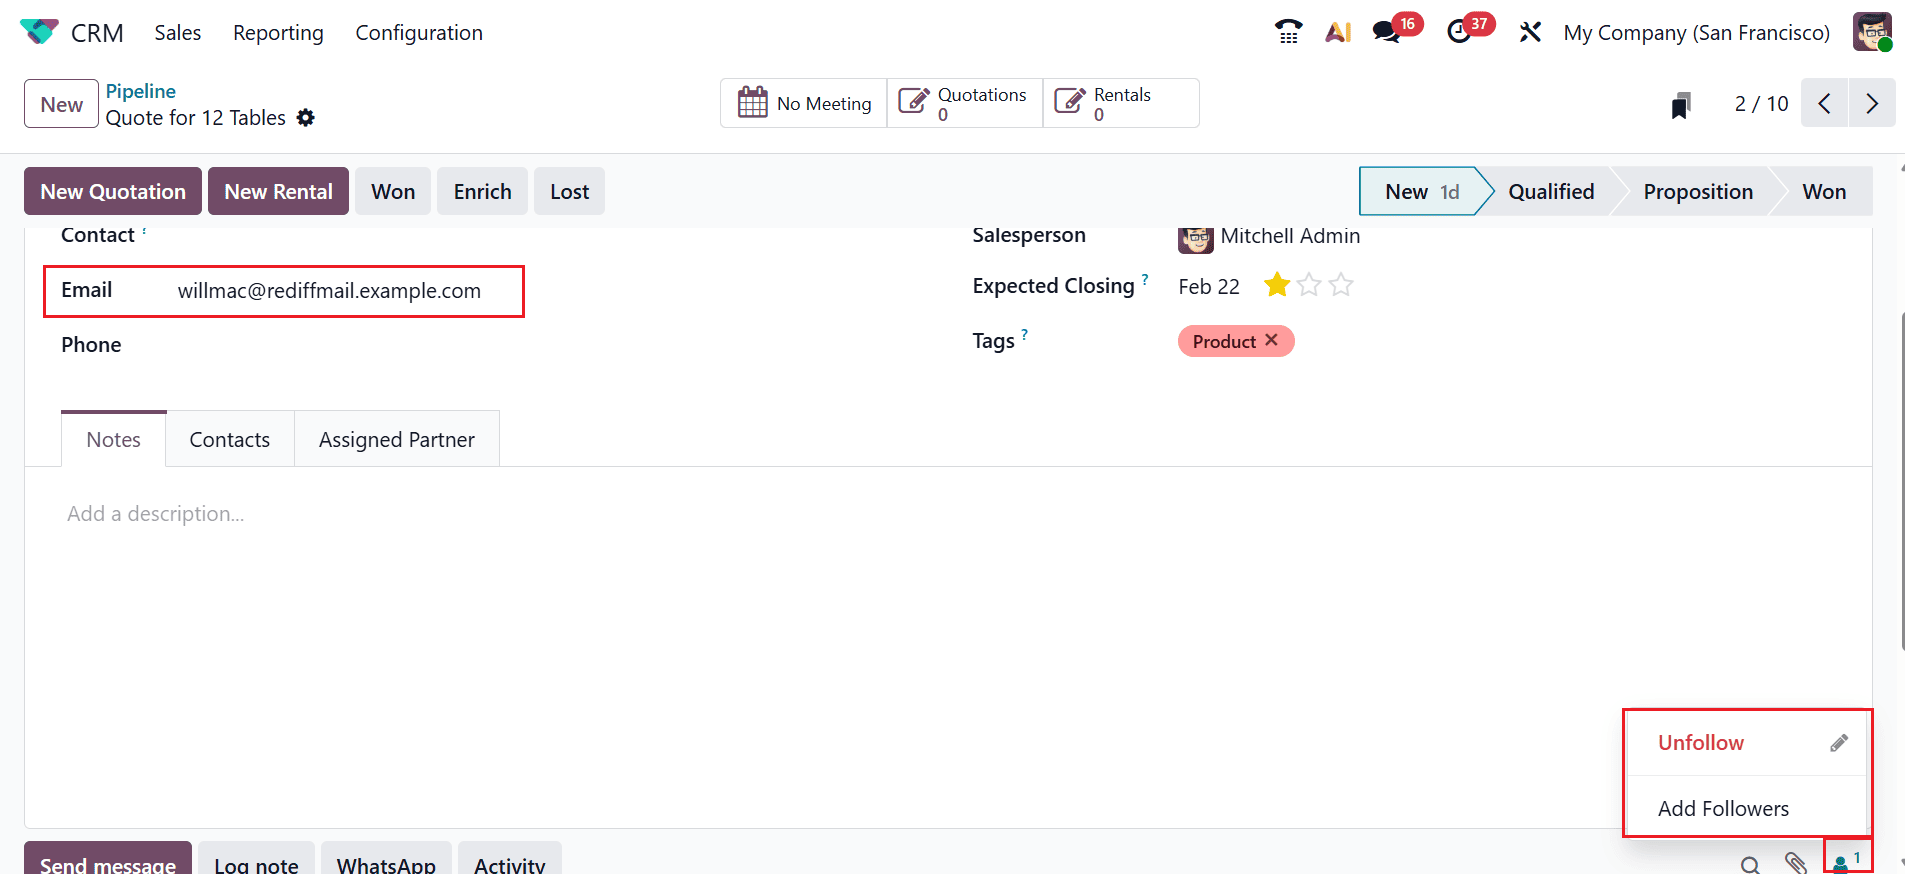
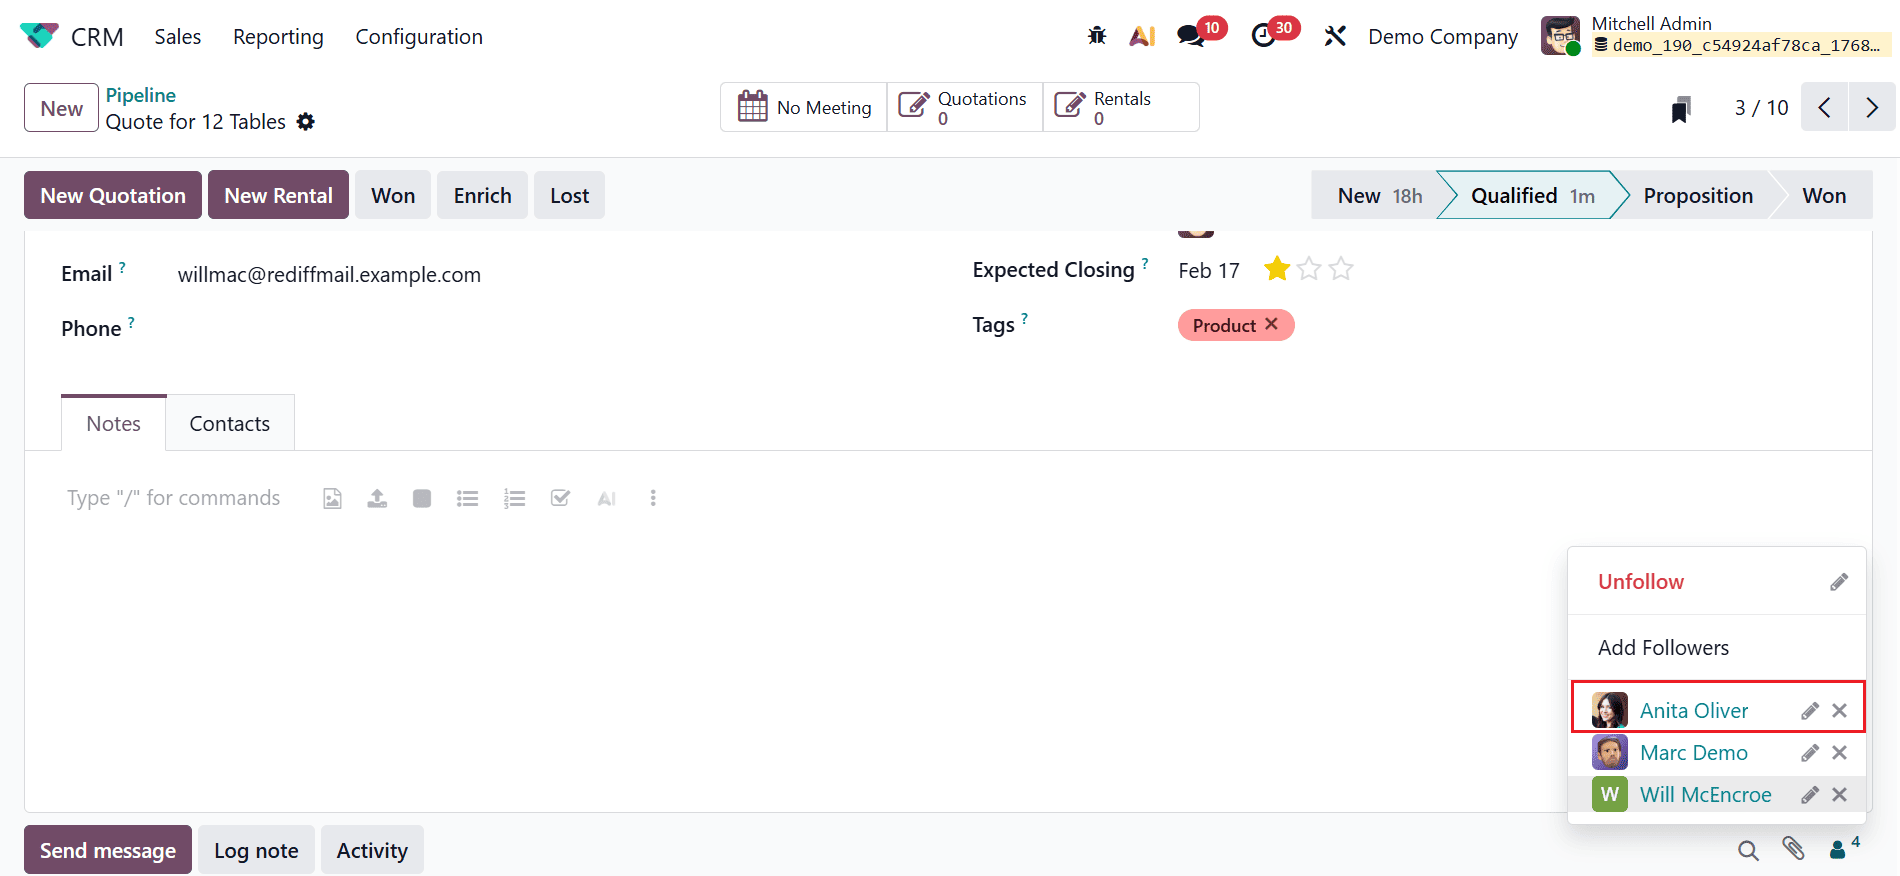
Then, check whether the mail ID set for the opportunity is valid. Here, you can see only one follower, Mitchel Admin, whom you can unfollow if needed.
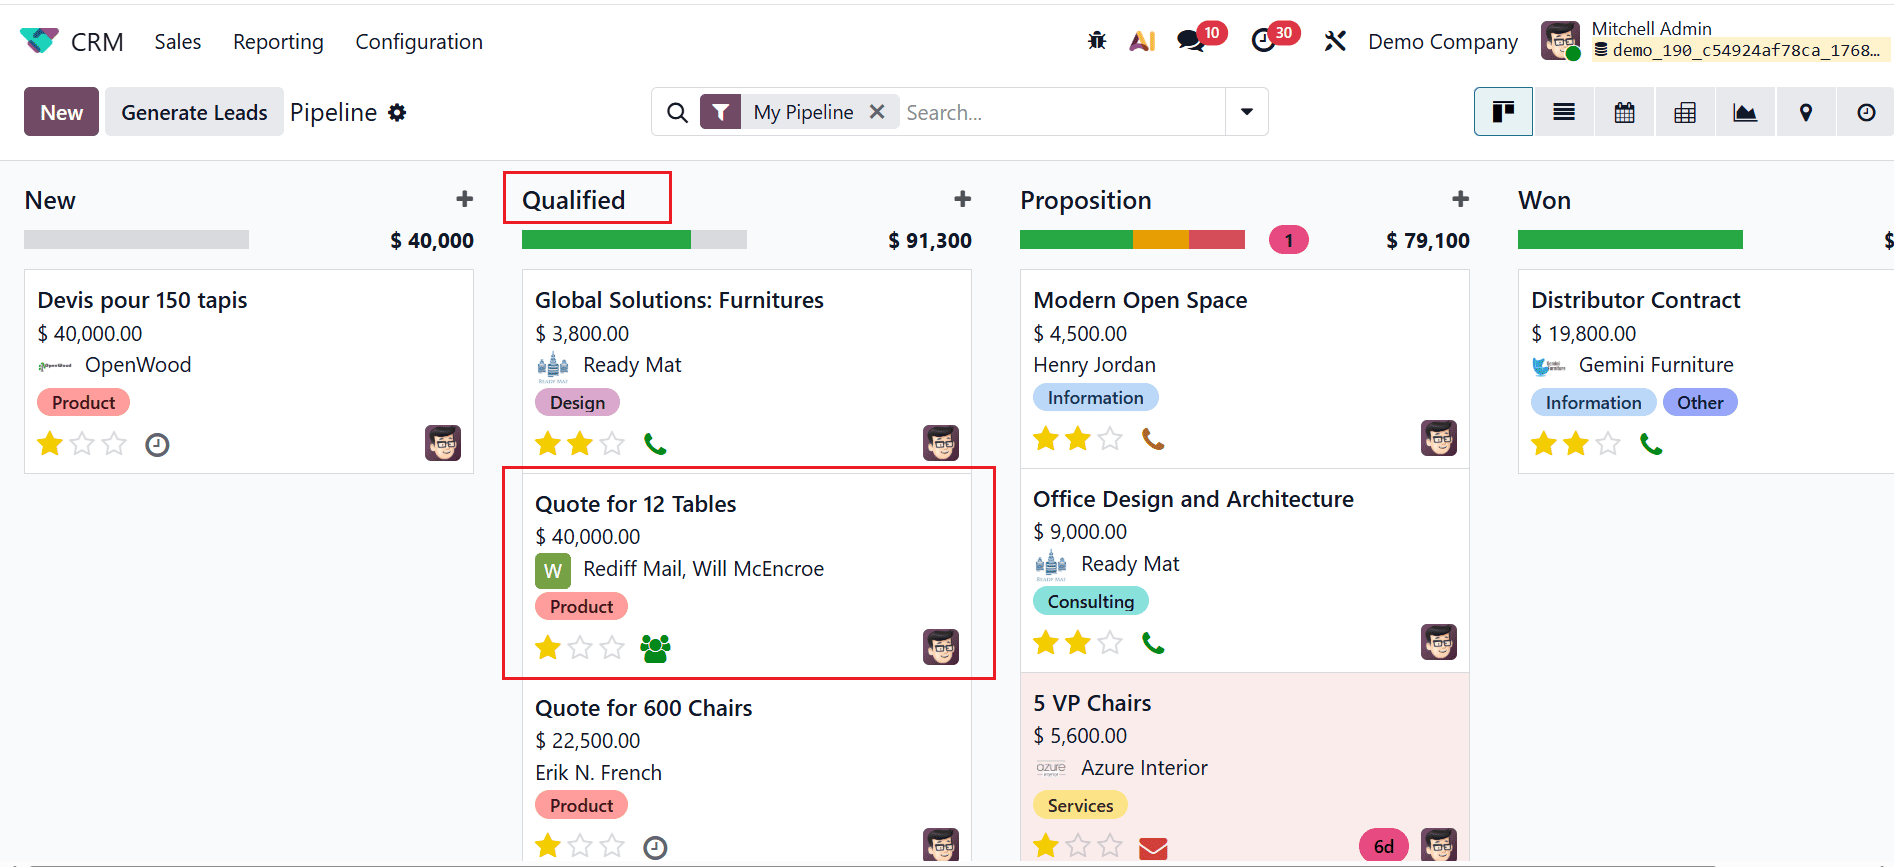
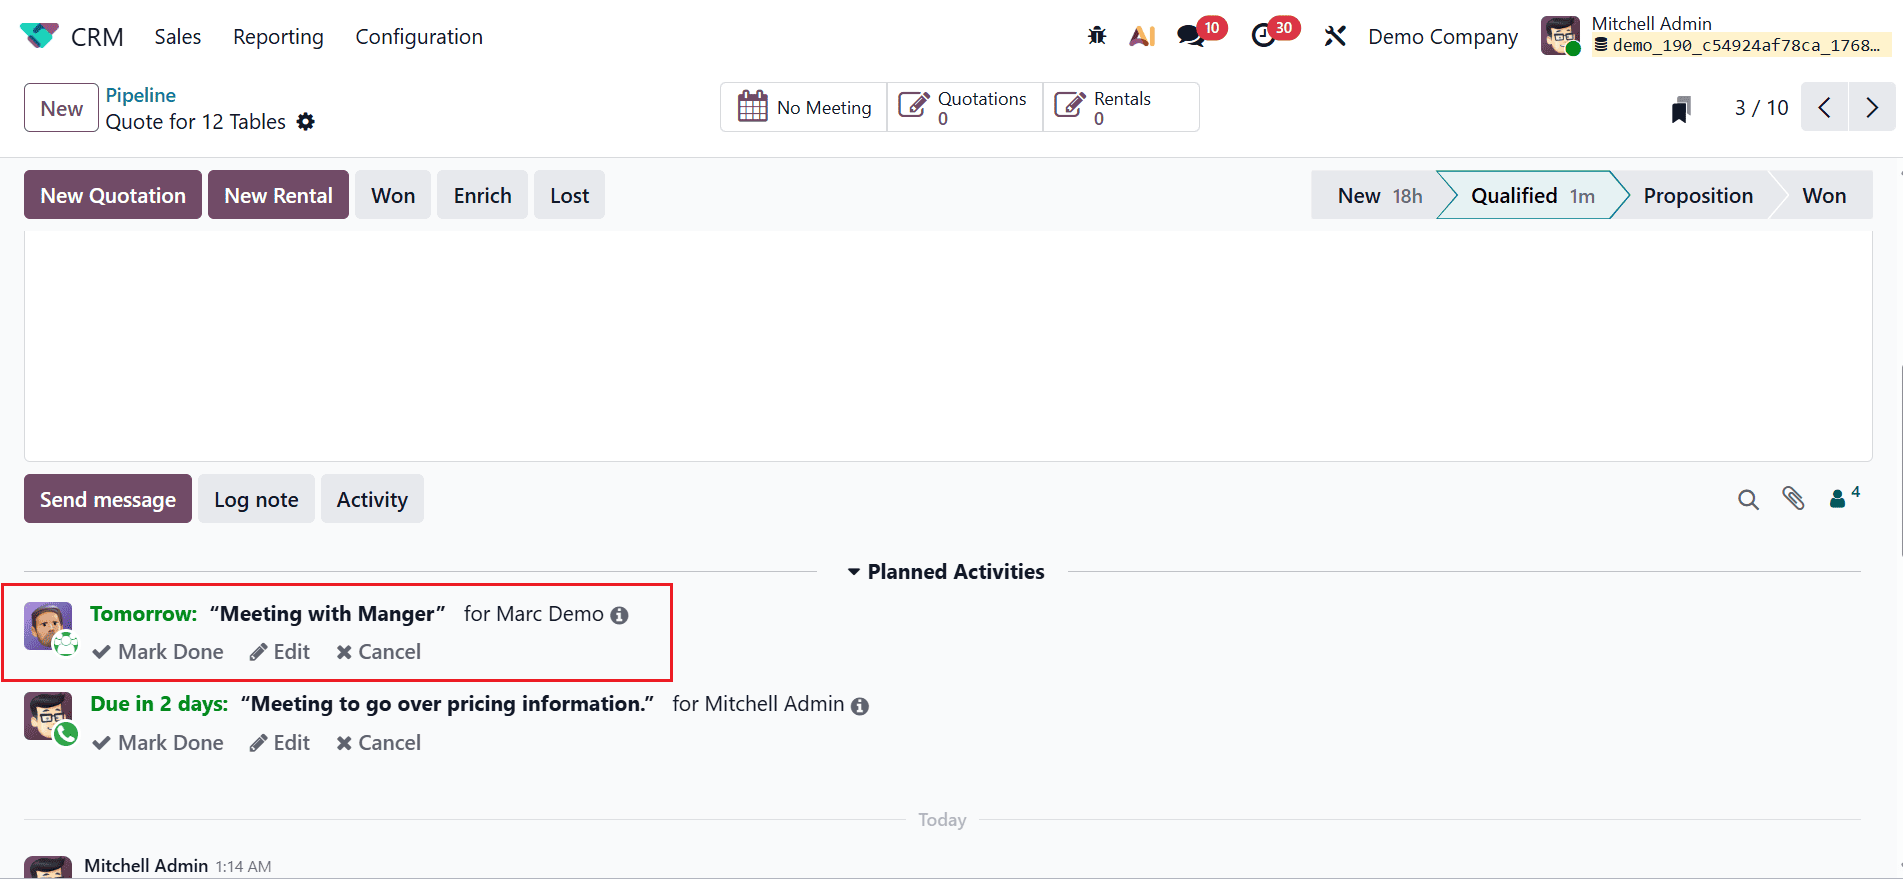
Now, change the selected opportunity from New to Qualified stage, as shown below:
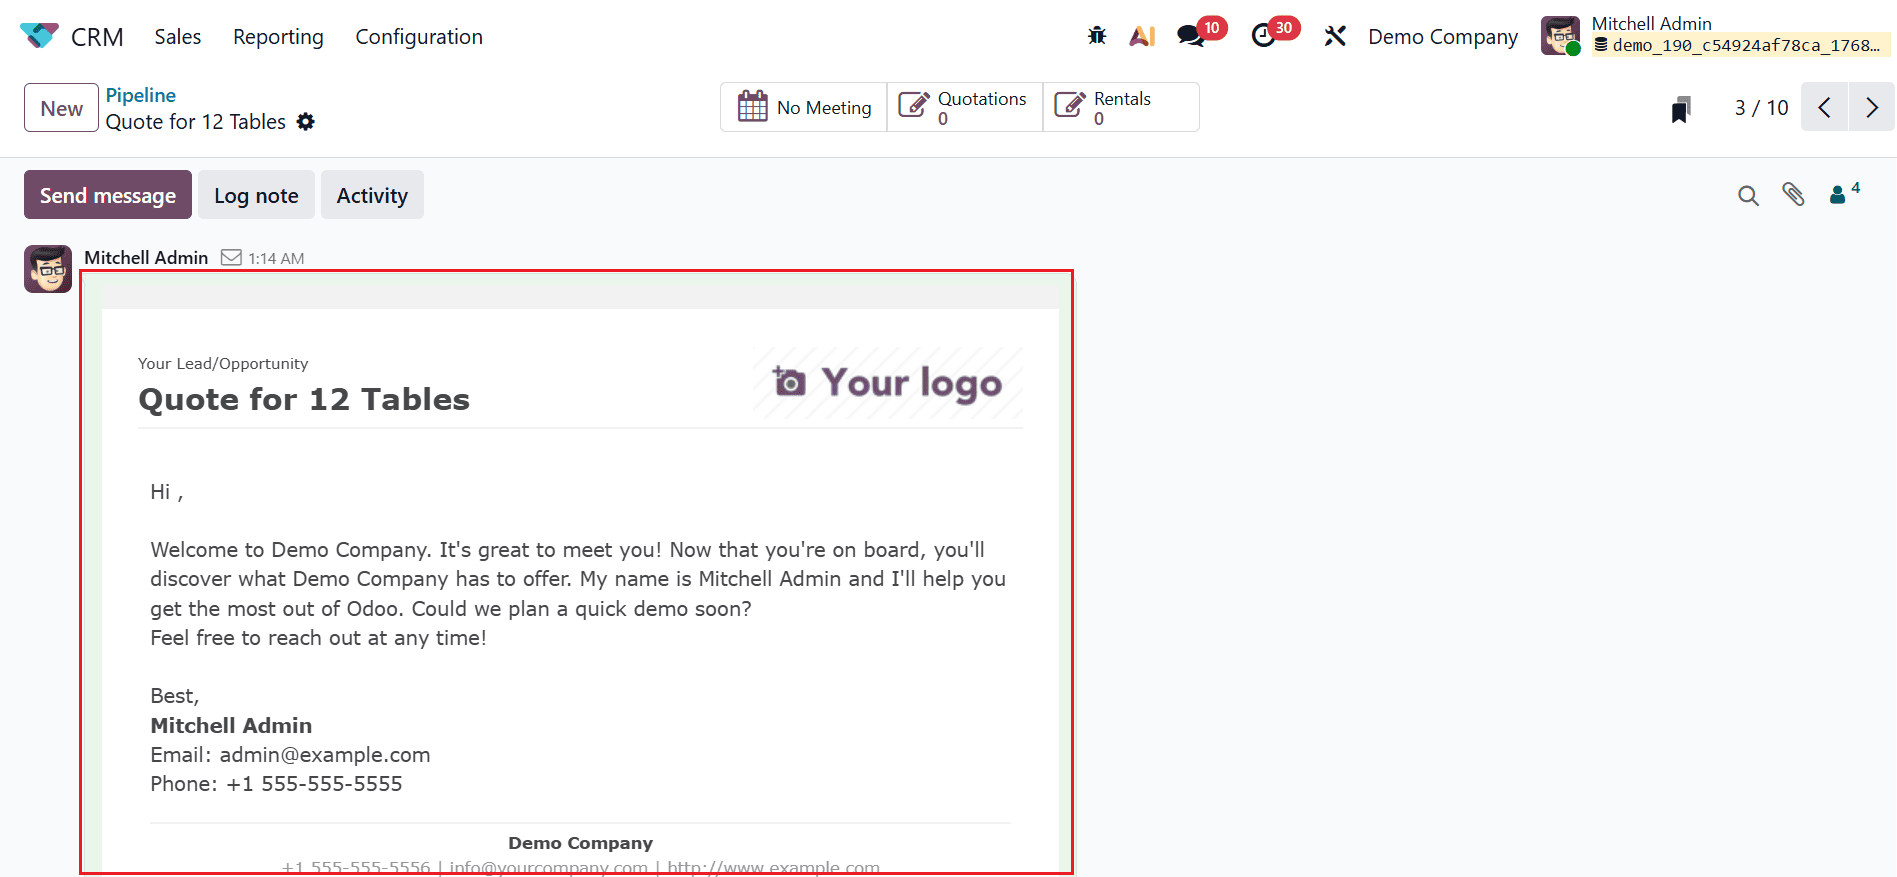
Here, you can see the mail has been sent when the opportunity reaches the Qualified stage.
You can also review the details of the scheduled meeting.
Here, you can see Anita Oliver became a follower of the opportunity when it reached the Qualified stage.
Using automation rules in Odoo 19 CRM enables businesses to transform manual sales activities into structured, efficient workflows. Automation enhances data accuracy, accelerates lead management, and ensures no opportunity is missed. With well-planned rules, sales teams can maintain consistency while adapting to growing business needs. Odoo 19 CRM automation not only boosts productivity but also enhances customer experience through timely actions and follow-ups. By using these tools effectively, organizations can empower sales teams, improve decision-making, and drive scalable, long-term growth.
To read more about How to Apply Automation Rules in Odoo 18 CRM Stages, refer to our blog How to Apply Automation Rules in Odoo 18 CRM Stages.