Based on the amounts bought or received, the bill control policy in Odoo 19's purchasing app establishes how much suppliers will charge for each purchase order (PO).
One crucial step in the purchasing process that requires accuracy is creating vendor bills. With vendor bills that are directly connected to the vendors in the system, Odoo makes it simple to register payments to them.
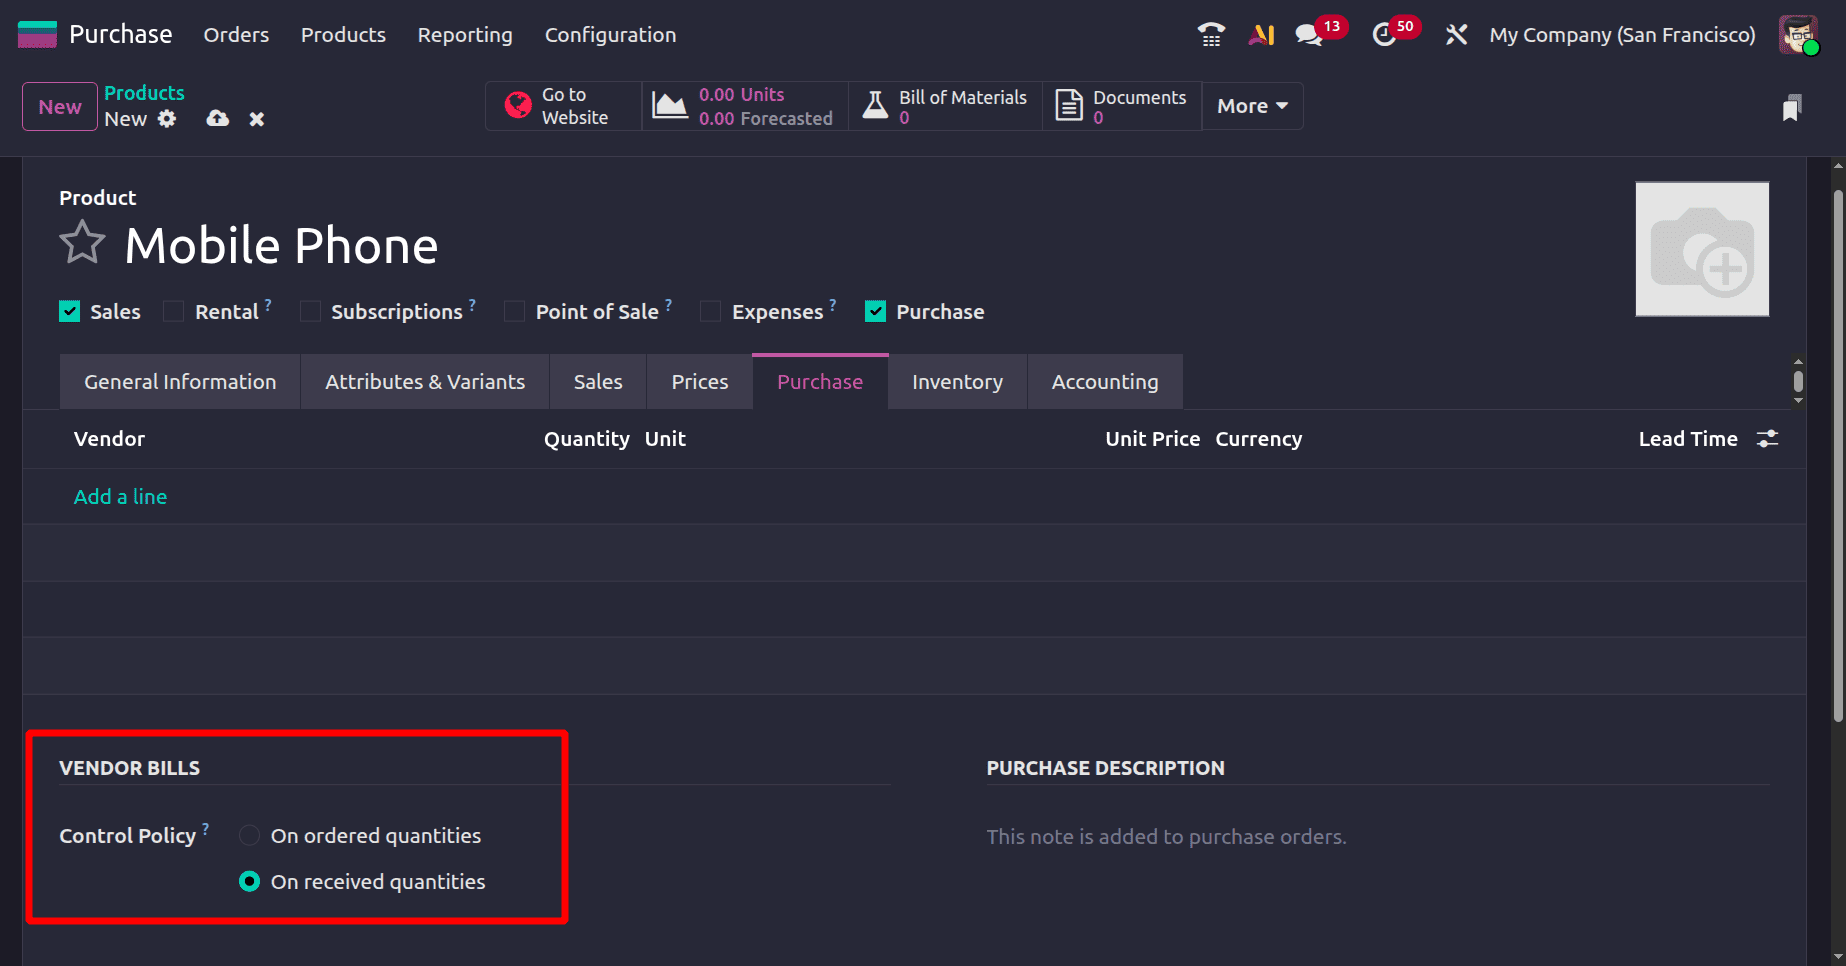
Go to the Odoo 19 Purchase module and open a product. and select the Purchase tab to view the bill control policy. Ordered quantity and Received quantity are the two options for bill control.
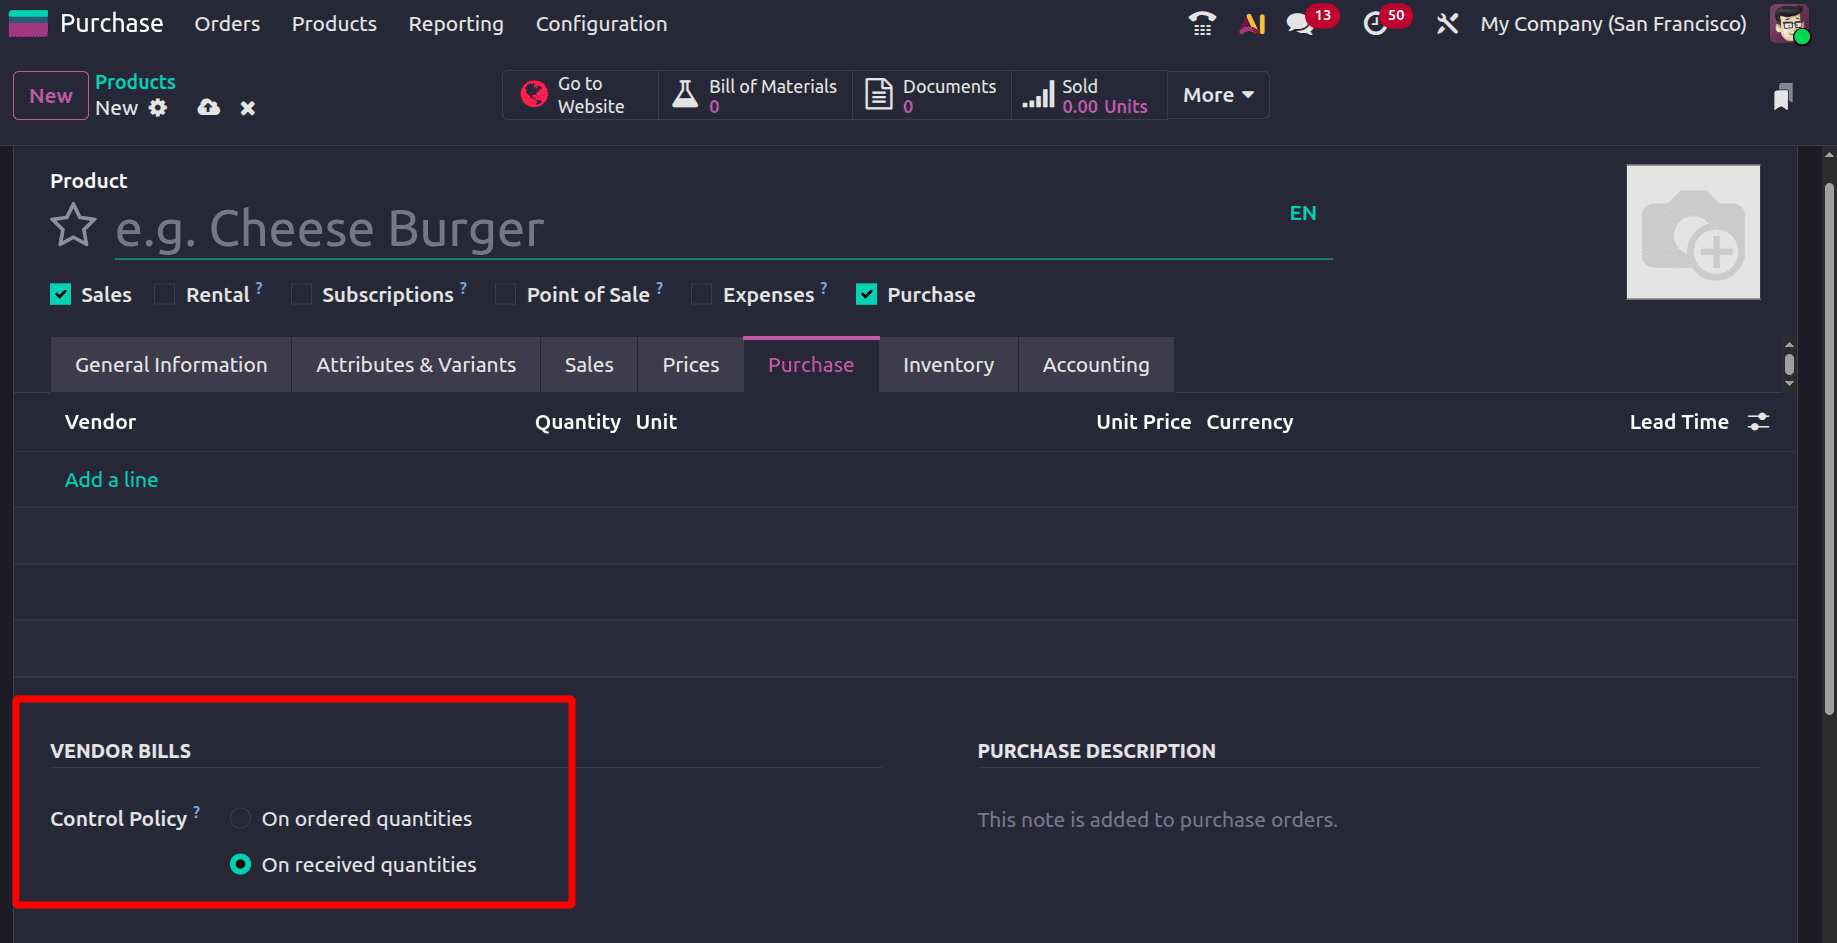
- Ordered Quantities: Only the ordered quantities will be included in the bill if the control policy is set to ordered quantities. If the quantity that was ordered and the quantity that was received differ, the bill will only be generated for the ordered quantity.
- Received Quantities: Only the received quantities will be included in the bill if the control policy is set to Received Quantities. In the event where the ordered and received quantities differ, yet the bill is generated for the received quantity
The chosen policy will be the Bill control Policy for created items.
Create Bill based on Ordered Quantities
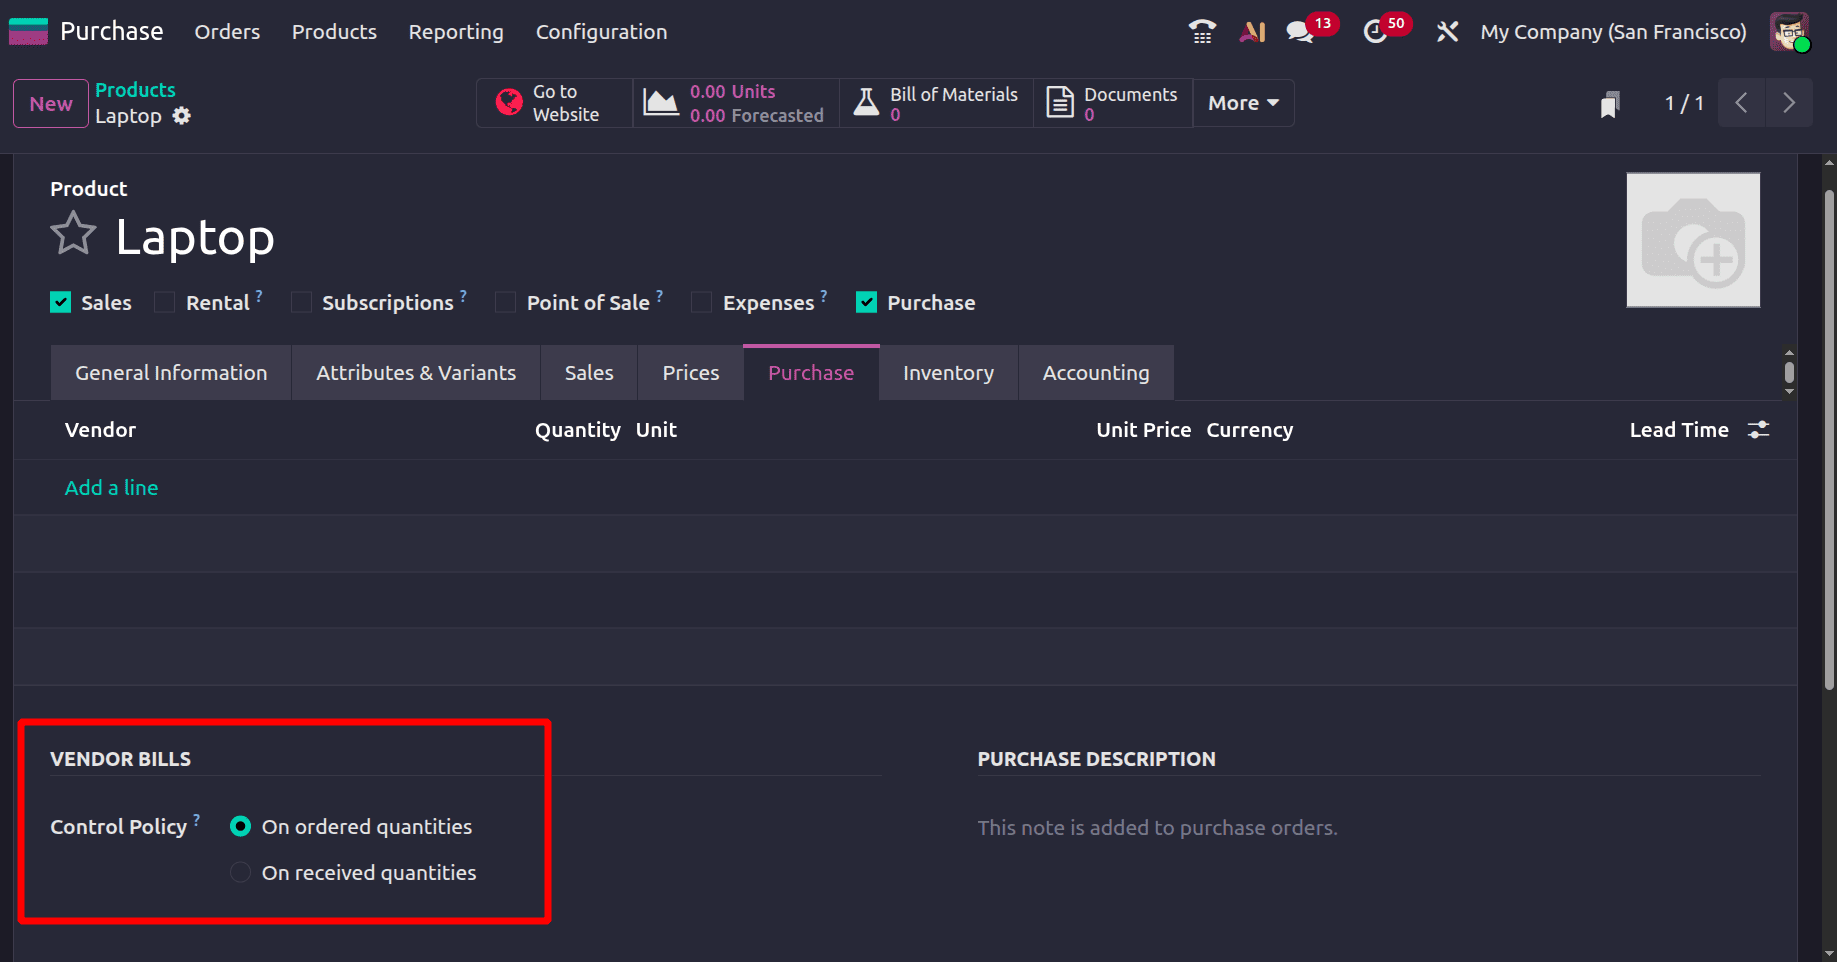
Let's make a new product with ordered quantities as the default policy. Save it after the product details have been entered. The vendor bill control policy is set to the Ordered Quantities on the product's purchase tab.
In the Purchase module, now generate a new Request for Quotation (RFQ). Verify the RFQ, choose the newly generated product on the order line, and indicate the necessary quantity. Ten laptops are ordered here.
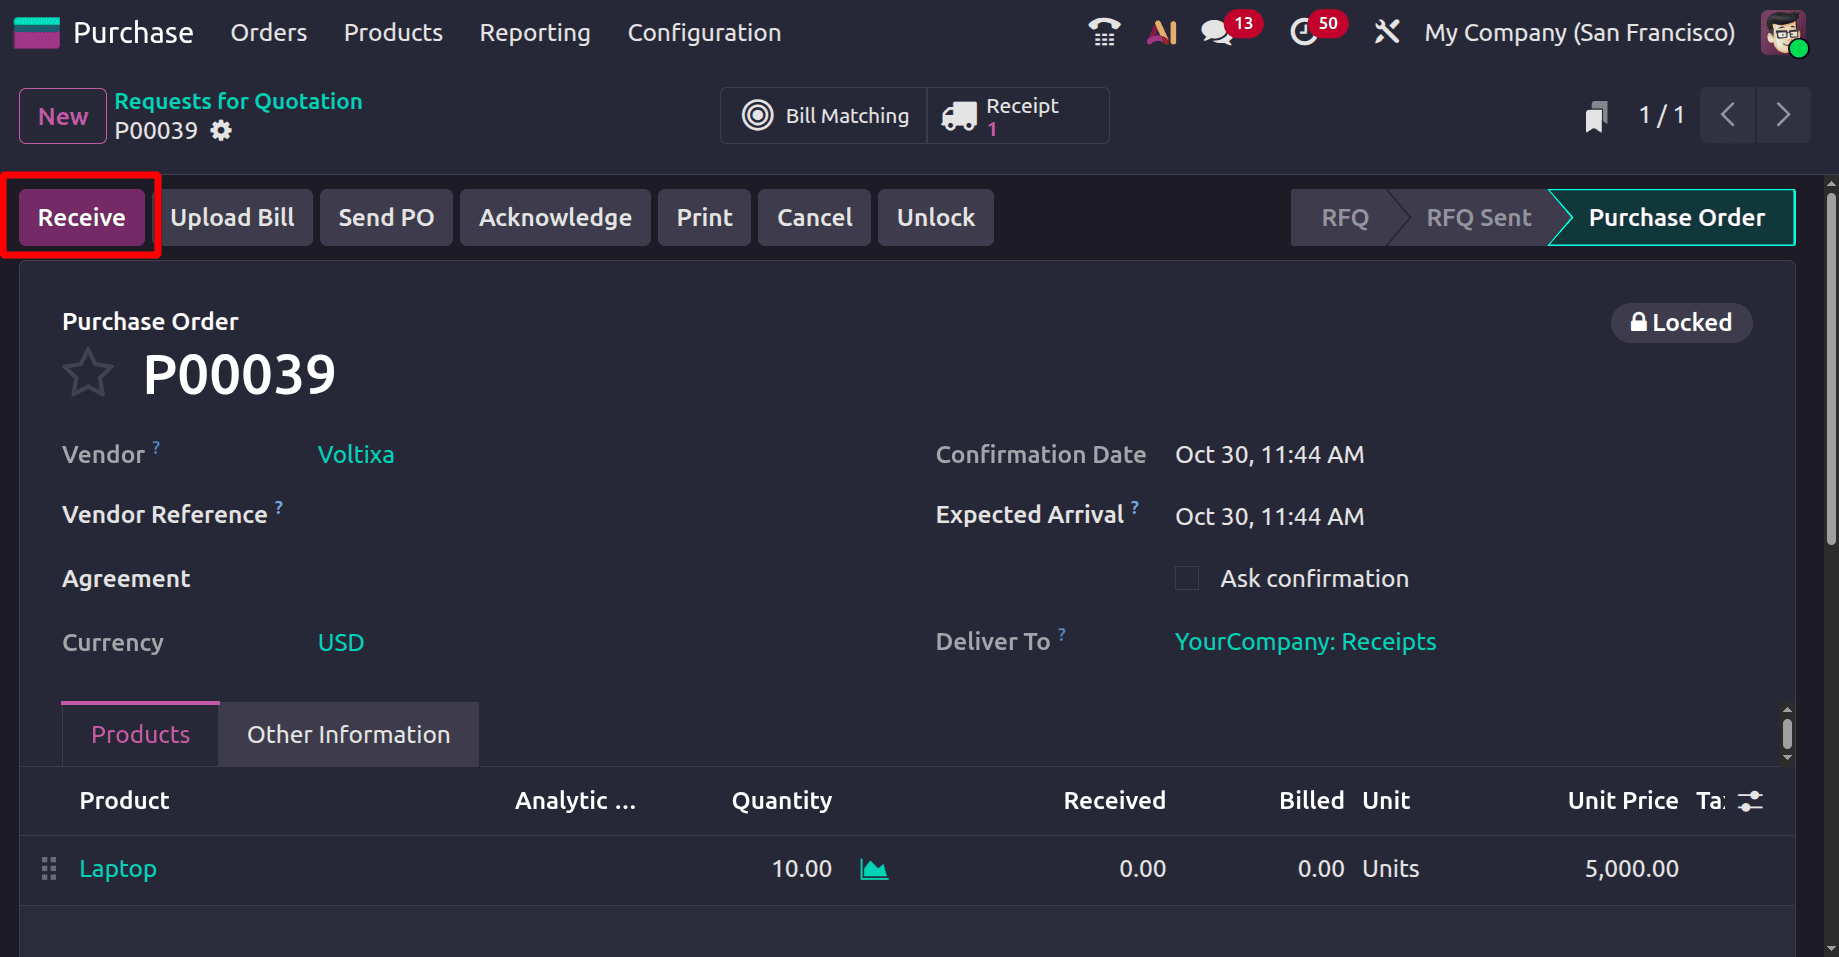
You can proceed with receiving the products and verifying the amount to be received once the purchase order has been confirmed. Here, the company received 15 quantities.
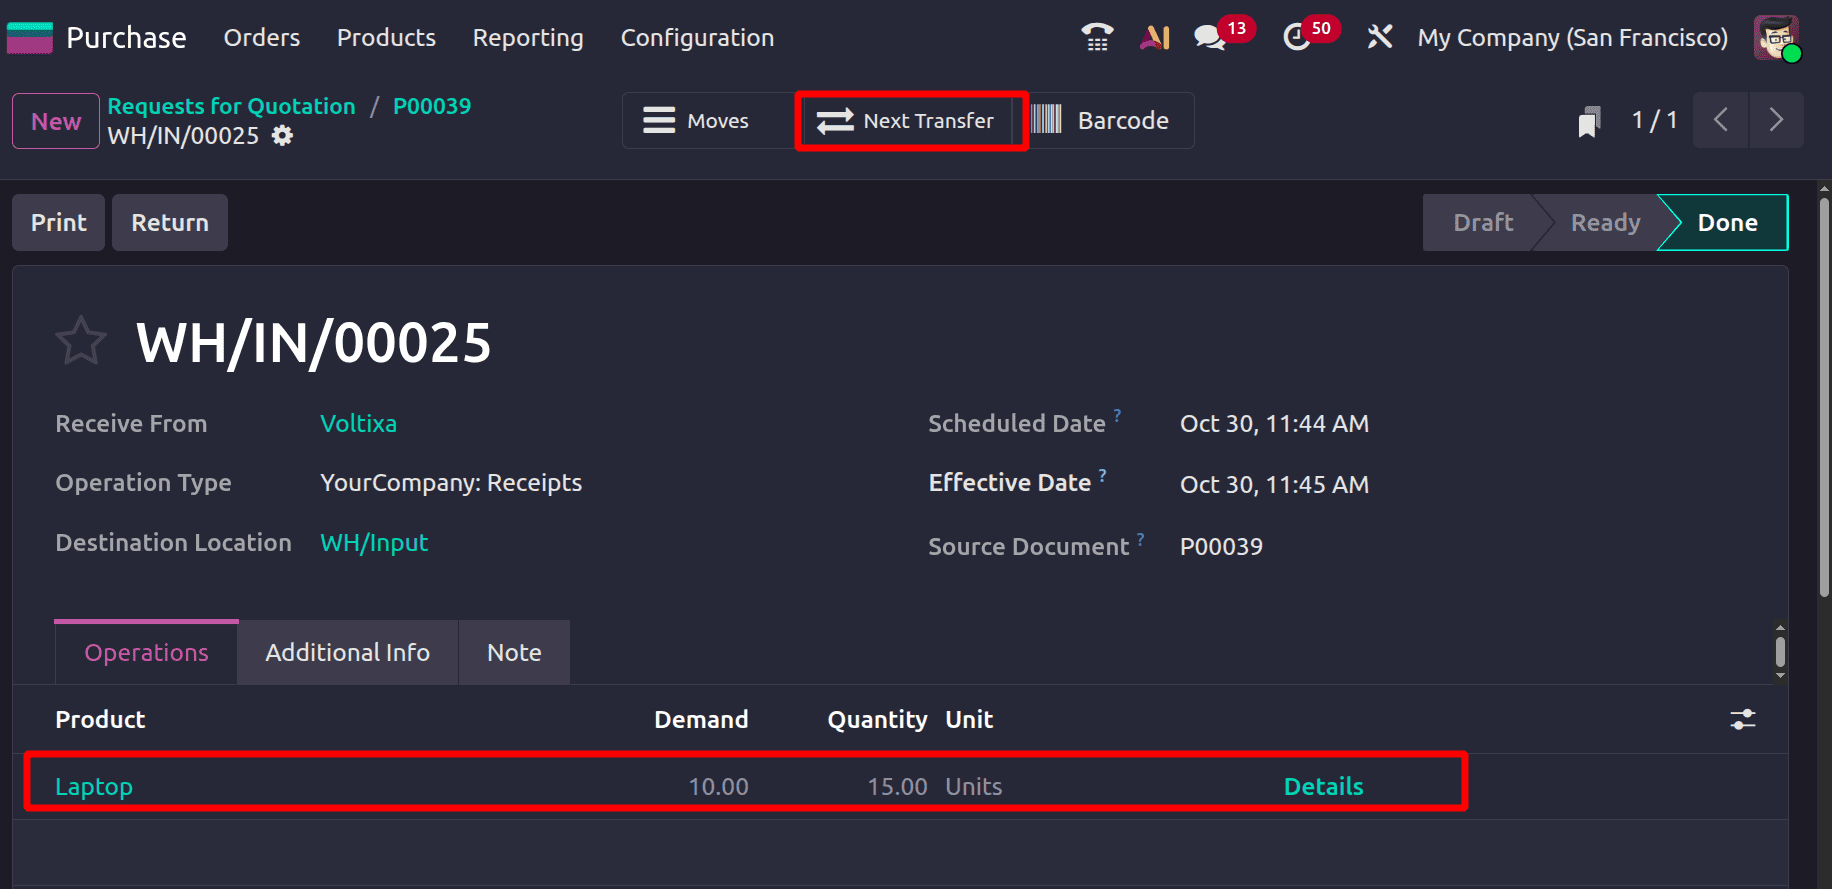
Here, the Incoming Shipment is in 2 steps. So the 15 quantities of Laptop received from the Vendor WH/Input location. So click on the Next Transfer.
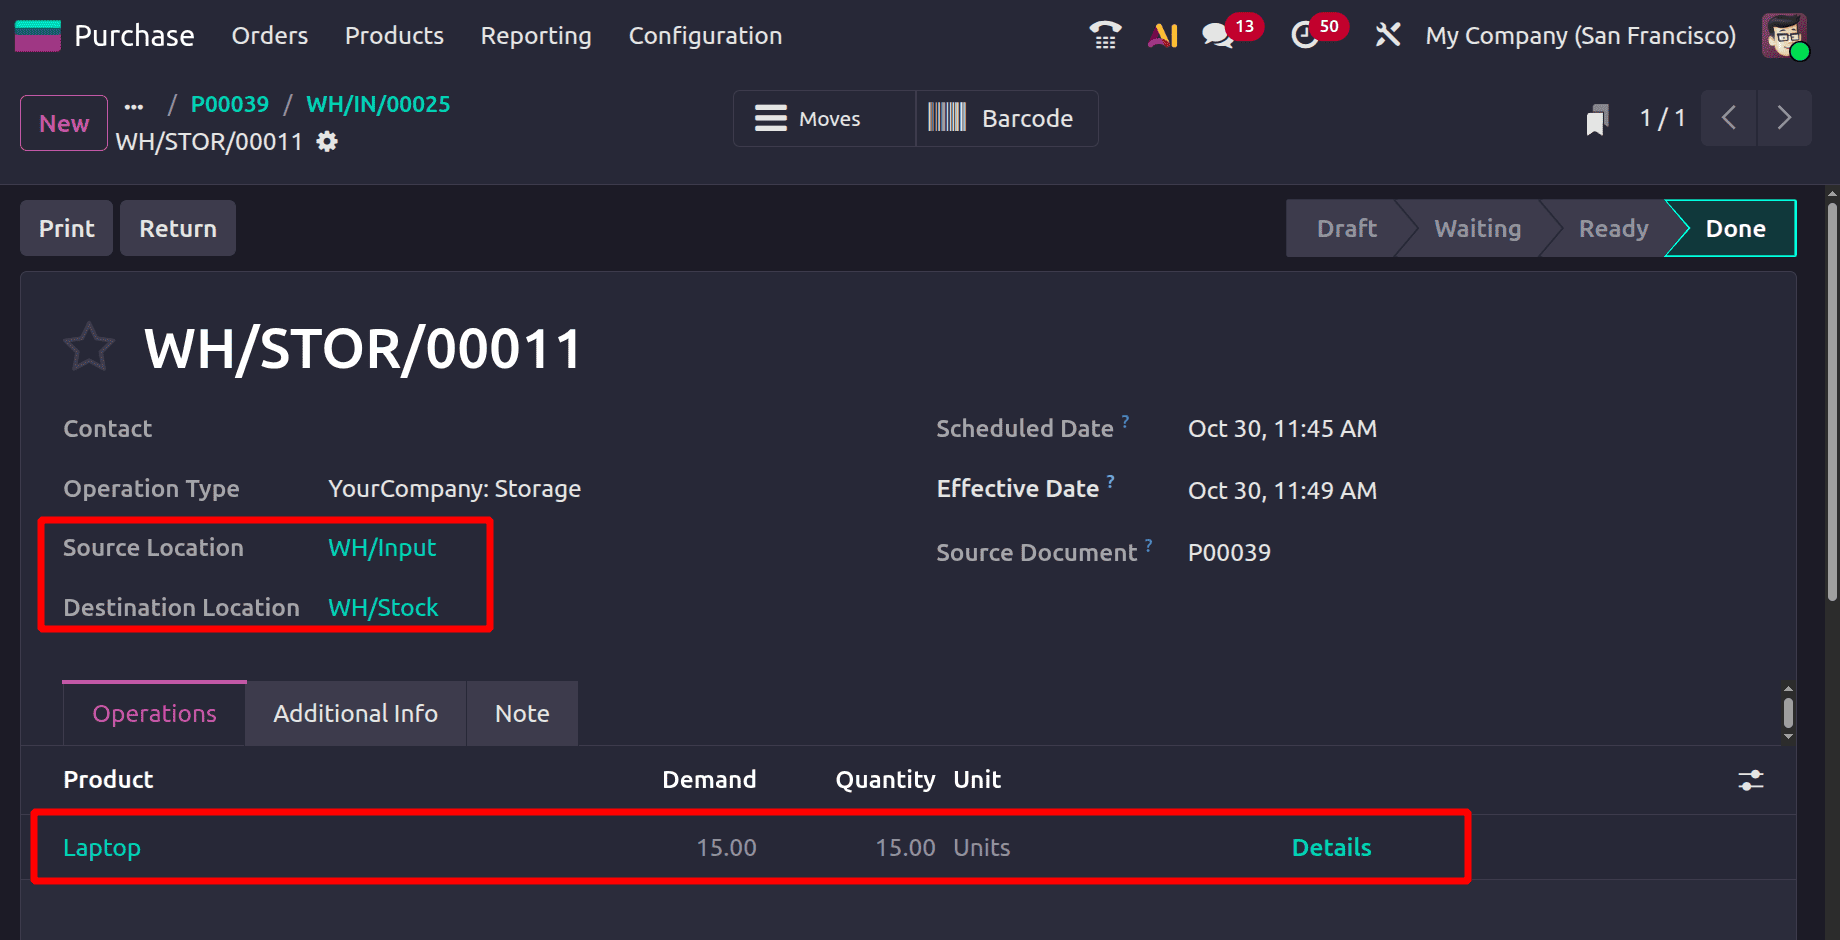
Then, validate the next transfer. Now the product has arrived in the company's stock.
Move back to the purchase order. Here, the bill will be created on the basis of the ordered quantity. To check that, click on the Upload Bill button.
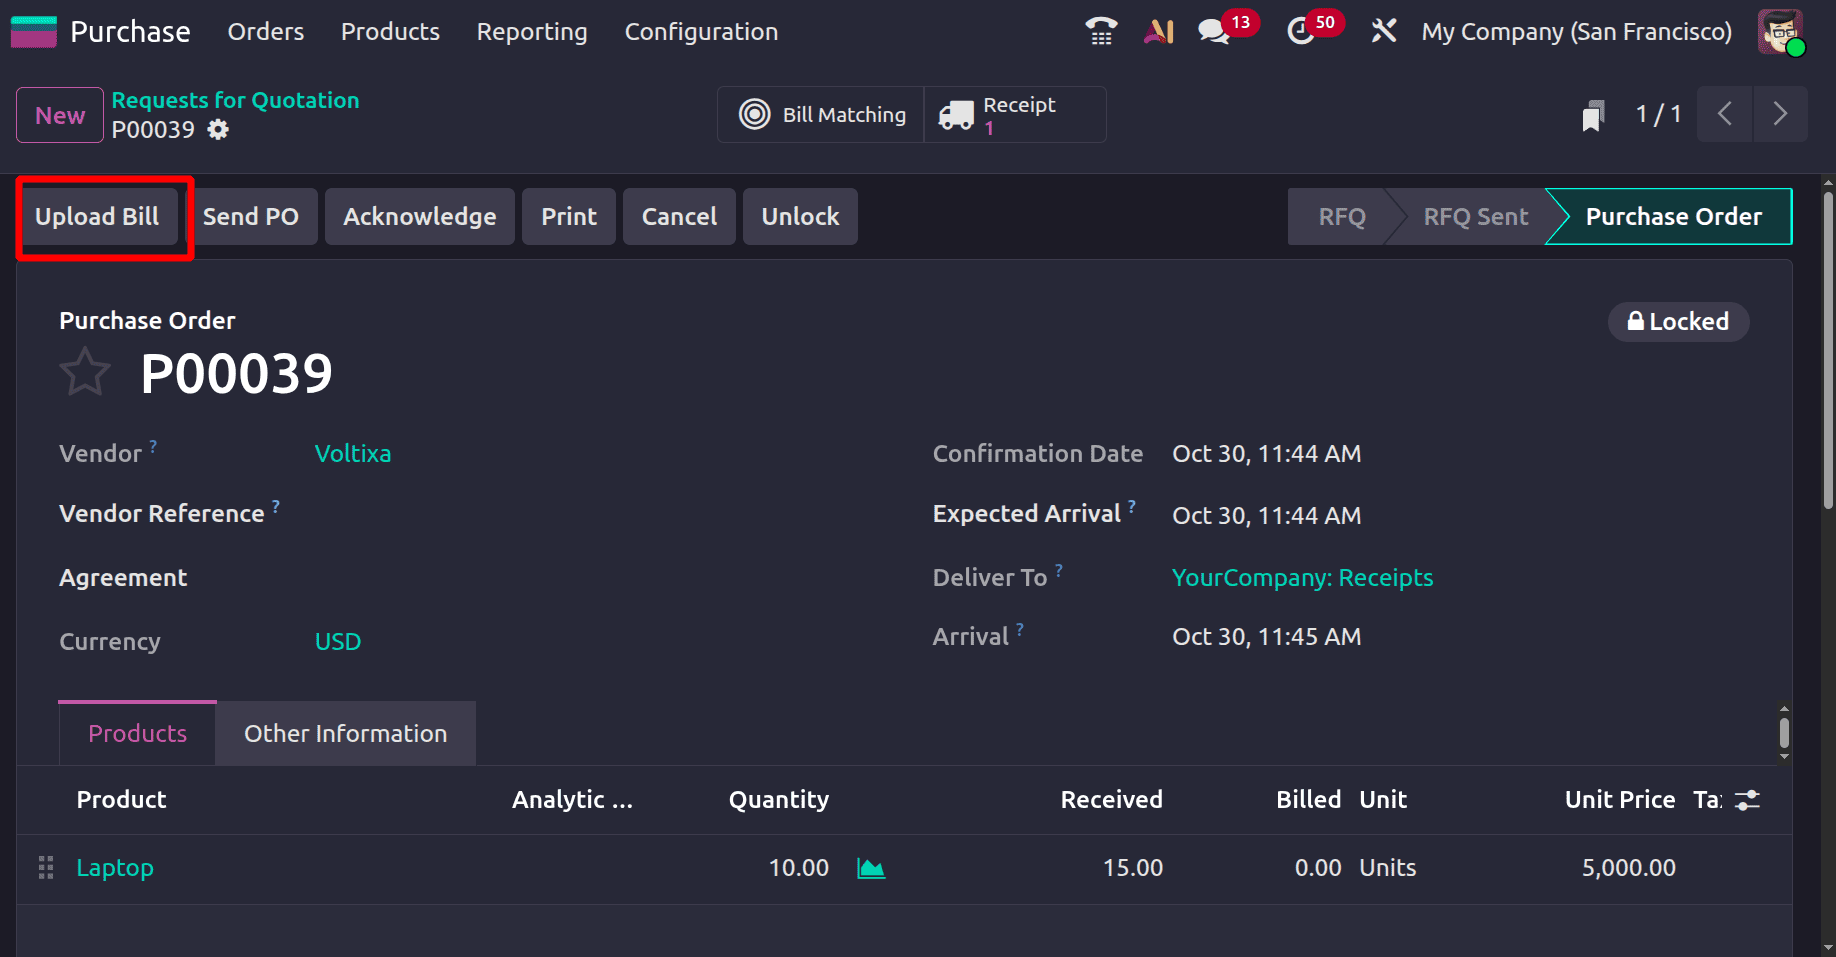
After uploading the bill, check the Orderline. Here, the bill is created only for 10 quantities of Laptopes. Confirm the bill.

Users can either edit the quantity or update the new quantity. Or use the Debit Note option to create a bill for the remaining quantities.
Create Bill based on Received Quantities
Make a different product called a mobile phone. Save the setup after selecting "Received Quantities" as the Bill Control Policy.
Next, draft a purchase order that details the required amount. Purchase ten mobile phones from the seller. After that, go ahead and get the goods.
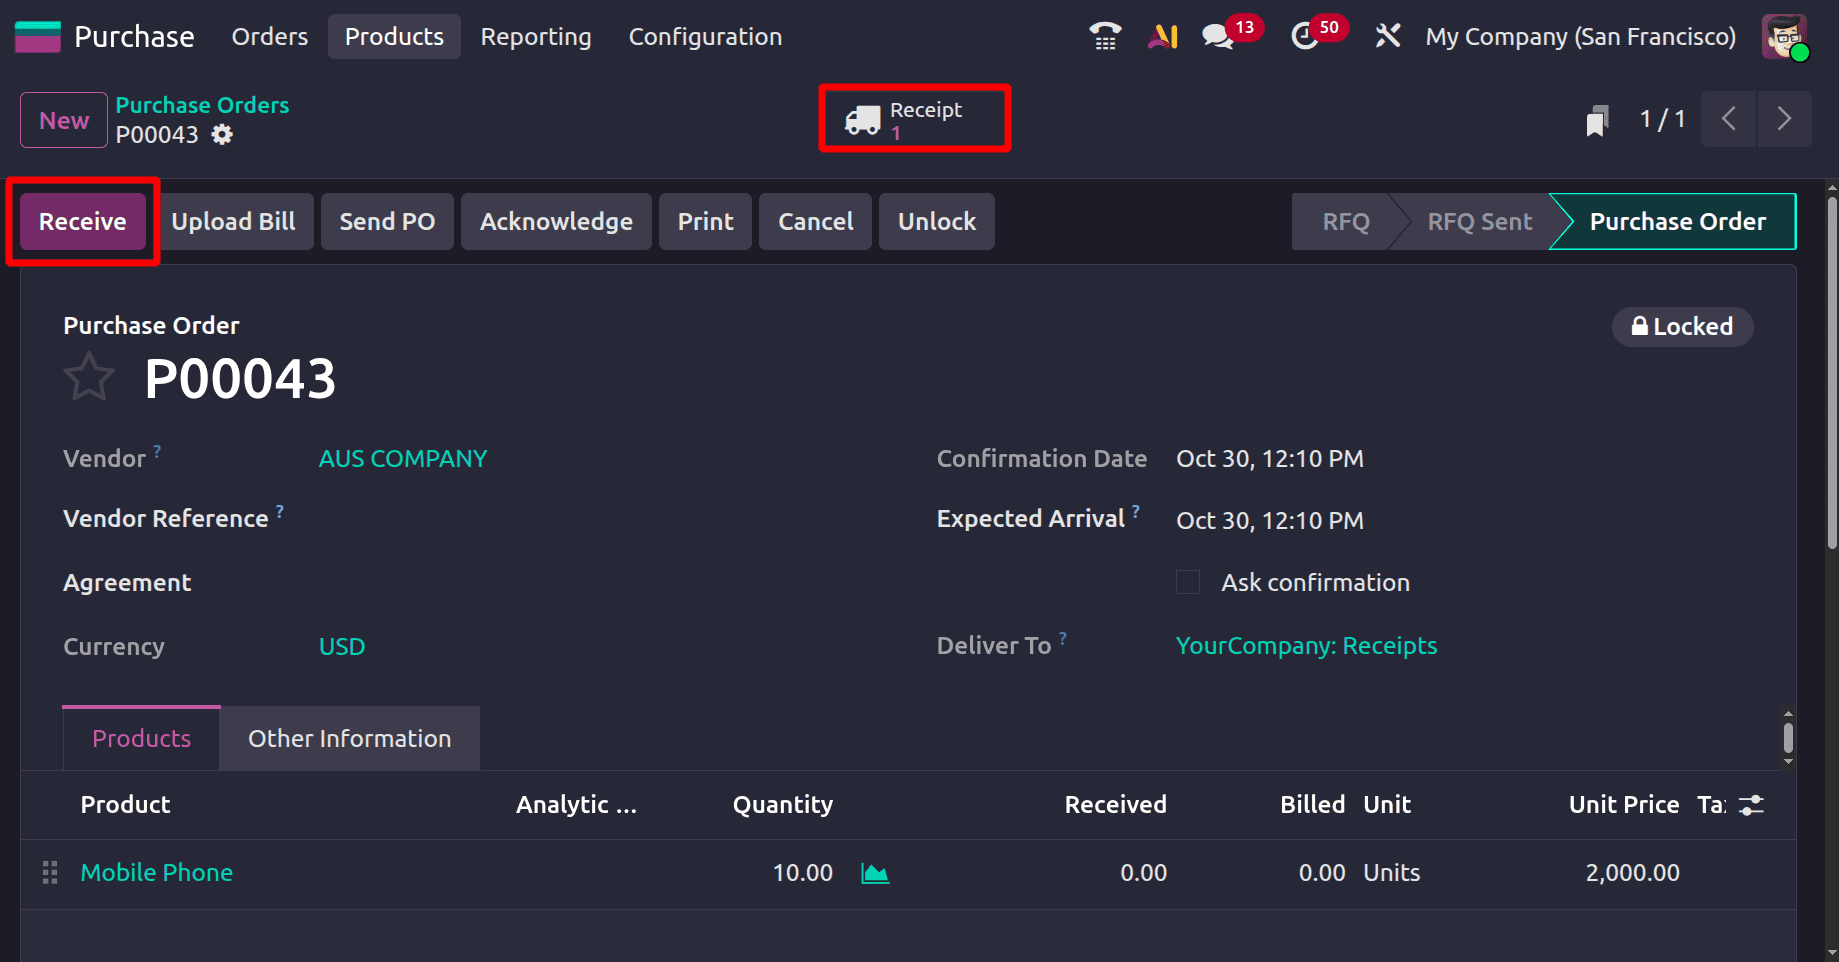
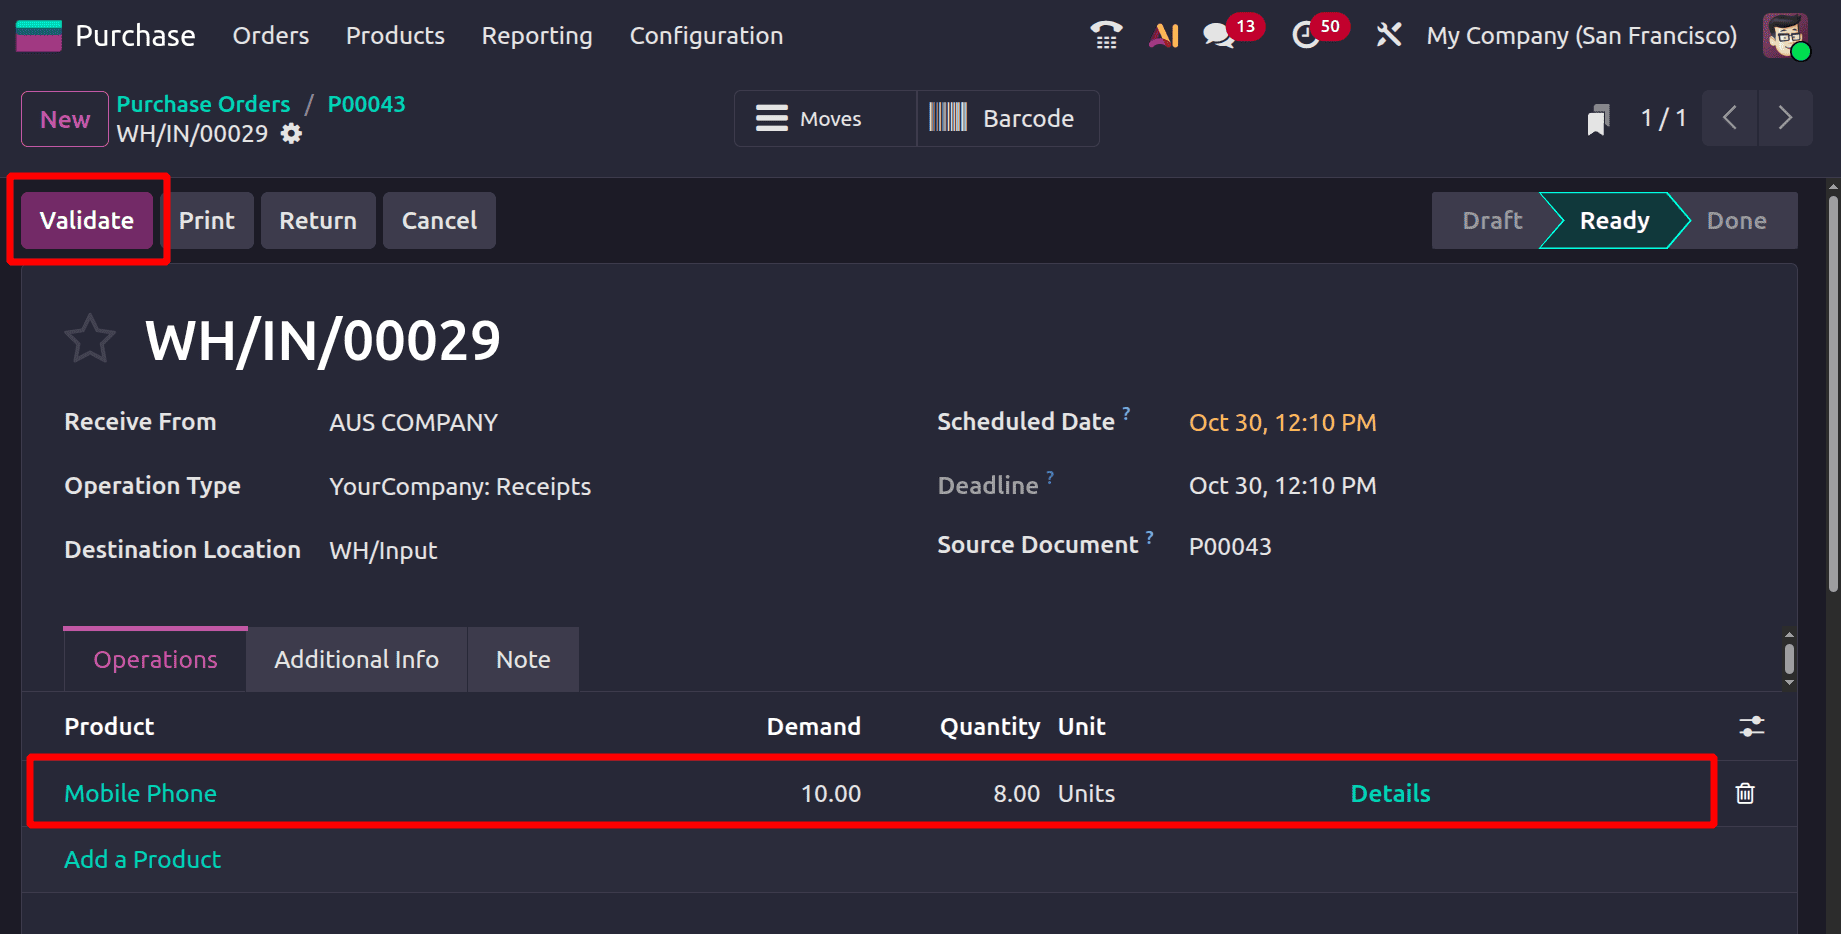
Choose the Receipt. Here, the ordered quantity is 10. But receiving just 8 quantities. Clcik on the Validate button.
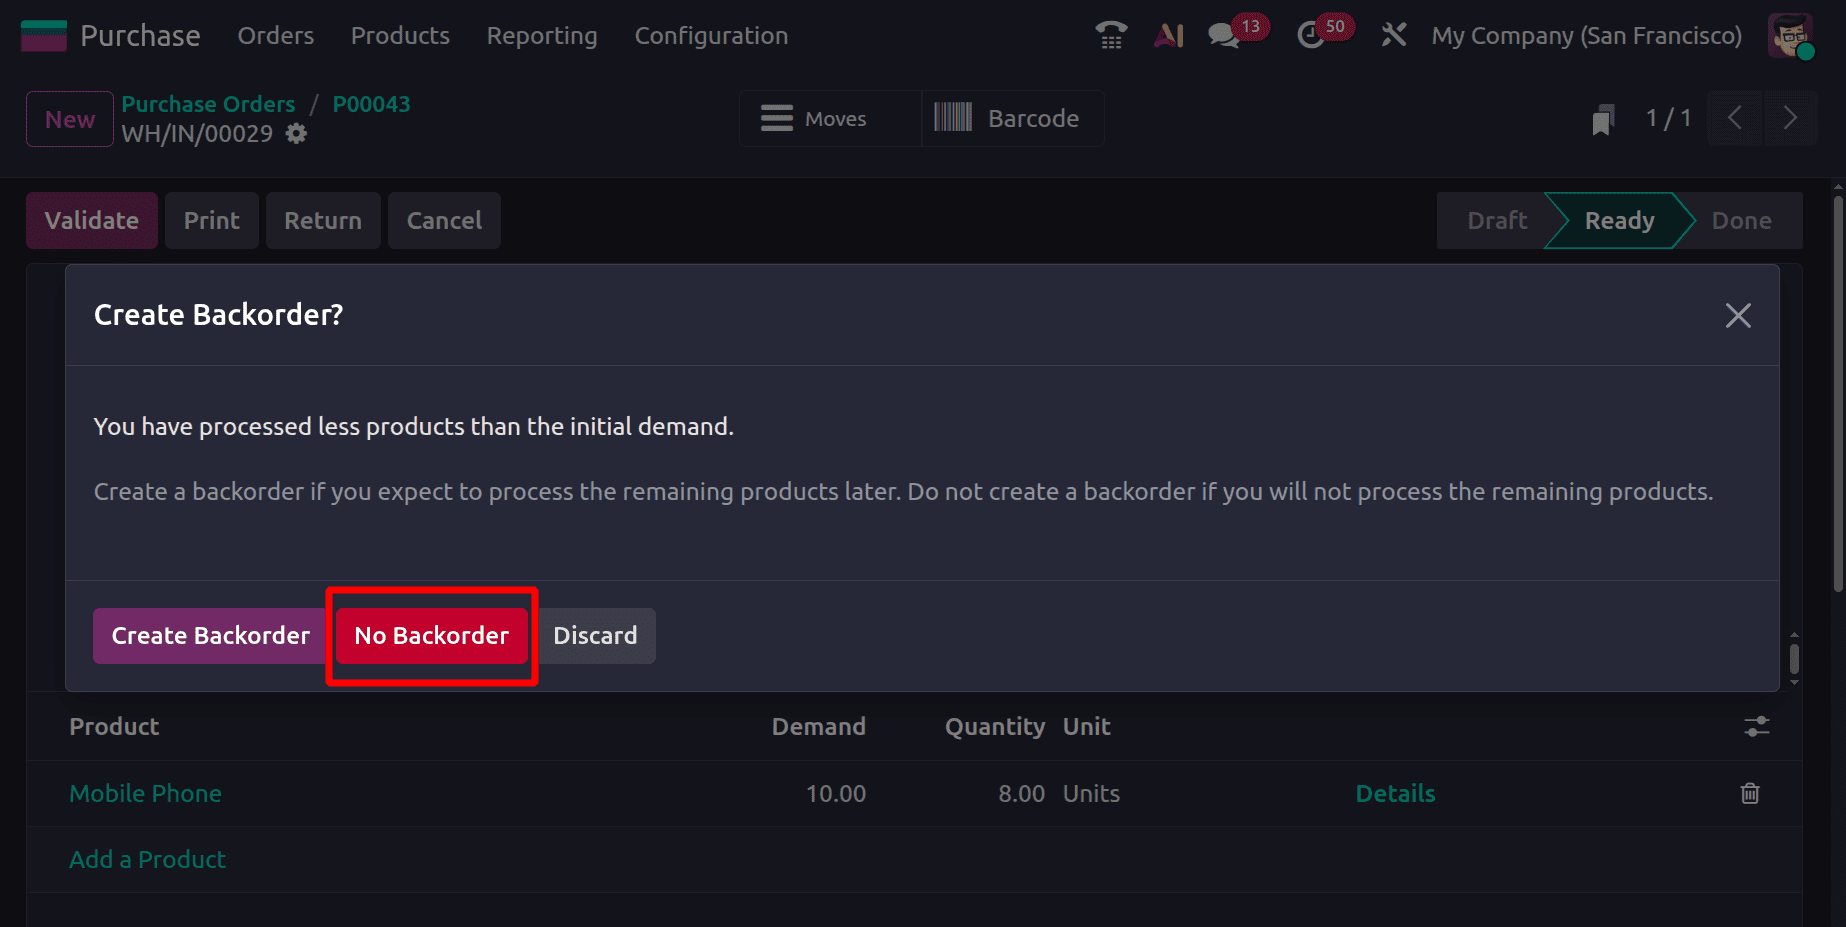
A pop-up for creating a backorder will show up once you enter a quantity that is less than what was ordered and confirm the receipt. To add backorders for the remaining quantities, click Create Back Order. Here, selecting "No Backorders" allows you to proceed without placing a backorder.
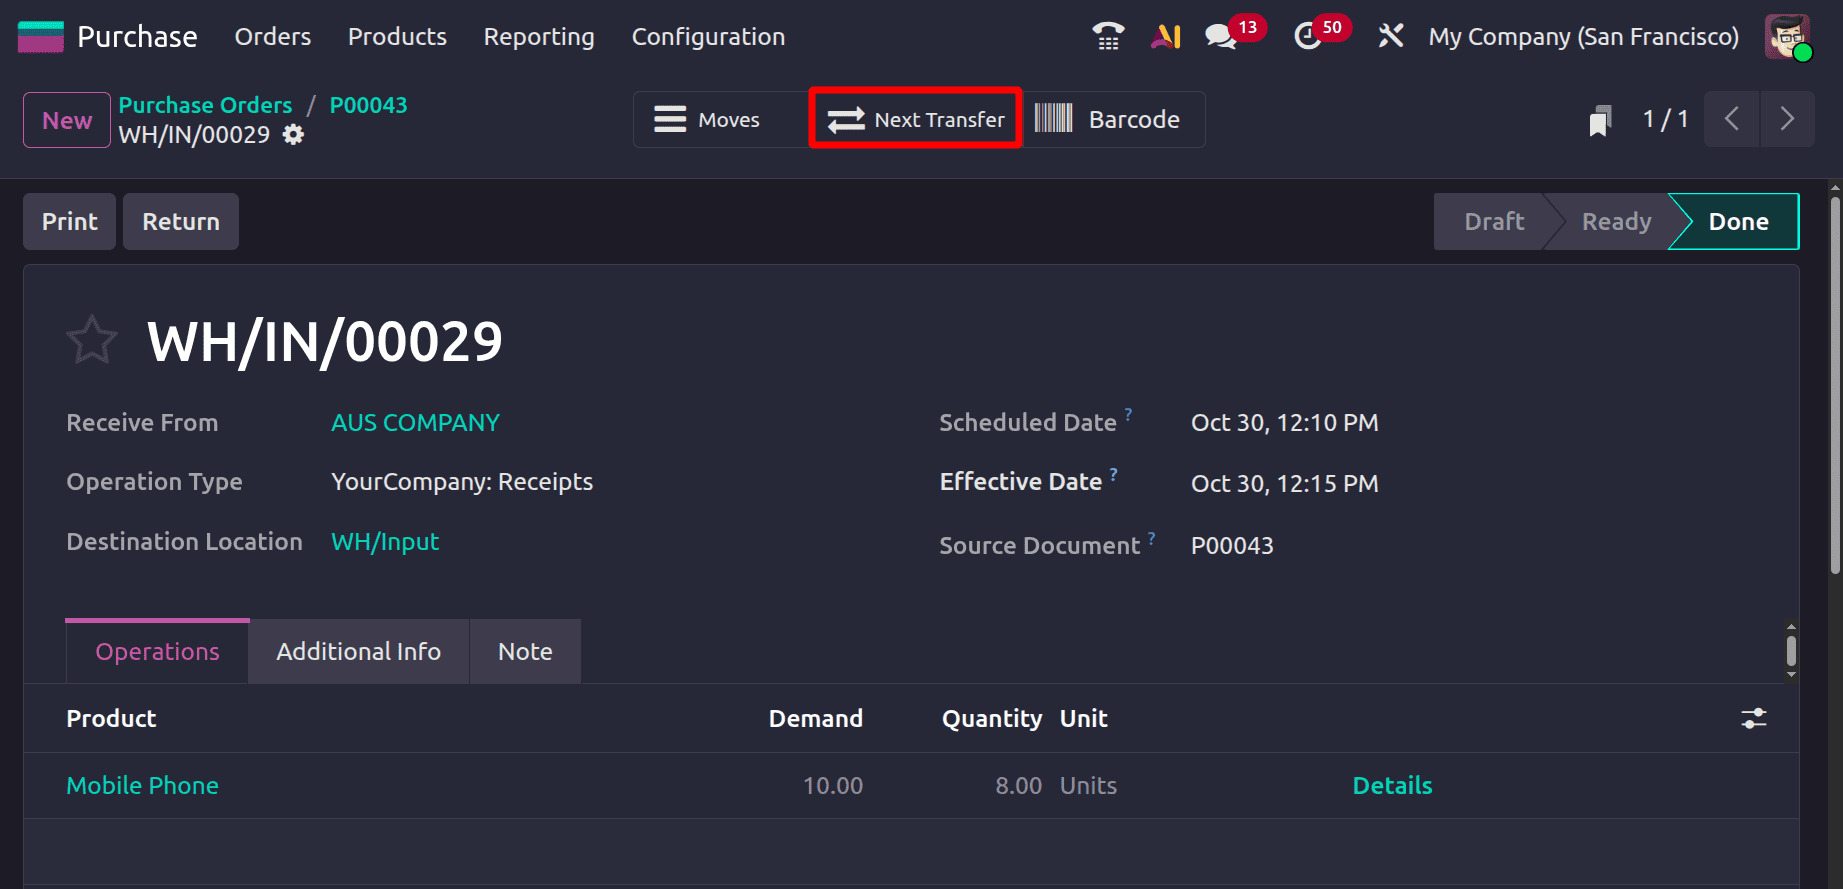
Then the receipt shows that 8 quantities arrived from the vendor location to the company's input location. Then click on the Next Transfer.
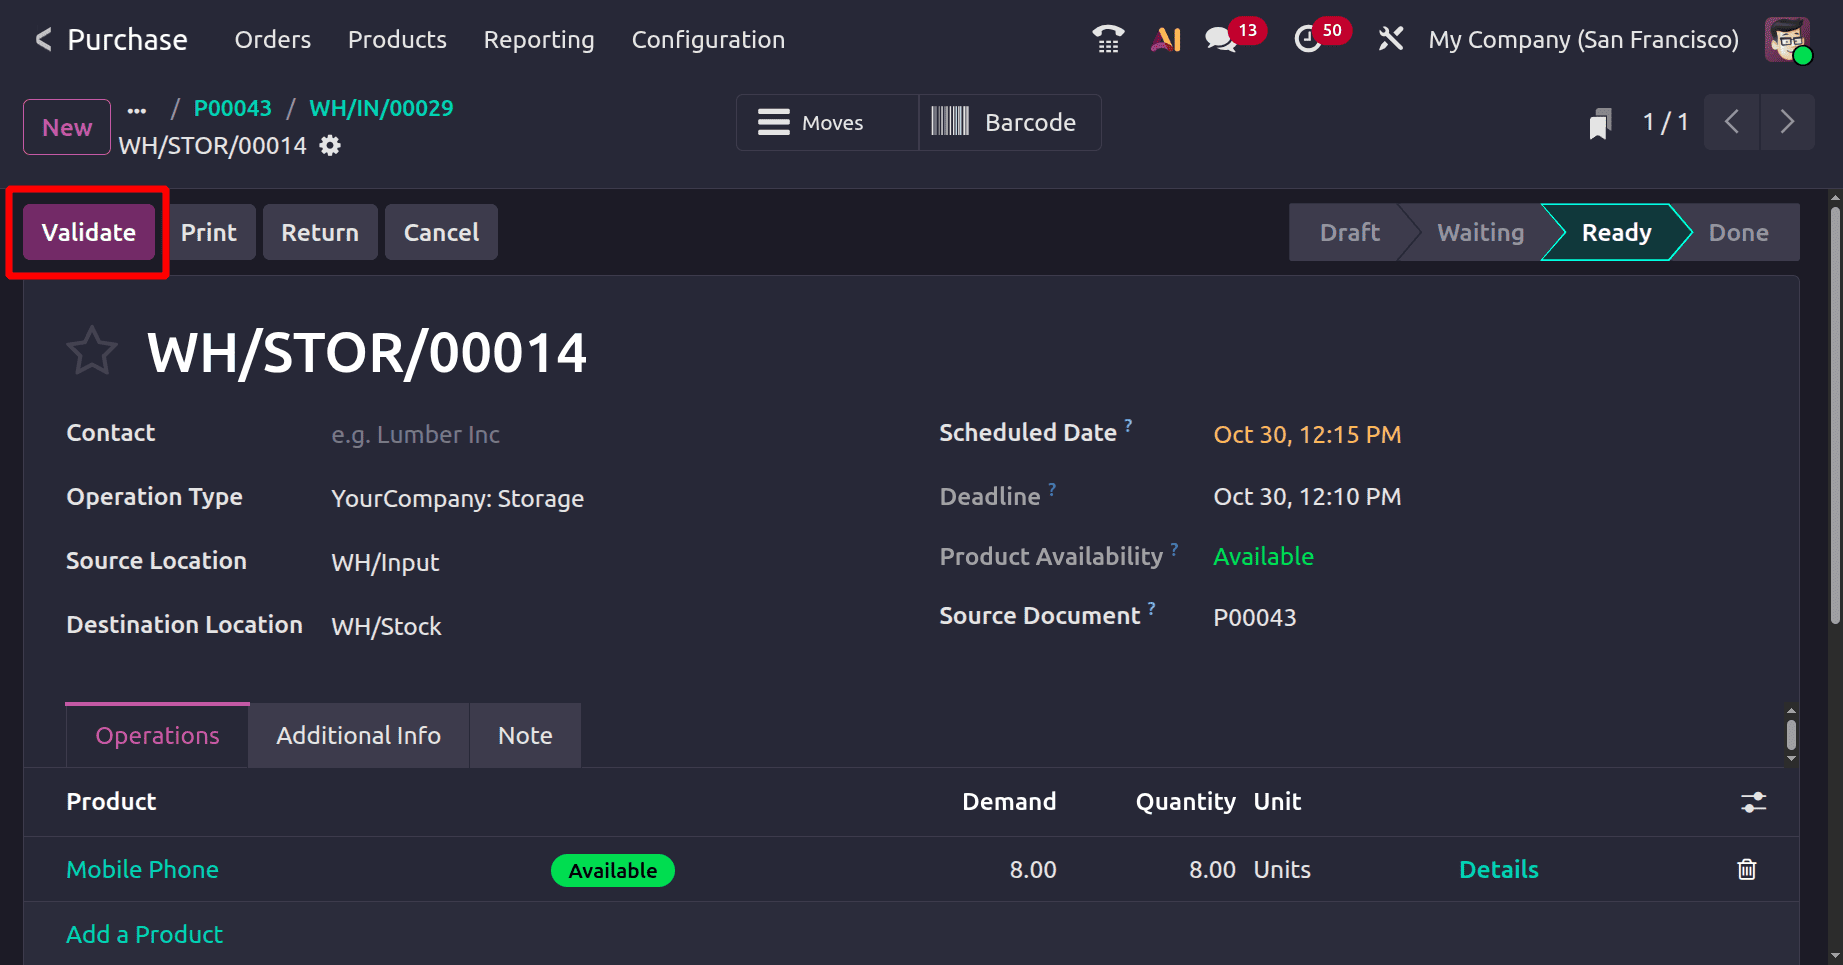
To receive product to company stock, click on the Validate button. Then the stage will change from Ready to Done.
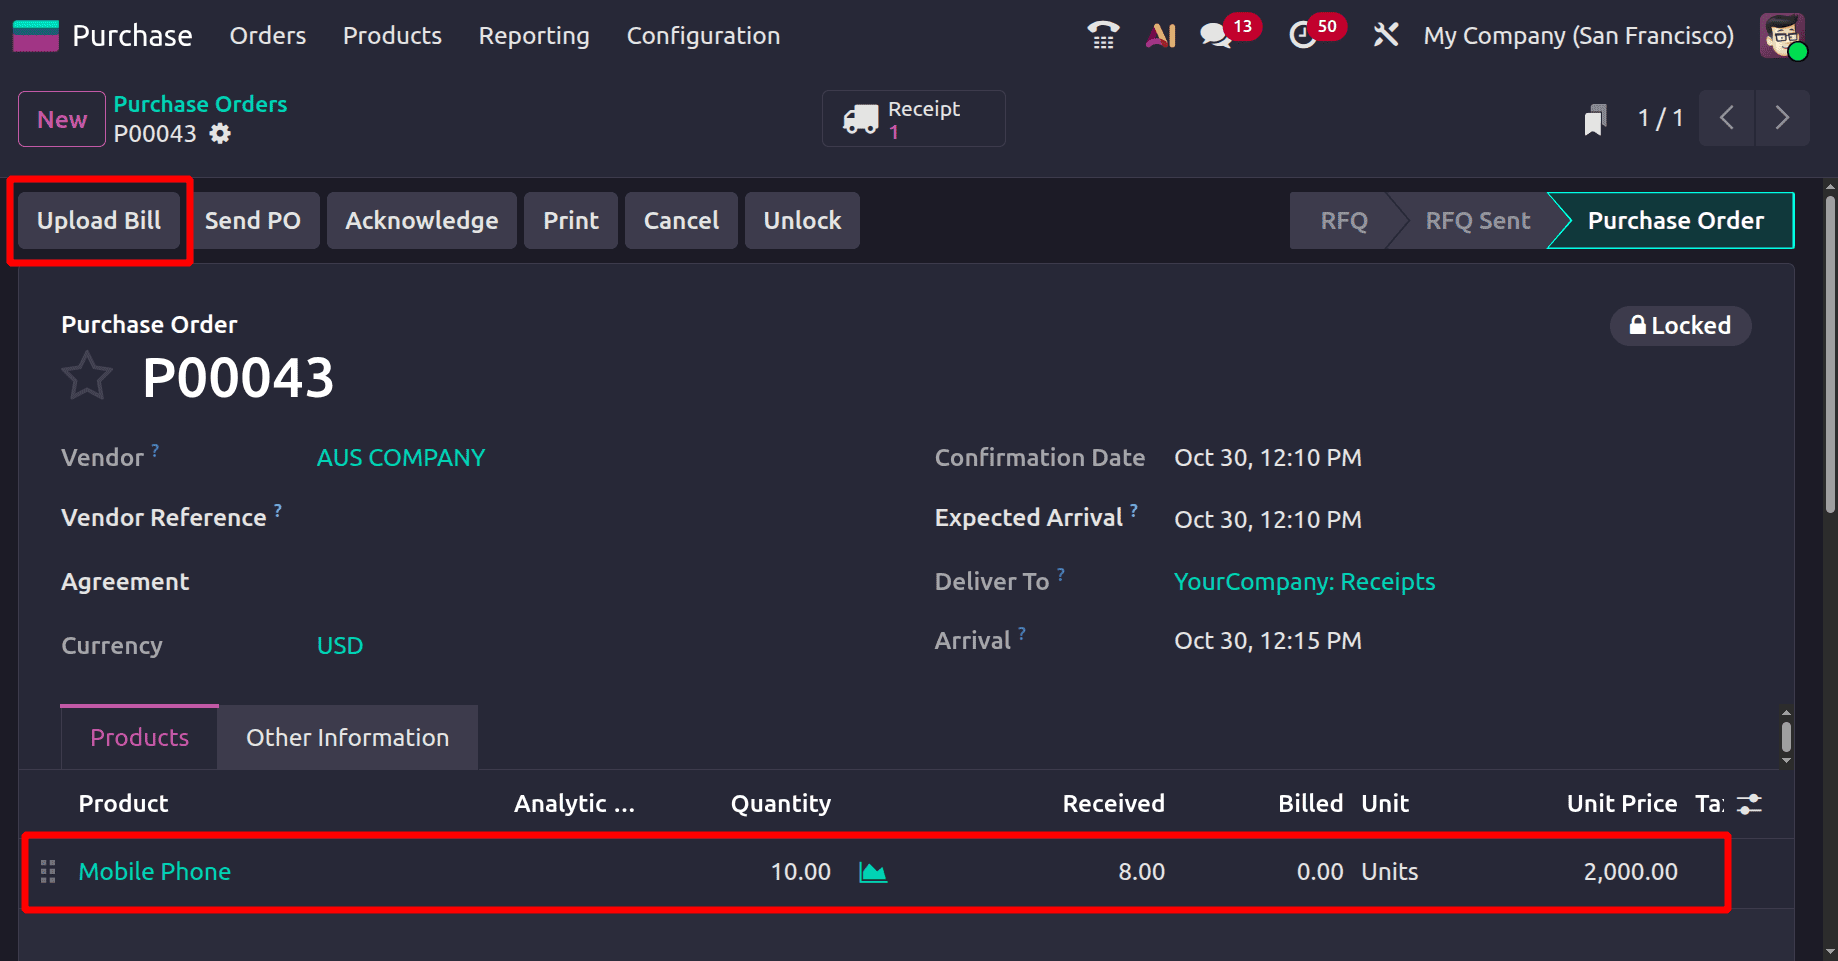
Let's move back to the purchase order. Here, the ordered quantities is 10, but the received quantities are automatically updated as 8.
Then the next step is to create a vendor bill. Click on the Upload button to add a vendor bill.
Check the uploaded bill. In the previous case, the bill was generated for the ordered quantities. But for a change, this time the bill is generated for the received quantities.
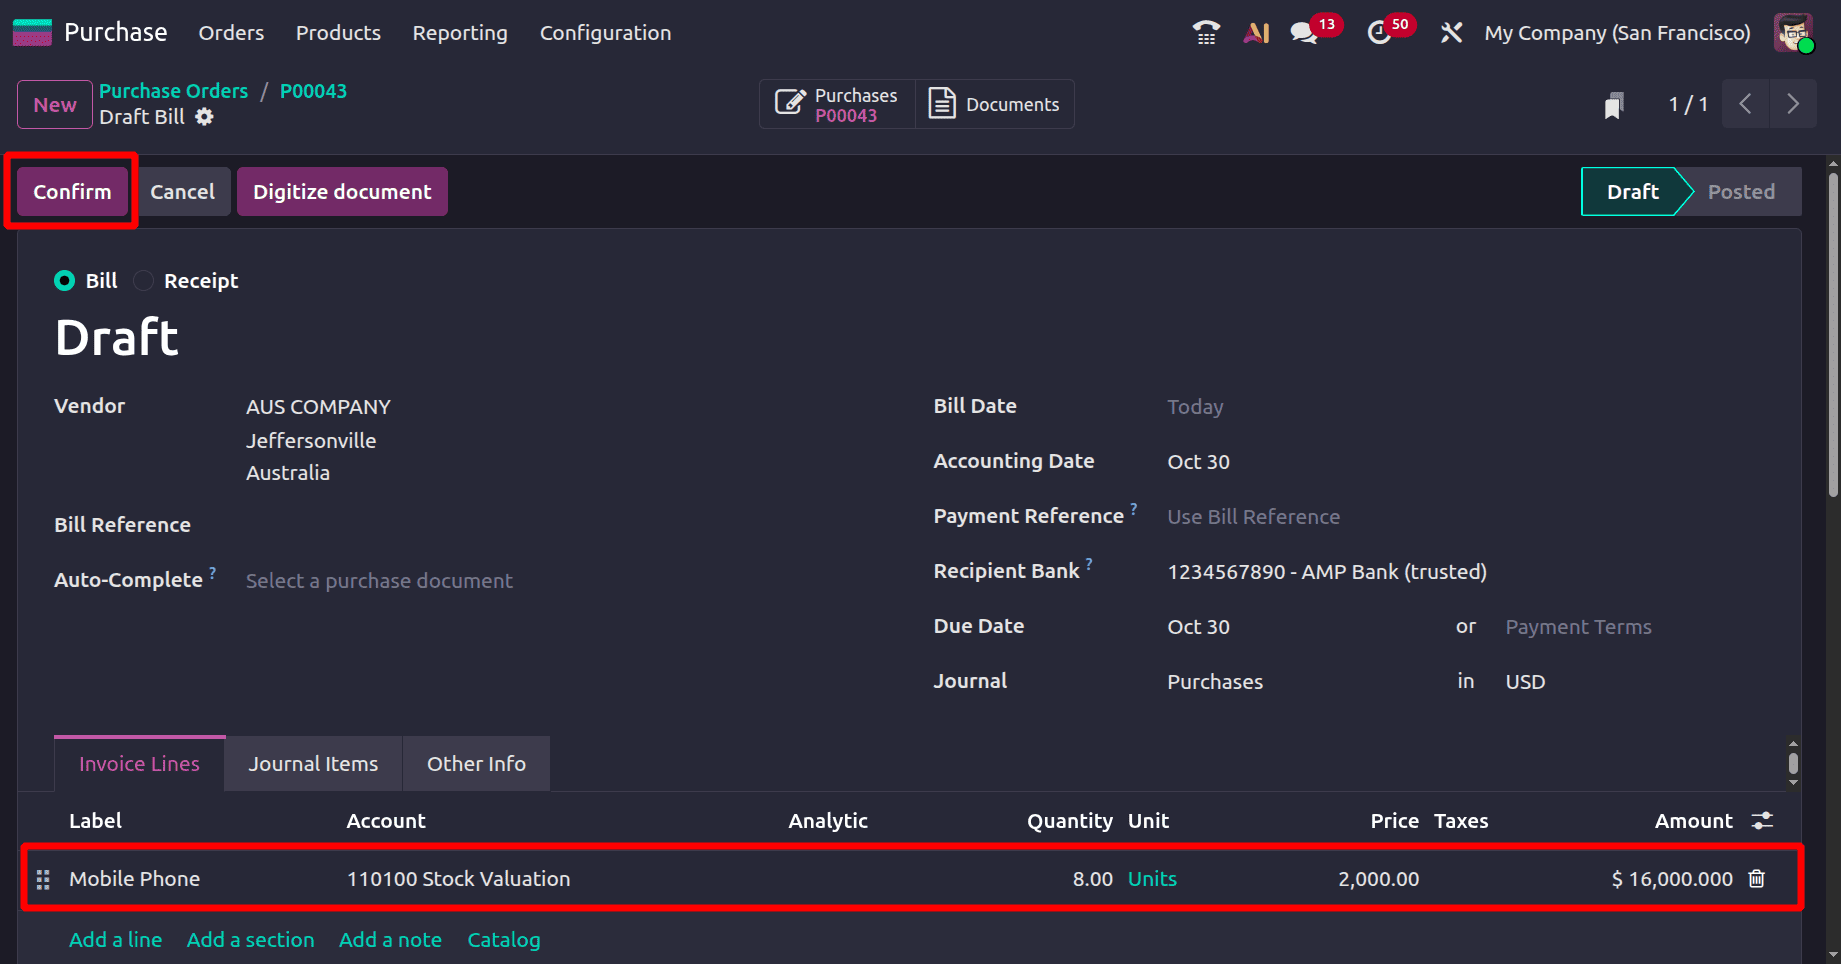
So this time the user can directly confirm the bill without adding any corrections. Click on the confirm button.
In conclusion, companies can closely align invoicing with actual procurement events by implementing robust vendor bill control policies in Odoo 19 Purchase. This can be done by either billing based on ordered quantities or waiting for received quantities before billing.
This clarity improves communication between the accounting and purchasing teams and helps avoid early or duplicate billing. Businesses can increase the level of verification between purchase orders, receipts, and vendor bills by turning on optional features such three-way matching.
In the end, implementing and setting up the appropriate control strategy guarantees that vendor invoices accurately represent business operations, facilitate compliance, and add to more trustworthy financial reports.
To read more about How to Configure Bill Control Policy in Odoo 18 Purchase, refer to our blog How to Configure Bill Control Policy in Odoo 18 Purchase.