Data import is a critical part of any ERP implementation, and in Odoo 19, the import engine has become more flexible and powerful. One of the most useful capabilities is custom field mapping, which allows you to align external data structures (CSV/Excel) with Odoo’s internal models.
Custom Mapping
Custom mapping refers to the process of manually assigning columns from your import file to the appropriate fields in Odoo.
Instead of relying on automatic matching, you explicitly define:
- Which column maps to which field
- How relational fields (Many2one, Many2many) are resolved
- How to handle mismatched or missing data
This is especially useful when:
- Your file headers don’t match Odoo field names
- You are importing from third-party systems
- You are working with customized models
Supported File Formats for Odoo 19:
For best results:
- Use UTF-8 encoding
- Avoid merged cells
- Keep one header row
Step-by-Step: Import with Custom Mapping
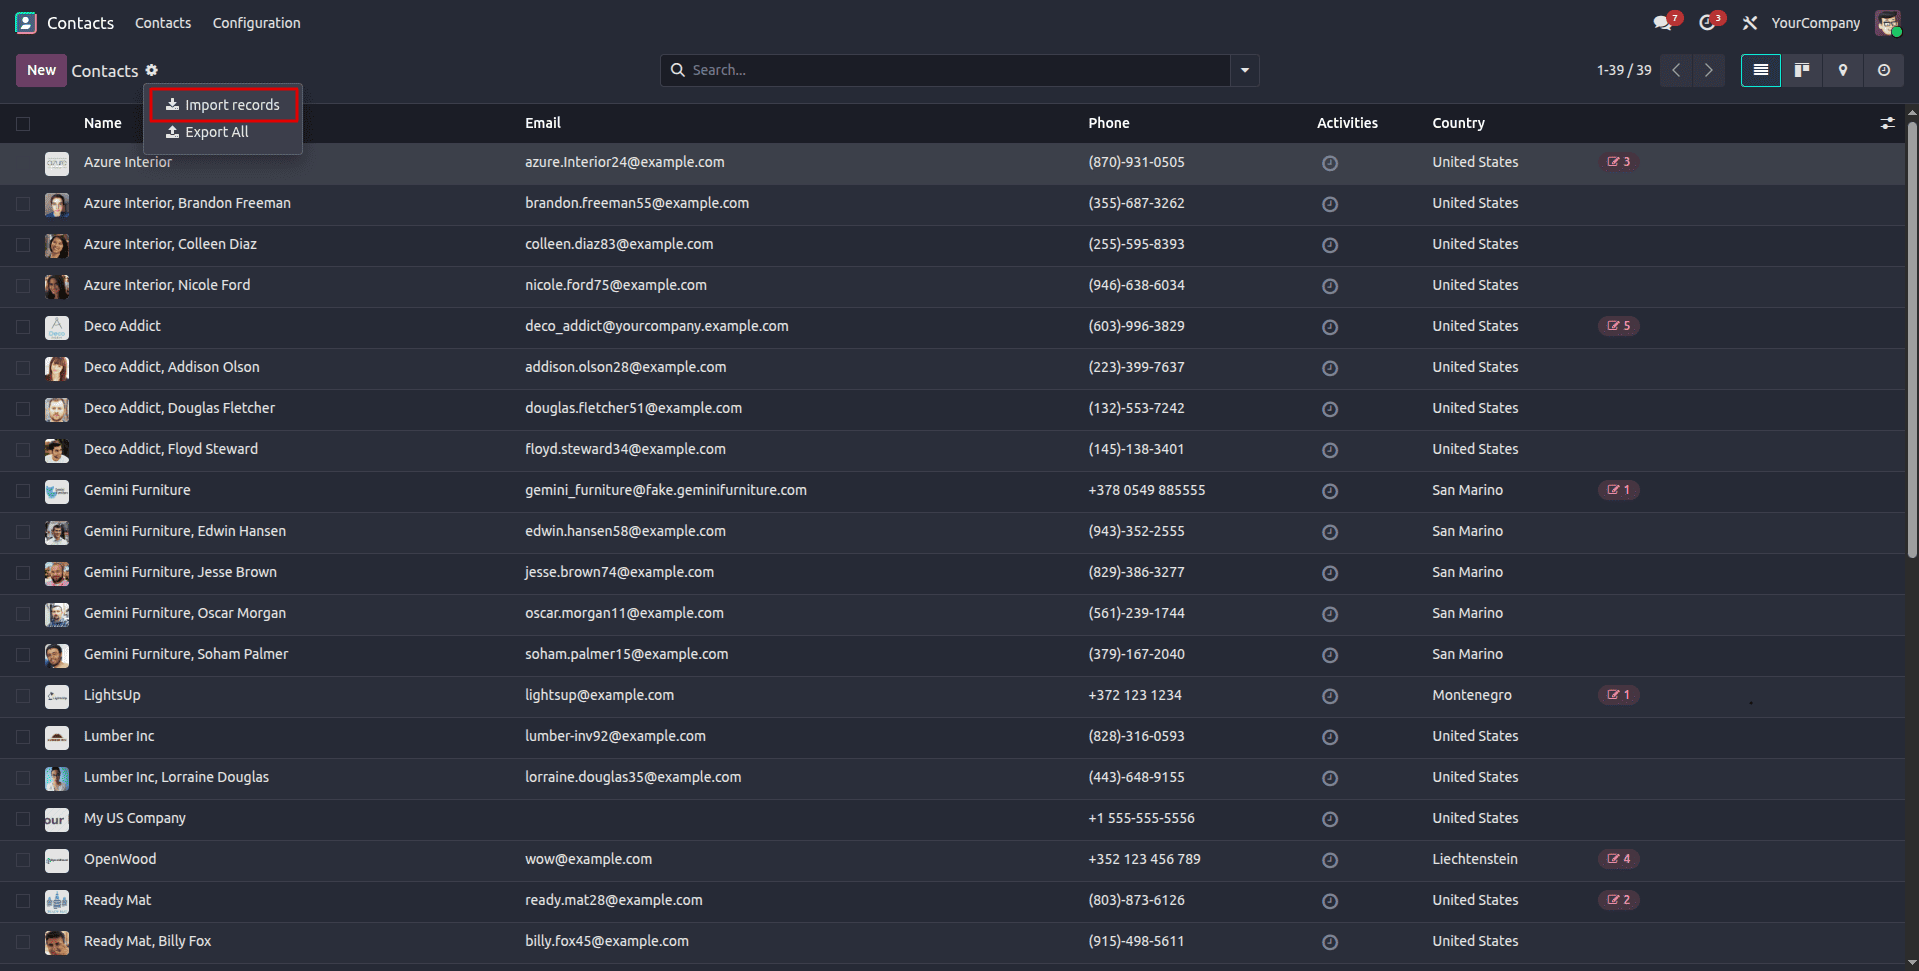
1. Navigate to Import Screen
- Go to the relevant model and click ‘Import Records’ from.
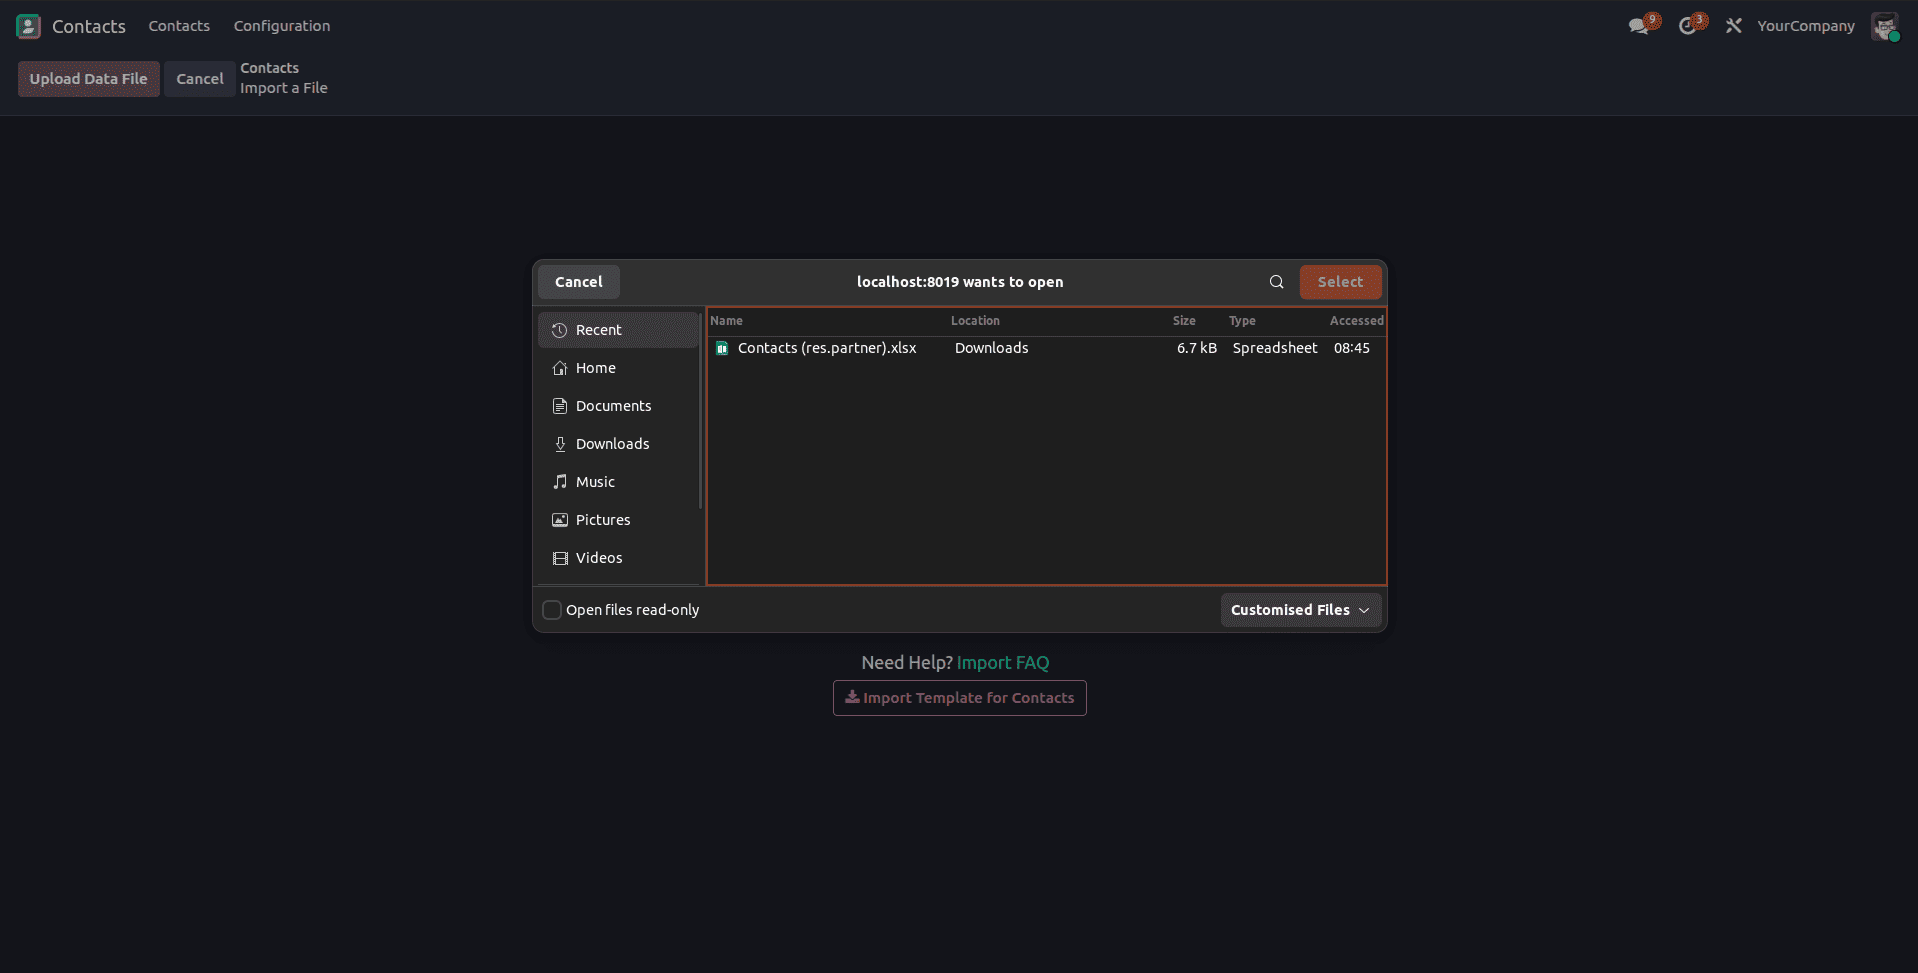
2. Upload Your File
- Drag and drop/Upload your file
- Odoo will attempt automatic field detection
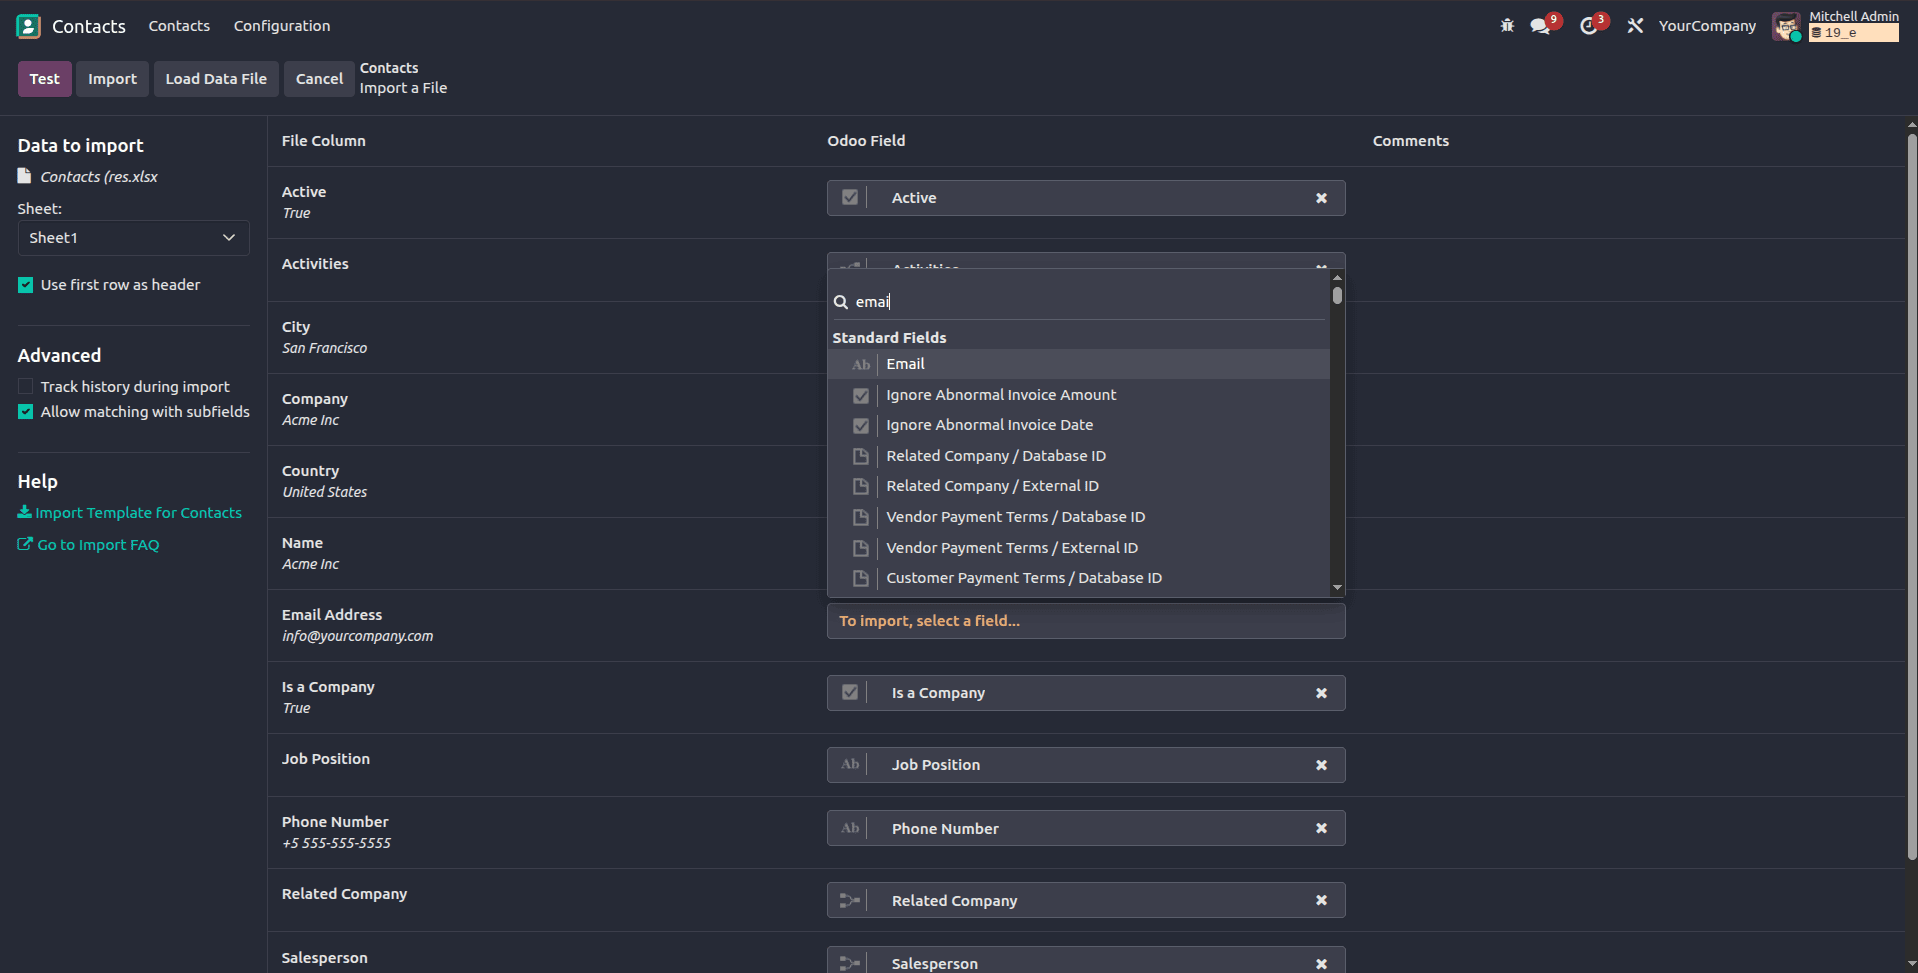
3. Enable Advanced Mode
Activate ‘Developer mode’ from settings, then enable ‘Allow matching with subfields’ in the left tab of the import page.
This allows you to:
- Map nested fields (e.g., Country / Name)
- Handle relational data properly
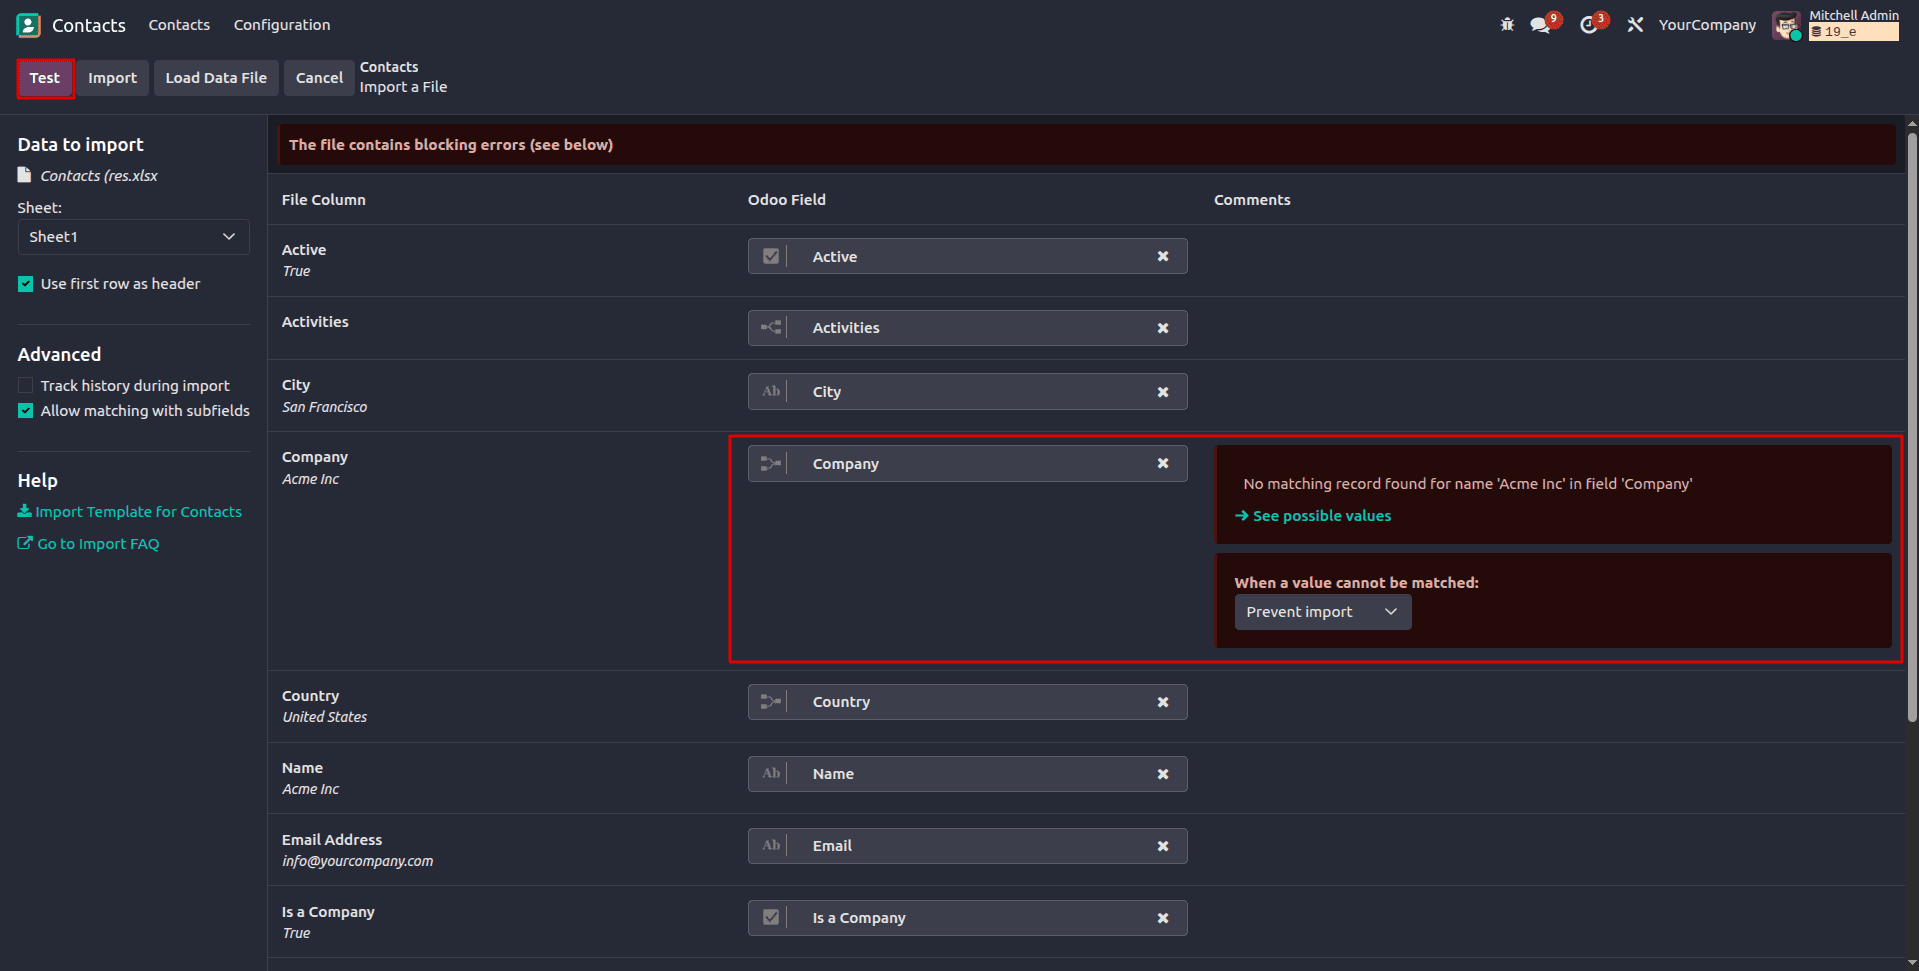
4. Perform Custom Mapping
Each column will appear with a dropdown.
You can now:
- Select the correct Odoo field manually
- Search by technical or label name
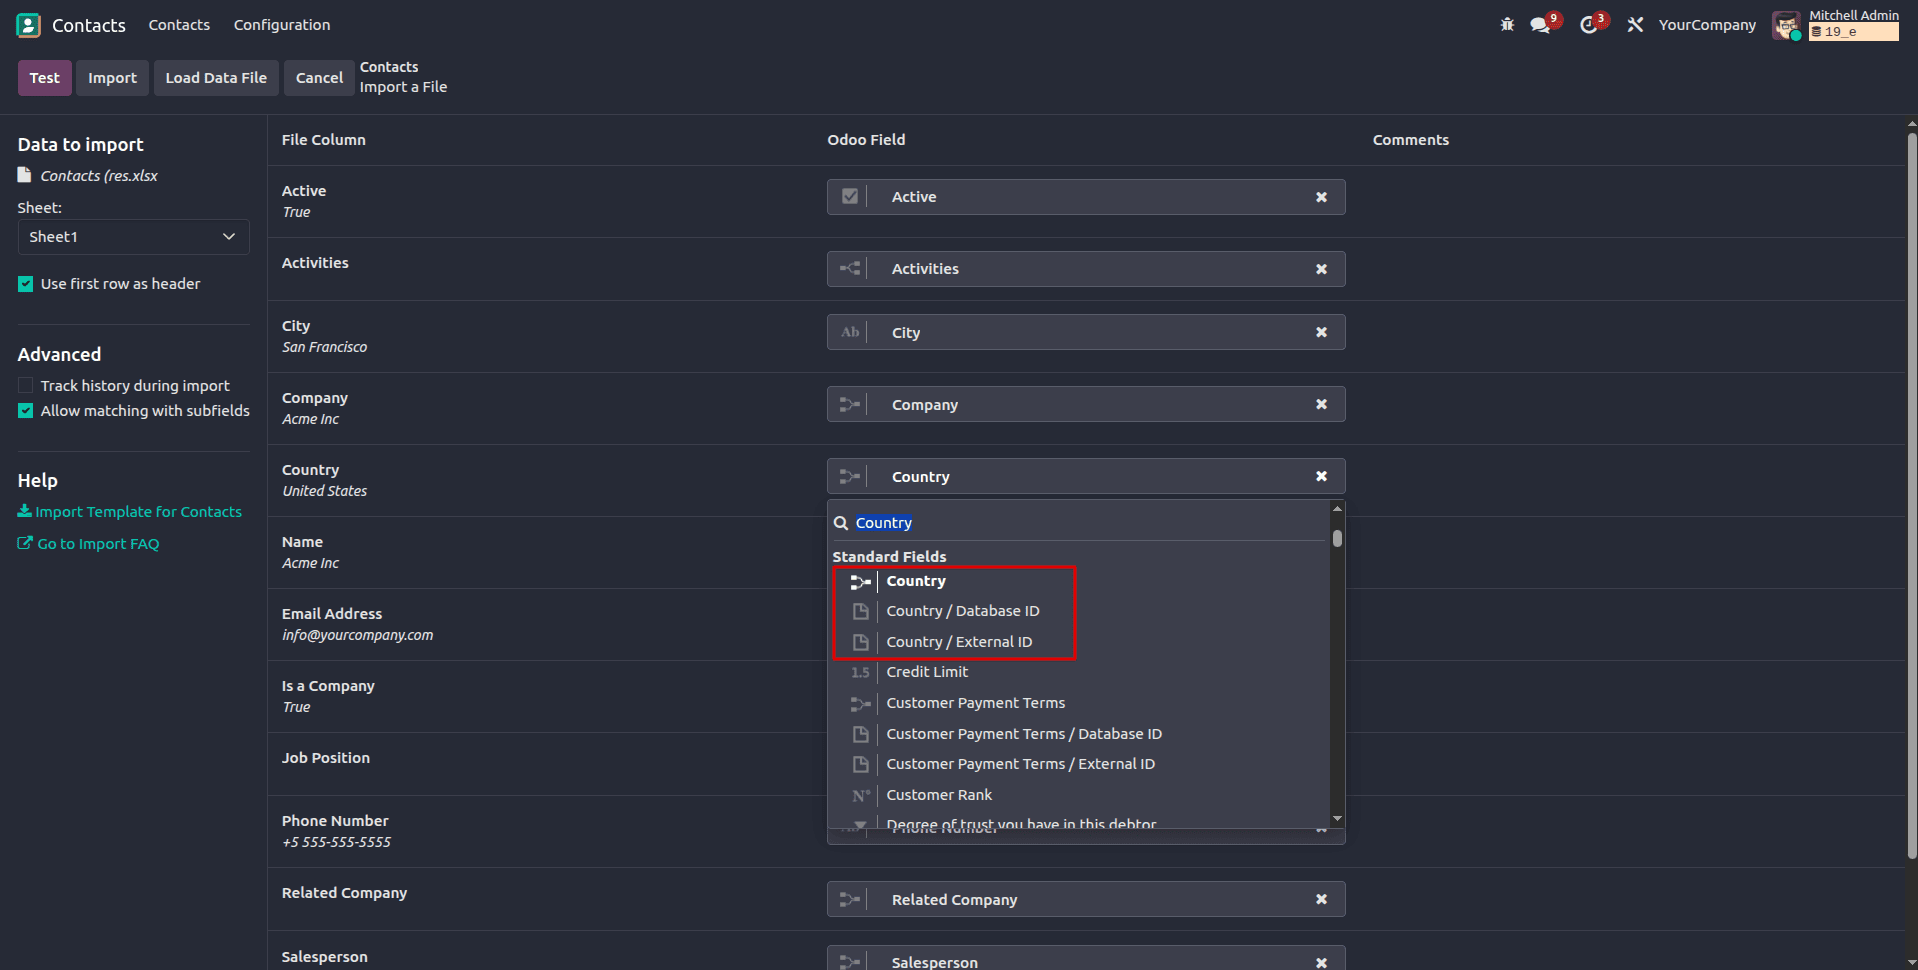
Map relational fields like:
- Customer > Partner
- Country > Country / Name
- Product Code > Internal Reference
5. Handle Relational Fields
For Many2one fields, you have options:
- Use Name (default)
- Use External ID
- Use Database ID (not recommended)
Example:
- Country > India
Odoo matches res.country(name = "India")
6. Test Before Import
- Click Test
- This validates:
- Fix errors before proceeding.
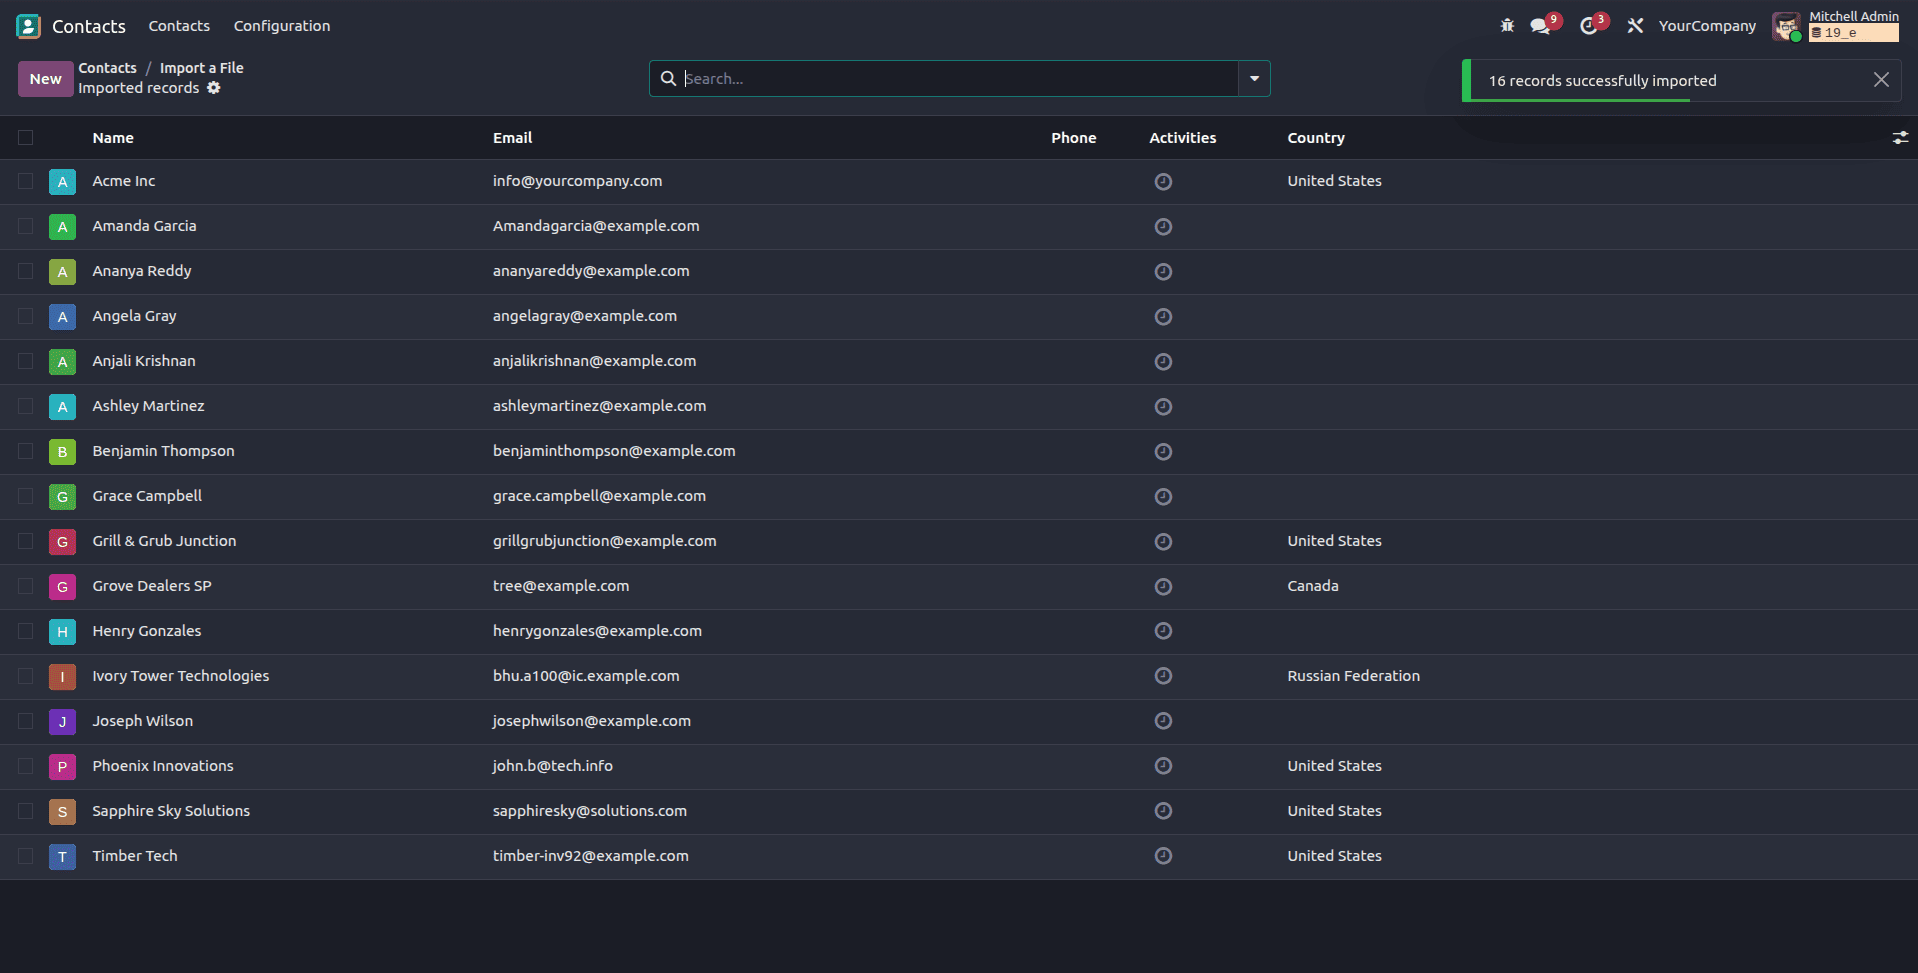
7. Import Data
Once validation passes, click ‘Import’
Odoo will:
- Create new records
- Update existing ones (if External ID is used)
Advanced Mapping Techniques
To update existing records:
- Include a column: External ID
- Ensure it matches existing records
- This prevents duplication.
Import Nested Fields:
- Creating related records inline
- Updating linked data
Example:
- Customer / Email
- Customer / Phone
Use Developer Mode
Enable Developer Mode to:
- View technical field names
- Ensure accurate mapping
Common Mistakes to Avoid:
- Wrong field type (text into integer)
- Missing required fields
- Incorrect relational values
- Duplicate records due to missing External ID
- Using database IDs instead of External IDs
Best Practices
- Start with a small test file
- Export sample data from Odoo first (to see correct format)
- Keep mapping consistent across imports
- Use External IDs for long-term maintainability
Real-World Example
Importing customers from a legacy system:
| CSV Column | Odoo Field |
| Name | Name |
| Email Address | Email |
| Phone Number | Phone |
| Country Name | Country / Name |
Custom mapping in Odoo 19 gives you full control over how external data integrates into your system. While automatic mapping works for simple cases, mastering manual mapping is essential for real-world implementations involving complex data structures.
With proper planning, testing, and use of External IDs, you can achieve clean, repeatable, and error-free imports.
To read more about The Ultimate Guide to Data Import and Export in Odoo 19, refer to our blog The Ultimate Guide to Data Import and Export in Odoo 19.