Routes are a certain flow of actions which are utilized to take out and sell each and any product/good from a warehouse. In order to commit a procurement, rules coming with the routes are employed for a sales order. Procurement can be explained as a location or venue in demand for a certain quantity of products. Rules are mandatory for creating a well-defined route for a product to move or procure from a warehouse location. In Odoo, a default push/pull path is provided for easy management of products.
Routes in Odoo Sales
Generally, before shipping, a product must go through certain stages like quality control, packaging, etc. With Odoo one can seamlessly configure and manage complex and advanced pull routes. In this blog, I will be explaining how all these actions can be performed.
Configuration
Go to Inventory -> Configuration -> Settings
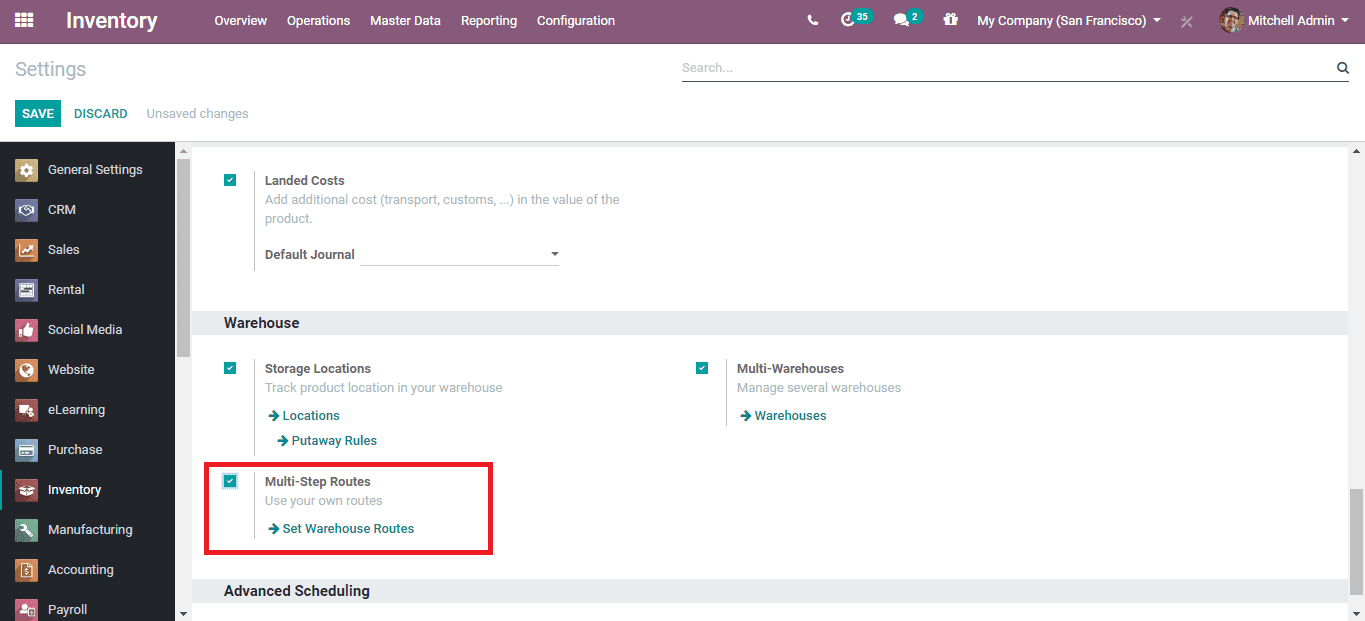
There, under the Warehouse section, tick marks the ‘Multi-Step Routes’ option.
After that, go to Inventory -> Configuration -> Routes
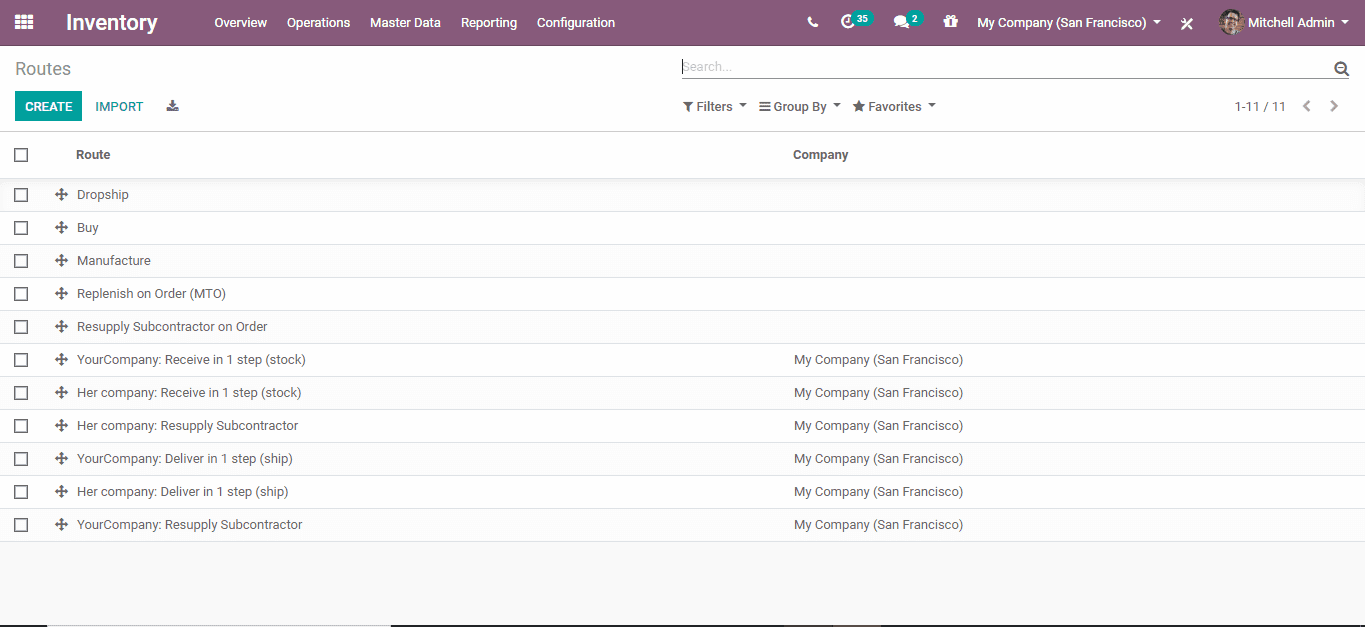
There you can see all the default routes in Odoo;
Dropship: Under the Dropship route, the supplier never keeps hold of the product in his inventory, in turn, it is shipped directly from the vendor to the customer without any intermediary storage.
Manufacture: The products under this route is manufactured.
Buy: A product is bought using this route (Purchase Order).
Make To Order: Under this route, a purchase order for a product is triggered simultaneously with the creation of a sales order for the product. The purchase order is triggered whether or not the product is available as ‘Stock in hand’.
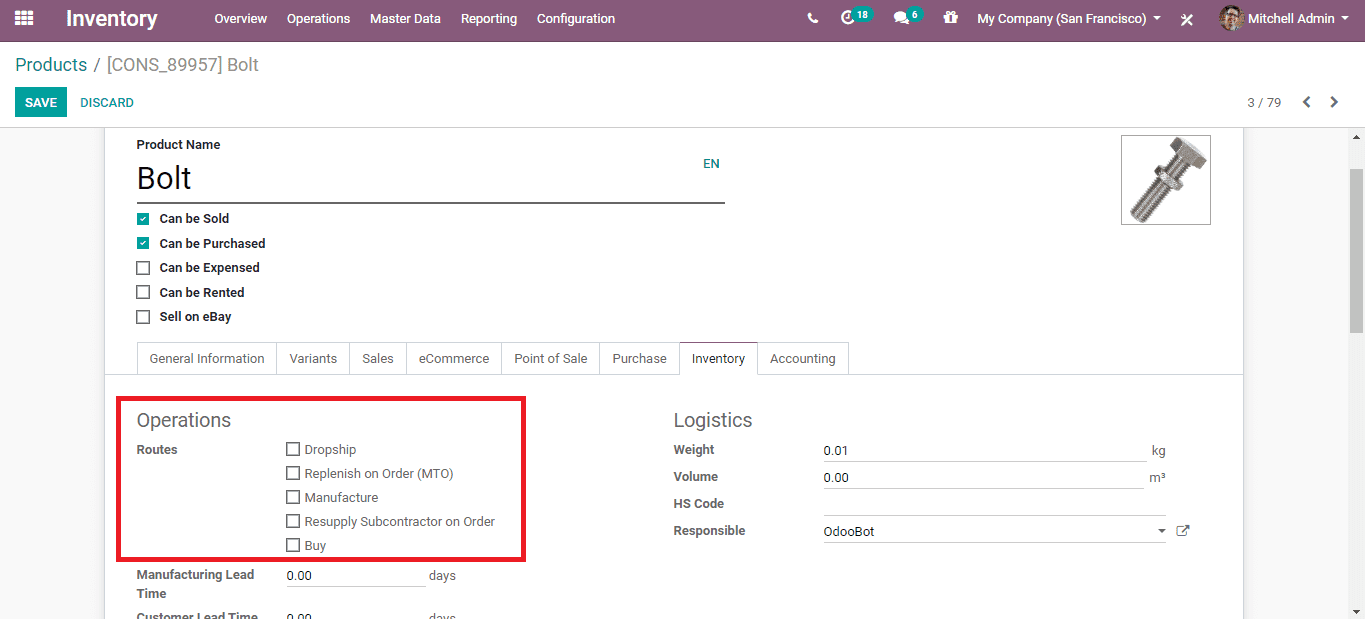
Each default route for the product can be seen directly under the ‘Inventory’ tab of the product.
In order to create new routes according to your need;
Go to Inventory -> Configuration -> Routes
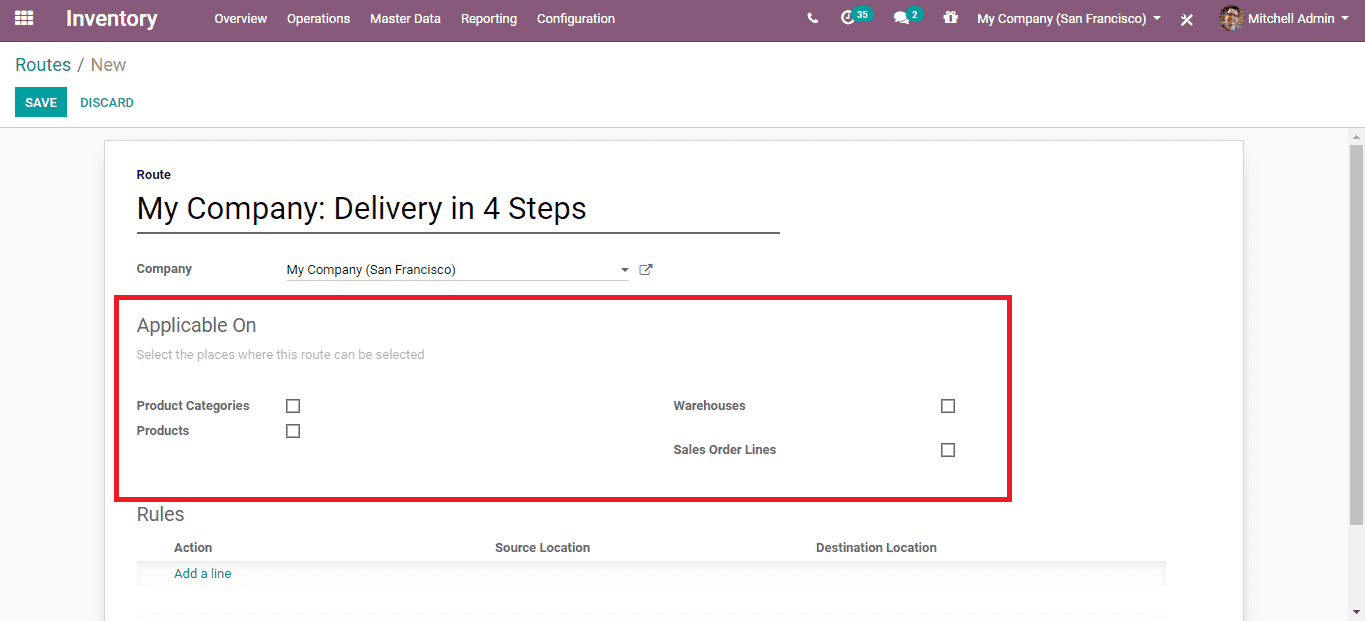
Click ‘CREATE’ seen on the top left corner and the form like the one above will appear. Below the applicable section, the prospect to which this route should be assigned can be selected and they are;
1. Product Categories
2. Warehouse
3. Sale Order line
4. Products
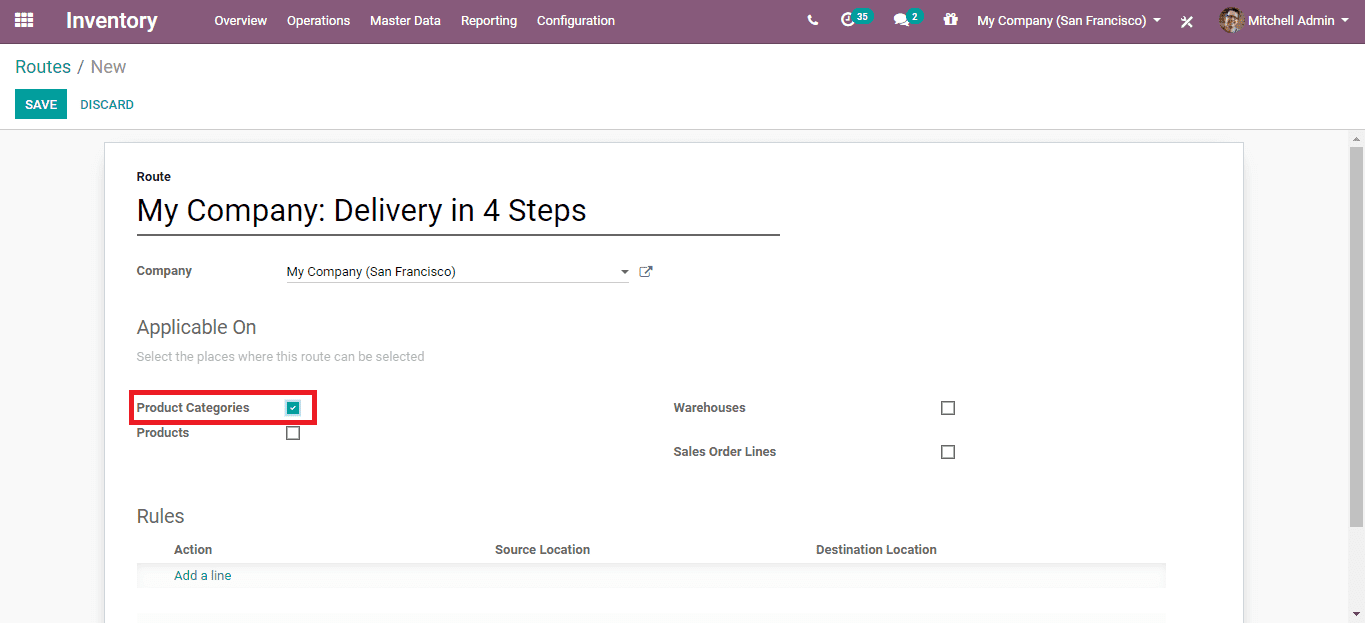
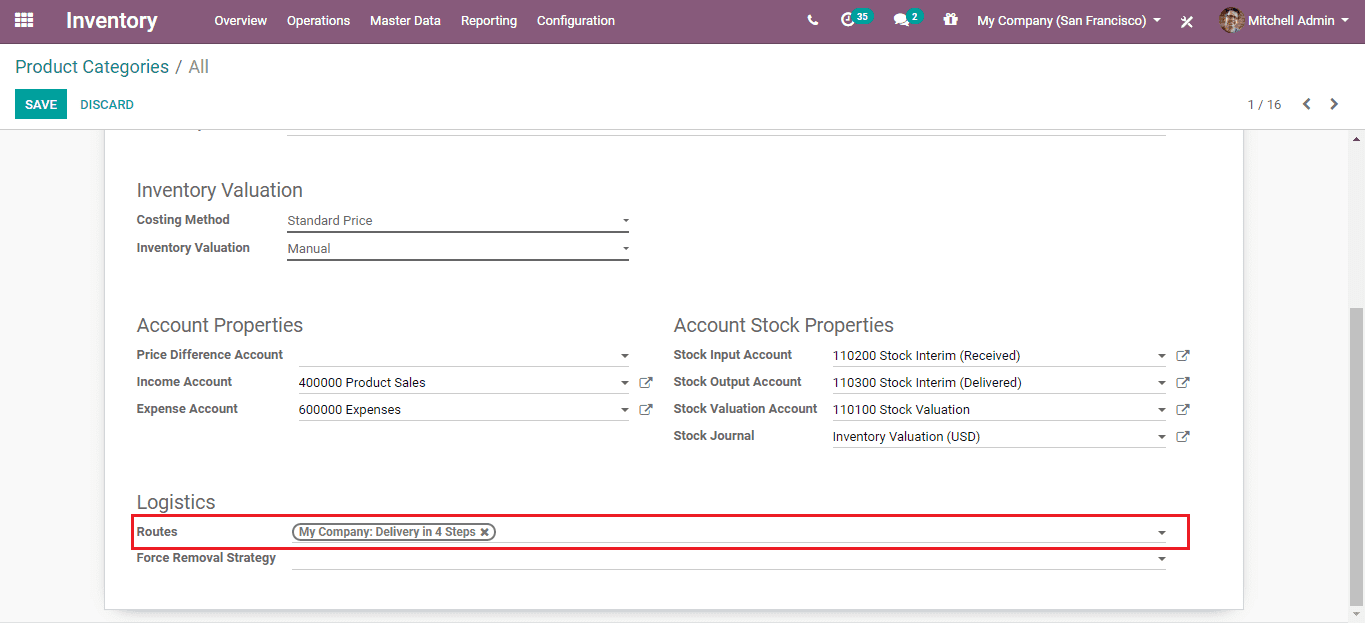
In the case of the product category, the route shall be manually set under the Logistics tab.
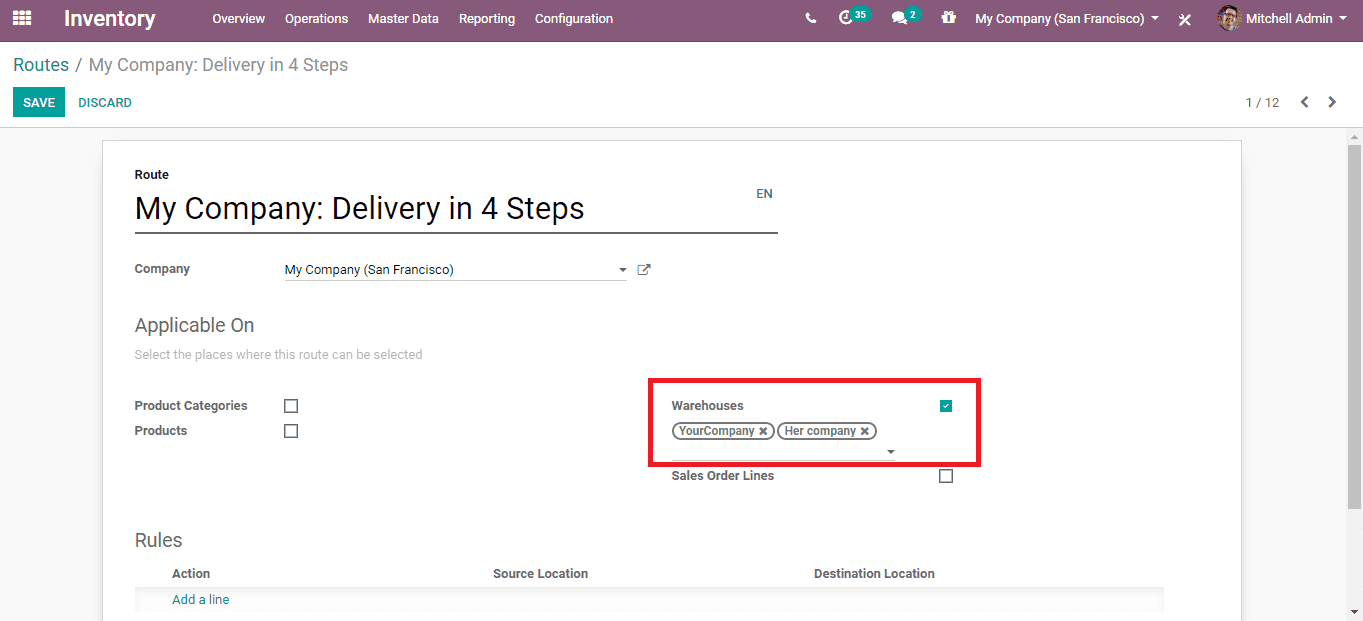
All the warehouses to which this route should be assigned are selected in the corresponding filed for the case of, Warehouses.
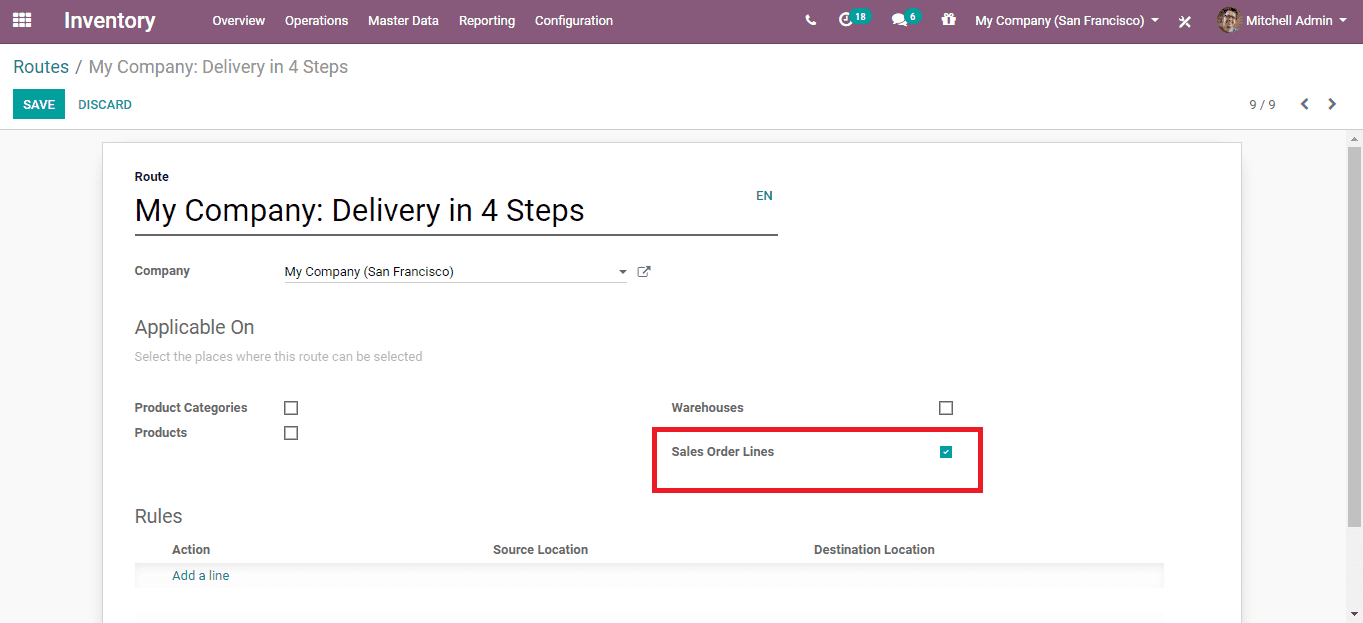
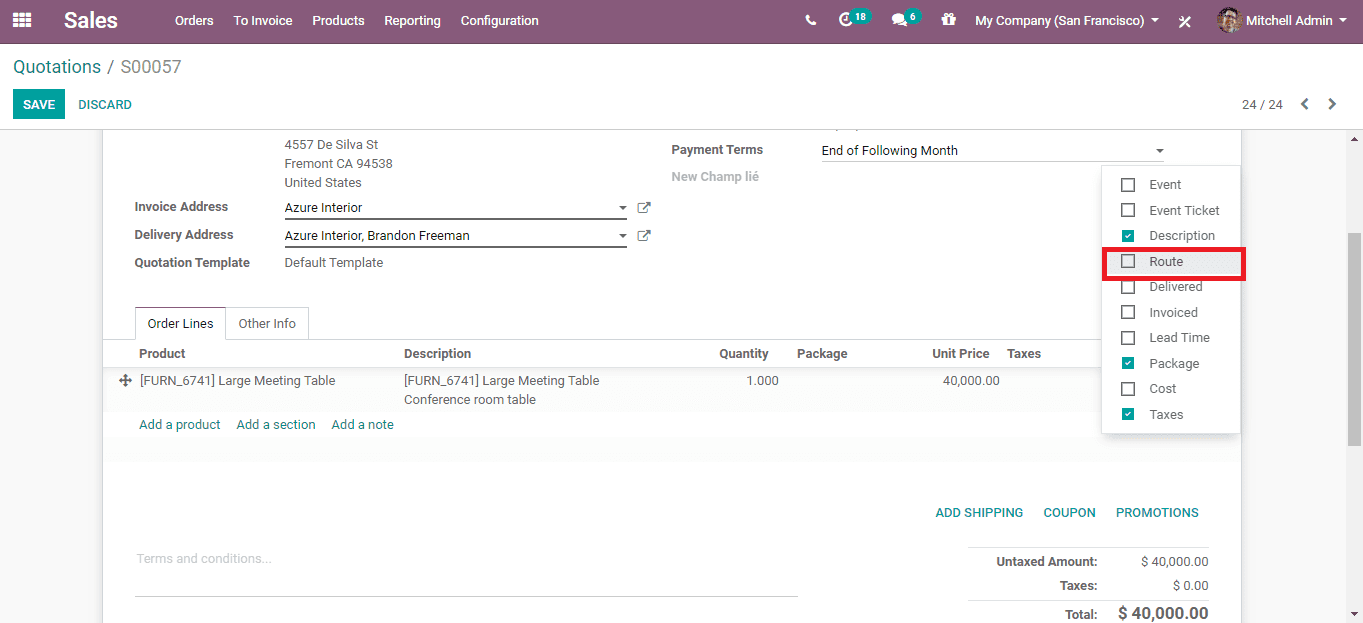
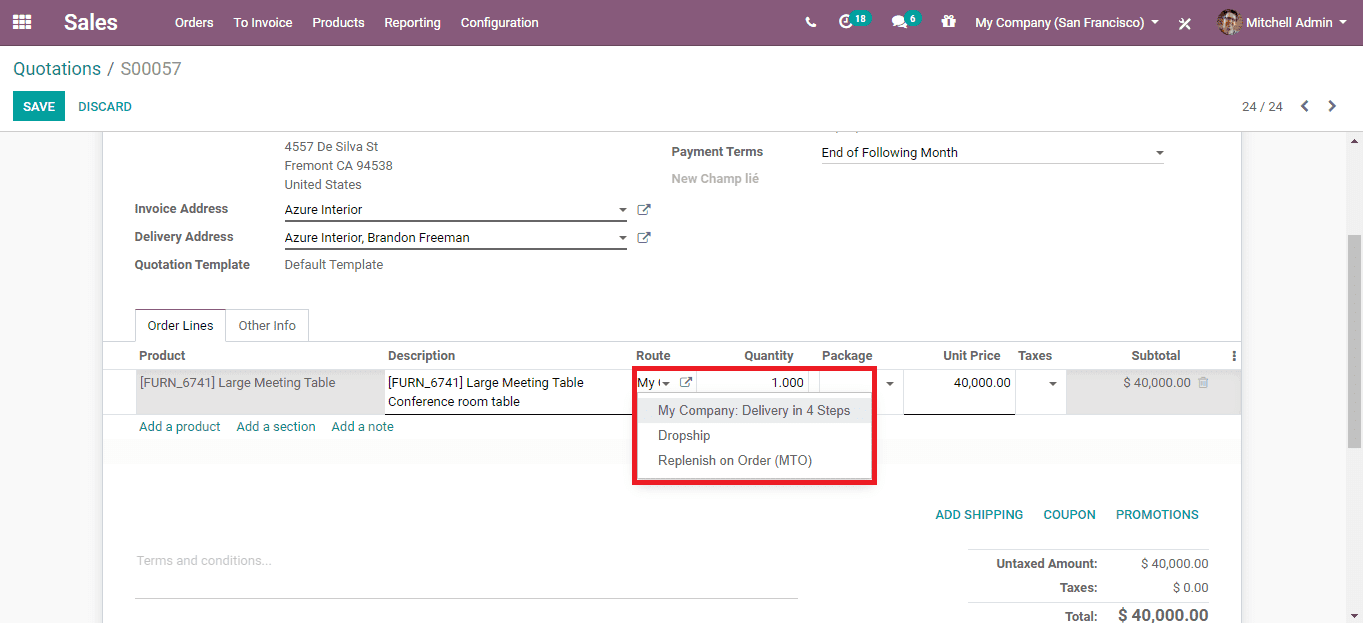
The route is manually set at the sale order line by clicking and tick marking the ‘Route’ option from the boolean button seen on the right end of the order line field.
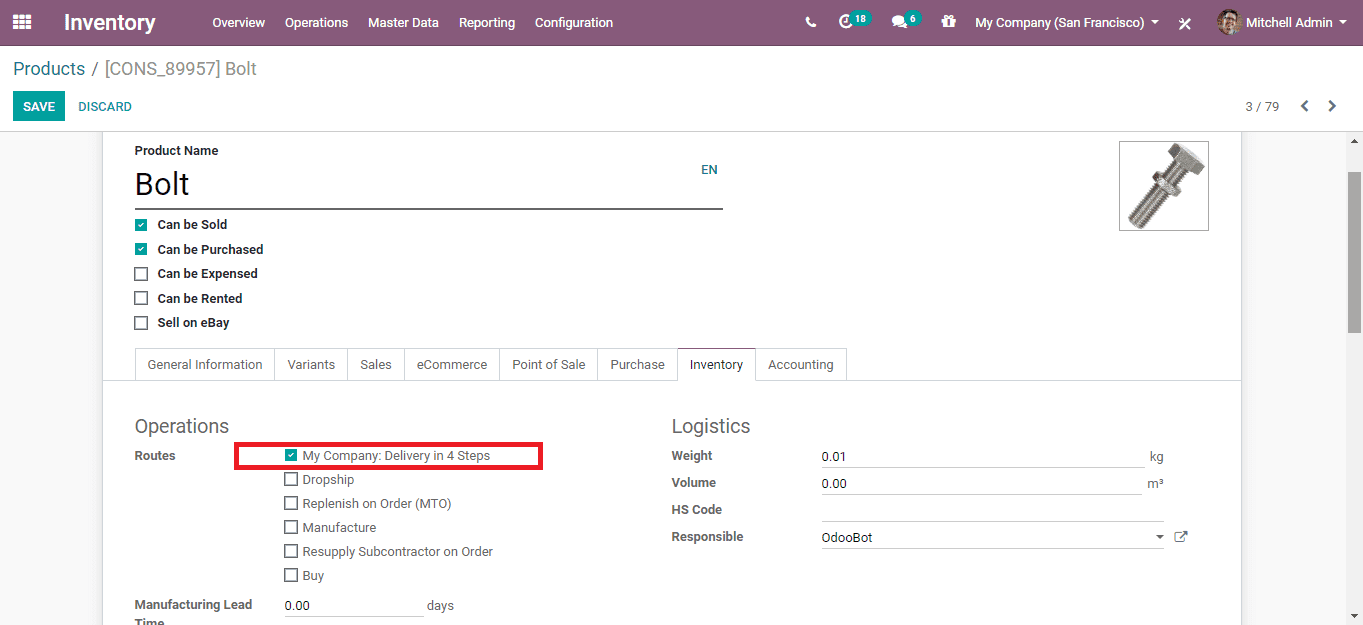
For products, the route must be selected under the inventory tab of the product.
Now let’s see an example of the application of routes in a product.
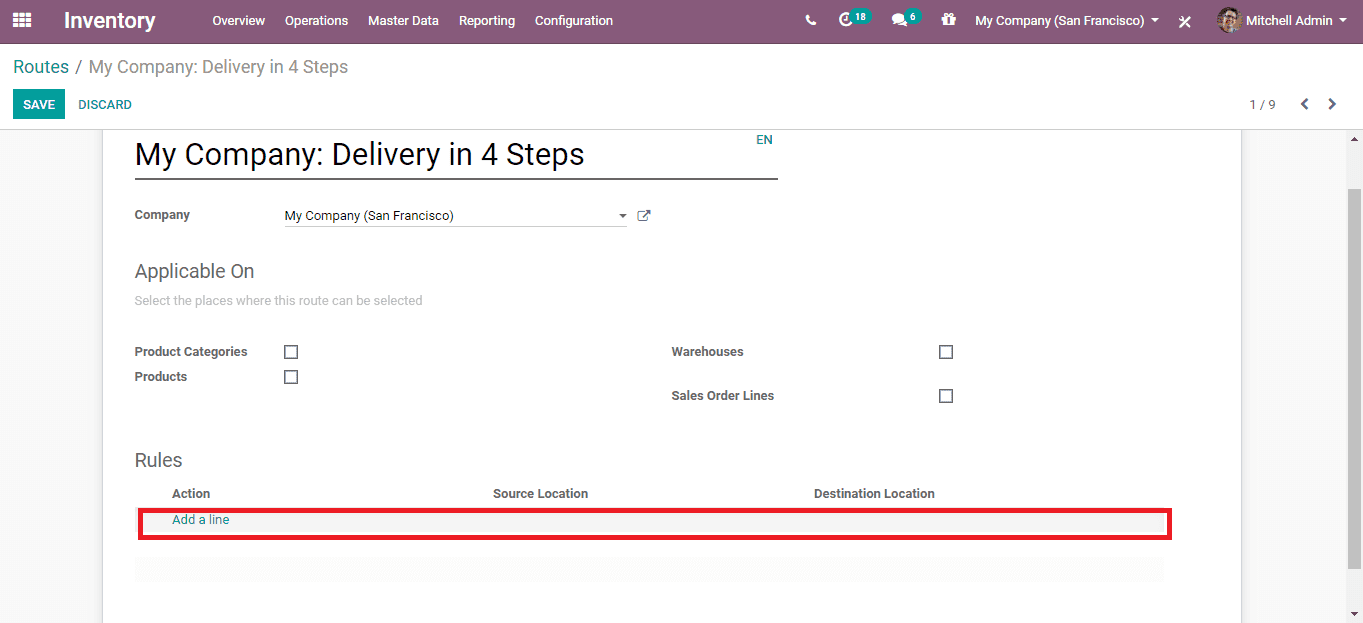
Click on the ‘Add a line’ field under the rules to create a new rule.
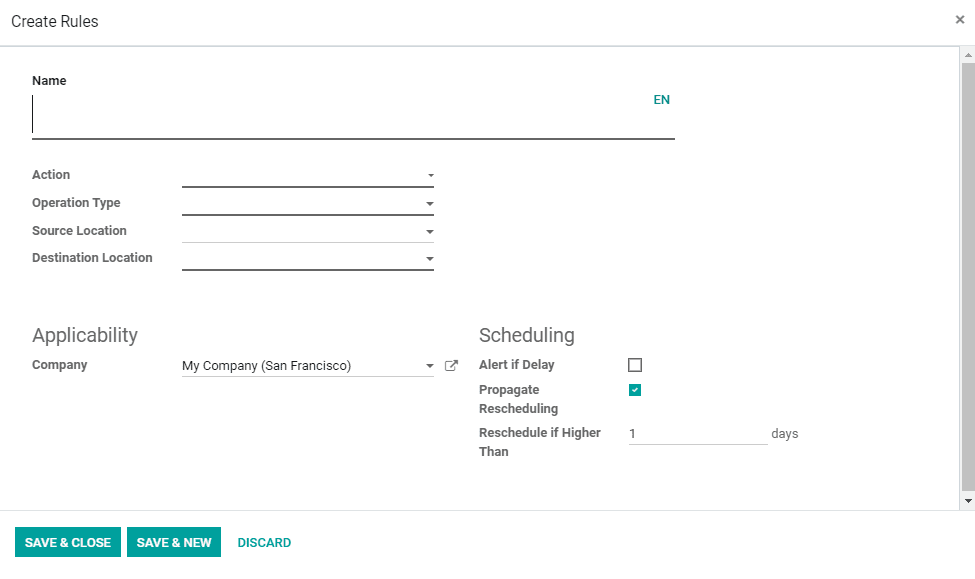
You can see some fields to be filled in the newly appeared form like the one above;
Operation Name: The name of the new rule.
Action: There are five available actions namely;
* Pull From
* Push From
* Pull & Push
* Manufacture
* Buy
Operation Type: The type of operation applied to the stock move is given here.
Source Location: This would be the location to which the rule is applied right after the confirmation of a move.
Destination Location: The location where the products/goods taken from the source location must reach.
Automatic Move: For ‘Manual Operation’, the stock will be automatically moved after the commencement of the current move. For ‘Automatic No Step Added’, the replacement of location will happen in the initial move.
Supply Method: For ‘Take From Stock’, the product is taken from the already available stock in hand. For ‘Trigger Another Rule’, the system will try to narrow down a rule to resolve the procurement from the location. ‘Take From Stock, If Unavailable, Trigger Another Rule’ is just as the name indicates.
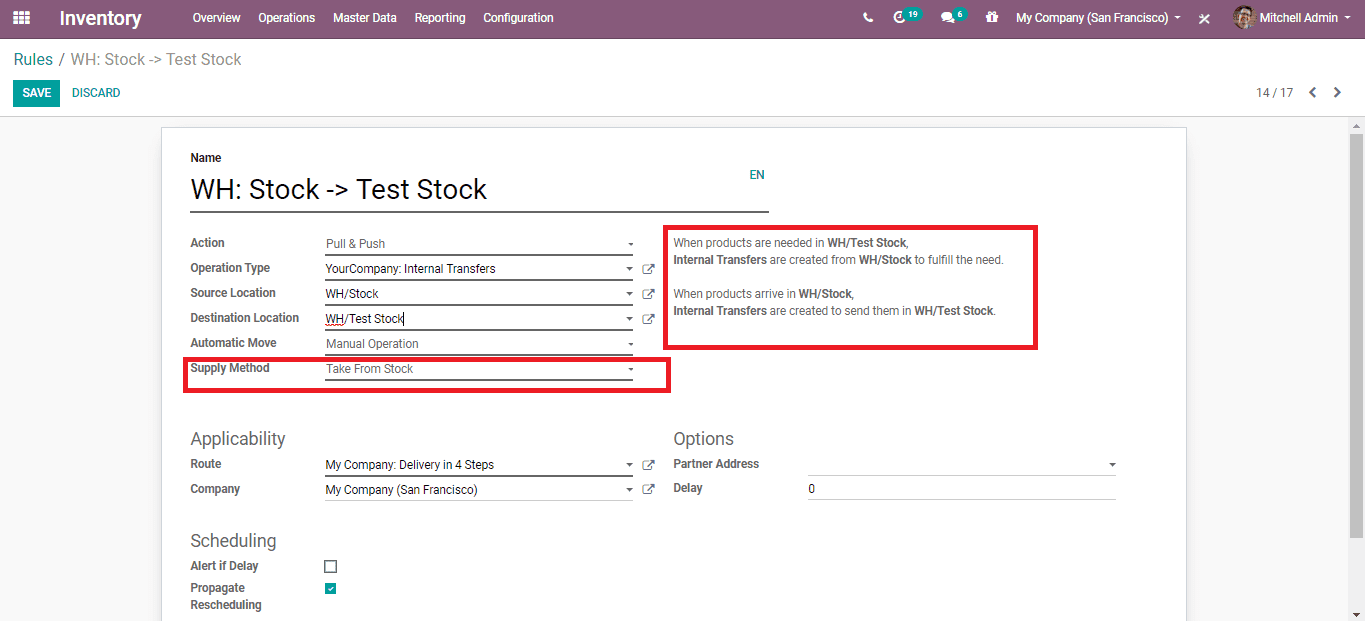
As the First Rule, we apply the supply method ‘Take From Stock’ as the rule is applied upon the products/goods on the stock.
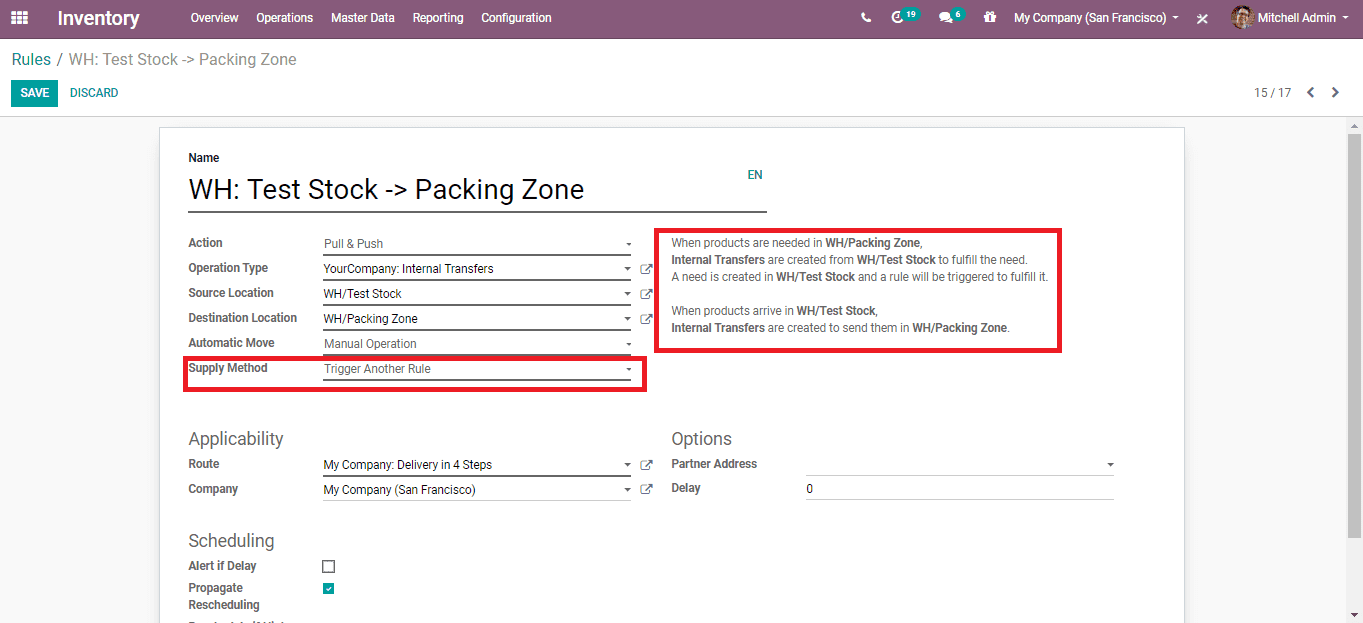
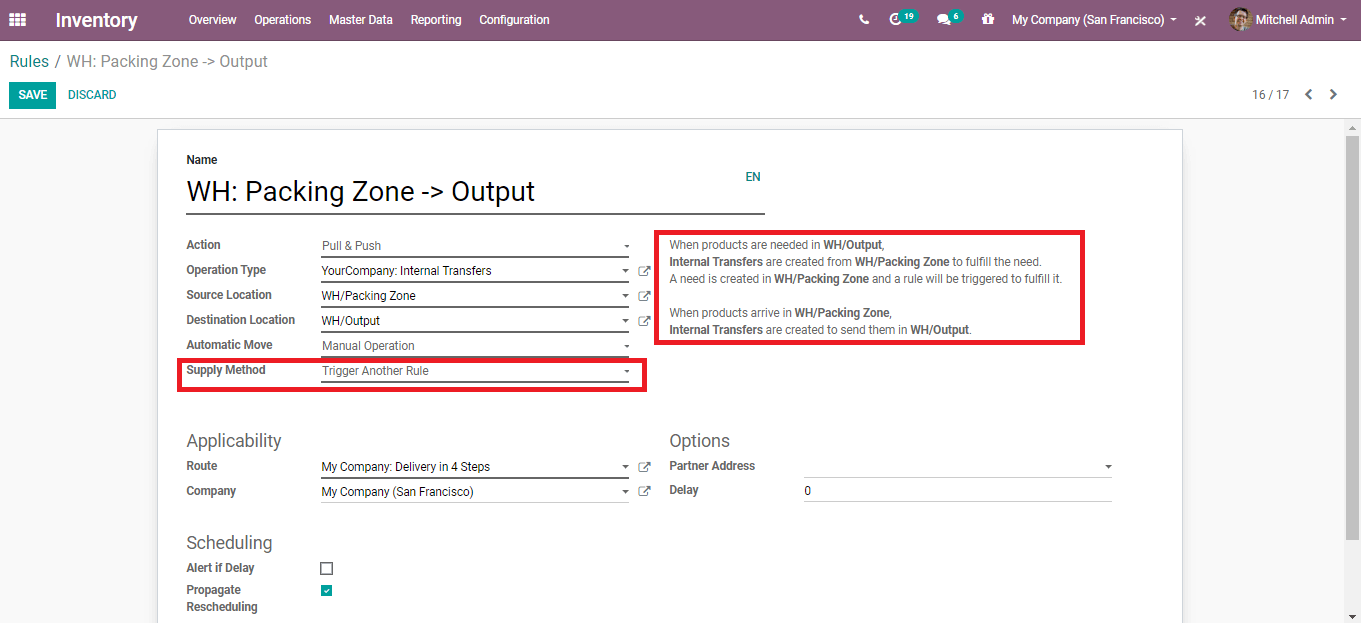
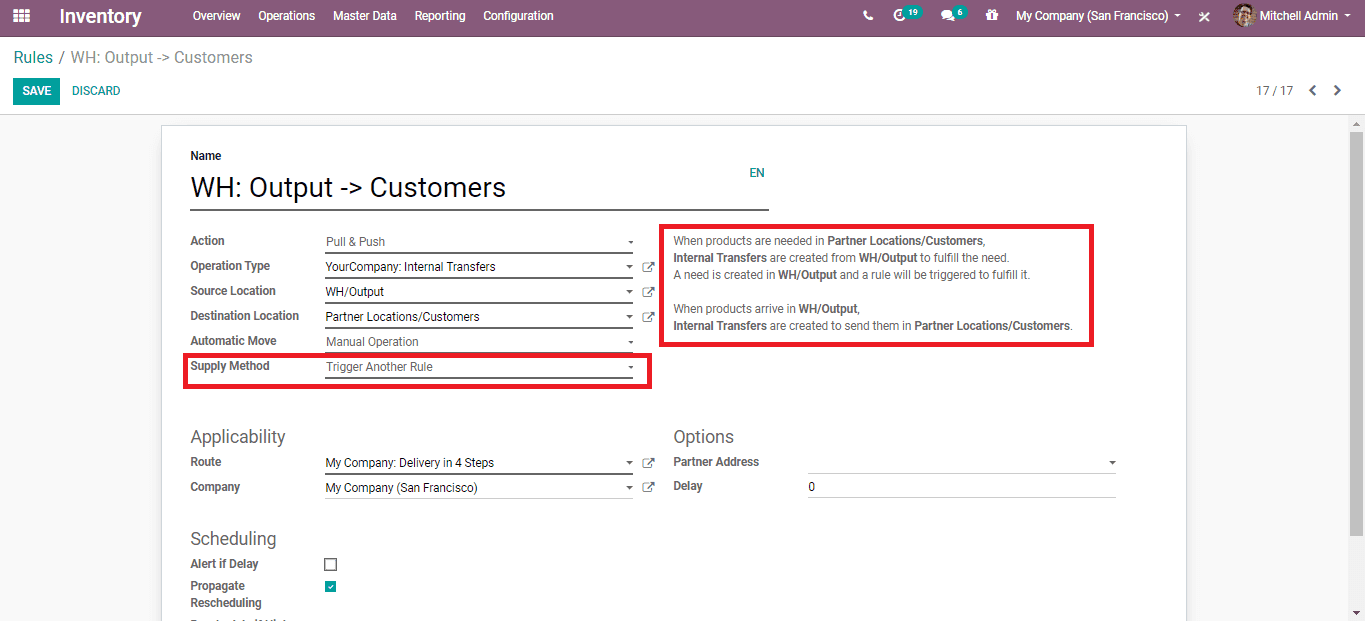
From the Second Rule onwards, the Supply Method is selected as ‘Trigger Another Rule’.
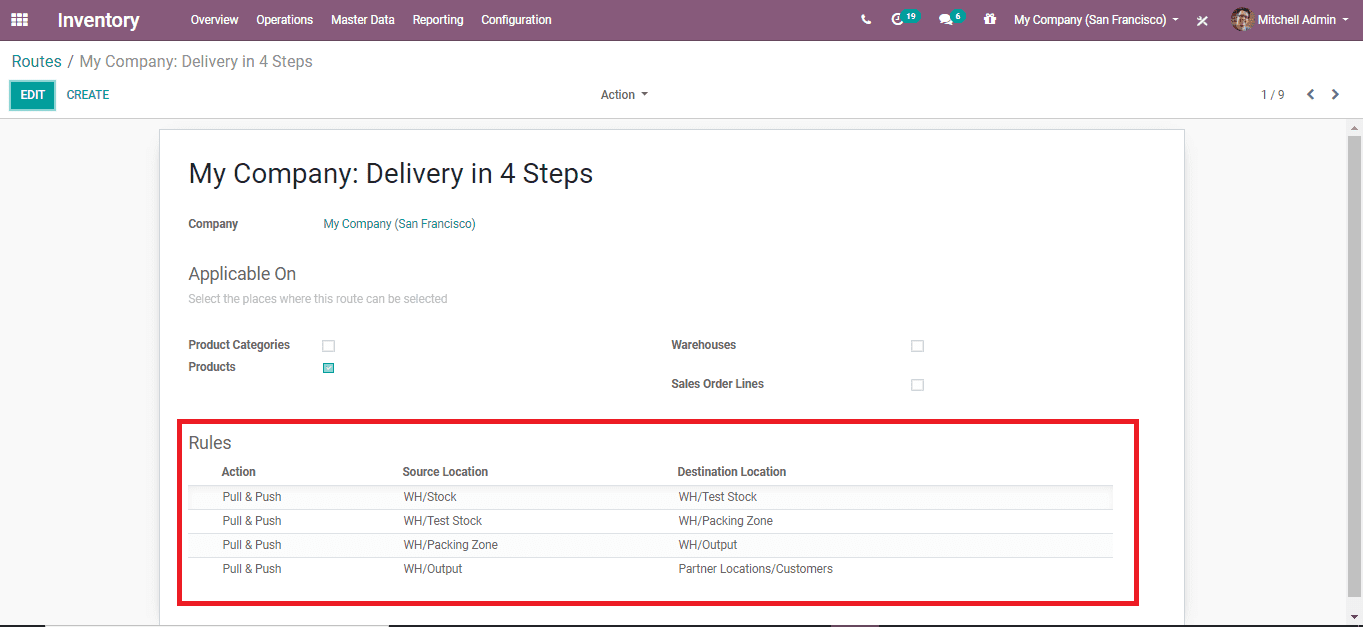
Once all the rules are made, click ‘SAVE’ to save the route.
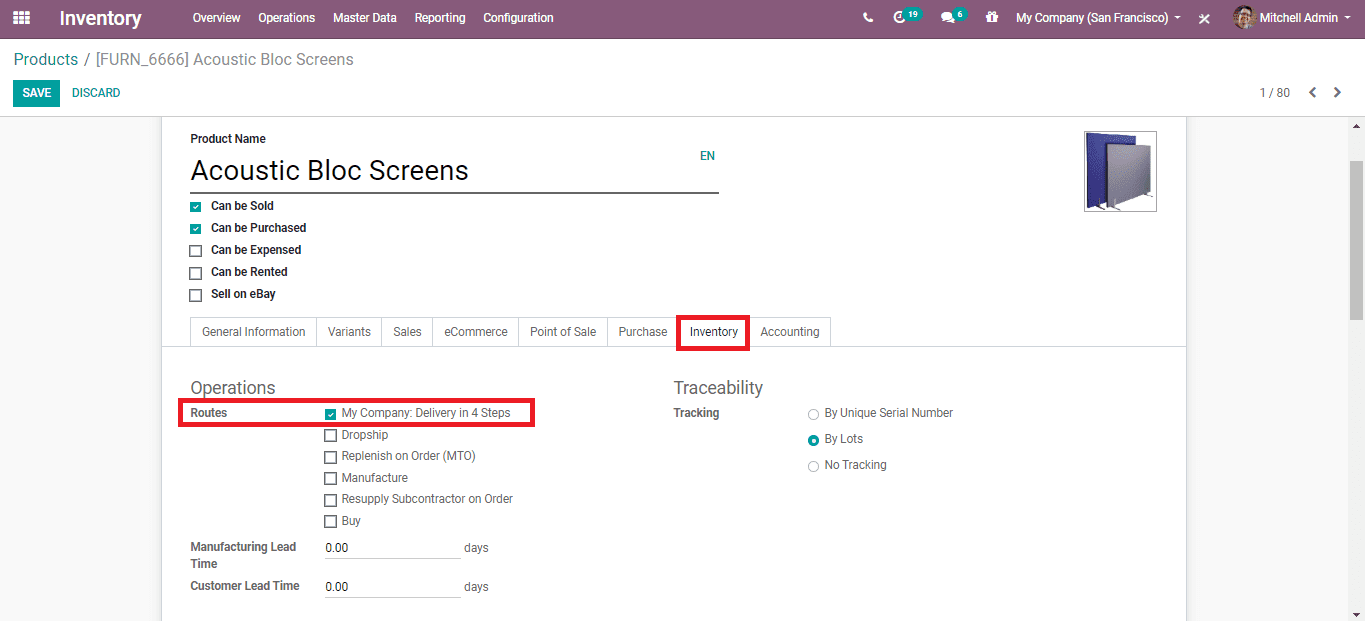
Now go to the product to which the route has to be set and select the route and click ‘SAVE’.
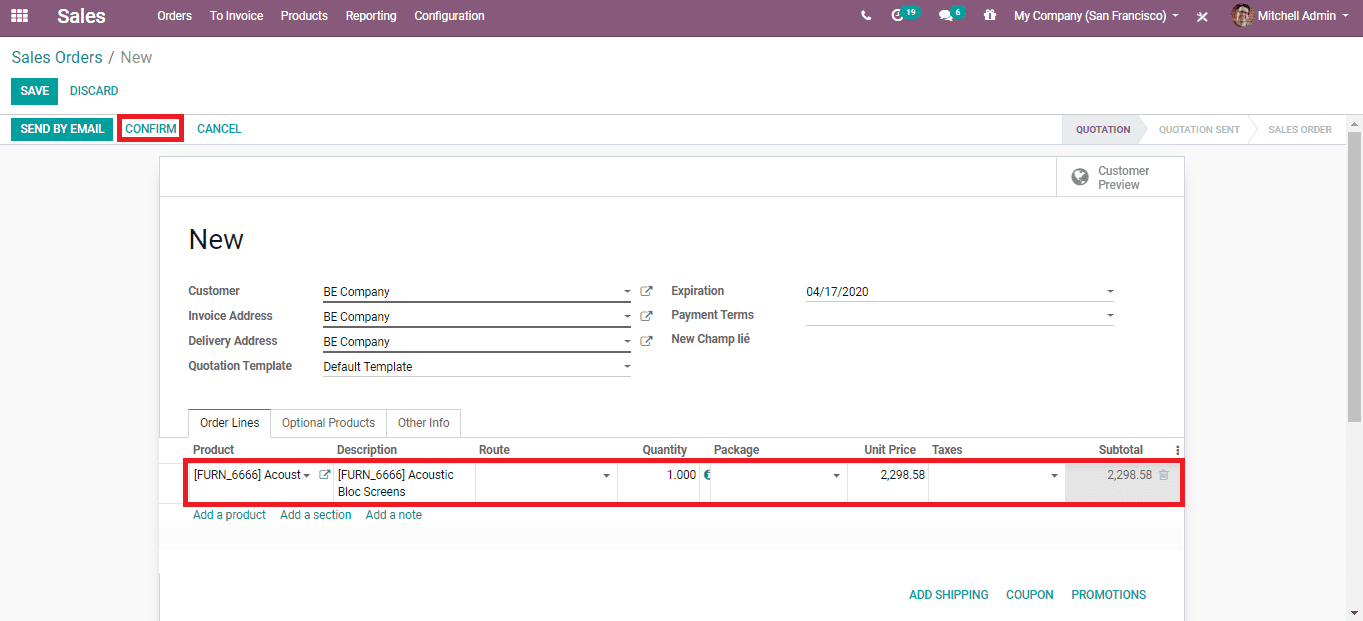
Now go to Sales -> Orders -> Orders and click ‘CREATE’ to create a new sale order. Select the product in the field under the ‘Order Line’ tab and ‘CONFIRM’ the sale order.
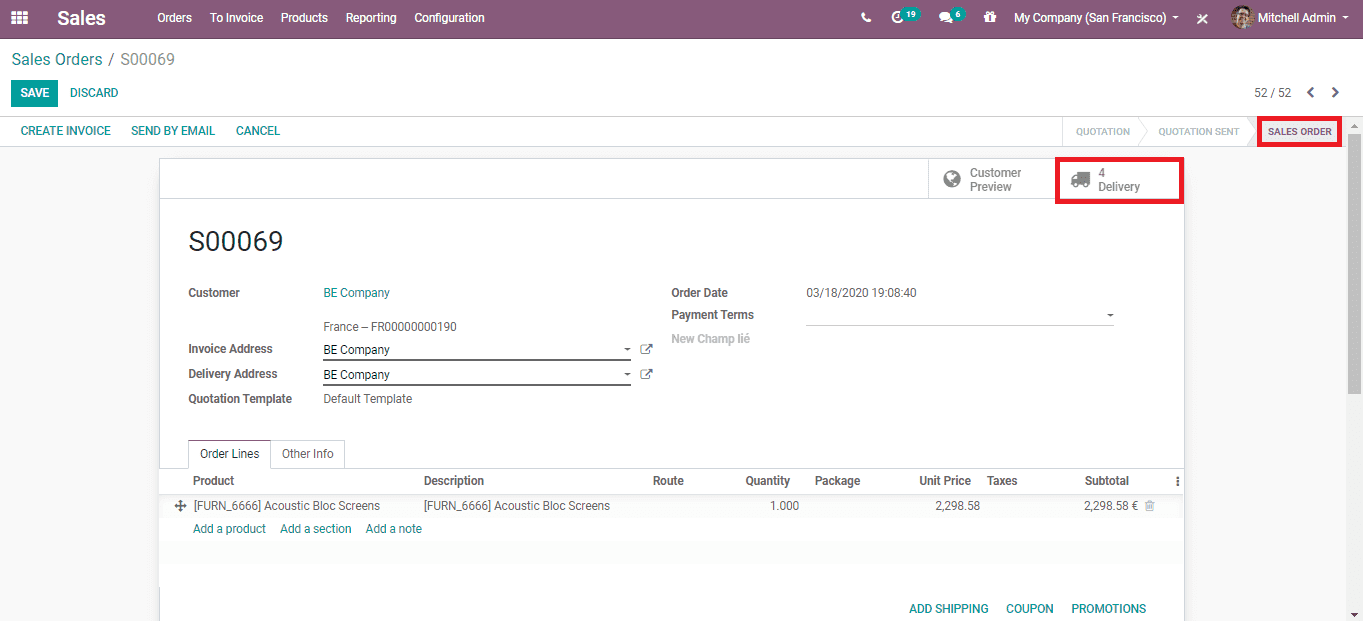
Once confirmed, the stage of the sale order will be changed to ‘SALE ORDER’ in the top right corner of the confirmed form. A ‘4 Deliveries’ operation indicator can be seen right below the stage, click on that to view it.
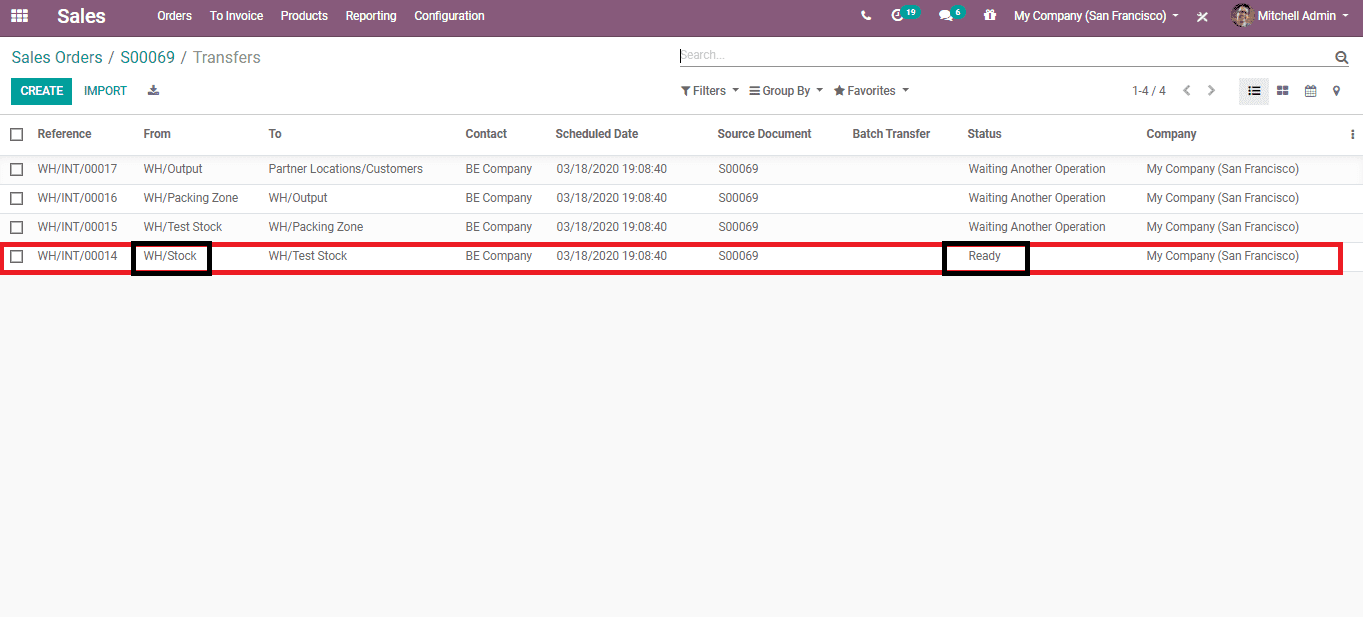
You will be able to see that one of them has the ‘Status’ as ‘Ready’. Click on it to run the action.
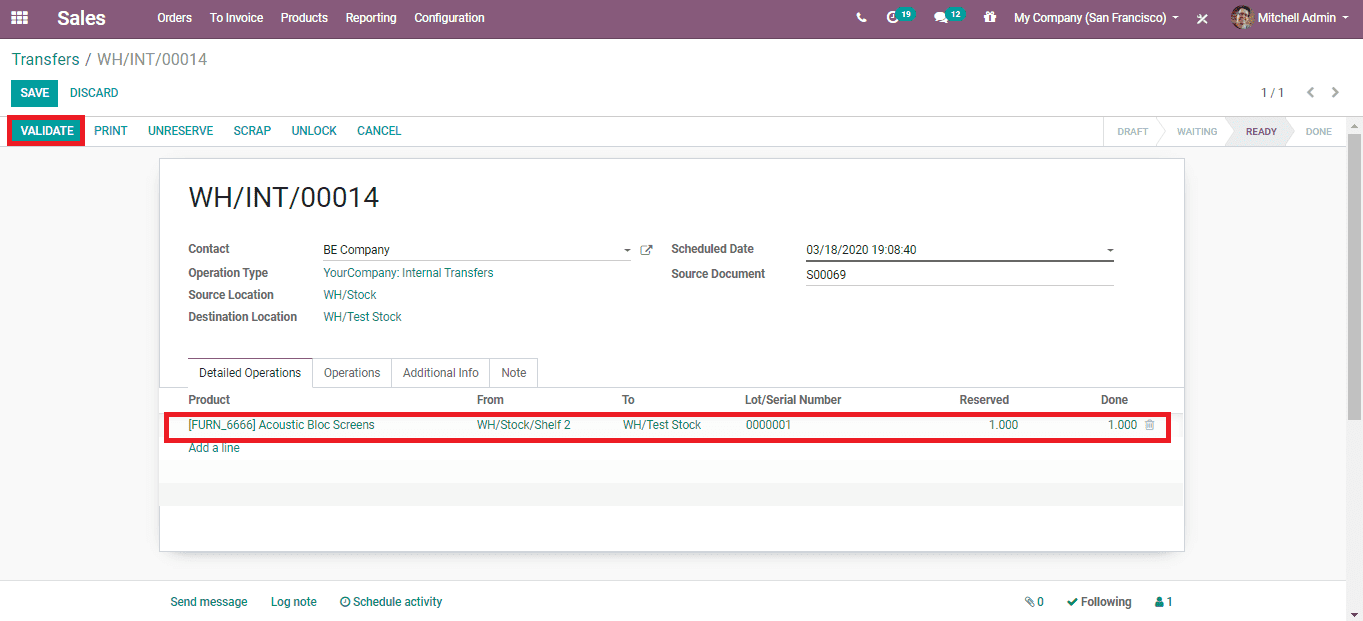
Click ‘EDIT’, provide the ‘Done’ quantity and click ‘Validate’.
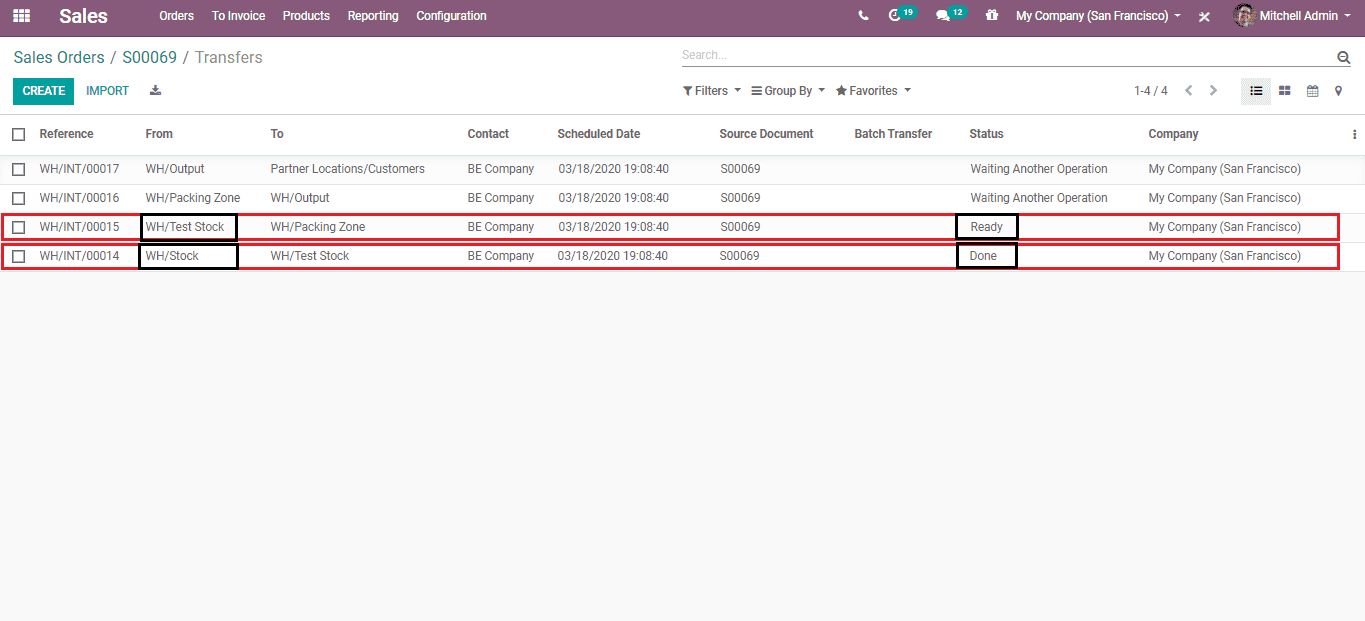
Once the first operation is validated, you can see that the one is ‘Done’ and the next operation will be ‘Ready’. Click on it and run it.
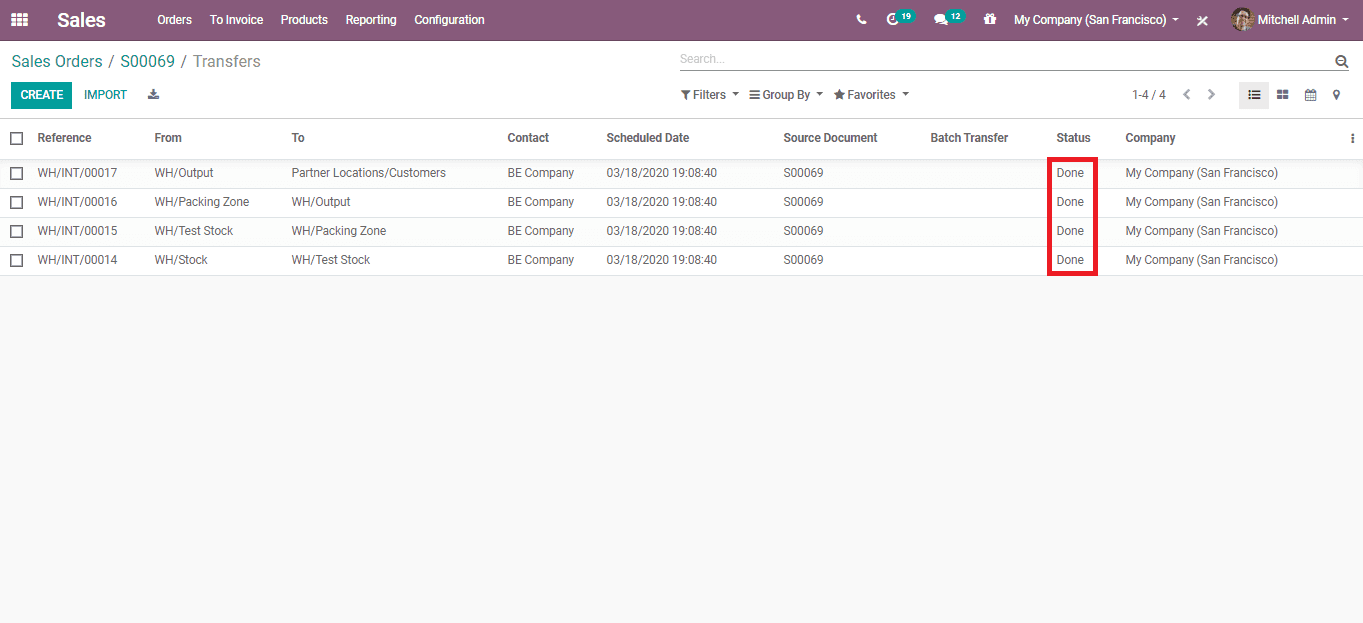
Like that validate every operation till all of them are ‘Done’ and once done the delivery is successful. More rules can be added to this method.
This is how the rules are managed in Odoo 13 sales.